3D Printing Surgical Guides
Formlabs Surgical Guide Resin is a biocompatible material formulated for manufacturing surgical guides, pilot drill guides, and drilling templates. This application guide demonstrates each step for making 3D printed surgical guides on the Form 2, Form 3B and Form 3BL SLA 3D printers. Use the following workflow to ensure precise results.
Table of Contents

3D Printing Surgical Guides With Formlabs 3D Printers
Would you like to save this guide, print it, or share it with colleagues? Download it as a PDF.
Essentials
Made by Formlabs:
- Form 2 (SLA) 3D Printer, Form 3B (SLA) 3D Printer or Form 3BL (SLA) 3D Printer
- Surgical Guide Resin
- PreForm Software (free)
- Form 2 Resin Tank LT, Form 2 Standard Resin Tank, Form 3 Resin Tank or Form 3L Resin Tank
- Finish Kit or Form Wash
- Form Cure
Made by Third Parties:
- Surgical guide treatment planning and design software (CAD)
- Intraoral or Desktop 3D Scanner
- CBCT scanner
- Surgical guide sleeves
1. Scan
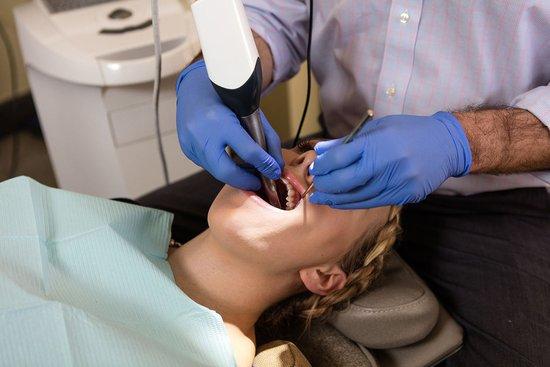
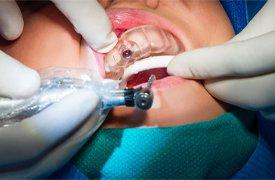
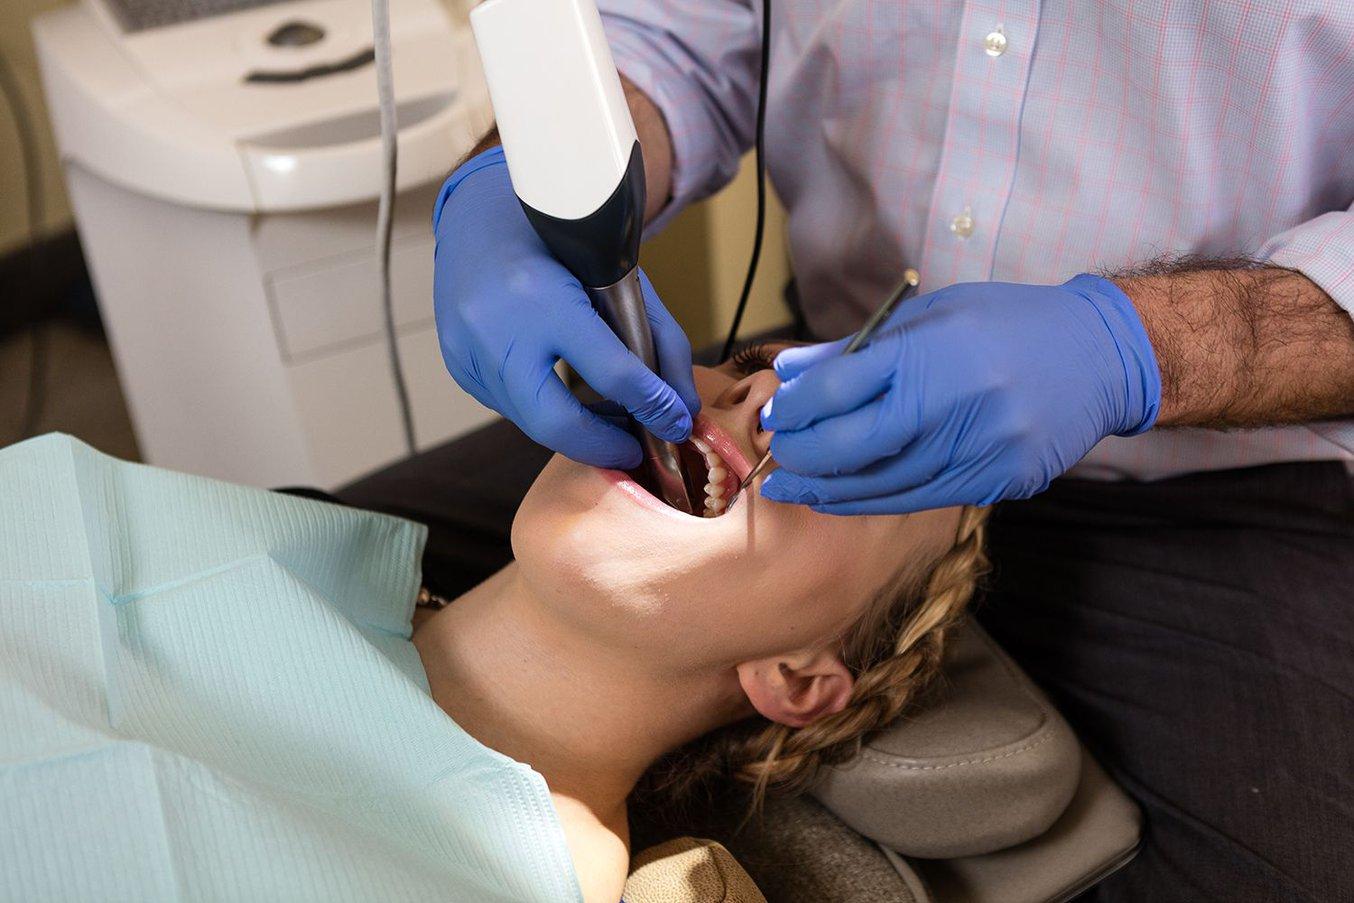
In order to plan the treatment and design a surgical guide, collect anatomical data of the patient’s dentition by either scanning the patient directly with an intraoral scanner, or using a desktop optical scanner to scan a polyvinyl siloxane (PVS) impression or model.
To make a fully limited surgical guide, capture the anatomy of the patient's hard tissue structures with a cone-beam computed tomography (CBCT) scanner.
2. Design
To begin, design the surgical guide in a dental CAD software, such as 3Shape Implant Studio. Make sure to select software that offers open .STL file export to ensure compatibility with PreForm.
Adjust design settings carefully for each guide to ensure safety, precision, and comfort. Design surgical guides to print on the Form 2, Form 3B or Form 3BL SLA printers by following the guidelines below to ensure strong, durable results. Modify the recommended design setting values based on the brand and size of guide sleeves being used.
| DESIGN SETTING | MINIMUM VALUE | MAXIMUM VALUE | |
|---|---|---|---|
| Wall Thickness | Ensures structural stability, should be large enough for sufficient strength and durability. | 2.0 mm | n/a |
| Offset From Teeth | Impacts how tightly the guide fits on the patient’s teeth — higher values will fit more loosely, lower values will fit more tightly. | 0.05 mm | 0.07 mm |
| Offset From Sleeve | Ensures a tight press fit when inserting the metal guide sleeve. | 0.00 mm | 0.040 mm |
The exact step-by-step in treatment planning and surgical guide design varies by software package, but generally follow the same high level flow. For detailed advice on designing surgical guides, contact your software manufacturer.
A few best practices and considerations for 3D printing surgical guides are:
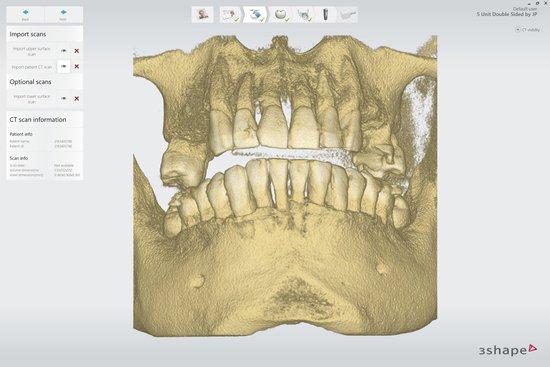
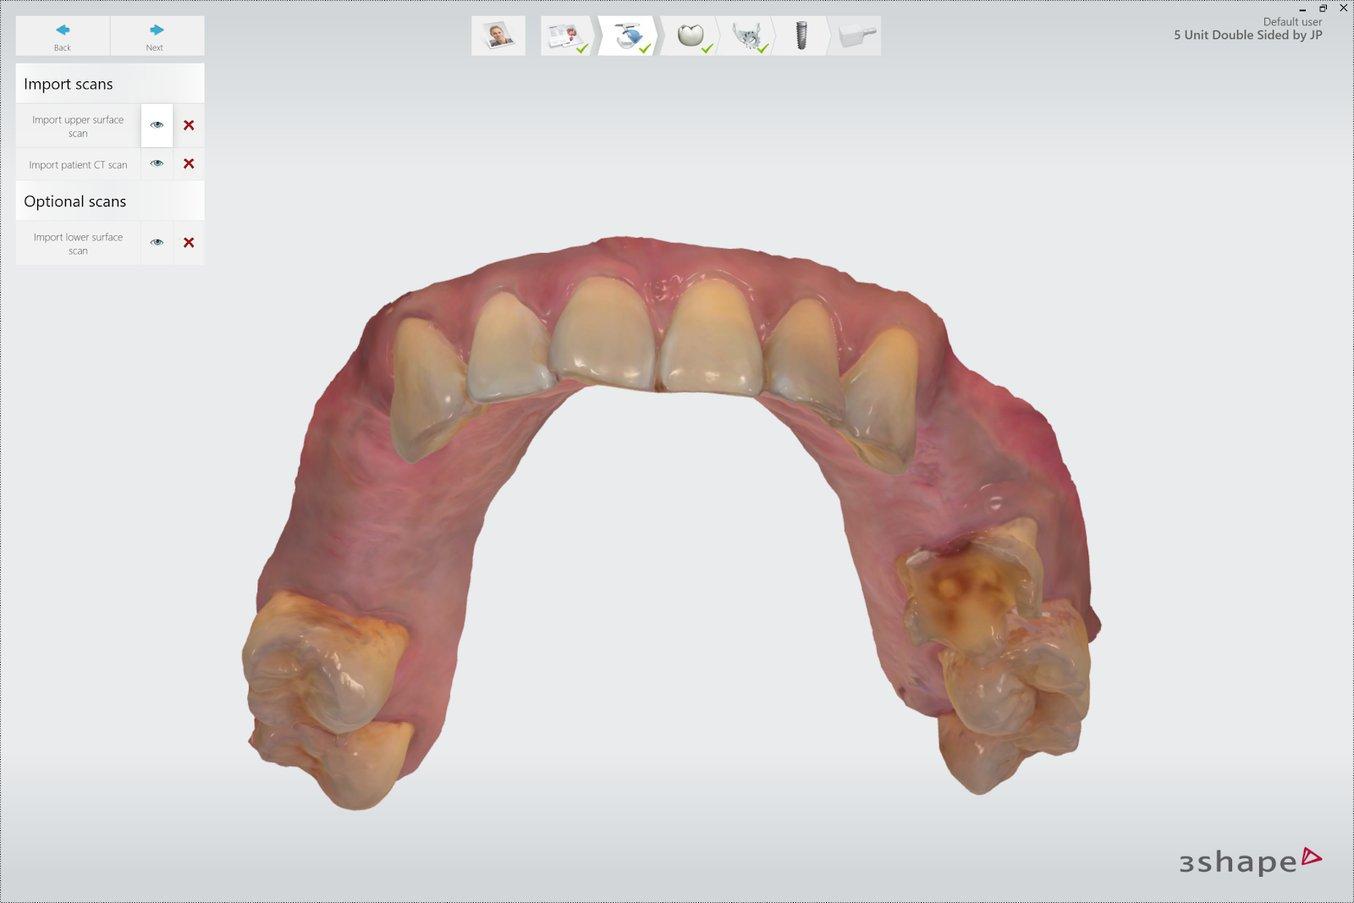
2.1 Import Scans
Import the intraoral or desktop 3D optical scans of the patient's dentition and the CBCT scan of the patient's hard tissue structures into your dental CAD software.
The standard file format for 3D optical scans is .STL, while the standard for CBCT is .DICOM. Most scanners allow open export and most software allow for open import of these file types. Be sure to check that the software is compatible with scanners when purchasing new solutions.
2.2 Review Scans
Review the CBCT scans and identify the mandibular nerve if applicable.
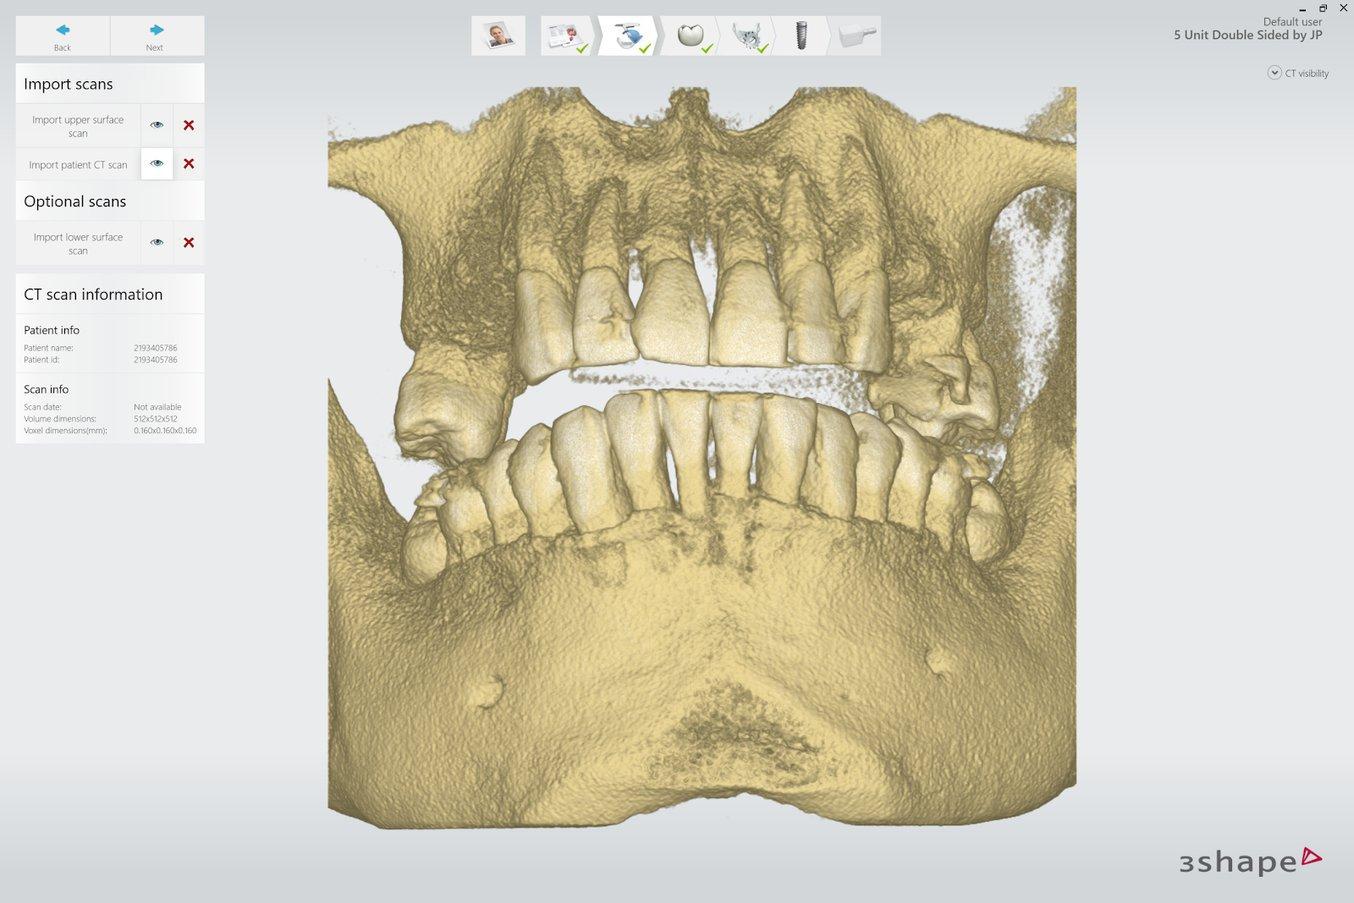
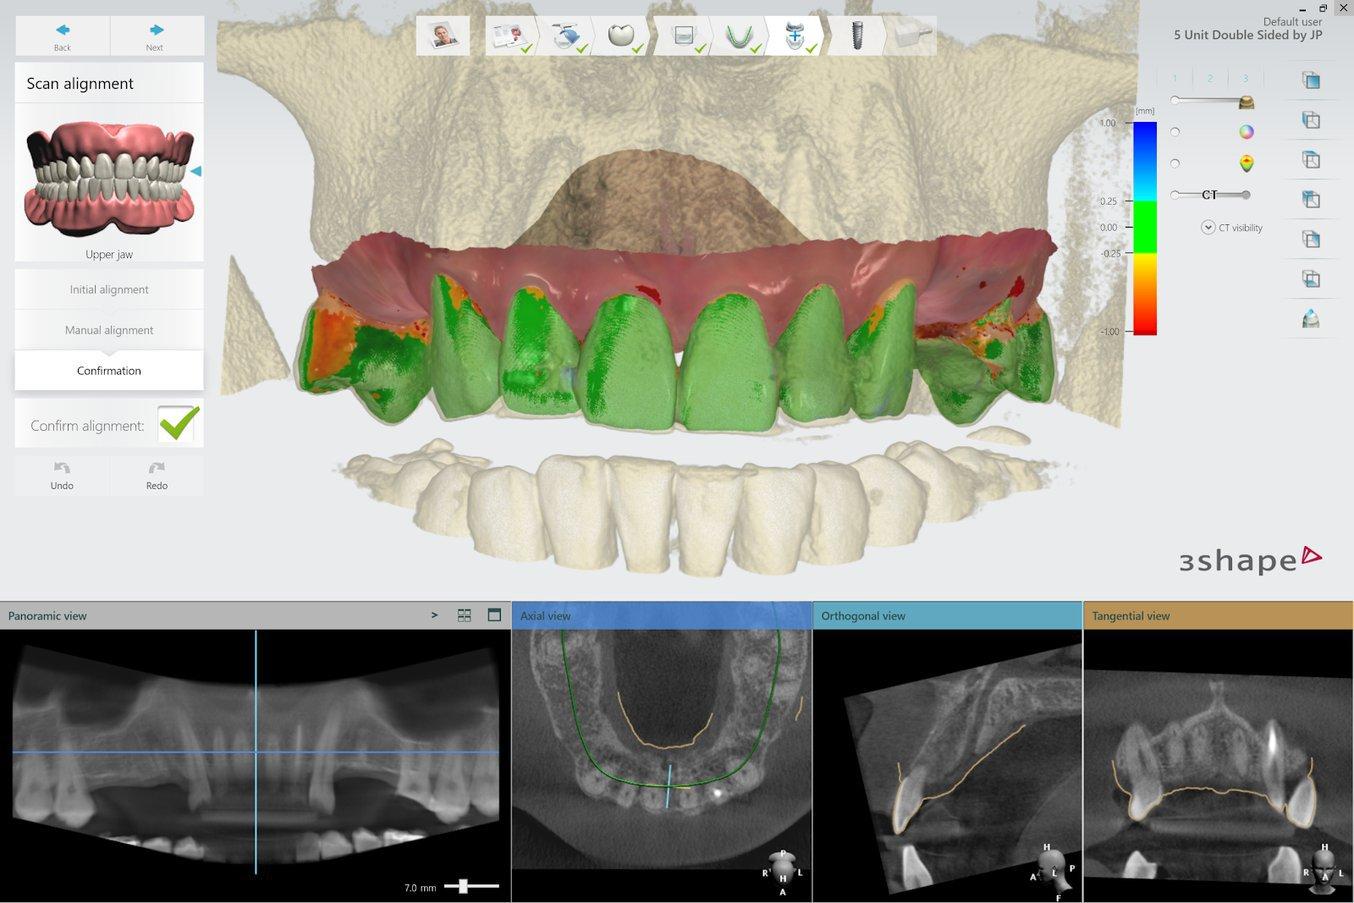
2.3 Align Scans
Align the intraoral scan and the CBCT scan using both manual point-of-interest identification tools and automatic tools for detailed alignment. This allows both the detailed surface scan data and the CBCT bone data to be used in treatment designs.
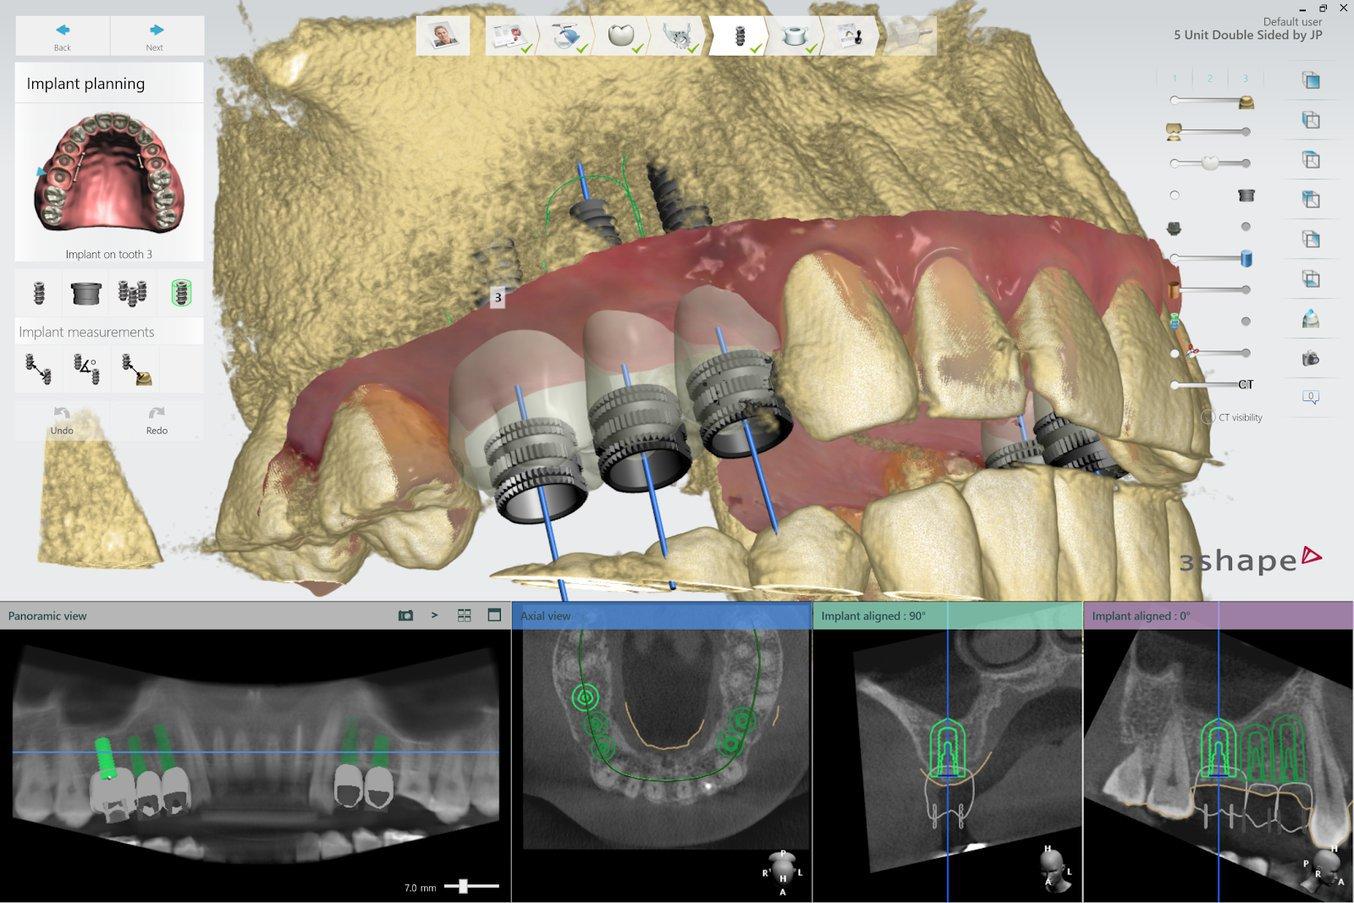
2.4 Design Treatment
Select your desired implant and place it on the patient’s anatomy. Choose the position, angulation, depth, desired clinical outcomes, and restoration design. Most dental CAD software packages offer a range of implant libraries, allowing you to design virtually with the implant system being used for the specific case.
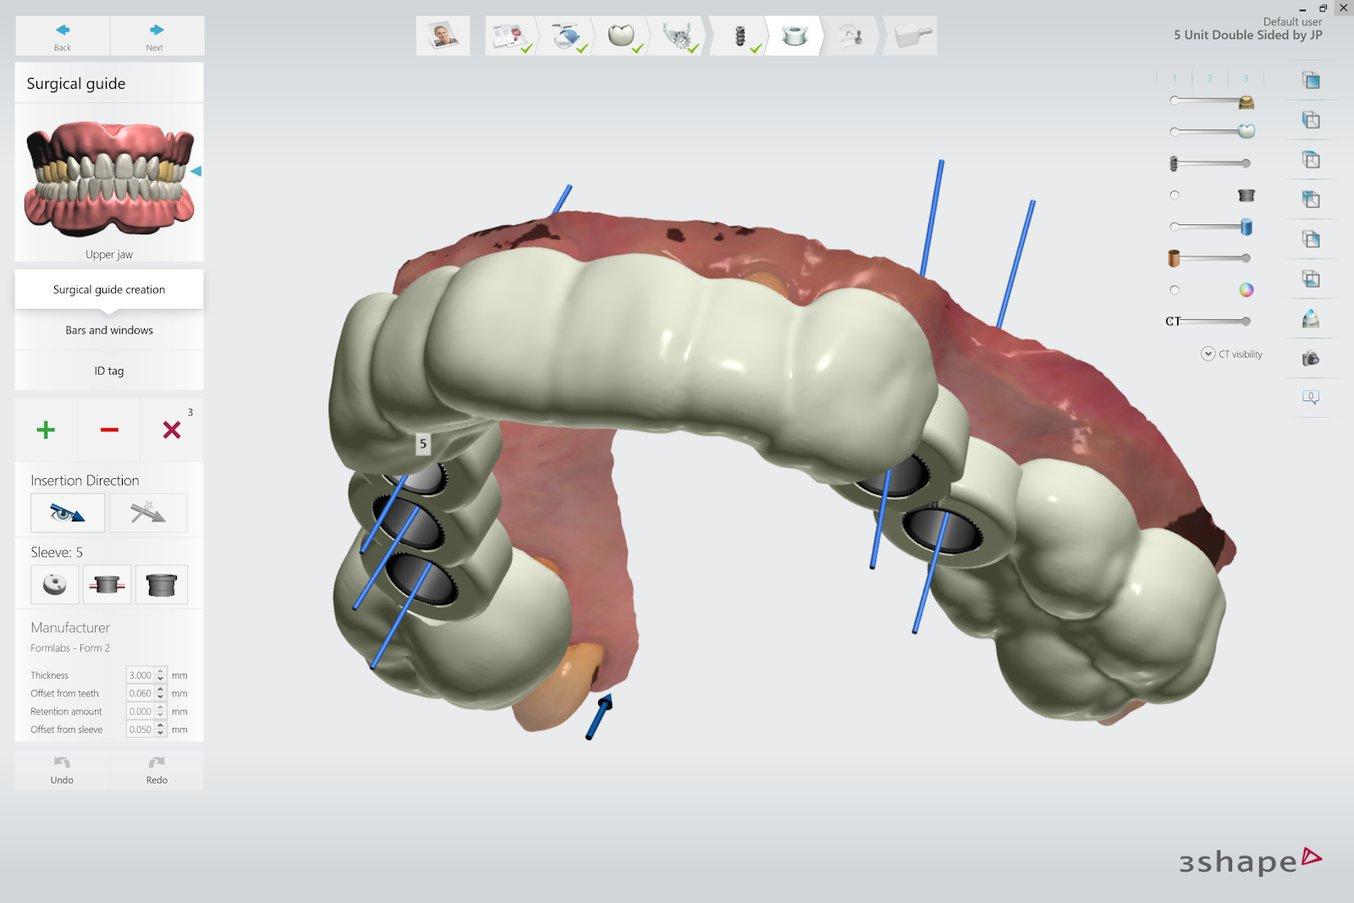
2.5 Design Surgical Guide
Design the surgical guide by drawing the desired area of the arch to cover. For the best retention and accuracy, use full arch guides. The dental CAD software should generate a model integrating the implant system with the guide design.
2.6 Export
Once the design is created, export a digital model of the part in .STL or .OBJ file format.
3. Print
3.1 Select Material
Open PreForm. Select "Surgical Guide" from the Material menu.
3.2 Import Model Files Into Preform
Import the .STL or .OBJ file into PreForm.
Note:
If you are using 3Shape Implant Studio or other dental CAD software that integrates with PreForm, steps 3.2-3.4 are automated. The software automatically orients parts and generates supports. Your ready-to-print file will open directly in PreForm. After it loads, just click print.
3.3 Orient Models
Orient parts horizontally with the intaglio surface facing away from the build platform to ensure that the supports will not be generated on these surfaces. If printing more than one surgical guide in a single print, manipulate the placement of each model on the build platform for the best fit.
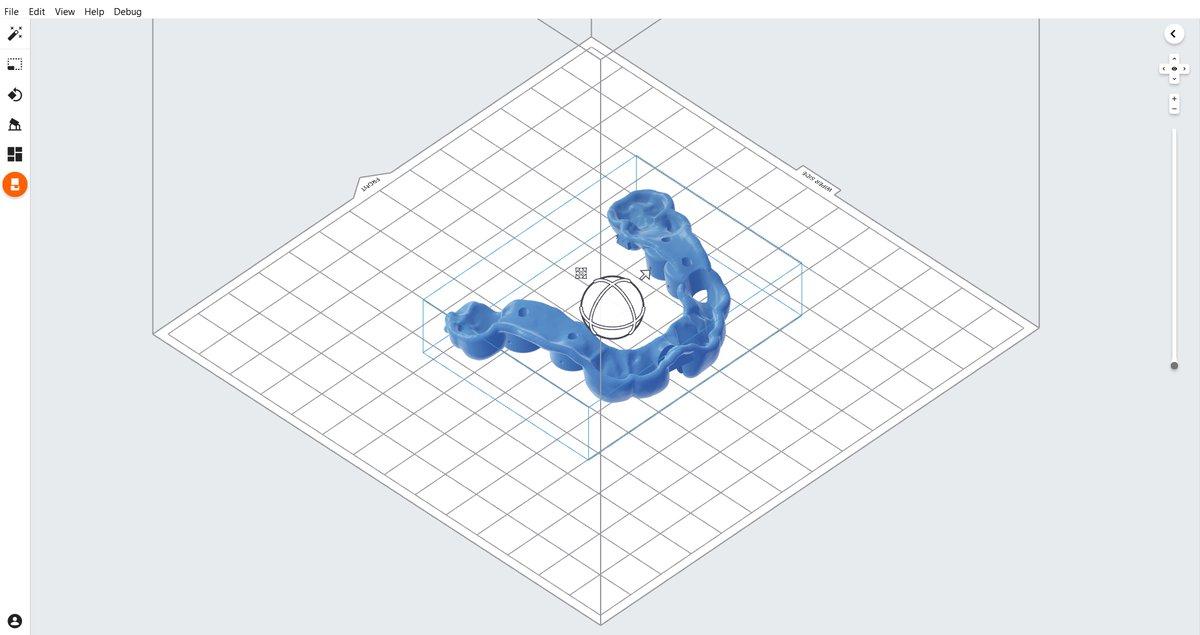
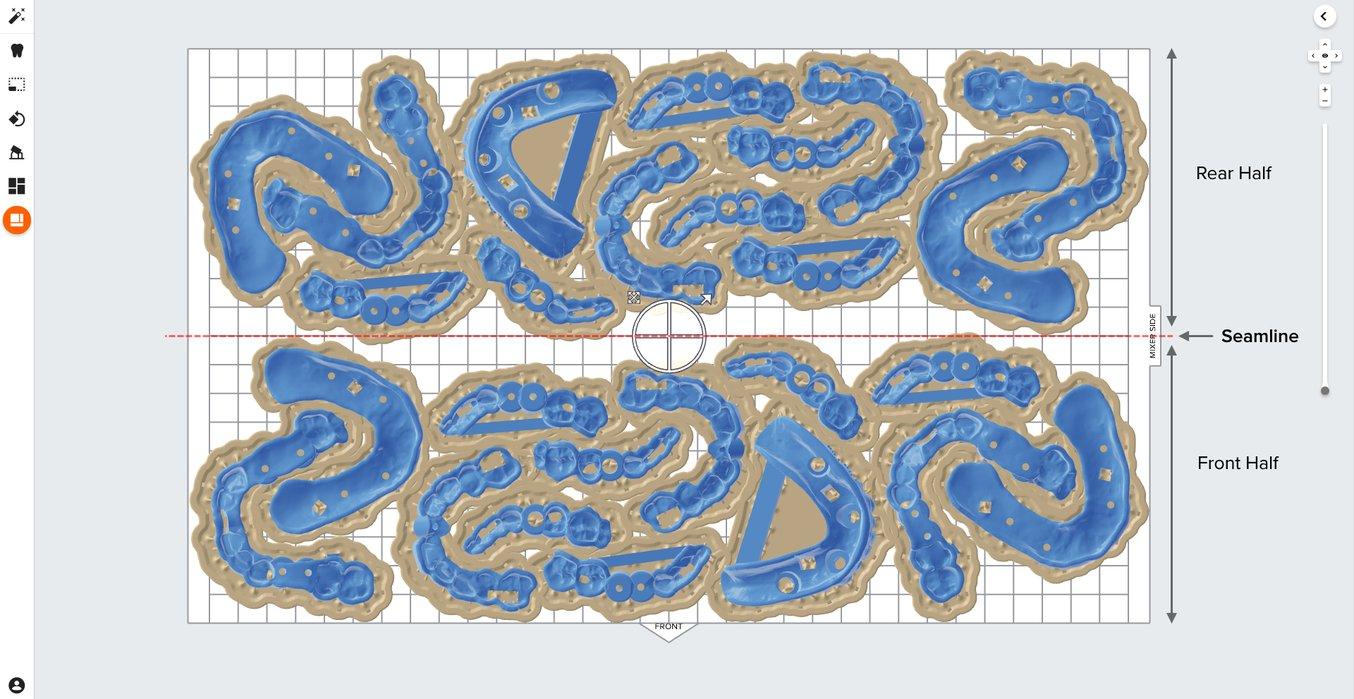
3.3.1 Form 3BL Orientation
The Form 3BL laser overlap creates a seamline that divides the build volume into two halves.
Parts should be positioned in the rear or front half of the build area, not crossing the seamline.
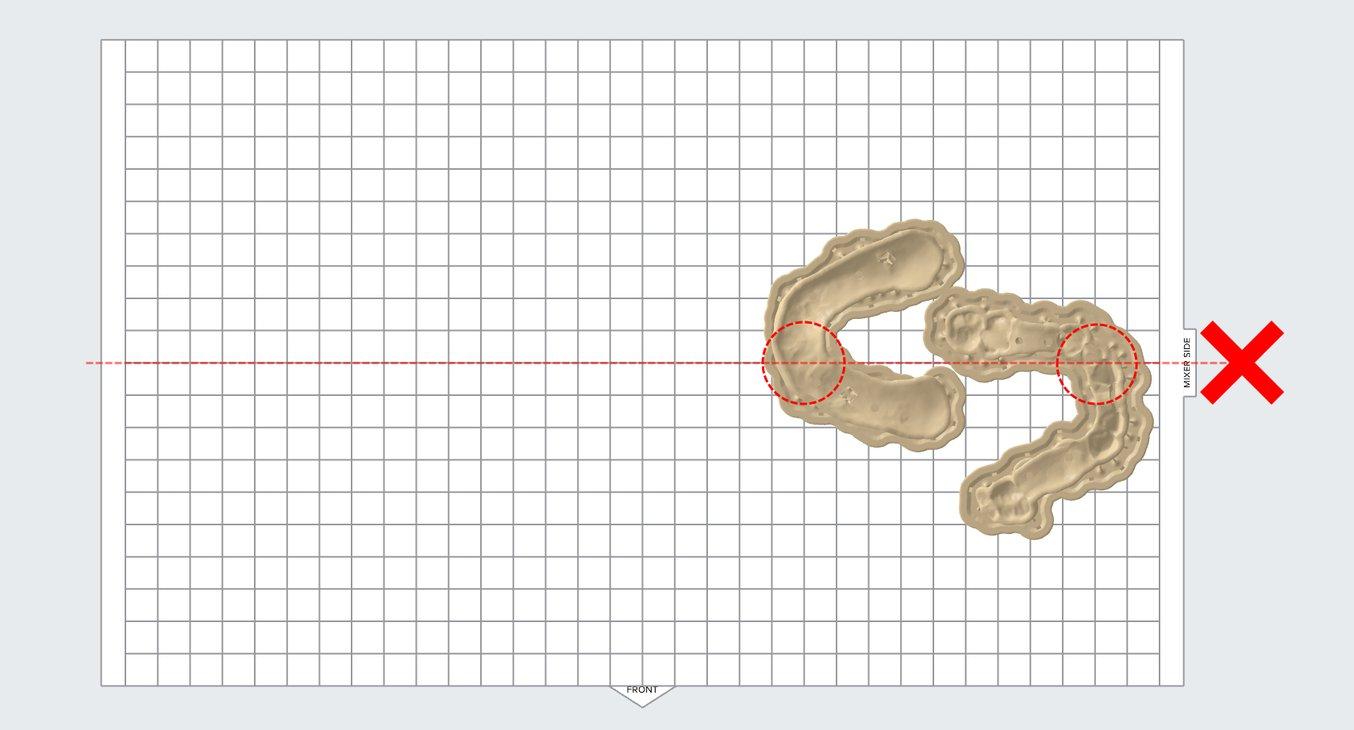
In this example two parts are incorrectly overlapping the seamline of the print area.
Note: Overlapping surgical guides on the seamline may adversely affect the fit of those parts.
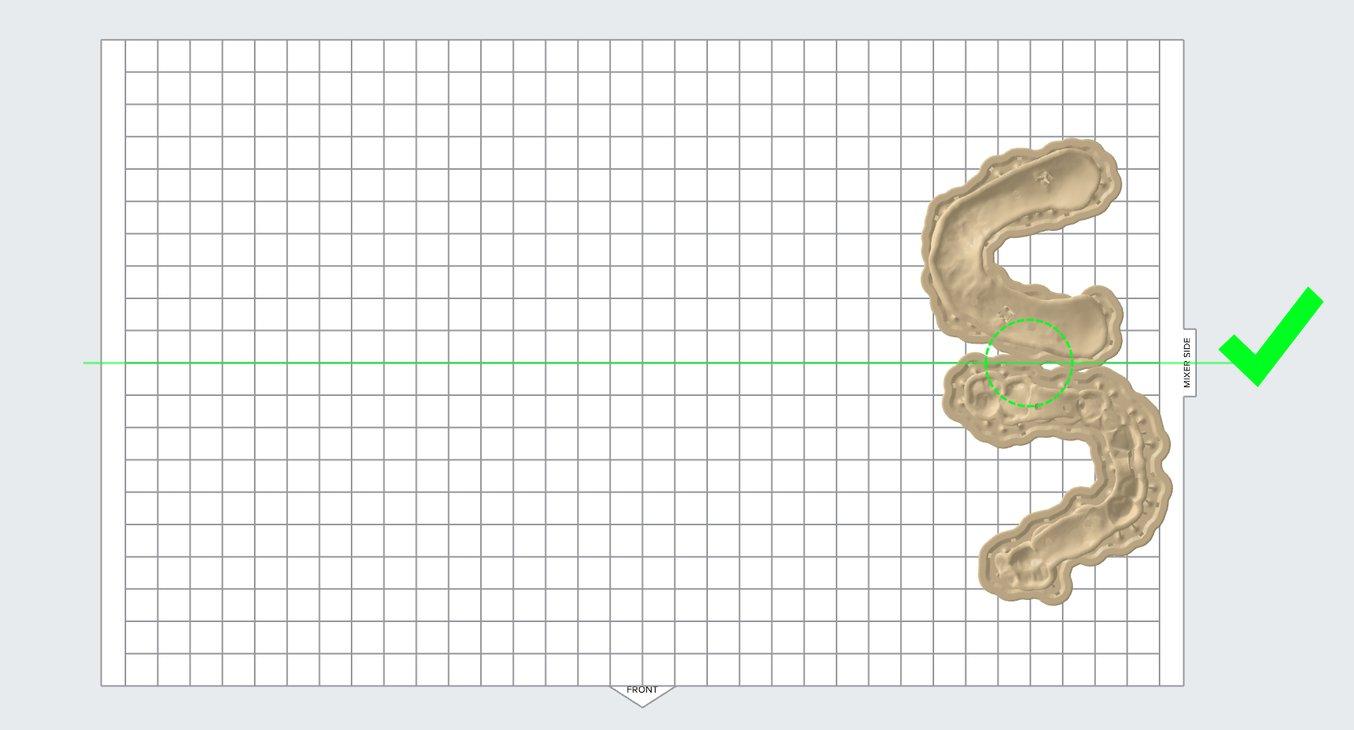
Finally, this example shows the correct placement of the two parts completely in the rear and front half of the print area.
Note: The raft or support structure can cross the seamline without affecting the part it supports.
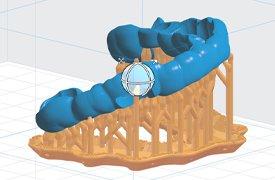
3.4 Generate Supports
Generate supports using the PreForm auto-generation feature.
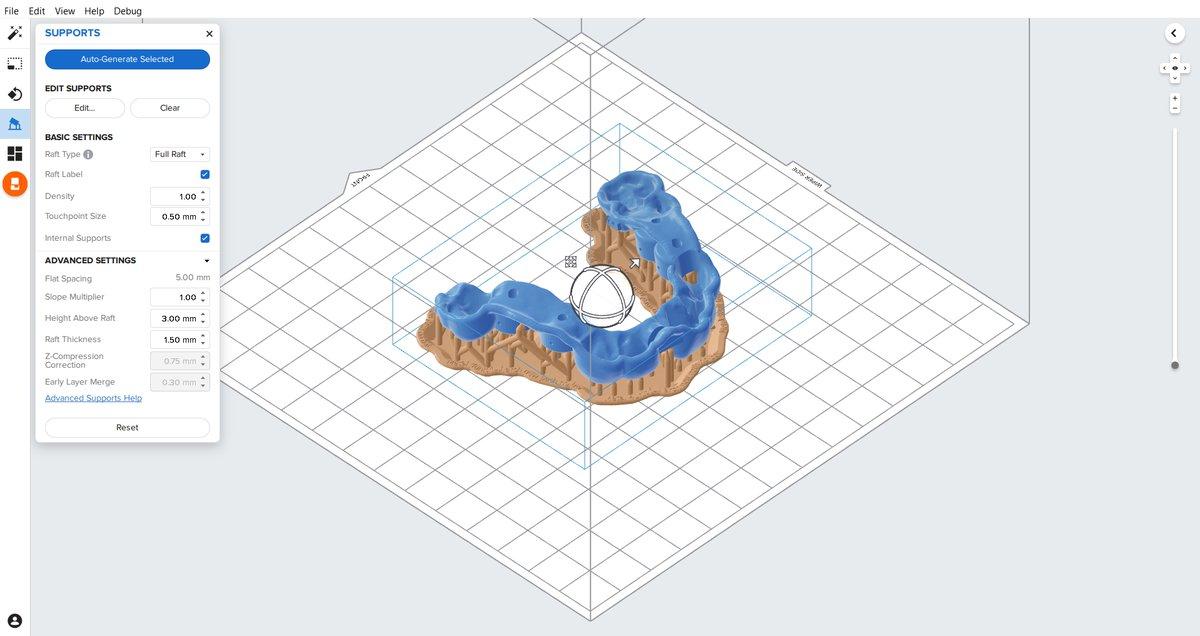
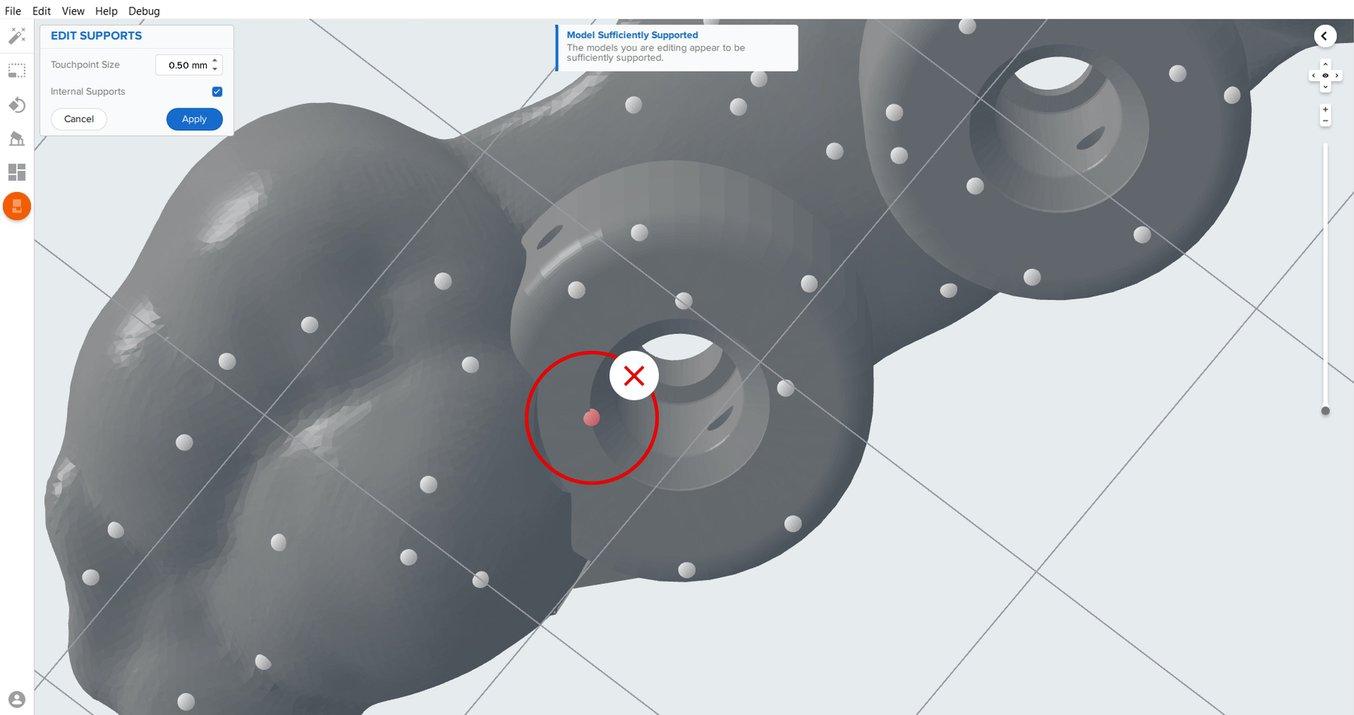
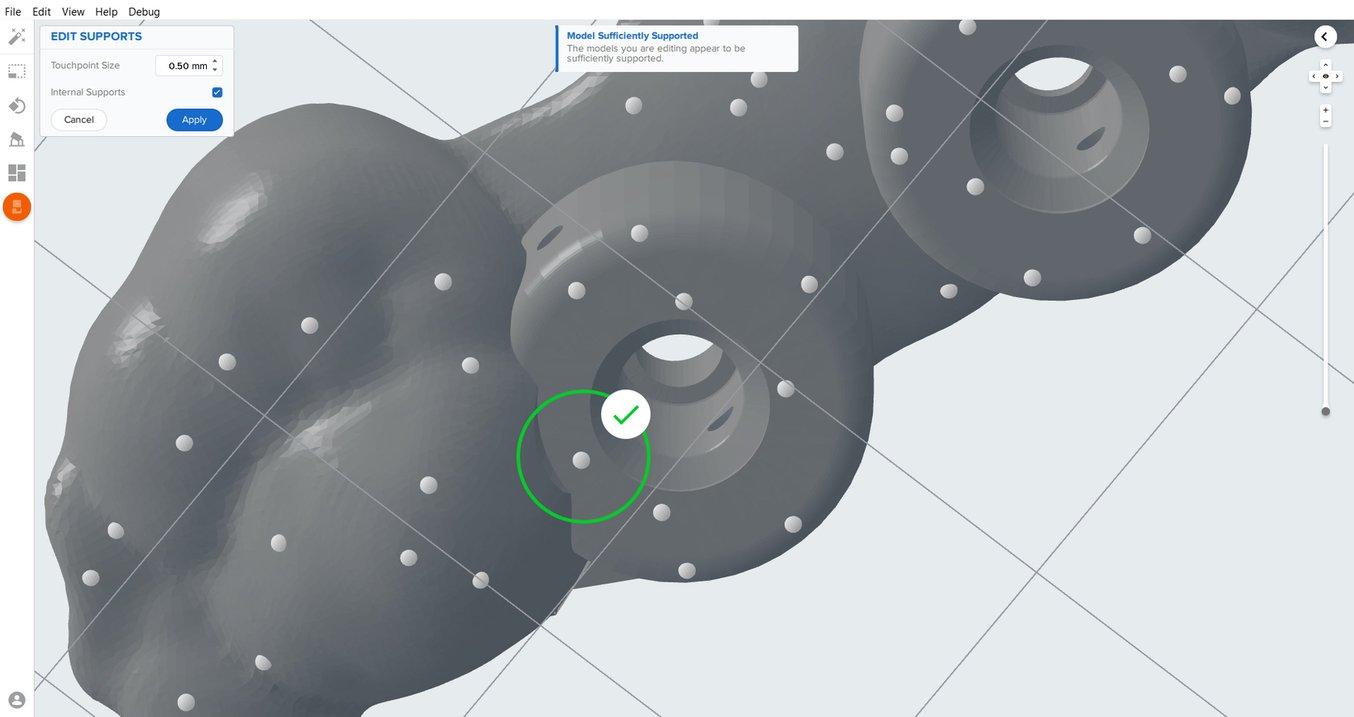
To allow for simple and precise assembly, ensure that there are no supports near the guide sleeve holes or on the intaglio surfaces. Use the manual support editing feature to closely inspect support locations and add or remove supports as needed.
3.5 Upload The Print
Send the print job to a Form 2, Form 3B or Form 3BL printer.
3.6 Prepare The Printer And Resin
Thoroughly agitate the resin cartridge by shaking and rotating it several times. Insert the appropriate resin tank for your Formlabs 3D printer, Surgical Guide Resin cartridge, and a build platform into the printer.
Surgical Guide Resin was validated for use with the Form 2 Resin Tank LT, Form 3 Resin Tank or Form 3L Resin Tank.
ATTENTION:
For full compliance and biocompatibility, Surgical Guide Resin requires dedicated Resin Tanks, Build Platform, and Finish Kits or Form Washes, which should only be used with other Formlabs biocompatible resins.
3.7 Print
Begin printing by selecting the print job from the printer's print menu. Follow any prompts or dialogs shown on the printer screen. Printer will automatically complete print.
4. Post-process
Post-processing 3D printed surgical guides involves six steps: part removal, rinsing, drying, post-curing, removing supports, and polishing.
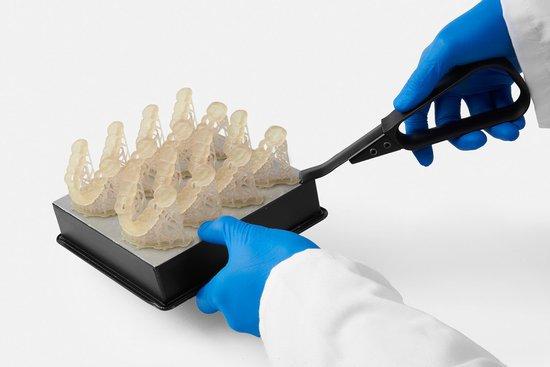
4.1 Part Removal
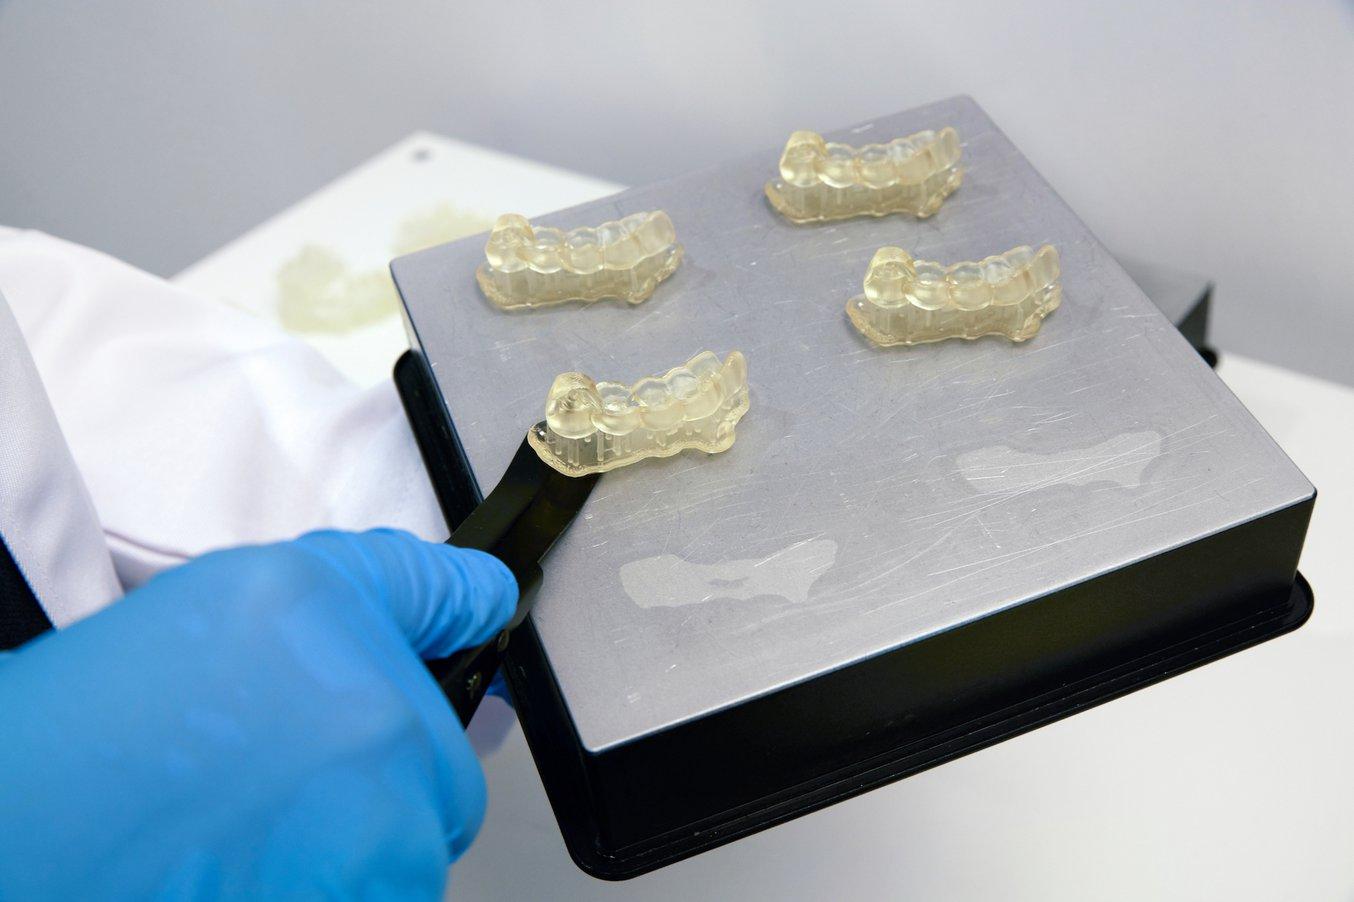
Printed parts can be removed from the build platform prior to- or post- cleaning. To remove parts from the build platform, remove the build platform from the printer, slide the removal tool under the base of your print and rotate the tool to release the surgical guide.
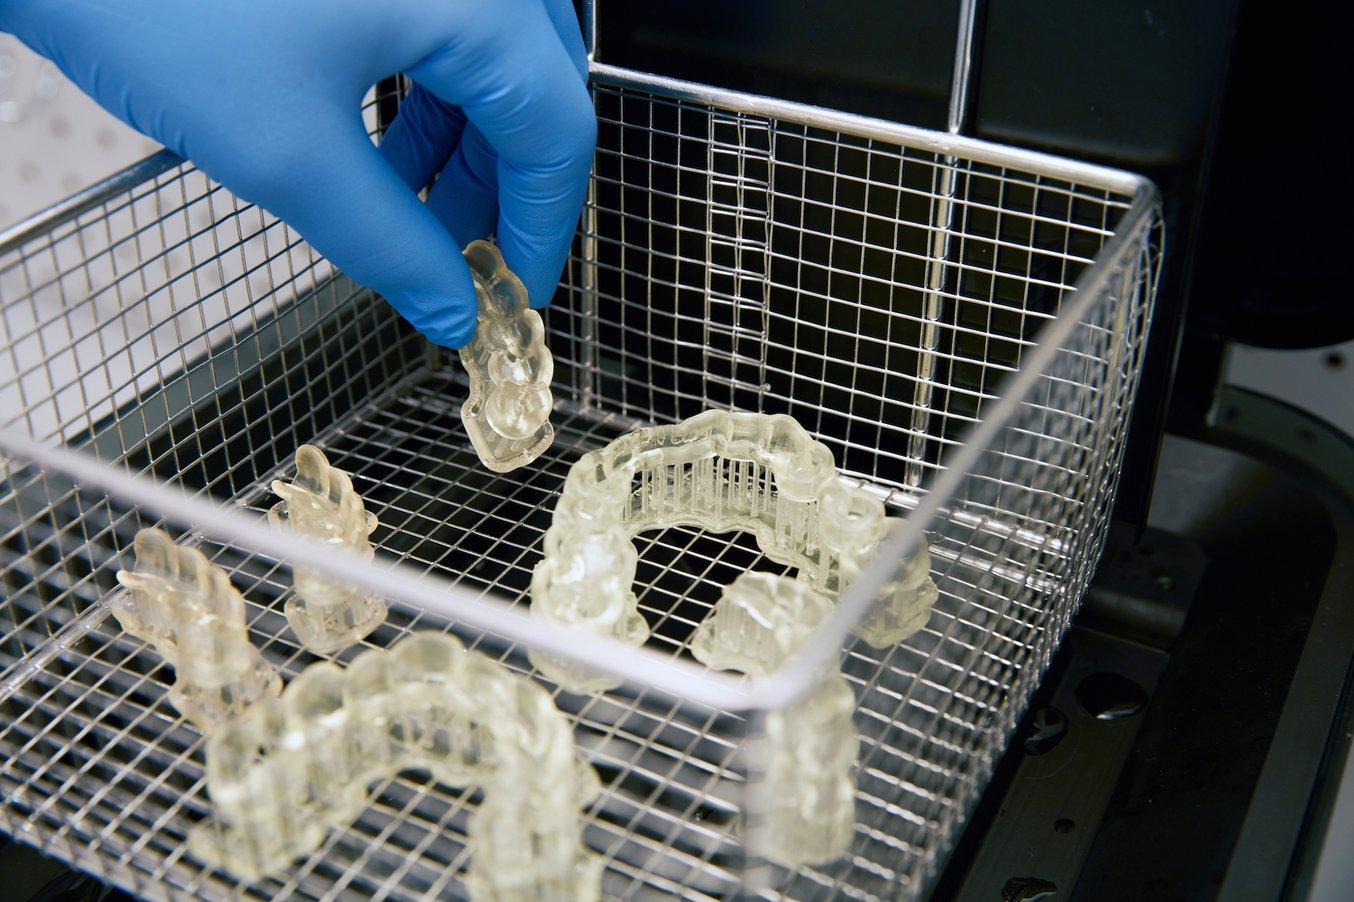
4.2a Wash Parts With Form Wash
If you do not own a Form Wash, skip to 4.2b.
Place the surgical guides, free-standing or still attached to the build platform, in a Form Wash filled with 99% isopropyl alcohol (IPA). Set to wash for 20 minutes to clean the parts and remove liquid resin before post-curing.
4.2b Wash Parts With The Finish Kit
If you do own a Form Wash, skip 4.2b
Remove parts from the build platform with the part removal tool as described in Section 4.1 Part Removal.
Rinse the parts in two buckets of 99% isopropyl alcohol (IPA), for 10 minutes each to clean parts and remove liquid resin before post-curing.
4.3 Drying Parts
Leave parts to air dry completely (at least 30 minutes) or use a compressed air hose to blow IPA away from surgical guide surfaces. Inspect parts closely to ensure all surgical guides are fully washed with no particles or uncured resin present on the surfaces before proceeding to subsequent steps. If needed, repeat wash with fresh 99% IPA.
If printed parts are still on the build platform, remove the parts using the removal tool as instructed in Section 4.1 Parts Removal.
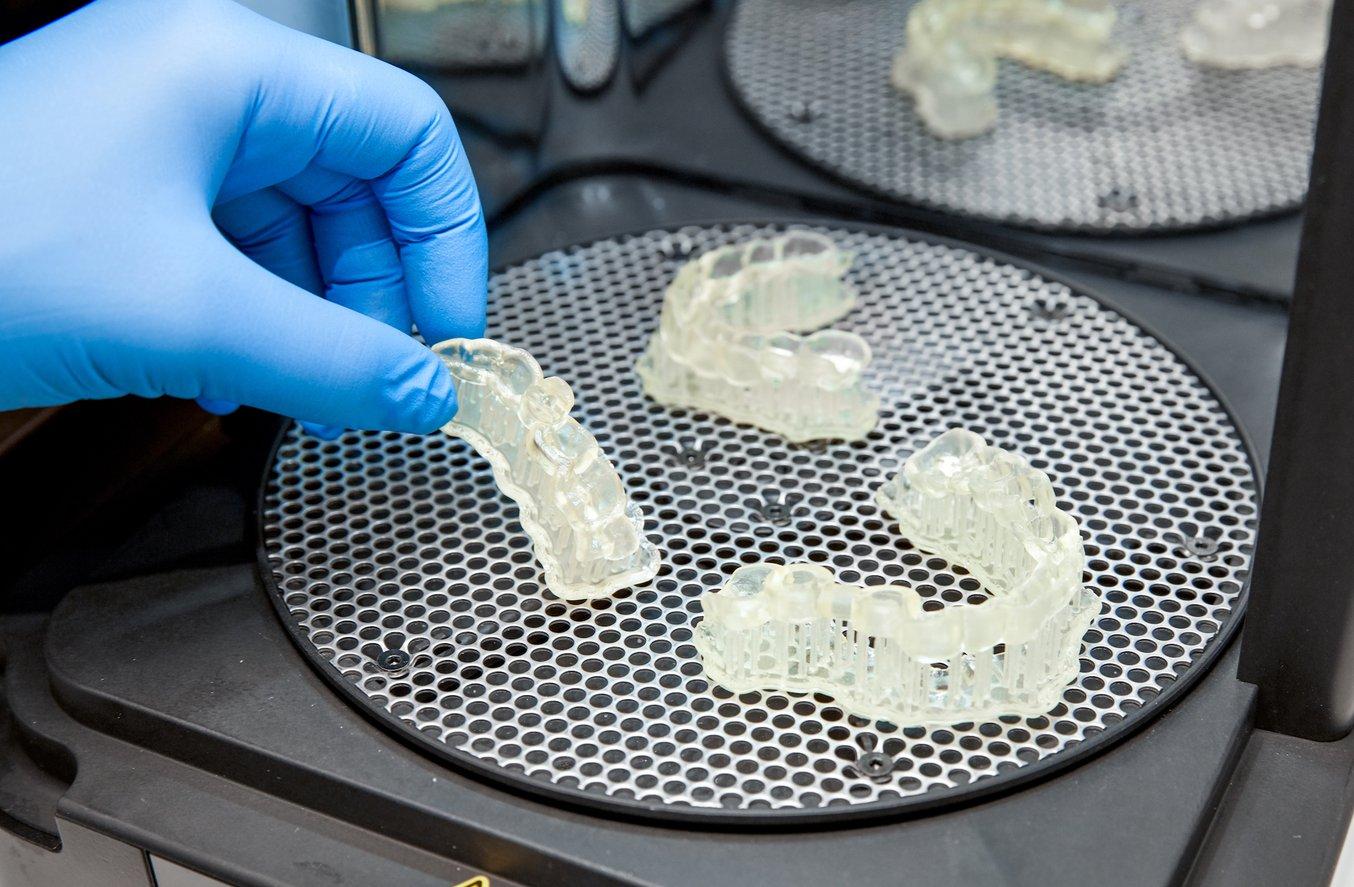
4.4 Post-Cure Parts With Form Cure
Printed surgical guides must be exposed to light and heat to achieve biocompatibility and optimal mechanical properties. Post-curing is also critical to fully cure the surgical guide to ensure patient comfort and safety. Place the printed guides inside a Form Cure. The post-curing process is dependent on the Form printer used to print the surgical guides.
| Printer | Temperature | Post Cure Time |
|---|---|---|
| Form 2 | 60°C | 30 minutes |
| Form 3B | 70°C | 30 minutes |
| Form 3BL | 70°C | 30 minutes |
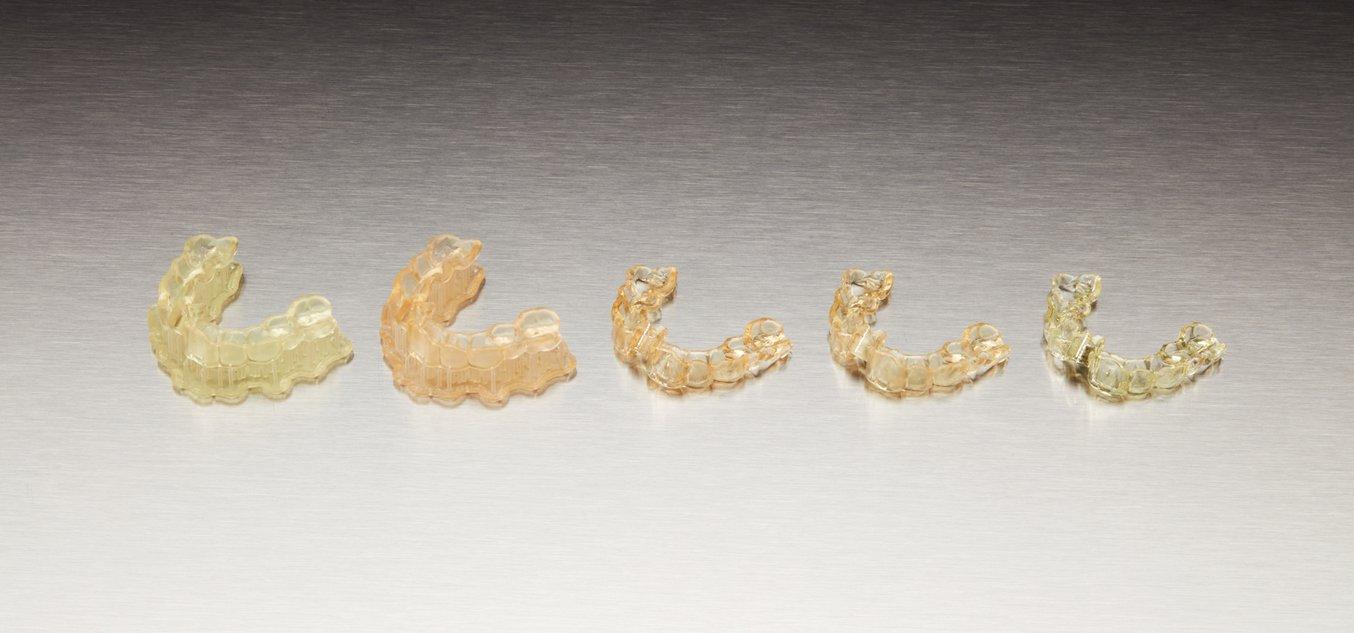
Allow Form Cure unit to cool back to room temperature between post-cure cycles. During post-curing, a color change from translucent yellow to translucent orange will occur.
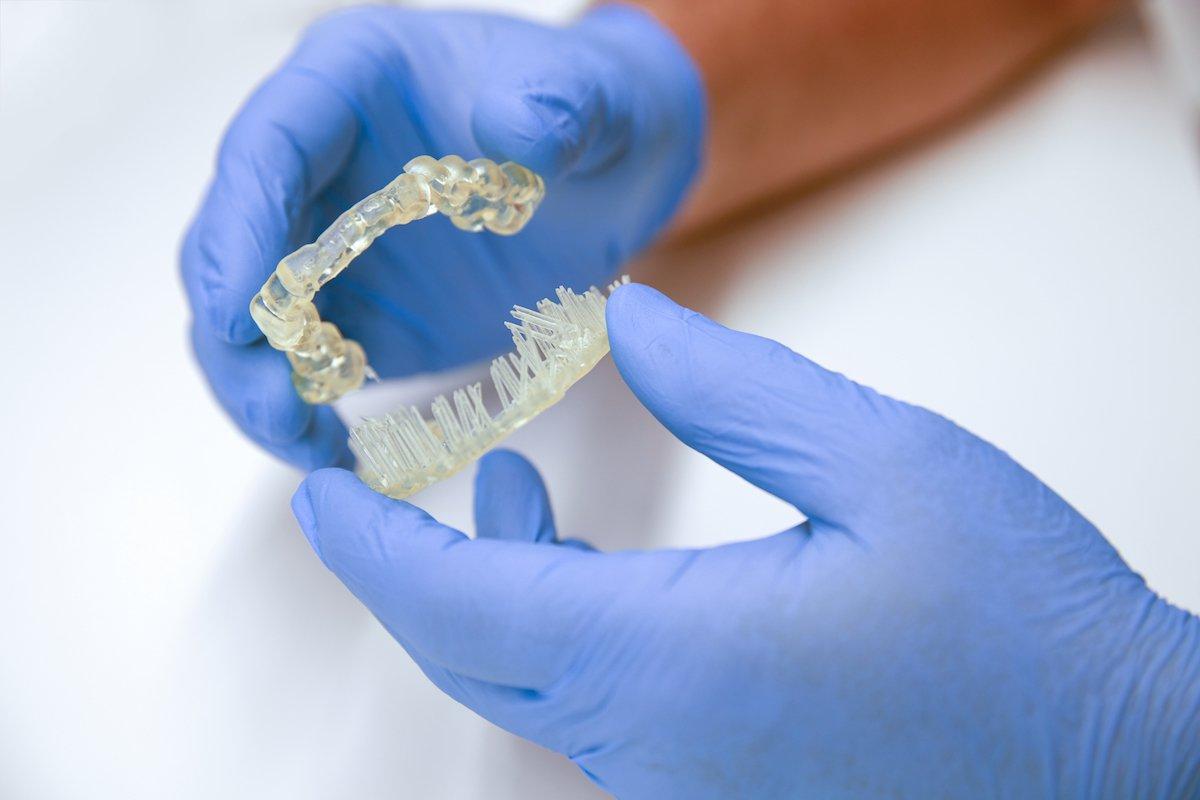
4.5 Remove Supports
Use the flush cutters included in the Formlabs Finish Kit or other part removal tools to carefully cut the supports at touch points attached to the surgical guide. Use caution when cutting the supports, as the post-cured material may be brittle. Supports can also be removed using other specialized appliances, such as cutting disks or round cutting instruments like carbide burs.
CAUTION:
Post-curing outside of the recommended settings can lead to suboptimal mechanical and biocompatibility properties. Post-cure only in accordance with official recommendations from Formlabs for the best possible results.
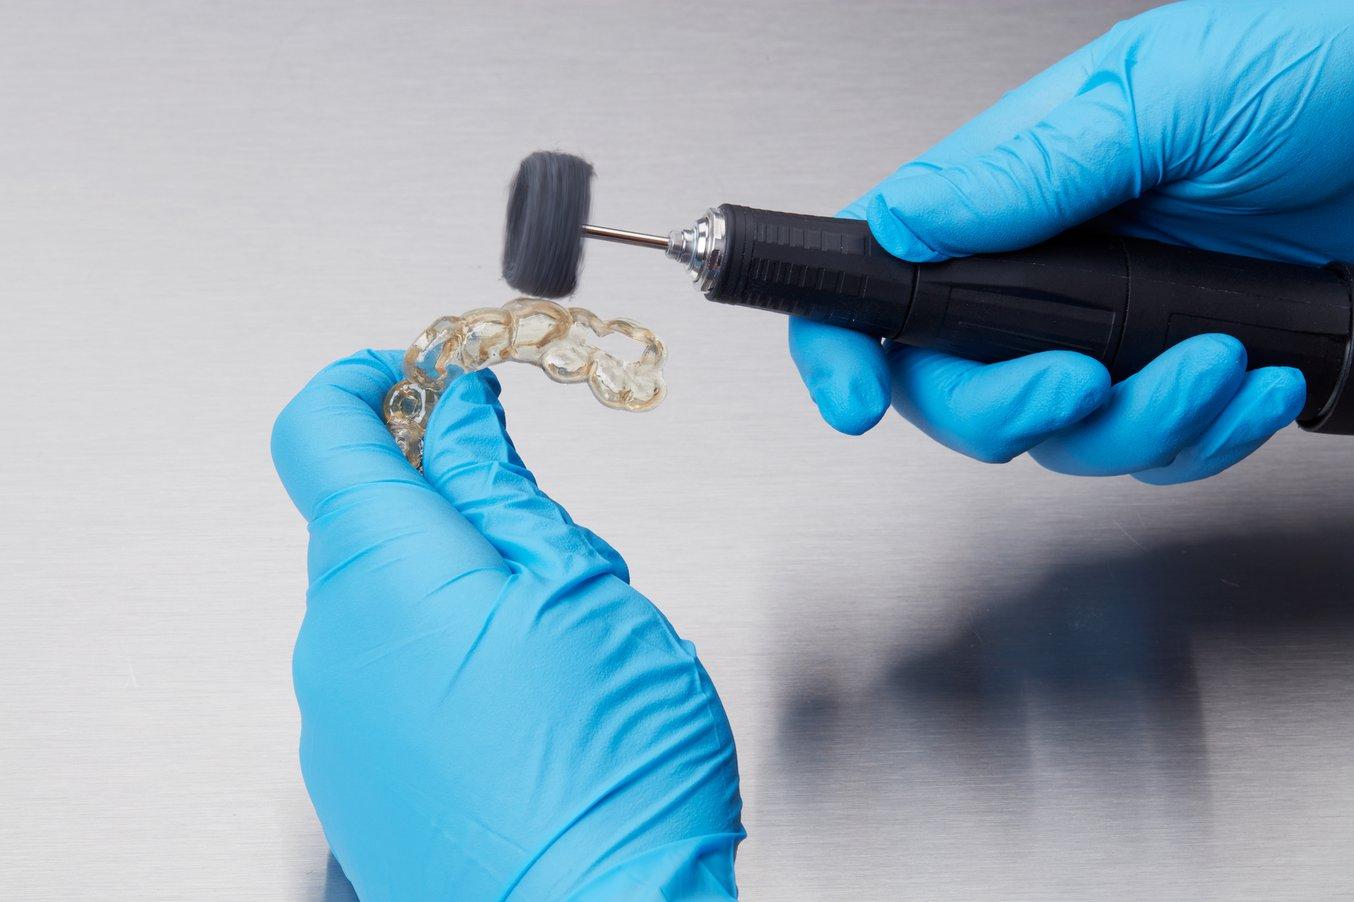
4.6 Polish Parts
Polish parts using typical dental polishing methods such as, high grit sandpaper to smooth support marks for patient comfort. For higher levels of part translucency, polish guides using pumice and a rag wheel or other specialized appliances.
ATTENTION:
Inspect the surgical guides for cracks. Discard if cracks are detected.
NOTE:
Remove supports only after post-curing to ensure that parts do not warp.
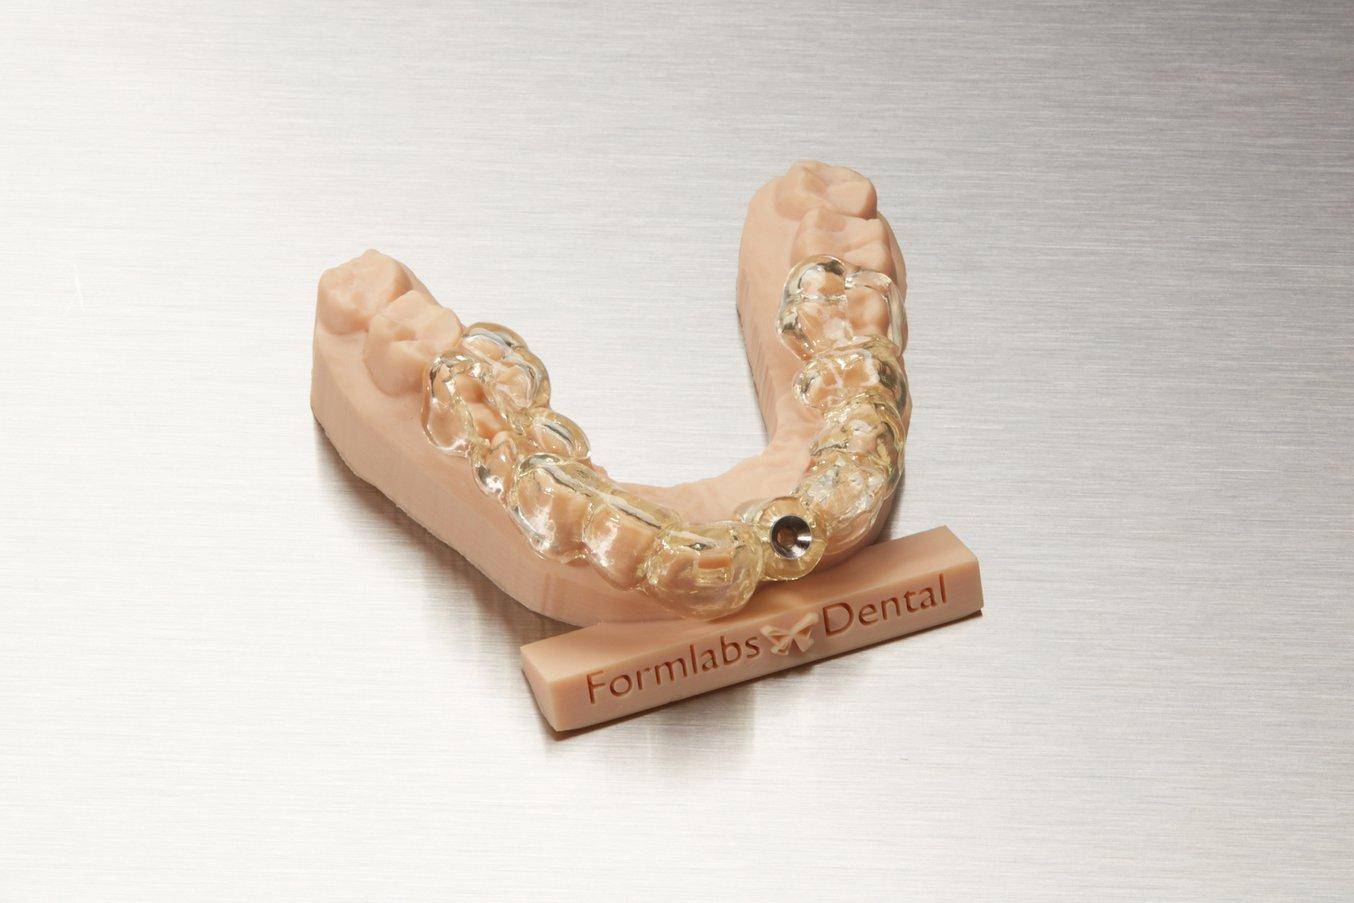
4.7 Assemble The Surgical Guide
Surgical guide sleeves are required to ensure that drill bits do not cut into the printed guide itself. To ensure proper safety and use, assemble printed guides with the surgical guide sleeve selected during design.
When using the recommended design parameters, metal tubes or surgical guide sleeves can be press fit into the guide. Friction holds the metal tube in place. Make sure to only use compatible surgical guide sleeves.
5. Use
5.1 Sterilization, Cleaning And Disinfecting
Surgical Guide Resin printed guides can be sterilized according to CDC recommended guidelines in industry-standard steam autoclaves, either with or without sterilization pouches. Sterilize according to facility or autoclave manufacturer protocols, or one of the autoclave cycles listed below.
| AUTOCLAVE TYPE | TEMPERATURE | TIME | ||
|---|---|---|---|---|
| Pre-vacuum Steam Sterilizer | 132 °C / 270 °F | 4 minutes | ||
| Gravity Displacement | 121 °C / 250 °F | 30 minutes |
NOTE:
Do not exceed autoclave cycles of 20 minutes at 134 °C / 273 °F or 30 minutes at 121 °C / 250 °F as longer and hotter autoclave cycles may result in degradation of surgical guide mechanical properties and accuracy.
Autoclave cycles must include a dry cycle to maintain best accuracy. For example, according to CDC guidelines, wrapped instruments sterilized in a prevacuum autoclave must be dried 20-30 minutes. After autoclaving, parts will change in color from translucent orange to translucent light yellow.
If cleaning or disinfection methods are preferred or required, use facility protocols. Tested methods of disinfection include soaking the finished product in fresh 70% IPA for 5 minutes.
NOTE:
Do not leave surgical guides in alcohol solution for an extended period of time as it may lead to degradation of mechanical properties and accuracy.
After disinfection or sterilization, inspect the printed part for cracks to ensure the integrity of the surgical guide is maintained prior to use in patients.
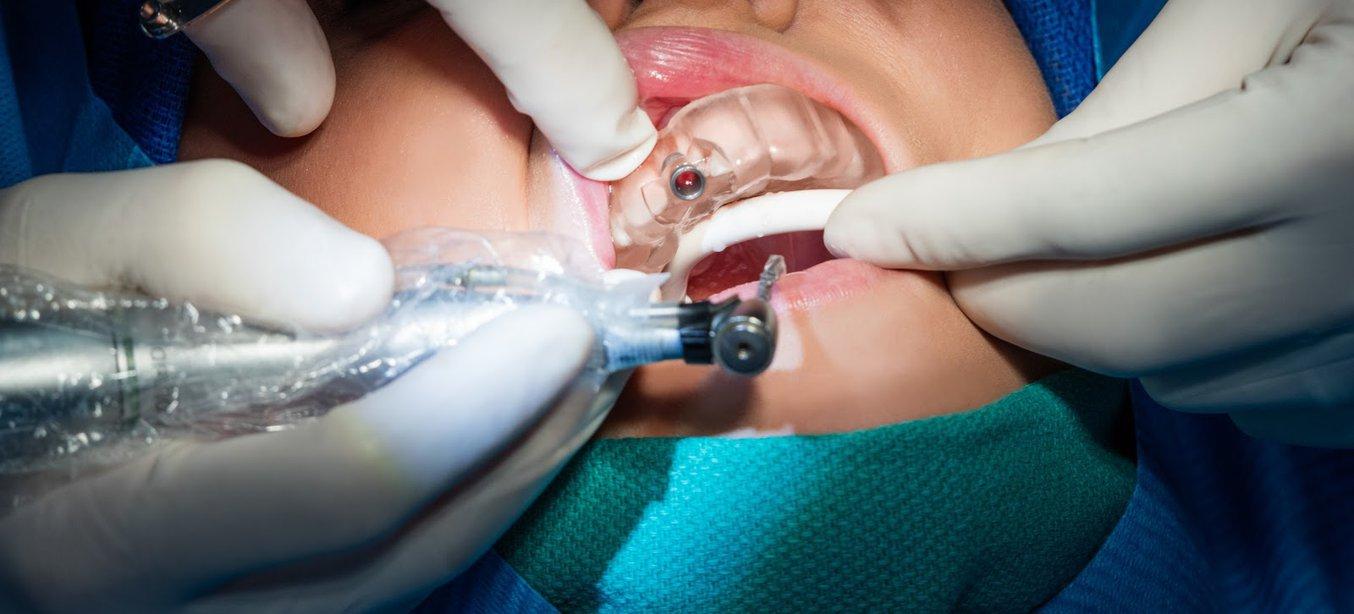
5.2 Perform Procedure
Execute the procedure with precision using the surgical guide.
6. Biocompatibility
Surgical Guide Resin is non cytotoxic, not a sensitizer, non irritating and complies with ISO 10993-1:2018.
7. Supporting Documents
PRNT-0015 Revision 01 11-10-2020