
Calculating SLS Cost Per Part for Fuse Series 3D Printers
3D printing is becoming increasingly reliable as a production method, rather than solely a prototyping tool. Powder bed fusion 3D printers, like selective laser sintering (SLS) and multi-jet fusion (MJF) models, are ideally suited for production applications due to their high throughput capacity and industrial strength materials. As manufacturers weigh their options for end-use production, cost per part becomes a more important consideration. In the following guide, we will go through them and provide examples for calculating SLS cost per part on the Formlabs Fuse Series.
Calculating SLS Cost Per Part for Fuse Series 3D Printers
Download as PDF3D printing is becoming increasingly reliable as a production method, rather than solely a prototyping tool. Powder bed fusion 3D printers, like selective laser sintering (SLS) and multi-jet fusion (MJF) models, are ideally suited for production applications due to their high throughput capacity and industrial strength materials. As manufacturers weigh their options for end-use production, cost per part becomes a more important consideration. In the following guide, we will go through them and provide examples for calculating SLS cost per part on the Formlabs Fuse Series.
Primary Factors for Calculating SLS Cost Per Part
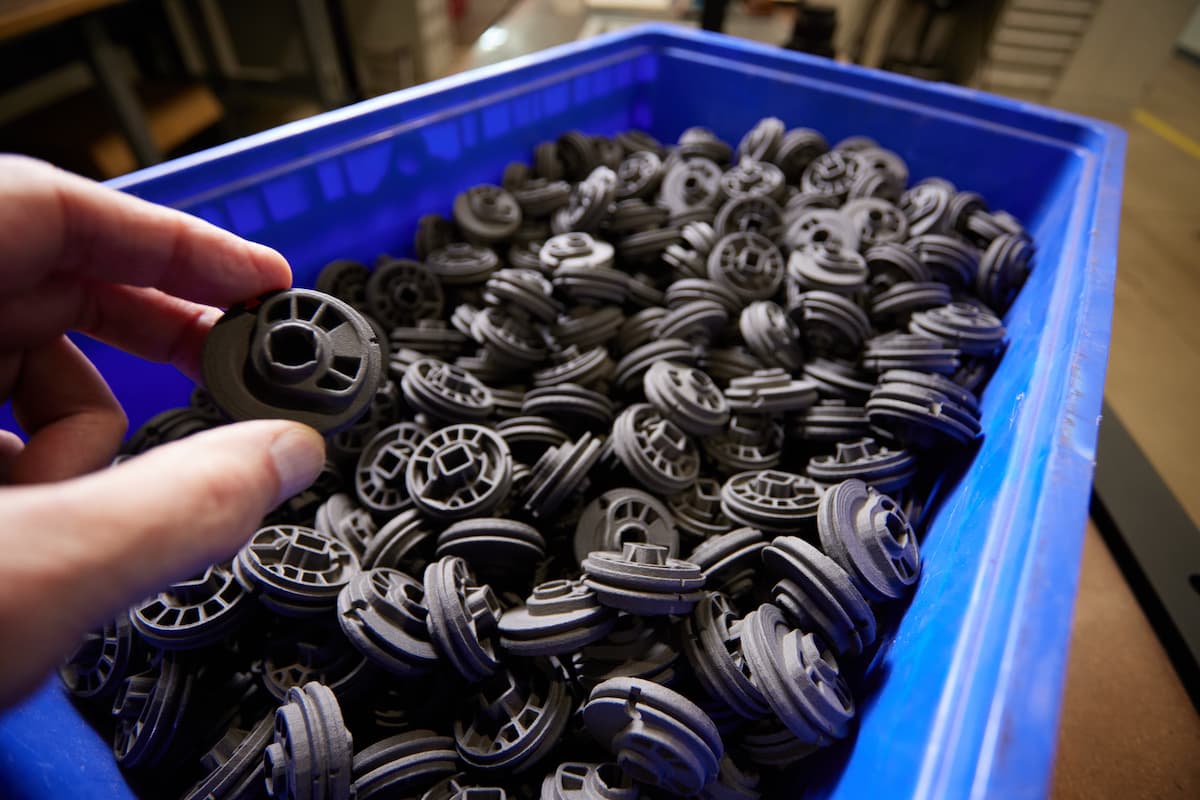
Many businesses only factor in material cost when calculating cost per part (rather than also factoring in labor, electrical usage, etc.). However, even when solely looking at material cost, there are multiple factors to consider. Consider the four options below, all for the same single part, with different costs depending on orientation an the corresponding packing density.
** Example builds have not been not optimized for lowest cost, speed, or efficiency.
Part Cost: $22.61
Total Powder: 0.75 kg
Sintered Powder: 0.04 kg
Unsintered Powder: 0.71 kg
Refresh Rate: 30%
Packing Density: 5%
Material Cost: $99.90/kg
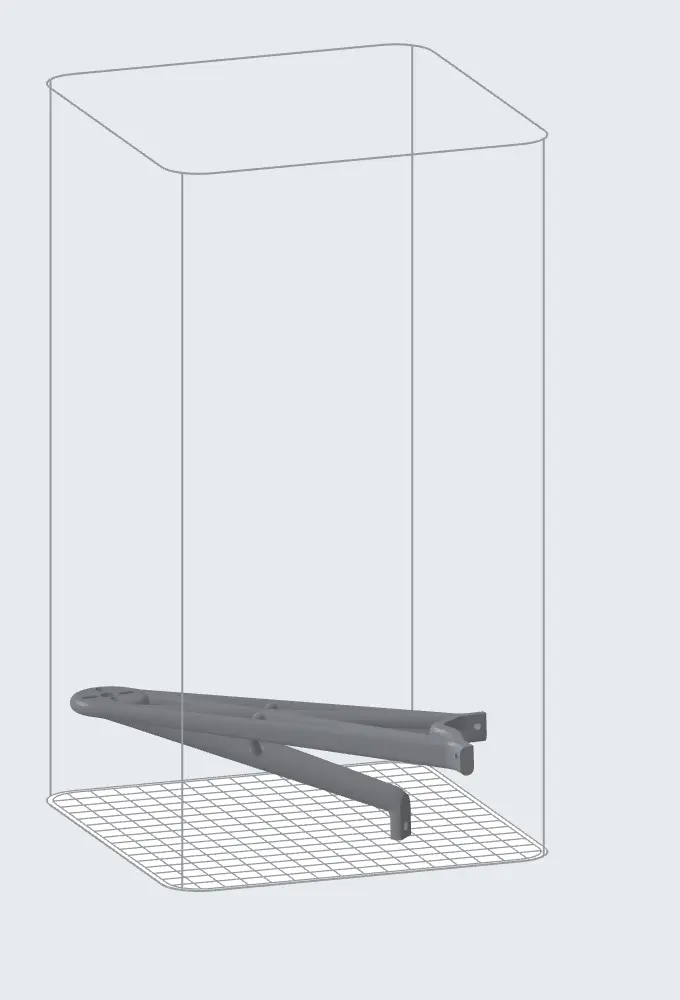
Part Cost: $53.41
Total Powder: 1.78 kg
Sintered Powder: 0.04 kg
Unsintered Powder: 1.74 kg
Refresh Rate: 30%
Packing Density: 2%
Material Cost: $99.90/kg
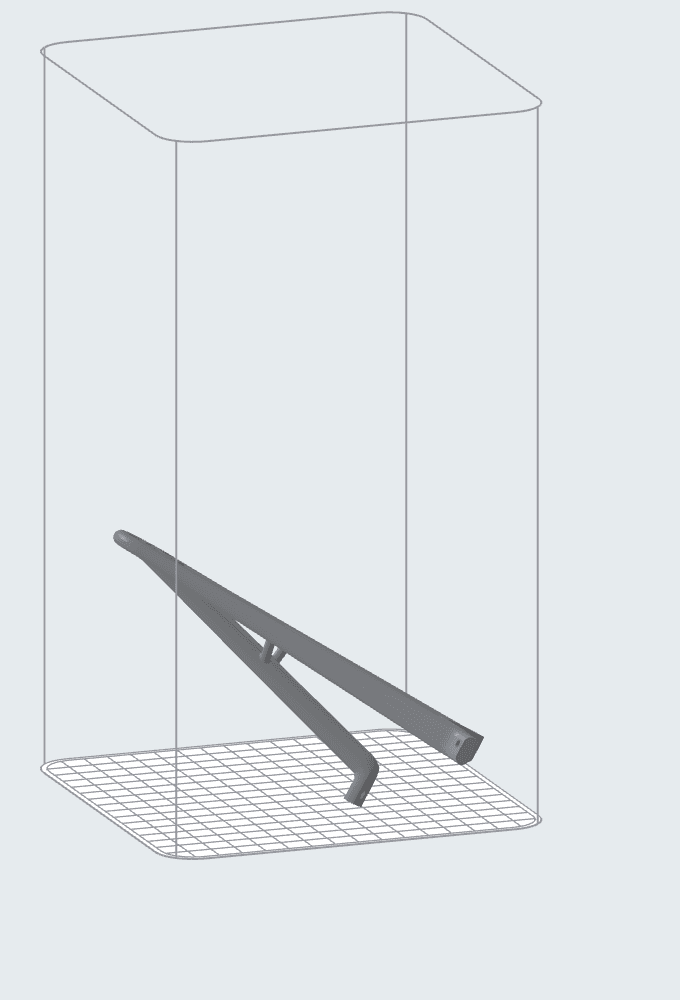
Part Cost: $80.91
Total Powder: 2.70 kg
Sintered Powder: 0.04 kg
Unsintered Powder: 2.66 kg
Refresh Rate: 30%
Packing Density: 1%
Material Cost: $99.90/kg

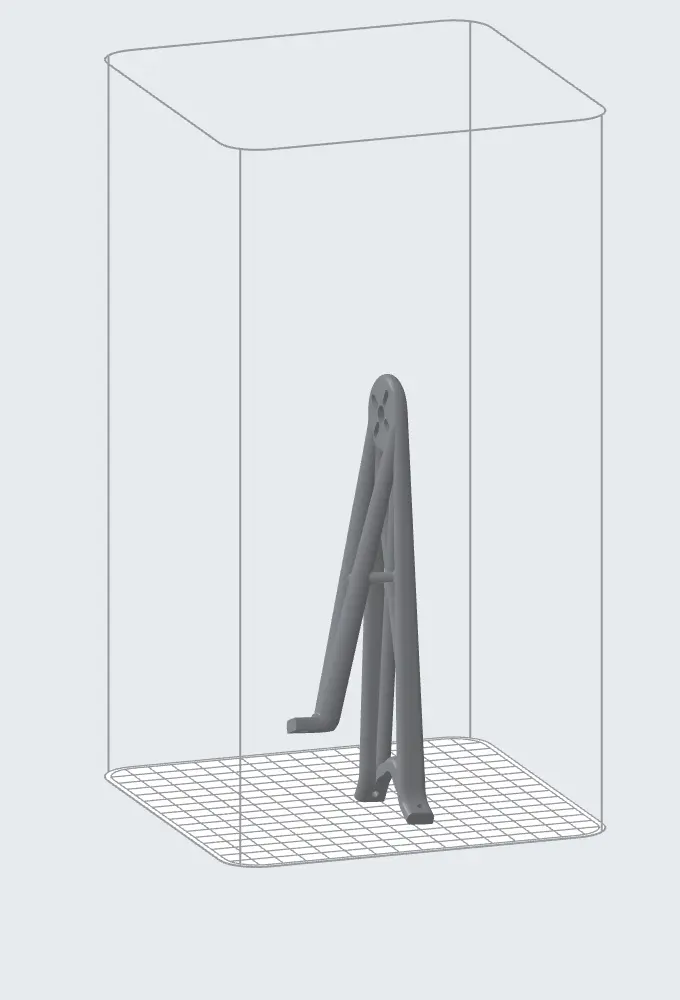
Part Cost: $117.50
Total Powder: 3.92 kg
Sintered Powder: 0.04 kg
Unsintered Powder: 3.88 kg
Refresh Rate: 30%
Packing Density: <1%
Material Cost: $99.90/kg
Material Cost
Material cost is not just the amount of material that makes up the final sintered parts, nor is it the amount of material labeled ‘Total Powder’ in PreForm. Material cost can be calculated by adding the sintered powder to the powder that is not sintered but also cannot be recycled into your next print.
This means that this formula changes based on the type of material used, refresh rate, packing density, and cost of powder (whether or not it is discounted in bulk). The latest version of PreForm calculates material cost based on the following formula, and will prompt you to enter the cost per kilogram of material (which can vary from $45/kg to $100/kg depending on the material and the amount ordered).
-
CM = Material Cost per Part
-
M = Mass per Part
-
PM = Material Price per kg*
-
RR = Refresh Rate
-
PD = Packing Density
* The best way of reducing cost per part is through bulk powder discounts. Formlabs SLS Powders can cost as low as $45/kg for bulk orders.
Cm = M x Pm x (1 + RR - PD)
Notes:
-
This model assumes that RR > PD
-
Though this happens rarely, if packing density is equal to or higher than the refresh rate, then you’ll have less unused powder for your next build than the refresh rate states, and you’ll need to supplement with a higher proportion of fresh powder.
-
Spending more time post-processing in the Fuse Sift can create marginally more powder for recycling, but at the cost of the added labor.
-
Once packing density matches or even exceeds your refresh rate (very difficult to do unless you’re printing solid blocks), your cost per part is simply the cost per gram of powder the parts use.
-
-
Unlike MJF 3D printing, the Fuse Series does not have to factor in the cost of a binding agent into material costs.
-
Regardless of build height, Fuse Series SLS powders’ refresh rates do not change — unlike MJF printers, where a shorter build may have a different refresh rate than a taller one.
-
The Fuse Series has no limit on packing density as long as minimum space between parts is maintained — PreForm will auto apply 5 mm space between parts, but this is conservative, and most parts can be spaced as closely as 2 or 3 mm apart before there is danger of fusing parts together or degradation in surface finish.
-
MJF printers often limit packing density, and even for MJF builds that reach a 15% packing density, the required refresh rate is 40%, meaning you’re always going to be using more ‘fresh’ powder for new builds and will be less able to efficiently recycle your unsintered powder.
-
Print Orientation/Build Height
Orient your parts so that they can fit in the shortest Z direction build possible. Orienting parts with their longest axis horizontally will reduce the amount of powder necessary and drive down your cost per part. PreForm’s ‘Pack Selected Models’ feature will orient your part for efficiency and highest pack density — if you need to print in a different orientation for some other reason, be cognizant of height and how that will affect your cost per part.
Ensure your parts are placed directly against the build chamber bottom as possible. Though PreForm will allow users to place a part in the vertical center of the build chamber, that will drastically increase the amount of powder needed and decrease efficiency, leading to a higher cost per part (not to mention longer print time).
Refresh Rate
Refresh rate is proportion of fresh powder needed to start your build. Formlabs’ Nylon 12 Powder has a refresh rate of 30%, meaning that each new build needs at least 30% completely fresh powder to begin, and can use up to 70% recycled or unsintered powder from a previous print. Though lowering your refresh rate means reducing your cost per part, going below the recommended refresh rate can have a negative impact on your part quality and surface finish. Different materials have varying recommended refresh rates.
| Material | Refresh Rate |
| Nylon 12 Powder | 30% |
| Nylon 12 Tough Powder | 20% |
| Nylon 12 White Powder | 30% |
| Nylon 12 GF Powder | 50% |
| Nylon 11 Powder | 30% |
| Nylon 11 CF Powder | 30% |
| TPU 90A Powder | 50% |
Packing Density
Packing density refers to how much of the build chamber is being sintered into parts, though you can also understand it as how densely your parts are packed together. PreForm’s Packing Density calculations are by mass, while other tools (or assumptions) may use volume. Sintered parts are nearly twice as dense as unsintered powder, so mass packing density will be larger than the volumetric packing density found using the build chambers’ internal dimensions.
The best way to drive down cost per part is to fill any large gaps between parts with other parts, or to orient them in such a way as to take advantage of features that can be printed within others’ cavities or negative spaces.*
PreForm’s auto-packing feature is the fastest way to get the best packing density while maintaining proper tolerances between parts. PreForm starts auto-arraying models with 5 mm in between them, although this is conservative and can be adjusted manually, with a recommended minimum space in between parts of 2 mm.
*Some Fuse Series users have part files like clips, connectors, or discs that they keep on hand to add into builds that need better packing density in order to better match the materials’ refresh rates.
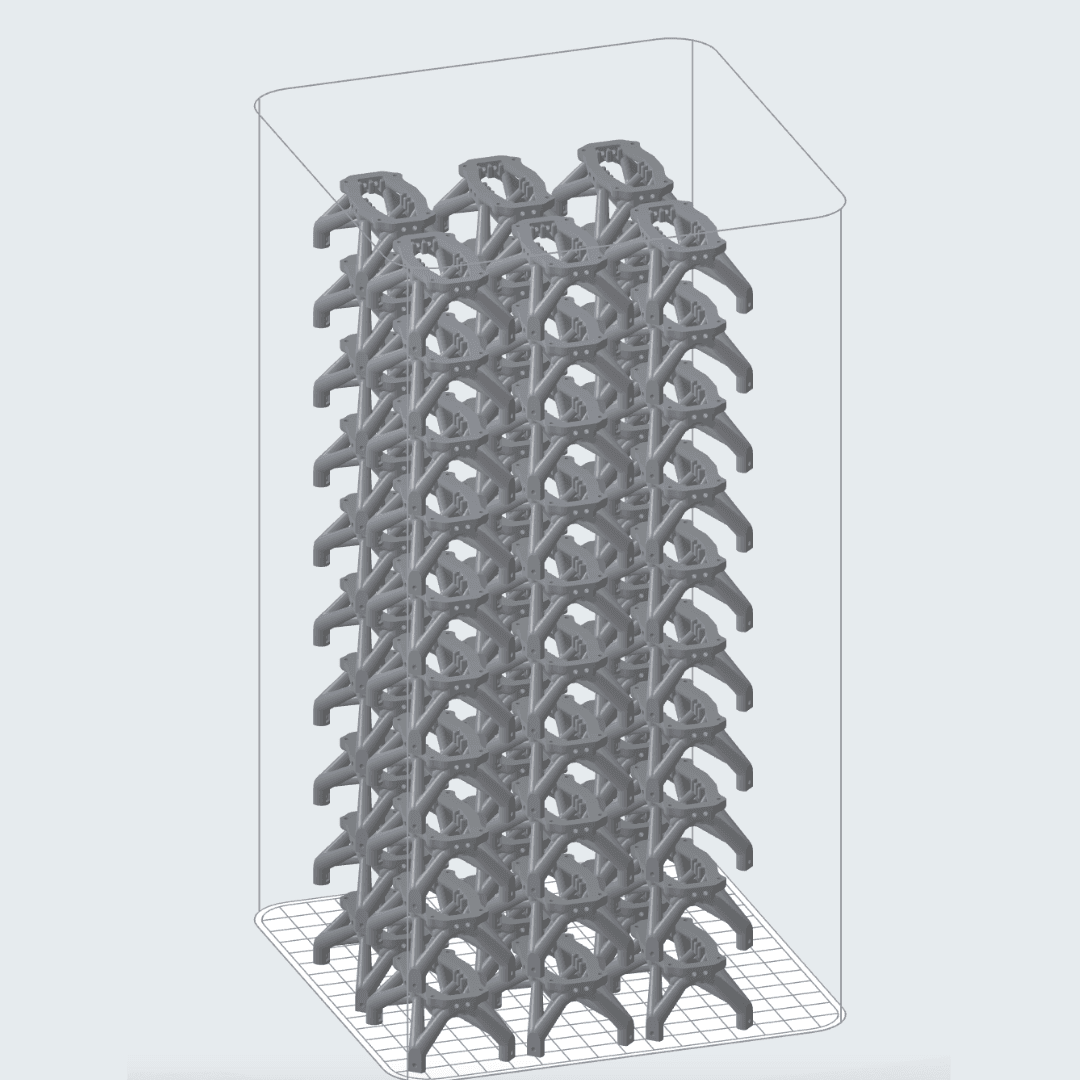
This build has 60 drone frames, stacked using the Array feature in PreForm (twice in X, three times in Y, and 10 times in Z.
Part Cost at $99/kg: $2.18 ($130.96 for full build of 60 parts)
Part Cost at $45/kg: $0.98 ($58.99 for full build/60 parts)
Total Powder: 4.37 kg
Sintered Powder: 0.37 kg
Unsintered Powder: 4.0 kg
Refresh Rate: 30%
Packing Density: 8%
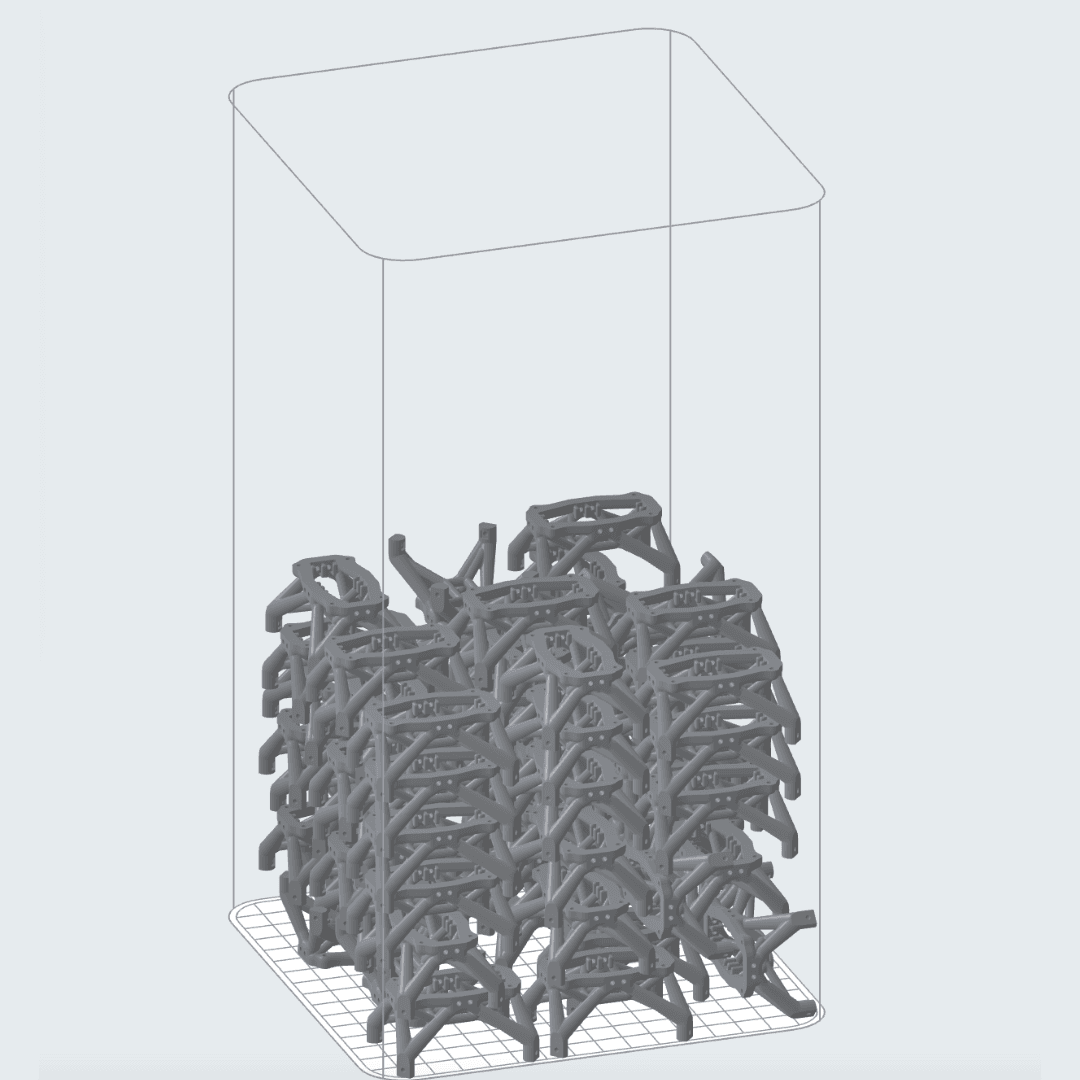
This build has the same 60 models, but they have been packed using the auto packing feature in PreForm.
Part Cost at $99/kg: $1.06 ($63.64 for full build of 60 parts)
Part Cost at $45/kg: $0.48 ($28.93 for full build of 60 parts)
Total Powder: 2.14 kg
Sintered Powder: 0.37 kg
Unsintered Powder: 1.77 kg
Refresh Rate: 30%
Packing Density: 17%
PreForm displays packing density along with the total powder usage. To most efficiently use your powder, you should try to match packing density to refresh rate. For Nylon 12 Powder parts, aim for a packing density of 30%. This way, 30% of that build will be sintered powder, and 70% will be unsintered powder. For your next print, all that unsintered powder can be recycled into the new build chamber according to the recommended refresh rate.
Hollowing/Latticing and Optimizing for SLS
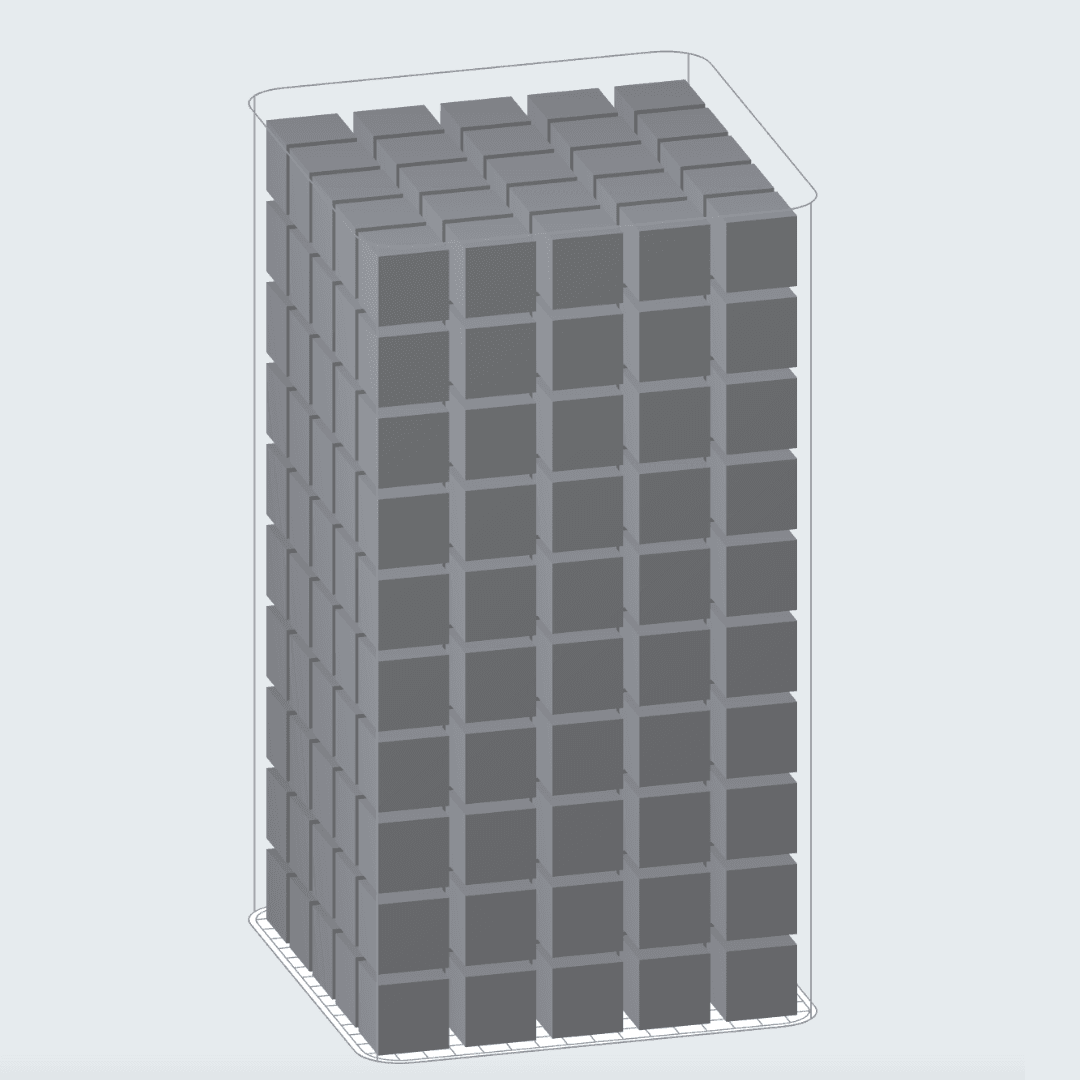
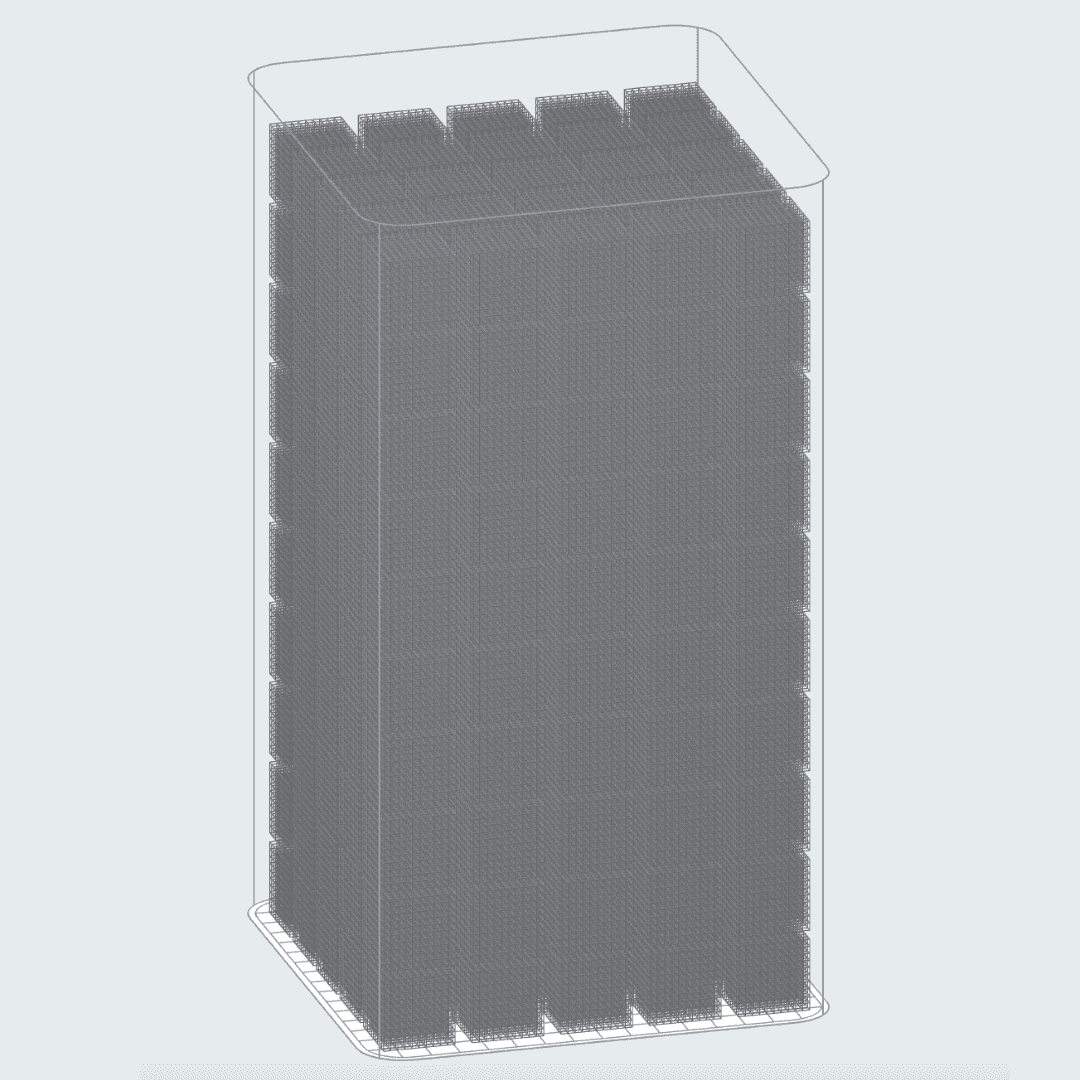
Solid
Part Cost at $99/kg: $1.57 ($389.36 for full build of 60 parts)
Part Cost at $45/kg: $0.71 ($176.98 for full build/250 parts)
Total Powder*: 6.11 kg
Sintered Powder: 3.93 kg
Unsintered Powder: 2.18 kg
Refresh Rate: 30%
Packing Density: 64%
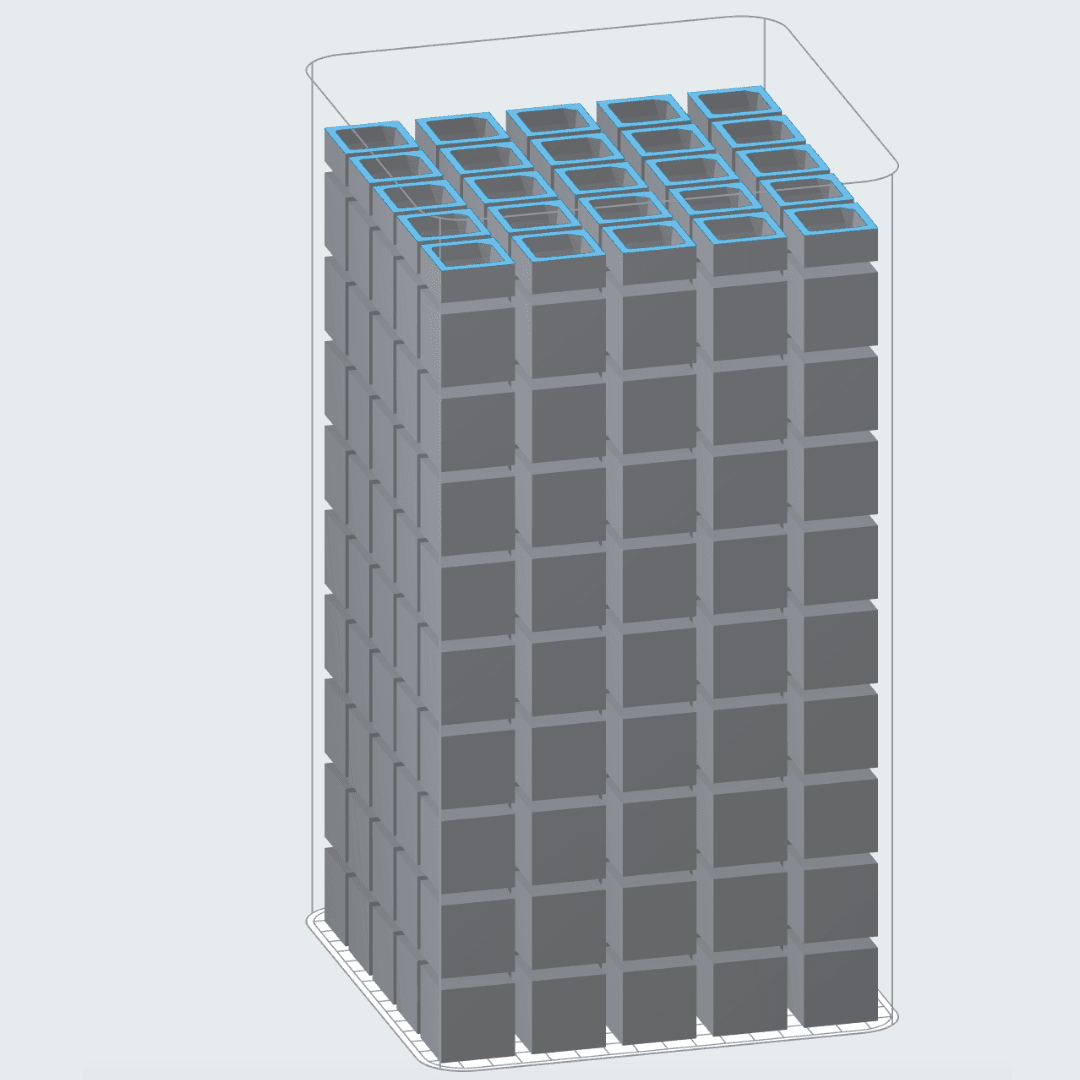
Hollowed
Part Cost at $99/kg: $0.80 ($198.62 for full build / 250 parts)
Part Cost at $45/kg: $0.36 ($90.28 for full build / 250 parts)
Total Powder*: 5.14 kg
Sintered Powder: 2.01 kg
Unsintered Powder: 3.13 kg
Refresh Rate: 30%
Packing Density: 38%
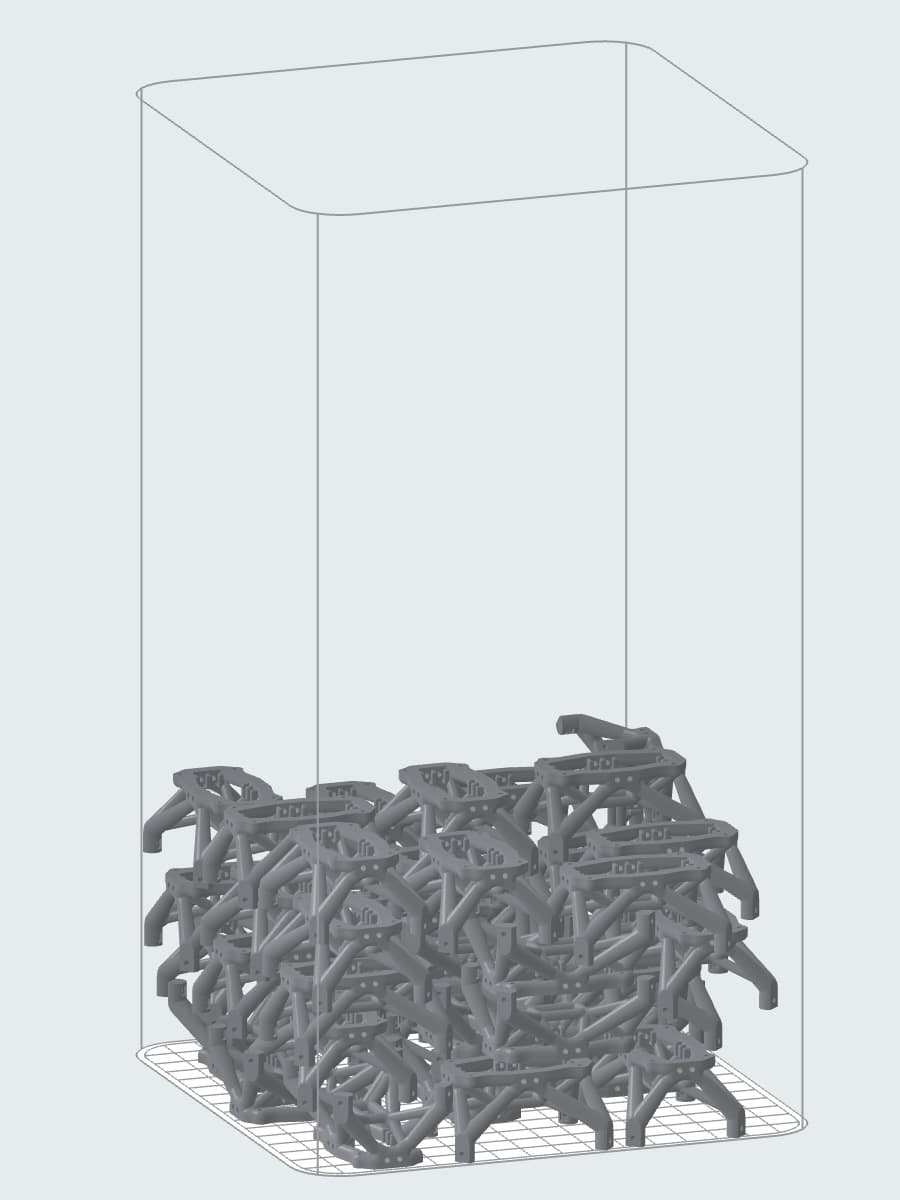
Latticed
Part Cost at $99/kg: $0.50 ($125.816for full build/250 parts)
Part Cost at $45/kg: $0.23 ($56.89 for full build/250 parts)
Total Powder: 4.21 kg*
Sintered Powder: 0.13 kg
Unsintered Powder: 4.07 kg
Refresh Rate: 30%
Packing Density: 3%
*Though each of these builds is taking up the same amount of volume when combining sintered and unsintered powder, the Total Powder weighs differently for each, because sintered powder has twice the density of unsintered powder, so the same volume will weigh more with a higher packing density.
Though trying to match packing density to refresh rate (getting packing density as high as possible) reduces part cost by making your powder recycling more efficient, in the examples above, you can see that latticing or hollowing parts reduces cost per part more significantly. However, this is just because of the significantly lower amount of powder used overall. If you can hollow or lattice your parts, or use generative design to create organic, efficient structures, this can reduce your cost per part (even when it also reduces pack density).
PreForm offers a Hollow option as well as a Hole option, so that when you hollow your models, you can add a drainage hole to get the unsintered powder out from the hollowed part (this would be difficult with a cube part like this, simply used as an example).
Electrical Usage
The average business in the US pays just over $0.16 per kWh for electricity. The Fuse 1 and Fuse 1+ 30W printers use about 5 kWh of electricity for a full 24-hour build of densely packed parts. The Fuse Sift and Fuse Blast use about 1 kWh of electricity for a 10-minute Sift and 1 kWh for two, 15-minute automated Blast cycles, combining for a total of about 7 kWh of electricity for one 24-hour production volume print with a packing density of about 30%. This equates to about $1.12 per day of electrical consumption. When dividing this cost by the number of parts produced, it often becomes a negligible addition to the formula.
Equipment Cost
Most businesses do not factor in equipment cost when calculating cost per part, often purchasing equipment cost with capital expenditure funds and materials, electricity, and labor with operating expenditure funds. However, many businesses do use their cost per part (and savings when compared to other production methods) for calculating their ROI. In this scenario, the complete Fuse Series SLS ecosystem, at less than $60,000, is a scale factor more affordable than other 3D printing options like traditional MJF or SLS printers, and small businesses can get started producing parts with just a printer and Fuse Depowdering Kit for $25,000. Extra production capacity can be easily achieved by adding extra build chambers at $3,999, to enable 24/7 production.
Labor Costs
Labor costs depend entirely on your business model, but to create your own labor cost estimate, you can use use the following estimates for the labor required for each build.
- File Prep and Upload: 10-20 minutes (less when printing repeated production builds)
- Printer preparation: 5 minutes
- Printing: 0 minutes hands-on labor
- Cooling in printer: 0 minutes hands-on labor
- Transferring to Fuse Sift: 1 minute
- Cooling in Fuse Sift before unpacking: 0 minutes hands-on labor
- Extraction (sifting): 10-20 minutes, dependent on part quantity (Using Fuse Blast reduces Sifting time by up to 80%)
- Transfer to Fuse Blast: 1 minute
- Blasting: 0 minutes hands-on labor
- Printer Maintenance: 12 minutes
- Fuse Sift Maintenance: 2 minutes
- Fuse Blast Maintenance: 2 minutes
Calculating Cost Per Part: Production Scenario
In the following production scenario, we’ll calculate the cost per part based on a medium-volume manufacturing workflow with the following inputs:
-
One employee with a $40/hour wage
-
Complete Fuse Series SLS ecosystem with two extra build chambers ($65,440)
-
Five days a week, 50 weeks a year
-
Drone manufacturing, with an average order of several hundred drone components each week
-
Part: Drone frame base, designed by Building Momentum
-
Bulk discount at 30%, ordering 200 kg of Nylon 12 Powder at a time, $65/kg

Two Build, Three Build Chamber Workflow

Build Details: 80 parts
Total Print Time: 8 h 47 m
Cool to 100 °C: 58 m
Cooldown time to ~ 50°C: 6 h
Cycle Time: 15 h 45 m
Build Details: 40 parts
Total Print Time: 5 h 28 m
Cool to 100 °C: 58 m
Cooldown time to ~ 50°C: 3 h
Cycle Time: 9 h 26 m
Equipment Amortization Schedule:
Equipment Cost (Fuse 1+ 30W Complete Package w/ 2 extra build chamber): $65,440
Working Days: 250/year
Amortization Timeline: 5 years
65,440/1500 working days = 43.63
43.63/120 parts per day = $0.36
$0.36 per day is the amortized cost of the printer over 5 years. Though this example shows what nearly 100% utilization (with an efficiently packed build, two printing shifts per day, and thousands of the exact same part) looks like, even if the utilization rate were half this, the amortization of the printer would still be extremely efficient.
Labor Tasks and Time
| Task | Time |
|---|---|
| File Prep and Upload | 20 |
|
Printer Prep (Load powder, load build chamber) |
5 |
| Printing | 0 |
| Cooling in printer | 0 |
| Transfer to Fuse Sift, finish cooling | 5 |
| Unpack build chamber in Fuse Sift | 10 |
| Transfer to Fuse Blast, start automated media blasting cycle | 5 |
| Maintain printer (6 min before each print) | 12 |
| Maintain Fuse Sift (once before using in morning) | 2 |
| Maintain Fuse Blast (once before using in morning) | 2 |
**Printer Maintenance Includes: Vacuuming all debris from around the build area, wiping the laser window, swabbing the IR sensor cone, and cleaning the air filter (every few prints).
Labor costs per 24 hour cycle of production come to $41.33. For 120 parts, labor costs of $0.34 can be added to material costs for cost per part.
Total Cost Per Part Including Material, Labor, and Equipment
Material: $0.71
Amortized Cost of Equipment: $0.36
Labor: $0.34
TOTAL COST PER PART: $1.41
In-House SLS: An Efficient Cost Per Part
Though material functionality, surface finish, dimensional accuracy, and machine consistency are all important qualities to consider when choosing a production method, the biggest concern many manufacturers have is cost. Traditional methods of production like injection molding are typically more cost-efficient when producing tens or hundreds of thousands of parts, and outsourcing to a 3D printing service bureau may make sense if you need only one or two parts. However, with the introduction of accessibly priced, powerful 3D printers like the Fuse Series, in-house manufacturing can be done efficiently and cost-effectively.
Setting up a manufacturing workflow that can deliver on a per part cost of less than a dollar is possible with the Fuse Series. As with the above example, you can produce close to a thousand parts a week with only an hour of hands-on labor each day, less than 100 square feet of space, and an equipment cost of just $65,440. The drone frame base parts used in this scenario would cost only $1.41, and with even greater bulk powder pricing tiers available, could cost even less.
Bringing SLS in-house for manufacturing doesn't have to be complicated or expensive. To learn more about getting started with a customized cost per part calculation, contact our team.