
Guide to SLS Post-Processing Techniques: Media Blasting, Smoothing, Polishing, Coloring, and More
Post-processing techniques can change the appearance, texture, and performance of an SLS 3D printed part.
Selective laser sintering (SLS) 3D printing is a proven manufacturing technique with high-performance materials — and those materials can go even further in performance and appearance when paired with advanced post-processing methods.
Read our guide to learn about both the basics of post-processing SLS 3D printed parts and advanced methods to smooth, polish, and color finished prints.
Basics of SLS Post-Processing
Like other powder-based additive manufacturing technologies, SLS parts must be cleaned of excess powder after printing concludes. Once your part has finished printing and is removed from the 3D printer, there are three core steps you need to take: part extraction, powder recovery, and media blasting.
This section covers the workflow with Fuse Series SLS 3D printers, Fuse Sift and Fuse Sift X1 powder recovery stations, and Fuse Blast media blasting solution.
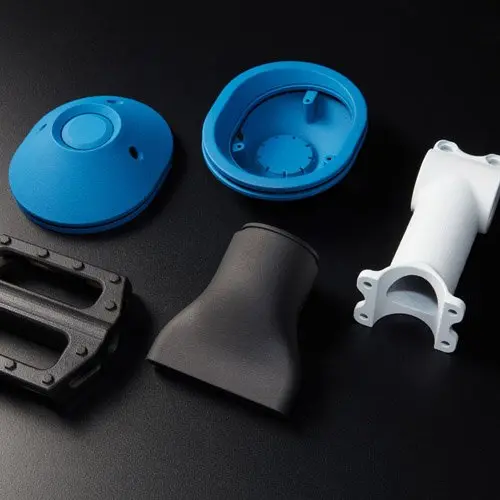
Request a Free SLS Sample Part
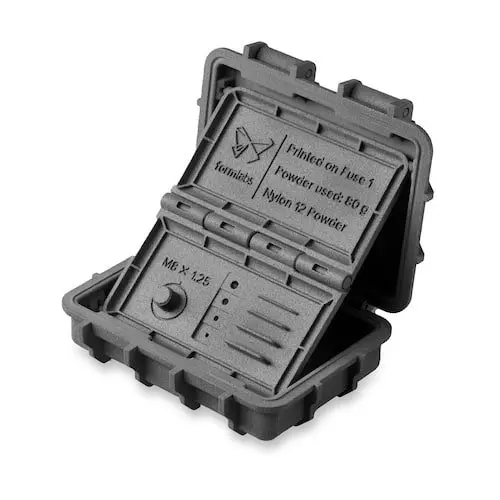
See and feel Formlabs quality firsthand. We’ll ship a free SLS sample part printed on the Fuse 1+ 30W to your office.
Step 1: Part Extraction
Before post-processing can begin, SLS prints need to cool down. Fuse Series printers have a touchscreen feature that indicates the recommended cooling time. Cooling can take up to half the print time for a fully packed Fuse build.
This cooldown process consists of two stages. The first step is to wait for the build chamber, or build unit for Fuse X1, to cool to ≤ 100 °C, at which point it can be removed from the printer and transported to the Fuse Sift or Fuse Sift X1. This industry-leading rapid cooldown time allows you to start a new print within one to two hours of your previous print job.
The Fuse Series allows the build chamber to be removed and transported to the Fuse Sift within just one to two hours of the print job concluding.

Once a print completes, the Build Unit is rolled out from the Fuse X1 printer to cool. Integrated insulation inside the Build Unit cools prints inside the unit, freeing the printer to start the next job while the last one is still cooling for near continuous operation.
The second stage of the cooldown process can take place with the build chamber already transferred into the Fuse Sift or Fuse Sift X1. Once the cooldown is complete, part extraction can begin. The Fuse Sift or Fuse Sift X1 will slowly raise the powder cake out of the build chamber, allowing you to separate sintered parts from unsintered powder, while a fan pulls any dispersed powder into a filter. The unsintered powder should fall away from the prints with the touch of your hand, exposing the completed prints.
When using Fuse Blast, operators can spend as little as five minutes extracting parts from the powder cake in the Fuse Sift or Fuse Sift X1 before moving the still-powdery parts into the basket for cleaning. When using other media blasters, we recommend removing loose powder and semi-sintered Surface Armor with the provided brushes in the Fuse Sift or Fuse Sift X1 to avoid media contamination.
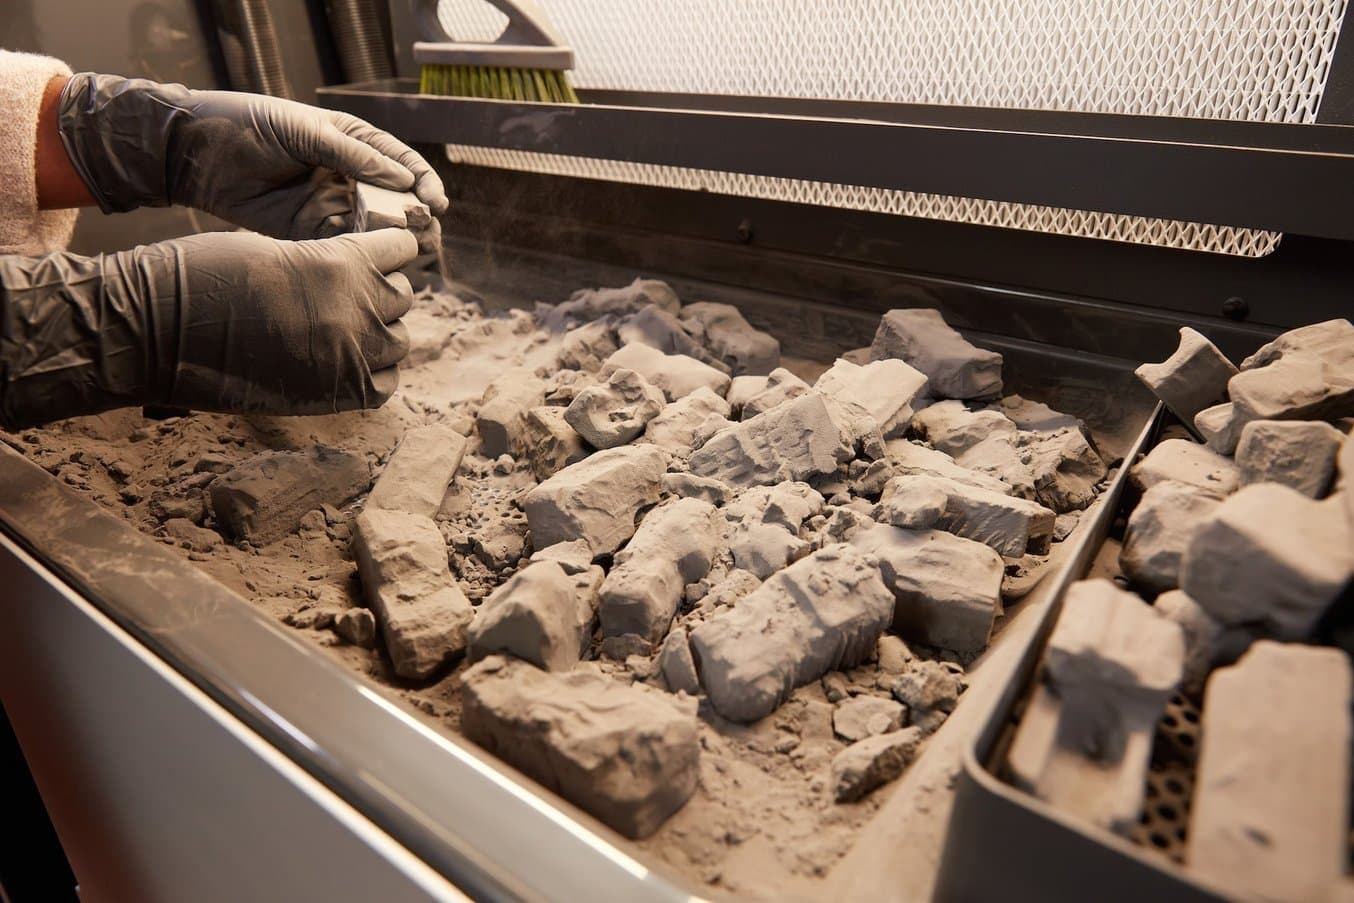
Fuse Sift offers a safe and efficient system for extracting prints and recycling powder.
Step 2: Powder Recovery
Any powder left unsintered after a Fuse Series print can be recycled and used again, reducing waste and material costs. The Fuse Sift recovers loose powder and tumbles it to mix with fresh powder for use in future prints. The recovered powder from the Fuse Sift X1 is moved via the Fuse X1 Vacuum Conveyor to the Mix Kit, where new powder is mixed in. The percentage of new powder added is called the refresh rate, which can vary between different manufacturers’ machines, materials, and printing environments.
Step 3: Media Blasting
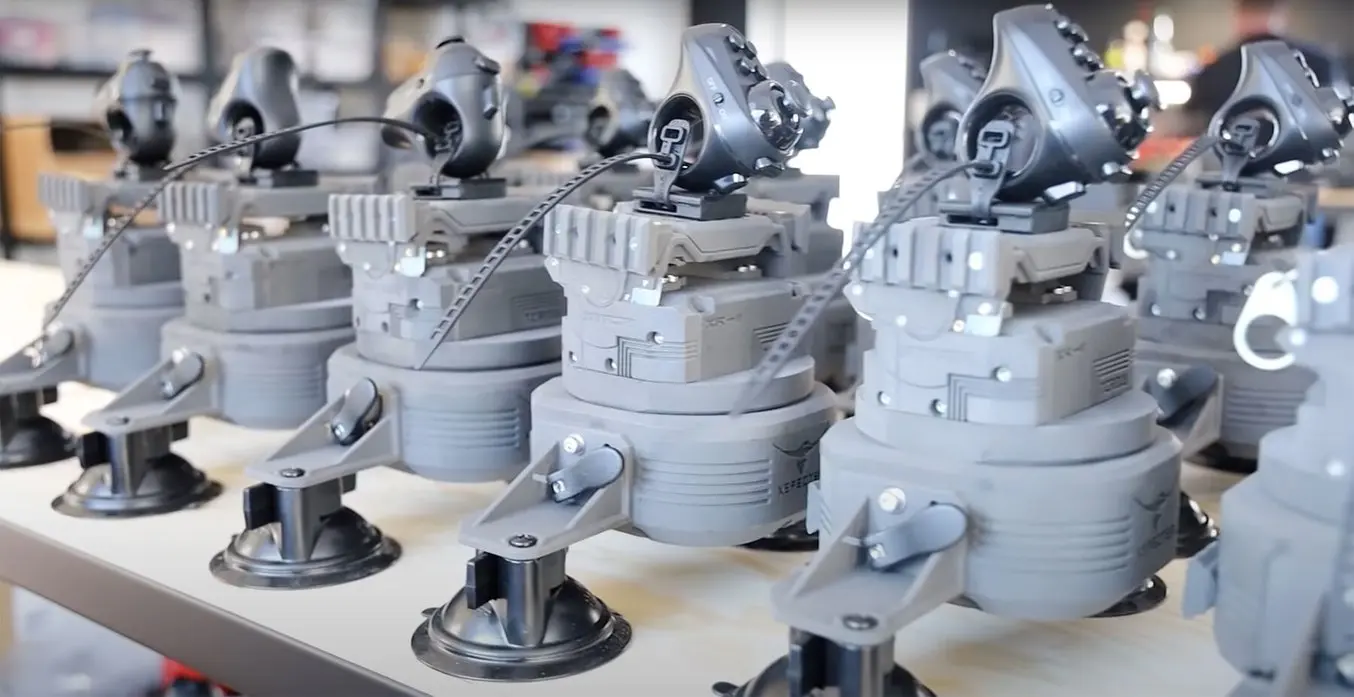
The printed parts are transferred to the Fuse Blast, where powder is removed by a combination of basket rotation, compressed air, and impact smoothing media.
After basic cleaning, media blasting (also called sand blasting) is recommended to fully depowder an SLS part. This is particularly useful for clearing the semi-sintered Surface Armor out of negative features, which can be hard to reach with a brush.
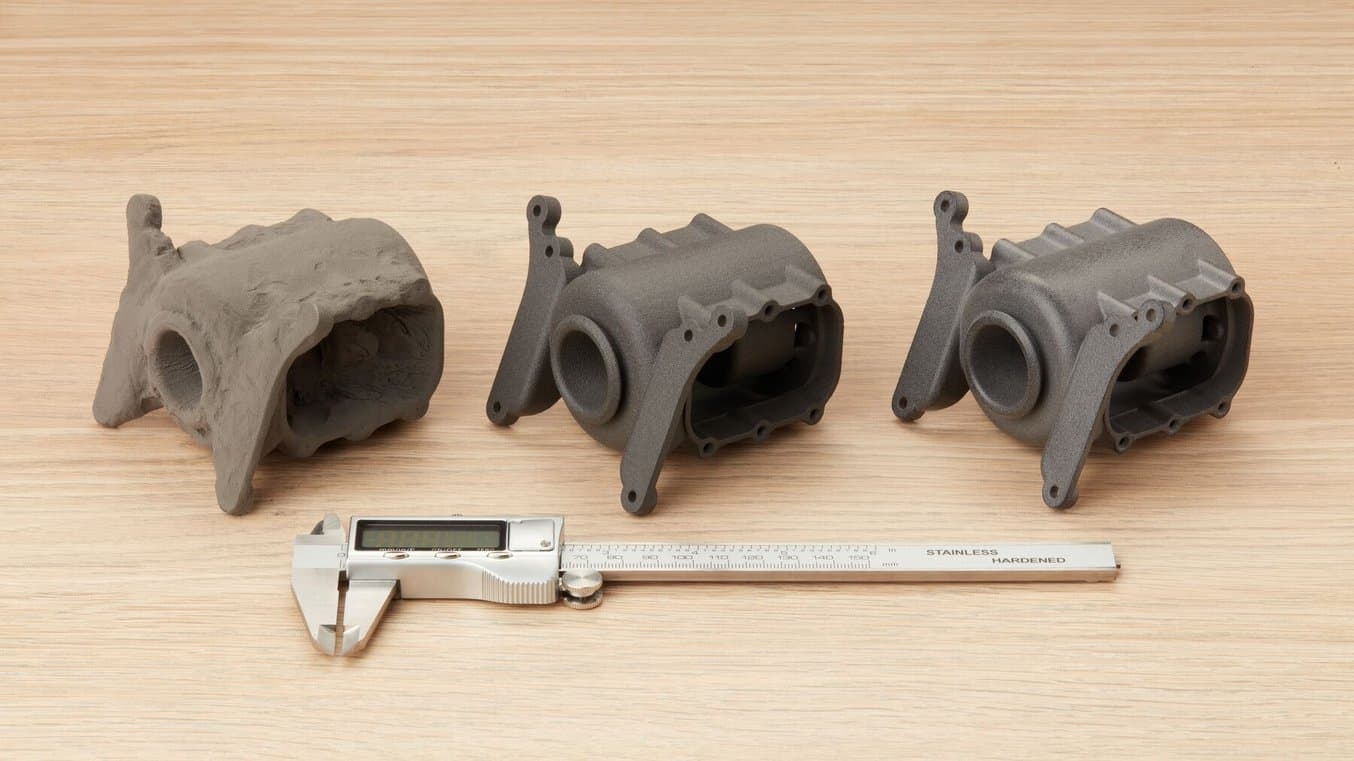
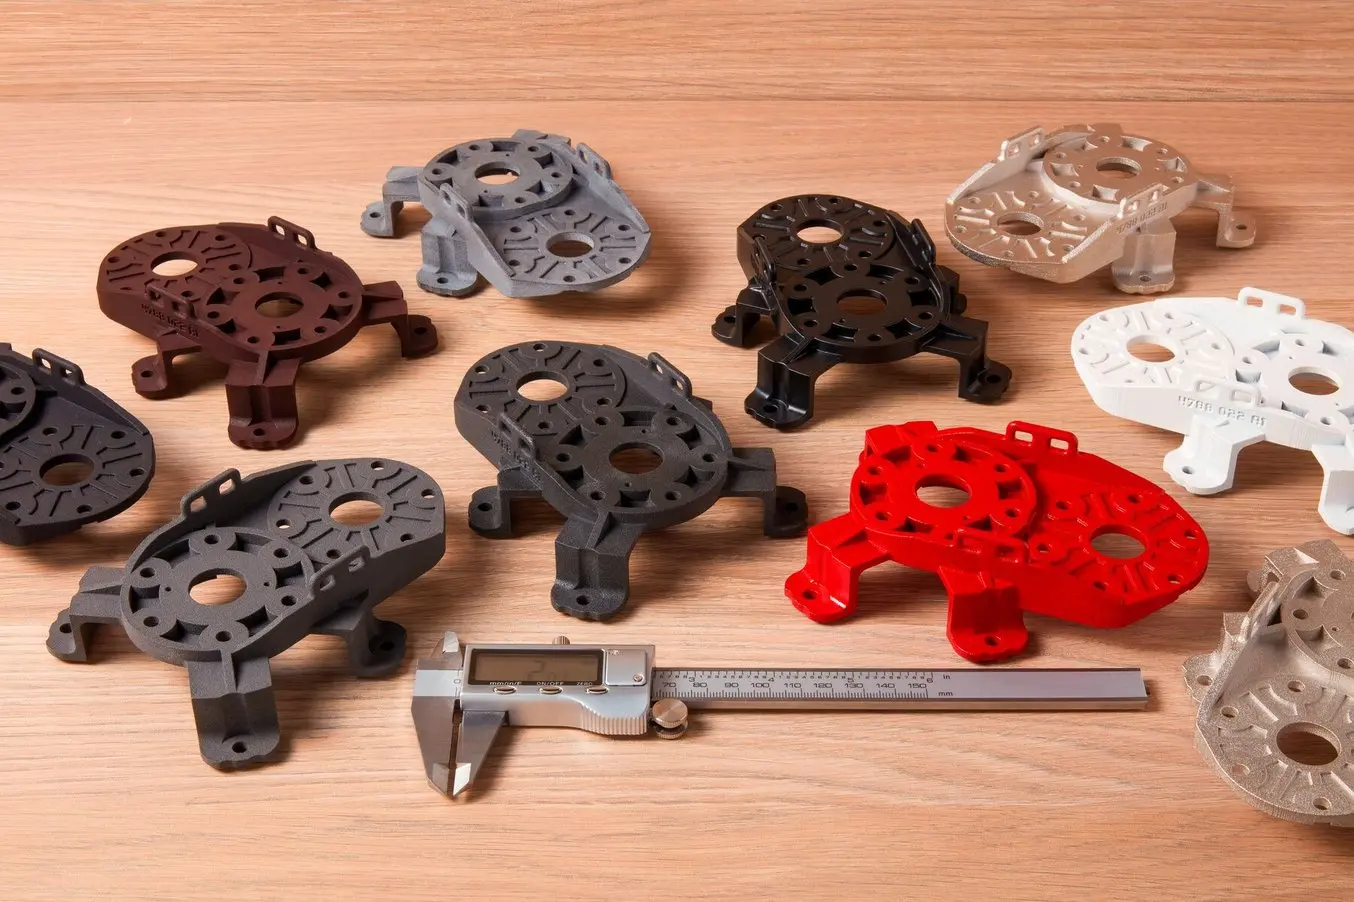
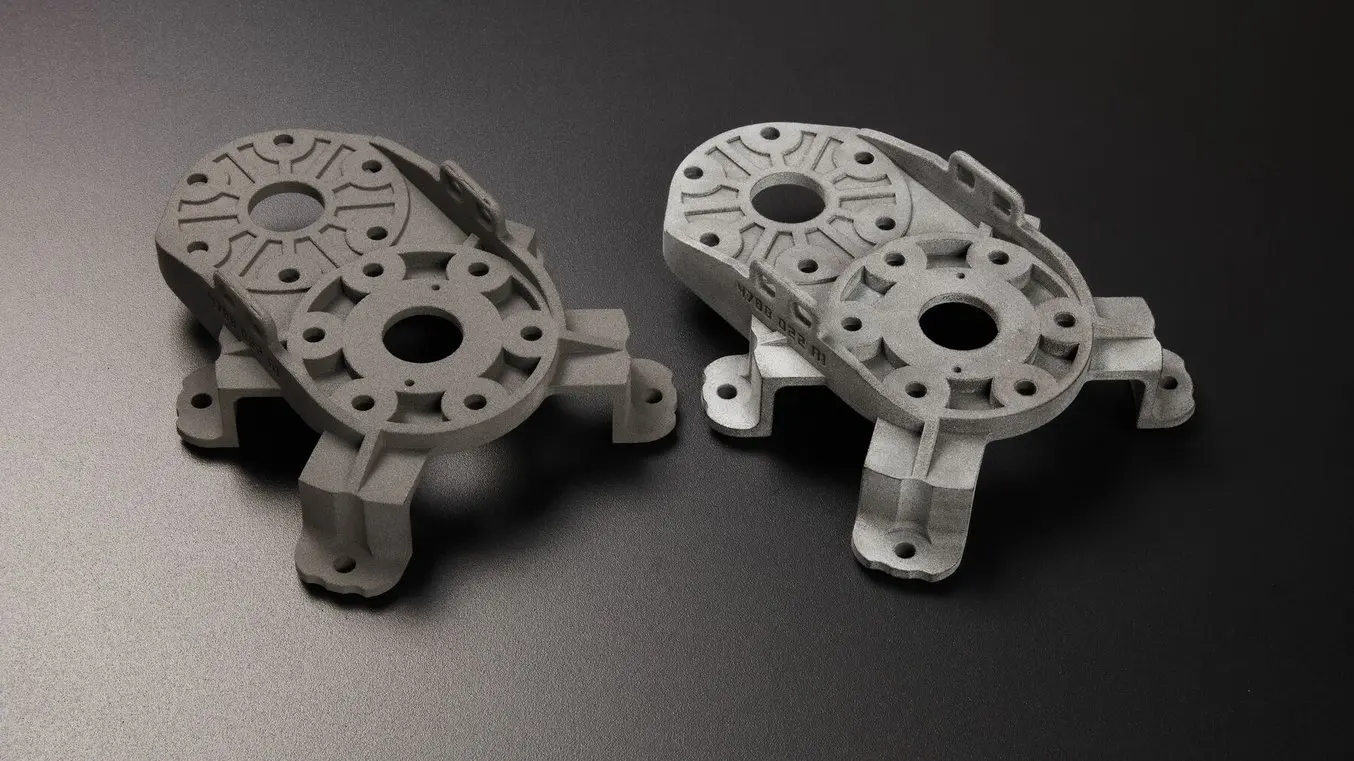
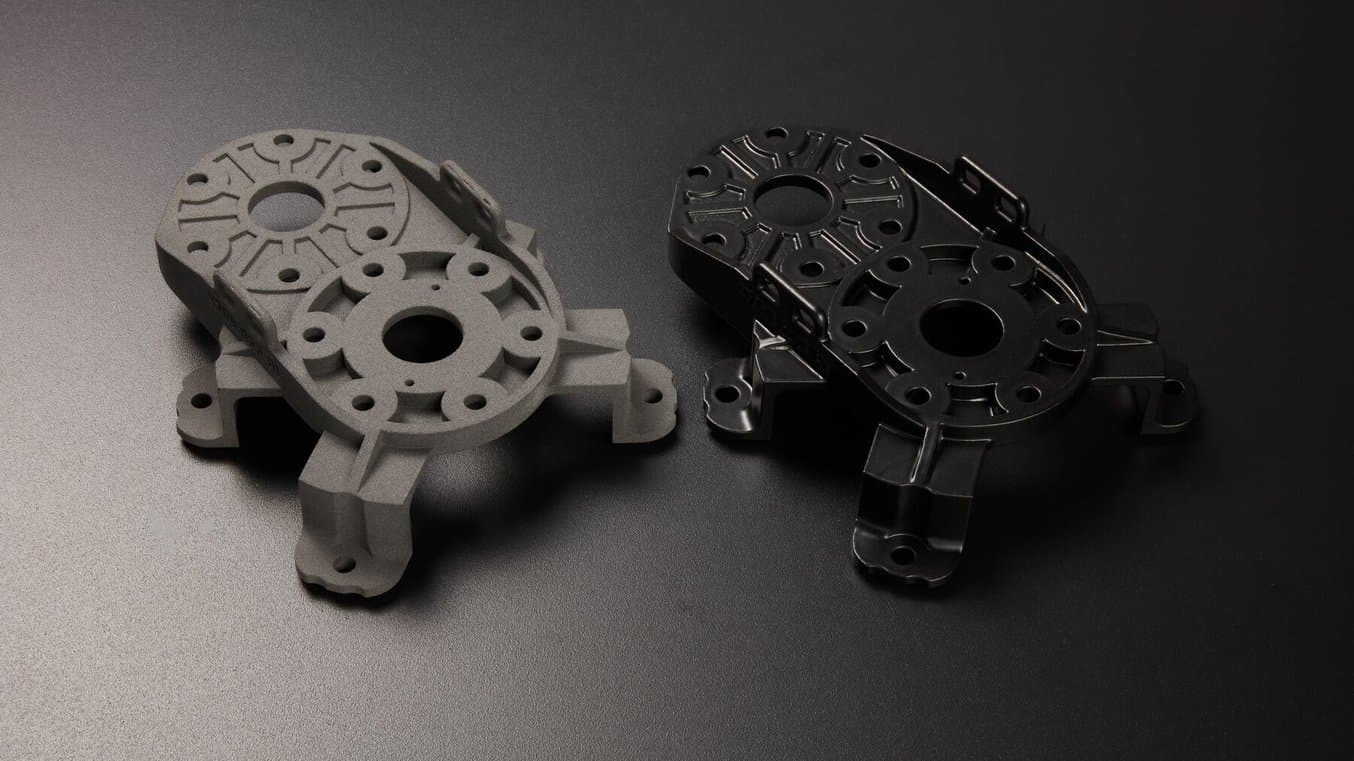
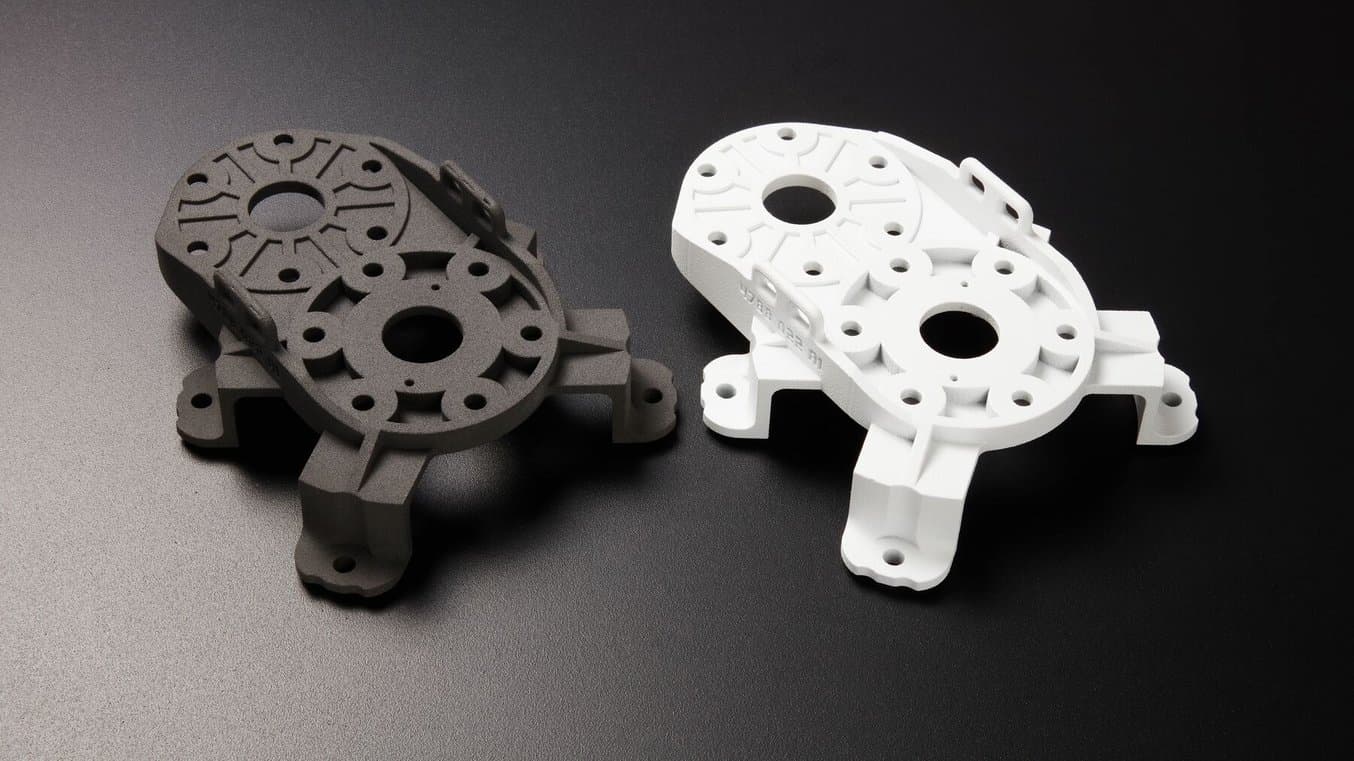
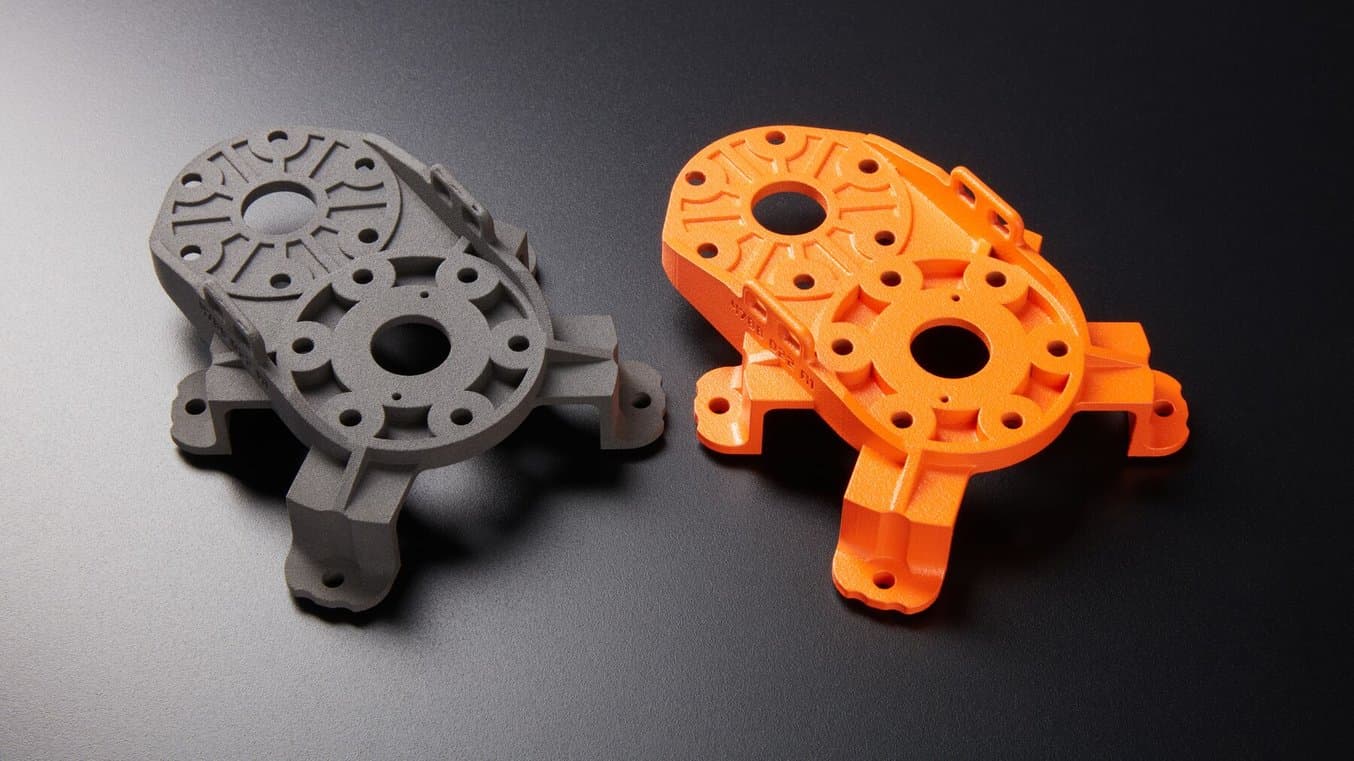
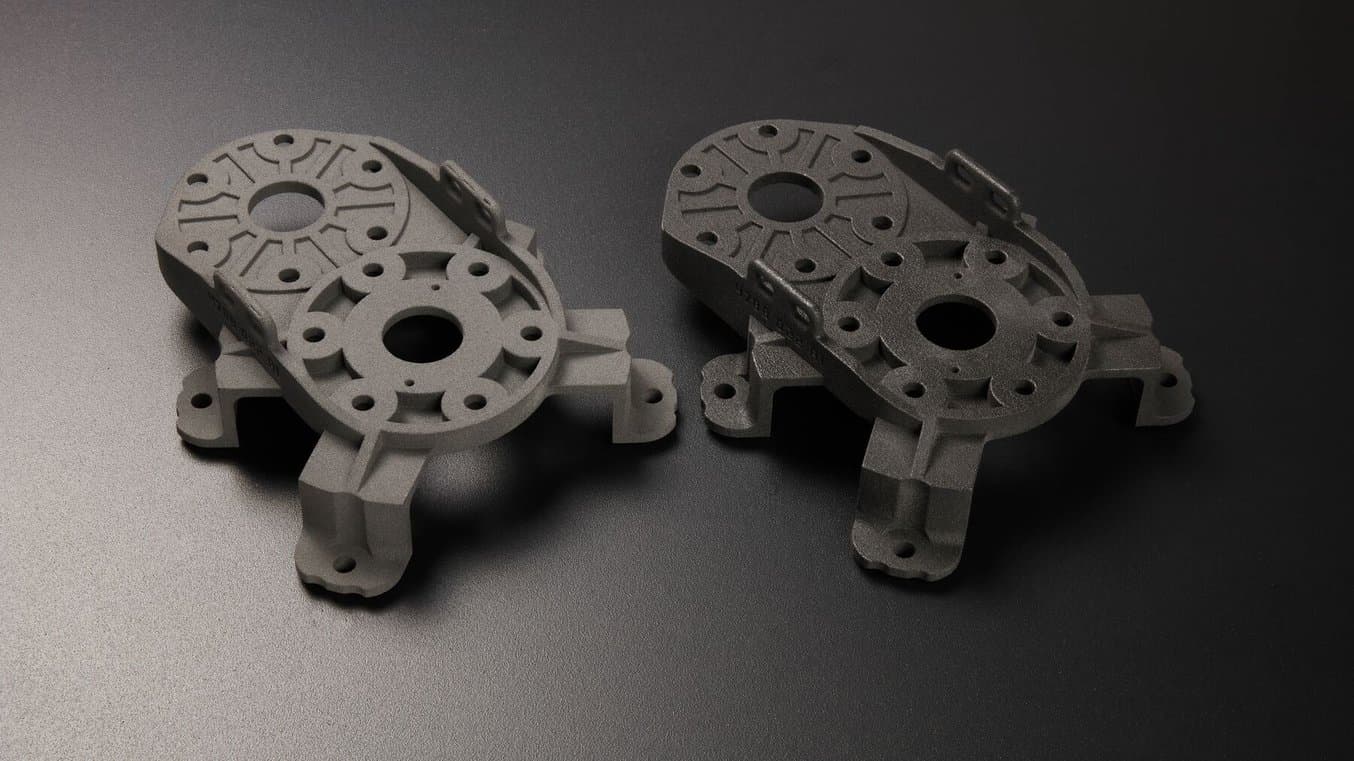
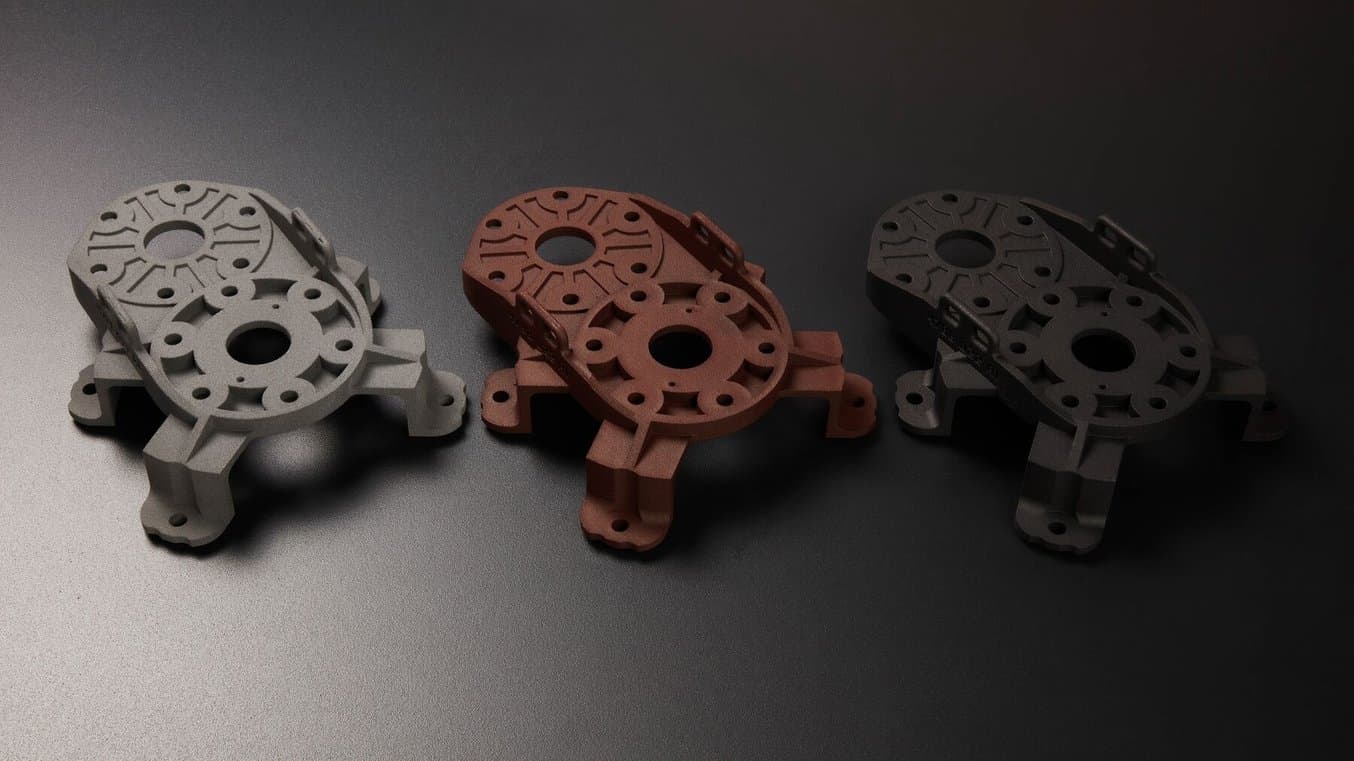
Left to Right: Pre-Blast part has some unsintered powder in its negative features and the edges are less defined. Blast cleaned part with no unsintered powder. Cleaned and polished part with the Fuse Blast Polishing System.
Formlabs’ Fuse Blast is the first affordable, automated media blasting solution that can complete either a Fuse Series SLS ecosystem or act as a printer-agnostic media blaster for other types of powder bed fusion 3D printers.
Manual media blasting cabinets are often accessibly priced, but require hands-on labor and make it harder to achieve a consistent finish.
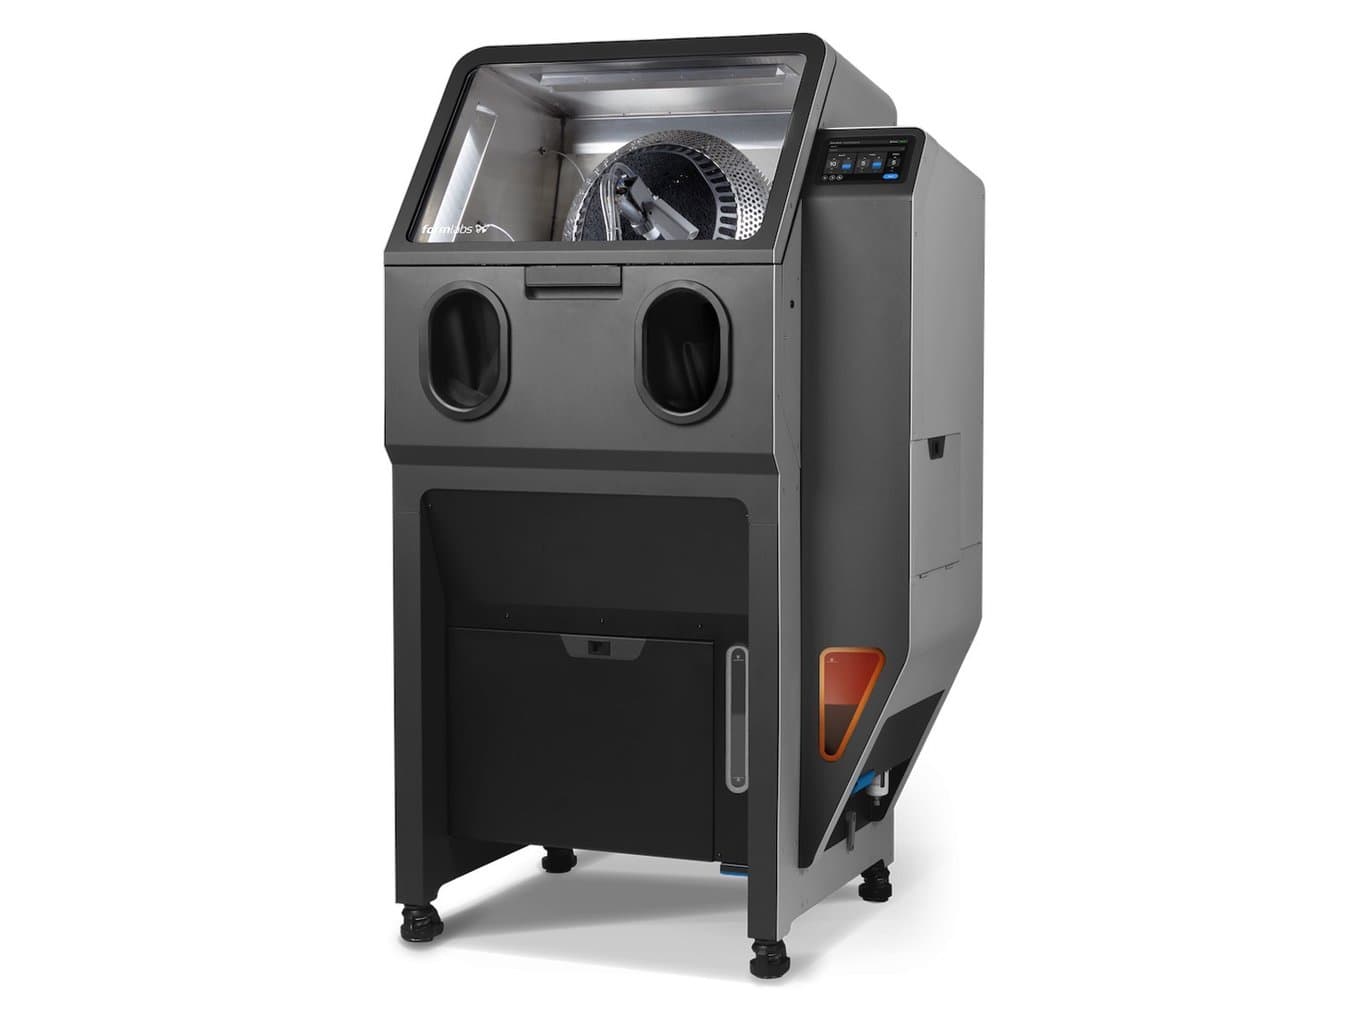
Fuse Blast delivers hands-free, automated, professional-grade SLS part cleaning at an accessible price and size.
Traditional automated blasting solutions are very expensive, large, and often require complex infrastructure.
Fuse Blast enables hands-free part cleaning in as little as 10 minutes thanks to a combination of basket rotation, compressed air, and abrasive media, and ensures consistent results thanks to the pre-programmed routines. Parts will come out clean-to-the-touch thanks to the in-line ionizer that prevents loose powder from resettling on the parts.
The High Capacity Kit can be added to Fuse Blast. This unlocks bigger batches on Fuse Blast, making it great for Fuse X1 users as well as those running multiple Fuse 1/+ printers.
Automating the powder removal and cleaning process not only frees up operators' time for high-value tasks but also reduces wear and tear on their bodies as well as the ventilation systems in their workspace. The option to add the Fuse Blast Polishing System streamlines a manual workflow that used to take multiple machines and hours of physically demanding labor.
SLS for End-Use Production
3D printing for end-use production is not only possible, it's more affordable, agile, and scalable than ever with the Fuse SLS Ecosystem. Visit our SLS for Production page to compare production methods, learn about bulk powder pricing, and see production in action for 15 different manufacturers currently using the Fuse Series.
Overview of Advanced SLS Post-Processing Techniques
Smoothing, coating, and coloring processes can add mechanical benefits as well as aesthetics improvements to SLS 3D printed parts. Each of these processes has its own benefits and drawbacks, and each can impact different material properties to different degrees. When considering these workflows, including whether to bring the equipment and skills in-house or have it outsourced, it is important to consider the capital cost and skill required.
The summary below shows the barrier to entry and potential outcomes of different advanced post-processing techniques on SLS 3D printed parts.
| Method | Barrier to Entry (Cost & Skill) | Smoothness | Chemical Resistance | Surface Hardness | Color | Conductivity |
|---|---|---|---|---|---|---|
| Polishing | Low | ✔ | ✔ | |||
| Dyeing | Low | ✔ | ||||
| Vibratory Tumbling | Low | ✔ | ✔ | |||
| Painting | Low | ✔ | ✔✔ | |||
| Liquid Polymer Coating | Low | ✔ | ✔ | ✔ | ✔✔ | |
| Ceramic Coating | High | ✔✔ | ✔ | ✔✔ | ||
| Powder Coating | High | ✔ | ✔ | ✔✔ | ||
| Electroplating | High | ✔✔ | ✔ | ✔ | ||
| Vapor Smoothing | Highest | ✔✔ | ✔ |
These steps can be done in sequence to achieve multiple attributes. In this article, we will discuss each option separately. If you are interested in stacking post-processing techniques to achieve a specific outcome, contact our team to speak with a specialist who can consult on your use case.
Options for Smoothing SLS Parts
After cleaning and media blasting, SLS 3D printed parts have a grainy, sandy surface texture. Here, we explore three techniques to smooth the surface: media polishing, vibratory tumbling, which gently removes material, and vapor smoothing, which adds a glossy finish to parts.
Looking for smooth parts right out of the printer? Consider the compact Form 4 or the large-format Form 4L stereolithography (SLA) 3D printers, which use liquid resin and produce parts with a naturally smooth surface finish. Learn more about comparing surface finish in our white paper.
Polishing
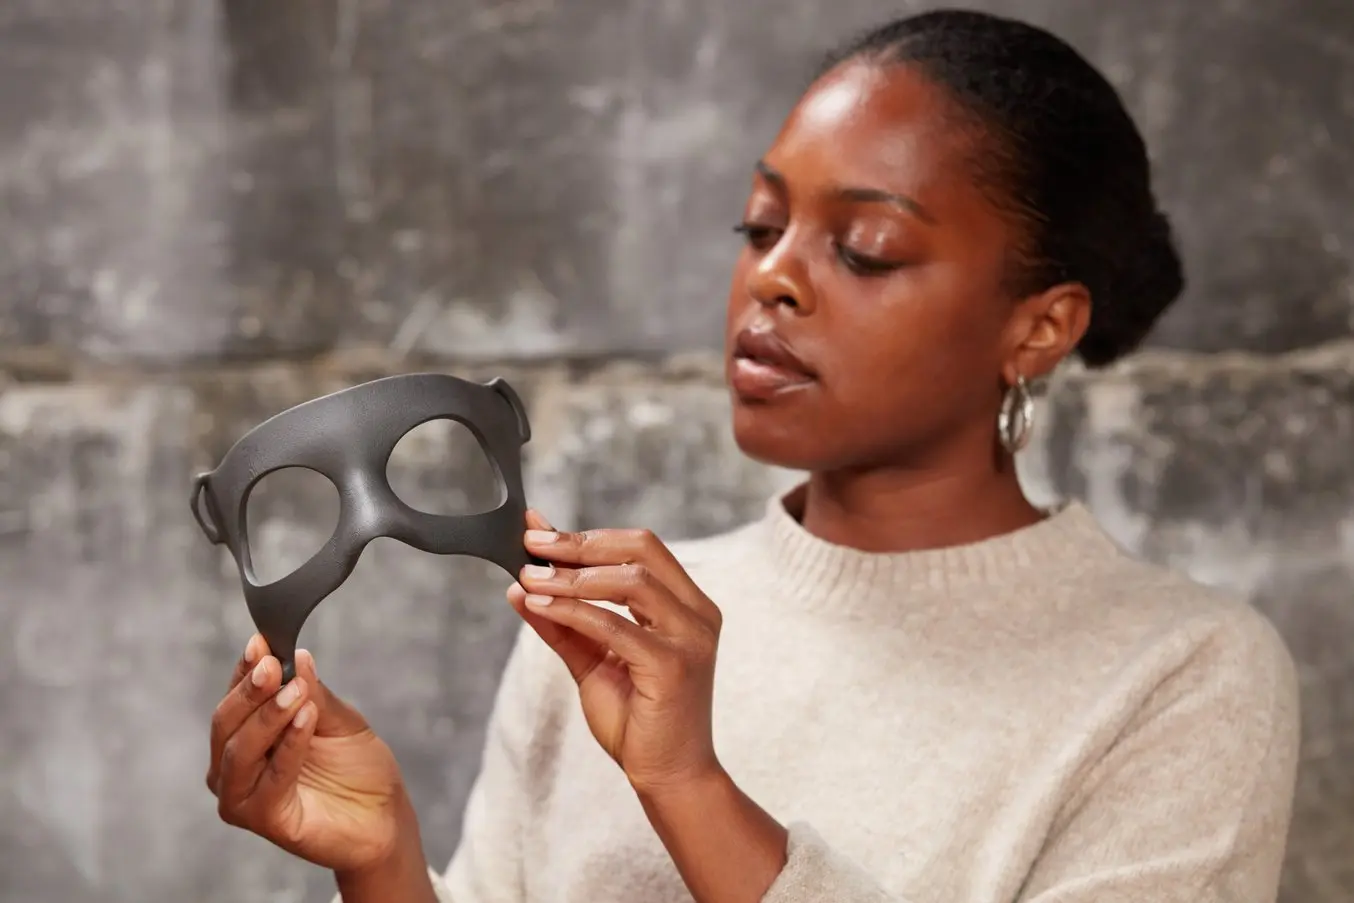
Media polishing uses a stream of specialty plastic media, designed specifically for polishing, and propelled at high pressure to compact the part surface, reducing roughness and porosity, leaving a glossy and dye-ready finish. The media used for polishing is a highly spherical specialty formulation, unlike granulated plastic used in standard blasting. The results of media polishing are similar to those of vibratory tumbling, but because the media is concentrated on specific surfaces, the process is much quicker — typically 15 minutes on the Fuse Blast, compared to tumbling for two to four hours.
With the Fuse Blast Polishing System upgrade, you can go beyond cleaning to surface finishing with an all-in-one system. Polishing parts in Fuse Blast will allow you to clean and surface your parts in one step, delivering parts that are not only powder-free, but also smooth, scuff-resistant, and dye-ready with a professional semi-gloss finish in as little as 15 minutes. This step can be done automatically thanks to the pre-programmed routines, or manually for delicate or intricate parts, by controlling the nozzle and aiming it directly at parts.
Deliver parts with a smooth, semi-gloss surface finish thanks to the Fuse Blast Polishing System add-on.
Vibratory Tumbling
Vibratory tumbling, also known as vibro-polishing or media tumbling, is a finishing process that smooths the surface of SLS 3D printed parts by placing them in a tumbler with other media. This produces a matte to semi-gloss finish that is satiny smooth to the touch. In our experiments, we observed an average reduction in surface roughness of 80%.
Vibro-polishing machines have a bowl, barrel, or tumbler that agitates the parts alongside pellets of media, such as ceramic chips, plastic pellets, or organic material like walnut shells, that gently abrade the surface. Cycle times typically vary from two to eight hours, and machines can run without a technician’s supervision.
Vibratory tumblers start at $100 for small benchtop models, making them an economical choice for any manufacturing setting. Larger, free-standing models are better suited for high-throughput production, and start around $3,000.
The part pictured below was tumbled with ceramic media in the Mr. Deburr 300DB for six hours.
Our test piece, before and after vibratory tumbling. The tumbled part is light gray and matte in appearance.

Vibratory Tumbling for SLS 3D Printed Parts
In this report, we’ll detail how to choose the right machine and materials for your workflow as well as highlight best practices and methods to achieve superior results.
Request a Free Tumbled Nylon 11 CF Powder Sample
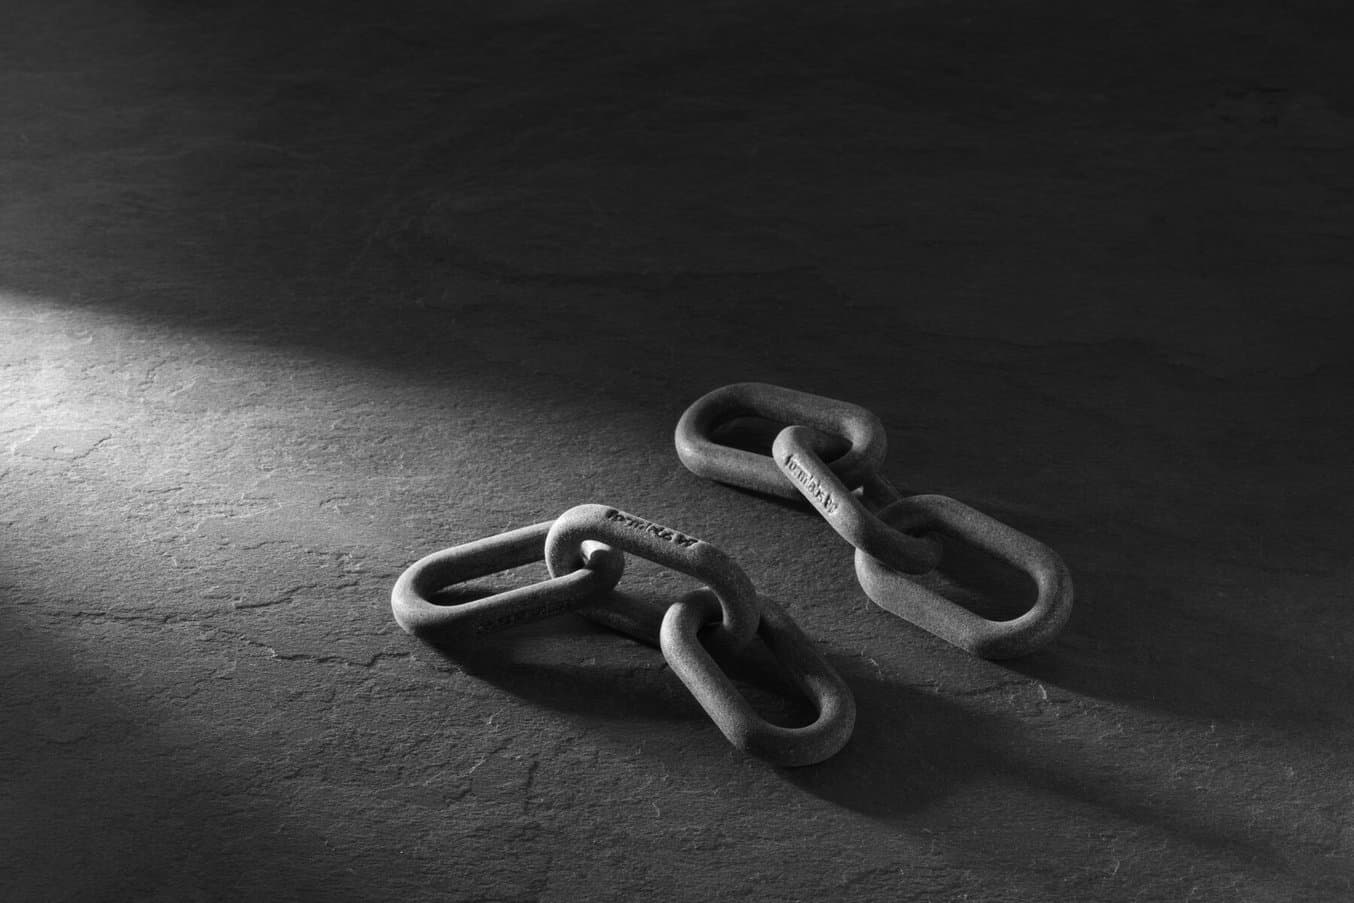
This SLS interlocking chain was fully printed in place and would be near impossible to finish using manual methods. The part was tumbled overnight in a DB-300 vibratory tumbler filled with angle cut ceramic triangle media. The improved surface is ideal for painting, coating, and electroplating.
Vapor Smoothing
Vapor smoothing bathes SLS 3D printed parts in vaporized chemical solvents that create a controlled chemical melt of the 3D printed material, filling minute cavities and forming a smooth, glossy shell around the part. Notably, the smoothing effect is not limited to line-of-sight geometries, making it suitable for complex parts with internal channels or other negative features.
Providers of vapor smoothing equipment and services claim that finished parts experience reduced bacterial growth, and may even be safe for food contact. Formlabs has not verified these claims, and we recommend you check with the equipment manufacturers for further safety information.
Vapor smoothing equipment is expensive, starting at $60,000, so businesses producing parts in smaller volumes may wish to send parts to be vapor smoothed at a service provider.
The part pictured below was vapor smoothed by DyeMansion, using a proprietary vapor mix. AMT also provides vapor smoothing equipment and services.
Our test piece, before and after vapor smoothing. The smoothed part is black and glossy in appearance.
Enhancing the Surface Quality of SLS 3D Printed Parts With Vapor Smoothing: A Collaborative Study by Formlabs and AMT
In this white paper, we will review the considerations and benefits of vapor smoothing and report results from testing Formlabs SLS powders with AMT Vapor Smoothing System.
Options for Coating SLS Parts
Coating the exterior surfaces of a 3D printed part with a performance material confers additional properties that the 3D printed material can’t achieve on its own. Such properties include increased strength, conductivity, or chemical resistance. Many options exist for coating SLS 3D printed parts, and different coatings can be layered to achieve different properties. This section has a brief explanation of each and when they are beneficial.
Metal
Coating 3D printed parts in metal may be done through electroplating, also known as electrodeposition. In this process, the 3D printed part is first coated in a conductive spray, then submerged in a chemical bath, where an electrical current transfers metal from a source material (the anode) to the surface of the 3D printed part (the cathode).
Parts can be plated in many metals, including chromium, nickel, zinc, and titanium. Manufacturers will sometimes layer multiple types of metals sequentially to achieve the right balance of mechanical, electrical, and cosmetic properties.
Although it is possible to electroplate SLS printed parts with a home or DIY setup, inexperienced users risk exposure to hazardous chemicals and may struggle to get a quality result. For any structural parts, we recommend sending parts to a specialized contract manufacturer. Download our white paper for a list of electroplating services by region and job size.
The part pictured below was plated with nickel by RePliForm, Inc.

Our test piece, before and after electroplating. The plated part is silver and metallic in appearance.
Strength from Metal: Strategies and Use Cases for Electroplating SLA Parts
Read on to learn how engineers are adding metal to resin 3D prints, and why hybrid metal parts can open doors to a surprising range of applications, including (but not limited to) end-use strength and durability.
Ceramic
Ceramic coatings, like those made by Cerakote, are applied in a thin film by spraying a polymer with ceramic additives directly onto the part. No primer is required, although parts need to be thoroughly media blasted with specialized media, and cleaned with a wax and grease remover to make sure no contaminants remain on the surface. Cerakote offers both air-cure and oven-cure formulations.
Ceramic coatings are among the highest-performance options for advanced post-processing techniques. Parts are chemically resistant and mechanically strong, and there are a number of color options available. Cerakote also offers specialized products for corrosion resistance, low friction, and more properties.
Cerakote has certified applicators listed on their website, and they also offer certifications for shops looking to bring ceramic coating capabilities in-house.
The part pictured below was coated with Cerakote H-140 Bright White by a trained applicator.
Our test piece, before and after coating in Cerakote H-140 Bright White. The coated part is white and matte in appearance.
Complete Guide to Cerakote: Ceramic Coating for SLA and SLS 3D Printed Parts
This whitepaper will cover how to coat stereolithography (SLA) and selective laser sintering (SLS) 3D printed parts through the Cerakote process.
Powder
Powder coating is a dry application of polymer in powder form to a substrate material. It is applied electrostatically and cured with heat, light, or both. Many powder coating materials require very high temperatures, which rules out thermoplastics, like those often used with SLS 3D printers, as a substrate. Some powder coating materials, that can be applied at lower operating temperatures, are suitable for use with SLS 3D printed parts.
UV curable powder coatings were developed specifically with heat sensitive substrates in mind. These coatings are also applied electrostatically and flowed with low heat. Once the powder has melted, the coating is exposed to high intensity ultraviolet light, which cures it. UV powders require significantly less heat and time to process compared to thermoset powder coatings, while providing comparable performance properties, without damaging or warping the printed part.
Similar to other types of coating, powder coating can increase chemical resistance, surface hardness, and mechanical strength. Powder coating is particularly well-suited to thick coatings and geometries that would be difficult to reach or evenly coat with a liquid application process, like painting or dipping, where the material can run and drip.
The part pictured below was coated by Keyland Polymer using their UVMax UV-cured powder.
Our test piece, before and after powder coating. The coated part is bright orange and semi-gloss in appearance.
Liquid Polymer
There are a number of liquid polymer coatings on the market that provide different degrees of smoothing and chemical resistance. They may be clear, tinted, or opaque; may be applied by dipping, brushing, or spraying; and may be based on different chemistries, such as epoxy, lacquer, and polyurethane.
When it comes to materials and application methods, there is a lot of variation in both performance and difficulty to apply. Some of these can be purchased at a hardware store and applied with a minimal setup; some require industrial setups to apply.
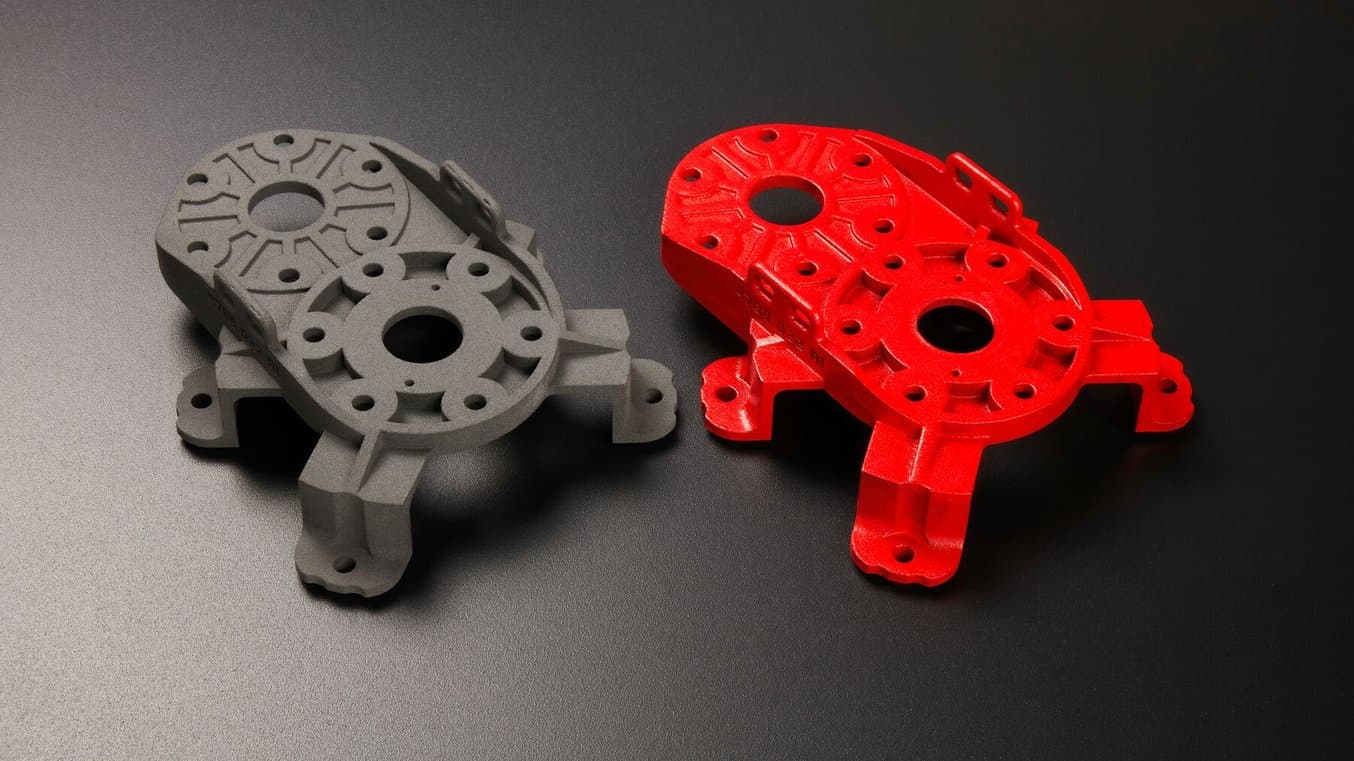
The part pictured below was coated with an inexpensive clear gloss spray paint.
Our test piece, before and after clear coating. The coated part is dark gray and semi-gloss in appearance.
Options for Coloring SLS Parts
Whether for prototypes or final parts, you may wish to modify the color of all or some of a part. Dyeing results in a consistent, semi-permanent color, even in hinges and interior cavities, but it isn’t possible to use dyeing to lighten the color of a part. Painting offers more control and customizability, but is typically a more manual process and may chip with abrasion or heavy use.
Dyeing
Because SLS 3D printed parts are porous, they can be dyed with consumer-grade dyes. Many SLS 3D printing materials are nylon or polyamide, which are also used in textiles, so fabric dye designed for use with synthetics should suit.
Dyeing 3D printed parts can be done with household materials, in industrial vats, or with any level of sophistication in between. Whatever your setup, parts 3D printed in a nylon-based material, like those available on the Fuse Series, shouldn’t require any special steps—the directions recommended by the dye manufacturer should suffice.
Because the barrier to entry is low on both cost and skill level required, dyeing is a great way to experiment with advanced post-processing of SLS 3D prints. And, because it scales easily, it’s also suitable for production applications.
The parts pictured below were dyed with RIT fabric dye.
Our test piece, before and after dyeing. One dyed part is black and matte in appearance and the other is dark red and matte.
Ken Pillonel has designed, manufactured, and shipped thousands of products to customers worldwide. He prints with Nylon 12 White Powder that is dyed to achieve a vibrant range of colors.
Guide to Dyeing SLS 3D Printed Parts
Dyeing parts 3D printed in Nylon 12 White Powder on Fuse Series SLS 3D printers unlocks a huge range of opportunities for customers to build compelling prototypes and create production-ready parts in an array of colors.
Painting
Painting may be preferable to dyeing when parts need to be brightly colored or color-matched to a reference. Spray painting provides the most even coverage and easier scalability, while painting by hand allows for greater detail. Both acrylic and enamel paints work well with powder printed parts. Other paints may work well, but Formlabs has not extensively tested these.
For best adhesion, use a primer that is designed for use with plastics. Spraying primer results in more consistent coverage. Additionally, a heat gun or hair dryer can be used to accelerate the drying process.
For an in-depth tutorial on spray painting 3D prints, check out our priming and painting guide.
The part pictured below was painted with an inexpensive spray paint.
Our test piece, before and after painting. The painted part is bright red and glossy in appearance.
Explore SLS 3D Printing Solutions
Ready to explore bringing SLS 3D printing in-house for any of the smoothing, coating, or coloring techniques outlined here? Formlabs is a trusted provider of accessible 3D printing solutions for organizations of all sizes, with SLS 3D printers Fuse 1+ 30W, and Fuse X1 for large parts and high part volumes.
Curious to get hands-on with an SLS material? Request a free sample part, shipped right to you.