
How to Build a 3D Printed Drone
The drone industry is fast-growing and fast-moving. The development of generative design software, advances in cameras, sensor technology, batteries, microchip and processor size and speed, and new data transmission methods have all contributed to a constantly evolving paradigm of unmanned systems.
Referred to broadly as drones throughout the following guide, these include unmanned underwater vehicles (UUVs), unmanned aerial systems (UASs), and small unmanned aerial systems (sUASs). The industry has leveraged the agility, flexibility, and cost-effectiveness of 3D printing to manufacture them.
Introduction
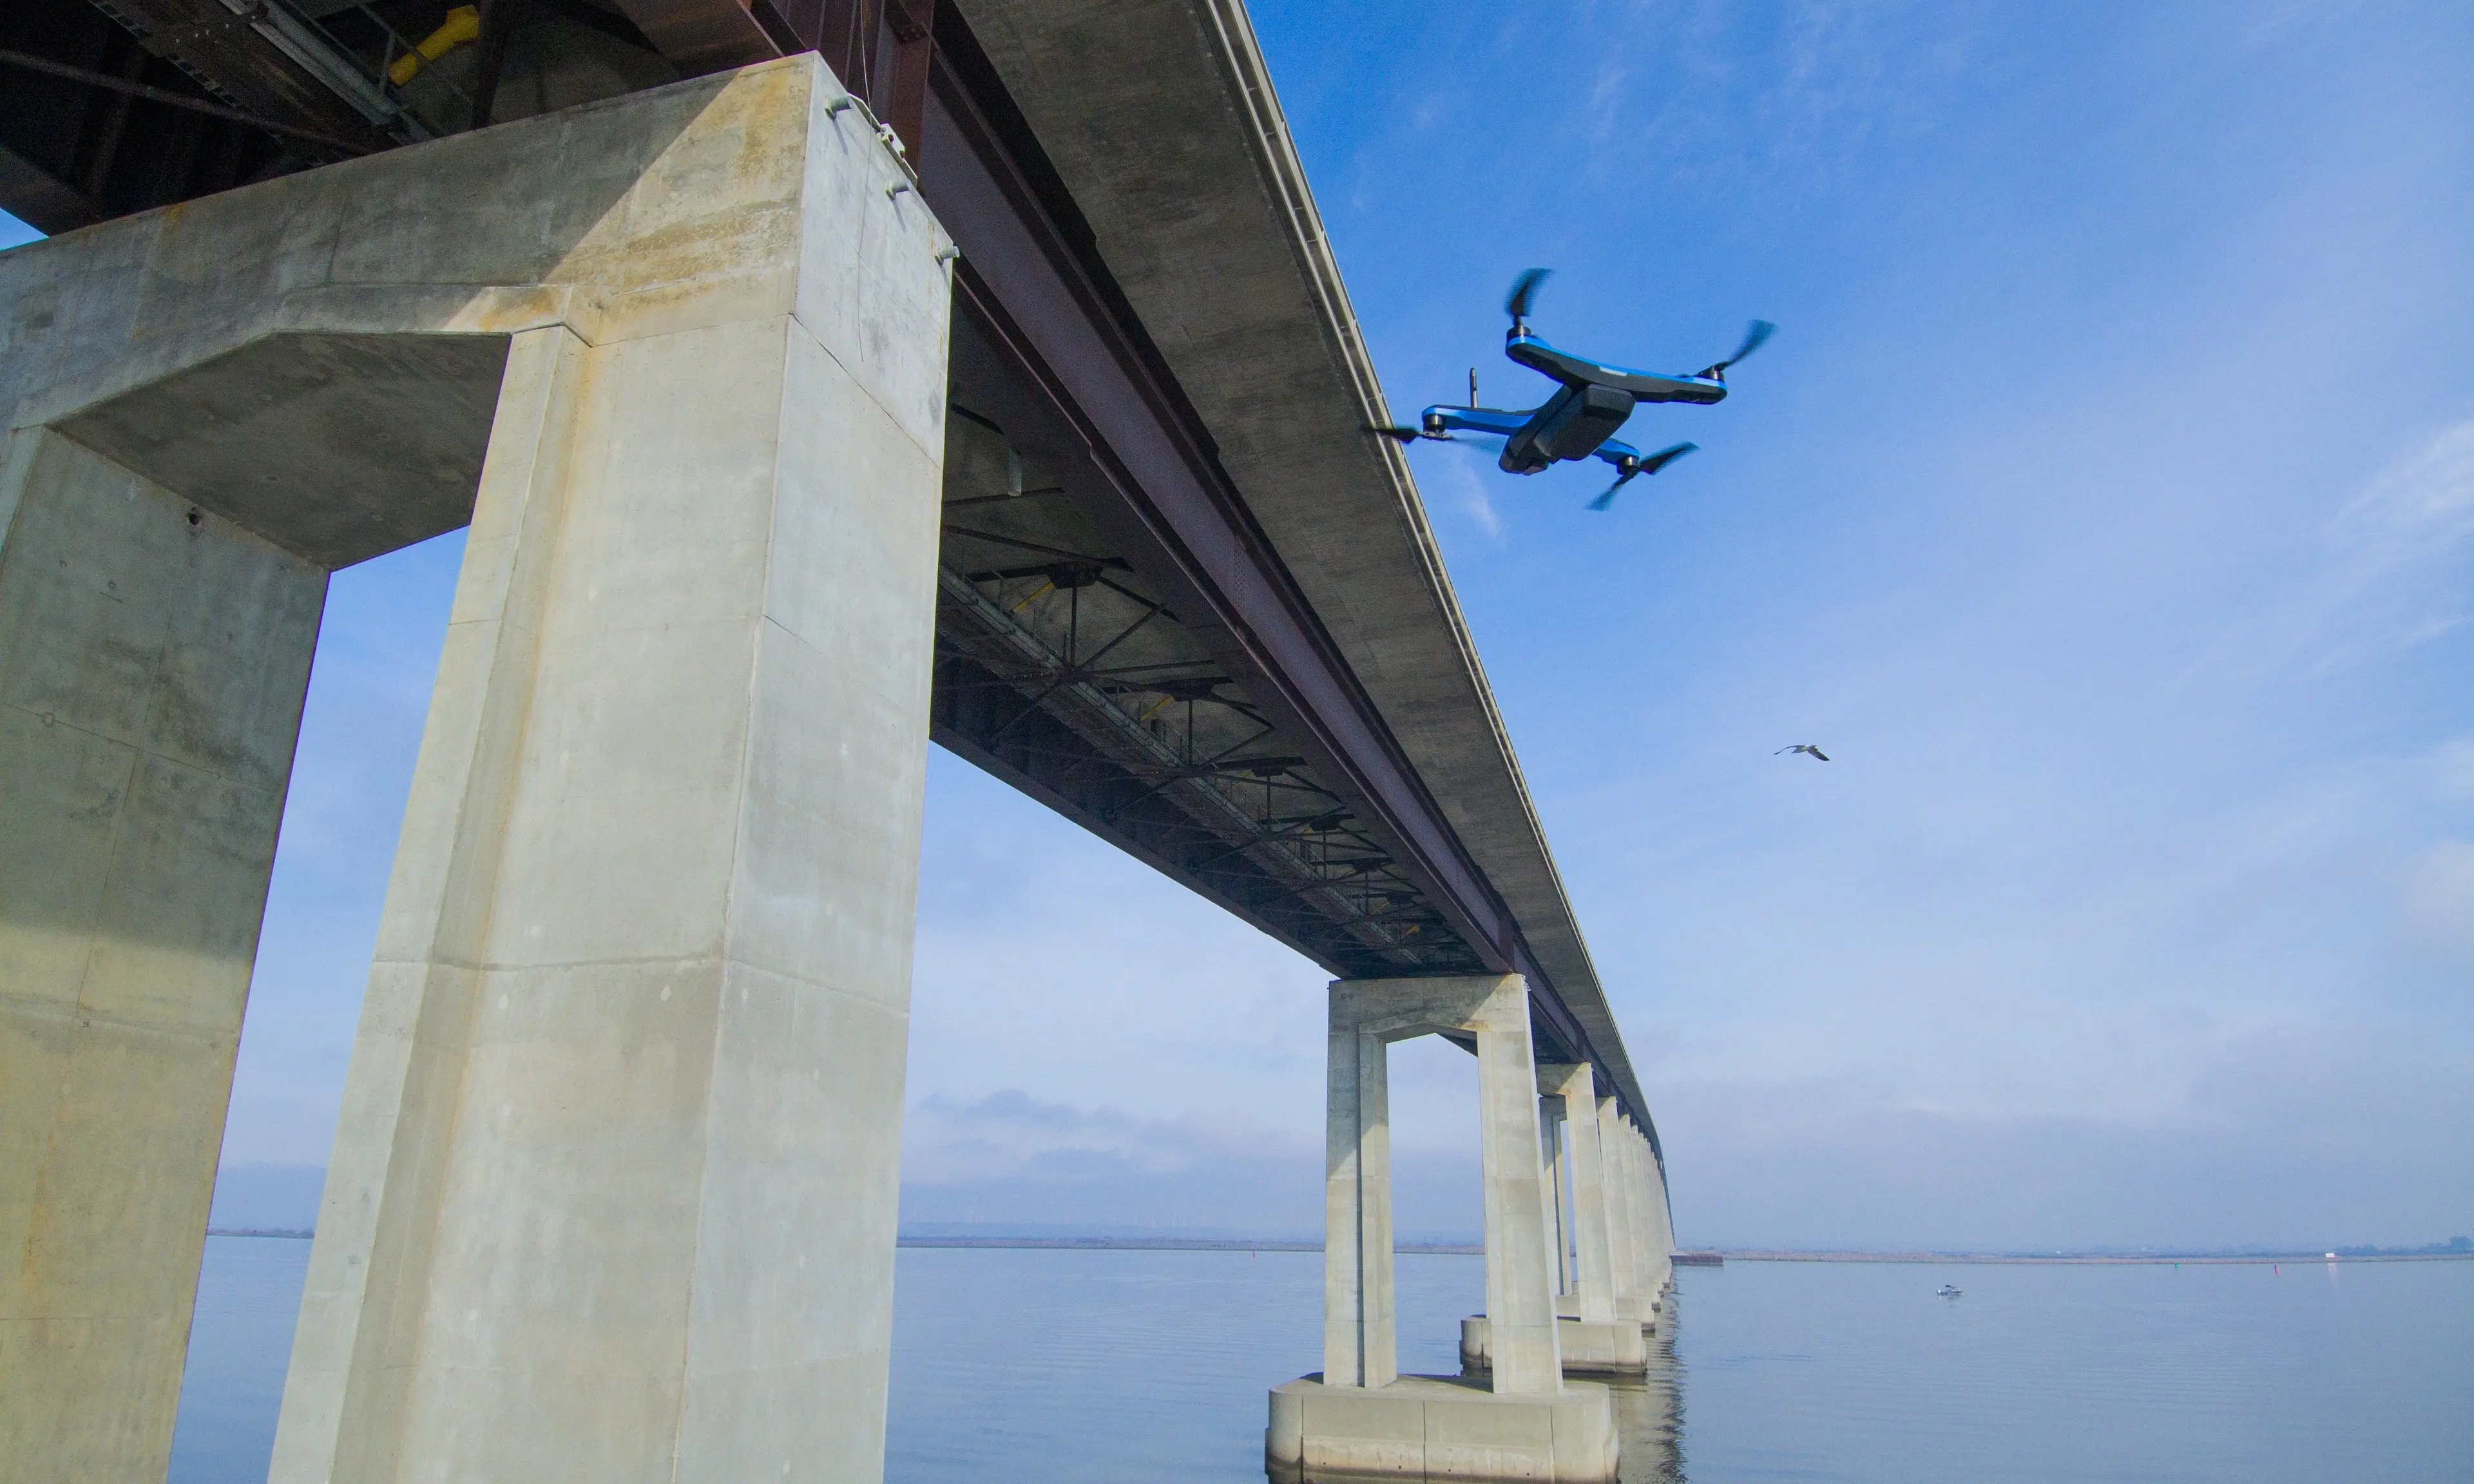
Skydio is a leading U.S. drone manufacturer and a world leader in autonomous flight. Their line of unmanned aerial systems (UASs) and new Dock products open up new opportunities in industries like energy utilities, transportation, public safety, environmental research, and more.
Drones were initially conceived as radio-controlled missile carriers and aerial training targets, and the first early versions were developed in the interwar period of the twentieth century. As communication technologies and sensor capabilities evolved, so too did drone applications, expanding beyond military use into diverse industries. Today, drones are deployed worldwide for a broad spectrum of applications, including military operations and defense, agricultural surveying, research and data gathering, security and oversight, recreation, entertainment, and more.
There are hundreds of drone manufacturers worldwide, though there have been efforts toward consolidation by some of the bigger players. Some manufacturers specialize in specific types of drones. Skydio, a California-based manufacturer, focuses on onboard processing ability that enables their drones to fly autonomously and follow a target through difficult terrain.
Other manufacturers, like DJI, the largest global manufacturer of drones, specialize in mass-produced, inexpensive first-person-view (FPV) drones that consumers purchase off the shelf. Then, there are the large military contractors, like Boeing, Lockheed Martin, and newer challengers like COLSA and Anduril, who design and manufacture low volumes of advanced tactical drones for national defense.
Despite the growth and market share of these large manufacturers, there are so many applications for drones that the industry can support hundreds of small and medium manufacturers. These manufacturers, like Nakai Robotics, Boresight, Nextech, Skydio, and more, can compete in a crowded field by focusing on the agility and innovation that 3D printing drones provide.
3D Printing in the Drone Industry
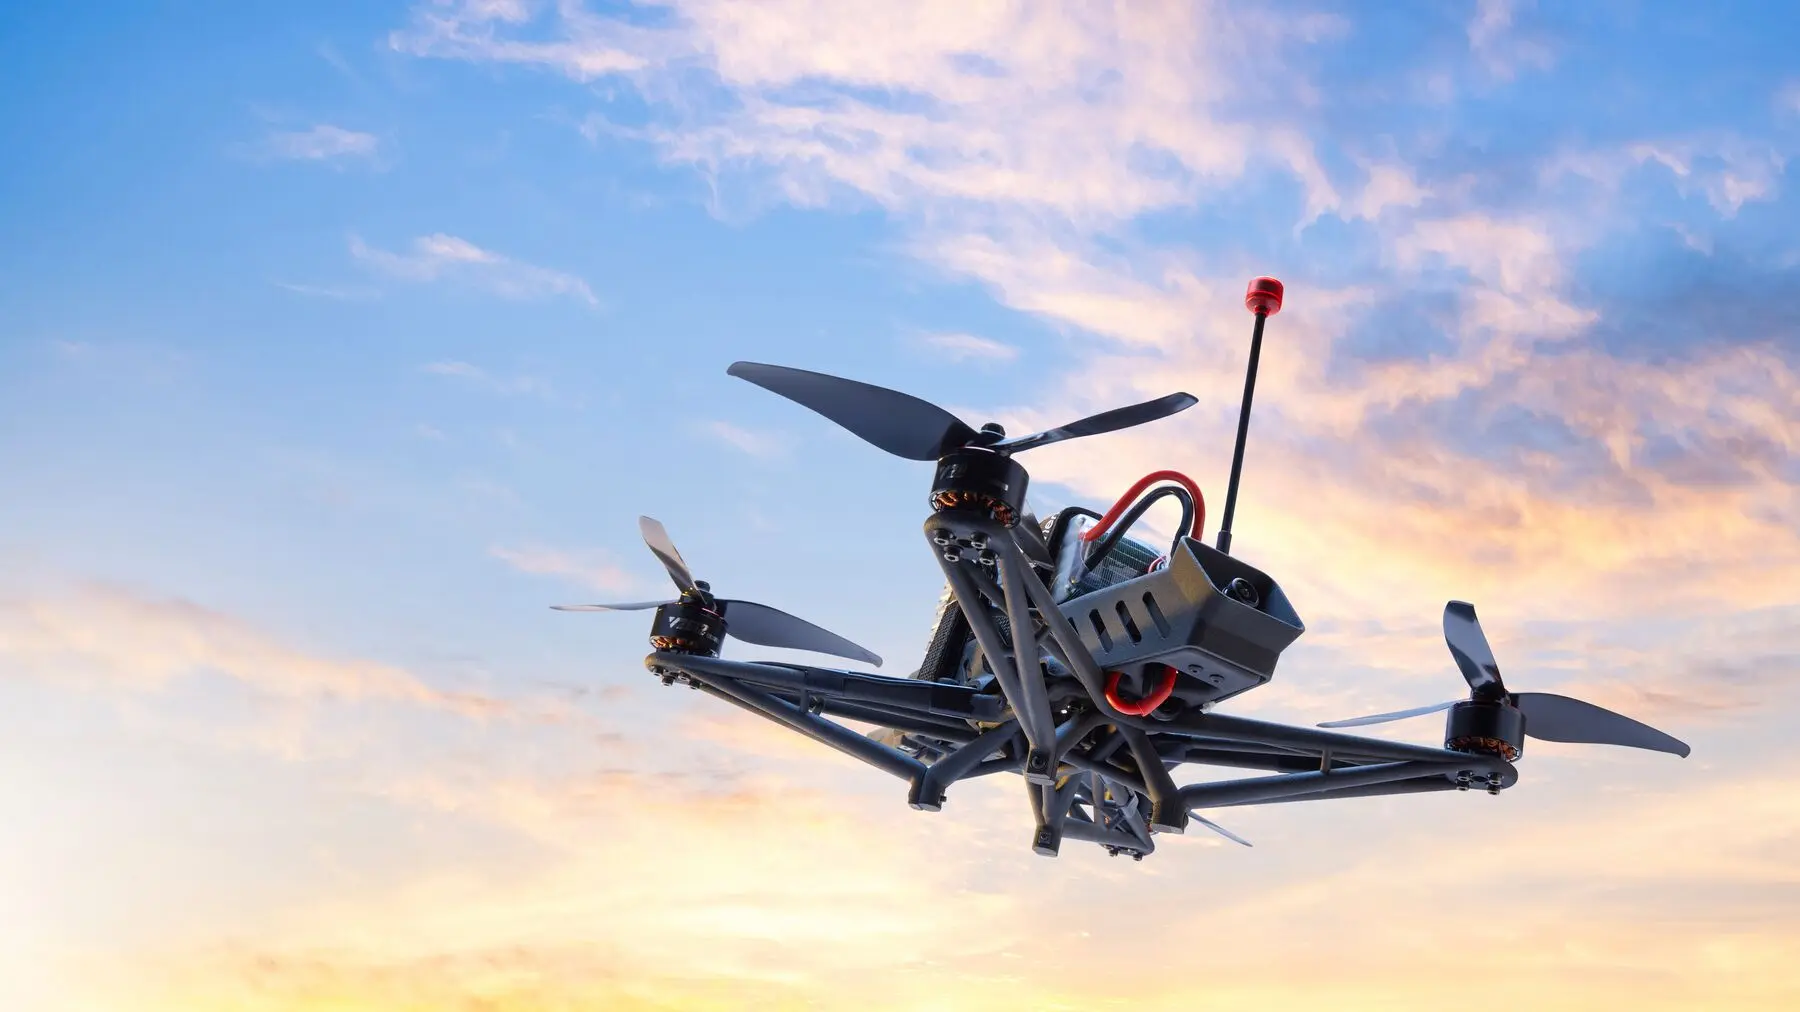
Nextech’s Atlas T quad-copter model utilizes a combination of SLS 3D printed (antenna blades and covers of gimbal and methane sensor), machined metal parts, and carbon fiber parts to optimize the payload and enable unique geometries for top performance. The end-use battery locator on the Atlas T quad-copter is 3D printed on the Fuse 1+ 30W SLS printer in Nylon 12 Powder.
The proliferation of drone manufacturers and their success in gaining a foothold in a competitive field can be partly attributed to the accessibility and power of modern manufacturing methods, namely 3D printing.
3D printing, and in particular the printers and materials developed in the last five years, have made it possible for small companies to reach market faster, quickly respond to changes in demand, and manufacture low volumes of specialized products cost-effectively. Fused deposition modeling (FDM), stereolithography (SLA), and selective laser sintering (SLS) technologies are ideally suited to the design and manufacturing of drones (underwater, aerial, or underground).
While large businesses that sell thousands of consumer-level drones, often called FPV drones, can afford to make their ‘drone kits’ very inexpensively through traditional mass manufacturing methods, the applications for these drones are limited. More sophisticated tasks aren’t possible because they require heavier payloads. Therefore, nearly all the specialist manufacturers require a different type of workflow. 3D printing drone components satisfies their need to move quickly, produce quickly, make changes on the fly, and deliver solutions before their competitors.
These manufacturers are using 3D printing at every stage in their process, from initial concepts and customer feedback rounds, to functional testing, to end-use production at volume. In military and supply chain-constrained environments, additive manufacturing bypasses traditional procurement bottlenecks, enabling on-demand, field-adaptable production without long lead times. A 3D printed drone unit deployed in remote or contested areas can manufacture replacement parts or custom modifications in-theater, ensuring continued mission readiness without waiting for centralized supply chains to deliver components.
Book a Consultation
Get in touch with our 3D printing experts for a 1:1 consultation to find the right solution for your business, receive ROI analyses, test prints, and more.
Applications of 3D Printing for Drones
Drones, regardless of industry or function, are complex assemblies that require sophisticated communication capabilities and controlled, agile, load-bearing flight — no small feat.
Rapid Prototyping
3D printing drone prototypes makes it possible to print an idea and test it immediately and affordably. Instead of waiting for tooling or committing to a design before you’re 100% sure, you can 3D print it and get it airborne to test its efficacy. Being able to prototype and produce in the same material throughout the development life cycle is easy with printers like the Fuse Series and materials like Nylon 12 Tough Powder.
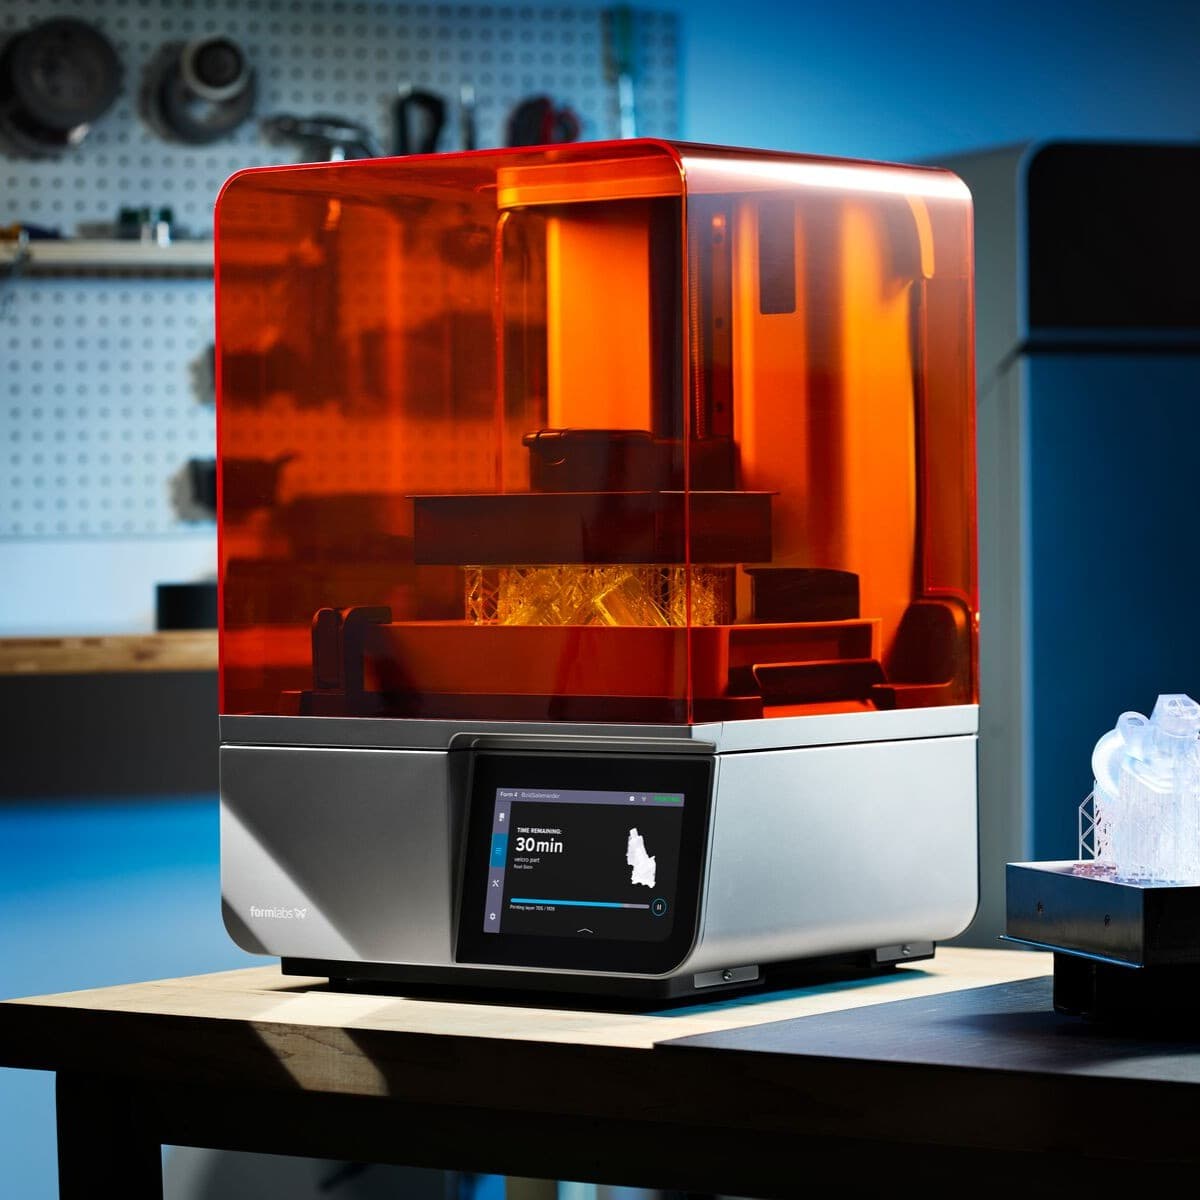
Skydio, the global leader in autonomous flight drones, uses Formlabs SLA 3D printers to create prototypes of drone frame components, electronics enclosures, and more. The tight tolerances and fast print times on printers like Form 4 can help teams of designers test and iterate multiple times a day.
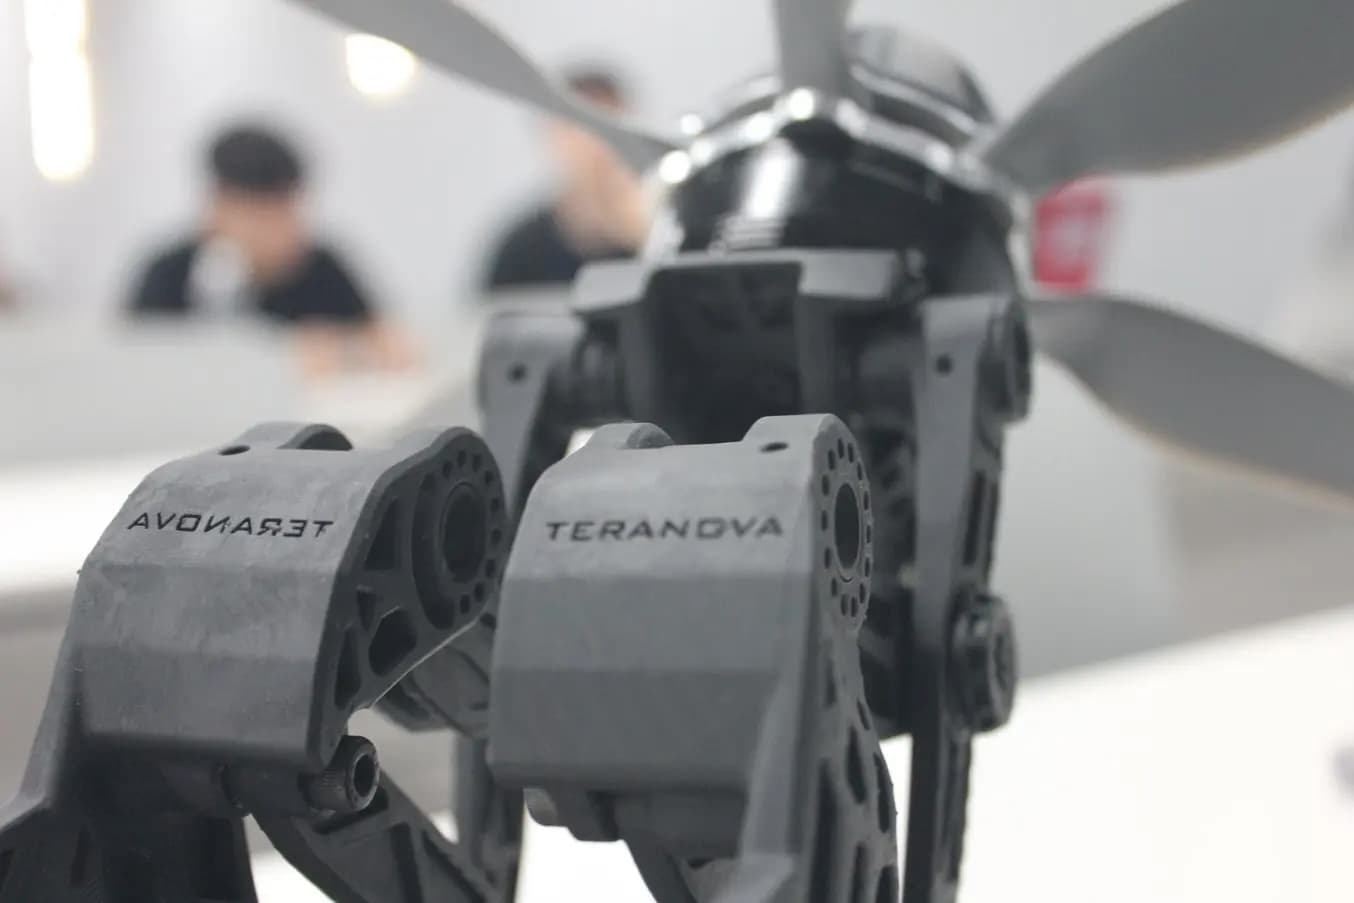
Teranova, based in Incheon, South Korea, develops and services drones for urban air mobility — logistics delivery in city environments — by relying on Formlabs SLA 3D printed drone prototypes for functional testing and iterative design.
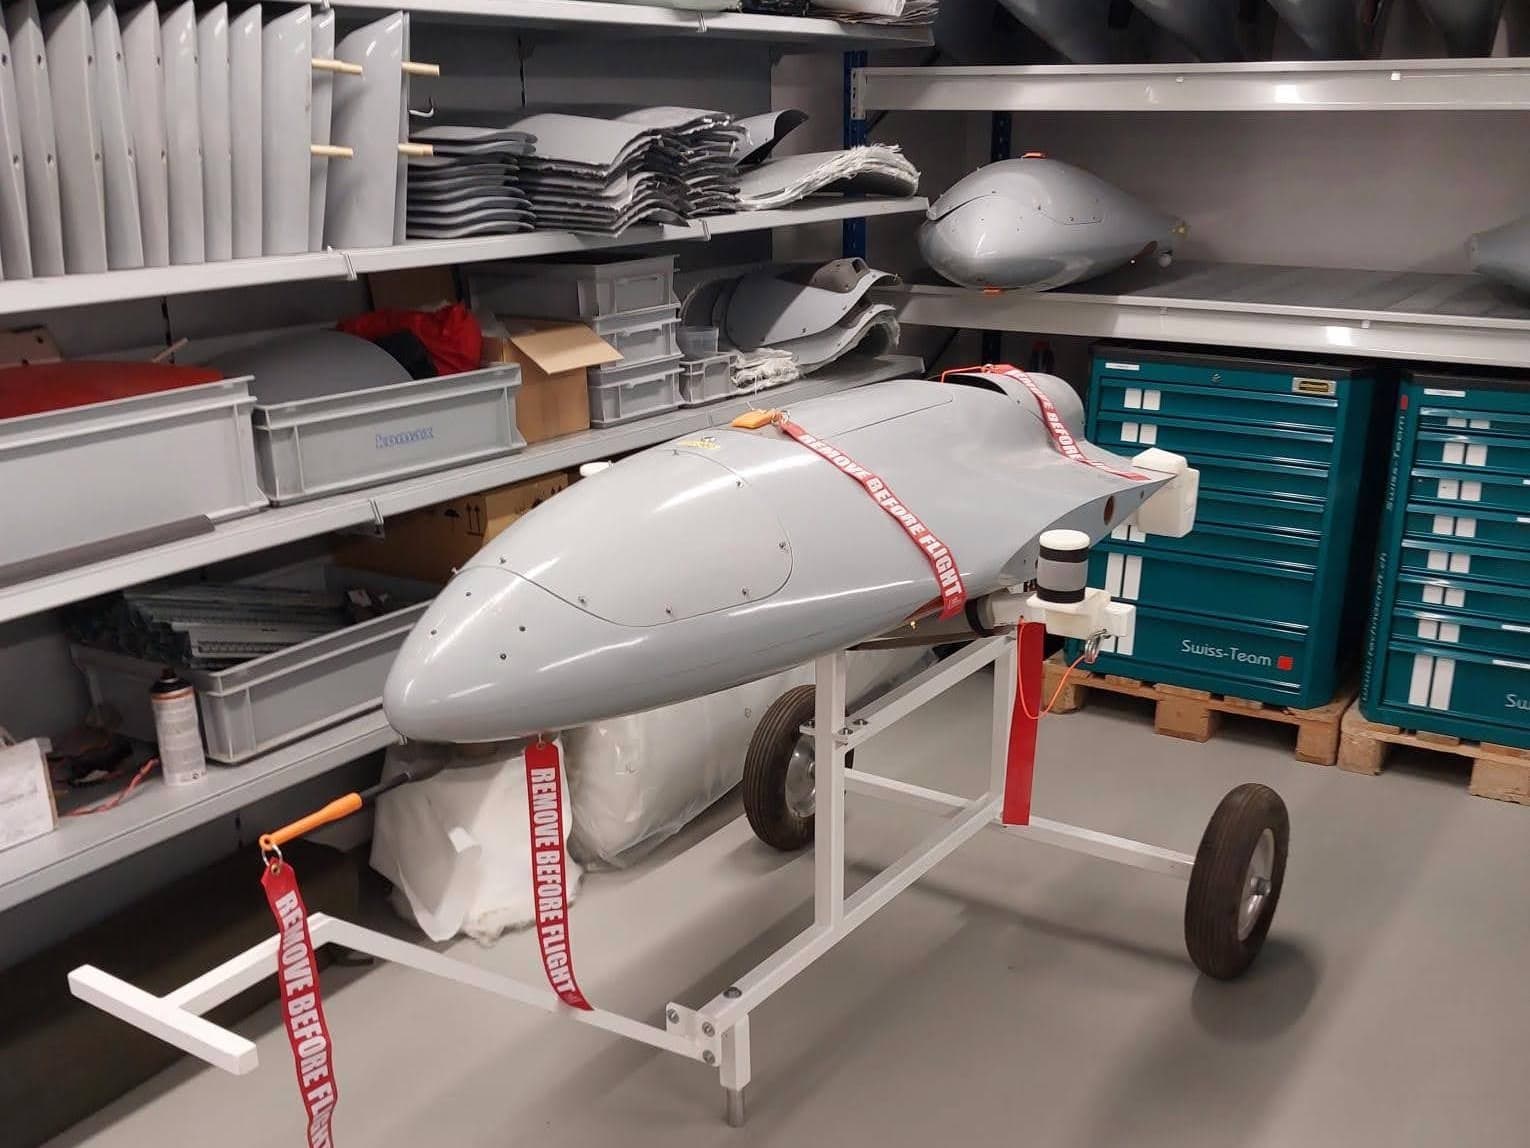
PMR Robotics leverages the Fuse 1 SLS 3D printer to prototype and test functional components for large, fixed-wing surveillance drones.
Rapid Tooling
Rather than outsource molds and forms to machine shops, you can 3D print tooling in-house to create end-use parts like carbon fiber shells or silicone gaskets. 3D printing material advances make it possible to do injection molding so that you can iterate your ideas without involving third parties, or spending thousands on tooling. Ensure that your designs are the best they can be by designing and testing the perfect tool before committing to a minimum order value.
Nakai Robotics has over 1,500 components in their autonomous robot that cleans biofouling off of ships. Their UUV has over 300 3D printed components from the Fuse Series. They also use Formlabs SLA printers to make carbon fiber molds for their robots’ durable outer shells. Nakai can print a mold, test the carbon fiber part after a prepreg process, and iterate on their design the next day.
End-Use Manufacturing
For decades, 3D printing was stuck in the realm of prototyping, especially for accessible, affordable models. Now, 3D printers like the Fuse Series or Form 4 and Form 4L can print end-use quality parts for a fraction of the cost of traditional methods, and in a fraction of the time of outsourcing.
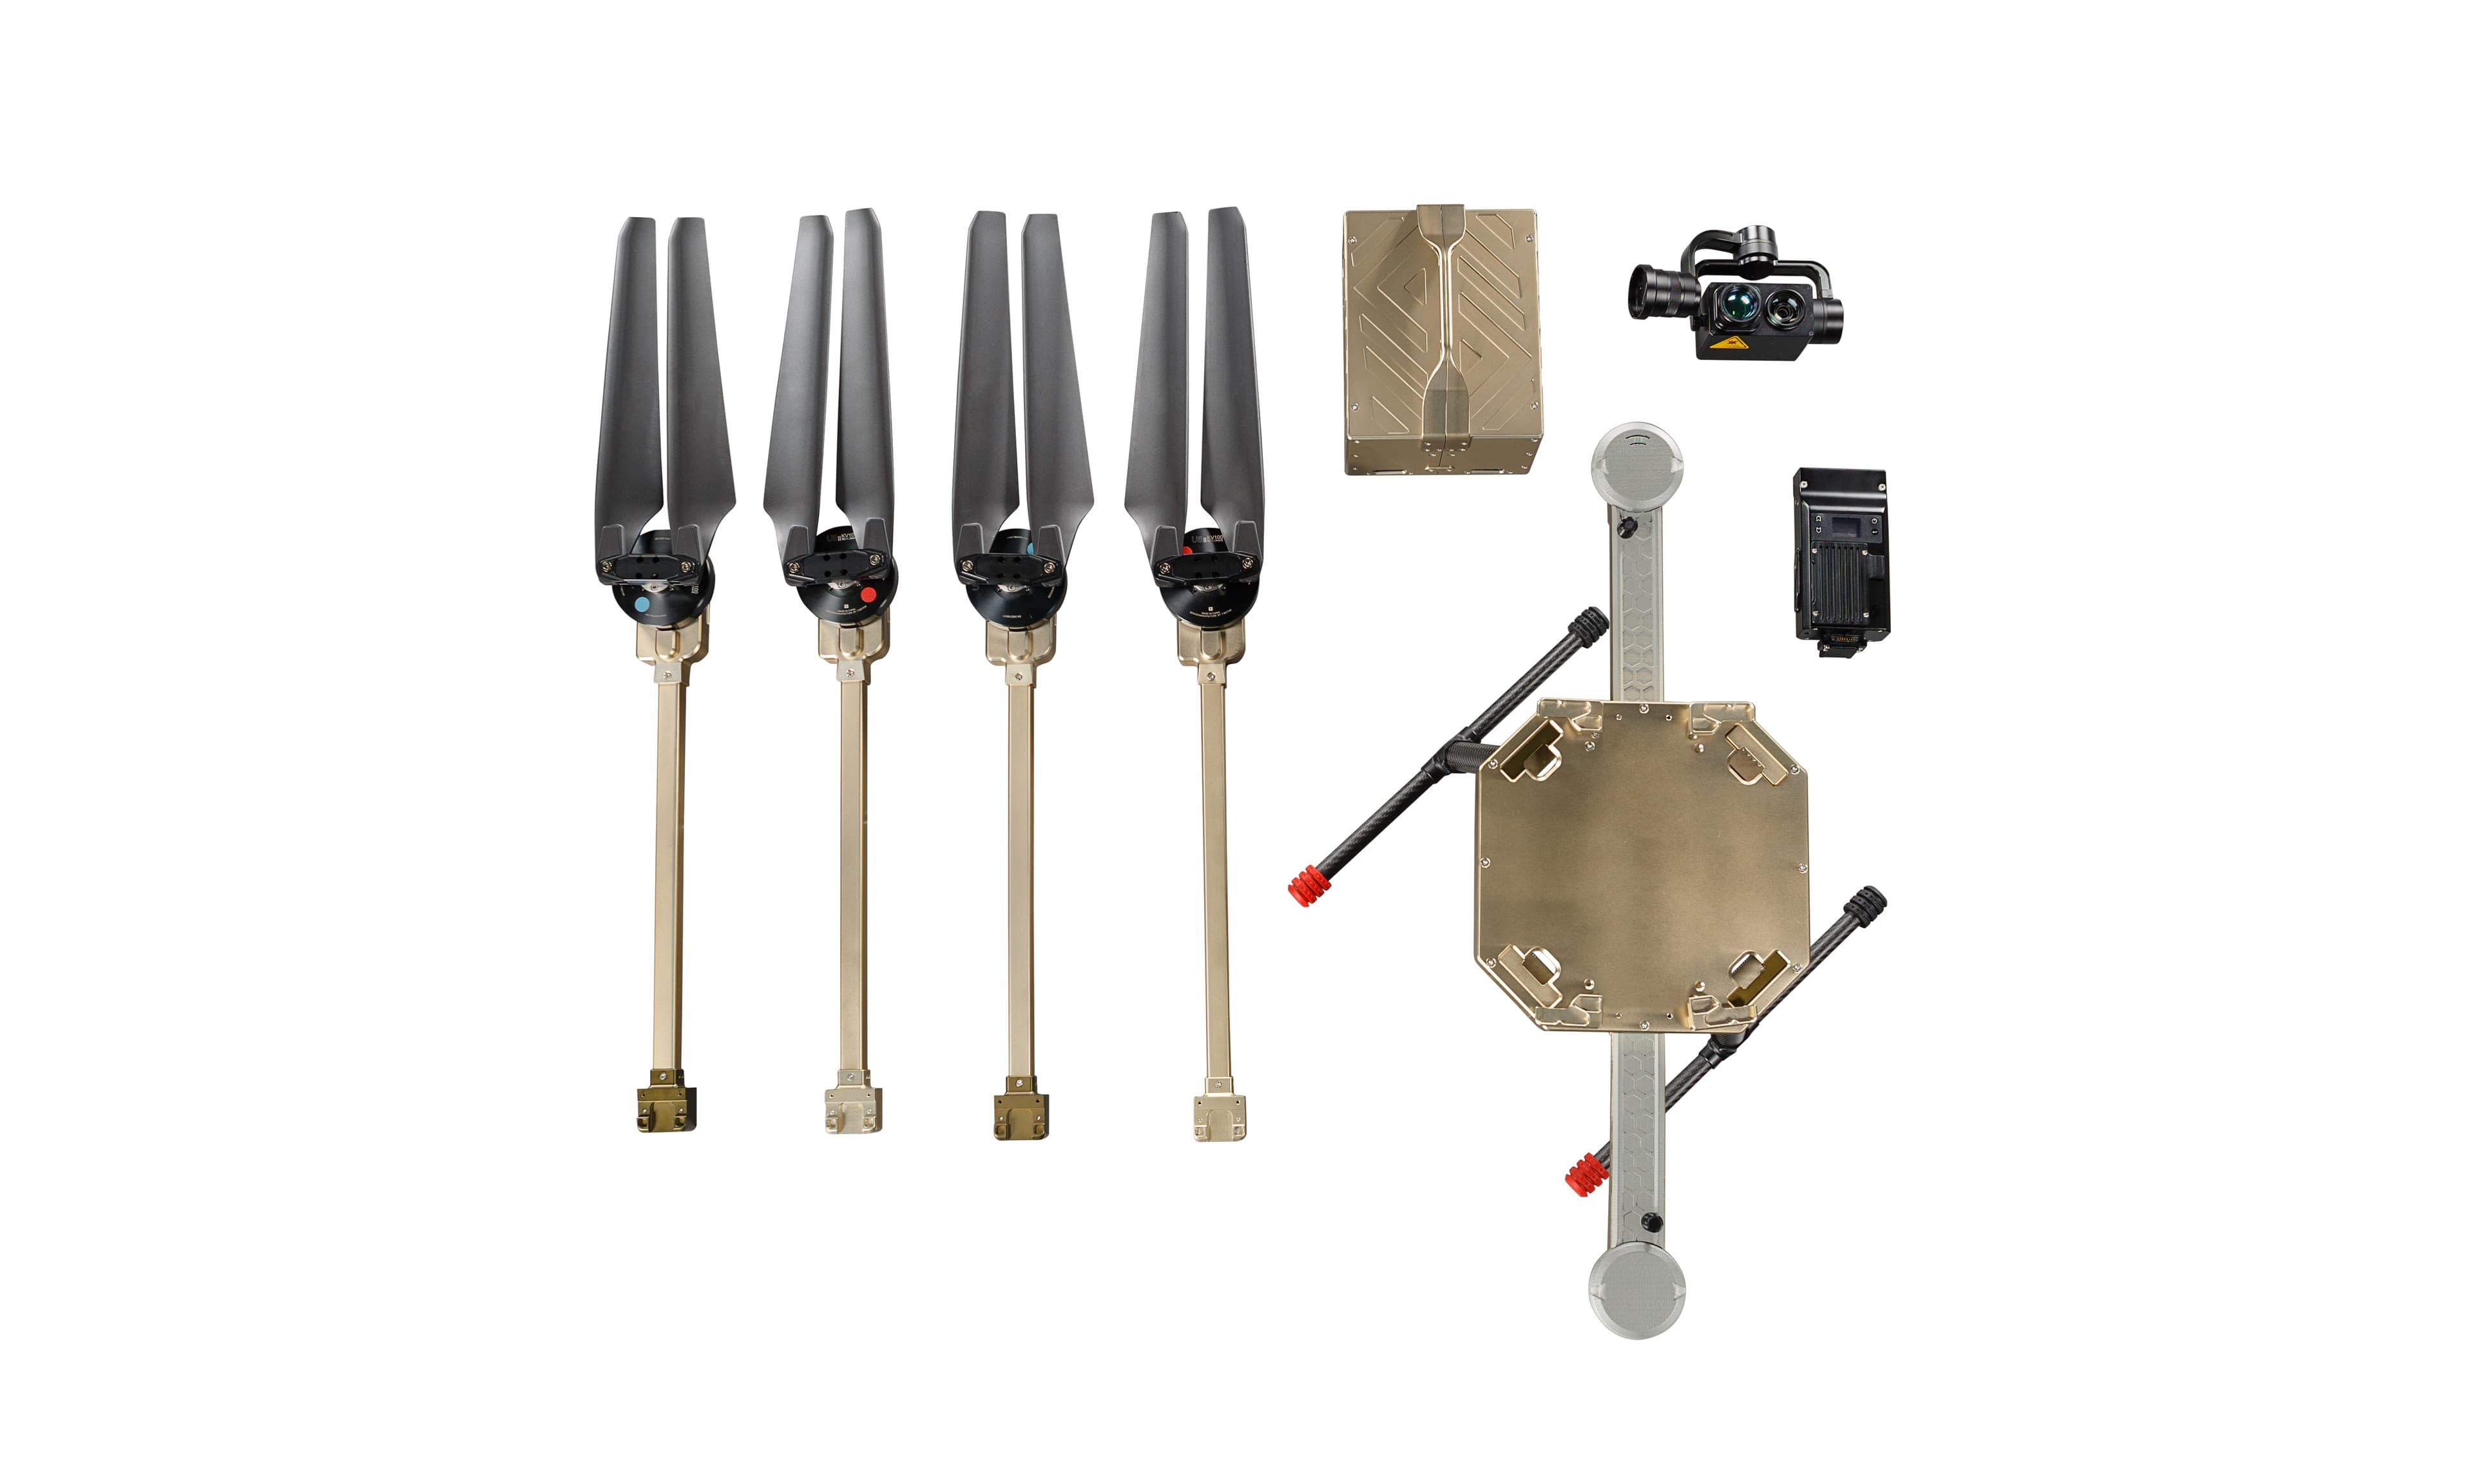
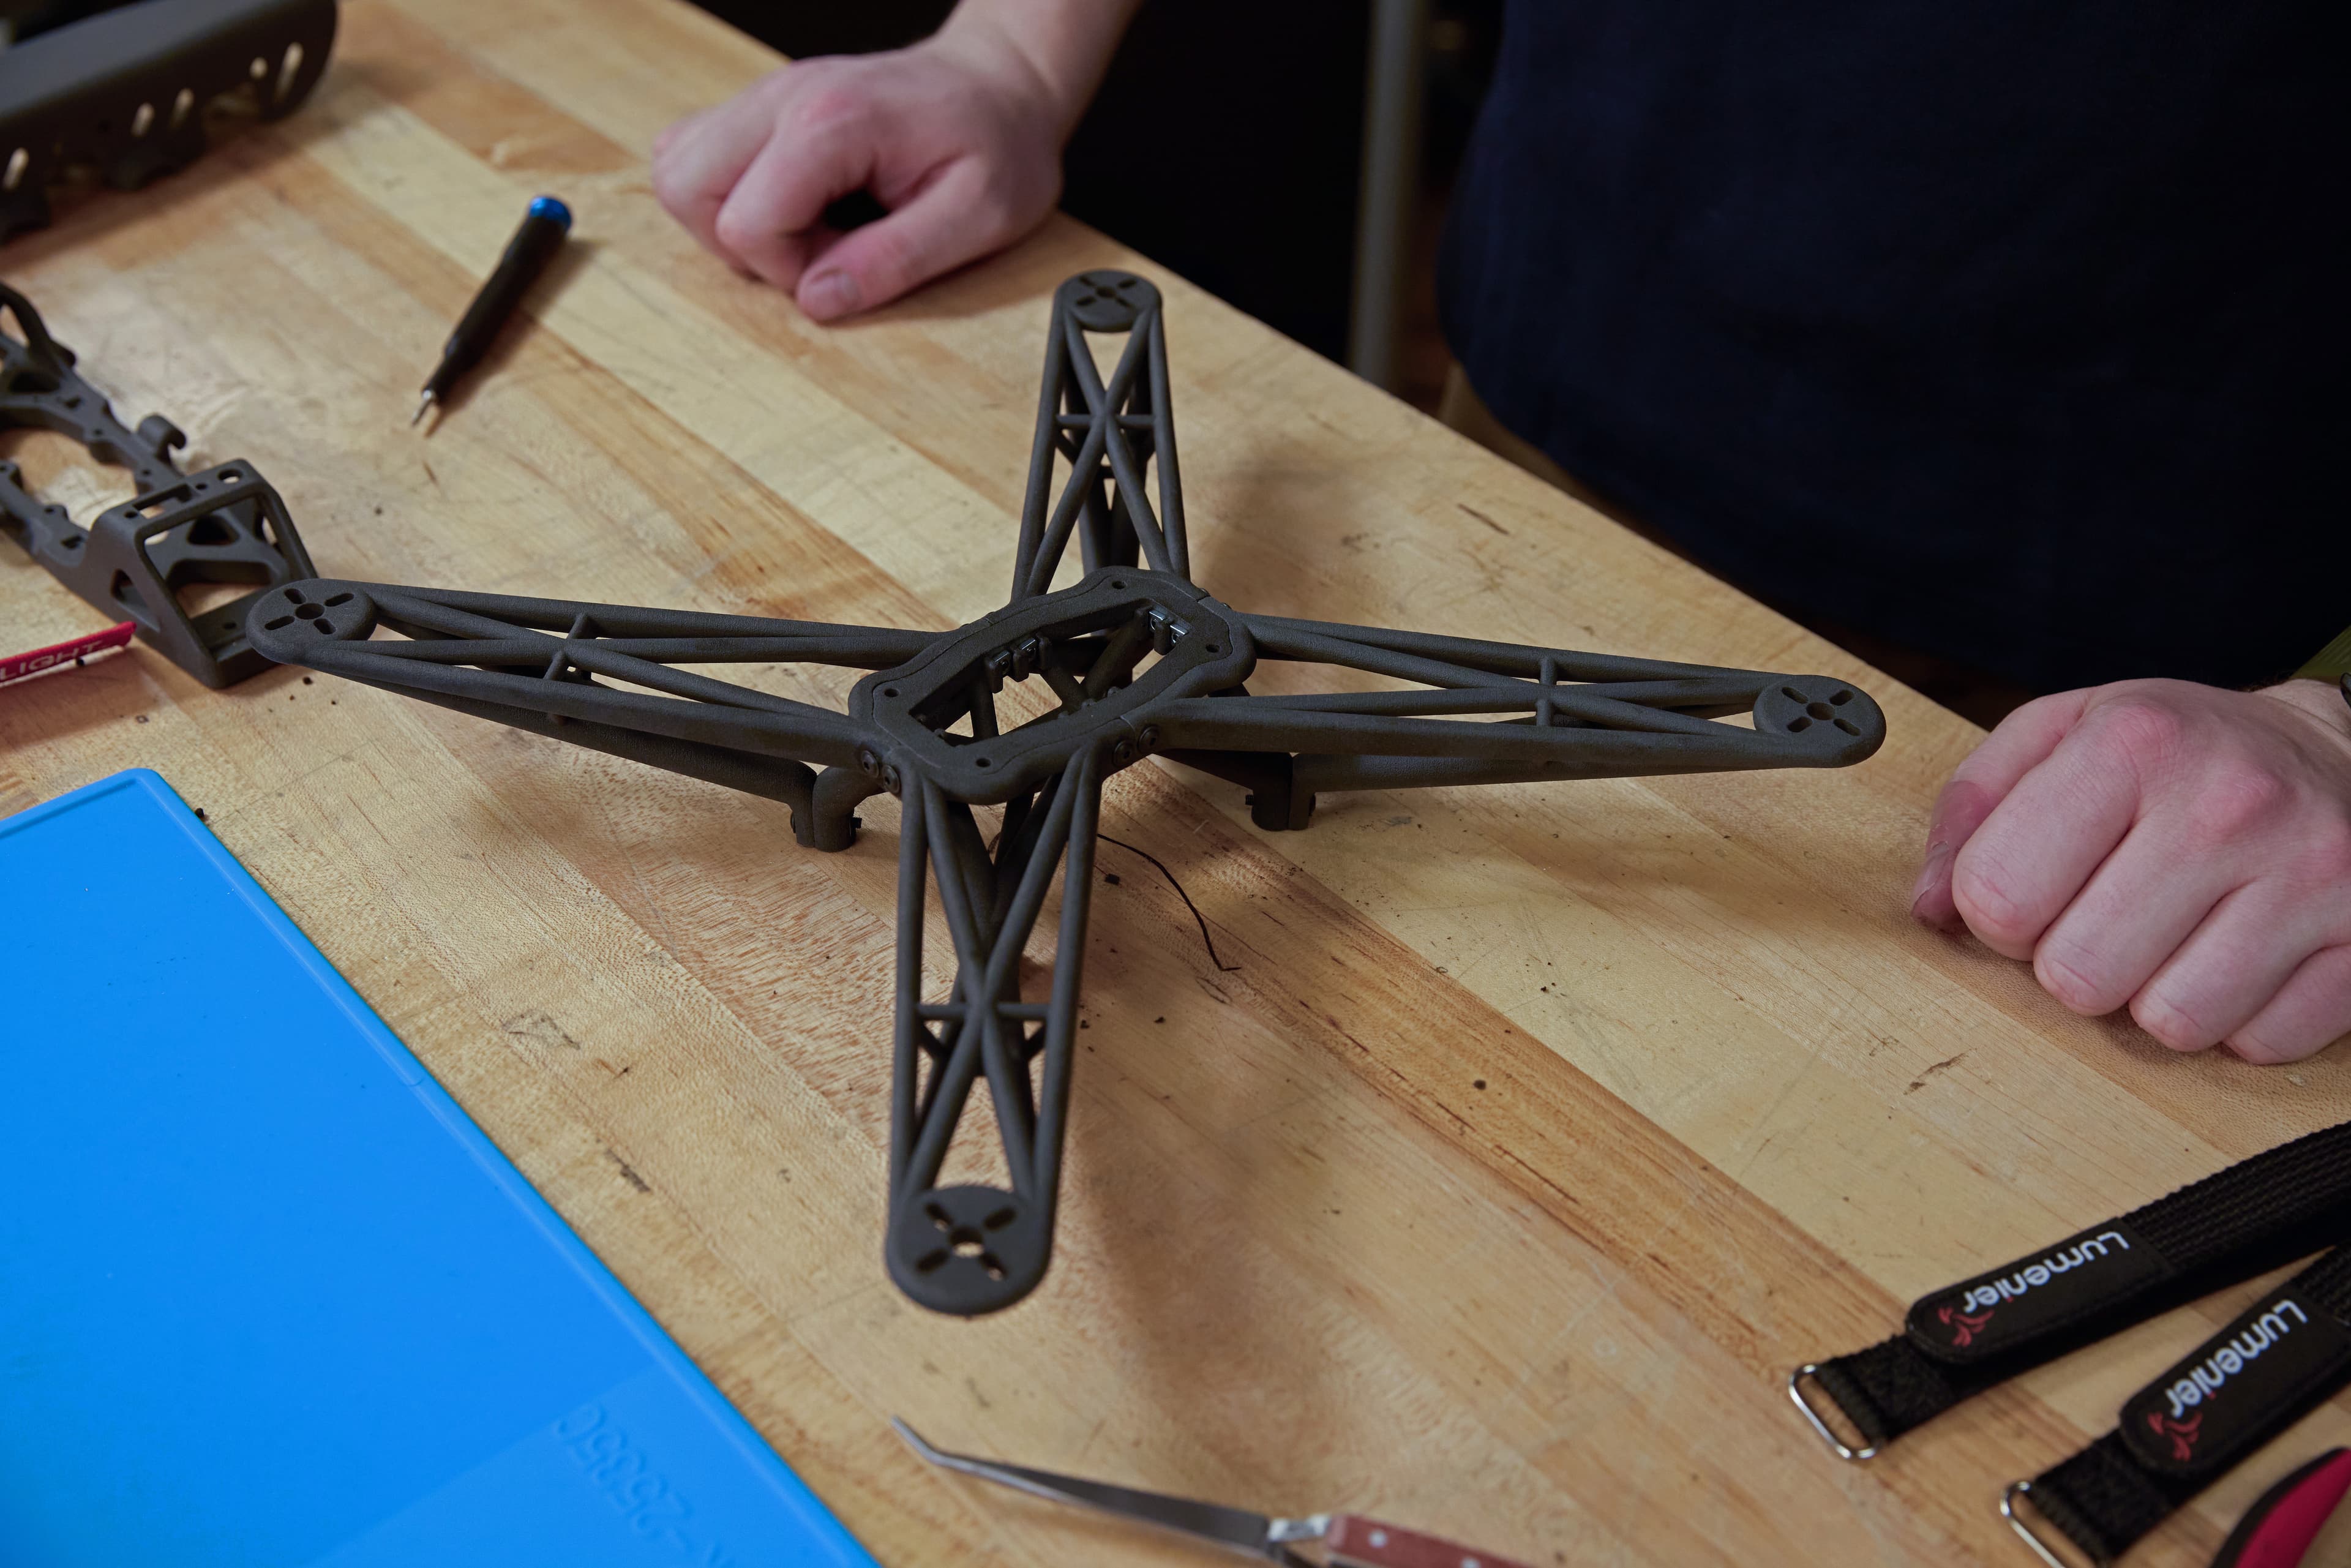
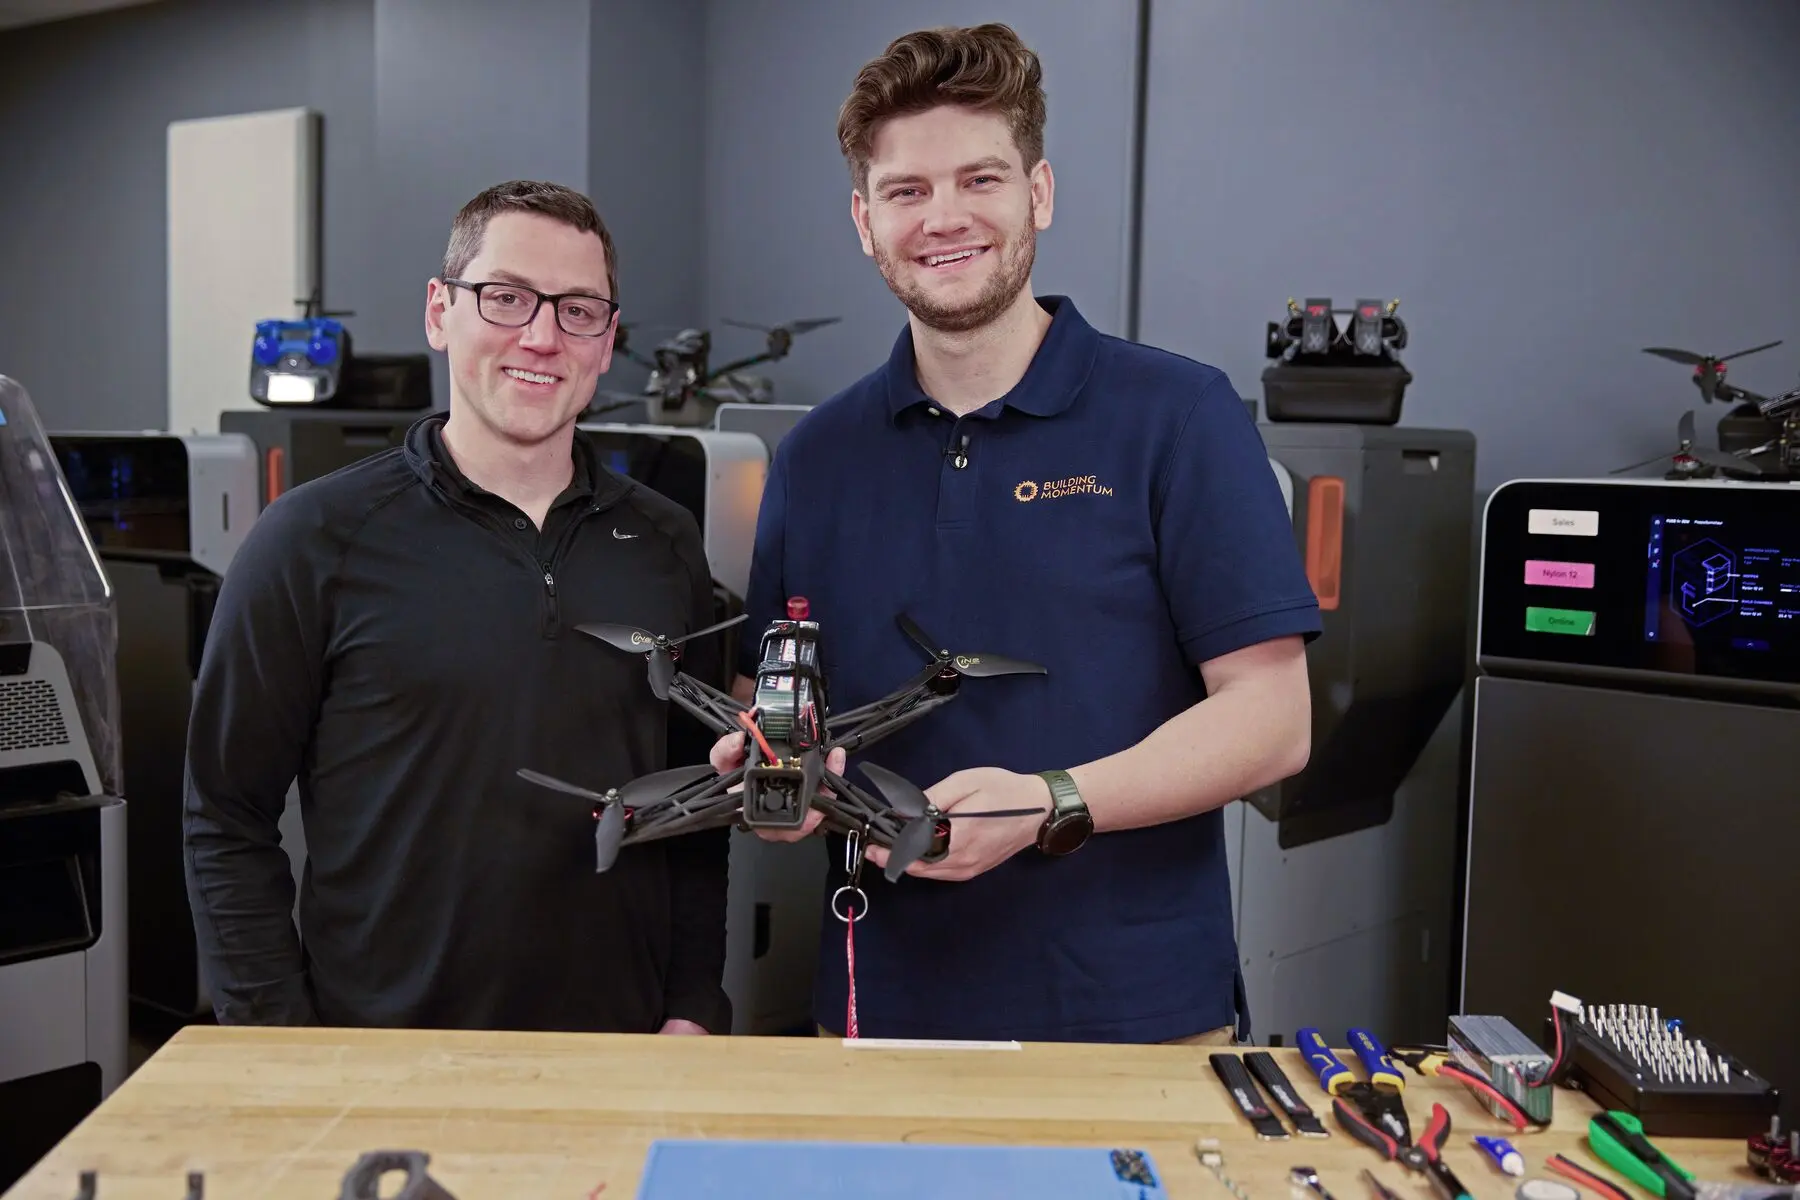
The 3D printed drone designed by Building Momentum leverages Formlabs Fuse Series SLS ecosystem and Nylon 12 Tough Powder to produce its frame, enclosure, wing arms, and bracketry.
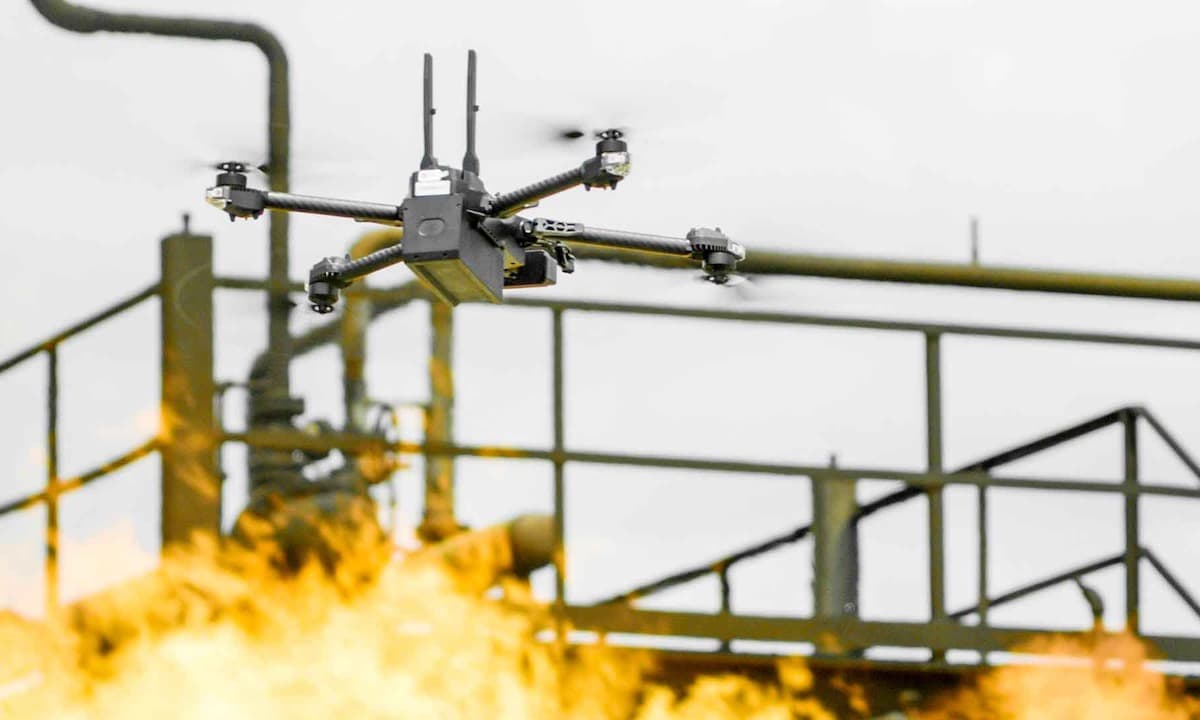
Boresight, an Australian defense contractor, used FDM printers to create thousands of cheap, fast target drones made to be destroyed during anti-drone target practice. Their high-volume experience got them a contract to 3D print functional, end-use drones, so they turned to SLS and the Fuse Series.
Nextech, a South African drone manufacturer, uses the Formlabs Fuse Series SLS ecosystem to print end-use components for their fixed-wing and quadcopter-style drones.
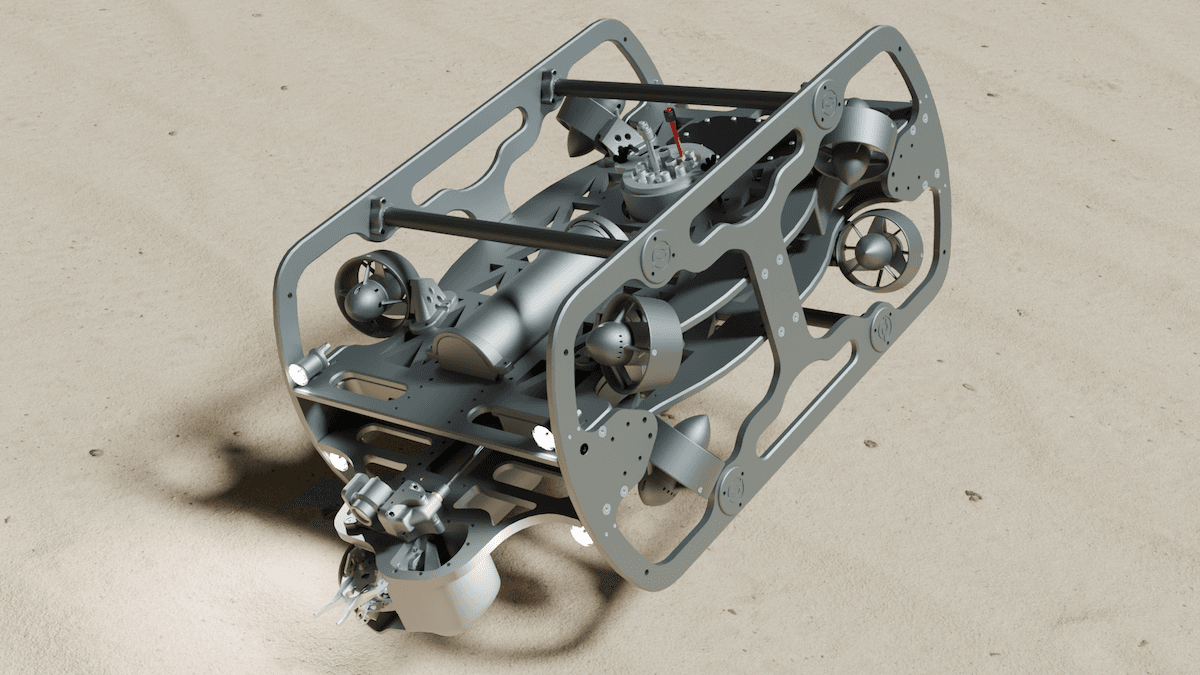
SoSub uses Formlabs’ SLA 3D printers to produce end-use components for their underwater, remotely-operated drones that do dangerous, complex repair work for fishing fleets. Their waterproof 3D printed components, like their ‘squid-lock’ mechanism, hold up perfectly underwater and in extreme environments.
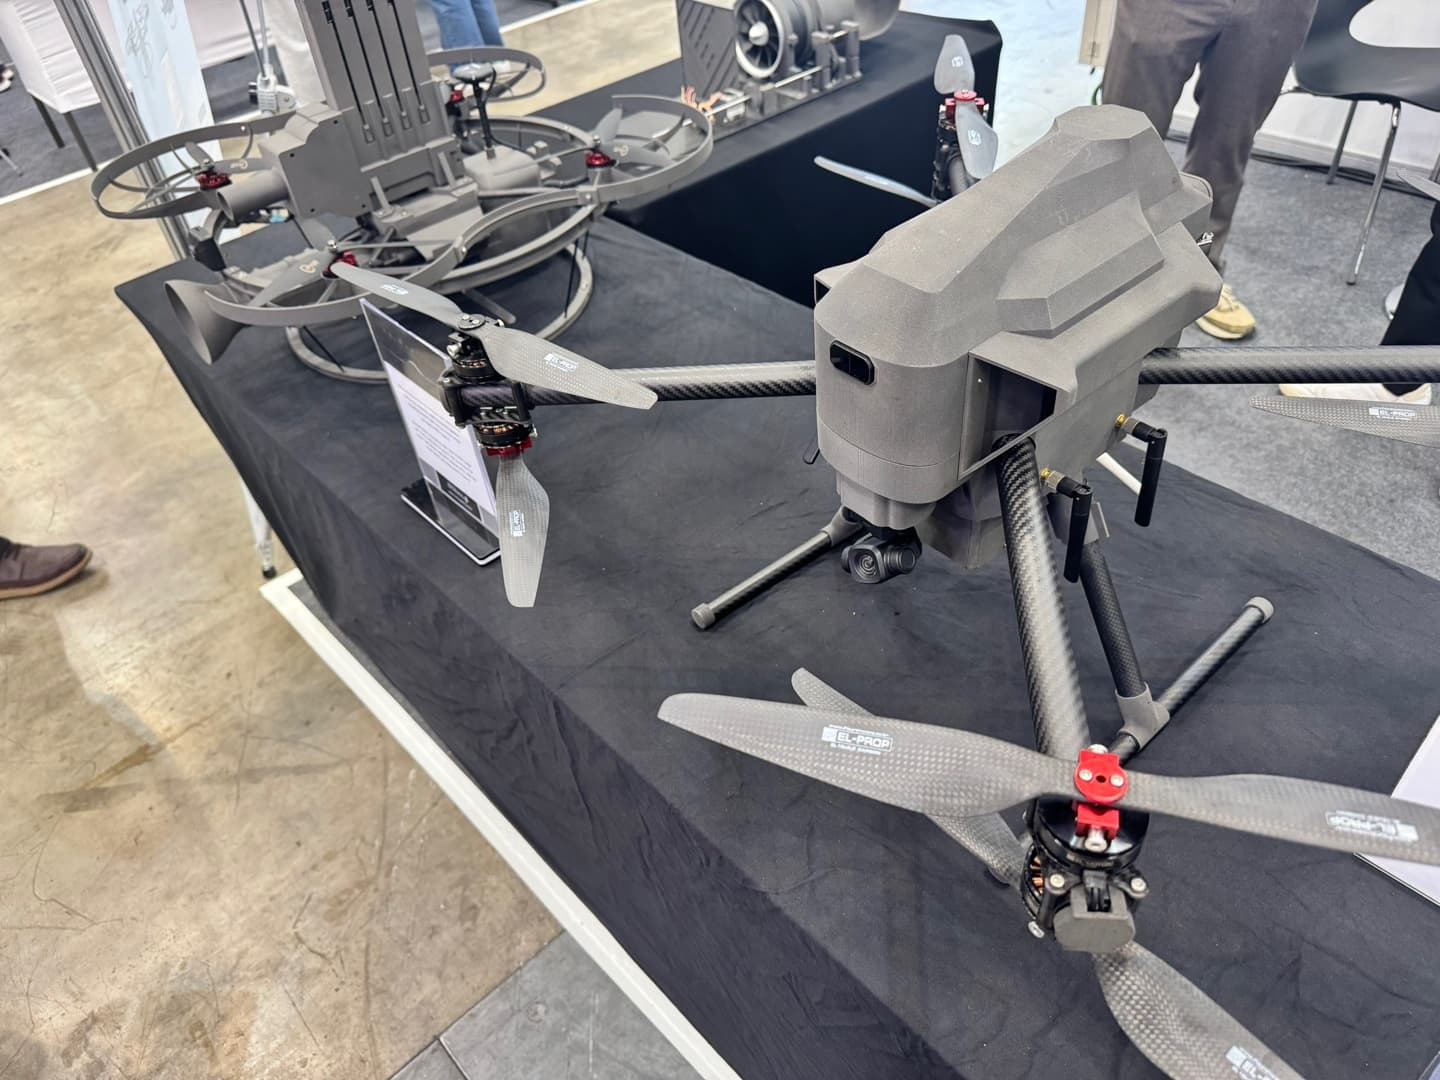
ION Mobility designs and builds advanced UAV systems tailored for public safety, defence, logistics, and industrial use. Their drones are deployed in real-world missions — ranging from surveillance to emergency response — equipped with HD cameras, thermal imaging, and secure communication systems.
3D Printing Drone Fabrication Methods
Considering the following factors can help you choose the right manufacturing method for your drones. The ideal method should help you balance the following factors:
-
Weight and payload capacity: Drones must balance structural strength with minimal weight. Lighter drones extend operational range and endurance, but reducing weight can compromise durability. Drones 3D printed with SLS materials like nylon and TPU can offer strength without adding bulkiness.
-
Durability and structural integrity: The drone frame needs to withstand the impact and the continuous stress of flight while carrying the cameras, power source, and other weight. Airflow around the power source is essential to keep electronics and frequency transmitting cool and functional. SLS 3D printing for drones enables complex geometries for optimal air flow while maintaining structural integrity.
-
Environmental resistance (weatherproofing and waterproofing): Drones operate outdoors and can be in harsh climates — designs need to waterproof electronics and protect the structure against corrosion, extreme cold, and more. Post-processing for SLS like Cerakote or vapor smoothing can extend the lifetime and weatherproofing of an SLS 3D printed drone.
-
Cost and scalability: Optimizing for different production volumes impacts every part of the design process, from material choice to assembly method. 3D printing is ideal for prototyping all the way to production.
-
Electromagnetic interference (EMI) shielding and RF transparency: Consider which components need to be shielded and which need open lines of communication between receivers, then choose manufacturing materials and methods appropriately. Nylon 11 CF Powder is a good choice for EMI shielding components.
-
Ease of assembly, field reparability: Drones are, inherently, devices operating in the field. Operators need to be able to replace parts, access recorded information, disassemble, repair, and modify as the situation demands, and 3D printing makes on-demand supply much easier.
-
Customization: Traditional FPV drones rely on laminated sheets of carbon fiber for their frames, which offer excellent strength-to-weight ratios but can limit design complexity and agility due to fabrication constraints. The only way to cost-effectly customize a drone is to 3D print a majority of its key components.
Each of these considerations points to the suitability of SLS 3D printing drones. As powerful printing technologies have become more accessible, they’ve opened the doors for small and medium-sized manufacturers to compete.
Comparison of 3D Printing Technologies for Drone Design and Manufacturing
| FDM | SLA | SLS | ||||
| Ideal Applications | Rapid prototyping, target drones intended for defense practice (consumables), fit check models |
|
|
|||
| Advantages |
|
|
|
|||
| Disadvantages |
|
Lower impact strength, requires washing and curing | Higher barrier to entry ($30K starting price) | |||
| Ideal Materials |
|
|
Nylon 12 Tough Powder, Nylon 11 CF Powder, TPU 90A Powder (for dampeners, spacers) |
Request a Free Sample Part
See and feel Formlabs quality firsthand. We’ll ship a free 3D printed sample part to your office.
FDM
While FDM 3D printing is perfect for certain types of drones — like those designed to be blow up when used in defensive target practice — when designing a functional, end-use drone made to carry a payload and perform a task, FDM parts aren’t typically up to the challenge. In terms of cost and accessibility, FDM printers are the easiest to get started with. However, FDM technology struggles to build parts that need tight tolerances, consistent dimensional accuracy, and that are impact resistant, durable, and watertight. FDM parts are anisotropic and will split along layer lines under stress.
Best FDM Materials for 3D Printed Drone Components
| Qualities | Applications | |||
| ABS |
|
|
Stereolithography (SLA)
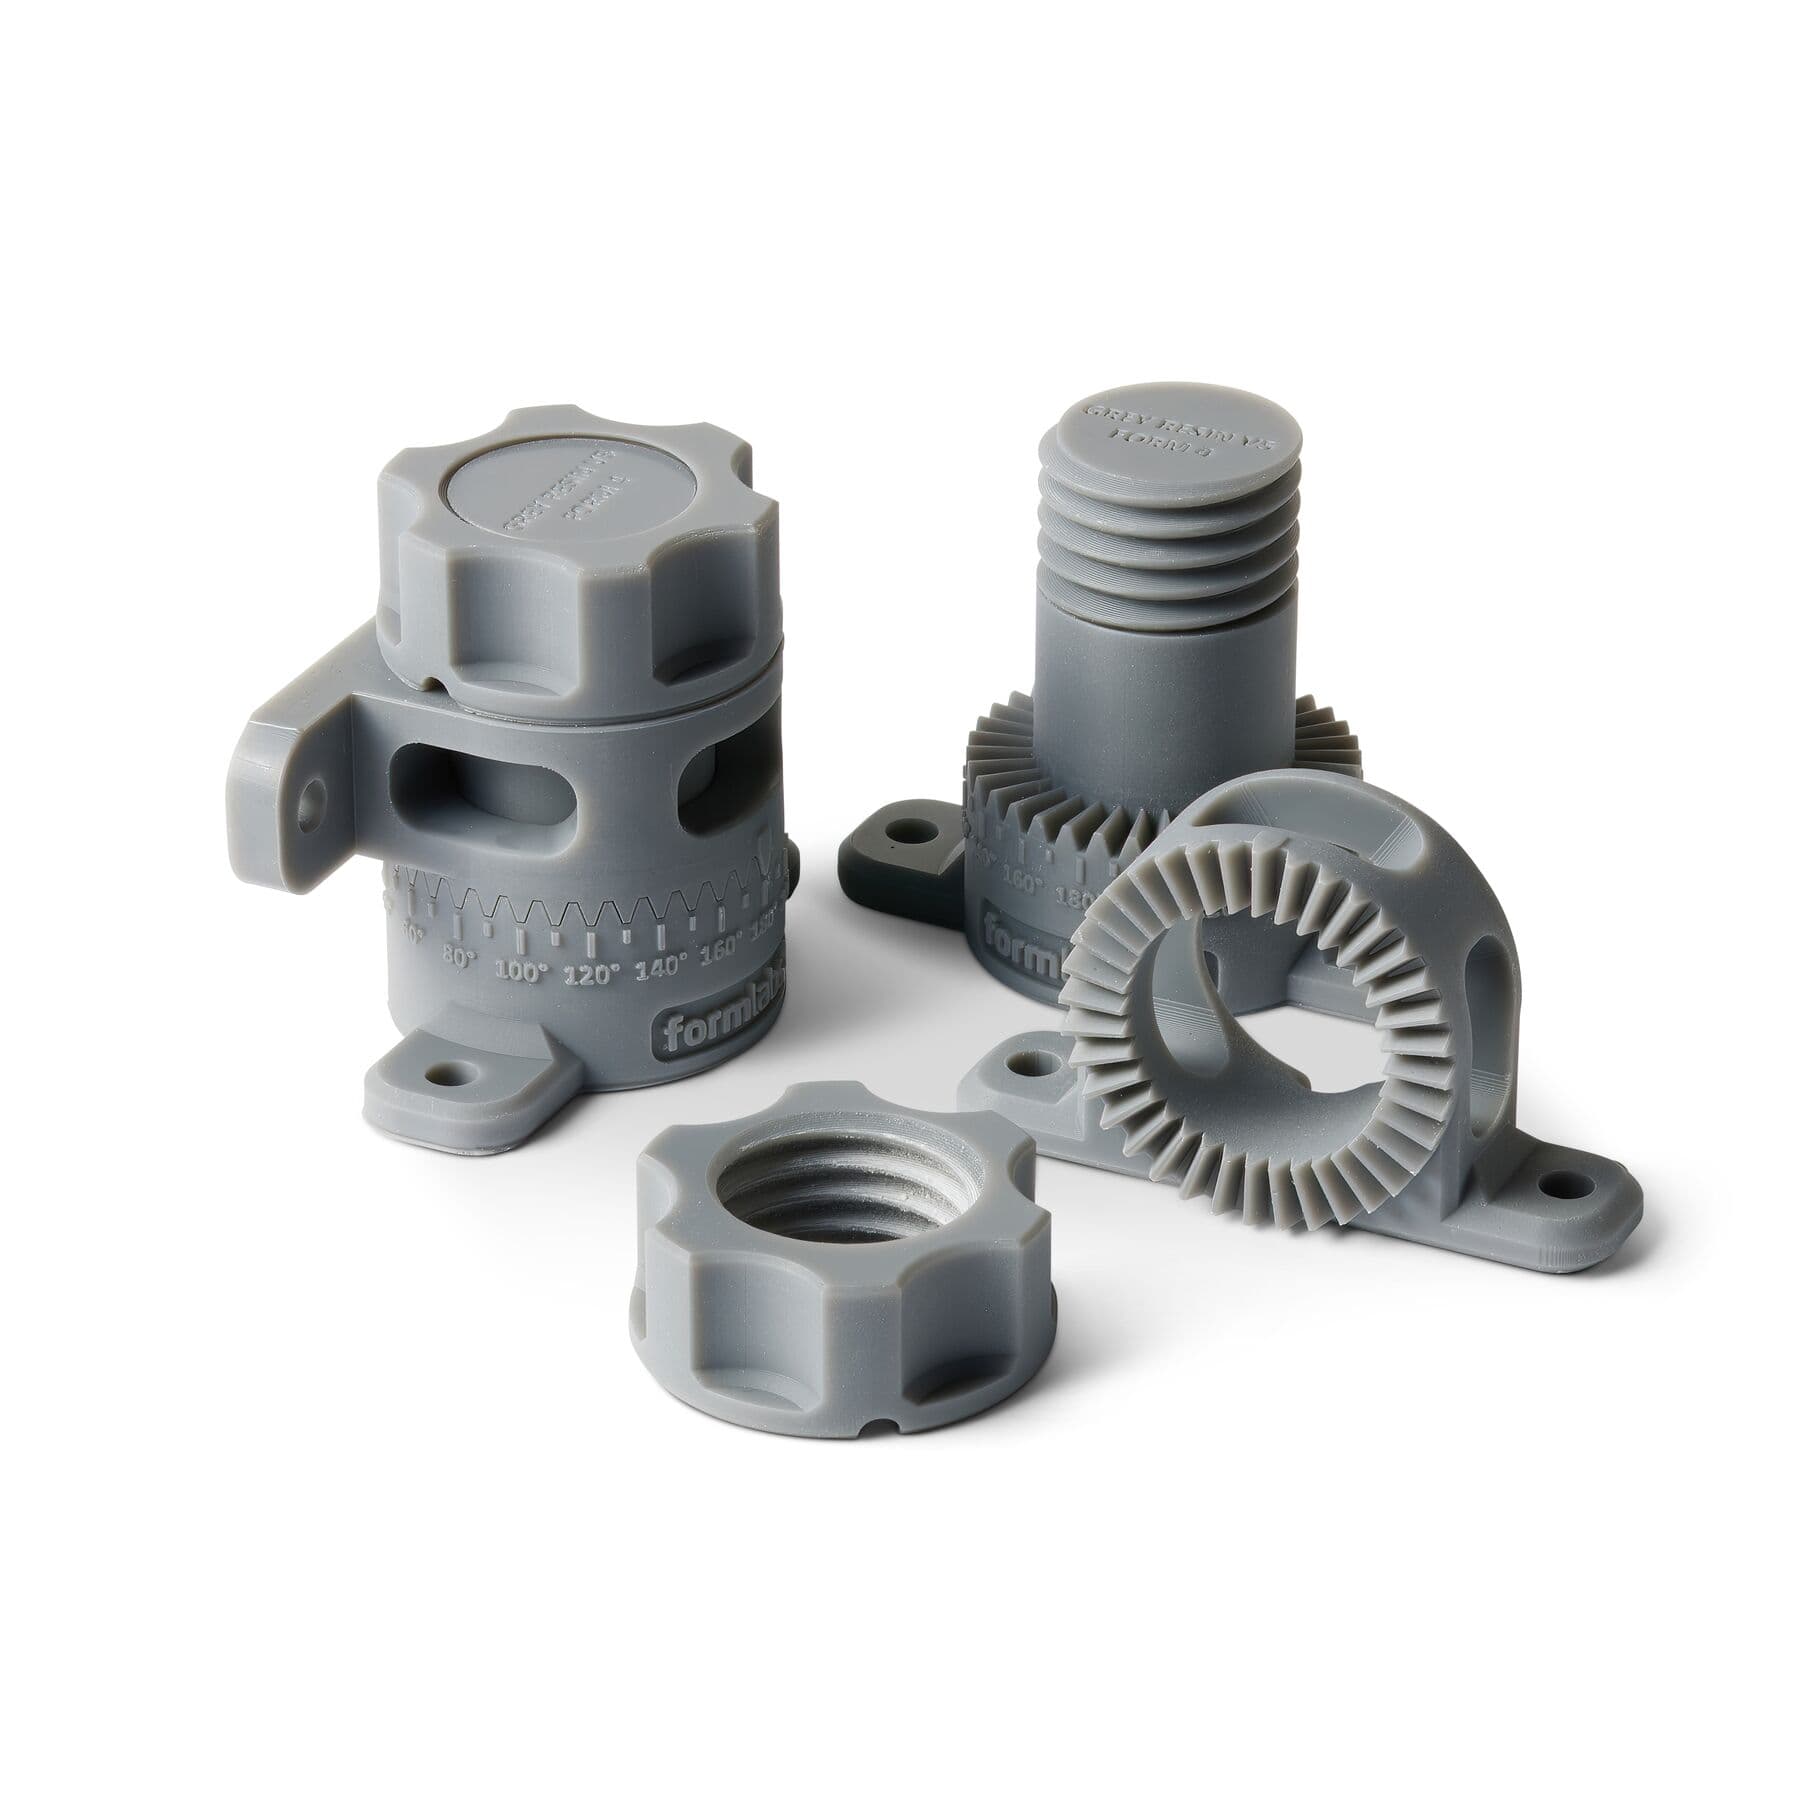
SLA 3D printers like Formlabs Form 4 and Form 4L are popular because they can produce highly accurate parts in a range of materials that can mimic most traditionally made plastics, all on desktop or benchtop printers that cost under $10,000. SLA parts are watertight and airtight because SLA technology creates isotropic parts that exhibit the same mechanical properties regardless of the direction from which stress is applied. The range of materials available, from true silicone like Formlabs’ Silicone 40A Resin to Tough 1500 Resin, with 155% elongation at break for ductile, long-lasting parts (comparable to injection molded ABS).
Best SLA Materials for 3D Printed Drone Components
| Qualities | Applications | |
| Silicone 40A Resin | True silicone, soft, elastomeric | Spacers, gaskets, seals |
| Tough 1500 Resin V2 | Similar strength, stiffness, and toughness to polypropylene (PP) | Enclosures, snap-fit features, self-tapping screws, assemblies |
| Tough 2000 Resin | Similar stiffness and strength to ABS | Jigs, fixtures, housings |
| Grey Resin | General purpose strength and durability, high accuracy and consistency | Fast, accurate prototyping |

Calculate Your Time and Cost Savings
Try our interactive ROI tool to see how much time and cost you can save when 3D printing on Formlabs 3D printers.
Selective Laser Sintering (SLS)
SLS 3D printing presents the best option for the end-use production of drone frames and other components. SLS 3D printing technology creates durable, rugged, and highly accurate parts in materials that are already familiar to industrial customers, like nylon and TPU. SLS printers like the Fuse 1+ 30W can deliver minimum feature sizes of 0.2 mm consistently, and create complex, organic shapes without any supports, making post-processing easier while enabling new geometries. Finally, SLS 3D printer build chambers are self-supporting, so drone manufacturers can print multiple builds at once, stacking the components on top of each other for more efficient printing and powder usage.
Best SLS Materials for 3D Printed Drone Components
| Qualities | Applications | |||
| Nylon 12 Tough Powder |
|
|
||
| Nylon 11 CF Powder |
|
|
||
| TPU 90A Powder | Soft, elastomeric |
|
||
| Nylon 12 Powder |
|
Frames, enclosures, jigs, fixtures, housings |
Building Momentum's Approach: Printer and Material
Building Momentum is an educational consultancy borne of years of tactical experience with the United States Armed Forces abroad. As drones have become even more relevant to the success and experience of defense efforts around the world, Building Momentum has created different drones as well as drone design and production training courses.
Their preferred method of fabrication is the Formlabs Fuse Series SLS ecosystem, due to its:
-
Material suitability: For EMI (Electromagnetic Interference) and RF (radio frequency) management to ensure reliable communication, navigation, and sensor performance.
-
Nylon 11 CF Powder has been validated for EMI shielding and is currently being used by a major US defense contractor for tactical drone production at scale.
-
Open Material License: Enables experimentation with different sintered powders for specialized applications, like RF transparency.
-
Mechanical properties and machineability: Ideal for enclosures and components requiring signal permeability, such as GPS housings, radio-transparent domes, and sensor covers.
-
Flexible material options: TPU 90A Powder, with its flexible properties, is especially useful for soft-mounting RF-sensitive electronics, reducing vibration, and ensuring clear signal reception.
-
-
Accessible cost and installation: At less than $60,000 for the entire Fuse Series ecosystem, the technology is a scale factor more affordable than traditional SLS options while requiring no more energy than two refrigerators and no more space than three.
-
High dimensional accuracy: The Fuse 1+ 30W consistently delivers parts with tolerances of +/- 0.1 mm, making complex assemblies easy and quick.
Pre-Design Drone Planning
Know Your Mission Set
- Do you need to fly autonomously?
- What will the environment look like? Indoors? Moving obstacles? Elevation?
- Do you need to carry a payload? How much will it weigh?
- Do you need to collect photo, video, or other specific data?
- How long will you need to fly for?
- How fast/maneuverable/agile do you need the drone to be?
Determine Components: Mission Specific
- Long Distances
- Long distance radios, limit data transmission
- Indoors
- Short-range sensors like LiDAR & Optical Flow over GPS and Barometer
- Outdoors
- GPS, Barometer
- Data Collection
- Camera Gymbal
- IR/Thermal Camera
- Onboard Video Recorder
- Bespoke Sensor Packages
- LiDAR for Mapping & Data Capture
- Autonomous Flight
- Telemetry Radio
- GPS(GNSS)/Optical Flow
- Barometer/LiDAR for navigation (1D, 2D, 3D)
- FPV Flight
- FPV Camera & Video Transmitter
- Payload
- Dropper Hardware
- Payload Fixture Mechanisms
Determine Components: Flight Specific
- Identify a frame size that can accommodate all the mission-specific components in addition to the flight components
- Choose the number of motors you want and identify a motor/prop combination that meets performance/lift requirements
- Identify a flight controller and configurator that best suits your mission and level of complexity
- Identify an ESC that meets your motor and propeller current draw requirements at maximum throttle and works with your flight controller
- Identify a remote ID module (if required in your flight area)
Designing the 3D Printed Drone Frame
Select Frame Type and Wheelbase
- Choose your wheelbase to ensure proper propeller clearances based on the motor and propeller you’ve identified.
- Frame Type
- X Frame – 4 motors. Ideal for compact builds with limited components, like FPV quadcopters. This also offers stable, predictable flight characteristics.
- H Frame – 4 Motors. Similar to X frame but with more space for components and less stable flight characteristics
- Modified X – 4 Motors. stability of an X frame but with more component placement options.
- Deadcat – 4 Motors. Similar to modified X, but with the arms swept back slightly to remove the propellers from the field of view of an FPV camera
- Ducted – 4 Motors (although more are possible), frame extends around the propellers to protect the blades during flights indoors or around people.
- Box/Square – 4 motors. Typically on smaller quadcopters, similar to X frame but more rigid and often stronger, at the cost of additional drag.
- Hexacopter/Octocopter – 6 or 8 motors to increase potential lifting power and add redundancy in case of ESC/motor/prop failure.
- Choose a general component layout. Keep mission set, center of gravity, and component interaction in mind.
- Where do you want/need to mount sensors or cameras?
- Do you have a payload that needs to be mounted in a specific location?
- Choose your battery location to compensate and bring your center of gravity closer to the center of the drone.
- There are often several different antennas on a drone, and each needs to be carefully located.
- All antennas need to be as far from components that produce lots of RF interference, light motors, power wires, and the ESCs.
- GPS antennas need a clear, unobstructed views of the sky and is best when placed away from sources of interference (other RF sources or wires with bursts of high current).
- Video, Telemetry, and RC antennas need unobstructed views of the base station and to be mounted so that the antenna range/pattern reaches the base station.
Choose the Materials You’d Like To Use
- Formlabs Nylon 12 Tough Powder provides the best impact strength and wear resistance, Nylon 11 CF Powder offers increased rigidity, and TPU 90A Powder is ideal for vibration-dampening and impact-absorption features.
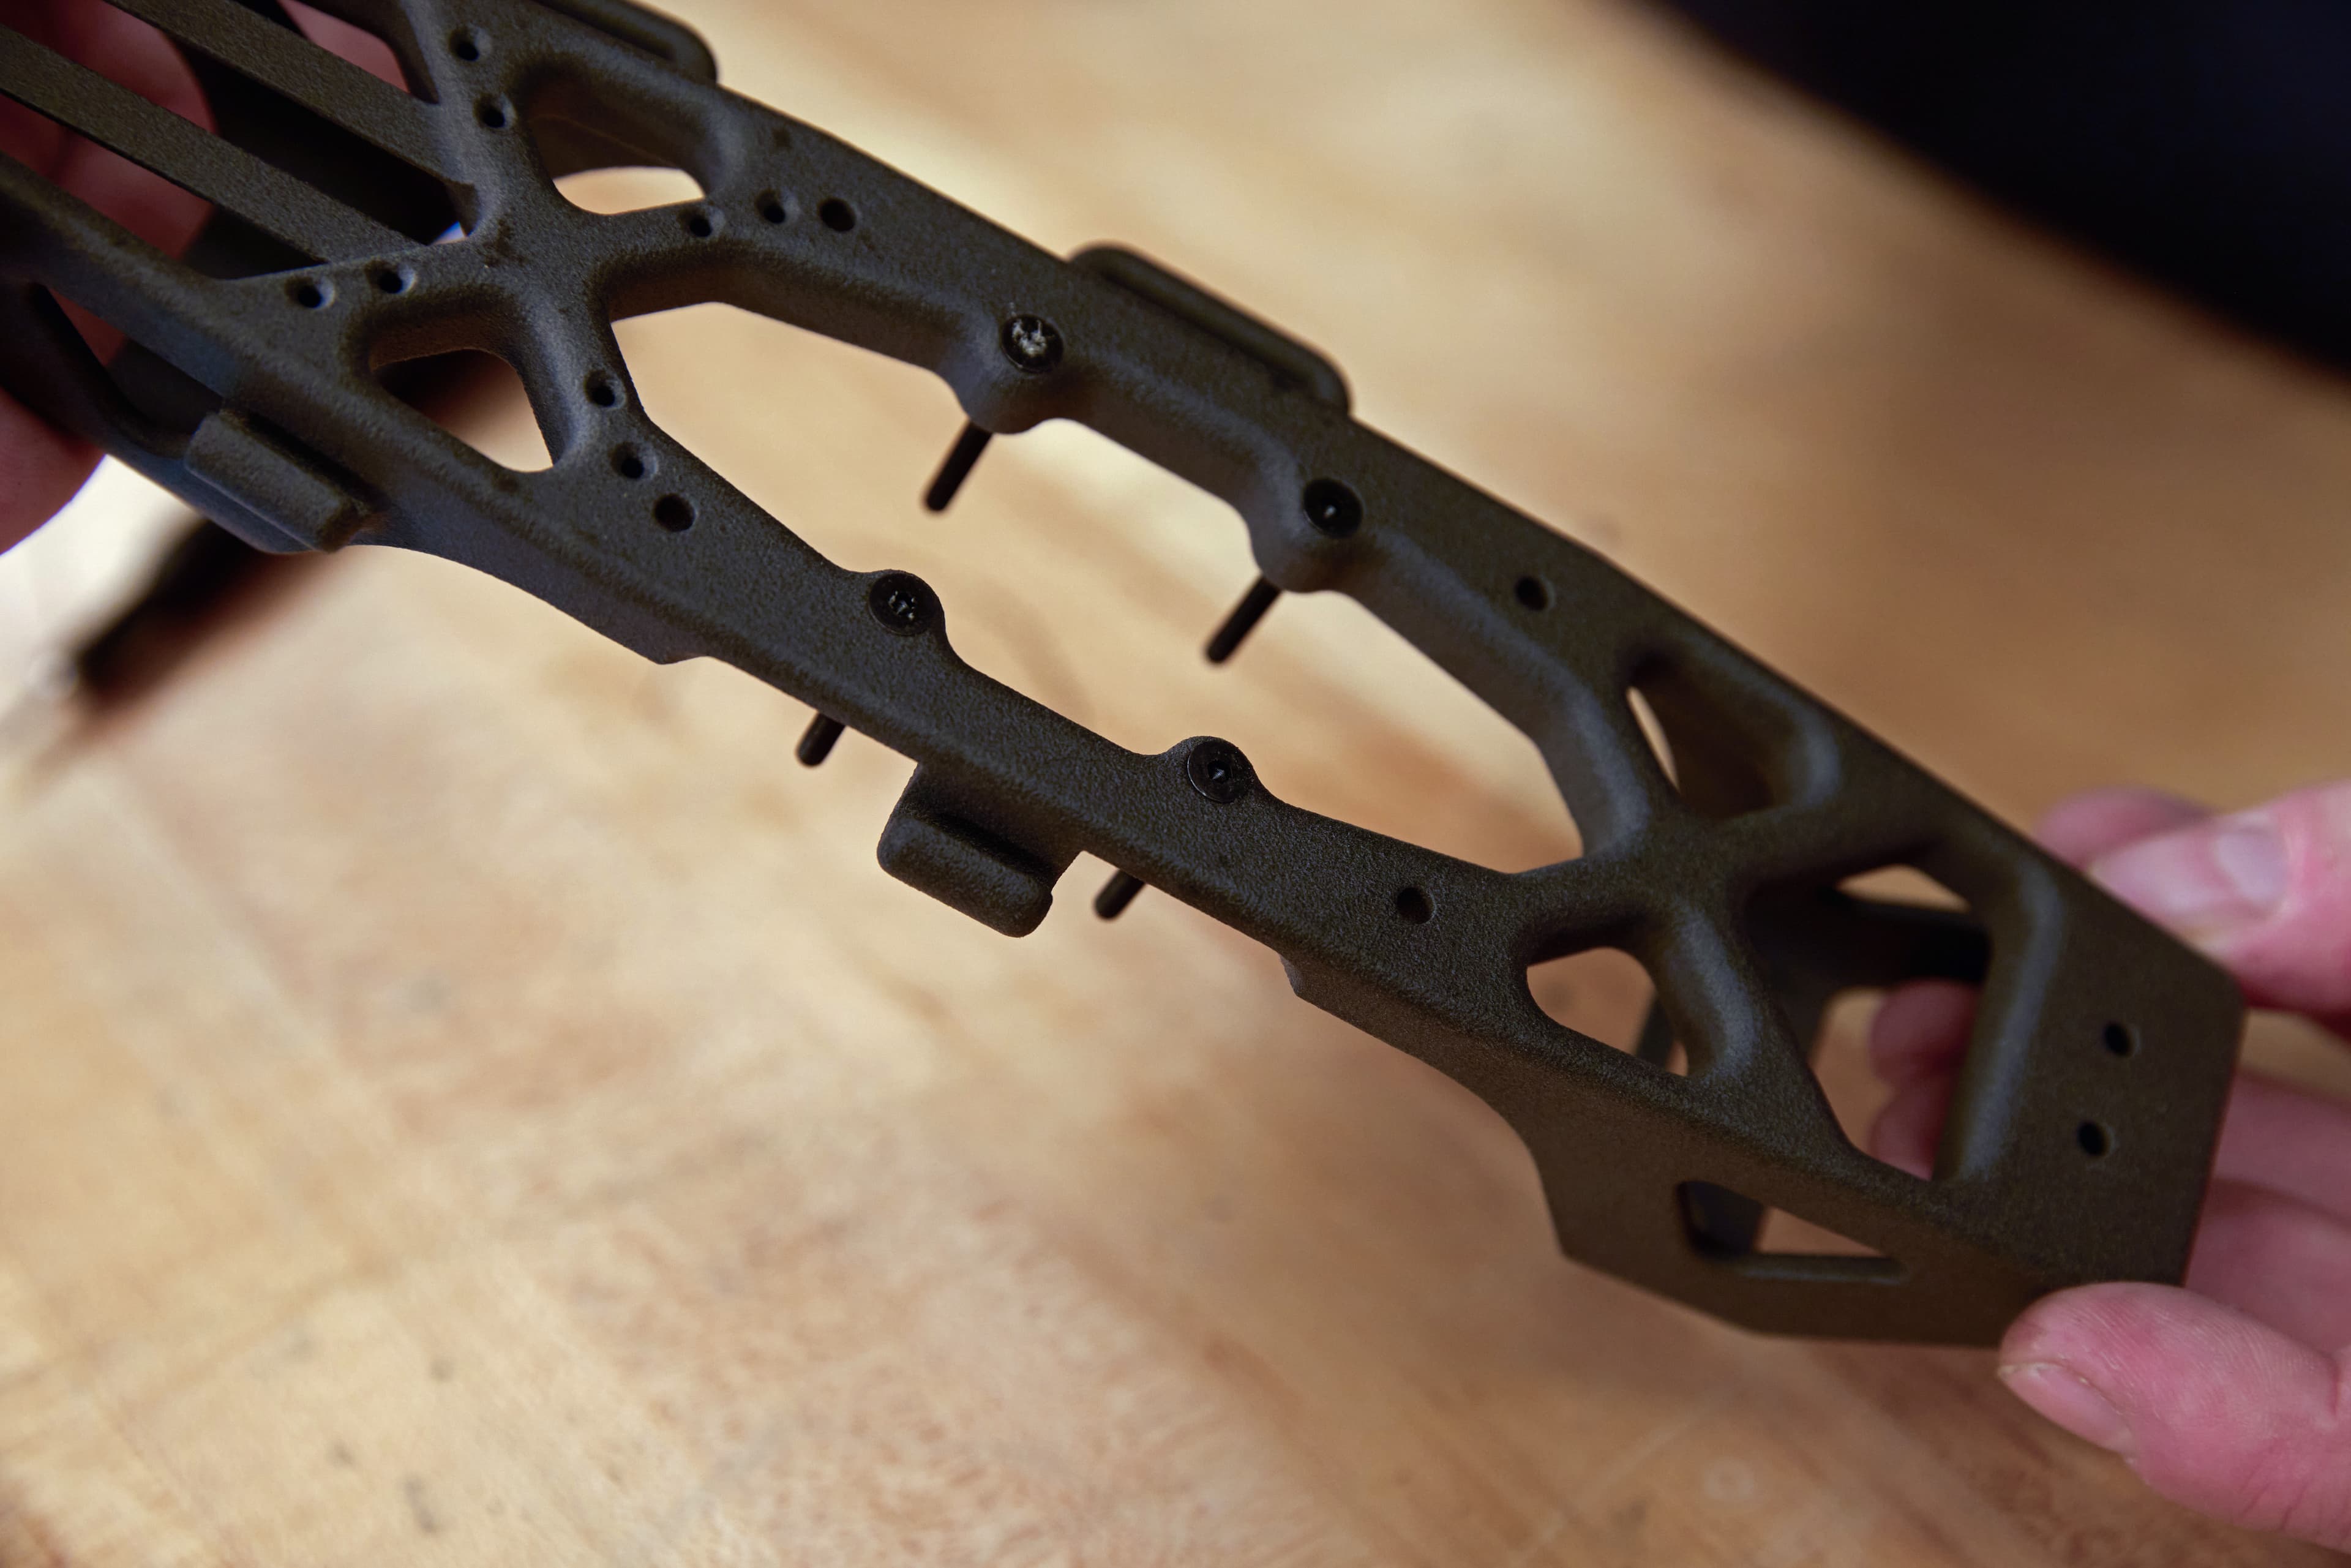
- When creating your frame, design to the strengths and weaknesses of the AM process. SLS parts cannot easily contain hollow cavities, and powder is difficult to remove from narrow, deep cavities. Therefore, the process often lends itself to skeletal designs.
- Don’t try to design it all at once! Start with your basic flight hardware and make revisions. You will naturally learn about what changes you should make (component placement, design/material improvements, wire routing, ease of replacement, etc.) by simply trying to assemble and fly your drone. Take advantage of the flexibility that 3D printing provides you by rapidly iterating on your design.
Step By Step Assembly
Step 1: Connecting Motor Arms to Base
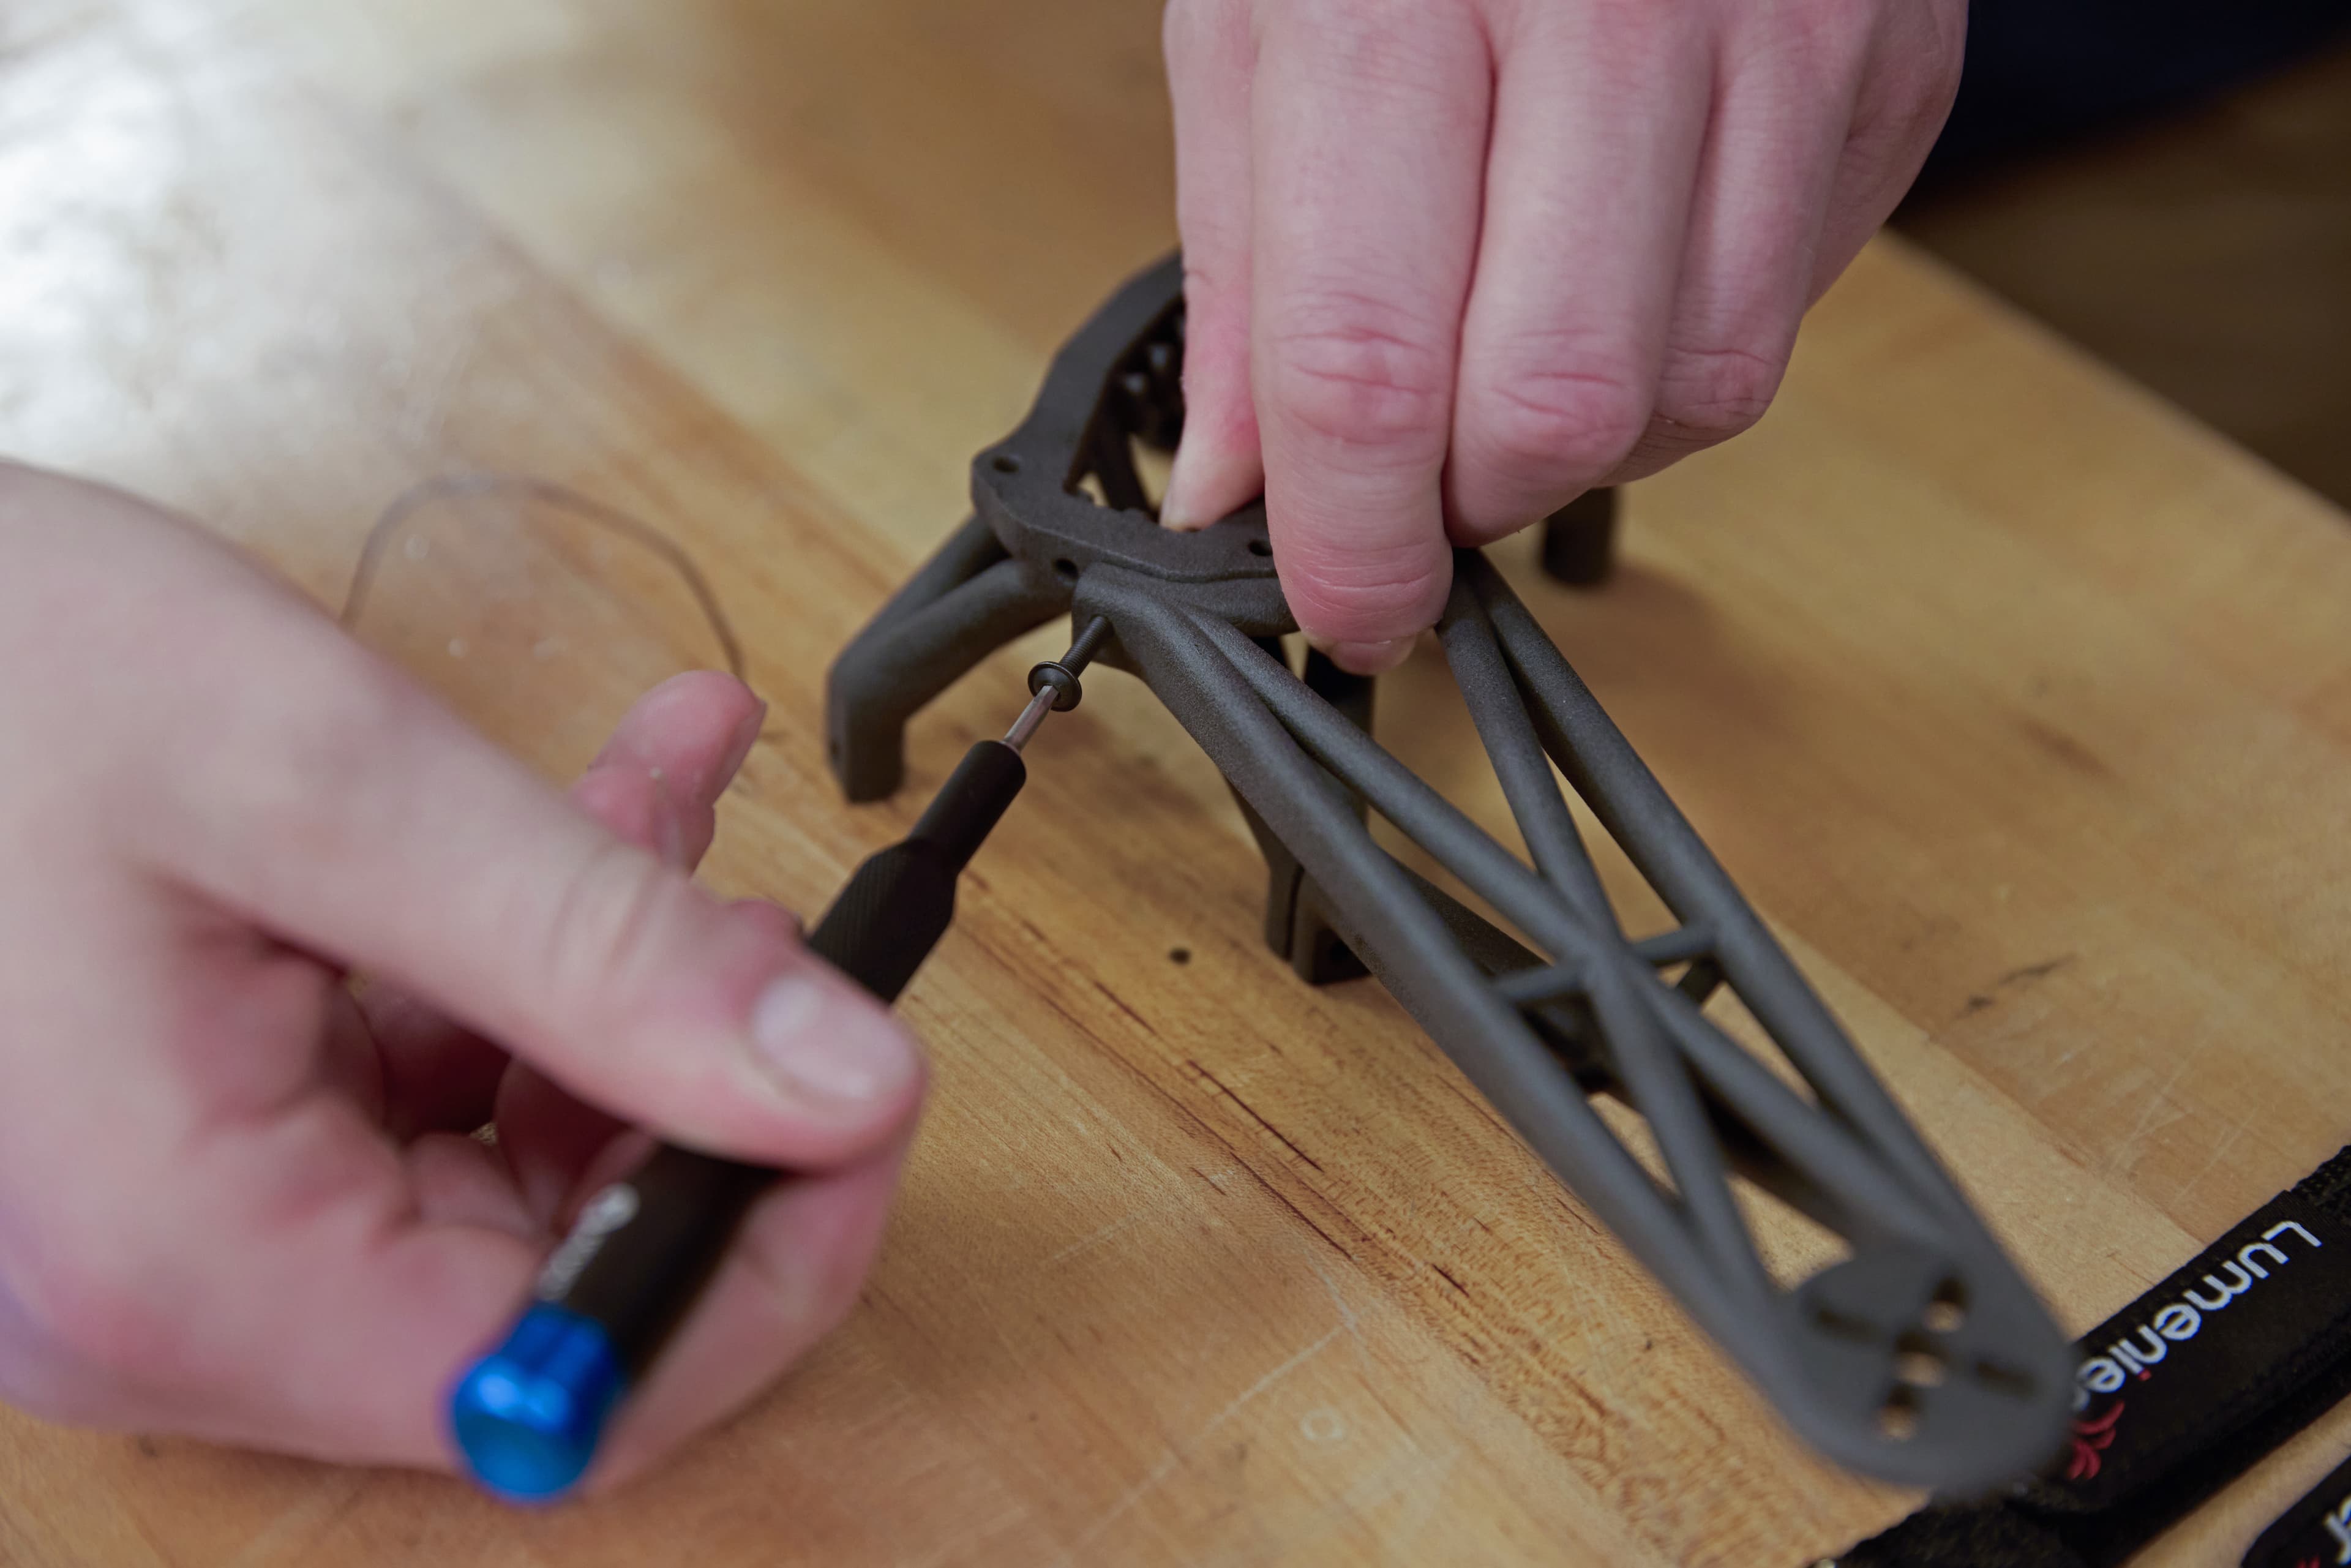
Almost every drone build, whether mass-produced FPV or customized, starts by connecting the motor arms to the base so that you can attach your stack. 3D printed frames allow you to design a drone around existing, off-the-shelf parts rather than making disparate parts fit together.
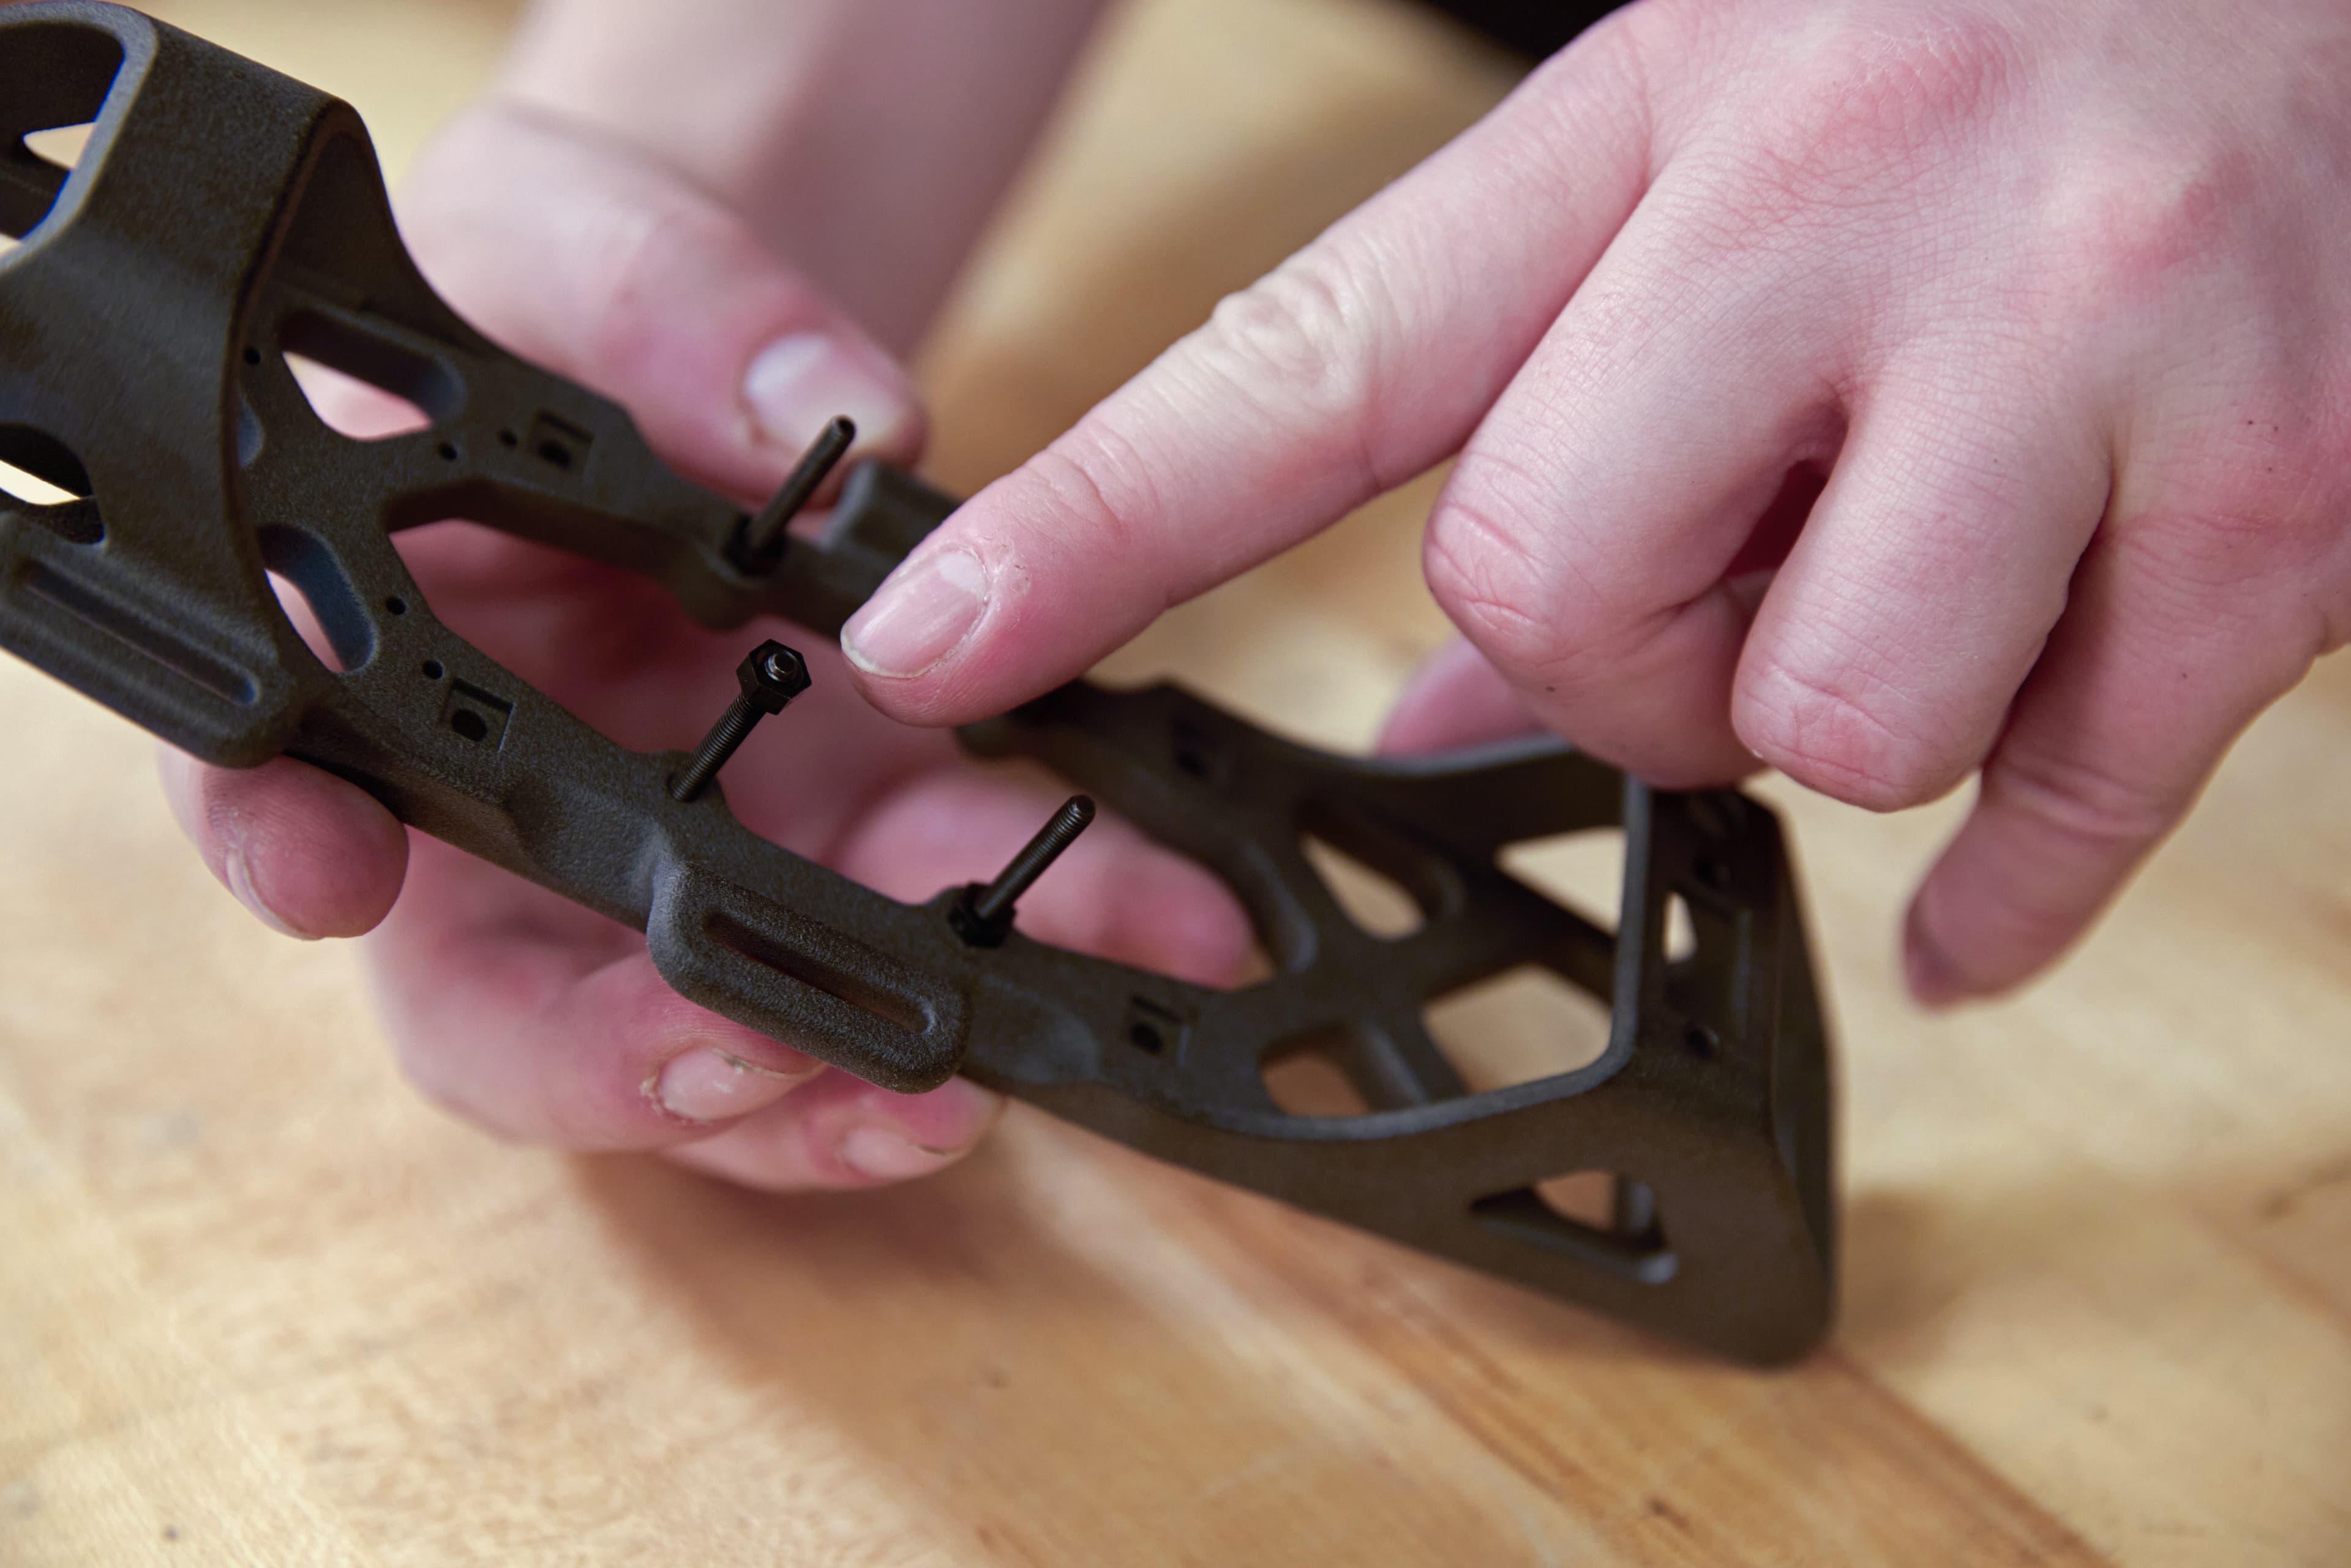
Dip your M3 screws in a tiny bit of Loctite rather than applying the Loctite to the thread directly. Leave your screws slightly loose while you ensure alignment is correct, then go through and tighten them all down to create a tight fit.
Here, we’ve designed certain things for ease-of-assemby. The drone base has slots that capture the square nuts, so you can secure the arms without holding the nuts in place. The drone design is also fully parametric, so if we want to change one feature’s size or shape, the rest of the drone will change accordingly.
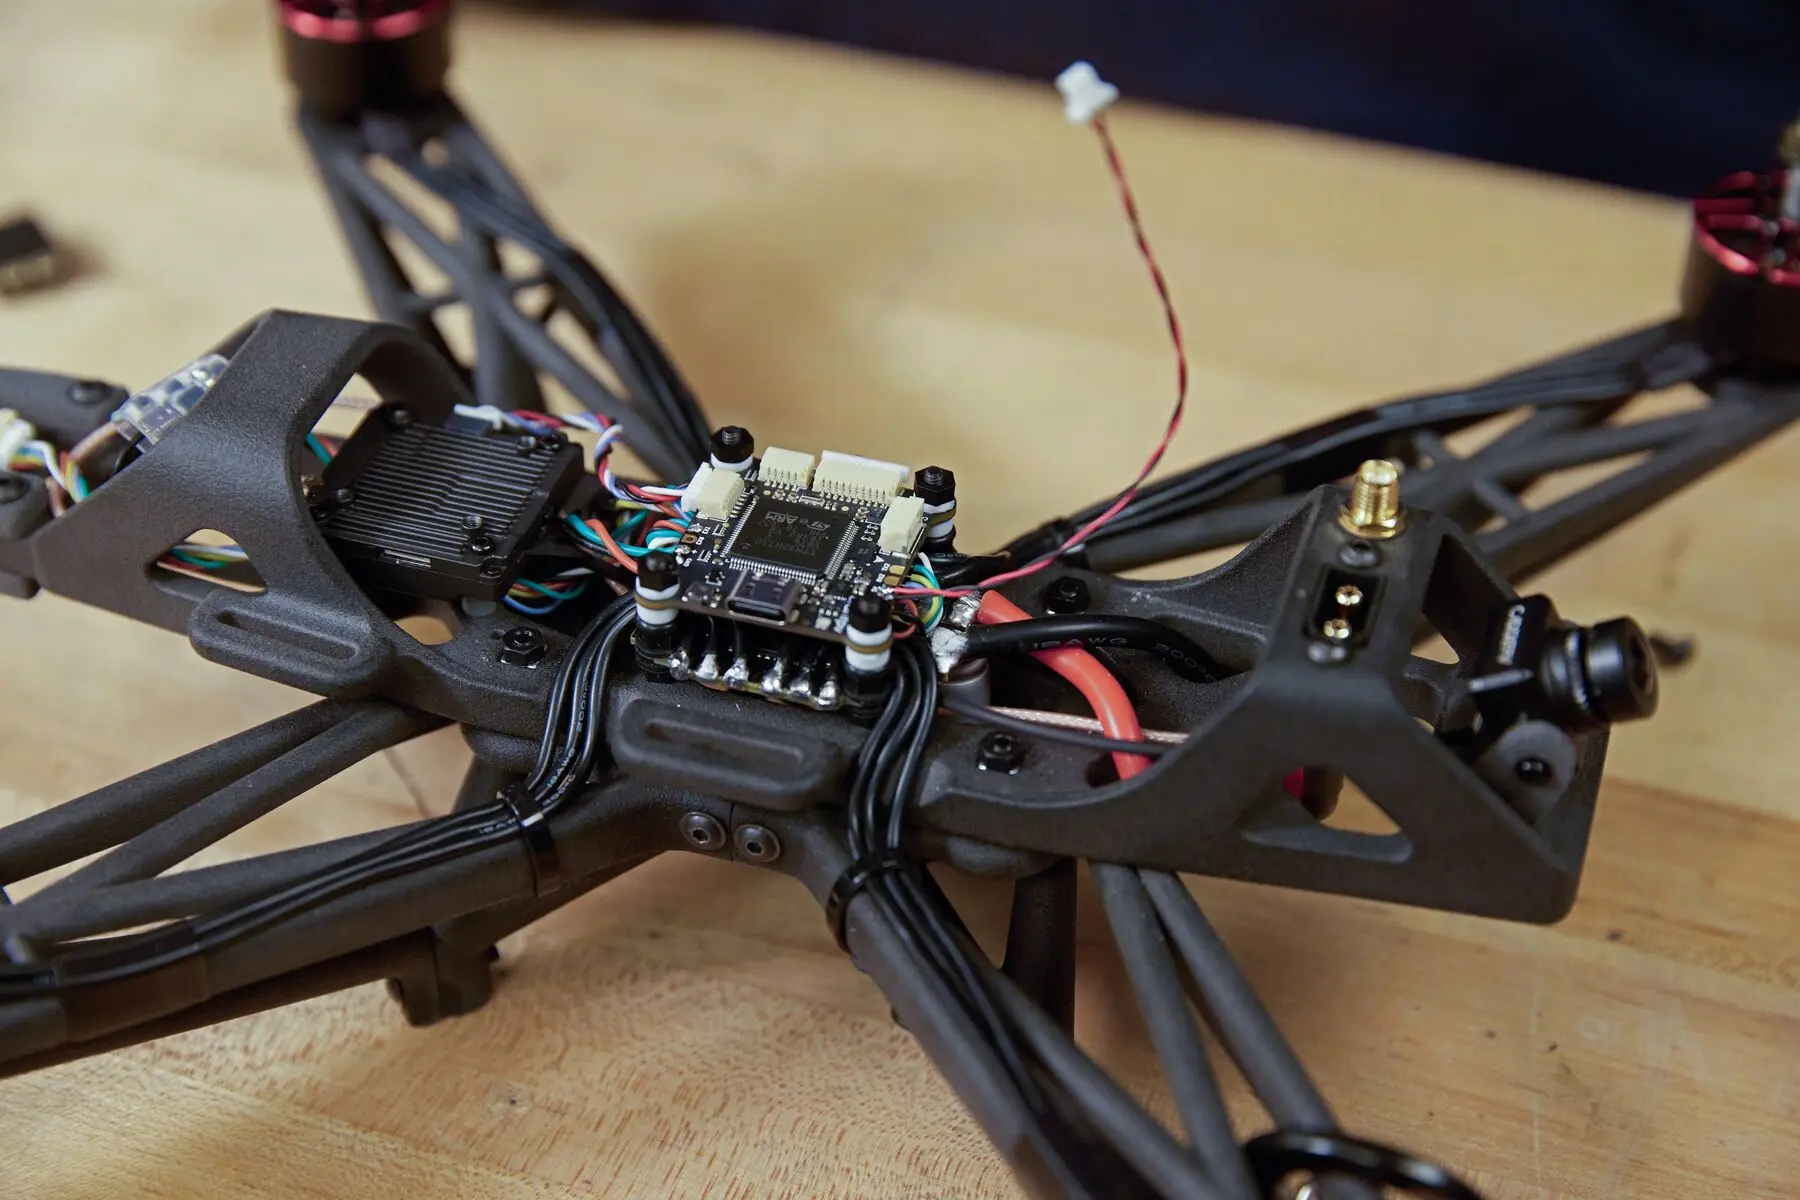
Step 2: Mount Stack Onto Mounting Board
The benefit to having a modular design with a separate base, mounting boards, and arms, is flexibility. If you would like to change your stack to run a specific type of hardware/firmware or change your ESC to accommodate different sets of motors, you can easily switch out your mounting board without completely reconfiguring your drone design.
Spacers are used to ensure there is adequate airflow around and below the Electrical Speed Controller to avoid overheating and damaging components.
We used flush mount screws with pre-designed countersink holes, so that the screws will lay flat on the bottom of the mounting board and maintain a precise fit of all the assembled components.
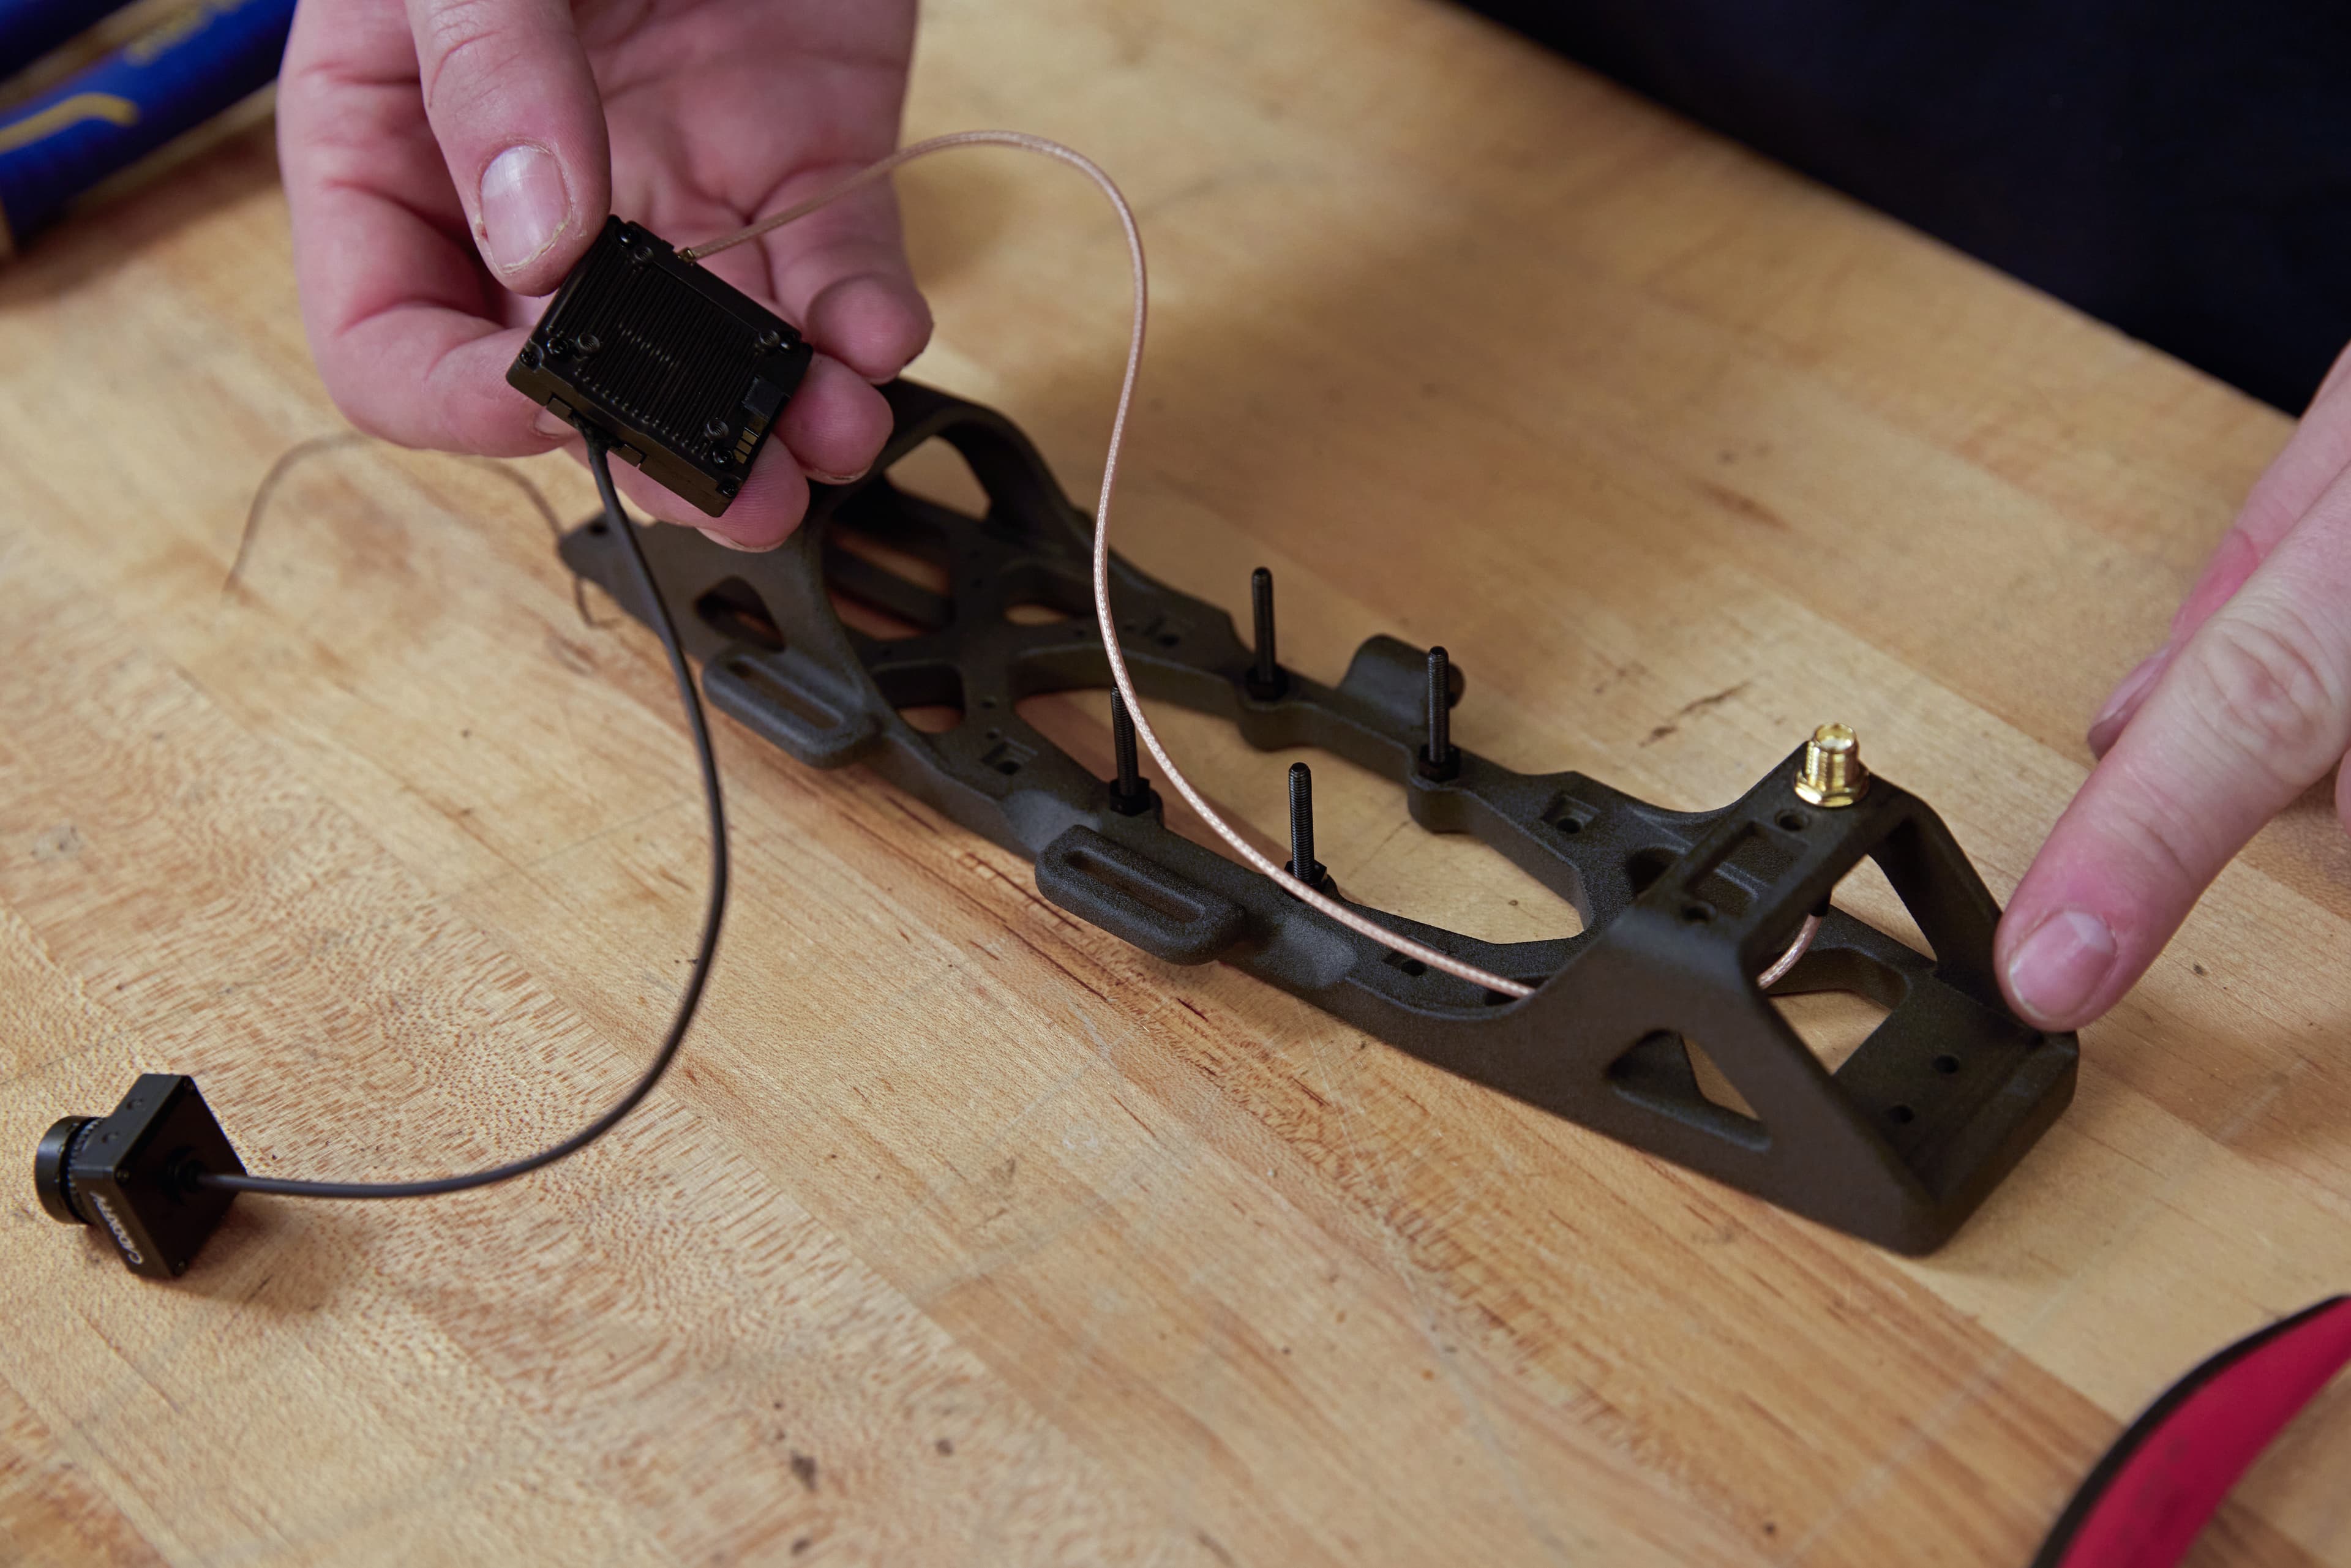
Step 3: Install the VTX
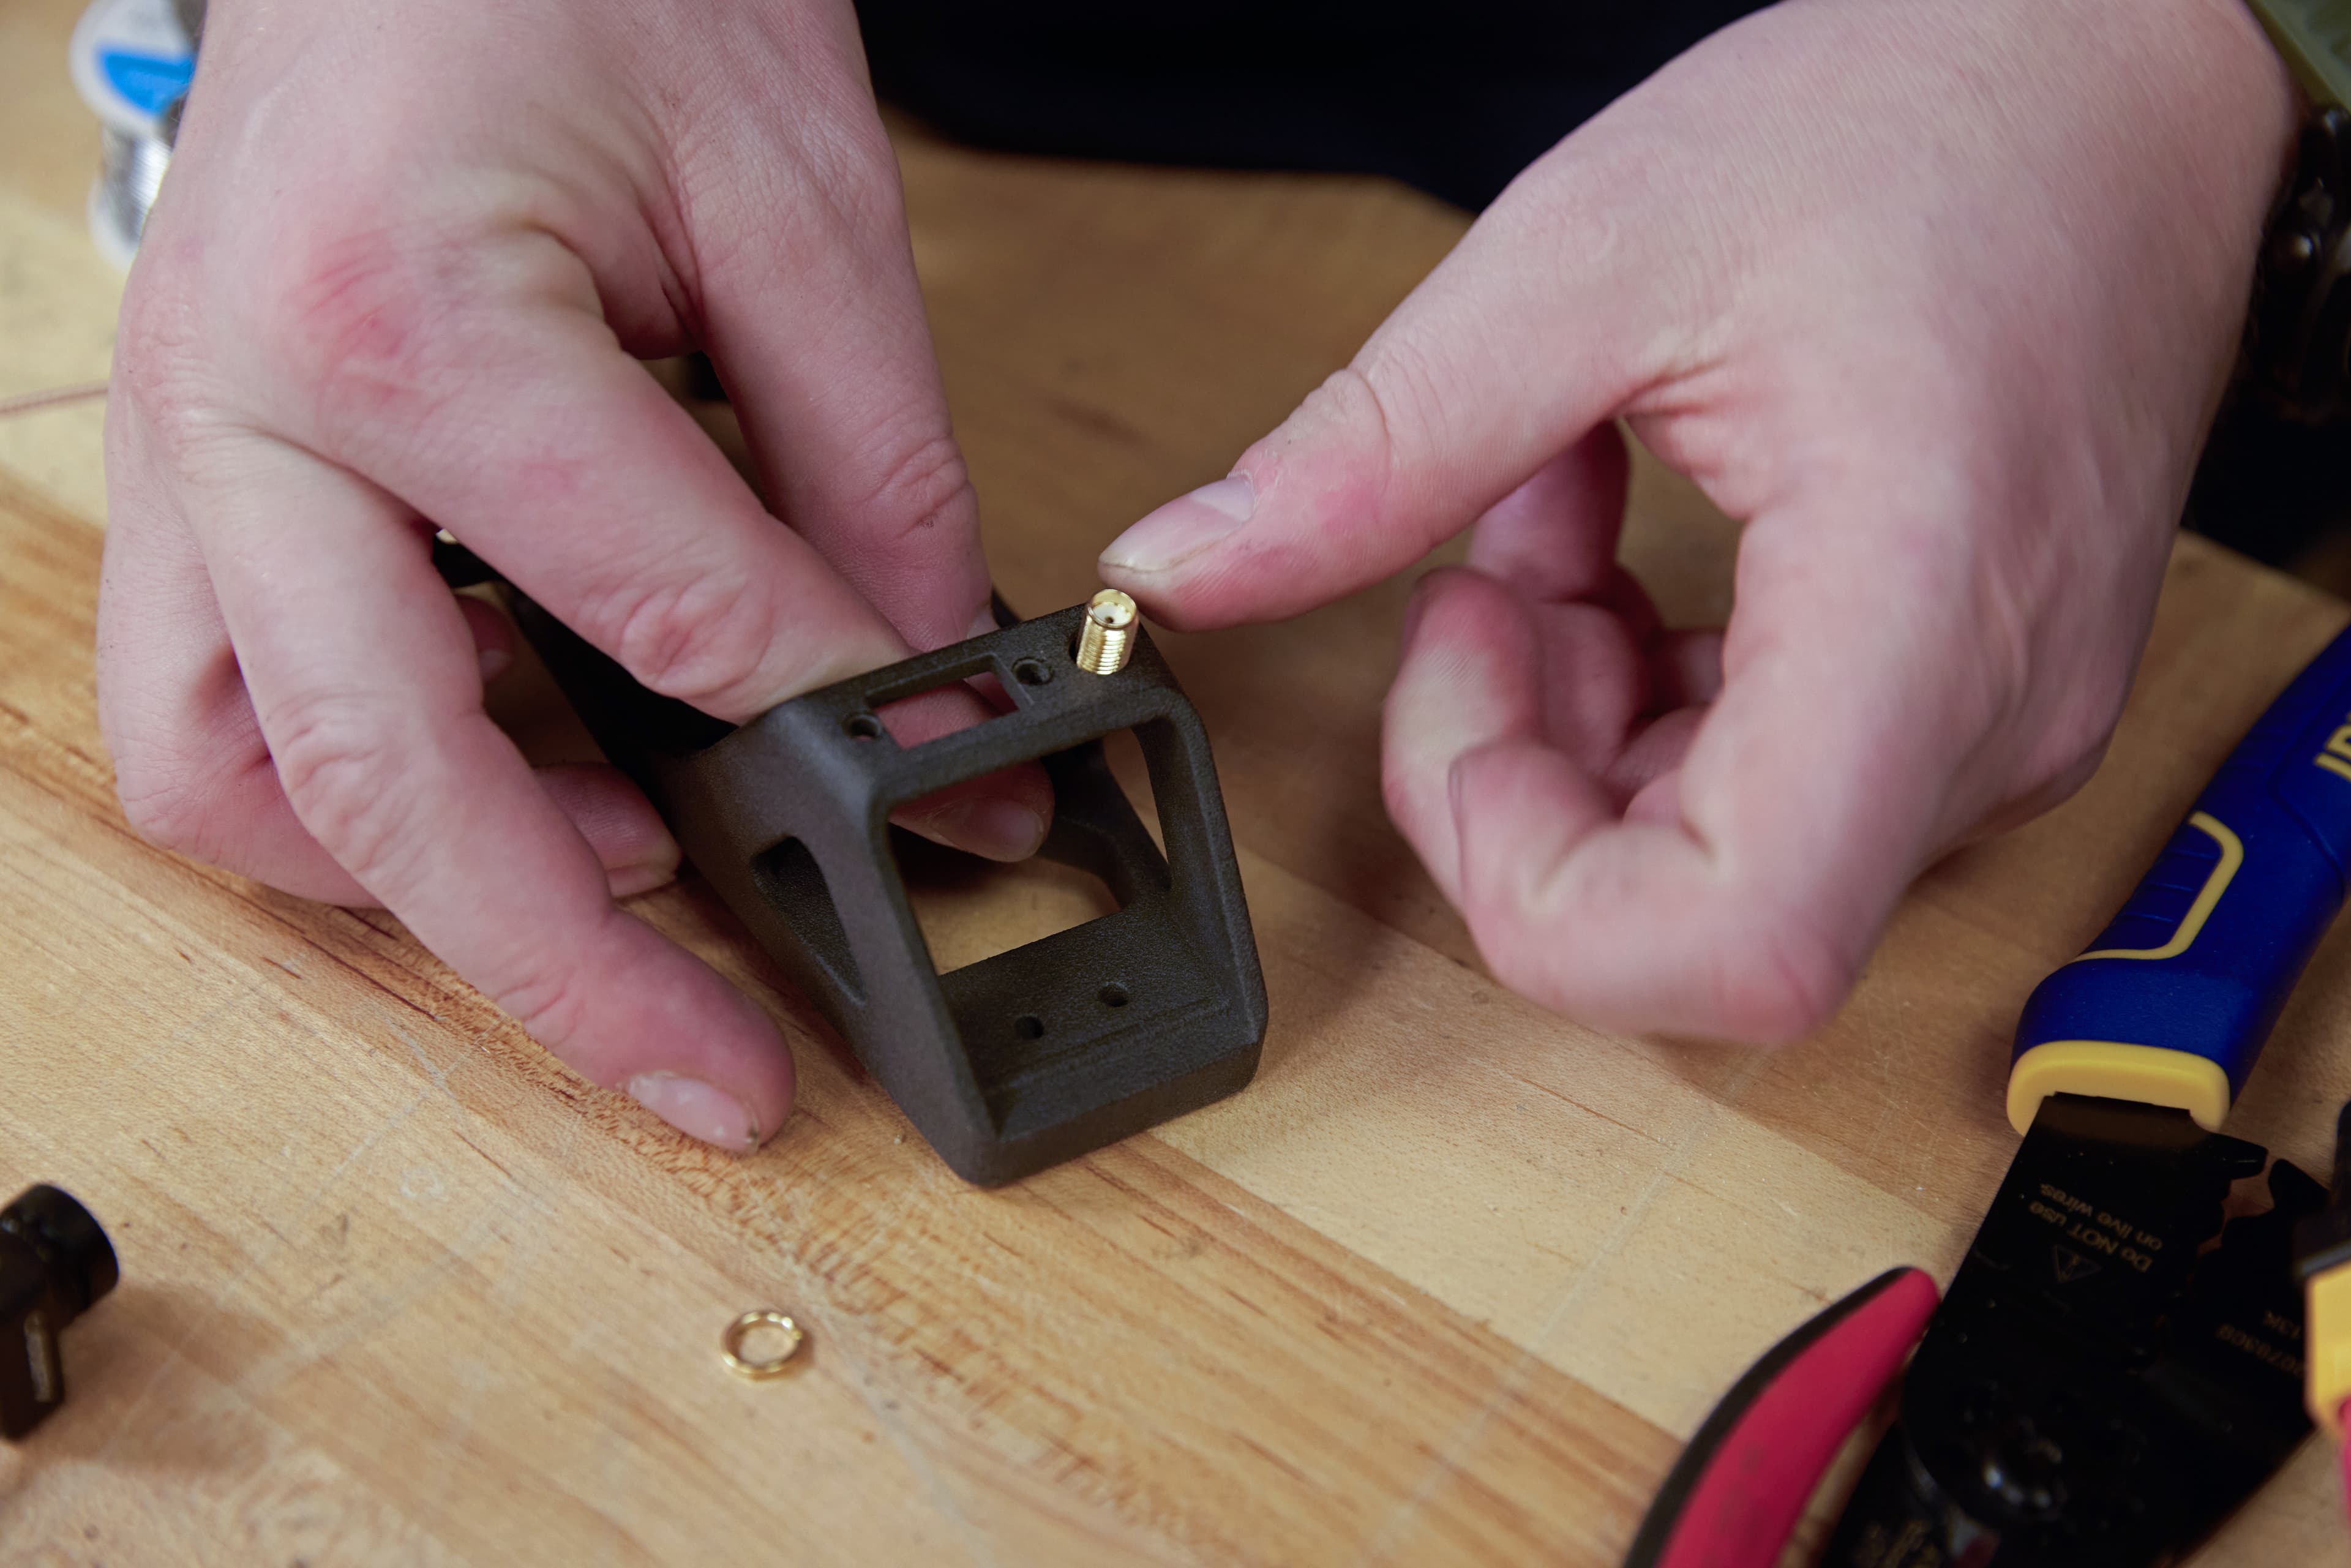

Place a brass nut around the SMA connector and tighten it to mount the antenna connector to the frame. Before positioning the Video Transmitter (VTX) onto the frame, push the screws through the bottom of the mounting board holes that match the mounting pattern. Place spacers onto the screws and secure the VTX to the mounting board. The screws will be slightly loose until you can ensure proper alignment, then fully tighten them.
The traditional placement of the Video Transmitter (VTX) antenna is at the back of most drones, near items that are either susceptible to RF interference or could cause interference. 3D printing lets us customize this part so that we can place the VTX away from these risks, but that means we do have to ensure correct cable lengths for both the camera and antenna to account for the longer distance between all the components.
Step 4: Mount Camera

Place your FPV camera mount, printed in the TPU 90A Powder, on the mounting board and secure your camera with small screws. TPU 90A Powder is elastomeric and behaves like a rubber, so it’s excellent for vibration-dampening components like this camera mount.
Step 5: Mount Motors
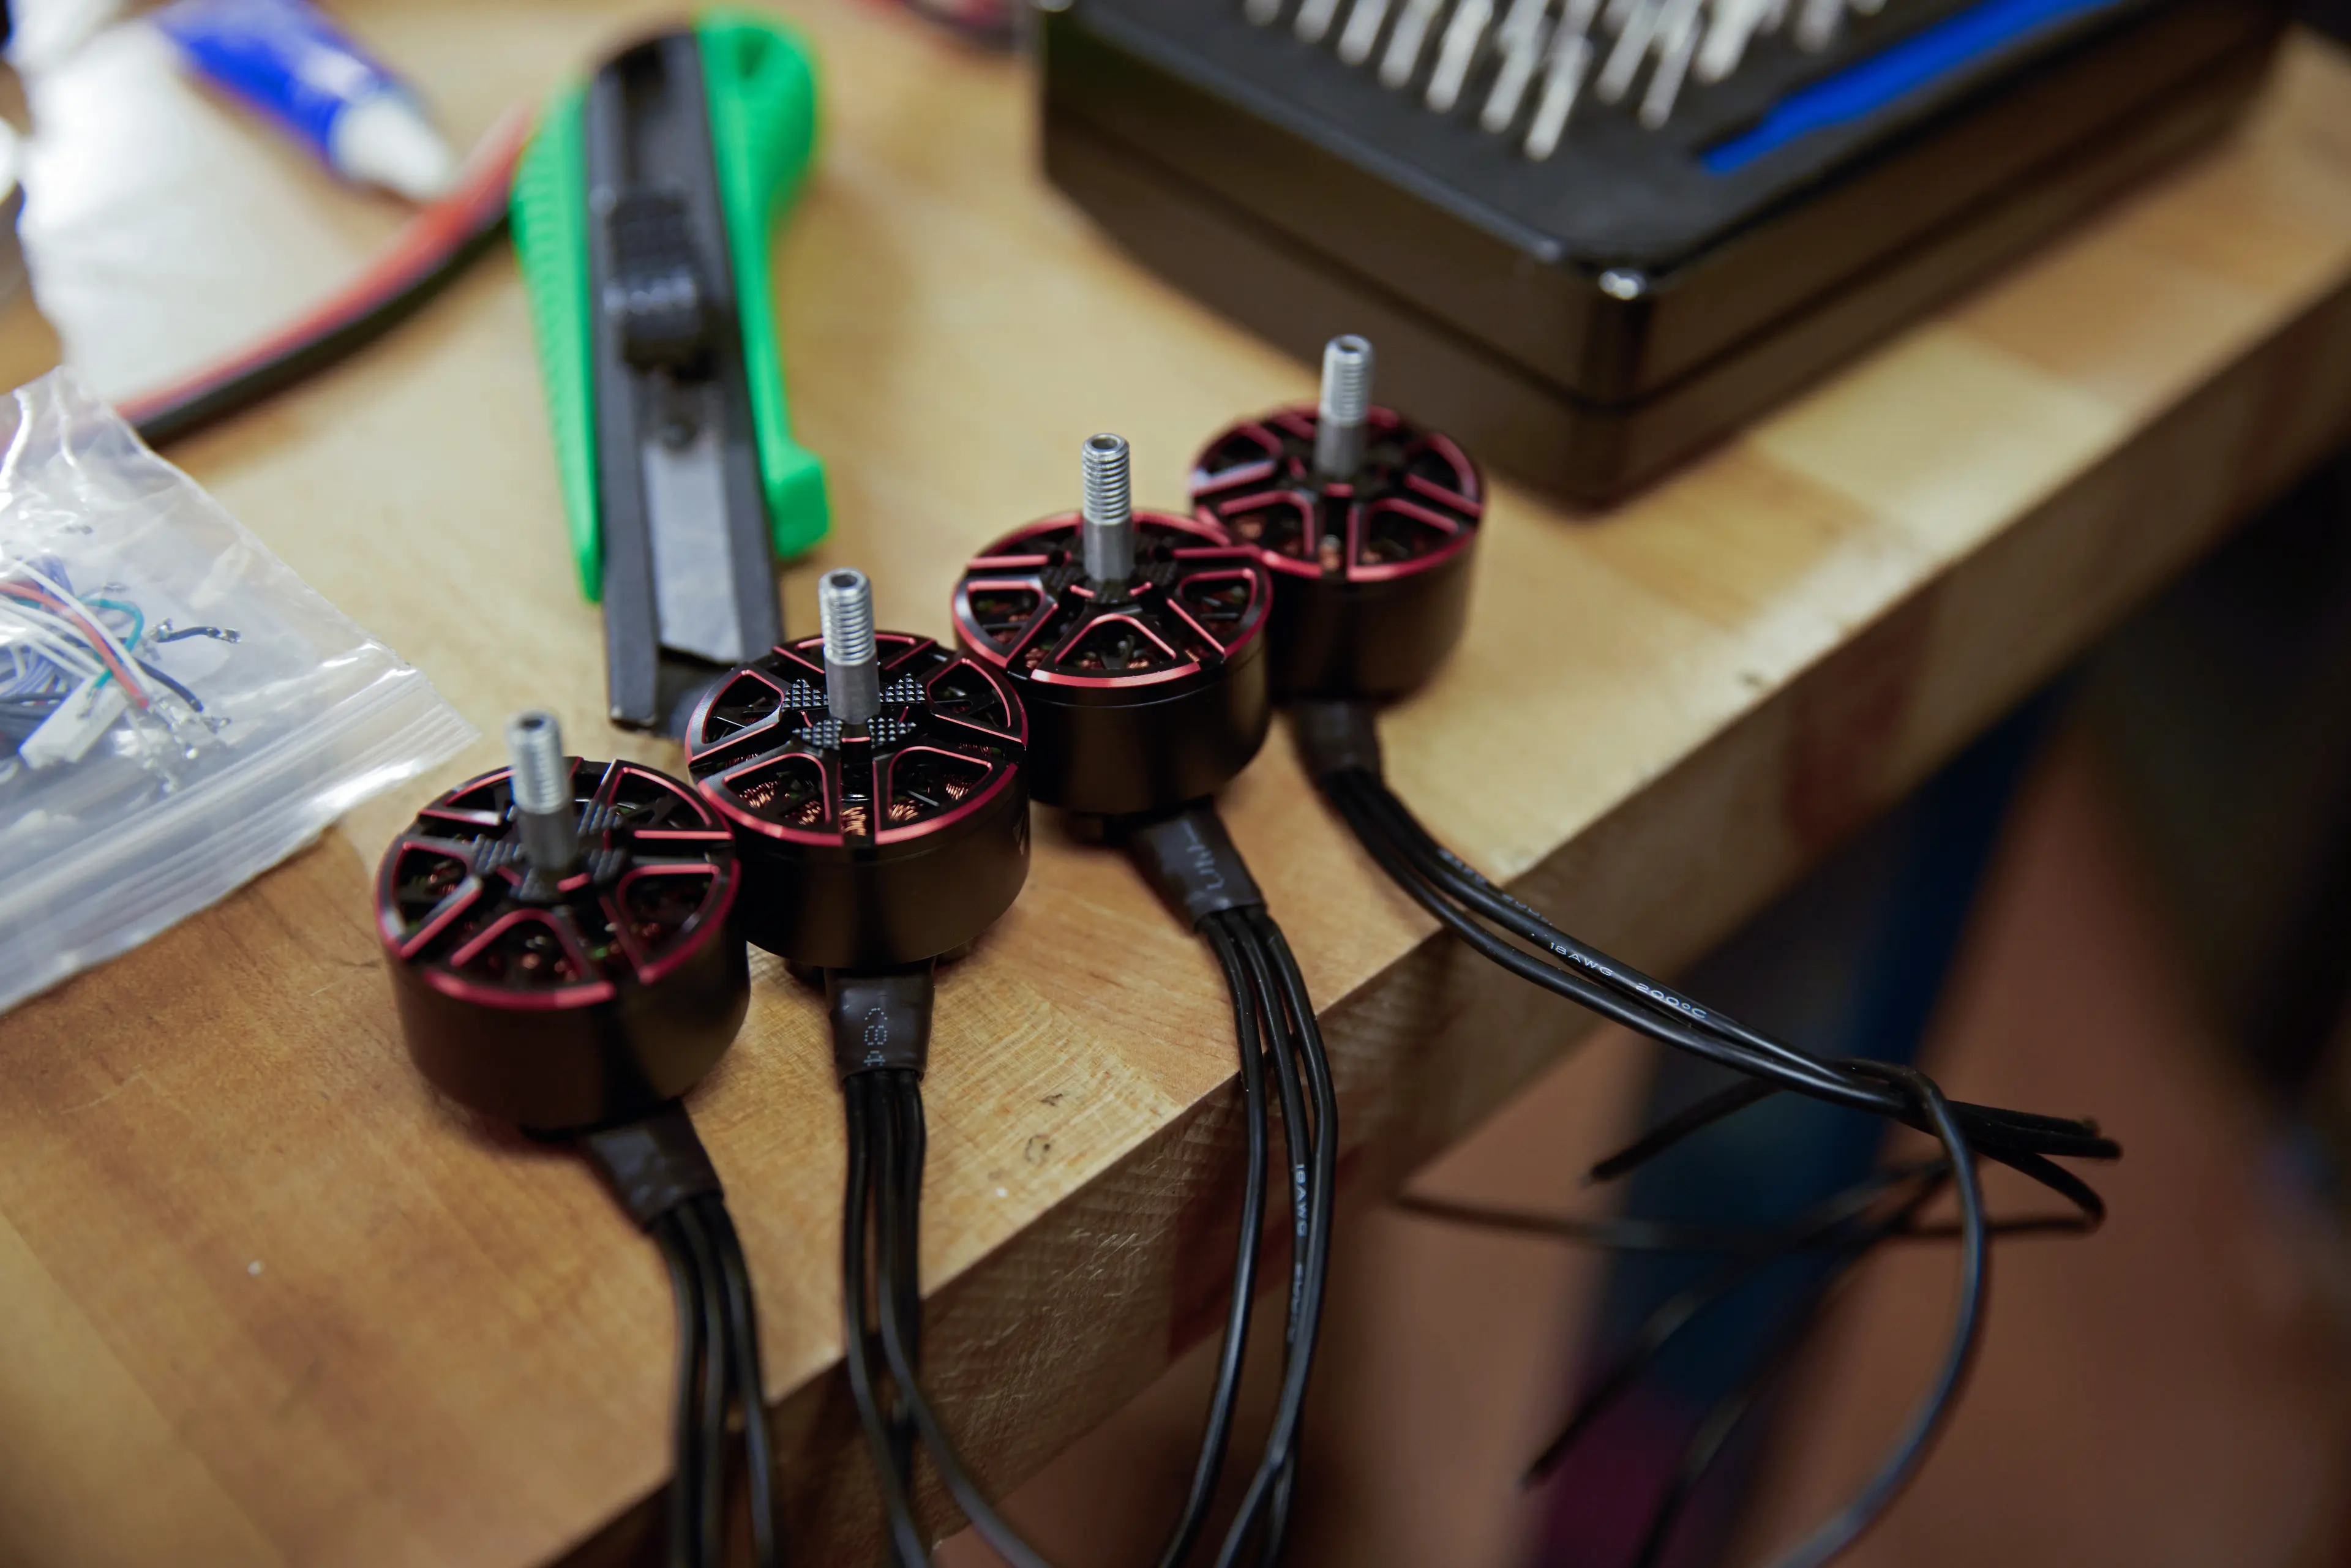
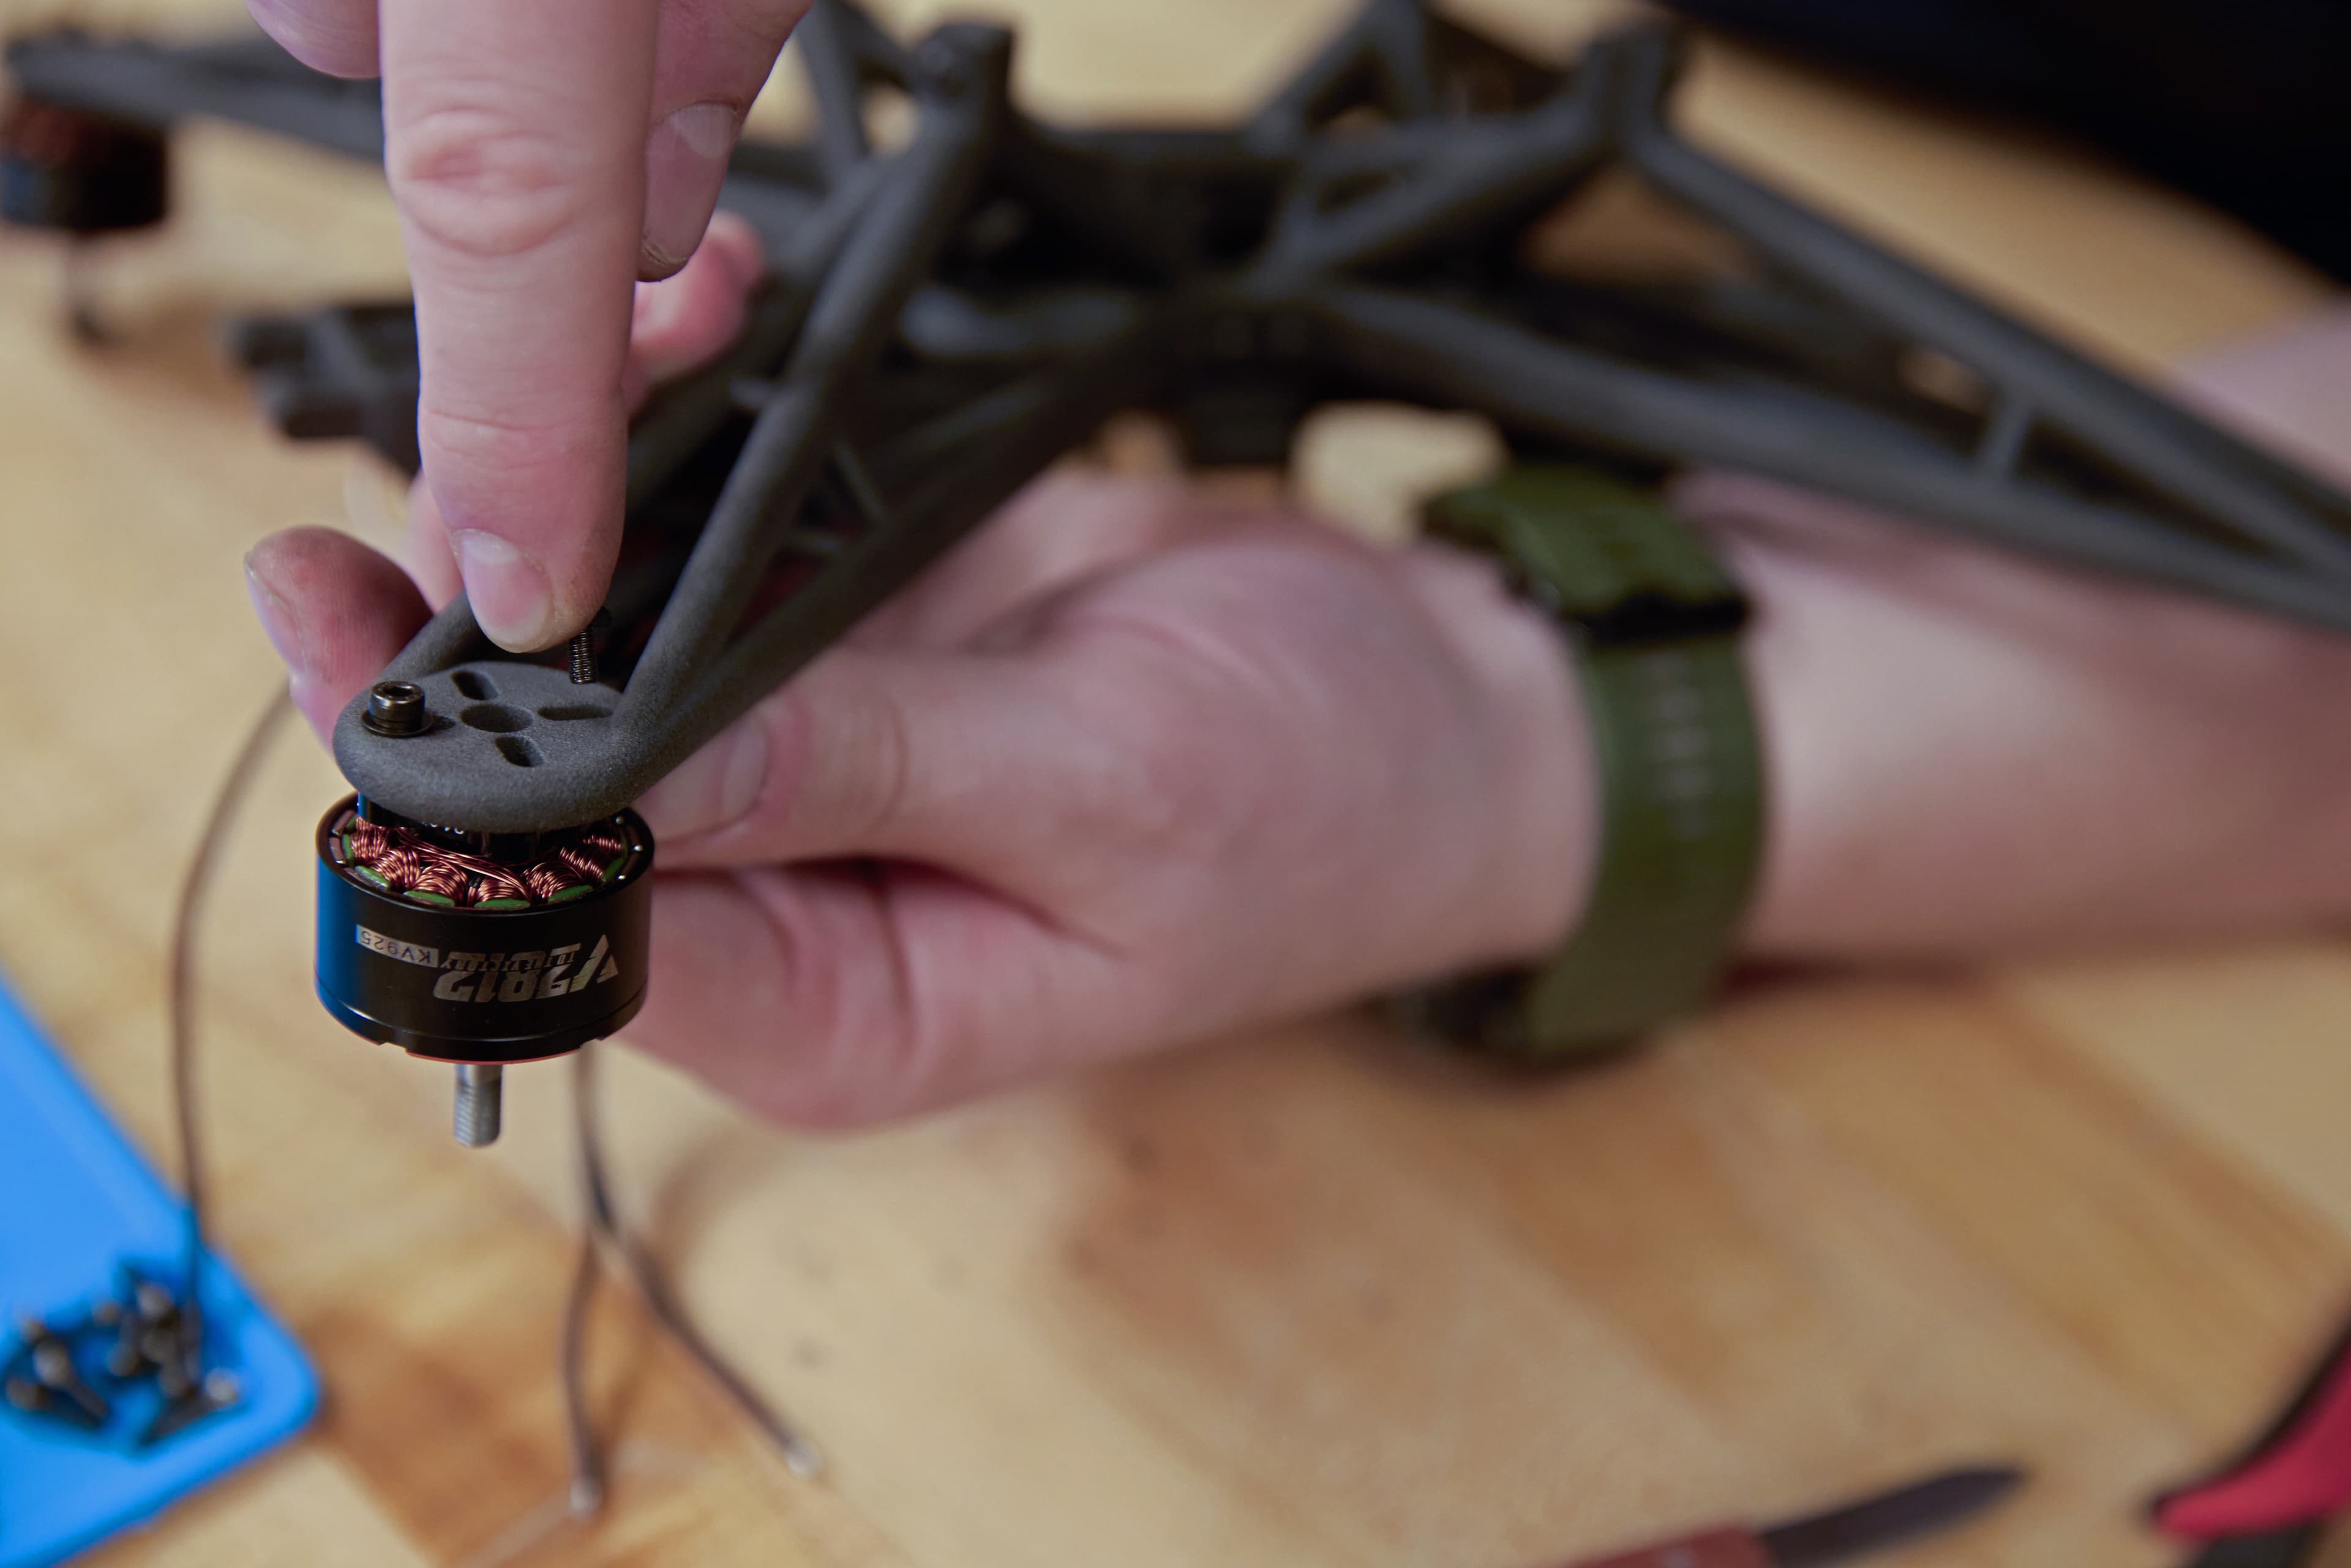
Attaching the motors securely is essential. Use Loctite on the tips of your screws again, and use a washer to distribute the force of the screw going through the nylon material. Keep the screws slightly loose, ensure proper alignment with all four of them in, then tighten fully. Add the nylon locking nut provided with your motor onto the motor shaft, which you will use later.
Step 6: Wire Management
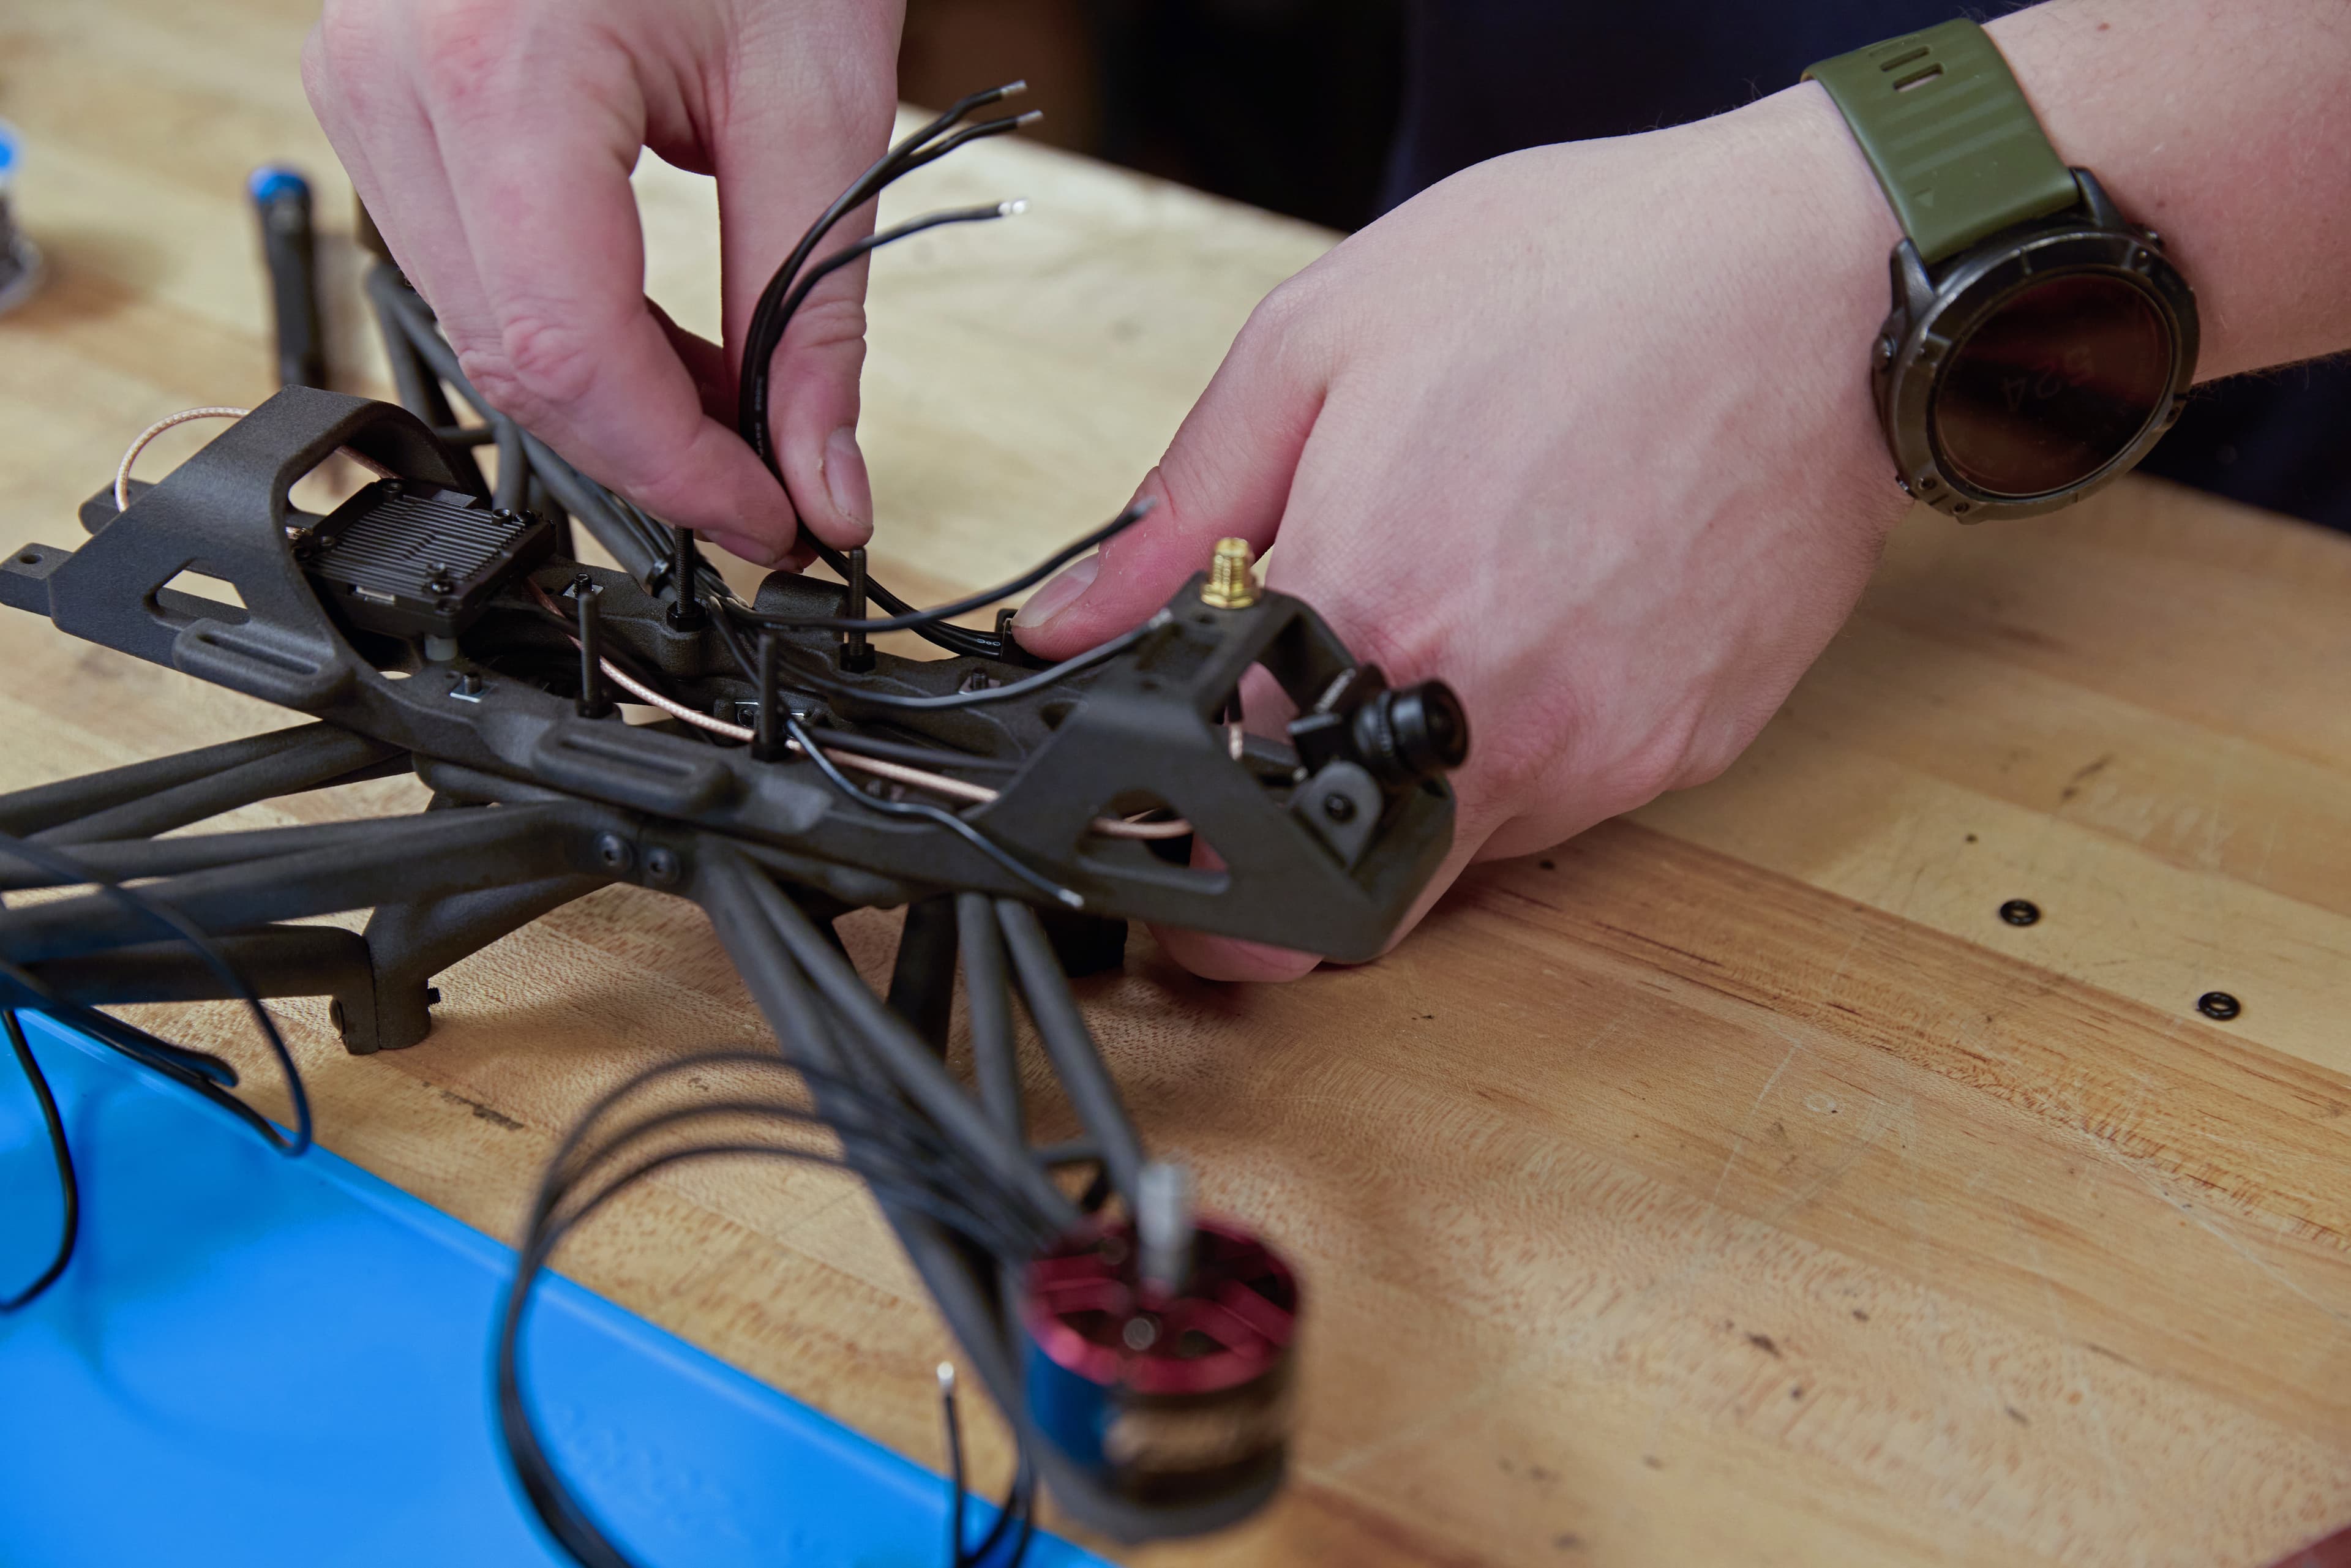
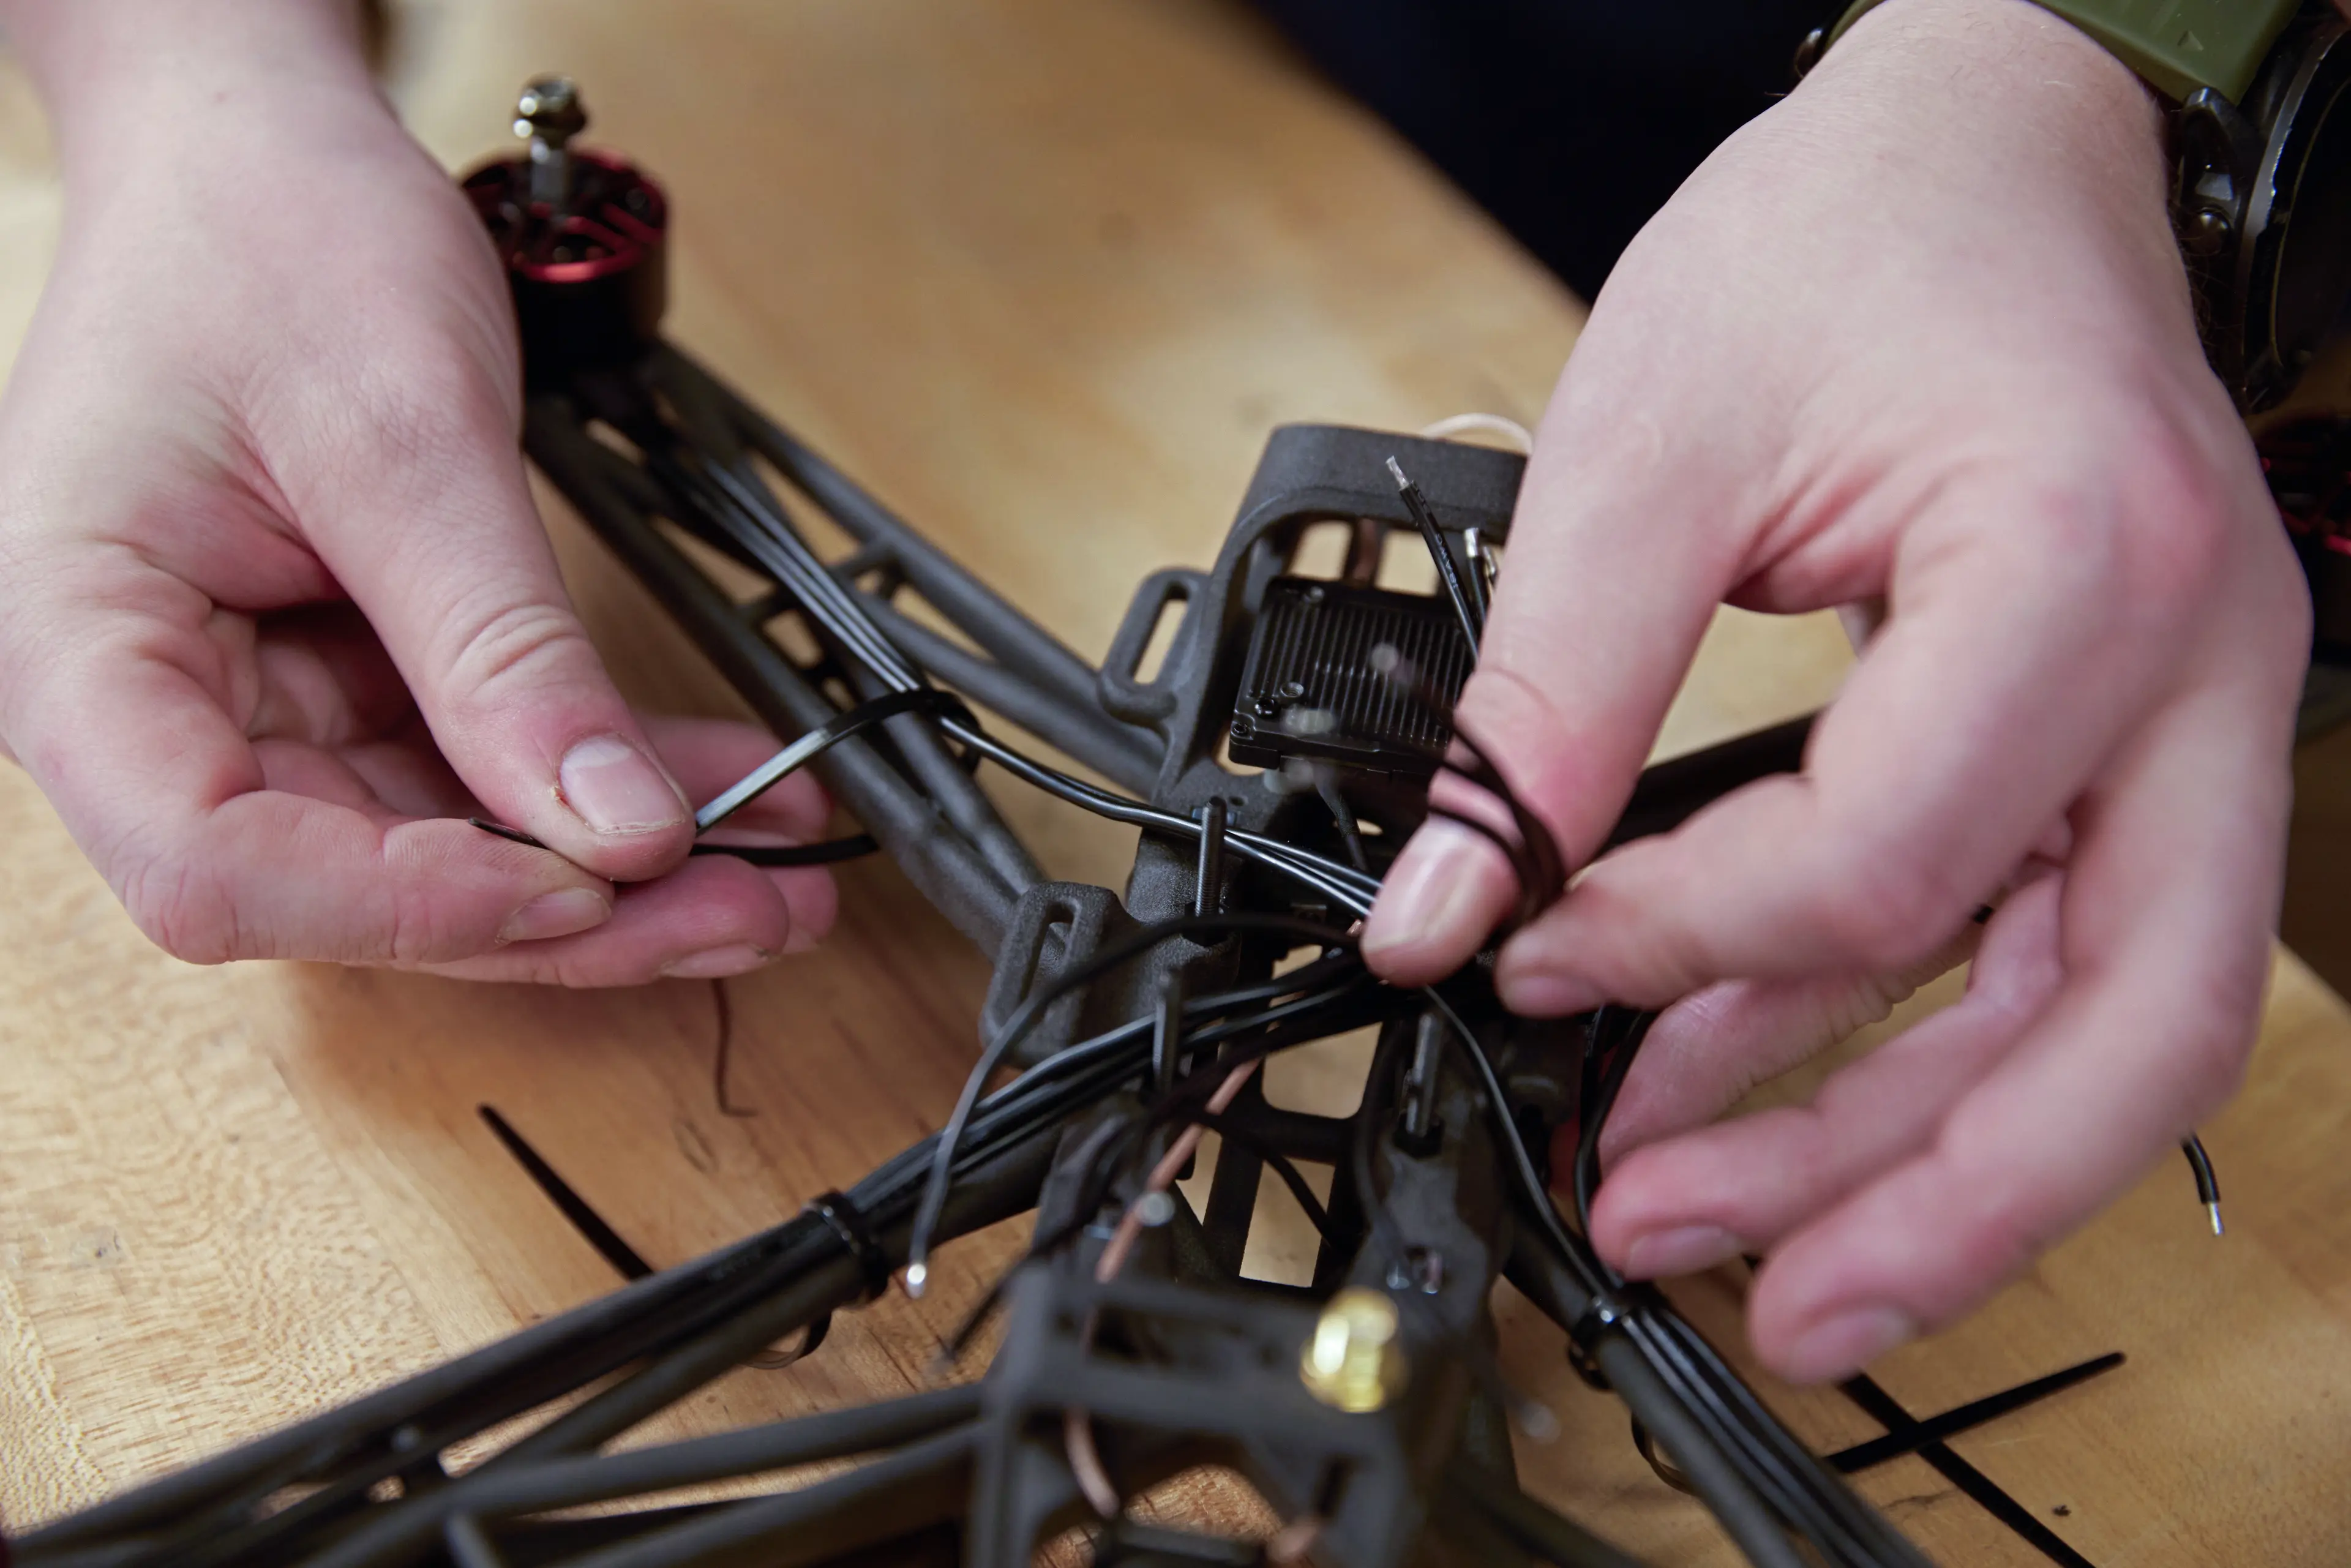
It is good practice to organize your build by zip-typing, electrical taping, or using wire channels to secure the motor wires to the drone arms, being sure to remove slack. This helps you avoid mistakes in the assembly process and reduces the risk of a prop getting caught in a stray wire.
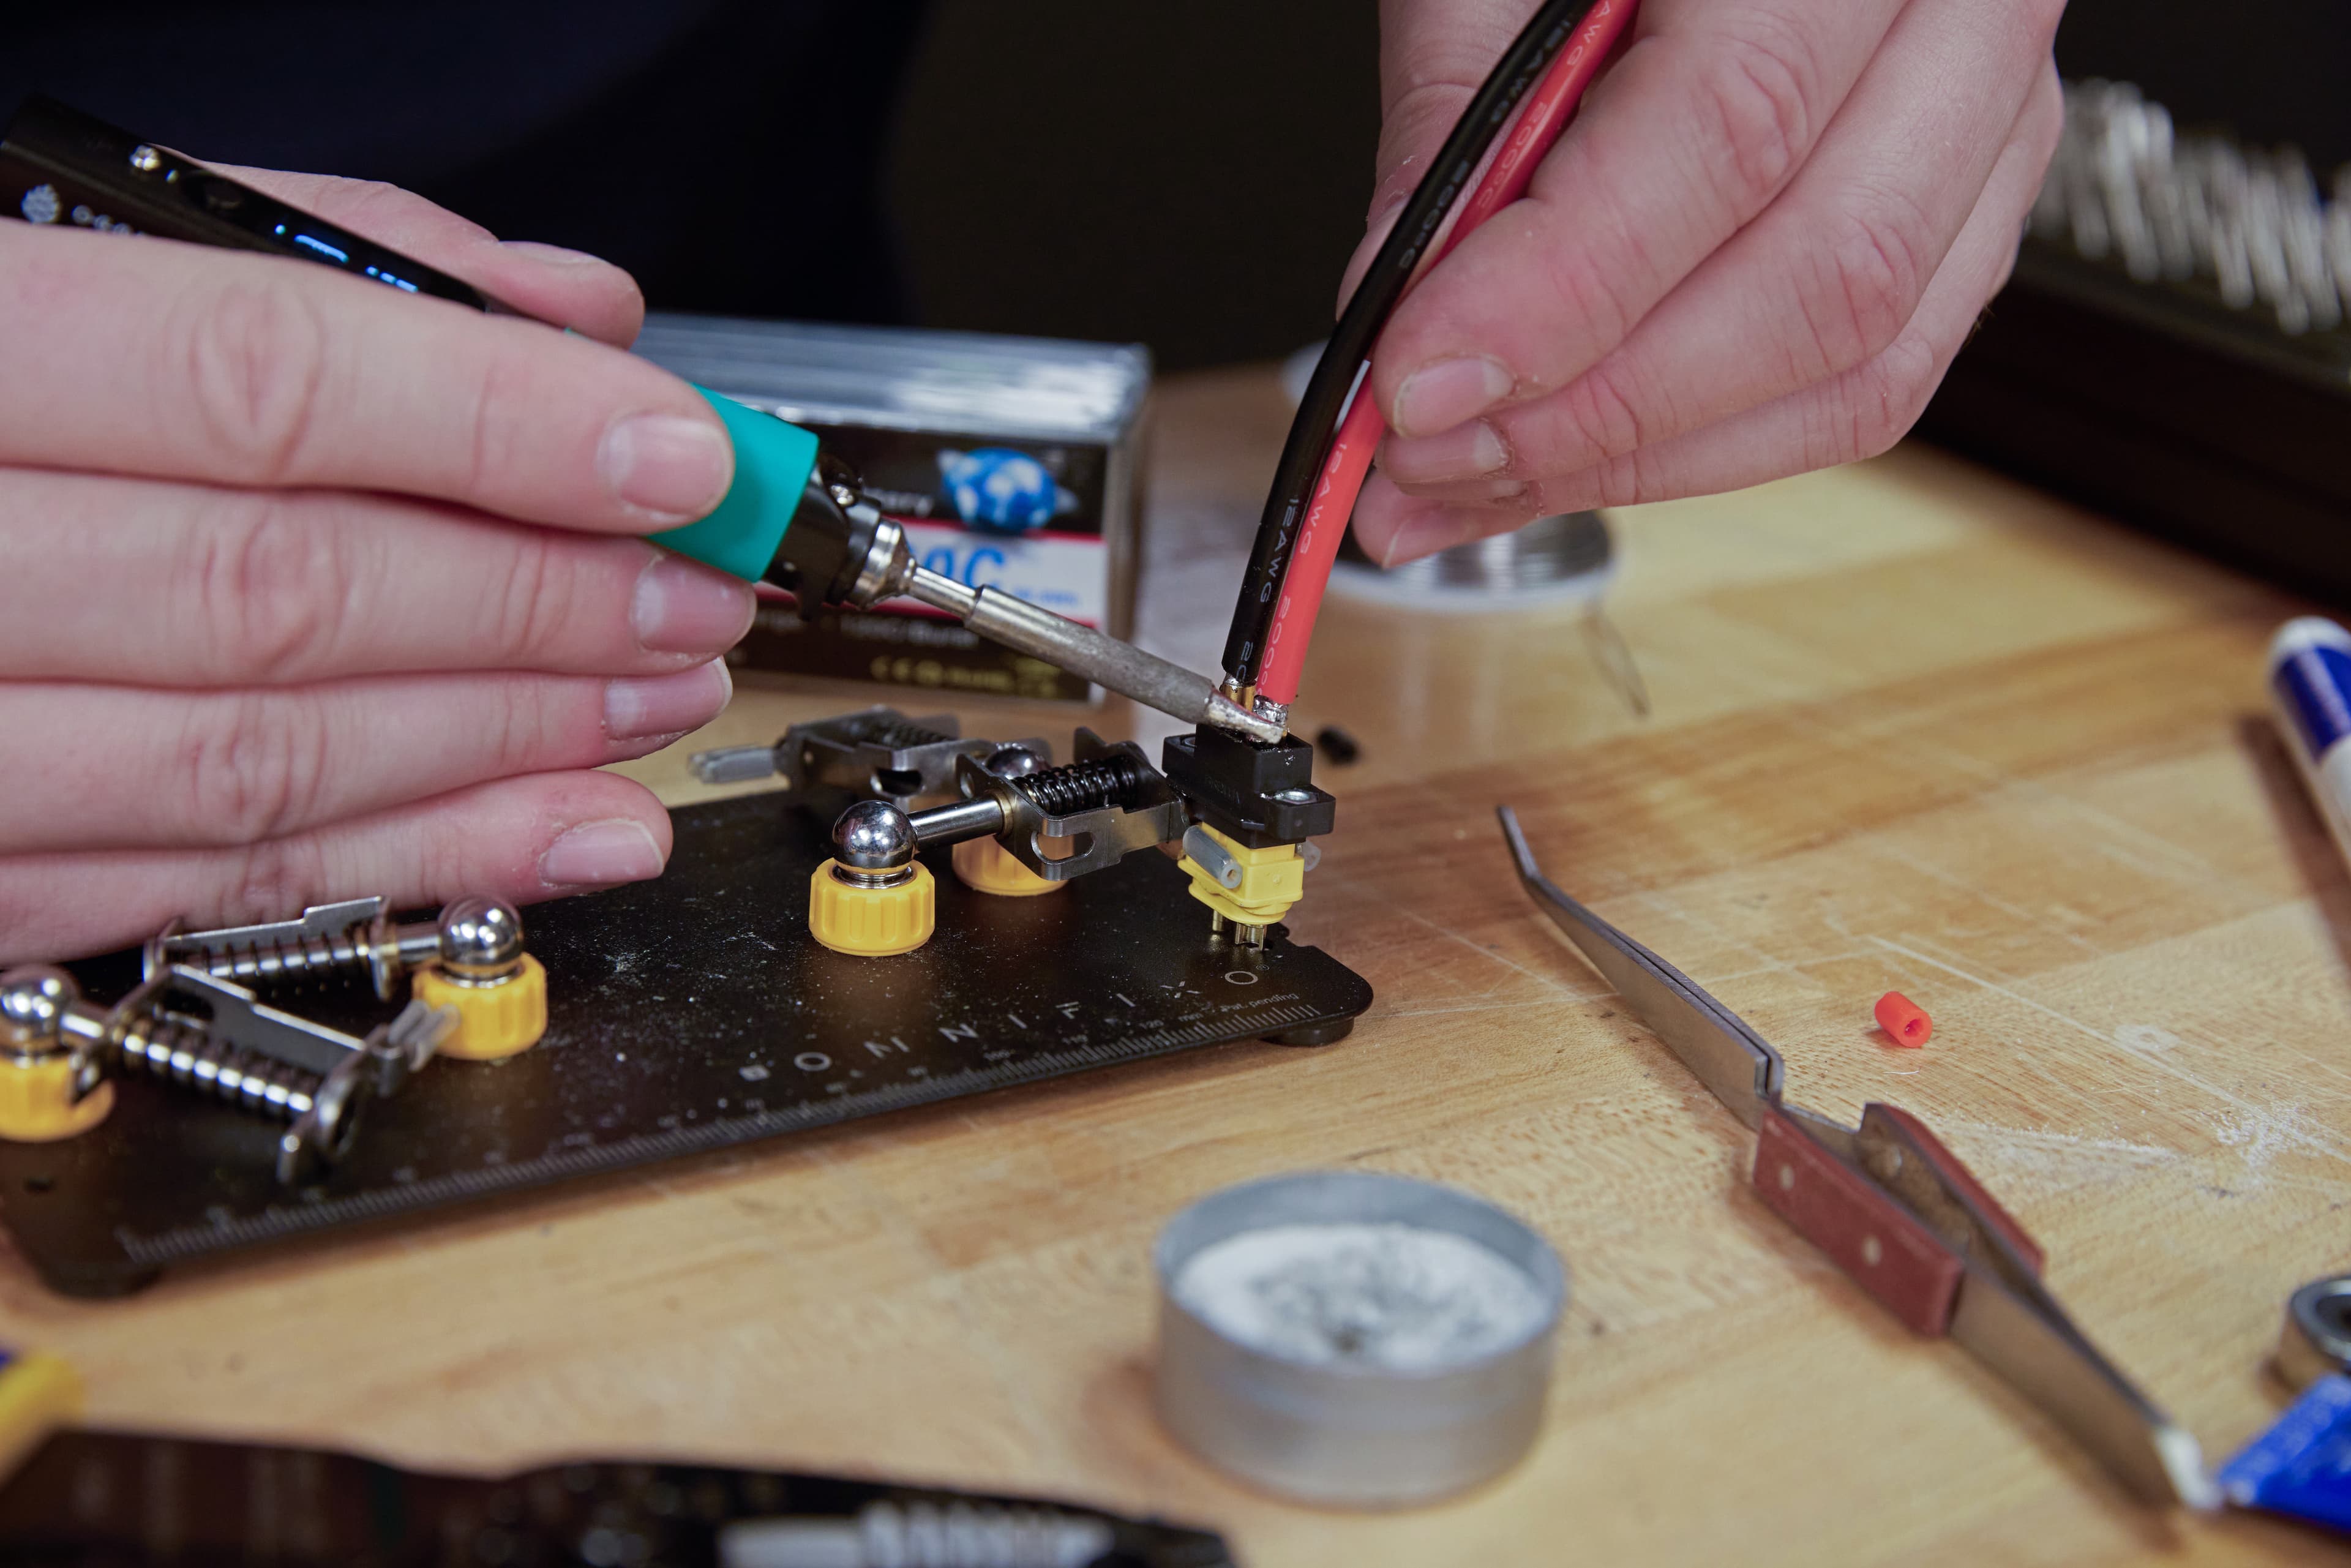
Step 7: Electronic Speed Controller (ESC) Installation
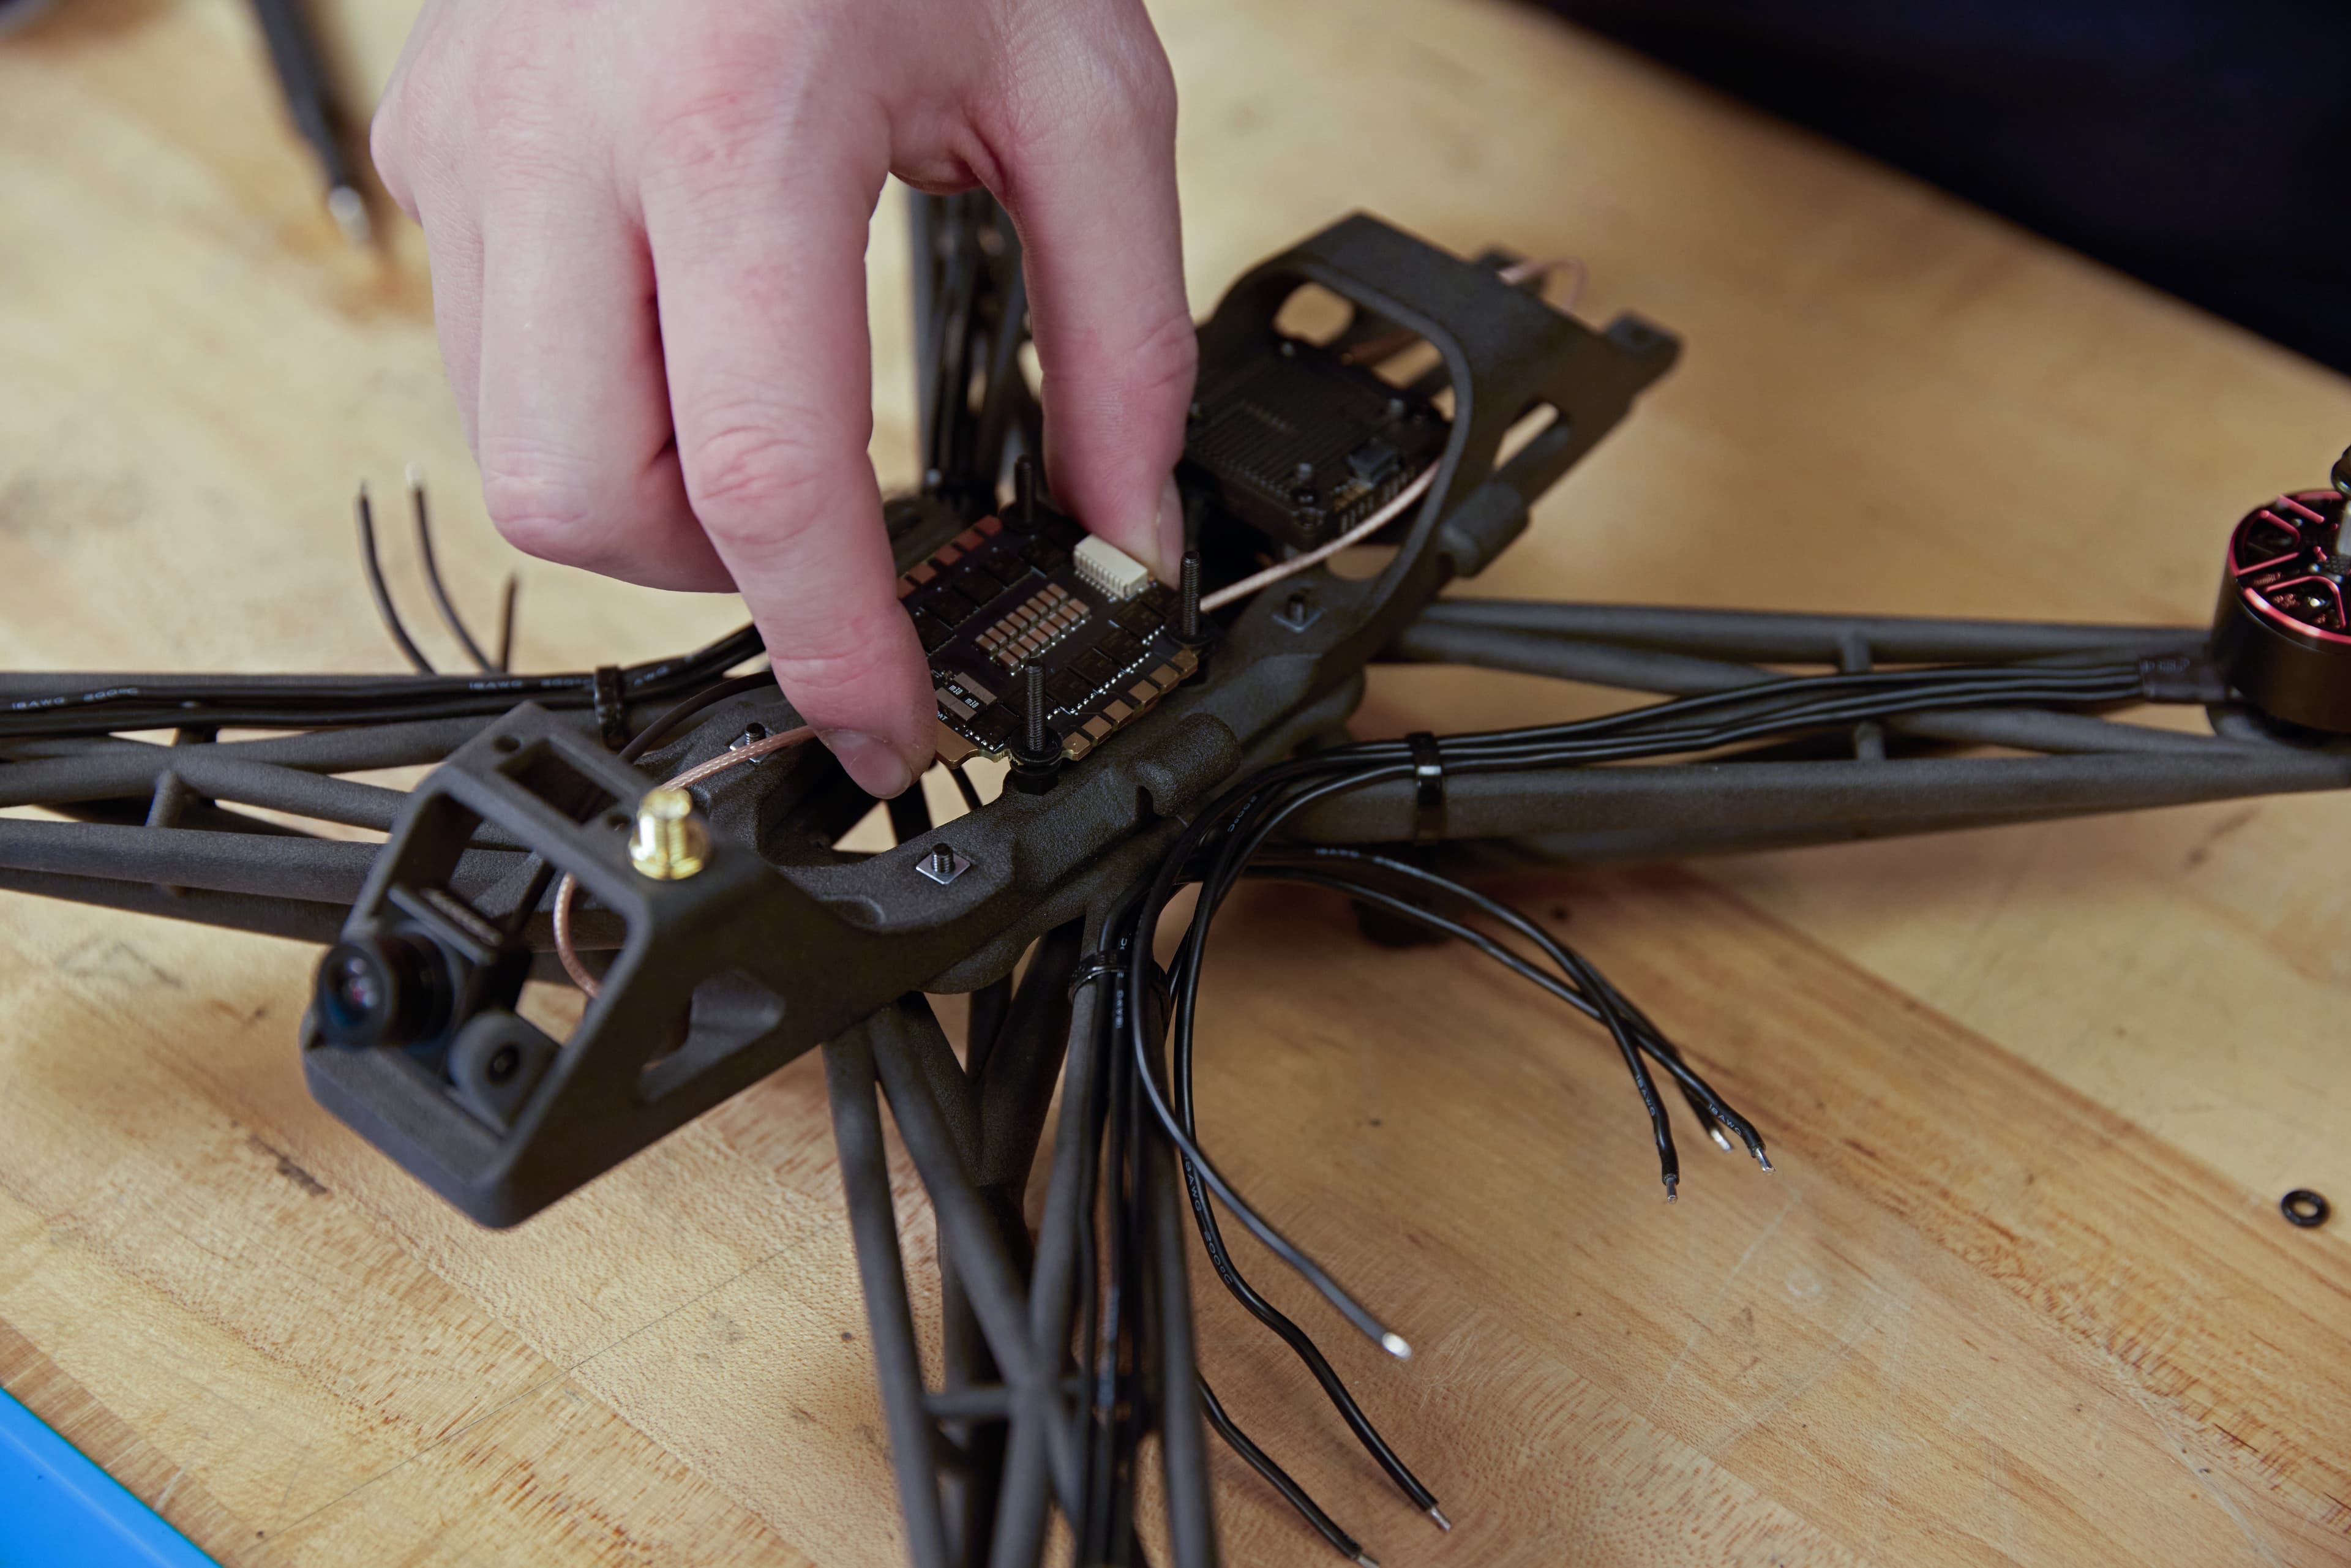
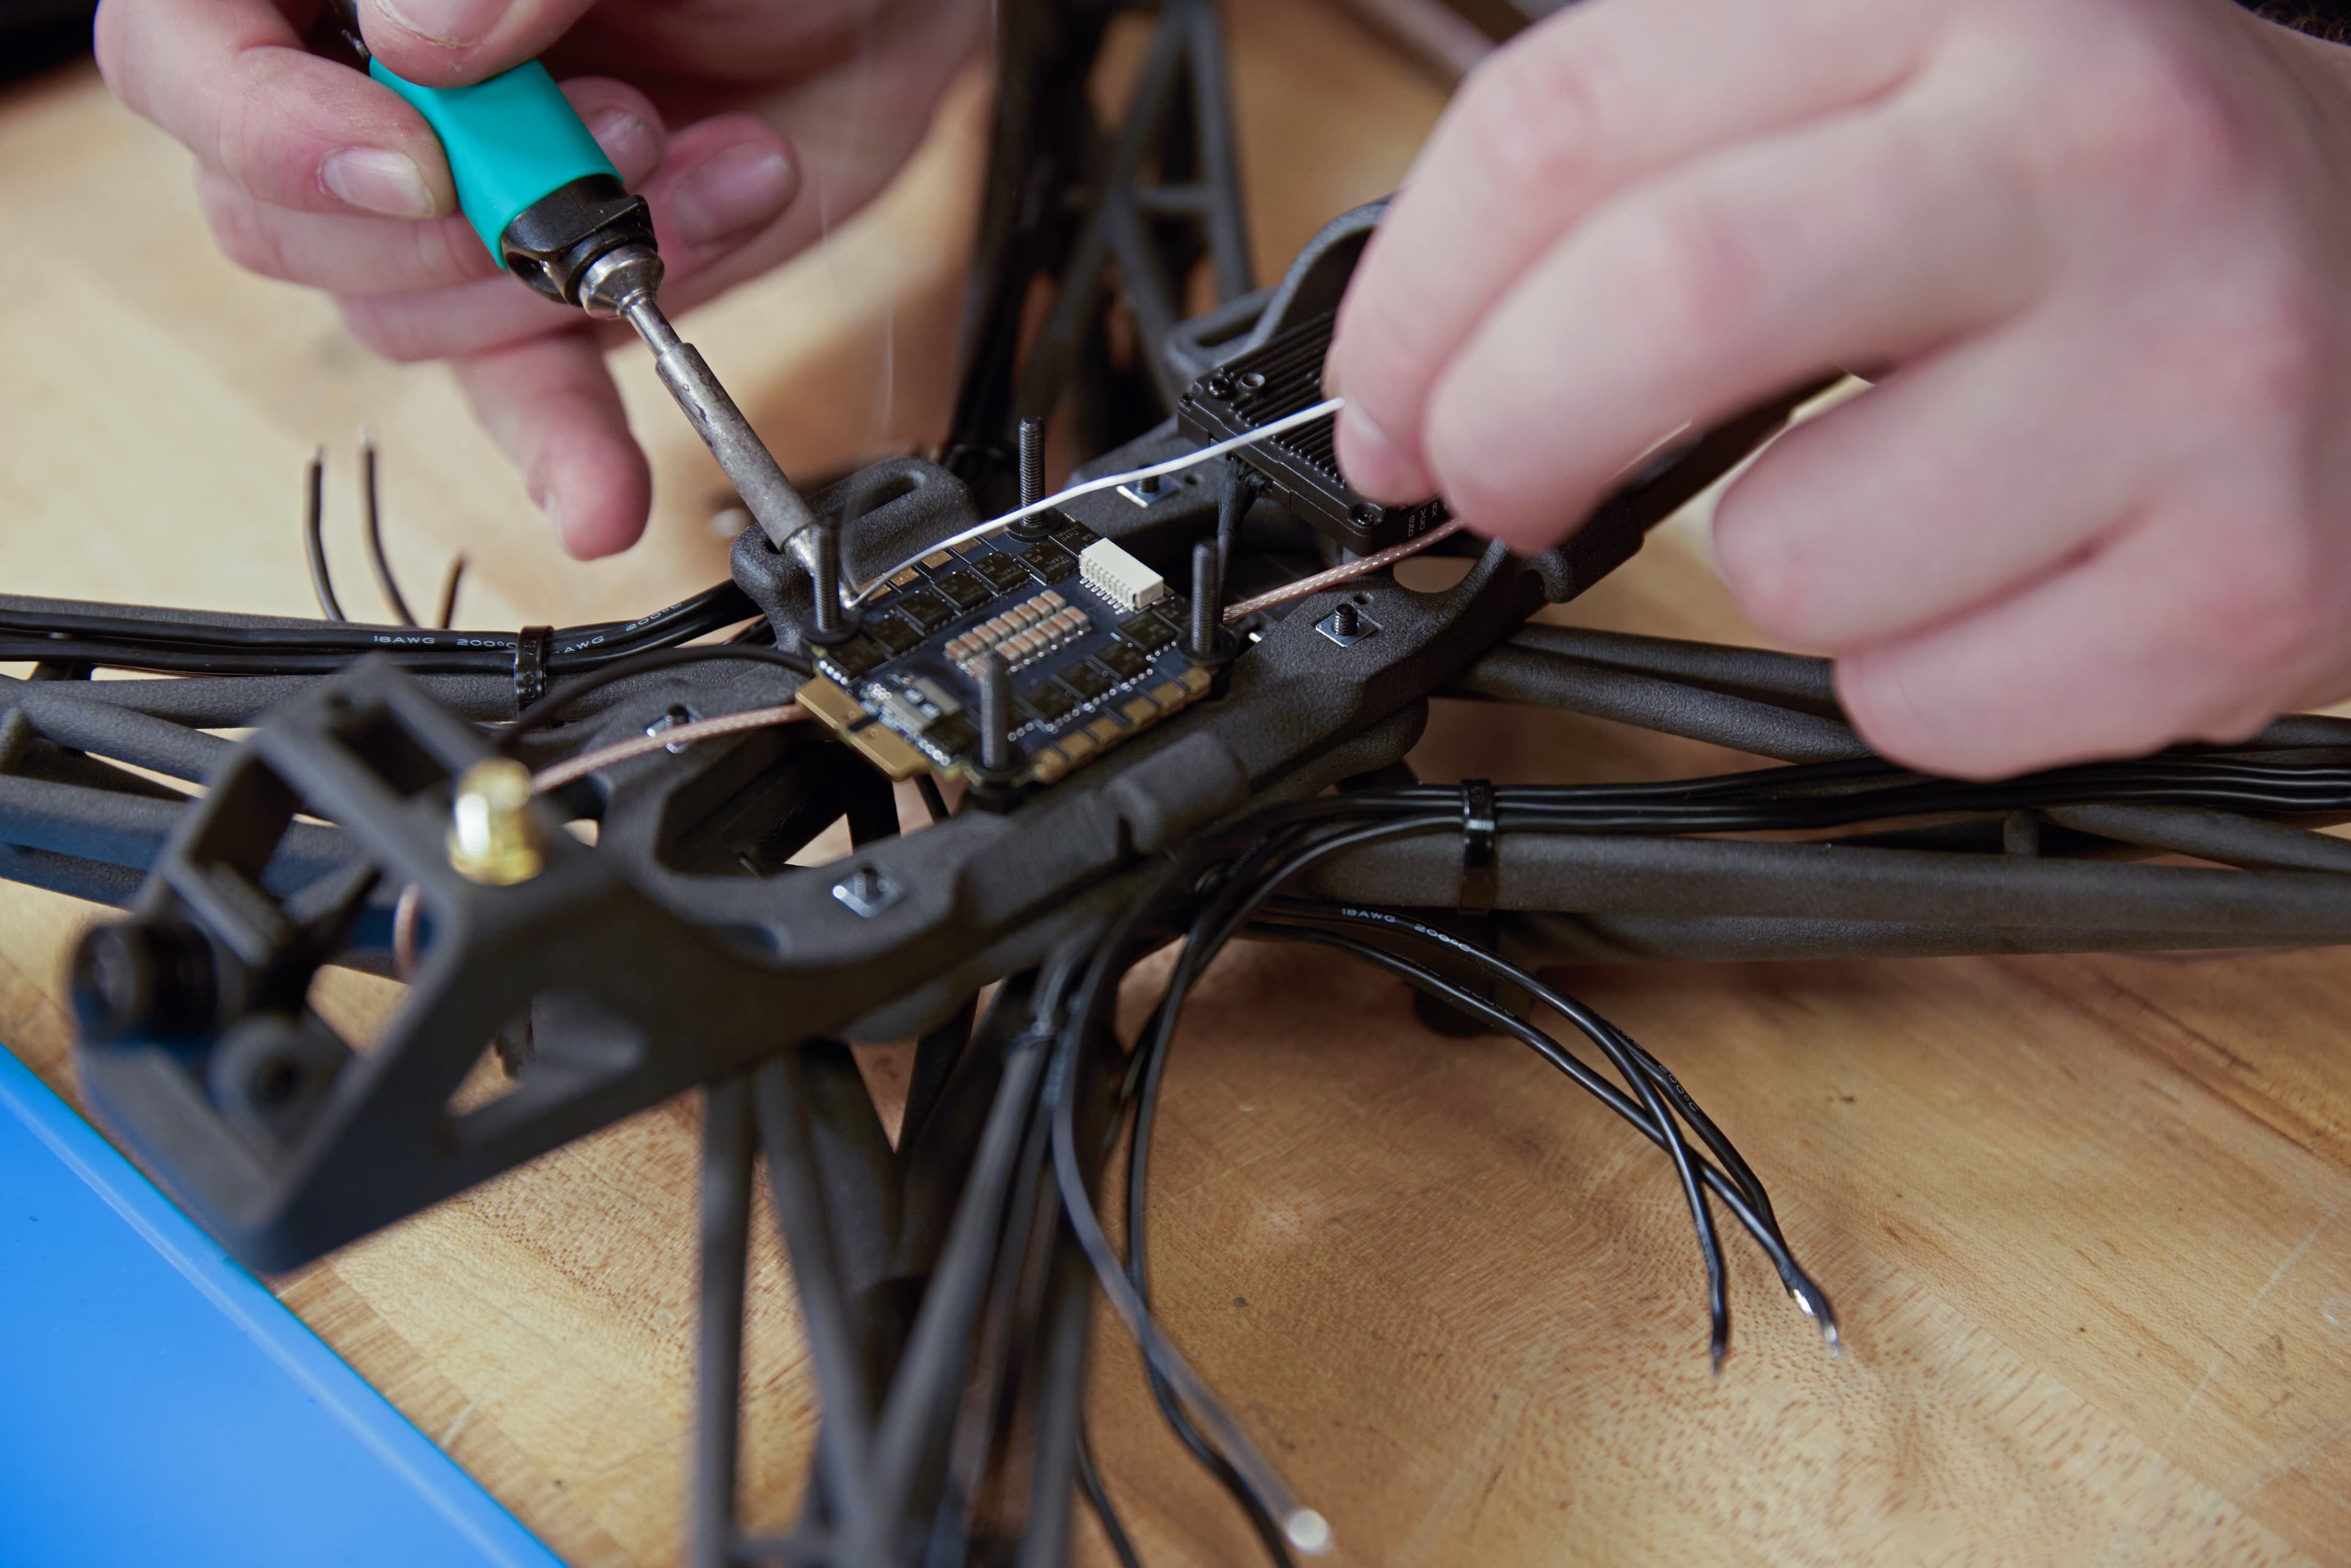
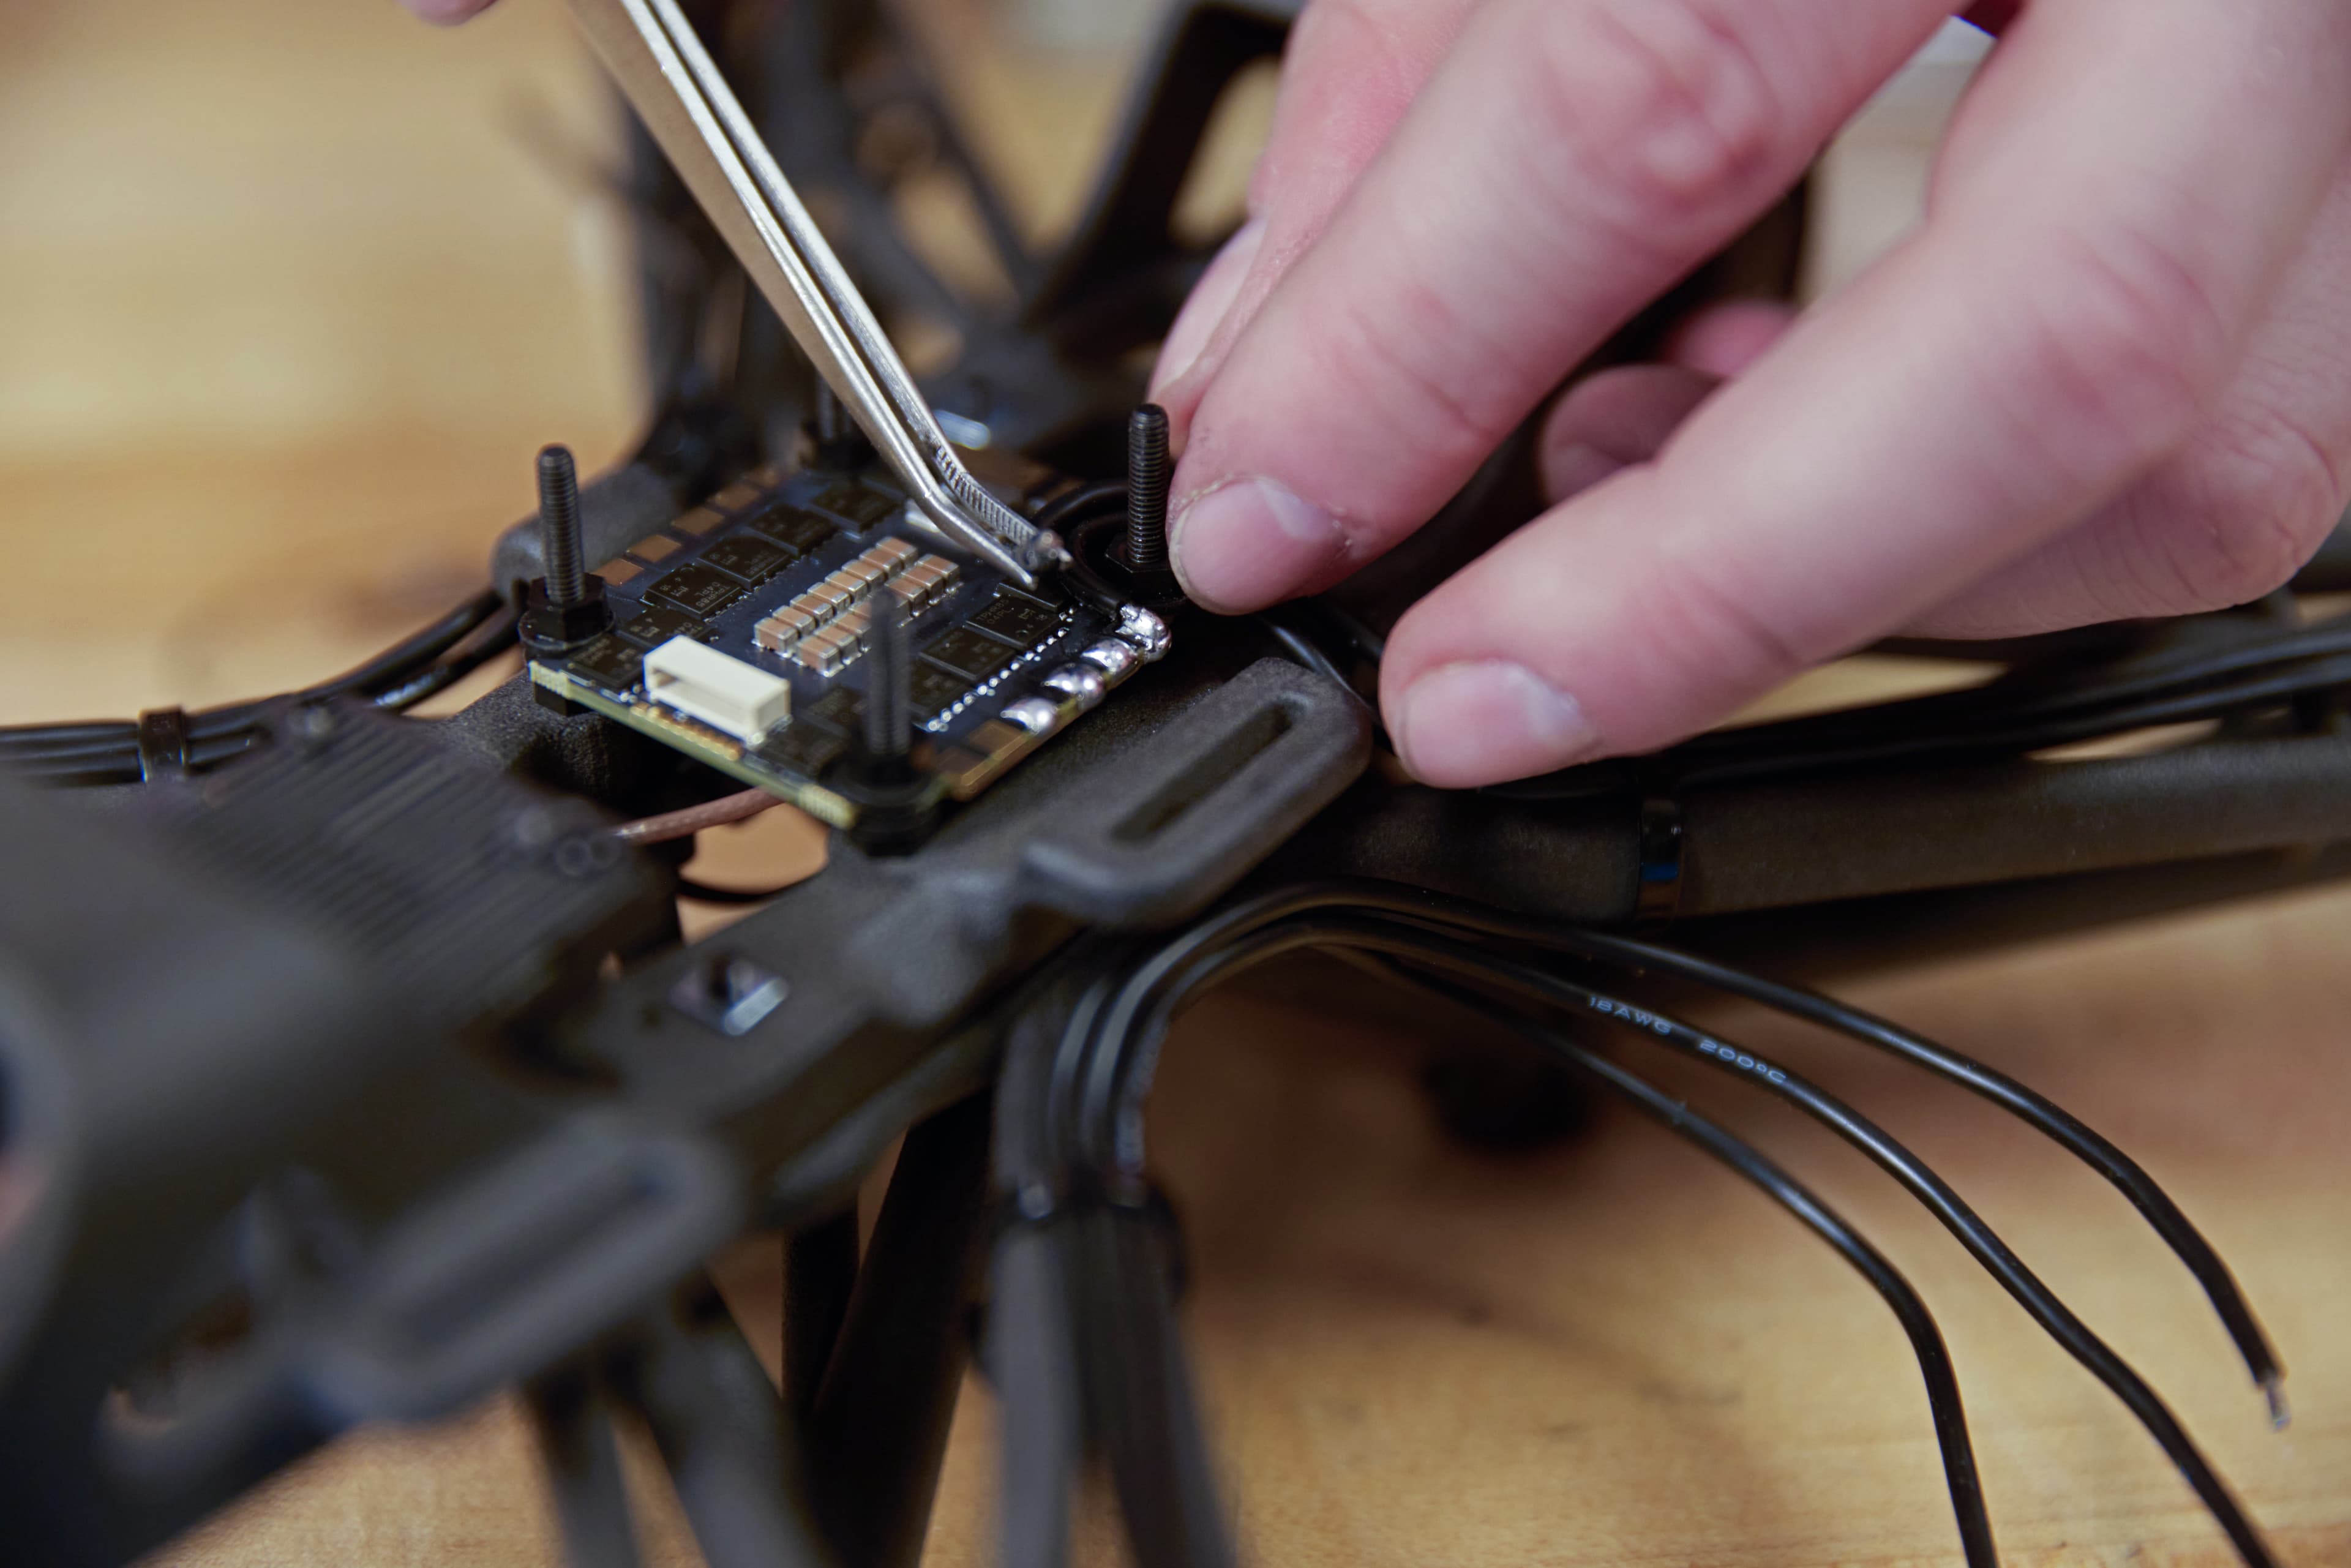
Mount your ESC with the main power pads toward the front of the drone.
This drone build was designed to be field serviceable, so your drone battery can serve as the power supply for a field soldering pen. Before soldering, apply flux to the pads to ensure a quality solder joint. We will be using a 380C-degree with a chisel tip. Trim the wire to the desired length, and wrap it around the screws for better organization. Add solder to the desired pad, then apply the tinned motor wires to the pad. Always apply heat to the pad, then add the solder.
After completing motor wire soldering, prepare the cable connecting the ESC to the flight controller. Ensure that the connector properly attaches the correct pins of the flight controller to the ESC. Once the cable is validated, plug it into the ESC connector.
Step 8: GPS
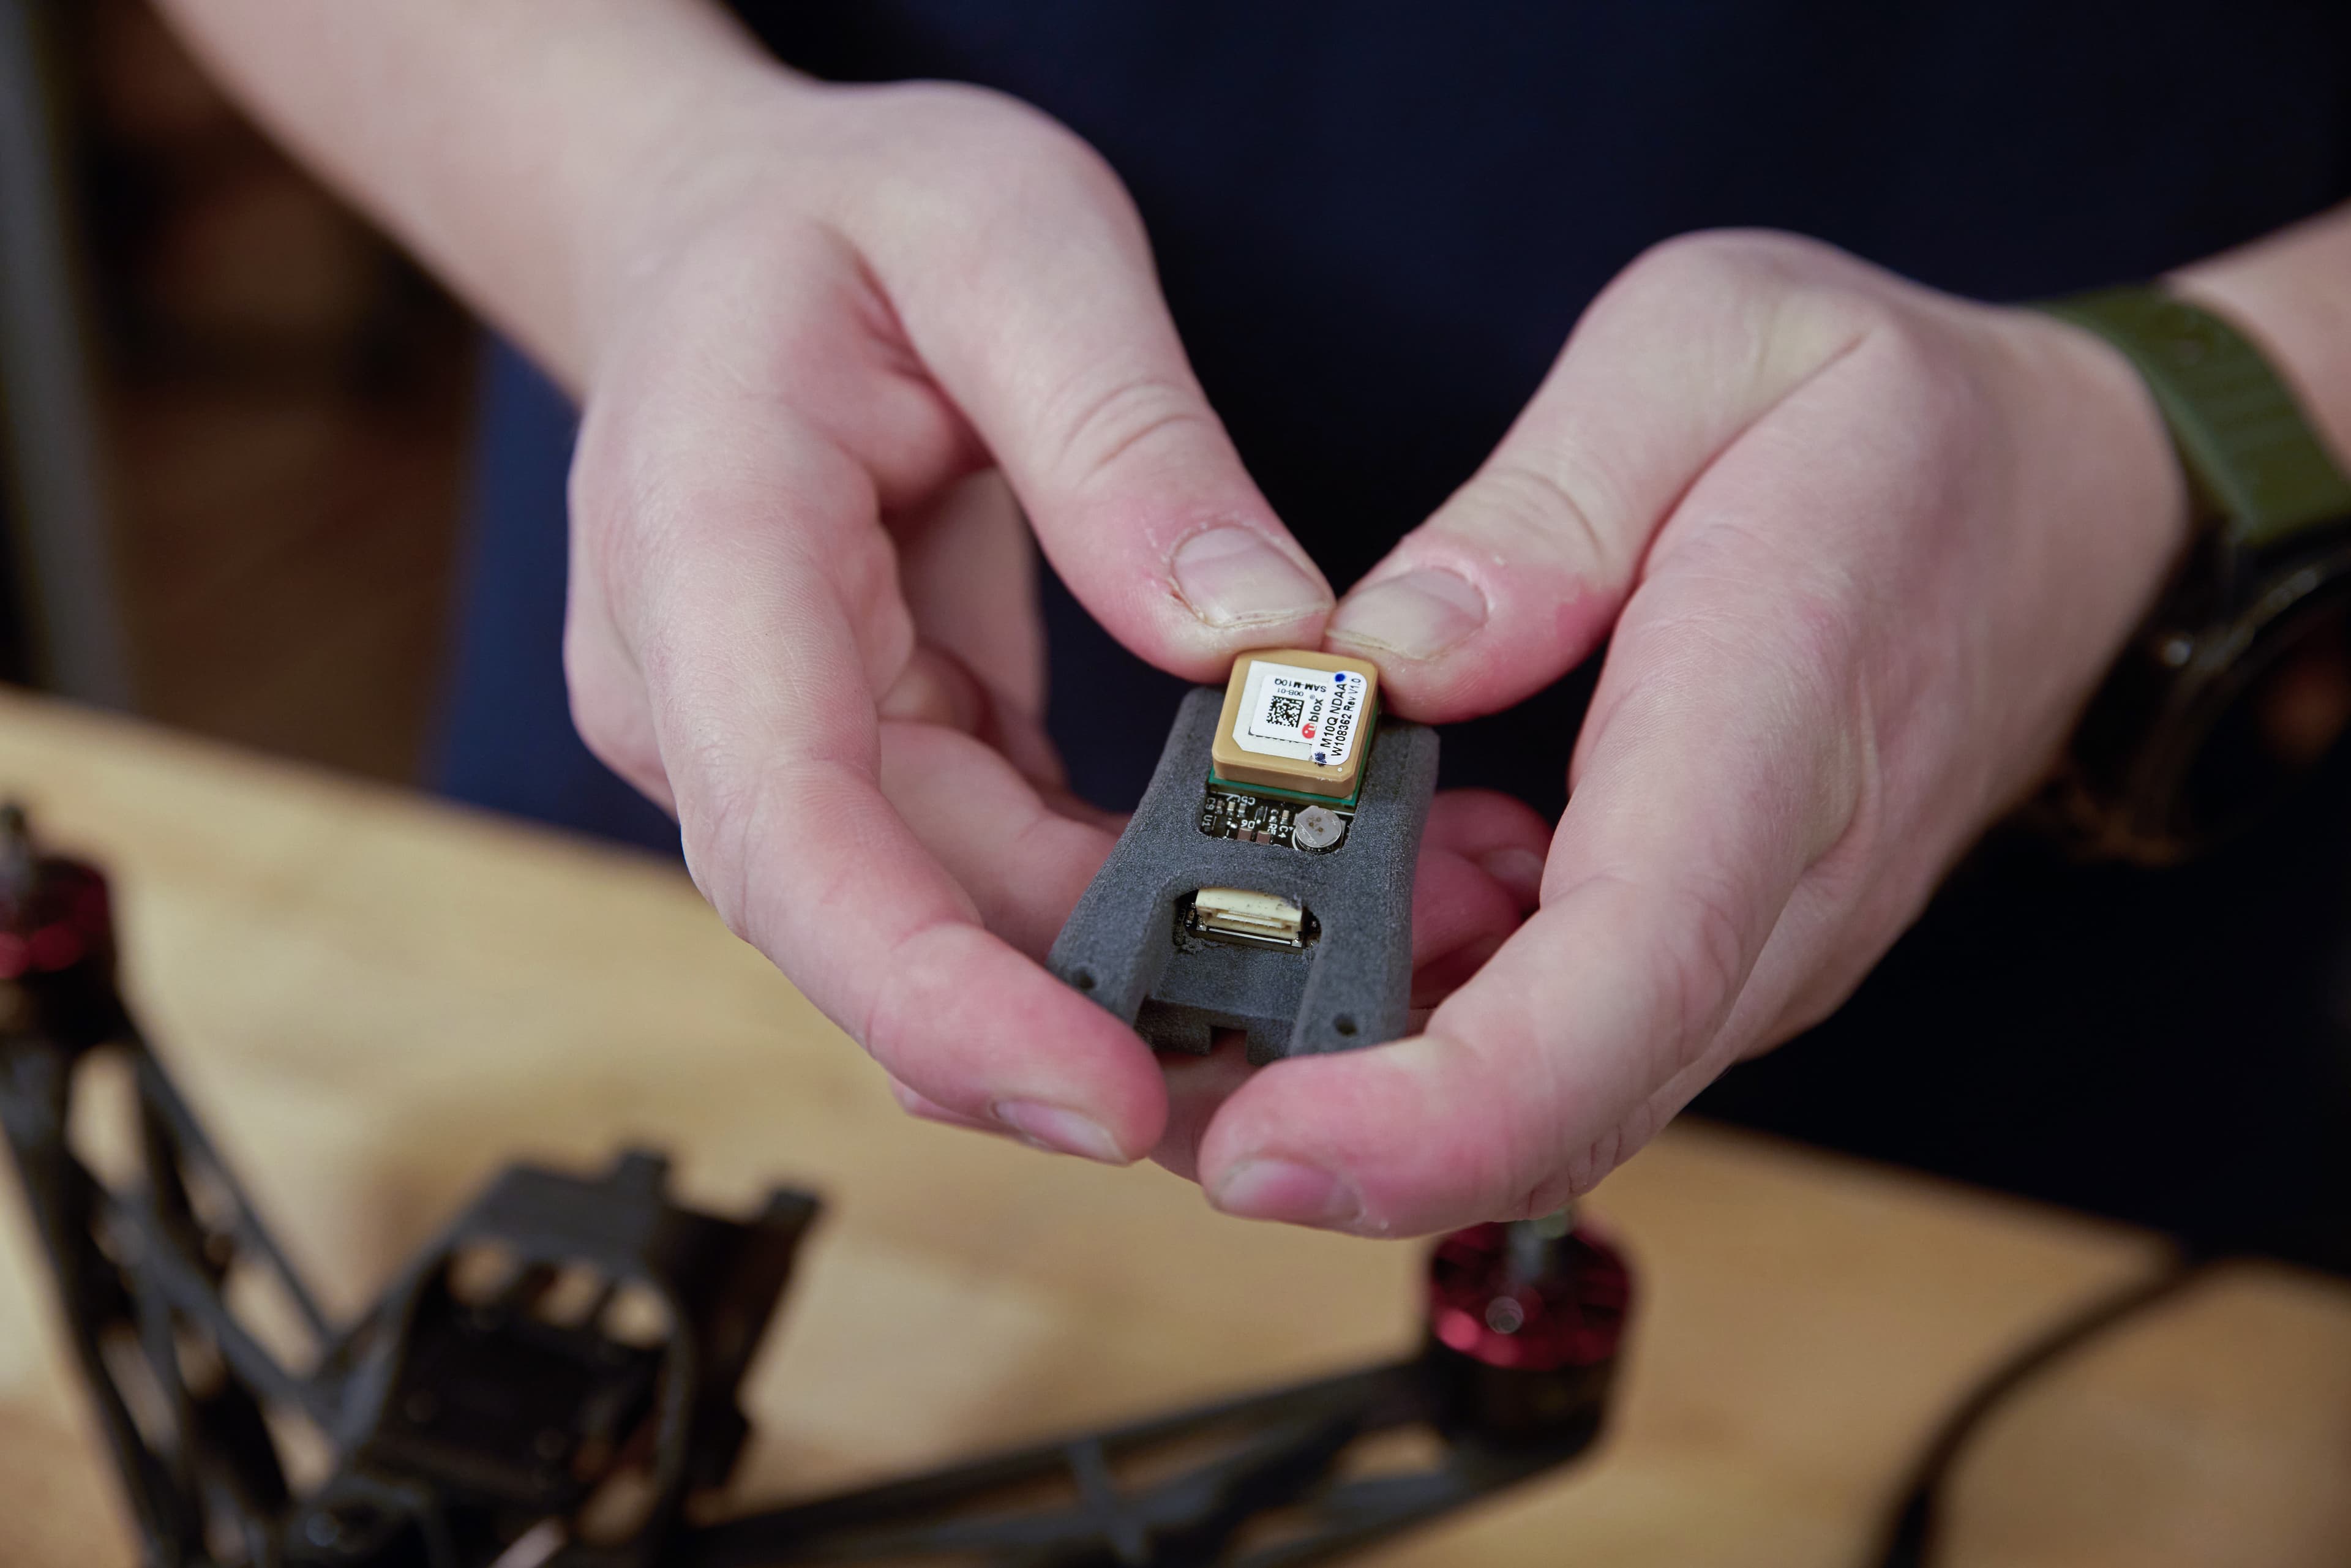
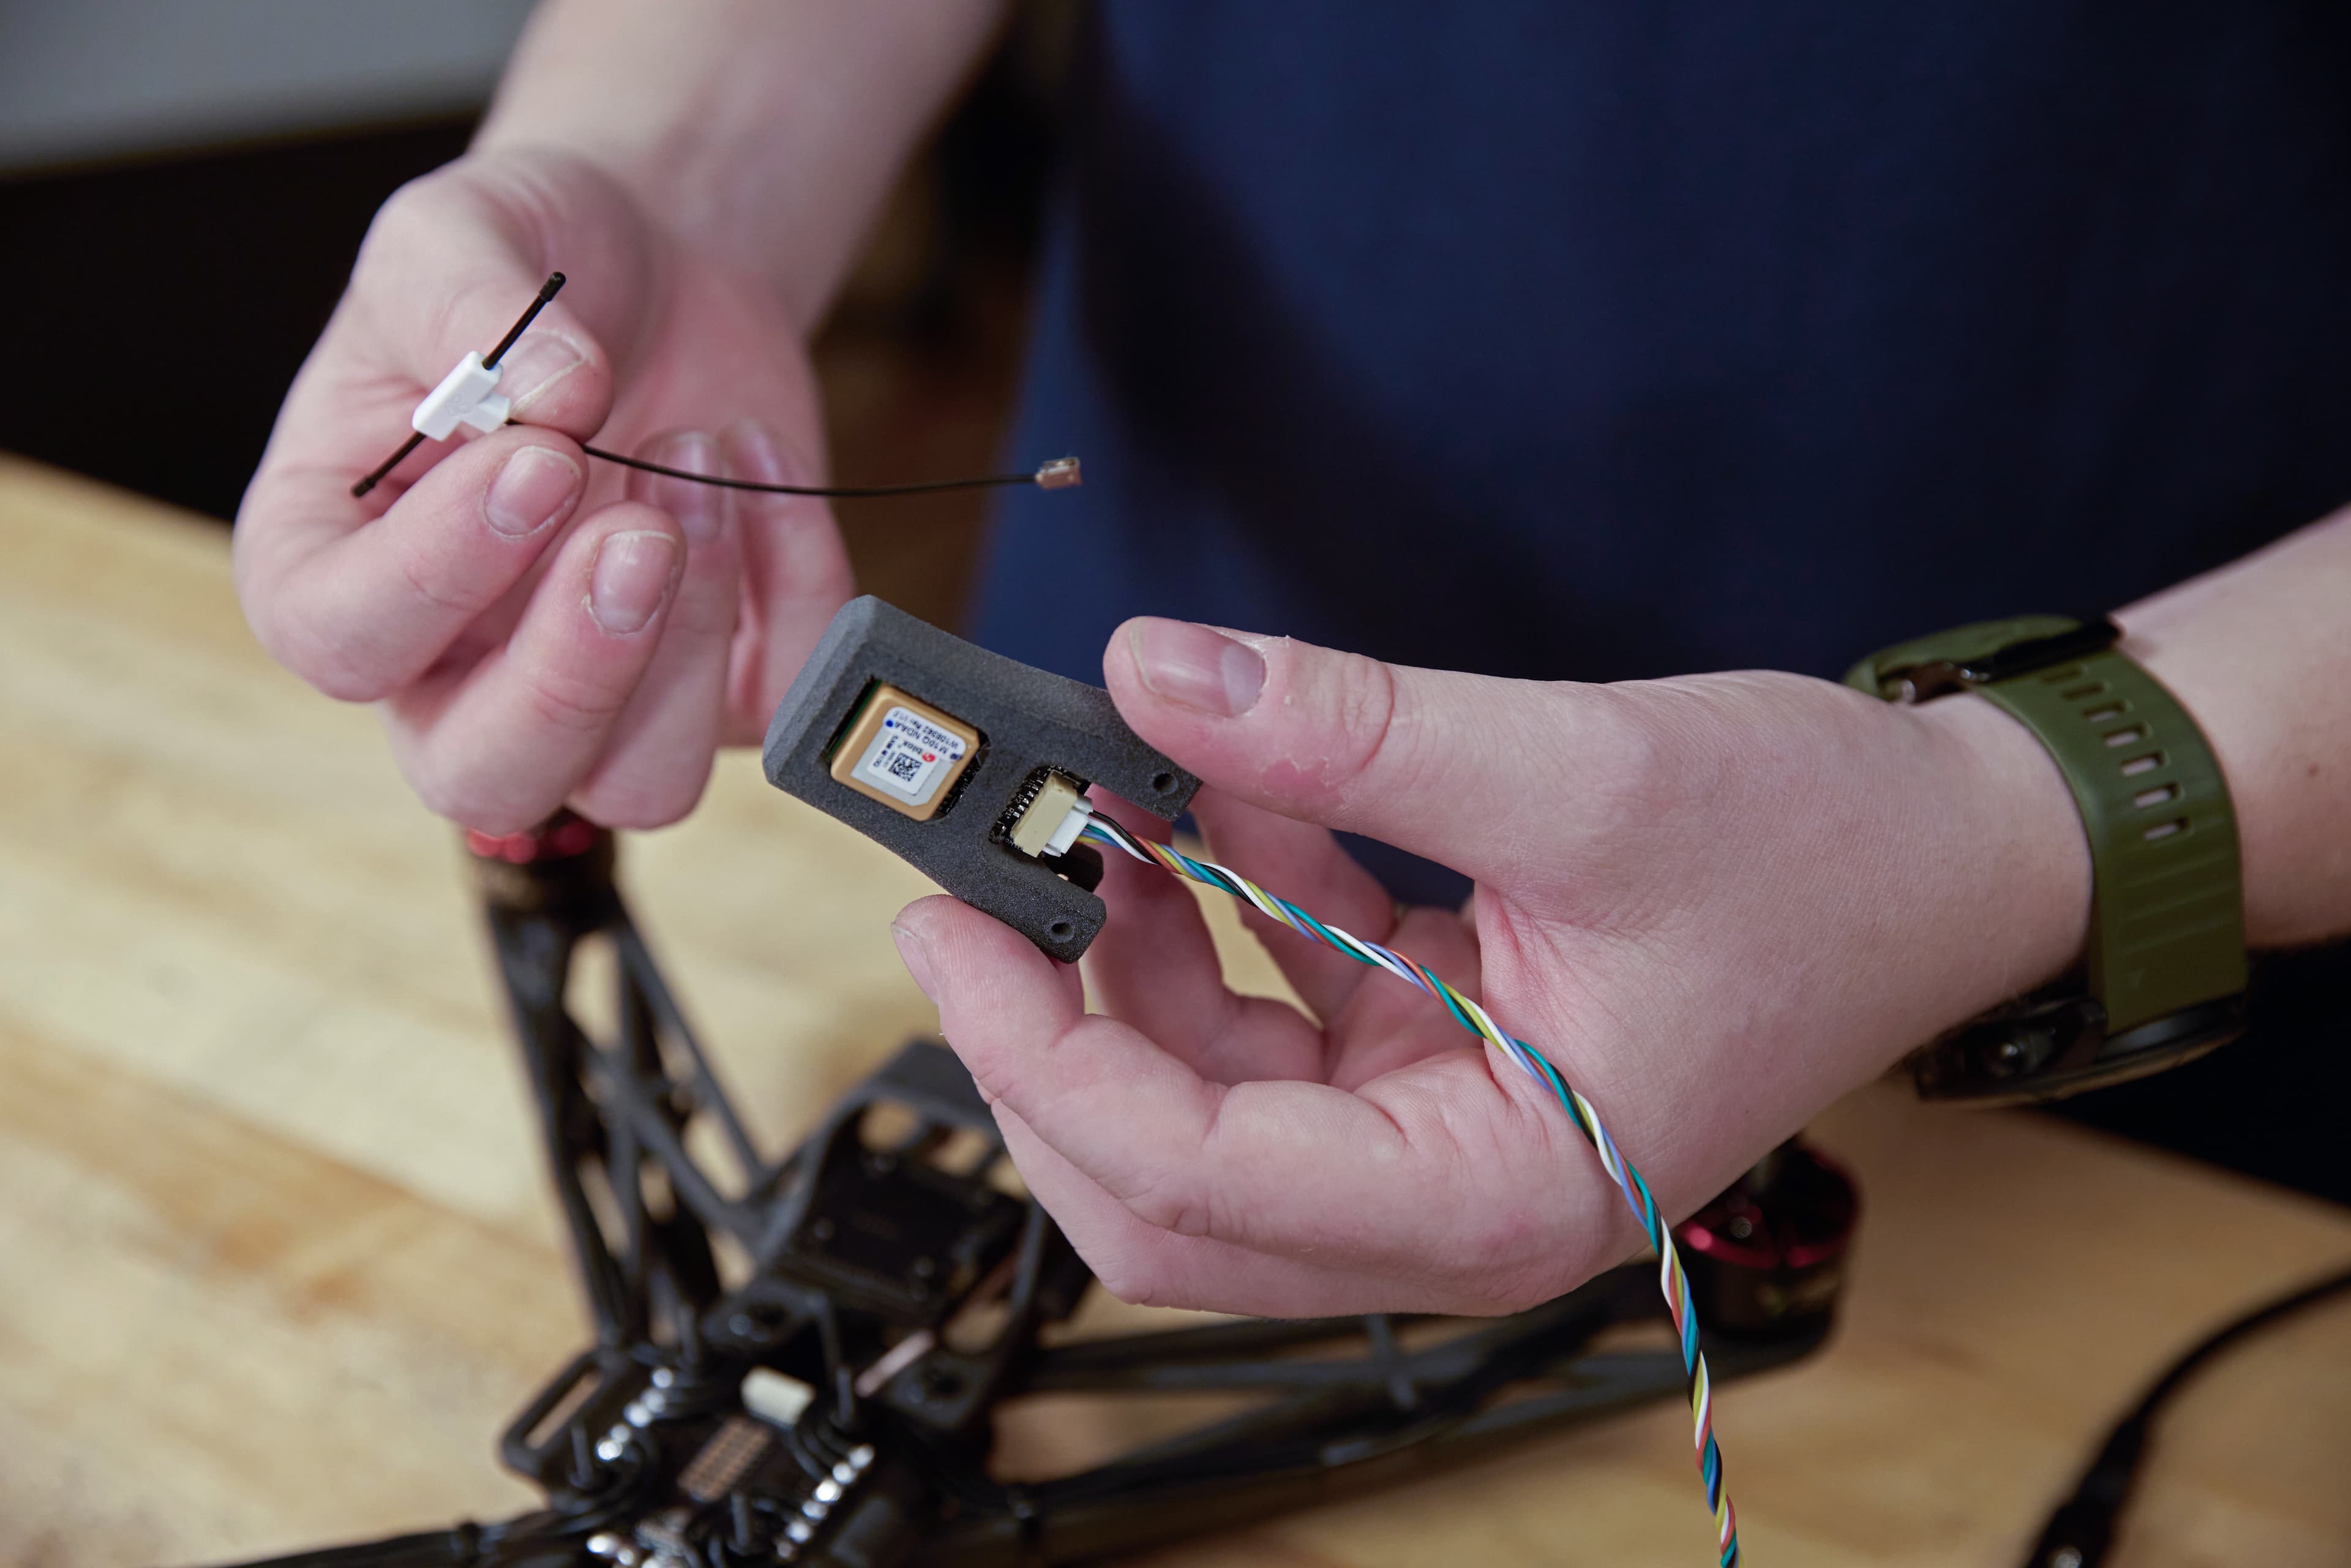
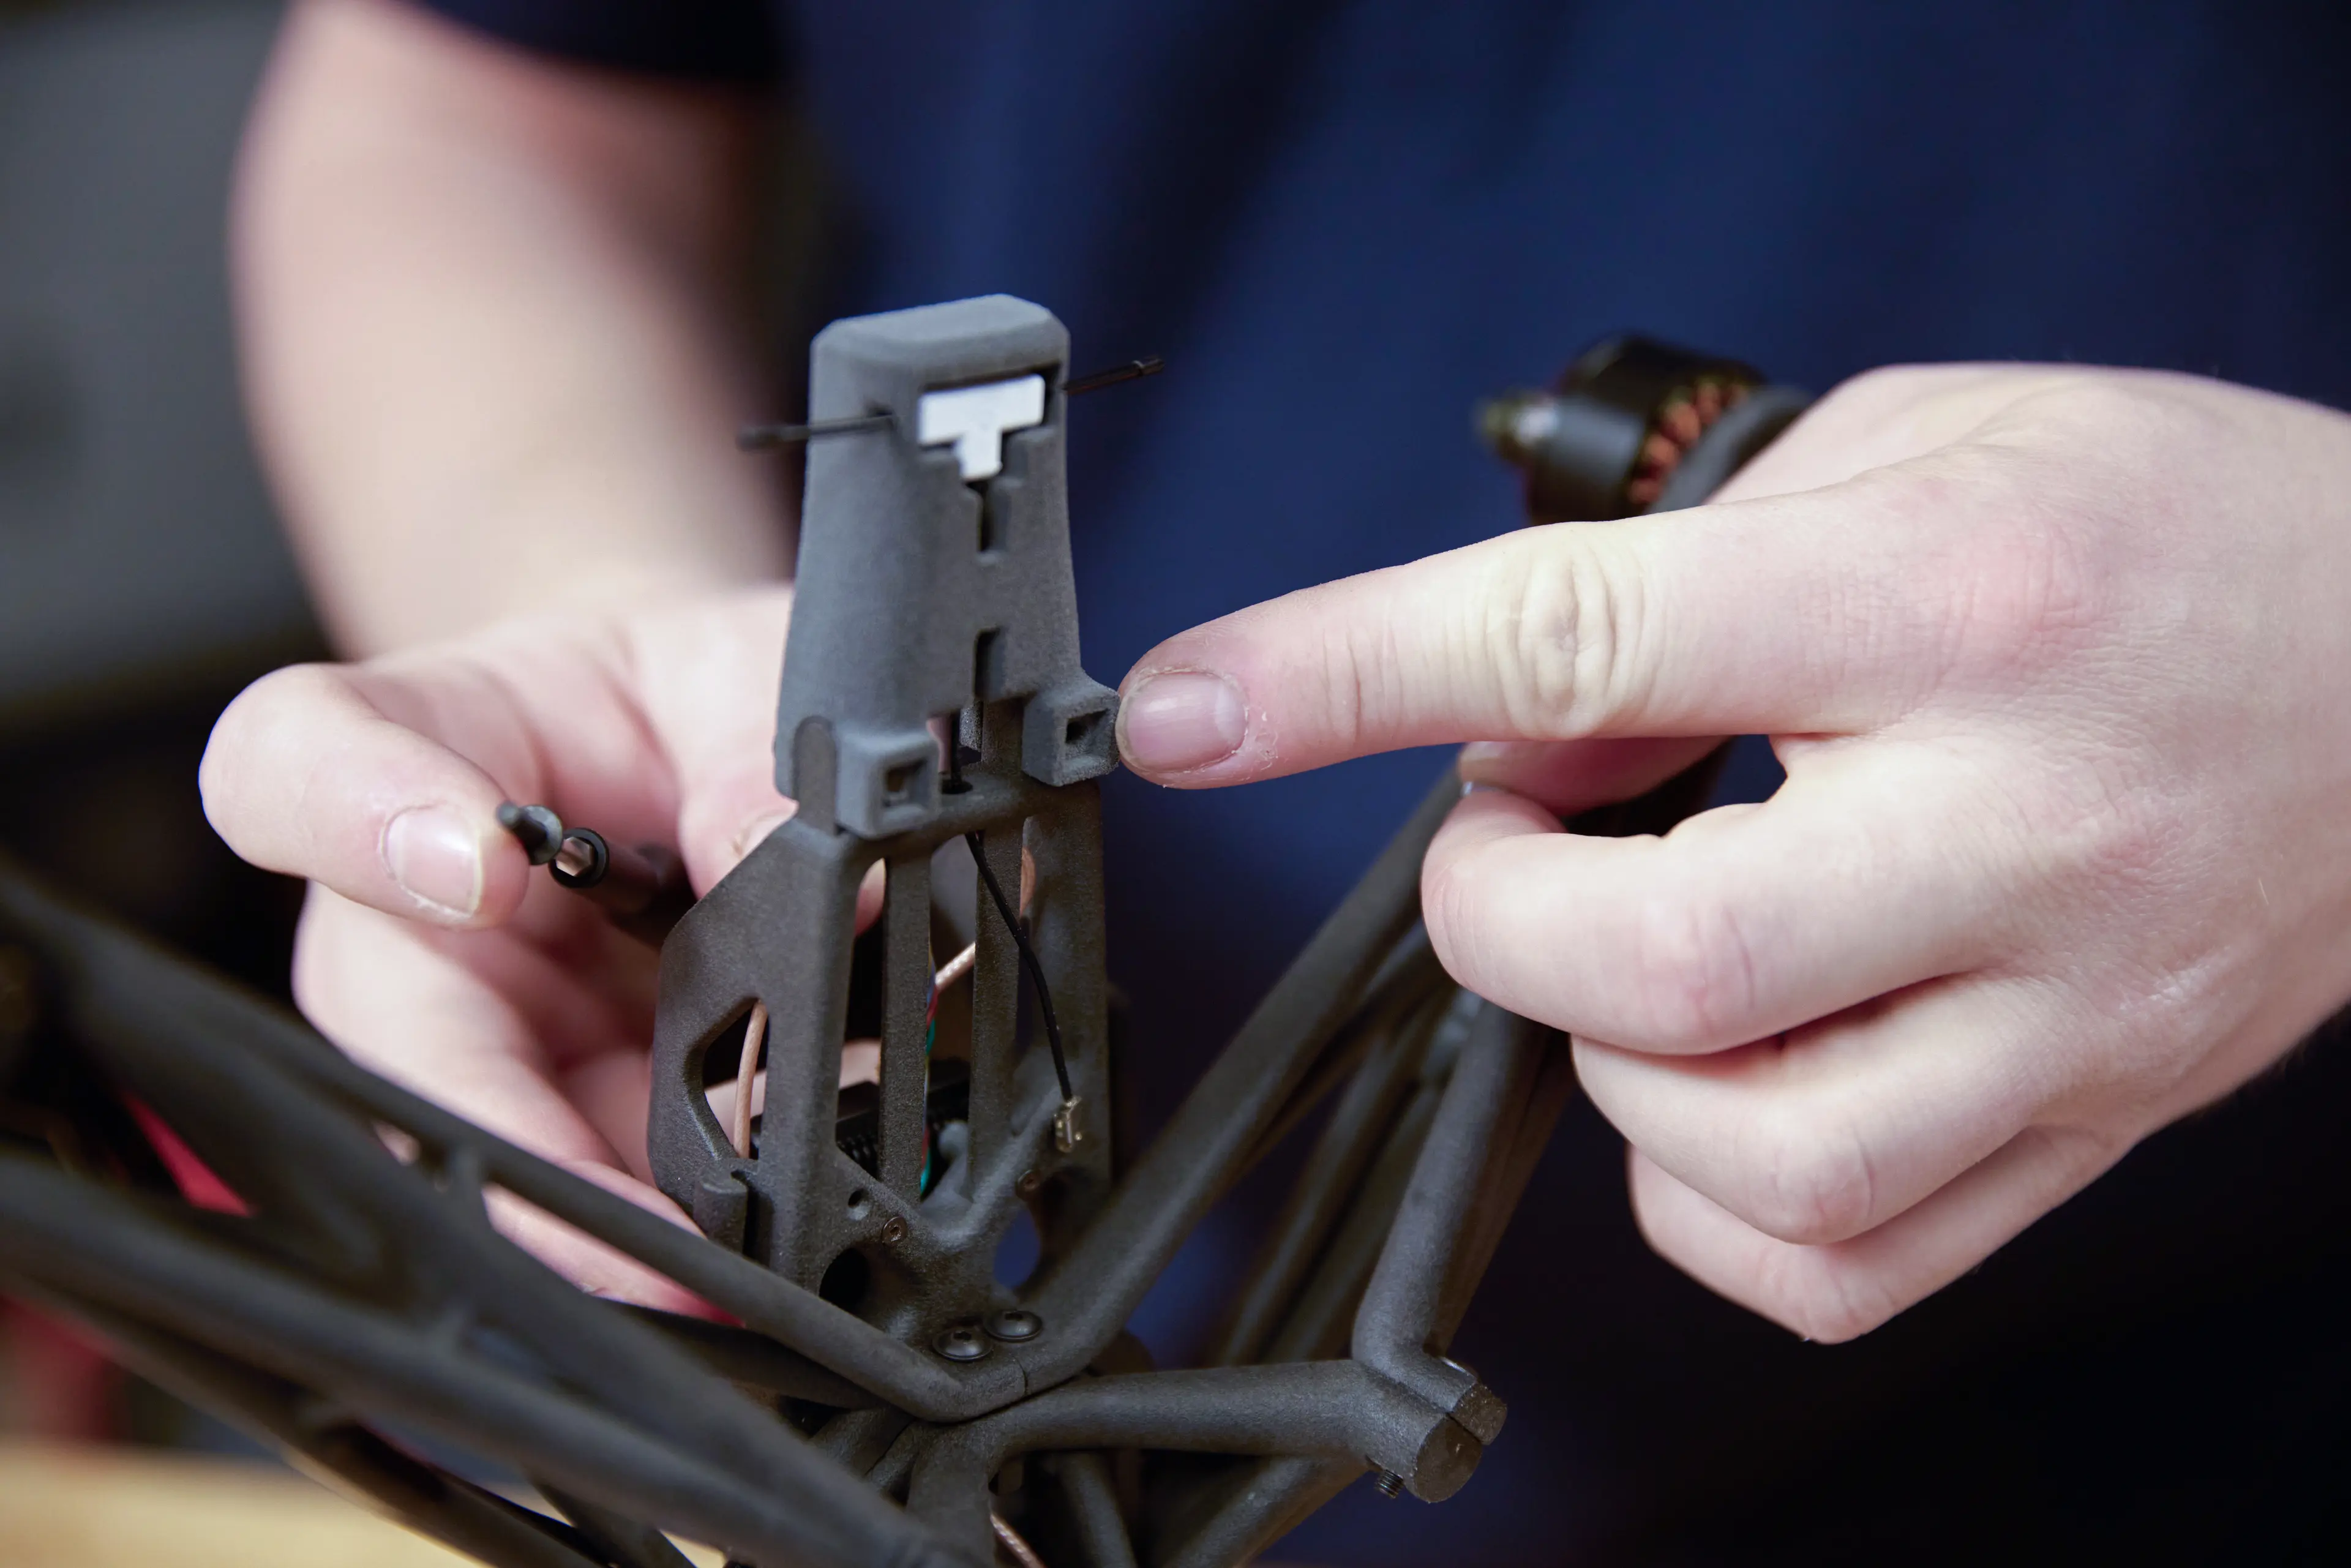
Mount the GPS module into the TPU mount before connecting the supplied cable. Use a small tool to clear out some of the additional powder.
Push the UFL connector end of the RC receiver antenna through the hole on the underside of the TPU mount, you will need to use a small tool.
Using some flush cutters, a boxer cutter, or a knife, cut one of the antenna holes on the backside of the TPU GPS mount to allow for RC antenna mounting without bending or breaking the antenna. We’ve made this design able to fit multiple sizes of RC antennas.
Twist the GPS cable so it’s easier to push through the frame, helps reduce EMI, and adds a polished look to your drone. Feed the now-twisted cable through the frame under the VTX.
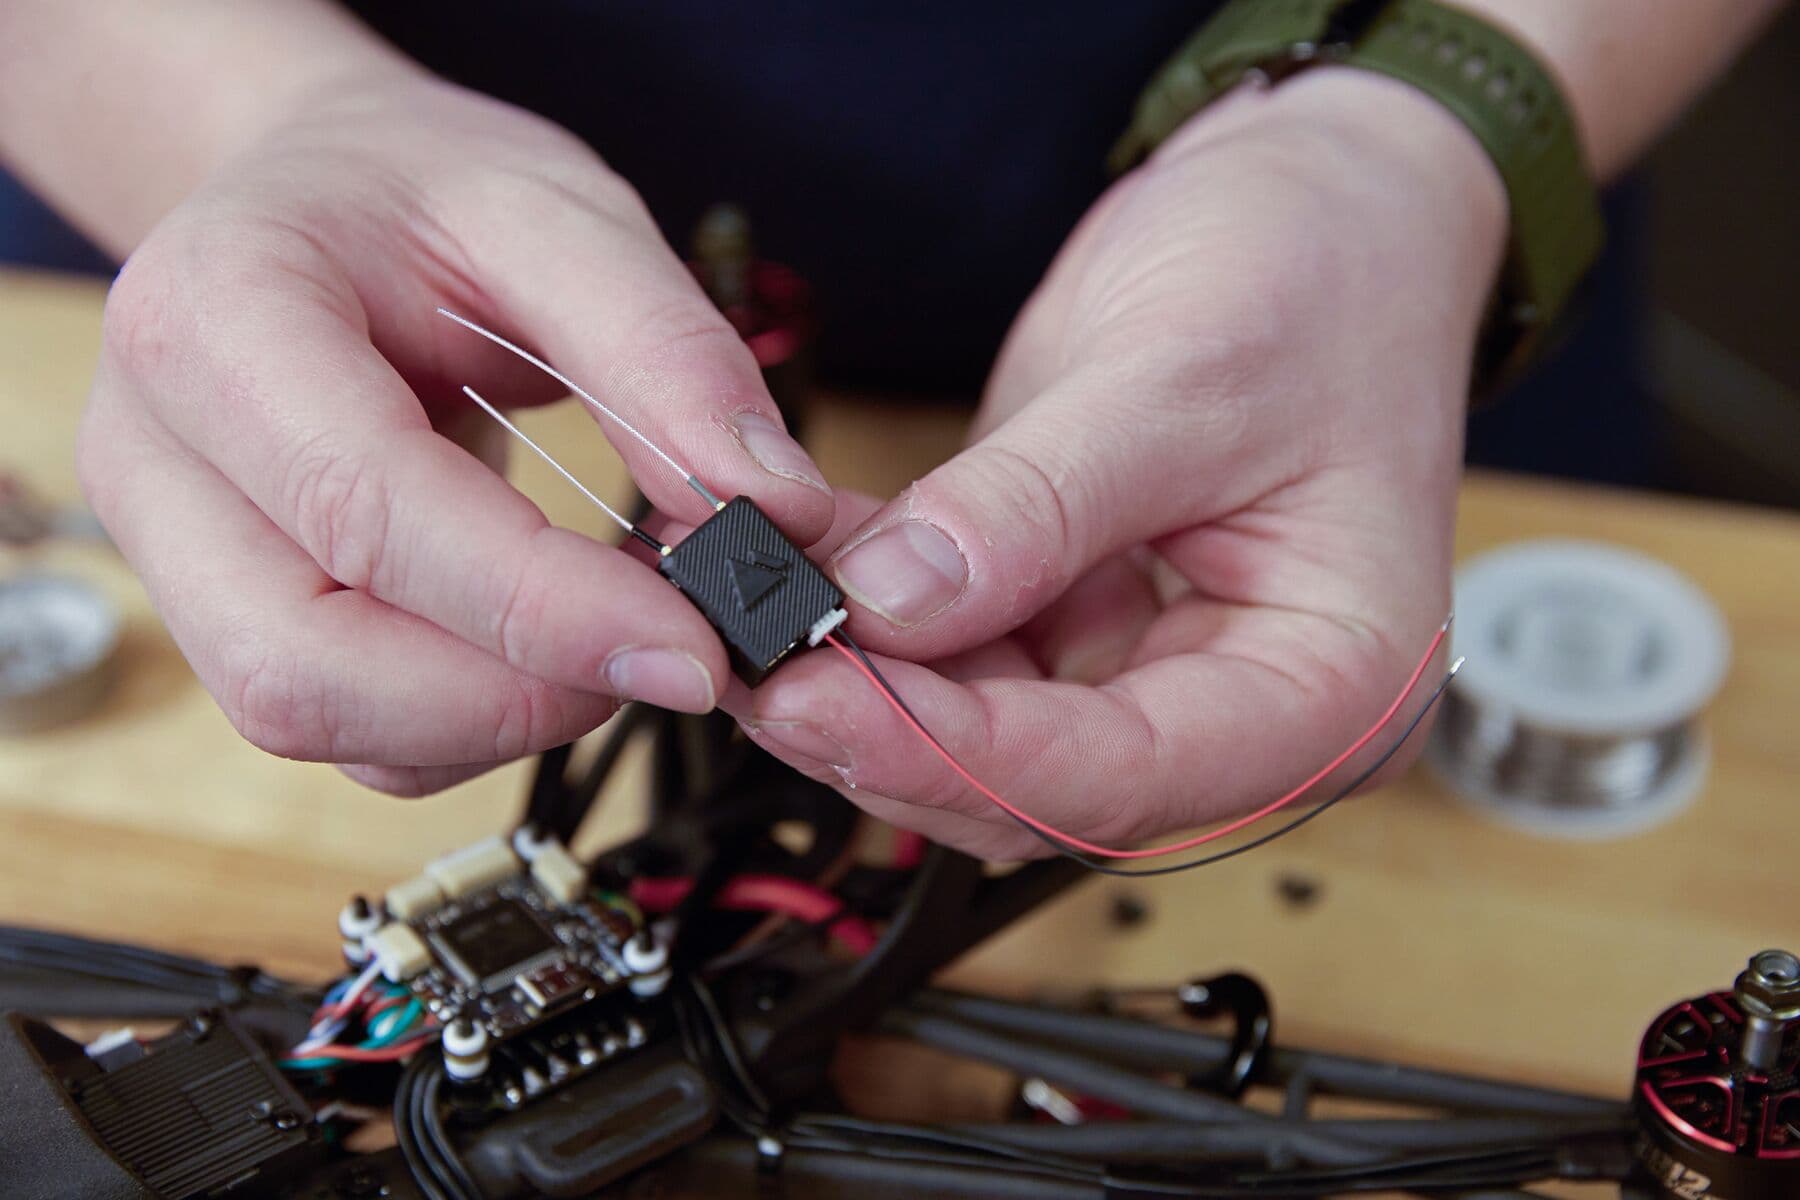
Push the UFL connector through the hole at the rear of the mounting board to terminate where the RC Receiver will live.
Attach the RC Receiver to the antenna. Be careful when installing the UFL antenna so as not to damage the connection. We are using the Ghost RC link, which comes with a locking UFL connector, which makes the antennae more secure.
Step 9: Power
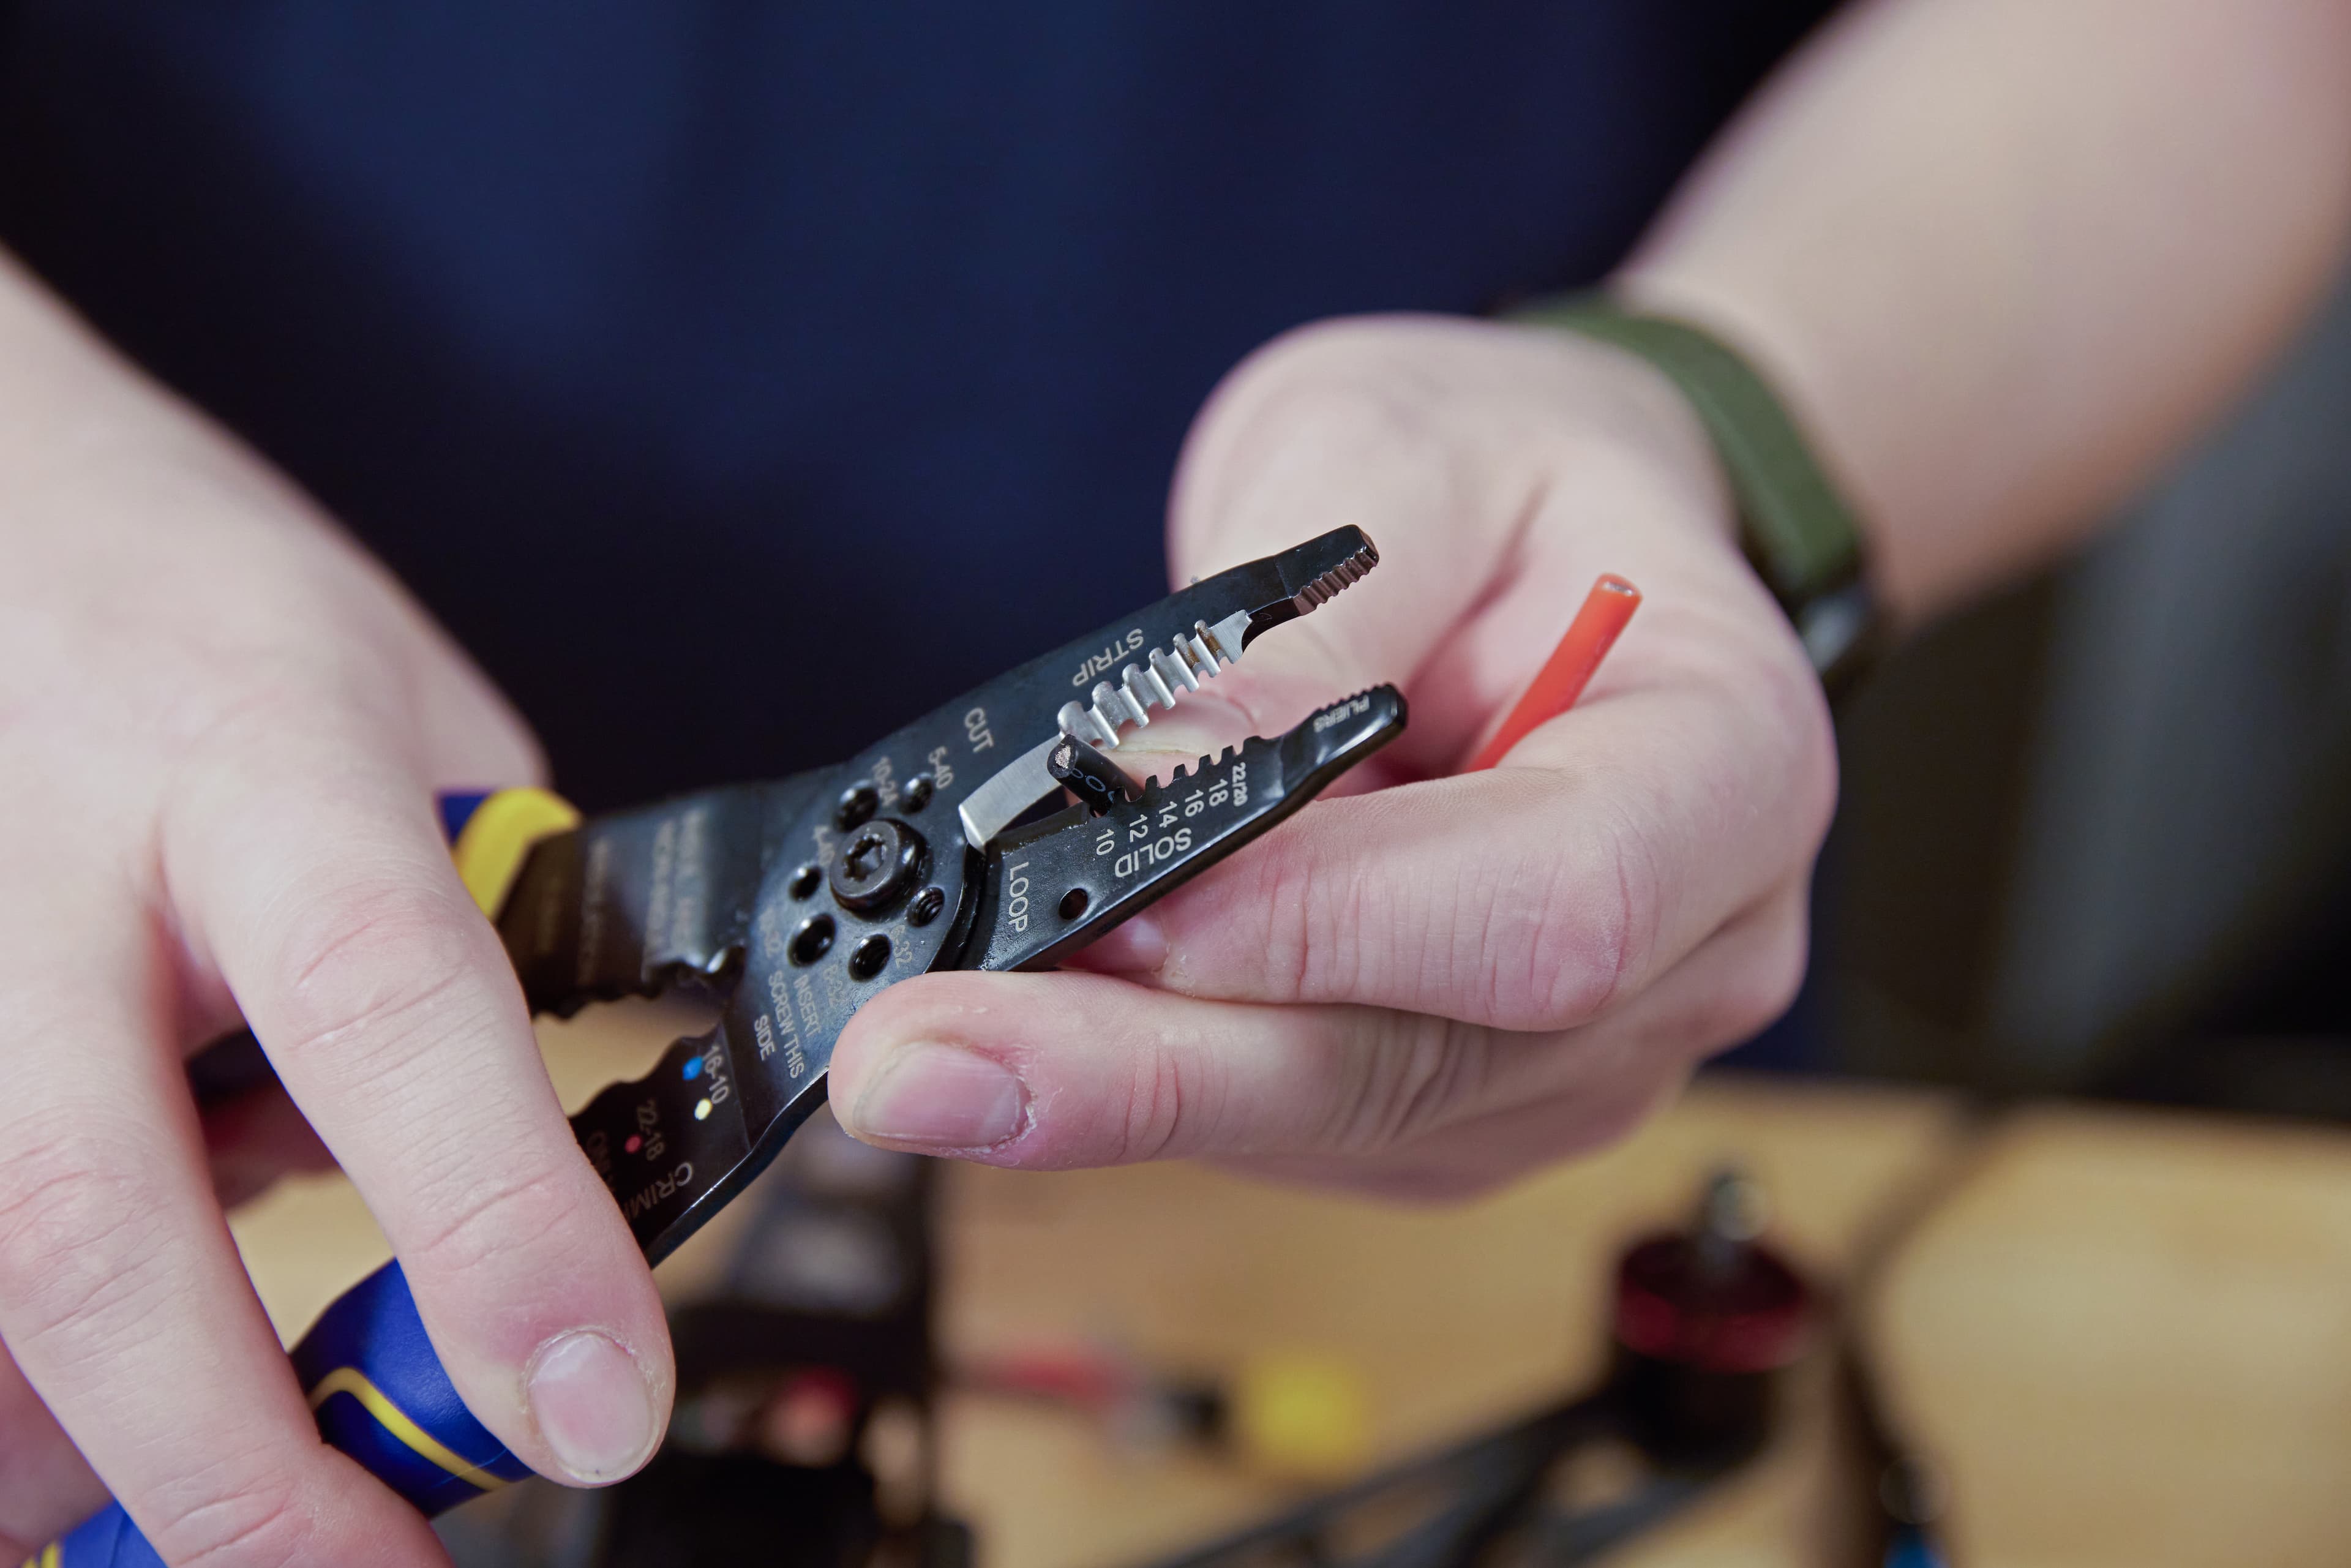

We use a frame-mounted XT60 connector for easy connection and disconnection of the power source. Cut the 12 gauge red and black wire to length, appropriately strip and tin the ends, add heat shrink to minimize the risk of short circuits, and solder one end to the XT60 connector — the flat side is positive.
Next, mount the XT60 connector directly onto the frame using M3 hardware. If necessary, install the connector through the bottom of the mounting board and route the power cables back to the ESC. Solder the wires to the ESC's main power pads.
Step 10: Flight Controller
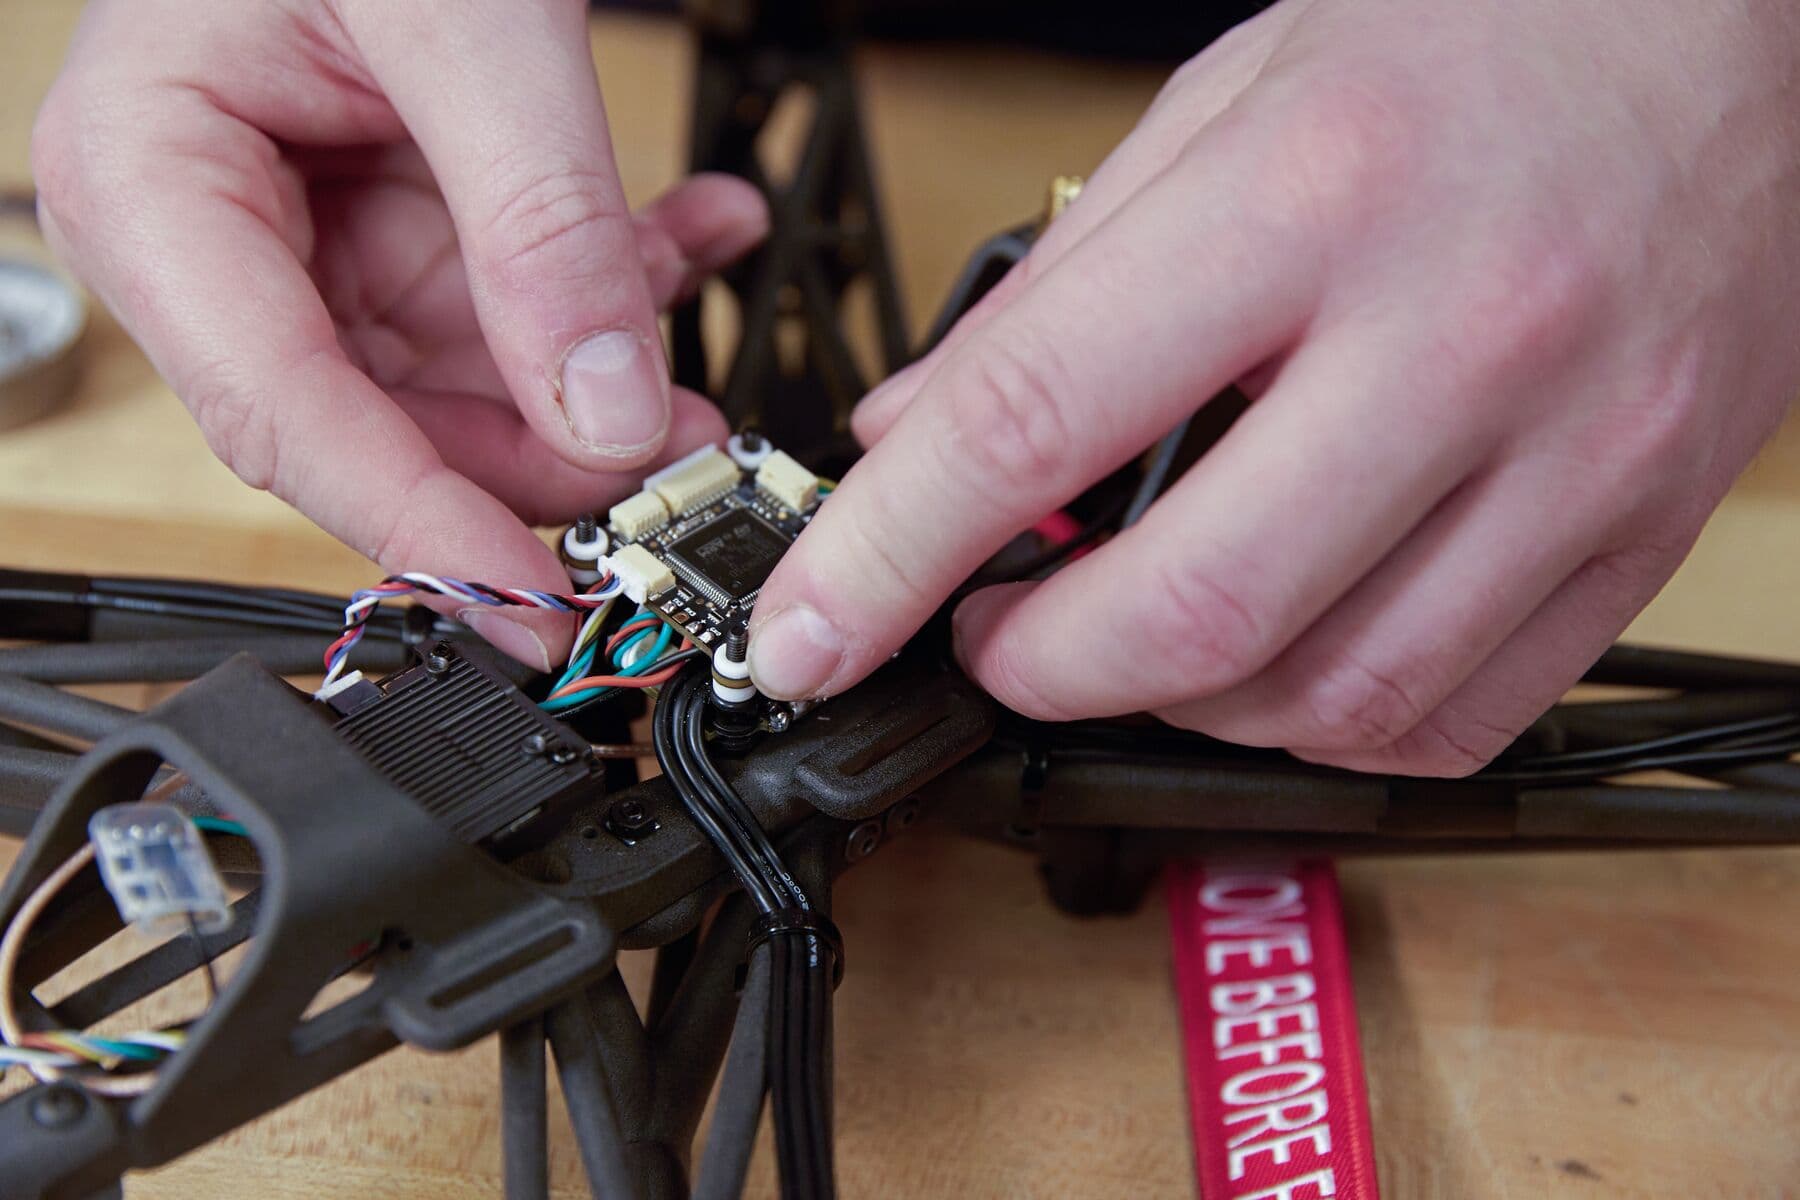
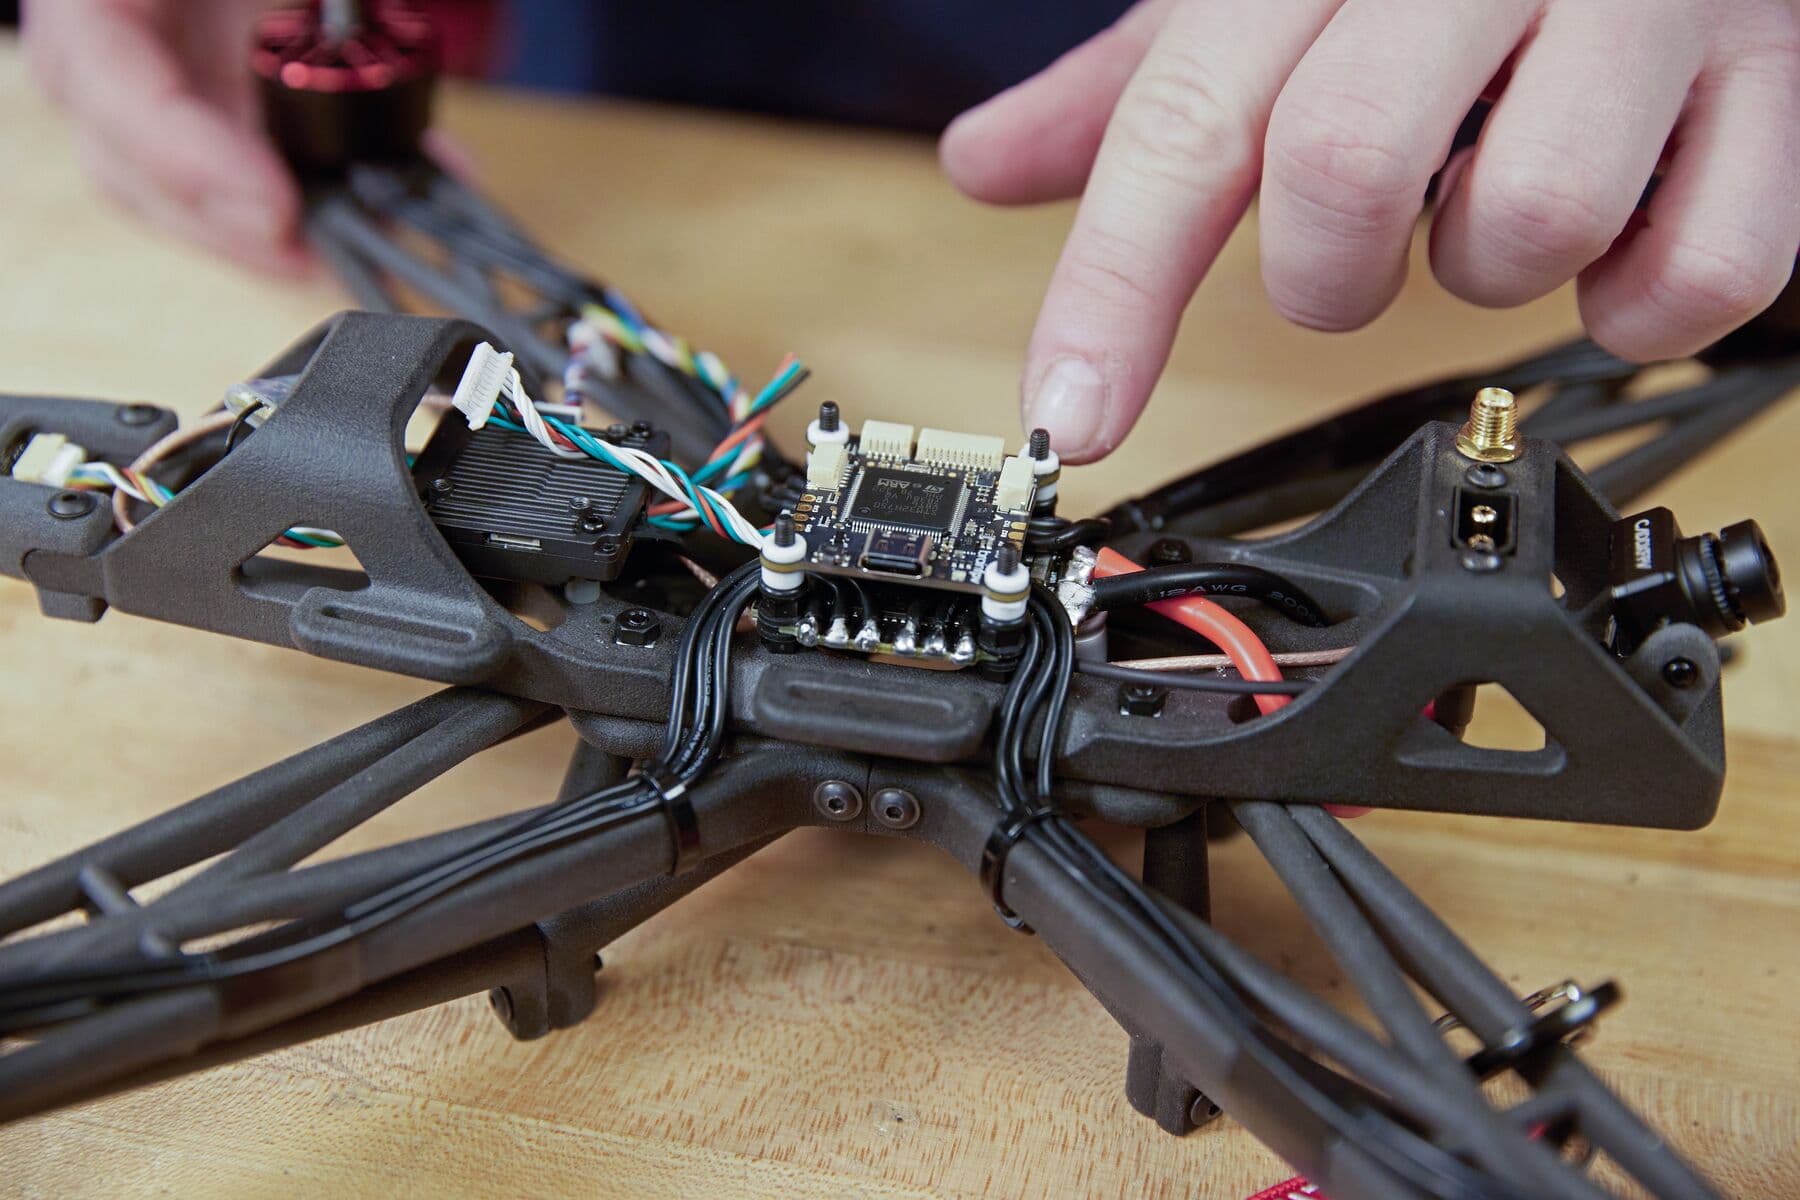
Now, we want to start the process of mounting the flight controller on top of the ESC. The ESC needs to talk to flight control to receive motor commands. Using the cable that was previously plugged into the ESC, attach the other end to the flight controller.
Using the datasheets for both the flight controller and the VTX, make a cable that properly connects the two. Plug in that VTX cable as well.
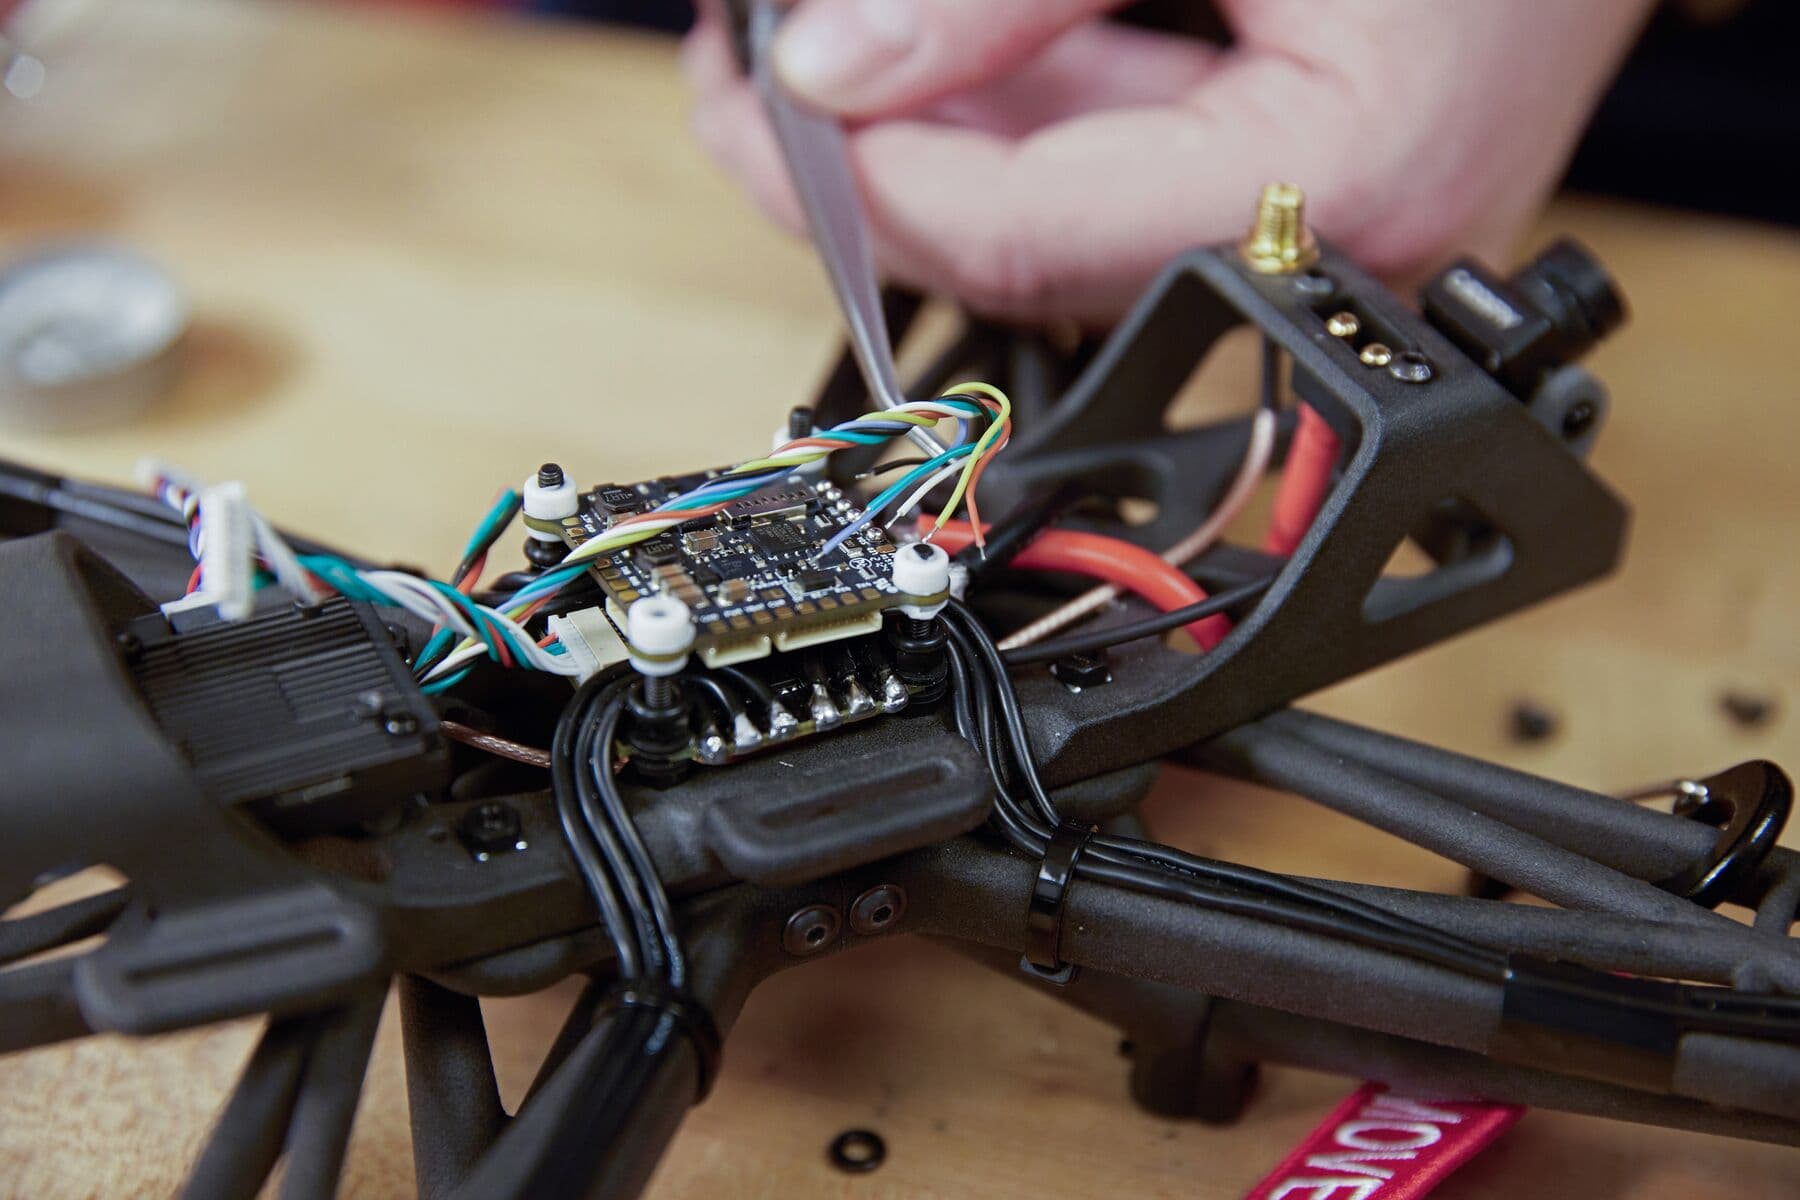
Flip the flight controller upside down and place it onto the mounting screws so that it is easier to access the solder pads. Prepare solder pads to connect the GPS module by cleaning and tinning the pads. In addition to the location information, the module also has a magnetic compass. That information comes through a different channel, and we need to make sure we’re attaching the right wires to the right pads. Please refer to the manufacturer’s pin/wiring diagrams to ensure the correct connections.
The radio that receives all the pilot commands also needs to be soldered to the flight controller. Tin the wires and ensure the proper pins are connected to the correct pads.
For this particular flight controller, we need to solder together a set of jumper pads to use the raw battery voltage for powering the flight controller board.
Step 11: Regulatory Piece (Attach Remote ID Module)
As required by the FAA, if you’re flying a drone over a certain size, you must be able to broadcast your information. You do not need this if you’re flying recreationally under 250 grams. Many FPV consumer drones weigh 249 grams to avoid this regulatory hurdle. However, regardless of the drone class, you must use a Remote ID if you are flying commercially. Attach the remote ID module by soldering the Positive and Negative wires to an available 5V and GND pin pair on the FC.
Step 12: Place Cover
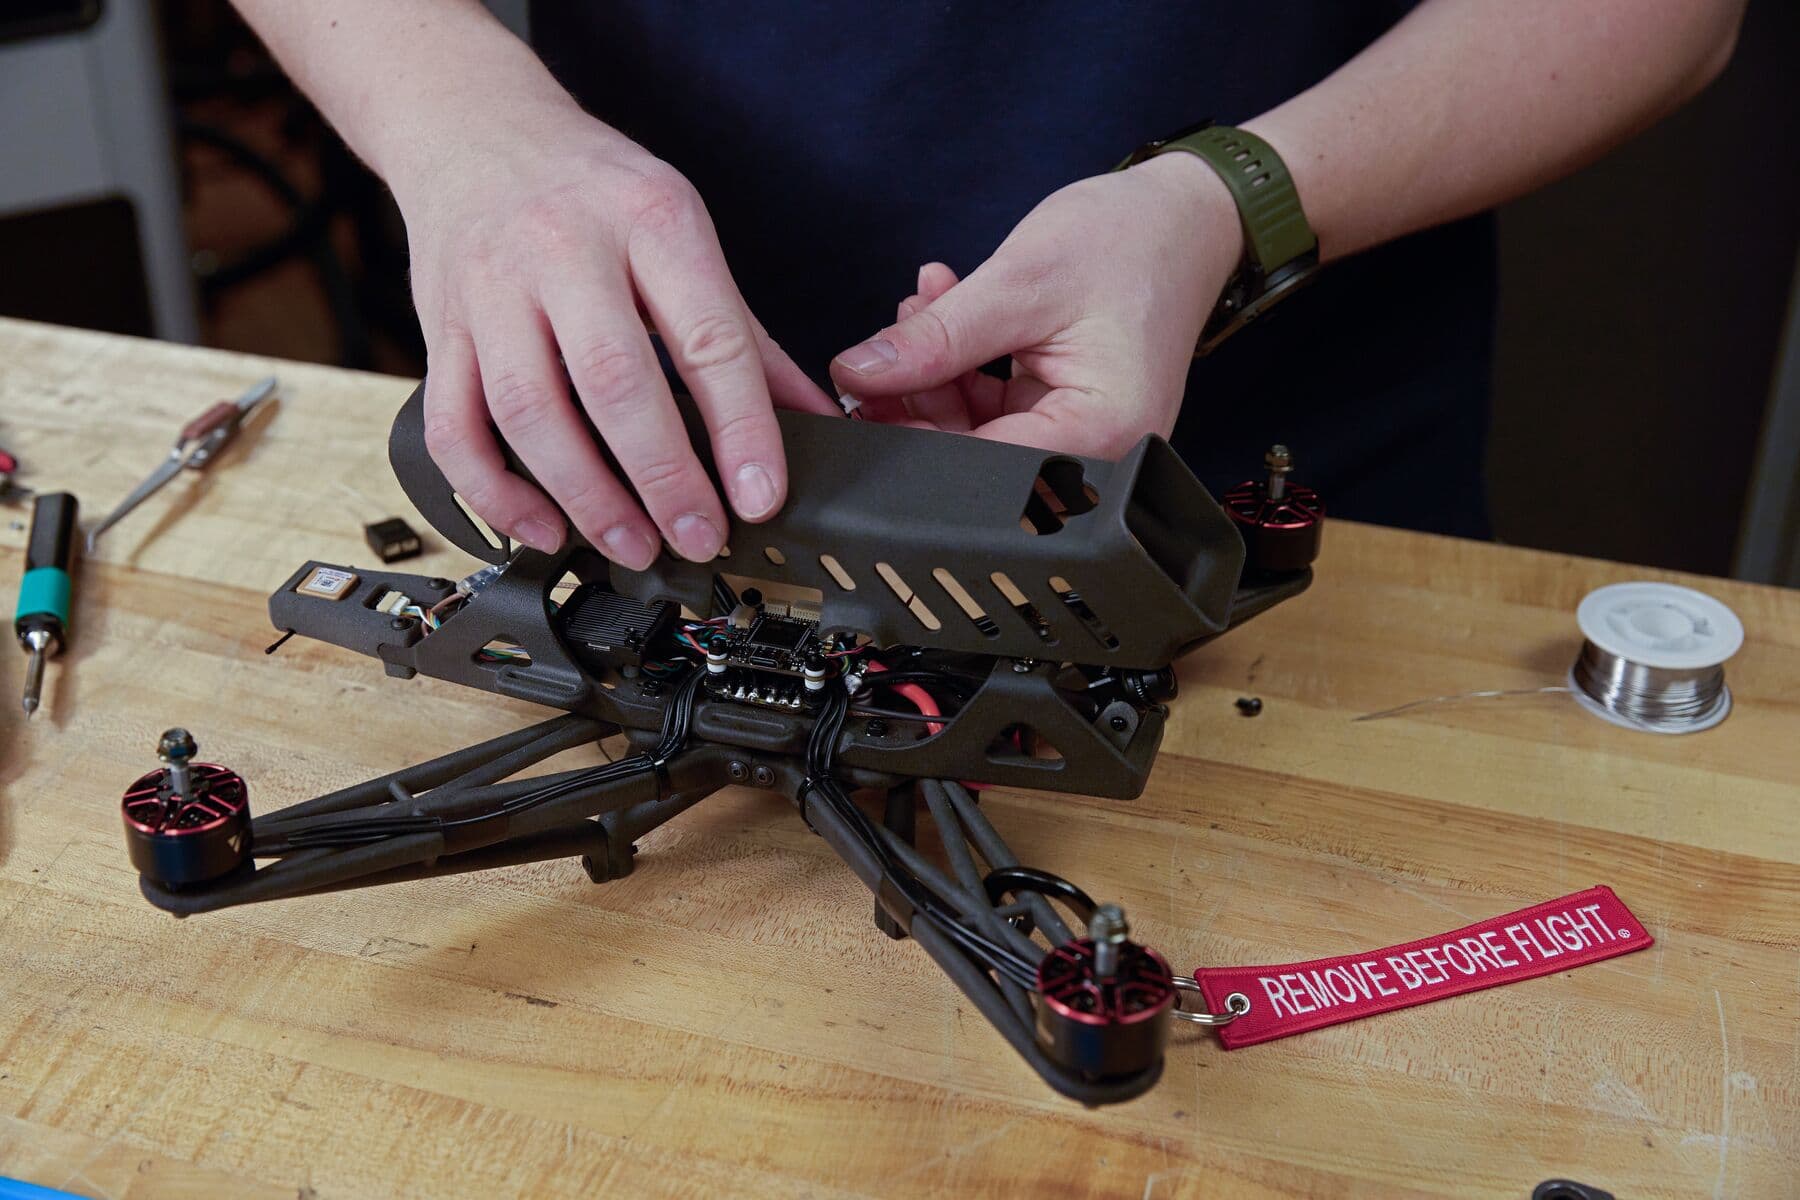
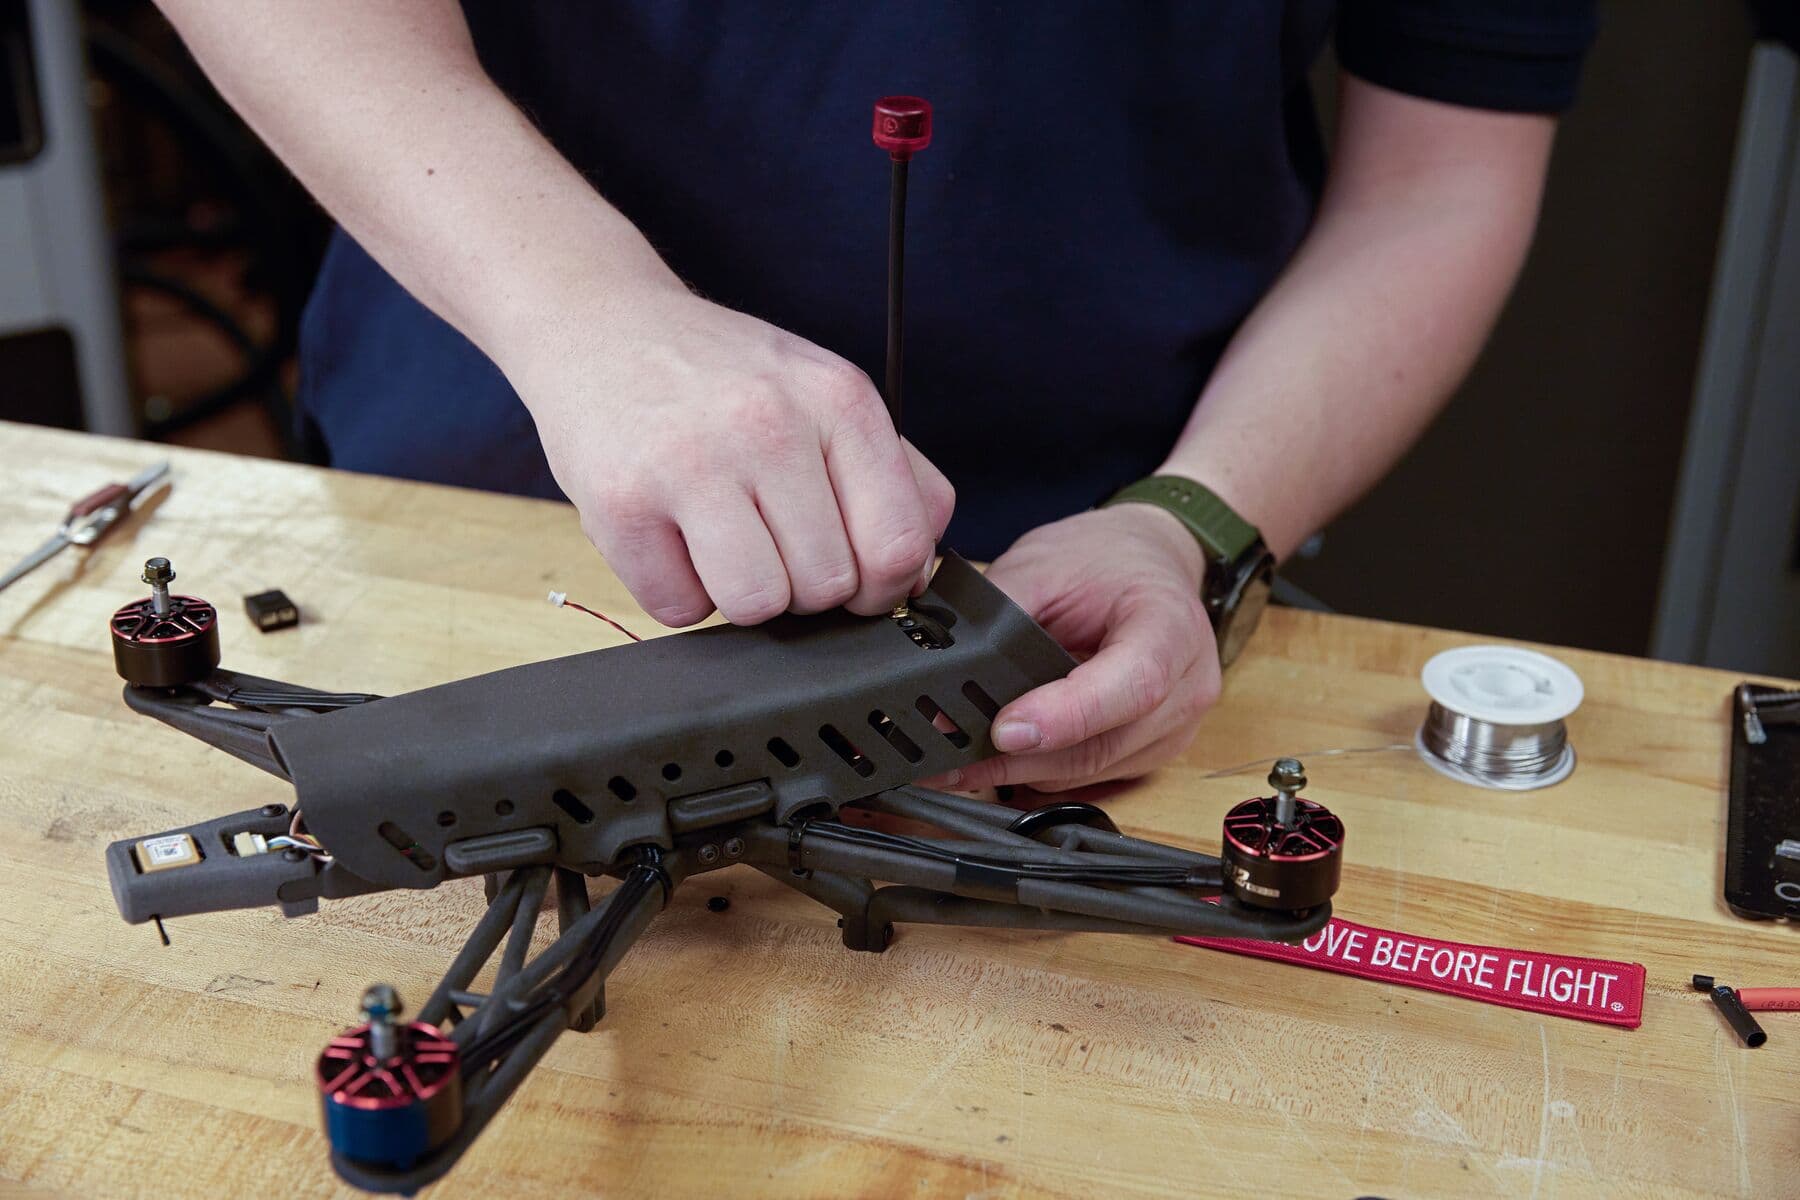
Place the SLS 3D printed cover on top of the drone mounting board. This design uses slots for airflow and cable routing. Route the Remote ID power cable through one of these slots.
Step 13: Finishing Touches (Antennae, Battery, Props)

Attach the antennae: Ensure the antennas are attached (if not already done) for the VTX, RC controls, and telemetry radio (if used).
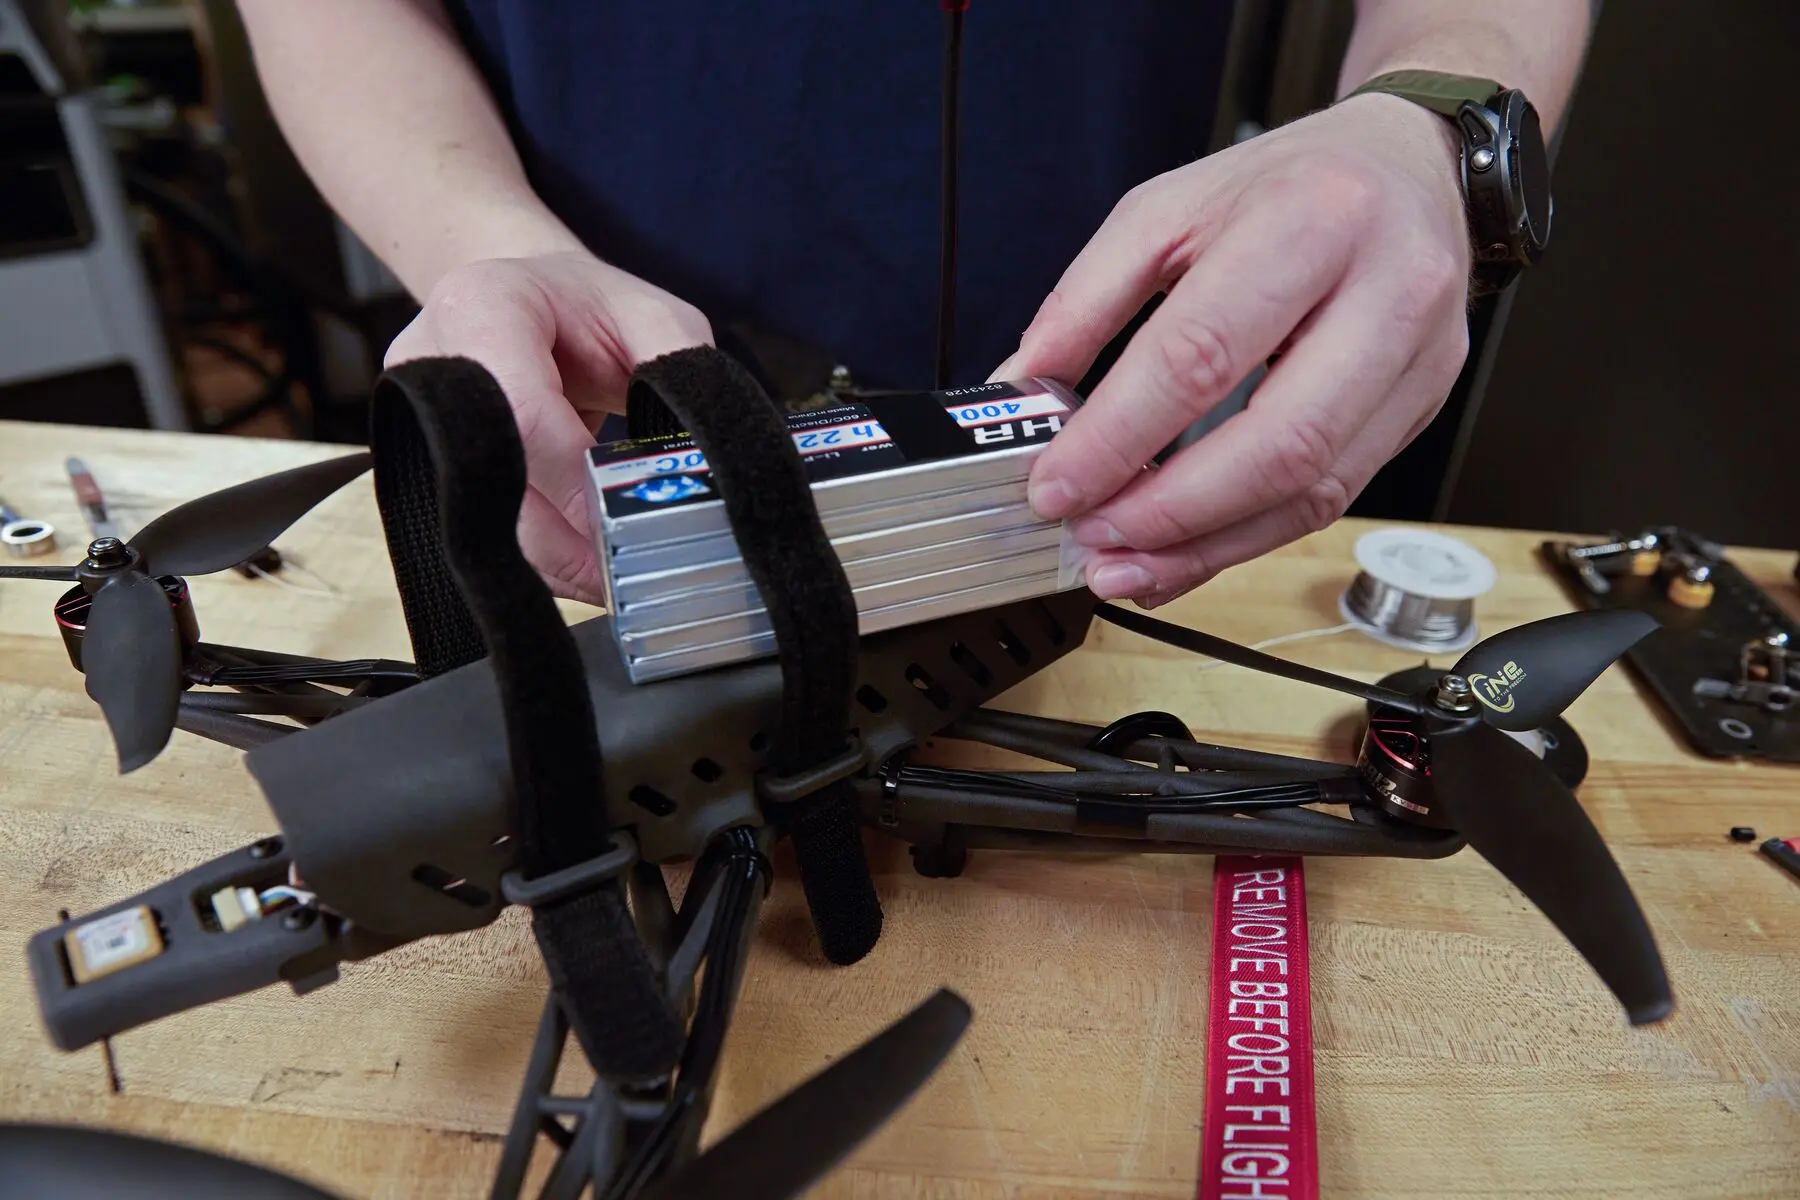
Attach the battery: Secure the battery pack with velcro straps, and tape the balance lead of the battery out of the way so it doesn’t get tangled or nicked by the propellers.
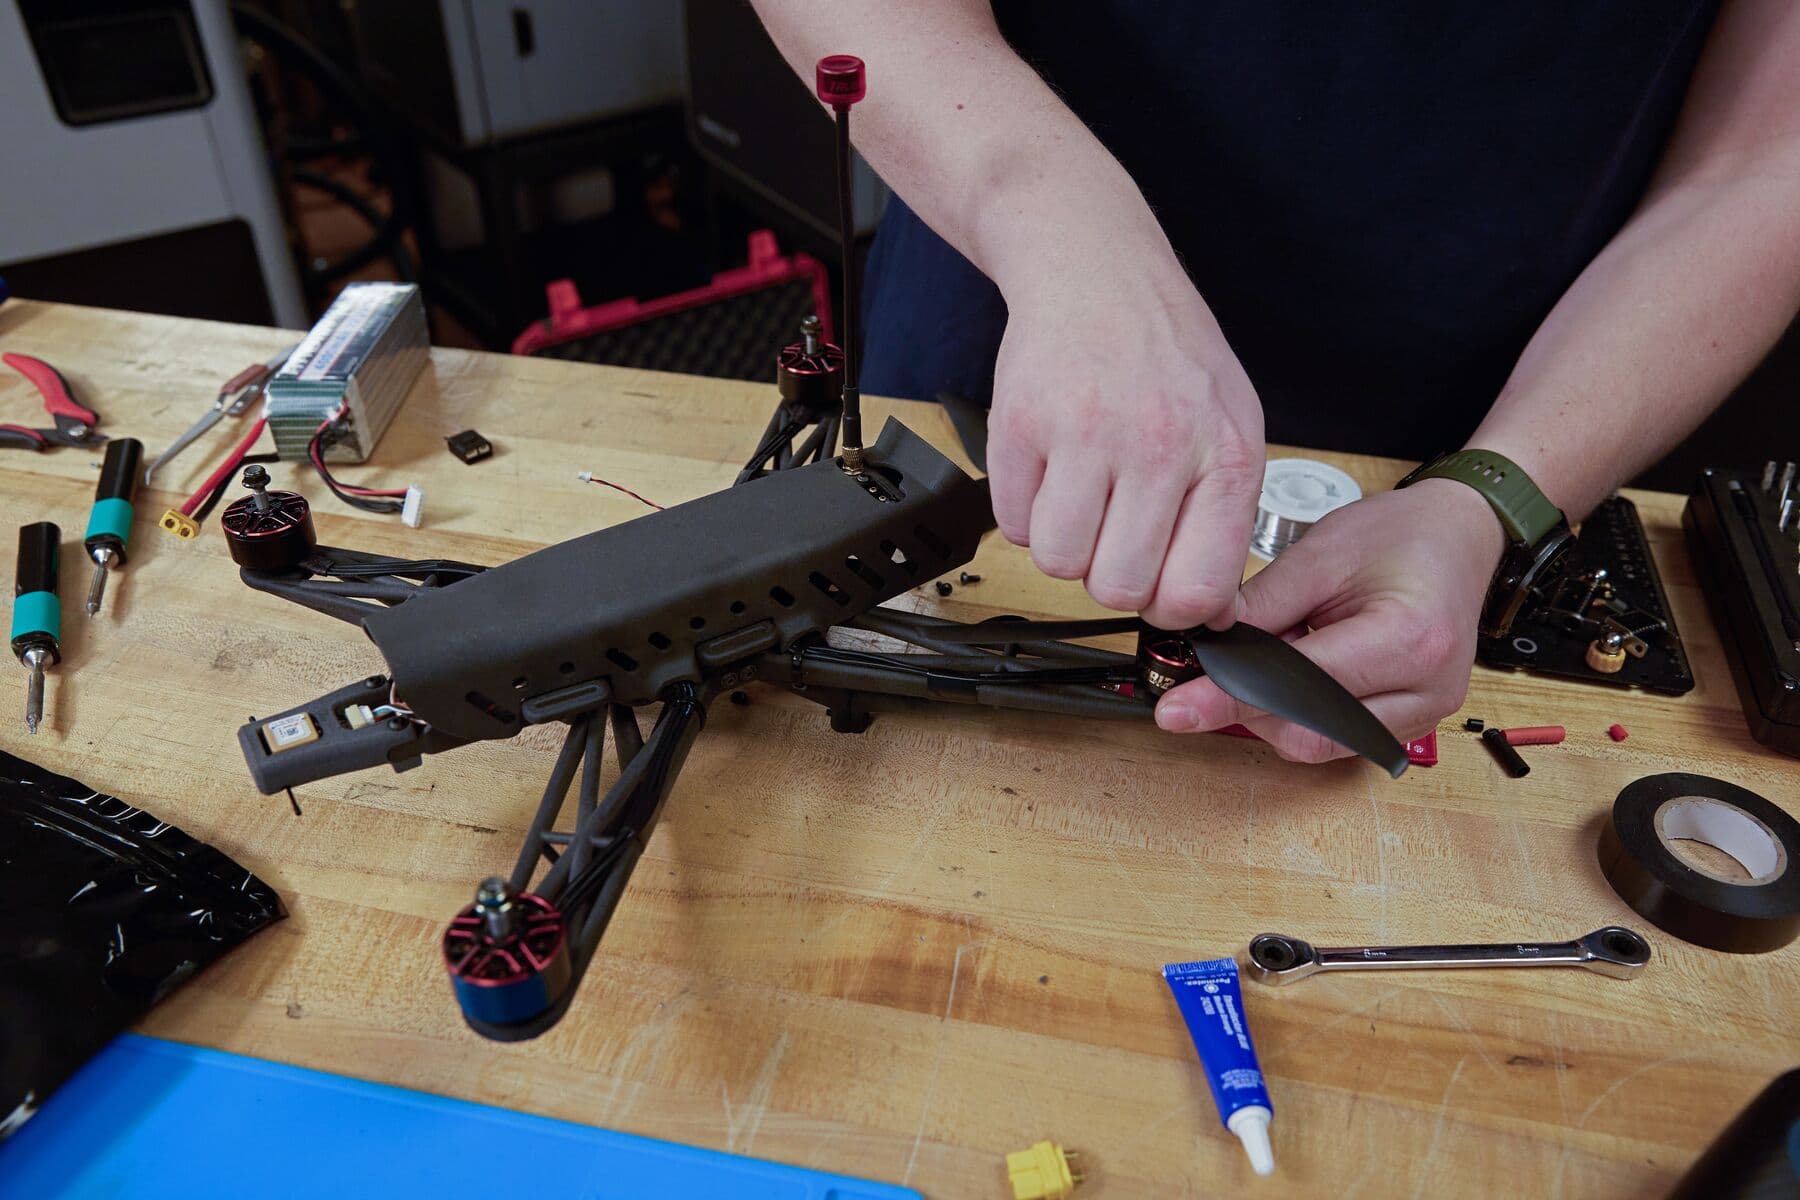
Attach the propellers: Place the propellers on the motors, secure them with nylon locking nuts, and tighten the nuts with a wrench.
Step 14: Fly
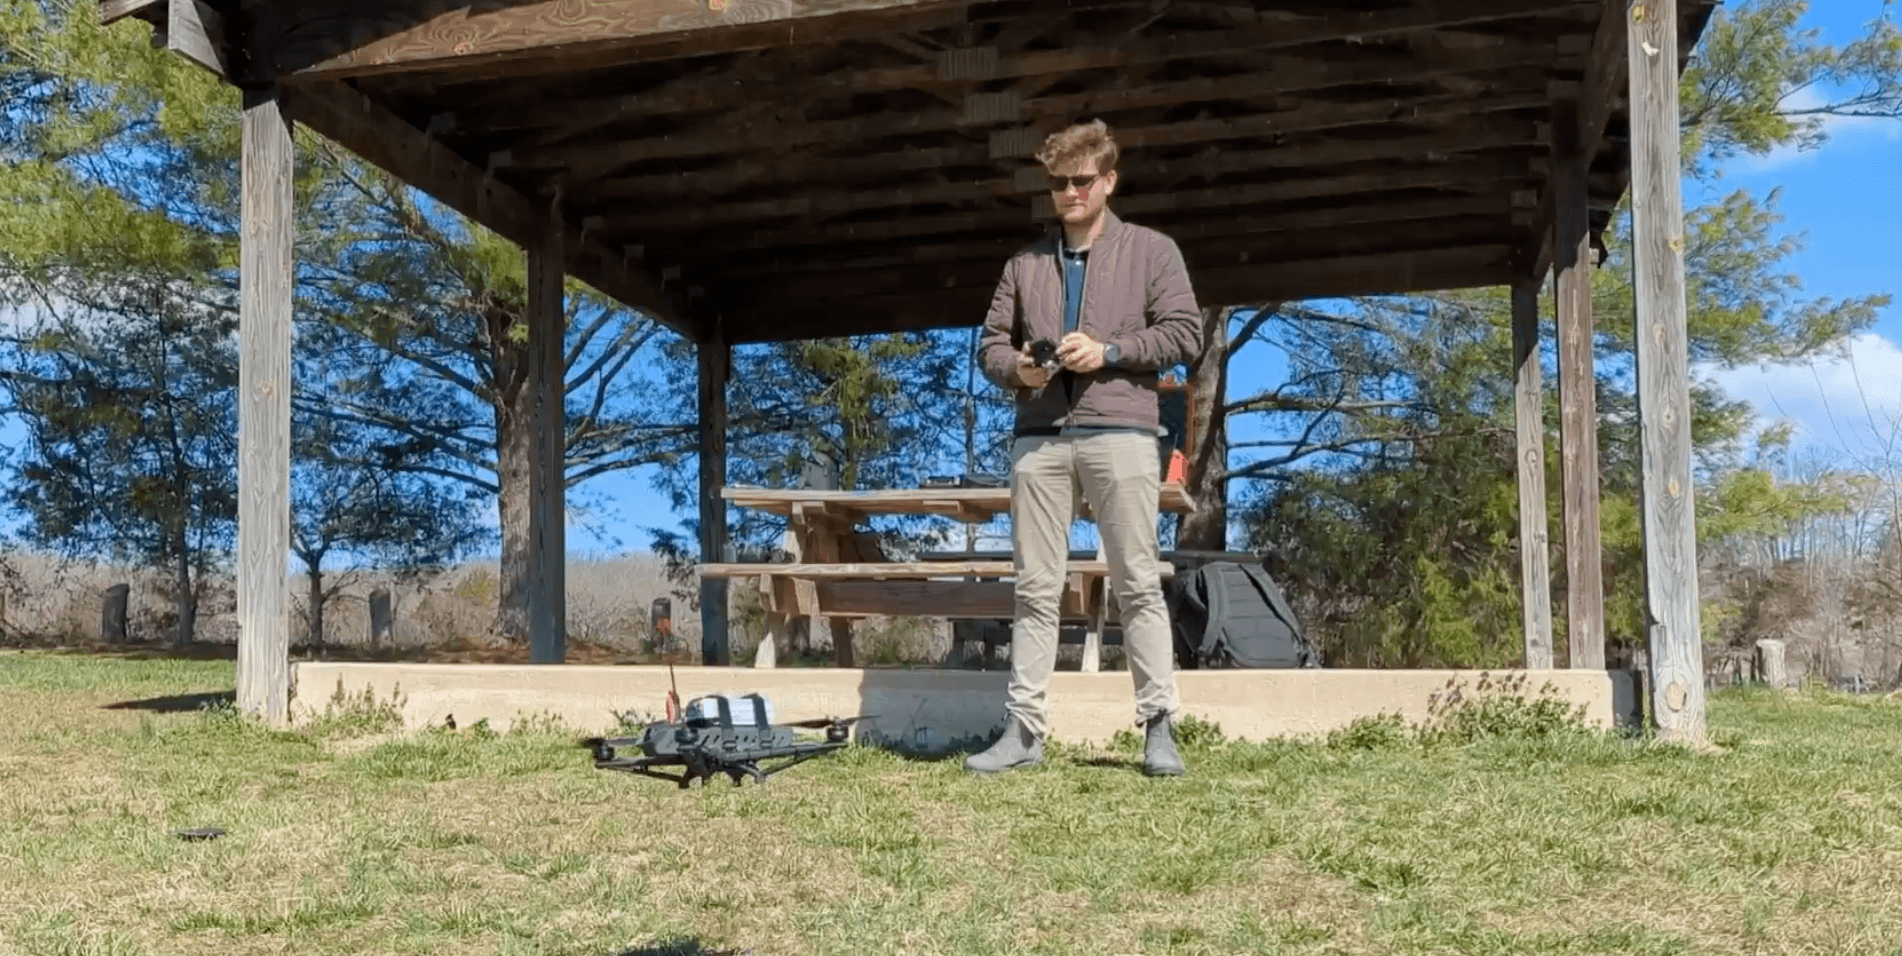
If you plan to fly a drone recreationally in the United States, you must pass The Recreational UAS Safety Test (TRUST) before you fly, and you need to carry proof of passage when flying. If you plan on flying for commercial purposes, you will need to be Part 107 certified.
It is smart practice to check your airspace using an FAA-approved mobile app or website to ensure there are no last-minute changes to airspace restrictions based on your exact location.
Rules and regulations can change quickly! So, always keep checking regulations and airspace conditions.
Conclusion: Building Drones With SLS 3D Printing
Drone manufacturing has experienced explosive growth in the last decade. The surge in interest, demand, and funding has enabled the creation of hundreds of small businesses and a diversification of the industry. 3D printing has been a part of that — the two technologies are almost inextricably linked. Affordable, accessible 3D printers like the Formlabs Fuse Series make independent manufacturing possible, especially in the case of a dynamic, fast-paced technology like drones.
The ability to iterate in end-use materials affordably and quickly gives designers the edge, while the ability to affordably produce hundreds or low thousands of end-use products gives manufacturers the chance to reach the market quicker and satisfy their customers’ demands better than the competition.
To learn more about how you can get started with a Fuse Series SLS ecosystem, contact our team. To learn more about Building Momentum and explore drone design and building trainings, visit their page.