
Atención: Para una conformidad y biocompatibilidad plenas, la Silicone 40A requiere un depósito de resina y una base de impresión específicos. Utiliza la Form Wash sólo con otras resinas biocompatibles de Formlabs.
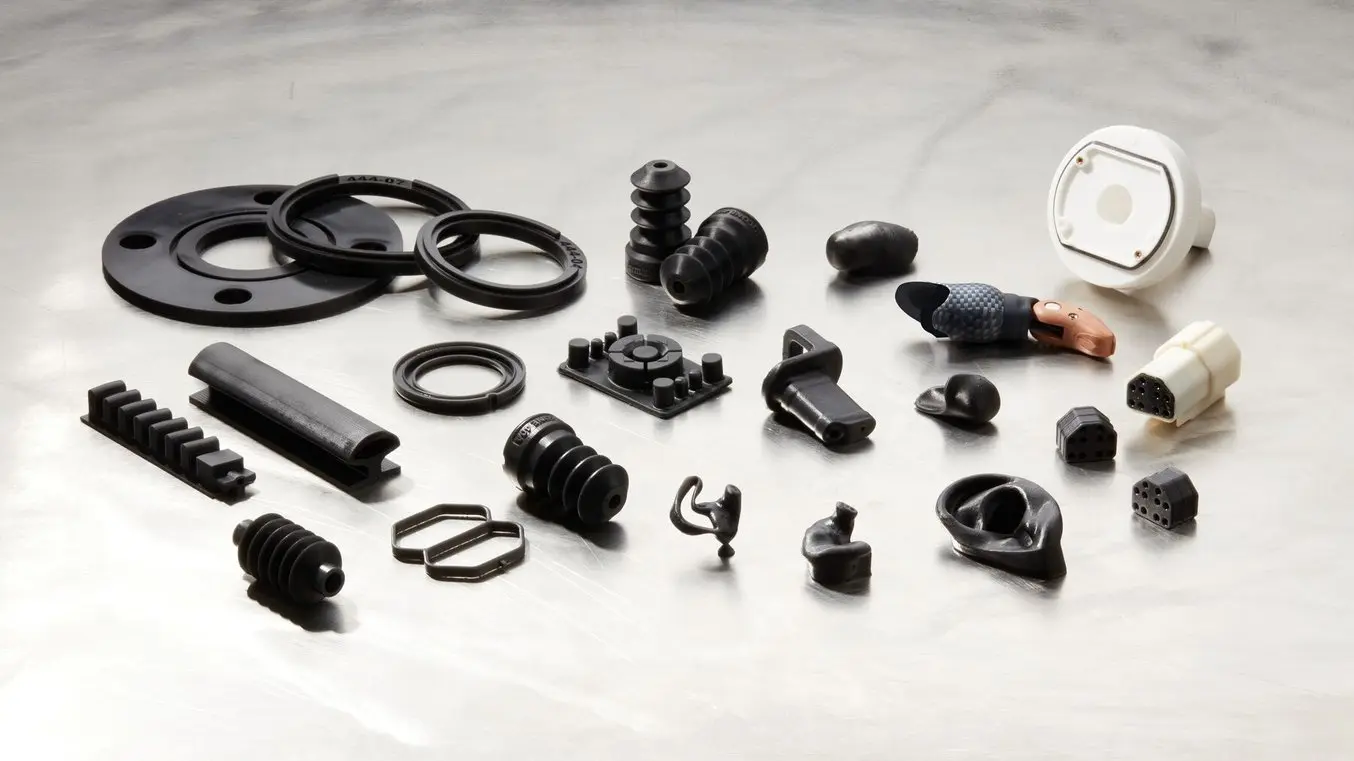
La goma de silicona es un material versátil con propiedades mecánicas, como la resistencia al calor y la biocompatibilidad, que lo hacen muy adecuado para aplicaciones en el campo de la medicina. Usos como audífonos personalizados, asas y mangos especializados para productos sanitarios, modelos anatómicos blandos y prótesis convierten a la silicona en un material clave para el sector sanitario.
En esta guía, describiremos las formas en que se puede utilizar el ecosistema Formlabs para crear auténticas piezas de silicona para aplicaciones en el sector sanitario, incluida la forma de imprimir con la resina Silicone 40A utilizando las impresoras 3D de estereolitografía (SLA) Formlabs, y de moldear silicona utilizando herramientas impresas en 3D mediante SLA (incluidos moldes de inyección de dos piezas, sobremoldeados y moldes de compresión).
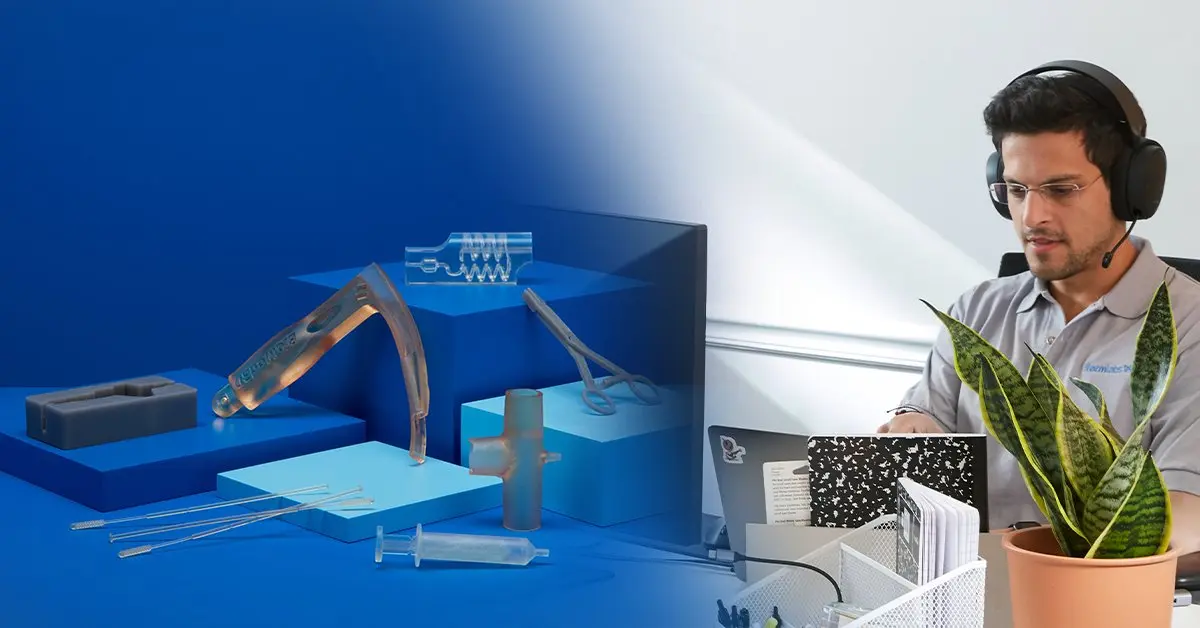
CONTACTA CON NOSOTROSPonte en contacto con un experto en impresión 3D
Habla con nuestros expertos
Tanto si necesitas fabricar herramientas quirúrgicas adaptadas al paciente como prototipos biocompatibles de alta fidelidad para un dispositivo médico, estamos aquí para ayudarte. Ponte en contacto con nuestros expertos en impresión 3D para encontrar la solución adecuada para ti y las necesidades de tu empresa.
Producción de piezas de silicona
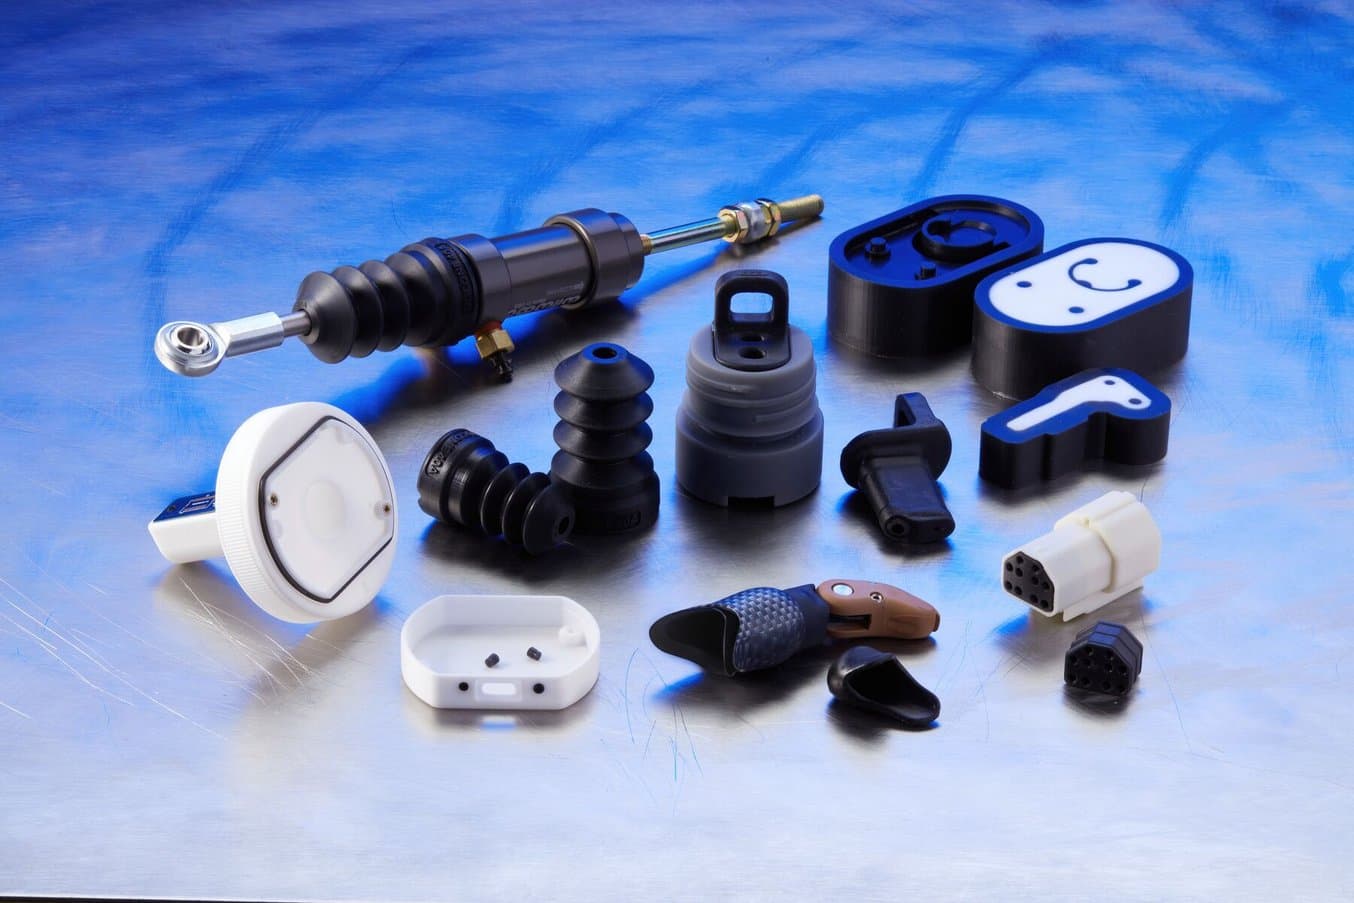
Las piezas blandas y gomosas tienen usos sanitarios, que abarcan desde modelos anatómicos blandos hasta prótesis y otros dispositivos ponibles. Los diseñadores pueden incorporar a sus catálogos piezas de verdadera silicona robustas, flexibles y estirables mediante dos métodos: la impresión directa con la Silicone 40A Resin y el moldeo de silicona usando herramientas impresas en 3D mediante SLA.
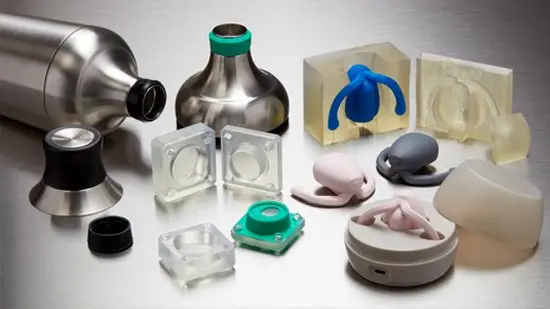
La silicona es un material muy utilizado para fabricar productos sanitarios blandos de uso final. También se puede usar para fabricar moldes blandos para la fundición de materiales rígidos, un proceso conocido como "fabricación de moldes de silicona". Esta guía solo trata la producción de piezas de silicona, que crea piezas blandas y gomosas imprimiendo directamente con la Silicone 40A Resin o fundiendo silicona en moldes impresos en 3D. En nuestra guía, encontrarás más información sobre la producción de piezas rígidas mediante la fabricación de moldes de silicona.
Este informe incluye ejemplos de producción de piezas de silicona con distintos métodos. Algunos ejemplos son los siguientes:
-
Impresión directa en silicona: Las piezas de silicona se producen directamente en las impresoras 3D de la serie Form con resina de silicona 40A. Este método es el mejor para producir geometrías complejas que no se pueden obtener mediante el moldeo.
-
Moldeo por compresión de masilla de silicona: Una silicona de curado rápido se coloca en dos lados de un molde impreso en 3D, que se sujeta con un tornillo de banco. Este método a menudo se usa para prototipos de juntas e imita las herramientas utilizadas en la producción en masa.
-
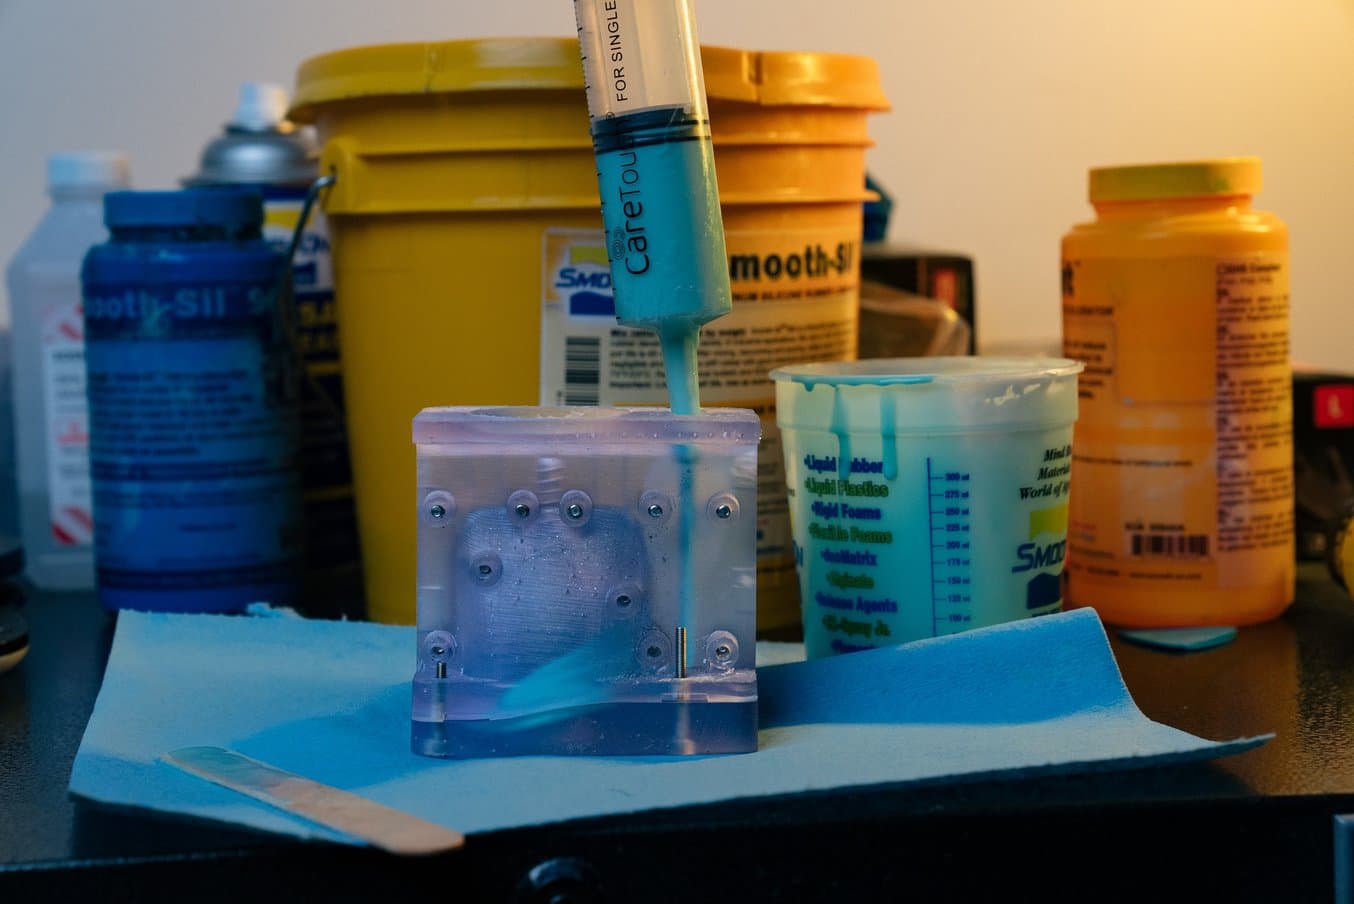
Molde llenado por inyección para silicona líquida: Este es el método más común para moldear un prototipo único continuo de silicona, utilizando un molde en dos o más piezas. En muchos casos, el molde está configurado de manera que la gravedad contribuye al proceso de llenado de silicona. La silicona se inyecta en un canal en la parte superior del molde y la cavidad del mismo se va llenando lentamente desde la parte inferior. Por último, la silicona líquida se libera mediante salidas y canales de aire en la parte superior del molde.
-
Sobremoldes para el encapsulado total o parcial de hardware en silicona: El hardware se suspende en un molde de dos o más piezas. A continuación, se inyecta silicona líquida en la cavidad del molde, para que envuelva total o parcialmente el hardware.
-
Moldes de cascarón para productos de silicona personalizados: El molde es un cascarón delgado (de menos de 1 mm) que envuelve la cavidad de inyección de silicona. Una vez que la silicona está curada, el cascarón impreso en 3D se rompe para revelar una pieza de silicona. Dado que este es un molde sacrificable que no se puede reutilizar, esta técnica se usa para crear una única pieza personalizada. Una guía paso a paso sobre la producción de moldes de cascarón se describe con gran detalle aquí en relación con los moldes auriculares de silicona.
Los métodos de diseño, impresión y fundición comparten pasos fundamentales incluso entre diferentes sectores y aplicaciones. Te mostraremos un ejemplo de diseño detallado para un sobremolde llenado por inyección, teniendo en cuenta los consejos y las buenas prácticas que ofrecen nuestros clientes.
Tipos de siliconas
Las siliconas son un tipo de polímeros que contienen los elementos químicos del silicio y el oxígeno en su cadena molecular, y que pasan de un estado de gel o líquido a un estado sólido muy flexible y estirable después del curado. Son materiales versátiles con propiedades de alto rendimiento, como un excelente aislamiento eléctrico, resistencia al calor, estabilidad química, una gran resistencia al desgarro y biocompatibilidad, lo que las hace atractivas para sectores muy exigentes, como el de la sanidad.
Los elastómeros de silicona dominan el mercado y se pueden dividir en tres categorías:
-
Las gomas de silicona líquidas son siliconas de alto rendimiento que se suelen emplear para producir piezas técnicas resistentes con tolerancias ajustadas, como sellos o conectores electrónicos. Se procesan a temperaturas elevadas, a menudo mediante el moldeo por inyección de líquido, y se eligen para una producción de gran volumen.
-
Las siliconas vulcanizadas a alta temperatura (HTV), también llamadas gomas de silicona curadas por calor, ofrecen una buena resistencia a las temperaturas elevadas y al envejecimiento, lo que resulta ideal para cables o aislantes en productos sanitarios. Suelen utilizar una química catalizada con platino y se les da forma mediante extrusión o moldeo por compresión, con una vulcanización bajo presión y calor. Descubre cómo los expertos en silicona de SiOCAST dan forma moldes de silicona vulcanizada a alta temperatura alrededor de patrones maestros impresos en 3D.
-
Las siliconas vulcanizadas a temperatura ambiente (RTV) son relativamente más fáciles de procesar, con buenas propiedades mecánicas y térmicas para juntas y productos sanitarios, así como para el encapsulado de componentes eléctricos y la fabricación de moldes. Tradicionalmente, se les ha dado forma a temperatura ambiente, mediante moldeo por inyección, moldeo por compresión o fundición por gravedad.
Este informe recoge el uso de las siliconas vulcanizadas a temperatura ambiente (RTV). Describe técnicas que se pueden utilizar in situ en cualquier laboratorio de prototipado o de desarrollo de productos. Algunas formas específicas de siliconas RTV son:
-
Silicone 40A Resin: La Silicone 40A Resin es una resina de silicona de un componente que produce piezas 100 % de silicona con una elasticidad, resistencia química y estabilidad térmica excelentes. Las piezas se imprimen directamente en la Form 3/3B y se posacaban con una mezcla de alcohol isopropílico (2-propanol) y acetato de n-butilo, y luego con agua, calor y luz UV.
-
Silicona líquida vulcanizada a temperatura ambiente: Las siliconas líquidas suelen estar formadas por dos componentes o por un componente con una pequeña cantidad de catalizador añadida. Existen dos categorías generales que se pueden obtener fácilmente. Las siliconas catalizadas con platino son más costosas, pero ofrecen una mejor estabilidad dimensional a largo plazo y un grado de contracción muy bajo tras un curado completo. Las siliconas catalizadas con estaño son más económicas, pero ofrecen una menor estabilidad a largo plazo y suelen contraerse más. El tiempo de curado varía de 10 minutos a varias horas.
-
Polidimetilsiloxano (PDMS): El PDMS es un tipo químicamente distintivo de silicona líquida RTV que contiene grupos metilo en la cadena polimérica de silicio y oxígeno. El polímero líquido se utiliza mucho como lubricante o aditivo modulador de la viscosidad en productos industriales y de consumo. Como goma curada, el PDMS se utiliza en varias aplicaciones de investigación. Su gran transparencia óptica y su capacidad de capturar texturas y canales microscópicos de las superficies hacen que sea ideal para la microfluídica y la litografía blanda. Muchas fórmulas de PDMS se curan a temperatura ambiente durante un período de 48 horas o en menos de una hora si se someten a temperaturas elevadas.
-
Masilla de silicona: Se trata de una masilla de dos componentes que se mezclan a mano en volúmenes equivalentes. El tipo que aparece en este informe tiene una dureza Shore de 40A (véase la escala que aparece a continuación) o, en otras palabras, una dureza parecida a la de una goma de borrar. Este tipo de silicona se puede adquirir de proveedores de joyería, ya que se suele utilizar para producir moldes maestros de cera para la fundición de metal. Sin embargo, la misma silicona también es un buen imitador para juntas y sellos moldeados por compresión.
Contacto seguro con la piel, las membranas mucosas o los alimentos
Algunas aplicaciones requieren más sensibilidad que otras cuando entran en contacto con el cuerpo o con la comida. Consulta siempre las fichas de datos de seguridad de los materiales (FDS) del fabricante de la silicona para asegurarte de que el material se pueda utilizar con seguridad para tu aplicación. Ten en cuenta que las siliconas líquidas de dos componentes que están aprobadas para el contacto con la piel tienden a usar un catalizador de platino.
La Silicone 40A Resin se está evaluando actualmente como un producto en contacto con la piel de conformidad con la Norma ISO 10993-1 para los siguientes parámetros de biocompatibilidad: ISO 10993-5:2009, 10993-23-2021:2021, ISO 10993-10:2021.
Escala de dureza
Los materiales elásticos, incluidas las gomas de silicona, pueden ofrecer distintos grados de dureza, desde extremadamente blandos a extremadamente firmes. El número de dureza Shore es el que expresa esa característica. La escala Shore A mide los materiales más blandos, mientras que la escala Shore D recoge los materiales más duros. La tabla que se muestra a continuación ofrece una comparación útil para productos comunes del hogar.

¿Imprimir o moldear?
Los requisitos específicos de la aplicación que darás a tus piezas y tu proceso de trabajo determinarán si el método óptimo es la impresión directa o el moldeo con silicona. Aquí tienes algunas especificaciones de cada proceso que tener en cuenta:
-
Geometrías complejas: No todas las geometrías se pueden obtener mediante moldeo. La impresión directa es preferible para aplicaciones que requieran geometrías complejas.
-
Color: La Silicone 40A Resin es de color negro. Para aplicaciones que requieran translucidez o piezas en color, el moldeo con silicona puede ser una opción preferible.
-
Tiempo: Diseñar piezas para una impresión directa lleva menos tiempo que diseñar moldes. Además, el tiempo necesario para imprimir una sola pieza de silicona es considerablemente menor que el que hace falta para imprimir un molde y luego llenarlo de silicona. Cuando el tiempo es un problema, se suele preferir la impresión directa.
-
Olor: La Silicona 40A Resin se termina de imprimir con un olor que puede tardar en disiparse. Este proceso puede acelerarse curando tu pieza impresa en una mezcla de agua y Febreze HD, pero el moldeo con silicona puede ser preferible para aplicaciones en las que el olor del material sea una preocupación importante.
-
Biocompatibilidad: Los distintos tipos de silicona tienen diferentes niveles de biocompatibilidad. La Silicone 40A Resin se está evaluando actualmente para usarla en contacto con la piel de acuerdo con la norma ISO 10993-1. El moldeo con silicona puede ser preferible para aplicaciones que requieran niveles más exhaustivos de biocompatibilidad.
-
Exposición a los rayos UV: Las propiedades mecánicas de la Silicone 40A Resin se degradarán tras una exposición repetida a la luz UV. Para aplicaciones en las que las piezas van a pasar mucho tiempo expuestas a la luz solar directa, probablemente sea preferible usar el moldeo con silicona.
Para aplicaciones médicas que requieran piezas gomosas en las que la silicona no encaje bien, puedes considerar elastómeros Formlabs alternativos, como BioMed Elastic 50A Resin o BioMed Flex 80A Resin para SLA o TPU 90A Powder para impresión 3D SLS.
| Material | Impresora | Resistencia a la rotura por tracción | Esfuerzo de alargamiento al 100 % | Alargamiento de rotura |
|---|---|---|---|---|
| Silicone 40A Resin de Formlabs | Form 4/B Form 3/B/+ | 7,2 MPa | 4,5 MPa | 135 % |
| BioMed Elastic 50A Resin | Form 4/B Form 3/B/+ | 2,3 MPa | 1,3 MPa | 150 % |
| BioMed Flex 80A Resin | Form 4/B Form 3/B/+ | 7,2 MPa | 4,5 MPa | 135 % |
| TPU 90A Powder | Fuse 1+ 30W | 8,7 MPa (X/Y) 7,2 MPa (Z) | 7,2 MPa (X/Y) 7,0 MPa (Z) | 310 % (X/Y) 110 % (Z) |
Información general sobre la impresión 3D con la Silicone 40A Resin
La Silicone 40A Resin utiliza la tecnología con patente en trámite Pure Silicone Technology™ y el ecosistema de estereolitografía (SLA) de Formlabs para producir in situ piezas 100 % de silicona en cuestión de horas. Es ideal para aplicaciones que requieren flexibilidad, durabilidad y resistencia a esfuerzos repetidos de estiramiento, flexión o compresión.
| Propiedad del material | Silicone 40A Resin |
|---|---|
| Dureza Shore | 40A |
| Alargamiento de rotura | 230 % |
| Resistencia al desgarro | 12 KN/m |
| Resiliencia de rebote | 34 % |
| Intervalo de temperaturas | -25 °C a 125 °C |
La Silicone 40A Resin se usa en ámbitos tan diversos como el prototipado rápido, las pruebas de fase beta y las etapas de validación en el desarrollo de productos, además de para llevar a cabo de forma rentable una fabricación personalizada o de bajo volumen de piezas de uso final. El material también es adecuado para la fabricación de productos sanitarios, prótesis adaptadas a los pacientes y componentes de audiología, así como para la fabricación de piezas con geometrías complejas difíciles de fabricar mediante métodos tradicionales.
La impresión 3D directa de silicona con la Silicone 40A Resin es ideal para aplicaciones como el prototipado rápido, los accesorios para la fabricación, el utillaje y la fabricación de bajo volumen o personalizada.
Empezar a usar la Silicone 40A Resin resuelve los antiguos problemas asociados a los métodos tradicionales de impresión 3D con silicona, como los costes elevados y las limitaciones técnicas. La impresión en un clic con la Silicone 40A Resin ahorra tiempo al eliminar la necesidad de diseñar y fabricar los moldes, y de verter y fundir la silicona. También abre posibilidades de diseño al permitir a los usuarios crear geometrías complejas difíciles de conseguir con los métodos de fabricación tradicionales. Esta solución accesible permite a las empresas crear piezas de uso final de alta calidad sin hacer concesiones en cuanto al precio, la calidad o la velocidad.
Información general sobre utillaje impreso en 3D para el moldeo con silicona
Los moldes tradicionales para la producción de piezas de silicona se fabrican mediante mecanizado CNC, a partir de bloques de aluminio o acero. Estos moldes tradicionales incluyen moldes de inyección de dos o más piezas para gomas de silicona líquida o moldes de compresión de cavidad única con una lámina de goma de silicona curada por calor que se cura al someterla a presión y altas temperaturas. Normalmente, estos tipos de moldes de metal se utilizan para la producción en masa. Sin embargo, cuando se emplean para el prototipado, los tiempos de entrega de varias semanas y los cientos o miles de euros que hay que invertir de antemano en herramientas limitan la capacidad de los diseñadores de aplicar y probar pequeños cambios en un diseño de molde.
La impresión 3D de escritorio es una potente solución para fabricar herramientas con rapidez y bajos costes. Requiere muy poco equipamiento, por lo que los operarios cualificados pueden centrar su atención en otras tareas importantes. Con la impresión 3D en sus propias instalaciones, los fabricantes y los diseñadores de productos pueden introducir el utillaje rápido en el proceso de desarrollo de productos para validar las decisiones de diseño y materiales antes de pasar a la producción en serie. Pueden realizar iteraciones rápidamente, acelerar el desarrollo de productos y lanzar productos mejores al mercado. El utillaje impreso en 3D utilizando las resinas para estereolitografía de Formlabs ofrece muchas ventajas a los diseñadores de productos en el prototipado, las series de producción a pequeña escala y la producción de piezas personalizadas. Mediante el utillaje impreso en 3D, las siliconas RTV de dos componentes se inyectan en un molde de dos o más piezas, o se introduce masilla de silicona RTV entre las secciones de un molde de compresión impreso en 3D. Gracias al utillaje impreso en 3D, hay un amplio abanico de siliconas catalizadas con estaño y con platino disponibles para los diseñadores, que abarcan una amplia gama de durezas, colores y grados de transparencia, así como funciones especiales como su seguridad para el contacto con la piel.
Libro blancoDescarga el libro blanco
Producción de piezas de silicona con herramientas impresas en 3D
Este informe ofrece una guía paso a paso sobre el utillaje impreso en 3D para la producción de piezas de silicona, con buenas prácticas y casos de estudio de clientes.
La tecnología de impresión 3D por estereolitografía (SLA) es una buena elección para las herramientas de moldeo con silicona. Las piezas elaboradas mediante SLA se caracterizan por un acabado de la superficie liso y una alta precisión. Las gomas de silicona RTV capturan detalles precisos de la superficie, incluidos sus defectos, por lo que la calidad de la superficie de la herramienta se traduce directamente en la calidad de la superficie de la pieza final. Por ejemplo, un molde impreso con una impresora de modelado por deposición fundida (FDM) dejaría improntas visibles de las líneas de capa de la impresión en la pieza de silicona.
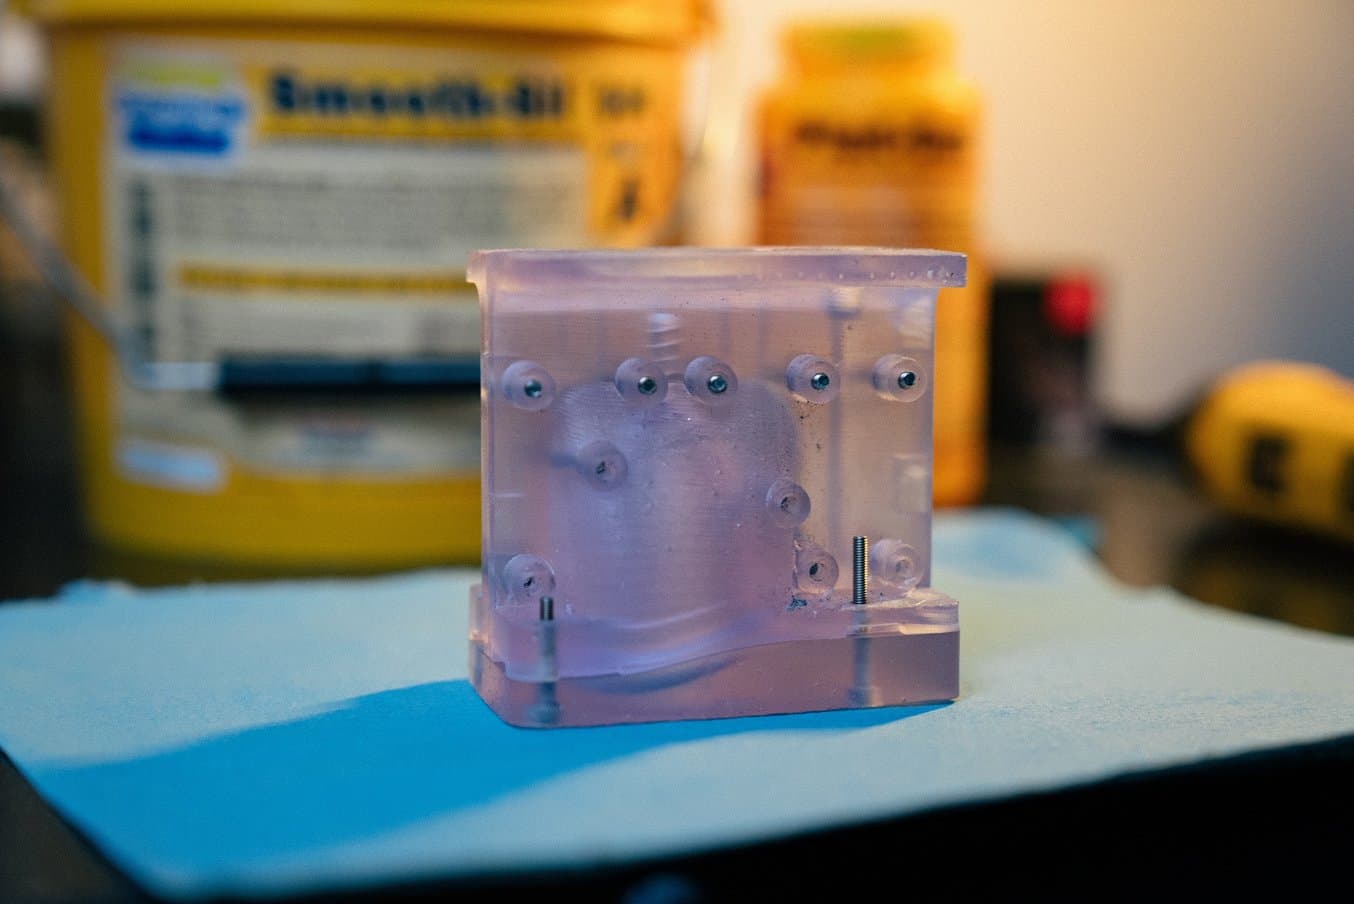
En cambio, la impresión 3D SLA con la BioMed Clear Resin o la Clear Resin de Formlabs permite visualizar el proceso de inyección de la silicona, con lo que los diseñadores pueden evaluar la formación de burbujas y vacíos e identificar las áreas en las que se deberían añadir filetes en las esquinas o más respiraderos de aire. La impresión 3D SLA también ofrece una ventaja en cuanto a la complejidad del diseño, ya que un molde impreso en 3D permite a los diseñadores aprovechar los socavados u otras geometrías complejas que no serían posibles o resultarían prohibitivamente caras de fabricar mediante el mecanizado CNC.
PSYONIC encapsula los dedos de la Ability Hand utilizando una configuración de sobremolde de silicona. Algunos moldes incluyen un inserto de molde de Tough 2000 Resin para anclar el "hueso" encapsulado en el molde.
La BioMed Clear Resin y la Clear Resin de Formlabs también son bastante versátiles en cuanto a su rendimiento mecánico. El mismo material se puede utilizar para crear un molde de cascarón extremadamente delgado que se quiebra y retira fácilmente de una pieza de silicona personalizada o para crear un molde de impresión robusto que se utiliza varias veces para producir juntas. Por último, llevar a cabo una fabricación asequible a escala del banco de trabajo reduce los tiempos de entrega, ya que un diseñador puede imprimir una geometría de molde y empezar a inyectar silicona el día siguiente.
Cuando se utiliza con moldes impresos en 3D, la goma de silicona vulcanizada a temperatura ambiente captura los detalles más precisos de la superficie, incluido el texto en relieve. Además, la mayoría de las siliconas para fundición no se adhieren químicamente y se pueden despegar de la superficie del molde tras el curado. Se puede conseguir una unión mecánica realizando la fundición sobre superficies muy porosas, como una tela. En algunos casos, se puede fomentar una unión química con aglutinantes especializados.
Ya que la silicona RTV no requiere temperaturas o presiones elevadas, se le puede dar forma fácilmente con un equipamiento limitado en un laboratorio de prototipado, lo que reduce el coste inicial de incorporar piezas blandas en el catálogo de diseño de cualquier empresa.
Compatibilidad de las resinas y siliconas de impresión 3D
Siempre que un material para fundición como la silicona entra en contacto con un molde impreso, debemos considerar la interacción química entre los dos materiales. A la hora de fundir siliconas catalizadas con platino en moldes de SLA, surge un desafío concreto: el monómero de resina puede inhibir el proceso de curado de la silicona, lo que deja una superficie gomosa y sin curar. Sin embargo, es posible producir las piezas de silicona catalizada con platino de alta calidad si nos aseguramos de que los moldes de SLA están completamente limpios y curados, además de aplicarles revestimientos protectores y agentes de desmoldeo.
Hay muchas combinaciones posibles de siliconas, resinas, revestimientos protectores y agentes de desmoldeo que se pueden probar. Pedimos a clientes de diversos sectores que nos informaran de si sus procesos de trabajo habían tenido éxito, y sus respuestas están resumidas a continuación. Hemos tenido en cuenta muchas de estas opiniones al desarrollar nuestro propio proceso paso a paso.
| Sector | Aplicación | Tipo de molde | Silicona | Resina | Buenas prácticas |
|---|---|---|---|---|---|
| Diseño de productos | Prototipos en beta Contacto con la piel | Sobremolde | Sin especificar (catalizada con platino) | Clear Resin | Pintar con vaselina como agente de desmoldeo |
| Diseño de productos | Uso final | Molde de cascarón | Mold Max de Smooth-On (catalizada con estaño) | Clear Resin | No se usó agente de desmoldeo, el molde es sacrificable/de un solo uso |
| Diseño de productos | Prototipos | Molde de compresión | Quick-Sil de Castaldo (masilla) | Clear Resin | Agente de desmoldeo de uso general de Smooth-On |
| Diseño de productos | Prototipos contacto con la piel | Molde llenado por inyección | Sin especificar (catalizada con platino) | LT Clear Resin Clear Resin Grey Resin | Cualquier agente de desmoldeo de uso general |
| Diseño de productos | Prototipos Contacto con la piel | Molde llenado por inyección Sobremolde | Dragon Skin 20 de Smooth-On (catalizada con platino) | Clear Resin | Spray acrílico Crystal Clear de Krylon + Ease Release 200 |
| Fabricación / Sanidad | Uso final | Molde llenado por inyección Sobremolde | Dragon Skin 20 de Smooth-On (catalizada con platino) | Clear Resin | No fue necesario agente de desmoldeo |
| Fabricación / Sanidad | Uso final Contacto con mucosas | Molde de cascarón | Sin especificar (catalizada con platino) | BioMed Amber Resin | No se usó agente de desmoldeo, el molde es sacrificable/de un solo uso |
| Audiología / Sanidad | Uso final Contacto con la piel | Molde de cascarón | BioPor AB 40 de Dreve | Clear Resin BioMed Clear Resin | No se usó agente de desmoldeo, el molde es sacrificable/de un solo uso |
| Entretenimiento | Modelos y piezas de atrezo Contacto con la piel | Molde relleno por inyección Molde abierto | FX Pro de Smooth-On (catalizada con platino) | Black Resin Grey Resin | No siempre se necesitó agente de desmoldeo |
| Entretenimiento | Modelos y atrezo Reproducción de piezas | Molde abierto Molde de silicona | Diversas siliconas catalizadas con platino o con estaño de Smooth-On | Clear Resin Grey Resin | Revestimiento de impresión 3D de alto rendimiento XTC-3D |
| Entretenimiento | Modelos y atrezo Reproducción de piezas | Molde de silicona | Sin especificar (catalizada con platino) | Clear Resin | Revestimiento en aerosol Flexible Primer Surfacer de SEM |
| Entretenimiento | Modelos y piezas de atrezo Contacto con la piel | Molde llenado por inyección | Platsil Gel-25 de Polytek (catalizada con platino) | Rigid 10K Resin | Revestimiento Super Seal de Smooth-On y Ease Release 200 |
| Aficionados | reproducción de arte | Molde abierto Molde de silicona | OOMOO 30 de Smooth-On (catalizada con estaño) | Grey Resin | Agente de desmoldeo de uso general de Smooth-On |
Aunque está claro que la combinación de materiales varía, nuestros clientes coincidieron en varias impresiones generales:
- Asegúrate de que tus piezas estén completamente lavadas y curadas. El molde impreso en 3D se debe lavar a conciencia en alcohol isopropílico limpio, para que las superficies no queden pegajosas después de que se seque el molde. También se debería curar completamente el molde para reducir la cantidad de monómero sin reaccionar en las piezas de SLA. Para este proceso, la unidad Form Cure ies una opción fantástica. Las piezas de Clear Resin adquirirán un tinte amarillo, lo que es un buen indicador de que tu molde está completamente curado.
- Prueba un revestimiento protector. Hay muchos revestimientos acrílicos o de epoxi disponibles que se aplican como un aerosol en un único paso (p. ej., el revestimiento Crystal Clear Acrylic de Krylon), o como un material aplicado con brocha en dos partes (p. ej., XTC-3D de Smooth-On). Ambos tipos de revestimiento dejarán un acabado vidrioso y brillante en las superficies internas del molde, utilizando muy poco material. Es posible que sean necesarias varias aplicaciones. Consulta las instrucciones del fabricante para conocer los tiempos de secado o de curado. Utiliza un agente de desmoldeo
- siempre que la silicona vaya a entrar en contacto con otro material. Esto facilitará la retirada del molde y eliminará los residuos de silicona de su interior, con lo que será más fácil reutilizarlo para múltiples fundiciones. En muchos casos, un agente de desmoldeo genérico o "de uso general" de tu marca de silicona será suficiente (por ejemplo, la película protectora Stoner Dry e408). Basta con una ligera niebla de agente de desmoldeo. Una vez más, consulta las instrucciones del fabricante para conocer los tiempos recomendados de secado.

Seminario webVer el seminario web ahora
Presentamos la Form 4B: Una producción más rápida, una mayor precisión y equivalencias normativas
Únete a Formlabs para conocer en exclusiva la Form 4B y descubrir cómo aumenta la producción, alcanza una precisión sin igual y se integra a la perfección (se explica la equivalencia normativa).
Otras buenas prácticas
Algunas fórmulas de silicona, como el PDMS, son más susceptibles a la inhibición del curado que otras cuando entran en contacto con utillaje impreso en 3D mediante SLA. Hemos incluido más pasos de resolución de problemas proporcionados por usuarios de Formlabs, que se han desarrollado a partir de nuestras recomendaciones generales para las siliconas líquidas RTV.
- Enjuaga con acetona. Rociar el molde impreso en 3D con una botella comprimible de acetona puede ayudar a retirar el disolvente residual y los restos que queden después del paso de lavado estándar con alcohol isopropílico.
- Sobrecura el molde. Para el utillaje impreso con la Clear Resin, aumenta el tiempo de curado de 15-20 minutos a 60-120 minutos, a 60 °C.
- Espera 24-48 horas después del posacabado. Deja que el molde repose expuesto a la temperatura y la luz del ambiente antes de aplicar revestimientos y verter la siicona. En este paso, también ayuda exponer las superficies del molde a un flujo de aire libre.
- Utiliza un revestimiento de epoxi. Un sellante de epoxi de dos componentes puede actuar como una barrera eficaz entre la silicona y el molde impreso en 3D.
- Utiliza una mayor concentración de catalizador. Cuando se usan siliconas de dos componentes, nuestra sugerencia es añadir un poco más del componente catalizador. Si una pequeña proporción del catalizador se ve inhibida por la superficie del molde, el catalizador adicional puede ayudar a compensarlo y evitar que se forme una superficie de silicona pegajosa.
Pieza de muestra gratuitaSolicita una pieza de muestra gratuita
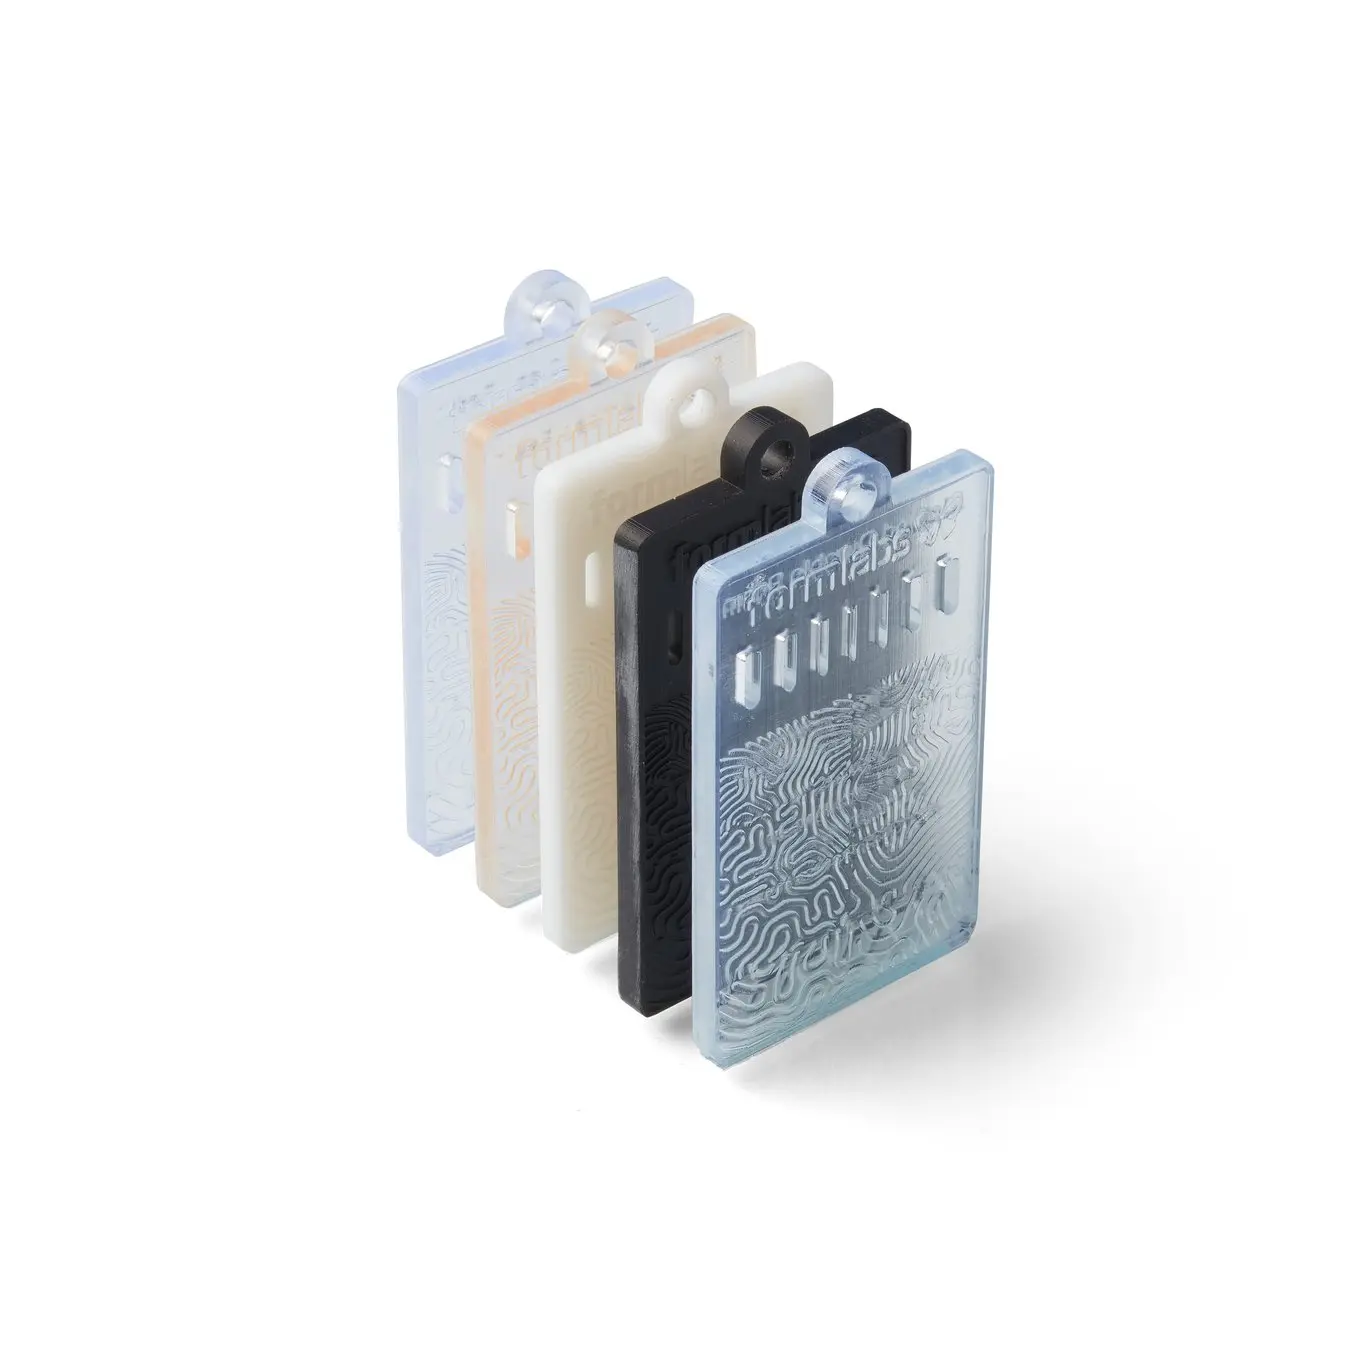
Muestras de las resinas BioMed
Cada muestra de las resinas BioMed incluye diseños en relieve o grabados en sus superficies, grosores de 0,5-2 mm e información normativa exclusiva de la resina en cuestión.
Cómo elegir un tipo de molde
Aunque el resultado de cada proceso de moldeo puede parecer similar, hay algunos criterios que recomendamos para elegir un tipo de molde. Entre ellos se cuentan la geometría que se quiere alcanzar para la pieza y la capacidad de incorporar socavados y agujeros en el diseño, tu escala de producción y los materiales que quieres fundir. Ofrecemos algunas pautas en la siguiente tabla.
| Tipo de molde | Geometría de la pieza | Materiales | Escala de producción |
|---|---|---|---|
| Molde de compresión | Sin socavados | Masilla de silicona de dureza alta | Decenas de fundiciones |
| Molde llenado por inyección | Socavados leves | Siliconas líquidas de dos componentes | Decenas de fundiciones |
| Sobremolde | Encapsula el hardware interno, socavados leves | Siliconas líquidas de dos componentes | Decenas de fundiciones |
| Molde de cascarón | Puede incorporar grandes | Siliconas líquidas de dos componentes | Uso único |
Moldeo con silicona paso a paso
El equipo de Formlabs ha desarrollado un proceso paso a paso para crear un prototipo de un producto de silicona, combinando aspectos de los procesos de trabajo que nuestros clientes han llevado a cabo con éxito. Un proyecto que mostramos a continuación es un llavero moldeado en silicona con un dispositivo AirTag de Apple integrado. La otra es una junta diseñada por OXO. Las directrices de diseño abarcan todos los pasos esenciales, desde importar una geometría de referencia a añadir elementos de alineación para hardware encapsulado. También utilizamos el novedoso método de llenado con silicona recomendado por Dame Products, que utiliza una pistola de epoxi con una boquilla de mezclado con proporción de volumen 50:50.
Muchos de los pasos y buenas prácticas que compartimos se utilizan con diversos tipos de moldes. Cada paso del tutorial indica su relevancia para los moldes llenados por inyección, los sobremoldes o los moldes de compresión.
Si necesitas más información acerca de los moldes de cascarón, el libro blanco de audiología de Formlabs Impresión 3D de moldes auriculares de silicona personalizados ofrece una guía paso a paso.
¿Qué se requiere?
De Formlabs:
- Formlabs BioMed Clear Resin o Clear Resin Impresora SLA de Formlabs compatible con firmware actualizado
- Software PreForm (última versión)
- Plataforma de impresión compatible Tanque de resina compatible
- Form Wash, Form Wash L, o Finish Kit
- Form Cure o Form Cure L
De otros fabricantes
Proceso de moldeo: Moldeo por inyección o sobremoldeo
| Elemento | Proveedor | Notas |
|---|---|---|
| Aerosol acrílico de alto brillo | Krylon | Revestimiento protector |
| Ease Release 200 | Tecnologías de liberación Mann | Agente de desmoldeo |
| AirTag de Apple | Hardware encapsulado | |
| Dragon Skin 20 | Smooth-On | Silicona líquida de vulcanización a temperatura ambiente (RTV), catalizada con platino |
| Silc Pig | Smooth-On | Pigmento de color |
| Palitos para remover | ||
| Cartucho de resina epoxi | McMaster-Carr | Relación 1:1 |
| Pistola dispensadora de epoxi | McMaster-Carr | |
| Boquilla de mezclado | McMaster-Carr | |
| Abrazadera en C o abrazaderas de muelle | ||
| Cinta adhesiva | ||
| Cámara de vacío y bomba (opcional) | Amazon | |
| Cámara de presión (opcional) | Amazon |
Proceso de moldeo: Moldeo por compresión
| Elemento | Proveedor | Notas |
|---|---|---|
| Ease Release 200 | Tecnologías de liberación Mann | AGENTE DE DESMOLDEO |
| Quick-Sil de Castaldo | Castaldo | |
| Tornillo de banco |
Diseño del molde
Sobremolde
- Importa la referencia Si piensas sobremoldear o encapsular otro objeto con silicona, importa tu objeto o sustrato de referencia en el software CAD que elijas. En este ejemplo, importamos una réplica digital de un AirTag de Apple.
Molde llenado por inyección, sobremolde o molde de compresión
- Diseña la pieza de silicona Juntos, la silicona y cualquier elemento encapsulado forman el Volumen base. Para las piezas sobremoldeadas, apunta a un grosor mínimo de 2 mm para el cascarón de silicona. En nuestro ejemplo de molde de compresión, el objeto tiene un agujero pasante completo. Recomendamos definir un núcleo como un objeto independiente. La pieza de silicona y el núcleo pueden considerarse como el volumen base.
- Diseña el molde Stock Crea un bloque en torno a tu volumen base que se extienda al menos 1 cm más allá de la carcasa exterior de tu pieza.
- Divide el molde Para un molde básico de dos piezas, tendrás que dividir tu volumen base en dos piezas a lo largo de una superficie definida, basándote en una línea de apertura. Empieza por utilizar el análisis del ángulo de desmoldeo para definir la línea de apertura. Considera cómo se separarán las dos mitades de tu molde para asegurarte de que la pieza de silicona se pueda liberar con facilidad del molde. Para evitar socavados, la línea de apertura podría ser un contorno en vez de una línea recta. A continuación, extruye la línea de apertura en una superficie y usa esta superficie para dividir tu molde. Para los moldes complejos que requieren más de dos piezas, este proceso se puede repetir varias veces para generar el número de piezas del molde necesarias.
- Elimina el volumen base del conjunto del molde. Utiliza la sustracción booleana en tu software CAD para esculpir la cavidad del molde a partir del bloque sólido. En el caso de nuestro molde de compresión, el componente macho individual se vuelve añadir con una adición booleana a un lado del molde, lo que acaba creando dos líneas de apertura.
- Comprueba los ángulos de desmoldeo Es buena idea hacer una pausa aquí y considerar cómo se abrirán los cuerpos de tus moldes después de que inyectes la silicona. Nuestros clientes recomiendan utilizar al menos un ángulo de Draft de 2º para prototipos de productos de silicona . Sin embargo, este aspecto del diseño de moldes de silicona es bastante permisivo. Dado que la goma de silicona se puede deformar en gran medida durante el desmoldeo, se pueden manejar muchos ángulos, incluidos ángulos de 90 grados o pequeños socavados. Recomendamos utilizar en este paso la herramienta de Draft Analysis (Análisis del ángulo de desmoldeo) de tu programa CAD para analizar y editar las zonas que aparezcan en rojo, más allá del ángulo de desmoldeo definido como umbral.
Molde llenado por inyección, sobremolde
- Si vas a valerte de la gravedad para llenar los recovecos de la cavidad del molde, coloca la entrada en la parte alta del bloque del molde y a continuación, mediante una forma de U con un radio de curvatura generoso, conecta la entrada a la cavidad del molde en el punto más bajo posible. Llenar en esta ubicación evita que se formen burbujas de aire. Crea la entrada aplicando sustracción booleana al conjunto del molde. Normalmente, el eje central de la entrada de llenado se encuentra en la línea de separación. (Otra configuración sería una entrada de llenado corta que estuviera conectada directamente a un punto de la cavidad de tu molde, con el principal respiradero de aire en el lado opuesto.)
- Definir respiraderos de aire El aire se desplaza al llenar un espacio cerrado de silicona, por lo que es natural colocar un respiradero de aire en el último punto del molde en llenarse. En nuestro ejemplo, esto se coloca en la parte superior del conjunto del molde. Para colocar más respiraderos de aire, conviene pensar en zonas donde es probable que quede atrapado aire y conectar respiraderos específicamente a curvas cerradas, esquinas o áreas en las que se encuentran dos frentes de líquido. Por lo general, los respiraderos serán cilindros (de aprox. 0,5-2 mm de diámetro) que conectan zonas de tu cavidad a la parte superior del molde. Como ocurre con la entrada de llenado, ayuda alinear el eje de cualquier respiradero de aire con la línea de apertura. Una vez que esté situado, aplica sustracción booleana al conjunto del molde para crear estos elementos.
Molde llenado por inyección, sobremolde o molde de compresión
- Añadir elementos de acoplamiento Estos elementos alinean y mantienen unidas distintas partes del conjunto del molde. Deja un margen de ~0,1 mm entre elementos de acoplamiento complementarios.
Sobremolde
- Añade pernos de alineación para dispositivos encapsulados Si estás sobremoldeando o encapsulando una pieza en silicona, la pieza debe estar completamente constreñida en el molde para que no se mueva al verter la silicona. Utiliza el menor número posible de pernos de alineación para constreñir la pieza e intenta que el diámetro de los pernos sea de alrededor de 1,25 mm. Los pernos deberían apuntar en la dirección en la que se va a tirar del molde, o en dirección perpendicular a la línea de apertura del mismo. Ten en cuenta que los pernos de alineación dejan pequeños agujeros en la superficie de la pieza de silicona. De ser necesario, estos agujeros se pueden tapar después del desmoldeo utilizando una pizca de silicona líquida y dejando que se cure.
Molde llenado por inyección, sobremolde
- Añade más elementos al molde Una característica adicional del molde es un canal de descarga. El canal de descarga se utiliza para contener la silicona que rebose tanto en la entrada de llenado como en los respiraderos, y se puede diseñar como un único pozo continuo que cubra todas las entradas y respiraderos. El canal de descarga también contiene un depósito de silicona líquida que puede introducirse en el molde durante el proceso de curado, dejando que se filtre libremente por la cavidad del molde para desplazar burbujas y vacíos o para compensar la silicona que entra en la superficie entre las piezas del molde durante el curado. En este ejemplo concreto, nuestro canal de descarga tiene 10 mm de profundidad.
-
Añade una entrada de jeringa También te recomendamos añadir una entrada de jeringa que se ajuste a la geometría de tu jeringa. Hicimos el nuestro ligeramente sobredimensionado, con un ángulo de 6° para ajustarlo a diversos tipos de jeringuillas y boquillas mezcladoras.
-
Añadirpuntos de palanca Se pueden añadir puntos de palanca para facilitar el desmontaje del molde después del curado. Son pequeños recortes rectangulares a lo largo de la línea de separación que permiten utilizar un destornillador de cabeza plana u otra herramienta para separar las piezas del molde. Nuestros recortes de ejemplo se adentran 5 mm en el borde del molde.
-
Añade listones o chaflanes Añade listones o chaflanes a los elementos del molde con ángulos. Este suele ser el paso final después de que la geometría del molde esté confirmada. Añadir listones para suavizar los bordes del molde también puede facilitar el proceso de impresión 3D. Al imprimir un material de molde directamente sobre la plataforma de impresión, biselar las esquinas externas facilita la extracción de las piezas después de la impresión y reduce la cantidad de rebabas de resina que se pueden acumular alrededor de las esquinas afiladas.
Impresión del molde
Molde llenado por inyección, sobremolde o molde de compresión
- Selecciona la resina Muchas resinas sirven, pero la Clear Resin y la BioMed Clear Resin son opciones excelentes para visualizar el flujo de la silicona mientras fundes tu pieza.
- Imprime el molde Recomendamos imprimir con una altura de capa de 50 micras para imprimir rápidamente sin sacrificar la textura lisa de la superficie. Ya que la silicona capta con precisión los detalles de la superficie, como las líneas de capa, podría ser necesaria una altura de capa de 25 micras para algunas aplicaciones estéticas. Orienta las piezas en la base de impresión de forma que no queden marcas de los soportes en las superficies interiores esenciales. Apoyar el conjunto del molde sobre la base de impresión en sí misma puede funcionar en algunos casos.
- Lavar y poscurar el molde Es fundamental lavar a fondo el exceso de resina del molde con 2-propanol limpio, porque la resina sin curar puede inhibir el curado de la silicona. También se debería curar completamente el molde para reducir la cantidad de monómero sin reaccionar en las piezas de SLA. Para la Clear Resin, los ajustes recomendados son de 15 minutos a 60 °C. Para la resina BioMed Clear Resin, los ajustes recomendados son 60 minutos a 60 °C. Los ajustes predeterminados de tiempo y temperatura de la Form Cure funcionan bien. Puedes pulir la superficie exterior para obtener un acabado con un alto grado de transparencia. Añadir aceite mineral a las superficies exteriores es una opción para ayudar a llenar los arañazos de la superficie y ofrecer una ventana extremadamente transparente al proceso de llenado de silicona.
Preparación del molde
Molde llenado por inyección, sobremolde
- Aplica los revestimientos y el agente de desmoldeo Aplica los revestimientos y el agente de desmoldeo. Considera utilizar agente de desmoldeo cada vez que dos materiales diferentes entran en contacto entre sí. Esto incluye hardware incrustado que tengas planeado introducir y retirar de una vaina sobremoldeada de silicona. Consulta nuestra tabla de procesos de trabajo de los clientes para ver recomendaciones. Sigue las instrucciones en el envase de tu material y espera a que los revestimientos se curen o se sequen completamente antes de pasar al siguiente paso.
- Introduce las piezas o el hardware que estarán dentro Los pernos de alineación ayudan a orientar la pieza que quedará encapsulada.
- Cierra y sujeta el molde con abrazaderas Sujeta con cuidado el molde, empezando en la dirección del tiro y asegurándote de que el conjunto del molde y que los objetos encapsulados permanezcan alineados. En nuestro ejemplo, utilizamos una réplica impresa en 3D de un AirTag de Apple, fabricada con la Rigid 10K Resin.
Preparación de la silicona
Molde llenado por inyección, sobremolde
Si vas a incorporar un pigmento, mezcla el pigmento con el componente B antes de pasar a los siguientes pasos.
Una preocupación frecuente con la silicona de colada es que queden pequeñas burbujas de aire atrapadas en el molde. Esto da lugar a huecos en la pieza fundida final. Se recomiendan algunos métodos adicionales para resolver las burbujas de aire, como desgasificar la silicona líquida en una cámara de vacío antes del llenado del molde. Como pauta general, comprueba la viscosidad de tu fórmula de silicona líquida RTV. Si supera los 18 000 cP (centipoise), se recomienda desgasificar. Si se encuentra por debajo de este umbral, es posible que no sea necesario un paso de desgasificación. Otra técnica recomendada es colocar el molde llenado en una cámara de presión durante el curado de la silicona, para colapsar y reducir las burbujas atrapadas. Se puede producir un buen prototipo sin desgasificar la silicona o realizar un curado bajo presión, pero puedes obtener una pieza casi perfecta con estos métodos suplementarios.
Método en tanque
- Desgasifica los componentes A y B en vacío por separado, de ser necesario.
- Mezcla con fuerza los componentes A y B. Por lo general, los dos componentes de la silicona se mezclan en volúmenes iguales. Permite que la mezcla se desgasifique en vacío una vez más o que se desgasifique suavemente al aire.
Método de la boquilla de mezclado:
- Desgasifica los componentes A y B en vacío por separado, de ser necesario.
- Llena cada lado del sistema de cartuchos de resina epoxi con una de las partes (A o B) de la silicona, utilizando jeringas diferentes para transferir los líquidos. Verter la silicona en el cartucho desde lo alto, en un hilo delgado, ayudará a evitar que se vuelva a introducir aire en la silicona.
- Desgasifica los componentes A y B. Colócalos en posición vertical y permite que la silicona se desgasifique suavemente al aire. Dado que las partes A y B siguen separadas, el cartucho lleno puede permanecer así durante días hasta que lo utilices.
Molde de compresión
- Mezcla las partes A y B por completo: Mezcla cantidades equivalentes de las partes A y B de la masilla de silicona y utiliza las manos para amasarlas. La goma de silicona comienza a curarse pasados 90 segundos, así que deberías amasar las piezas durante el tiempo mínimo necesario para generar un color uniforme.
Moldeo de la silicona
Molde llenado por inyección, sobremolde
Método en tanque:
- Absorbe la mezcla de silicona desgasificada con una jeringa. A continuación, da la vuelta a la jeringa para que la boquilla apunte hacia arriba. Deja que los depósitos de aire suban hasta la superficie. Empuja el émbolo para expulsar el aire y extruye una pequeña cantidad de tu silicona para asegurarte de que no queden burbujas de aire en la jeringa. Introduce la jeringa en la entrada de llenado y llena lentamente el molde hasta que salga silicona por los respiraderos. Si tu modelo tiene un canal de descarga, sigue llenando esta zona del molde.
Método de la boquilla de mezclado:
- Prepara la pistola de resina epoxi. Inserta los cartuchos en la pistola y ajusta la boquilla de mezclado. En esta fase, te recomendamos apretar la punta de la boquilla para que salga un poco de líquido y así asegurarte de que la resina epoxi está bien mezclada.
- Llena el molde. Introduce la jeringa en la entrada de llenado y llena lentamente el molde hasta que salga silicona por los respiraderos. Una vez más, llena el canal de descarga si tu molde cuenta con uno.
Utiliza una Cámara de presión (opcional)
- Como paso opcional, coloca el molde en la cámara de presión e introduce la presión de aire recomendada por el fabricante de tu silicona (p. ej., ~0,2 MPa). Esto reduce las burbujas atrapadas en el molde y obliga al material del canal de descarga a bajar al interior del molde. Deja que la silicona se cure bajo presión según las instrucciones del fabricante.
Molde de compresión
- Mete la silicona en el molde: intenta comprimir la silicona en ambos lados del molde, asegurándote de llegar a todos los detalles y recovecos. El material sobrante simplemente se derramará hacia fuera por los bordes del molde.
- Junta las dos partes del molde: intenta apretar el molde en dirección perpendicular a la línea de separación. En los moldes por compresión, las superficies de acoplamiento no se tocan completamente hasta que se aplica presión. Cierra la abrazadera con suavidad, hasta que no se pueda cerrar más. La goma de silicona recomendada, Quick-Sil de Castaldo, termina de curarse en 20 minutos.
El curado de la silicona y el acabado de las piezas
Molde llenado por inyección, sobremolde, molde de compresión
El tiempo de curado puede durar entre 10 minutos y varias horas, en función de la química de la silicona.
- Define la orientación del molde Con una configuración alimentada por gravedad, como en nuestro ejemplo, el molde puede permanecer orientado de pie sin que haya un paso adicional de sellado al curarse la silicona. Con una configuración de llenado de extremo a extremo, experimentaríamos un reflujo de silicona si el molde lleno se colocara en nuestro banco de trabajo.Después del llenado, recomendamos sellar la entrada con cinta adhesiva. El molde de compresión debería permanecer sujeto en un tornillo de banco mientras se cura.
- Desmoldear y recortar la pieza de silicona Es normal que aparezcan rebabas dentro y alrededor de la línea de apertura. En primer lugar, retira los restos de silicona que hayan quedado en el exterior del molde. Abre el molde introduciendo un destornillador de cabeza plana u otra herramienta plana en el punto de palanca y haciendo palanca para romper el sello. Retira la pieza de silicona, teniendo en cuenta que es posible que haga falta recortar con cuidado silicona de los respiraderos de aire.Después de retirar la pieza de silicona del molde, utiliza una cuchilla afilada o alicates de corte para recortar los respiraderos y los bebederos de entrada de la pieza. Las protuberancias que queden se pueden eliminar utilizando papel de lija de grano fino con suavidad. Por último, puedes lavar la pieza con agua y jabón para retirar los residuos del papel de lija y el agente de desmoldeo.
- Prepárate para la siguiente fundición Los moldes pueden reutilizarse varias veces. Puede que tengas que limpiar los respiraderos con una herramienta afilada y/o volver a aplicar el agente de desmoldeo antes de llenar de nuevo el molde con silicona. Es frecuente que se acumule silicona que no se ha curado por completo en la superficie estrecha entre los bloques del molde. Esta silicona se puede limpiar con un paño limpio.
- Iterar el diseño Es normal realizar un par de iteraciones del diseño del molde después de probar todo el proceso de trabajo.. Algunos cambios que puede que tengas que considerar para el diseño son aumentar la distancia de margen entre los elementos de acoplamiento, mover los pernos de alineación para asegurar que los objetos encapsulados queden totalmente constreñidos o añadir respiraderos de aire en áreas que tienden a atrapar burbujas de aire durante el llenado.

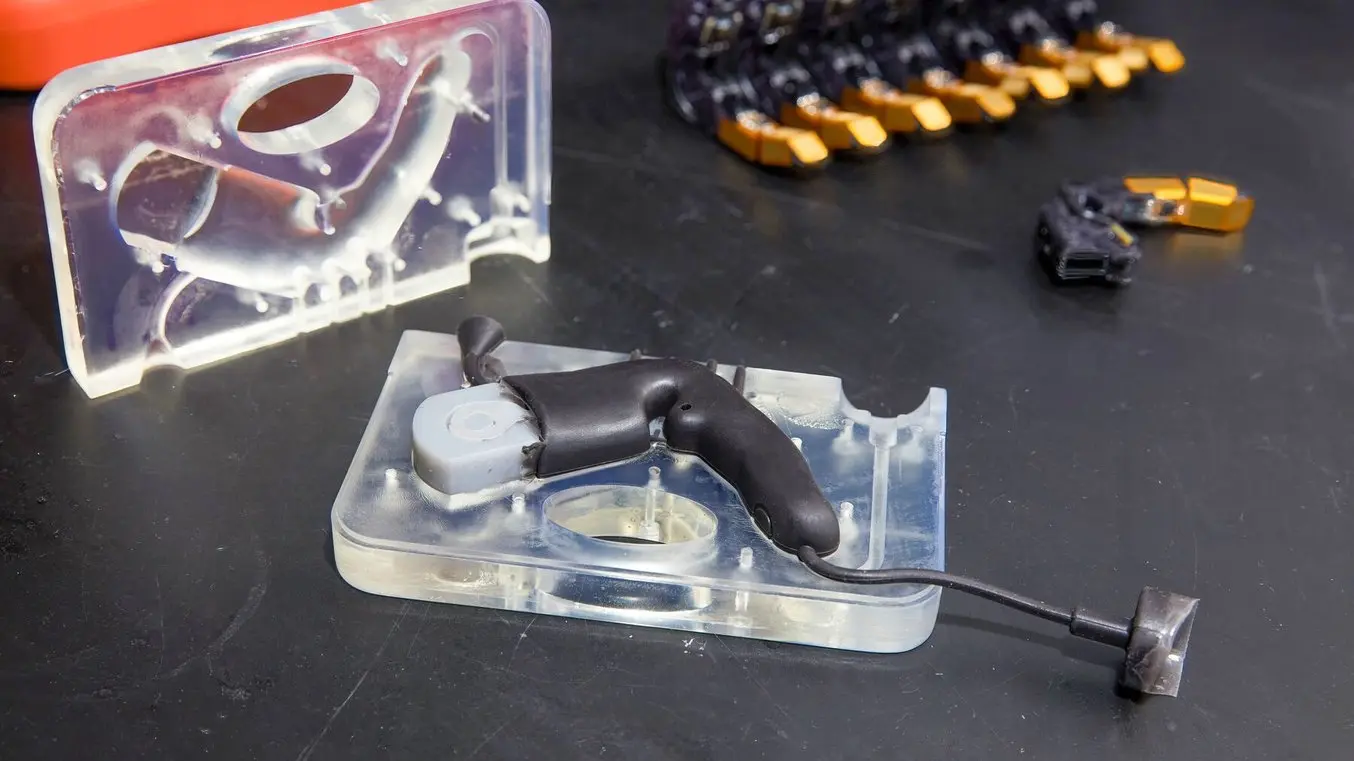
Dame Products utiliza moldes impresos en 3D para el sobremoldeo.
Cómo pasar del prototipado a la fabricación
Material del molde: Los moldes para producción se suelen fabricar a partir de aluminio o acero mecanizados.
Pernos de alineación para sobremoldeo: Los pernos de alineación para sobremoldeo se orientan dentro del plano de la línea de apertura principal del molde, en lugar de perpendicularmente a ella. También se diseñan para ser retráctiles y poder entrar y salir del molde, de modo que la capa de silicona no tiene muescas ni agujeros creados por los pernos de alineación.
Ángulo de desmoldeo: Nuestros clientes recomiendan utilizar un ángulo de desmoldeo de al menos dos grados para los productos de silicona. Aunque los prototipos y los moldes de producción en series cortas presentados en este informe pueden soportar socavados profundos, estos tipos de geometrías de silicona se deben sacar con cuidado del molde y serían difíciles de reproducir para un sistema de inyección automatizado.
La configuración de moldeo por inyección: Los moldes alimentados por gravedad son configuraciones de molde muy fiables para el prototipado en el banco de trabajo. Para los métodos de producción de masa rápida, las geometrías de entrada y salida están en lados opuestos del molde.
Aunque la química de la silicona que se utiliza para la producción es muy similar a la de los materiales RTV presentados en este libro blanco, tanto las gomas de silicona líquidas como las gomas curadas por calor para el moldeo por compresión suelen entrar en el molde a baja temperatura y después se curan a temperaturas elevadas.Impresión con silicona paso a paso
¿Qué se requiere?
De Formlabs
- Silicone 40A Resin de Formlabs
- Impresora SLA de Formlabs compatible con firmware actualizado
- Software PreForm (última versión)
- Plataforma de impresión compatible
- Tanque de resina compatible
- FormWash, Form Wash Lo Finish Kit
- FormCure o Form Cure L:
De otros fabricantes
- Alcohol isopropílico (99 % o superior): Para hacer la mezcla del disolvente para el lavado de las piezas de Silicone 40A Resin
- Acetato de n-butilo (compra en EE.UU.; compra en la UE): Para hacer una mezcla disolvente de lavado para lavar piezas de silicona 40A
- Vaso de vidrio (de un tamaño mínimo de 500 mL): Para sumergir las piezas de silicona 40Aenbagua durante los pasos de poscurado
- FebrezeHD (opcional): Para enmascarar el olor de las piezas impresas de silicona 40A
- Bote de cristal de1,5 galones (opcional): Para almacenar el disolvente de lavado y las piezas impresas de silicona 40A si no se utiliza una Form Wash
- Cuchilla decorte ultrasónica (opcional): Para eliminar protuberancias de soporte en piezas de silicona 40A
1. Diseño
1.1. Diseña tus piezas teniendo
en cuenta las directrices de diseño de la Silicona 40A.2. Impresión
2.1. Importar archivo
Comprueba que tu versión de PreForm está actualizada yendo a Ayuda y, a continuación, a Buscar actualizaciones en la esquina superior izquierda. Importa o abre el archivo de piezas arrastrándolo hasta PreForm o usando el menú "File" (Archivo) para encontrarlos en tu ordenador o red y abrirlos.
2.2. Seleccionar material
Selecciona Silicone 40A haciendo clic en el recuadro de la impresora del menú "Job Info" (Información del trabajo) que hay en el lado derecho de PreForm. Selecciona "Silicona" en la cuadrícula de materiales.
2.3. Orientación
PreForm puede realizar la orientación automática basándose en las prácticas recomendadas de Formlabs. Para orientar automáticamente, selecciona tu pieza y haz clic en Orientación en la parte izquierda de la pantalla. A continuación, haz clic en Orientar automáticamente la selección.
Para obtener los mejores resultados, puedes orientar manualmente utilizando los accionadores rojo, verde y azul que rodean la pieza. Considera orientar las piezas de manera que las áreas en las que es más importante que la textura de la superficie sea lisa queden orientadas en dirección opuesta a la plataforma de impresión.
Imprime directamente sobre la base de impresión siempre que sea posible. Intenta mantener la mayor parte del peso de la pieza lo más cerca posible de la plataforma de impresión y orienta las piezas largas en paralelo al borde delantero de la plataforma de impresión.
2.4. Añadir soportes
Para generar soportes automáticamente en función de las propiedades de los materiales, selecciona tu pieza y ve a Soportes en la parte izquierda de la pantalla y selecciona Generar automáticamente todos.
Para obtener resultados óptimos, recomendamos Editar manualmente los soportes generados automáticamente, o colocar soportes manualmente hasta que la pieza esté suficientemente apoyada (indicado por un pulgar verde hacia arriba junto a Soportes en el menú Configuración del trabajo). PreForm resaltará en rojo las zonas que puedan requerir apoyo adicional.
Si la textura de la superficie o el tiempo de posprocesado son una preocupación importante, puedes considerar la posibilidad de diseñar soportes personalizados con software CAD. Las directrices para dar soportes desgarrables se encuentran aquí.
2.5. Organización
Establece la ubicación de tu pieza en la base de impresión haciendo clic y arrastrando, utilizando los actuadores rojo, verde y azul que rodean tu pieza, o haciendo clic en Organización y, a continuación, en Organizar todo en la parte derecha de la pantalla. Es mejor colocar las impresiones en el centro de la base de impresión. Al imprimir varias piezas, se puede optimizar el espacio en la base de impresión y ahorrar material solapando las balsas.
2.6. Enviar a la impresora
Envía tu trabajo a la impresora haciendo clic en el botón naranja "Upload Job" (Cargar trabajo) de la parte inferior derecha. Cuando se abra el cuadro de diálogo Imprimir, selecciona la impresora que deseas utilizar.
2.7. Configurar la impresora
Agita el cartucho de silicona 40A y luego introdúcelo. Cuando utilices un cartucho nuevo, comprueba que la válvula de mordida de silicona se abre con éxito apretándola con un dedo enguantado. Introduce en la impresora una base de impresión y un depósito de resina compatible.
Empieza a imprimir seleccionando tu proyecto de impresión en la pantalla táctil de la impresora. Sigue las indicaciones o cuadros de diálogo que se muestren.
3. Posacabado
3.1. Extracción de la pieza
Extrae la pieza de la base de impresión encajando la herramienta para retirar piezas o una herramienta de raspado debajo de la base de impresión y girando la herramienta. Las piezas también se pueden lavar directamente en la base de impresión en el Form Wash.
3.2. Lavado
Coloca la pieza en el Form Wash llena de una mezcla de proporción 80/20 de alcohol isopropílico y acetato de n-butilo. No laves únicamente con alcohol isopropílico o acetato de n-butilo. Lava utilizando los ajustes recomendados para la Silicone 40A (20 minutos).
Si el modelo es hueco o tiene canales internos, asegúrate de que la resina líquida salga de todas las cavidades.Esto puede hacerse con una jeringuilla llena de la mezcla del lavado de Silicone 40A. Deja que las piezas se sequen por completo antes de llevar a cabo el poscurado.
3.3. Eliminar soportes
Para obtener el mejor resultado posible, Formlabs recomienda retirar los soportes después del lavado pero antes del poscurado.
Para eliminar los soportes, tira suavemente de las estructuras de soporte. En las partes más gruesas, puede bastar con tirar. En las partes más finas, considera la posibilidad de utilizar alicates de corte o deslizar un cuchillo de precisión por la superficie de la pieza, con cuidado de no dañarla. Si lo deseas, puedes utilizar un cortador ultrasónico para trabajar con mayor precisión.
3.4. Poscurado
Realiza el poscurado de las piezas para conseguir unas propiedades mecánicas óptimas. Sumerge completamente la pieza en un vaso de precipitados (u otro recipiente transparente a los rayos UV) con agua, y coloca el vaso de precipitados con la pieza en la Form Cure. Utiliza los ajustes recomendados para la Silicone 40A (45 min. a 60 °C).
Enmascara el olor de la Silicone 40A añadiendo Febreze HD al agua del vaso de preicipitados antes de poscurar. Por cada 500 ml de agua, utiliza 12,5 g de Febreze HD. Si no se trata, este olor se disipará con el tiempo.
3.5. Posacabado adicional
Se puede utilizar una rueda Scotch Brite en miniatura montada con una herramienta rotativa para lijar las marcas de soporte en las piezas, ya sea antes o después del curado.
Antes de aplicar cualquier adhesivo, asegúrate de que la pieza se haya lavado a fondo, esté seca y que la superficie no esté pegajosa ni tenga polvo. Formlabs recomienda utilizar una imprimación como la serie DOWSIL 1200 o una imprimación médica. Después de aplicar una imprimación, utiliza un adhesivo de silicona como DOWSIL 734. No utilices pegamentos de cianoacrilato, ya que son quebradizos y dejan una costra sobre la silicona.
Casos de estudio de clientes médicos
Impresión directa con Silicone 40A Resin
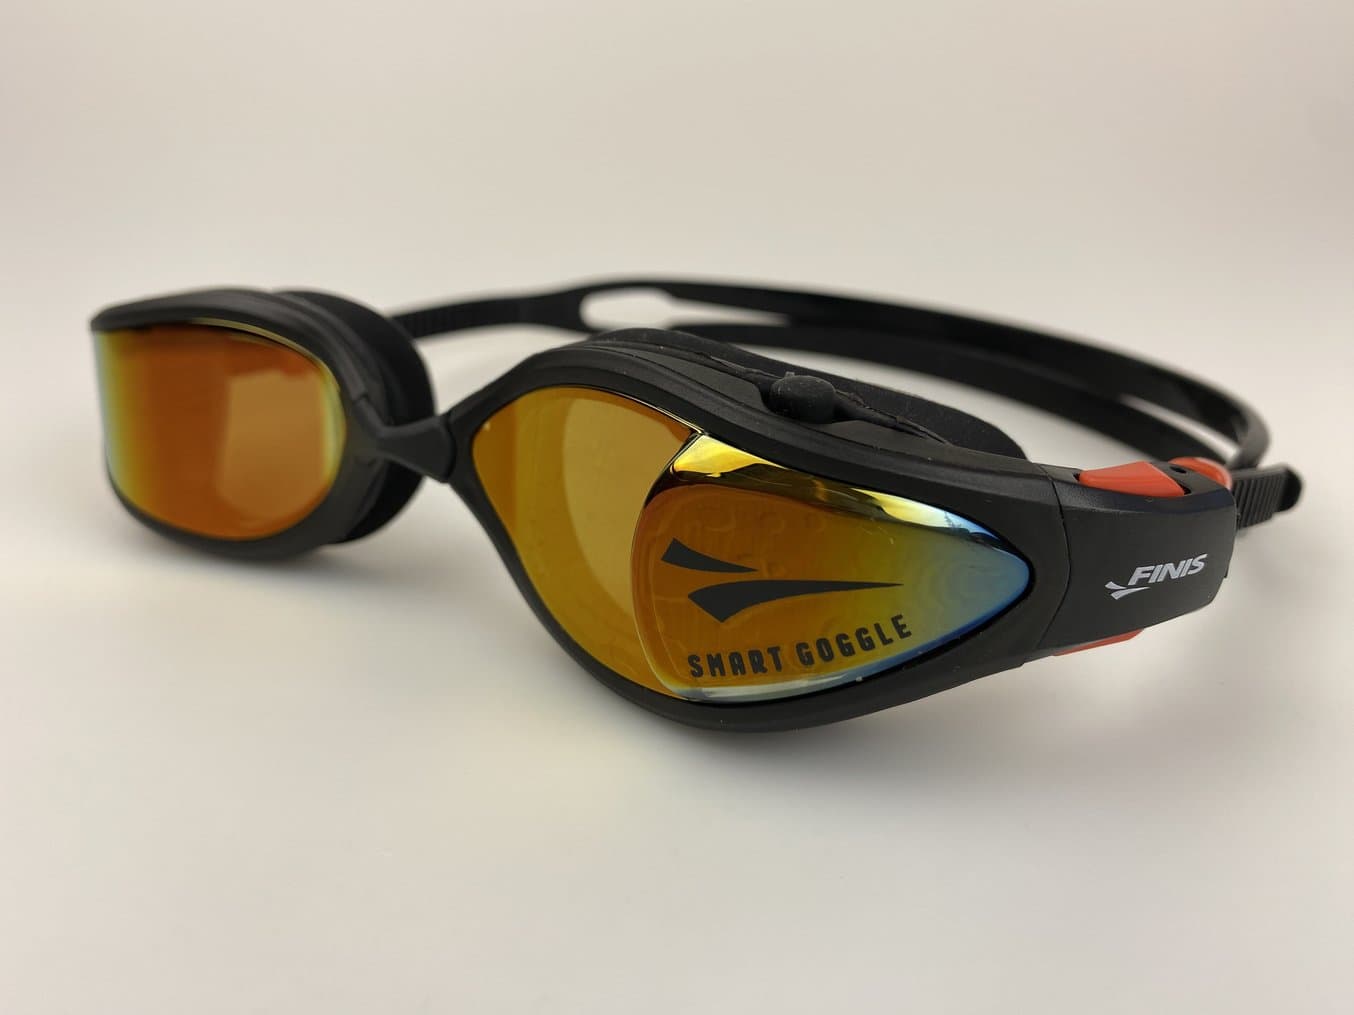
FINIS, Inc. está especializada en el desarrollo de equipamiento de natación y deportes acuáticos, incluidos productos punteros como las gafas de natación inteligentes Smart Goggle Max.
FINIS, Inc., una empresa con sede en California conocida por sus innovadores productos relacionados con la natación, da prioridad a la calidad y al rendimiento para satisfacer las necesidades cambiantes de nadadores de todos los niveles. Dirigido por el diseñador sénior David Beittel, el equipo de desarrollo de productos utilizó inicialmente la impresión 3D con filamento para crear prototipos rápidos, pero buscaba piezas más detalladas e isotrópicas. Fue entonces cuando pasaron a utilizar las impresoras 3D de estereolitografía (SLA) Form 3+ y la resina Silicone 40A de Formlabs. Esta resina resultó muy valiosa para realizar ajustes rápidos, imprimir prototipos funcionales de un día para otro y conseguir características muy similares a las de los materiales de producción finales.
Históricamente, FINIS recurría a la fundición de silicona en moldes tradicionales, que requería mucha mano de obra y daba lugar a largos plazos de producción. Con la introducción de las impresoras 3D Form 3+ y la resina Silicione 40A, el equipo superó los retos asociados a la producción en serie de piezas de silicona. Fueron capaces de producir piezas con calidad de producción en tan solo ocho horas por solo 10 dólares cada una. Esto supone una importante reducción de costes con respecto a la fundición de uretano subcontratada, que suele tener un coste superior a los 1000 dólares y un plazo de entrega de tres semanas. Las juntas de silicona impresas en 3D se sometieron con éxito a rigurosas evaluaciones de estanqueidad en el entorno de una piscina y demostraron una elasticidad que reflejaba fielmente las características finales de producción. La Silicone 40A se ha convertido en una herramienta esencial para refinar los diseños y garantizar un rendimiento óptimo en todo el proceso de desarrollo de FINIS, Inc.
Moldes llenados por inyección para el prototipado de productos con Glassboard
Glassboard
es una empresa consultora de diseño de productos de Indianápolis, en Indiana. Su equipo de diseño utiliza la silicona en moldes para un abanico muy amplio de aplicaciones de prototipado, como copas menstruales, fijaciones y sobremoldes a medida, sellos, juntas y anillas. Glassboard suele usar moldes compuestos por varias piezas que se pueden desmontar para retirar la silicona fundida y reutilizarse para múltiples fundiciones.
Un diseño de molde típico de Glassboard, como el que se utilizó para la copa menstrual Sunny, es un molde llenado por inyección con la asistencia de una configuración de alimentación por gravedad. La silicona líquida se inyecta a través de un puerto en la parte superior del molde, fluye por un canal para entrar en la parte inferior de la cavidad del molde, llena la cavidad gradualmente hasta su parte superior y sale por respiraderos estrechos en la parte superior del molde.
Un elemento innovador del diseño de moldes de Glassboard es un canal de depósito en la parte superior del molde. Los canales se utilizan para contener la silicona que rebose por las entradas y los respiraderos del molde. Otra meta del canal de depósito es permitir que la silicona sobrante entre en el molde después del llenado para desplazar los vacíos creados por el colapso de las burbujas de aire o por la silicona que se filtra por la superficie estrecha entre los bloques del molde.
Sobremoldes de silicona para prototipos en beta destinados a los clientes con Dame Products

Dame Products utiliza un método de sobremolde para producir prototipos en beta para los clientes con hardware incorporado. Su molde está impreso con la Clear Resin.
DameProducts es una startup de Brooklyn que diseña productos para el sector de la salud y el bienestar. Su línea de productos incluye hardware con geometrías complejas ergonómicas completamente encapsuladas por una capa de silicona de colores llamativos que es segura para la piel. El equipo emplea sobremoldes de silicona con moldes impresos en 3D para producir prototipos en beta para los clientes.
Cada conjunto de molde impreso en 3D es un molde llenado por inyección de dos o tres piezas que tiene relieves a los que se anclan pequeños elementos internos de hardware. Las piezas A y B de silicona catalizada con platino se cargan en los dos lados de un cartucho de epoxi en una proporción 50:50 y se unen a una pistola de epoxi con una boquilla de mezclado. Este método innovador mezcla los componentes de la silicona al mismo tiempo que introduce gradualmente la silicona líquida en el molde.
Los ingenieros de Dame Products pueden prototipar decenas de productos sobremoldeados en un solo día rotando entre tres o cuatro moldes impresos mediante SLA. Así, mientras la goma de silicona de uno de los prototipos se está curando, se puede desmoldar el siguiente y preparar el molde para llenarlo de nuevo. Al mismo tiempo, también se pueden acabar y limpiar los prototipos. Cuando la empresa recibe uno de sus prototipos de hardware de vuelta, se lava el producto beta en lejía, se retira la fina capa de silicona y se reutiliza el hardware interno en un nuevo prototipo.
Pinzas con sobremolde de uso final con PSYONIC
PSYONIC encapsula los dedos de la Ability Hand utilizando una configuración de sobremolde de silicona. Algunos moldes incluyen un inserto de molde de
Tough 2000 Resin para anclar el "hueso" encapsulado en el molde.PSYONIC, una empresa con sede en California, está reinventando las prótesis de las extremidades con la primera mano biónica del mundo con sentido del tacto.
El equipo utiliza la impresión 3D como un paso crucial en la fabricación de casi todos los componentes de su dispositivo. Esto incluye dedos mecánicos que están encapsulados con silicona utilizando un molde impreso en 3D mediante SLA.
Los moldes se producen tomando el reverso de la forma del dedo, sustrayéndola del conjunto del molde y añadiendo entradas y respiraderos para la inyección de silicona catalizada con platino de dos componentes. El molde también incorpora el "hueso" estructural del dedo, que se fabrica usando una impresora 3D FDM.
Los diseñadores de PSYONIC pueden utilizar cada molde decenas de veces antes de que se desgaste, y cuando eso ocurre, simplemente pueden imprimir un molde nuevo y empezar a inyectar silicona de nuevo al día siguiente. El equipo también ha notado la diferencia entre la Clear Resin de Formlabs y los moldes de termoplásticos fabricados mediante modelado por deposición fundida (FDM), principalmente en lo que respecta a la mejora en la calidad de la superficie. La silicona capta cualquier textura o defecto en la cavidad del molde, incluidas las líneas de capa de la impresión 3D, por lo que la calidad lisa de la superficie que ofrecen las resinas de Formlabs ha sido una ventaja.
Moldeo por inyección de silicona de efectos especiales de maquillaje personalizados con Dreamsmith
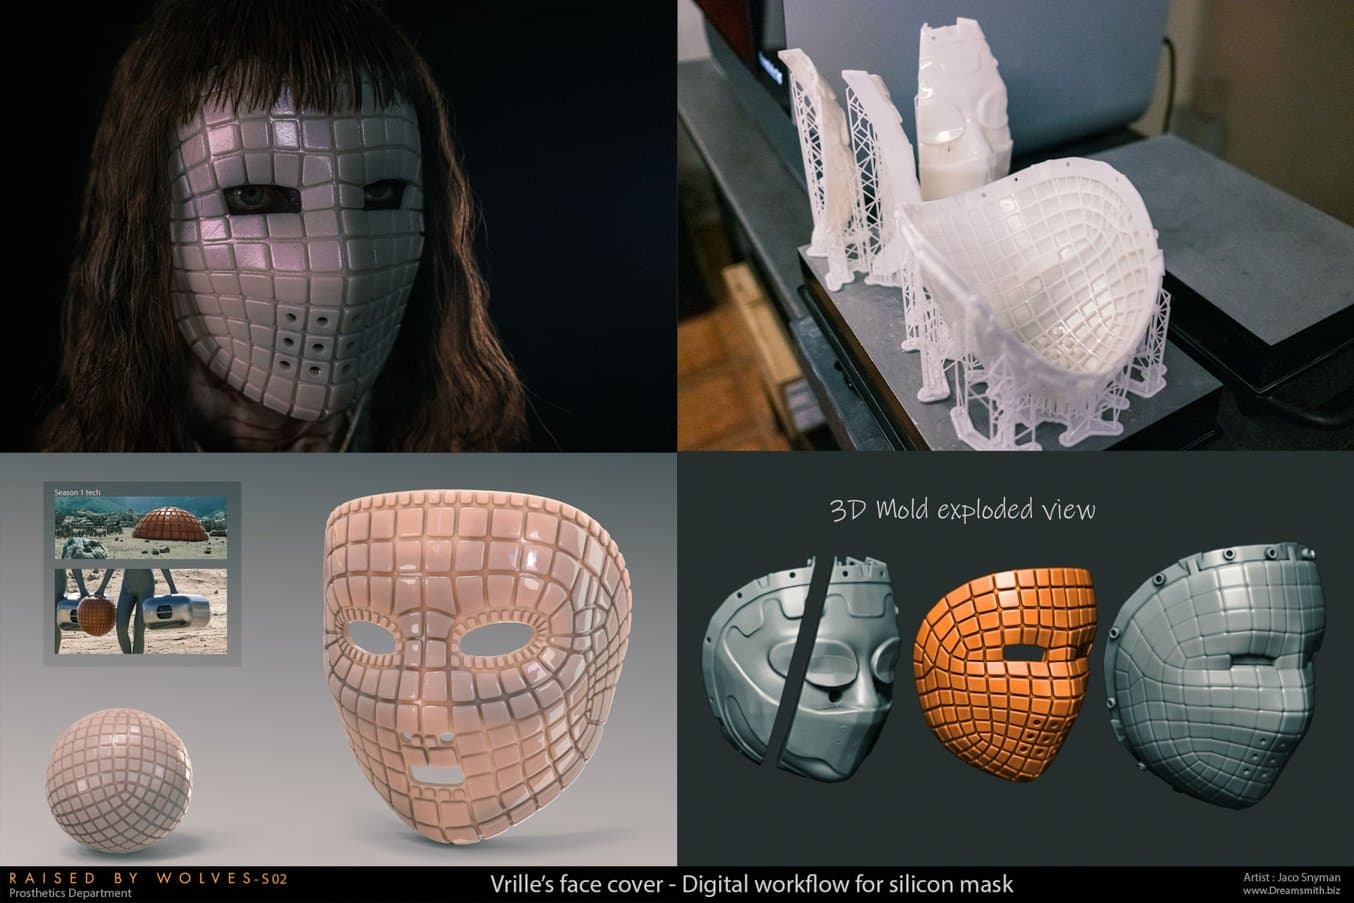
Para conseguir atrezo y efectos especiales de maquillaje personalizados para cine y televisión, Dreamsmith produce moldes de inyección de silicona con la Rigid 10K Resin. Un lado del molde se diseña utilizando datos de escaneo ópticos del rostro del actor.
Dreamsmith es una empresa de atrezo y efectos de maquillaje con sede en Sudáfrica.
Su equipo trabajó en diseños para series populares como Raised By Wolves, en las que uno de los efectos especiales que se necesitaban era una máscara de silicona con un exterior muy geométrico y un interior que se ajustase a la cara de su actor.
Utilizando la Form 3L, su equipo imprimió un molde que usaba datos de escaneo ópticos de la cara del actor para una superficie interna y una cenefa geométrica para la otra. Aunque su diseño tiene un aspecto bastante diferente al de algunos de ejemplos de diseño de productos de este informe, el equipo de Dreamsmith tenía muchas de las mismas preocupaciones respecto a los materiales, como la de asegurar la compatibilidad del material de su molde con silicona catalizada con platino segura para el contacto con la piel. Acabaron eligiendo la Rigid 10K Resin de Formlabs por su gran precisión.
Molde de cascarón para productos sanitarios personalizados con Cosm
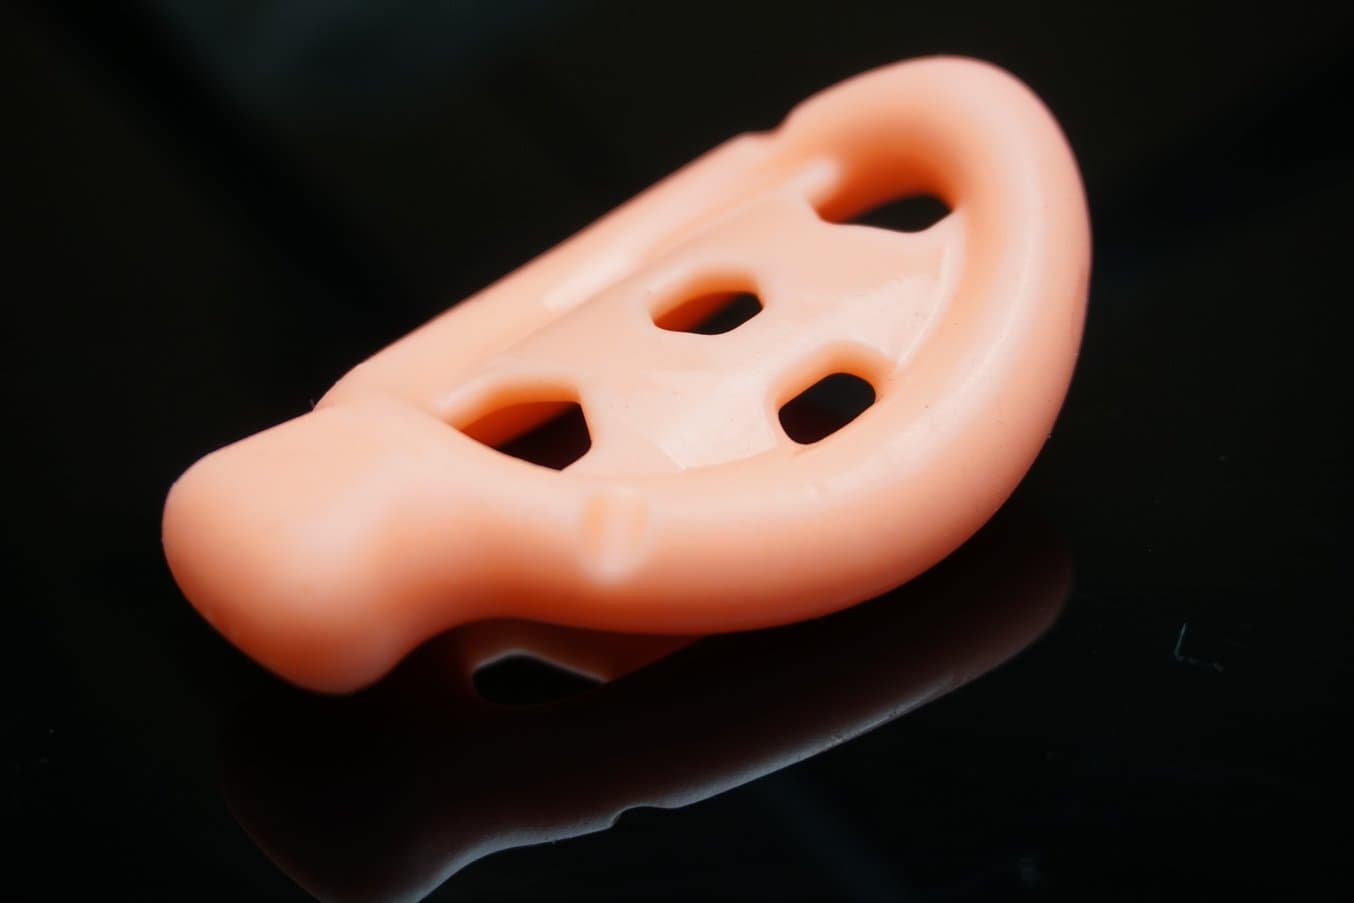
Cosm utiliza moldes de cascarón para producir productos sanitarios de silicona personalizados. Su molde de paredes delgadas se imprime con la BioMed Amber Resin.
Cosm
es un fabricante de productos sanitarios que está revolucionando el tratamiento del prolapso uterino, un trastorno médico común pero a menudo ignorado por el público, con pesarios de silicona adaptados a sus pacientes. El pesario es un tratamiento no quirúrgico que consiste en que un médico introduzca un pequeño dispositivo de soporte debajo del útero. Sin embargo, los diseños estandarizados requieren un ajuste mediante ensayo y error, por lo que las pacientes a menudo renuncian al tratamiento antes de encontrar uno a su medida.
El enfoque del equipo de Cosm es utilizar datos de una novedosa técnica de ultrasonidos para diseñar un dispositivo personalizado que esté adaptado a la anatomía de cada paciente. El equipo de Cosm recurrió a las impresoras SLA de Formlabs por su utillaje de silicona, desarrollando un molde de cascarón adaptable que se llena con silicona de uso médico y se quiebra para revelar el implante de silicona adaptado a la paciente. Los moldes se imprimen con la
BioMed Amber Resin en la Form 3B.Empieza a crear productos sanitarios de silicona
La silicona se usa en ámbitos tan diversos como el prototipado rápido, las pruebas de fase beta y las etapas de validación en el desarrollo de productos, además de para llevar a cabo de forma rentable una fabricación personalizada o de bajo volumen de piezas de uso final. El ecosistema de Formlabs hace posible imprimir en 3D con la Silicone 40A Resin e imprimir moldes de silicona para fabricar productos sanitarios, prótesis adaptadas a los pacientes y componentes de audiología, así como piezas con geometrías complejas difíciles de obtener mediante métodos tradicionales.
¿Tienes más preguntas acerca de cómo usar la impresión SLA para producir piezas de silicona o sobre cómo encontrar la solución de impresión 3D adecuada para tu negocio? Programa una cita con un experto de Formlabs que podrá responder a tus preguntas. Solicita una pieza de muestra gratuita para ver de primera mano los materiales de Formlabs impresos en 3D.