Warning:
Read and understand all relevant safety instructions before using the Form 3/Form 3+.


This guide illustrates the printer’s various components, the initial setup, and how to begin printing. For additional information, consult the Form 3/Form 3+ manual and safety documentation.
Warning:
Read and understand all relevant safety instructions before using the Form 3/Form 3+.
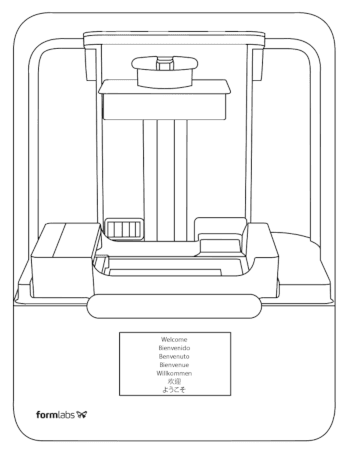
Componentes de la impresora
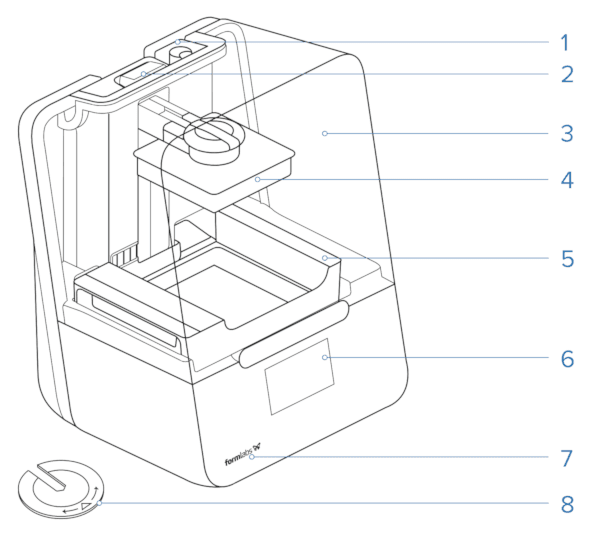
For additional information on printer components, refer to the support article: Product glossary (Form 3/Form 3+).
Desbloqueo
Un pasador asegura la Light Processing Unit (LPU) dentro de la impresora durante el envío.
Aviso:
Libera el pasador antes de conectar la impresora.
Cómo liberar el bastidor de la LPU de su posición de envío:
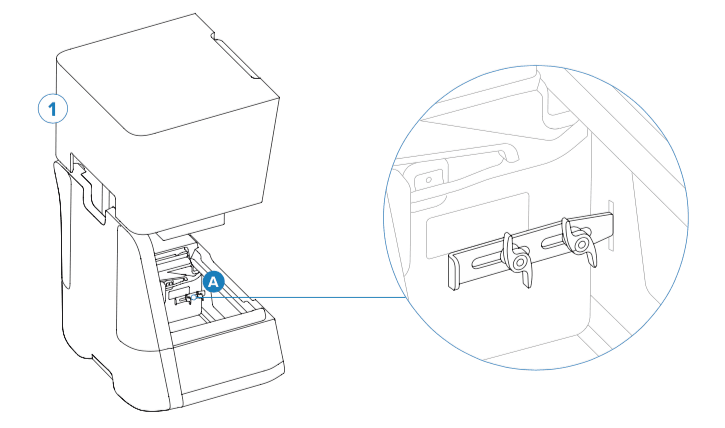
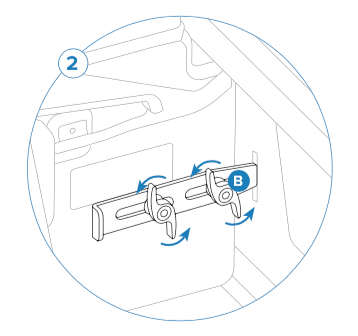
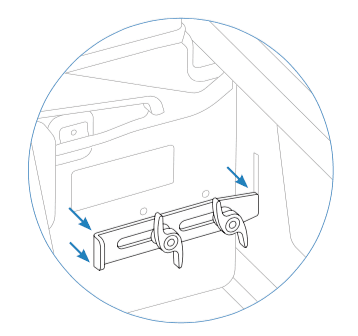
For additional information on removing the LPU latch, read our support article on receiving and unboxing the Form 3/Form 3+.
Encendido
Coloca la impresora sobre una superficie nivelada. Conecta el cable de alimentación a la impresora y a la toma de corriente.
Preparación
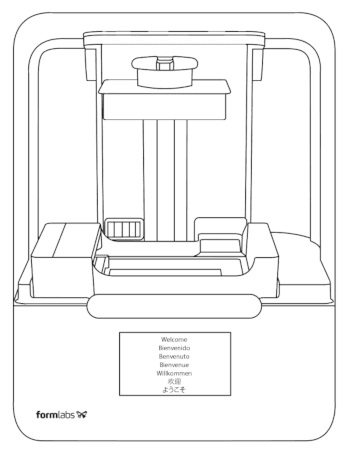
Sigue las instrucciones en la pantalla táctil para completar el procedimiento de instalación:
Ponte en contacto con el servicio de asistencia de Formlabs o con tu revendedor autorizado para obtener asistencia técnica adicional.
Siguientes pasos
Once you’ve set up your Form 3/Form 3+, download PreForm to your computer and start printing.
Step 1: Prepare a file for printing
After downloading PreForm, read the support articles on designing successful 3D models and using PreForm to learn more about the software and preparing models for printing on Formlabs SLA printers.
If this is your first time using PreForm, an onboarding tutorial will appear and walk you through the software’s capabilities. Click Help > Show Onboarding Tutorial to review this information at any time.
When you’re ready, send your print to your Form 3/Form 3+ and start printing.
Step 2: Start a print
Step 3: Register your printer on Dashboard
Add your printer to Dashboard to track print progress, manage printers, and more. Read the support articles on using Dashboard to learn more.
Step 4: Finish your printed part
Once the print is complete, remove the build platform from the printer, wash any remaining liquid resin off your printed part, and post-cure and remove supports as necessary. Read the support article on SLA basic finishing steps to learn more.
Step 5: Between prints
Between prints, be sure to keep your Form 3/Form 3+ clean, paying particular attention to spilled resin. Handle the Form 3/Form 3+ resin tank with care to ensure print success and printer reliability.