Required Supplies:
Formlabs:
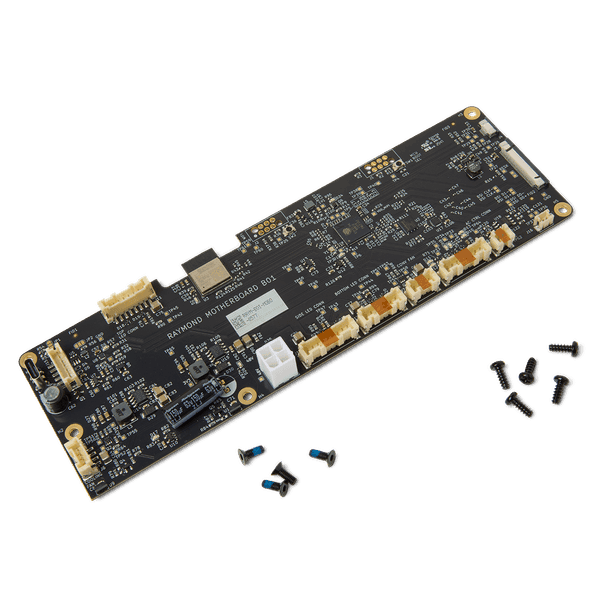
- Replacement motherboard (RP-CU2L-MOBO-01)
- 2 mm hex driver (included in the Form 4L tool cap assembly)
Third-party:
- Phillips driver
- Nitrile gloves
- Anti-static grounding strap


The Form Cure L V2 motherboard is mounted to the back of the machine’s display assembly. If the motherboard is faulty or malfunctioning, the Form Cure L V2 may behave erratically or not function at all.
Use this guide to replace the motherboard on a Form Cure L V2.
Required Supplies:
Formlabs:
Third-party:
Tiempo estimado: 15–20 minutos
Peligro:
Lee y sigue todas las instrucciones de seguridad y las advertencias del manual del usuario. El uso de piezas incorrectas como repuestos puede provocar quemaduras, descargas eléctricas, incendios o explosiones. Desecha todas las piezas de acuerdo con la normativa local.
Preparación del espacio de trabajo
Overview: Prepare the Form Cure L V2 and workspace for replacing the motherboard.
Step 1: Prepare the workspace
Clear a workspace around your machine. Ensure that the workspace is well-ventilated and free of dust.
Step 2: Unplug the machine
Turn off the machine using the power switch on the back of the unit. Disconnect the power cable before continuing with maintenance. Do not perform maintenance on the machine while it is connected to power. Wait five minutes after disconnecting the machine from power before proceeding. If the machine was recently in use, the post-cure chamber will be warm. Wait at least 10 minutes for the chamber to cool.
Peligro:
Realizar el mantenimiento de la máquina mientras está enchufada aumenta el riesgo de descarga eléctrica. No retires nunca las carcasas de la máquina mientras esté enchufada. No vuelvas a conectar la máquina a la corriente eléctrica mientras las carcasas estén desinstaladas.
Extracción de la placa base
Overview: Disconnect and remove the original motherboard.
Paso 1: Abre la puerta
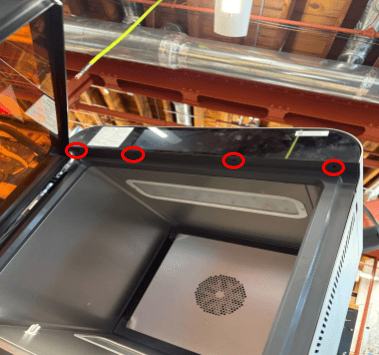
Abre la puerta de la cámara de curado para acceder a los tornillos que fijan el panel frontal.
Paso 2: Retira los tornillos de la placa base y del conjunto de la pantalla
Utiliza una llave Allen de 2 mm para aflojar y retirar los cuatro tornillos que fijan el conjunto de la placa base y la pantalla al chasis de la máquina. Deja aparte los tornillos.
Paso 3: Desmonta la placa base y el conjunto de la pantalla
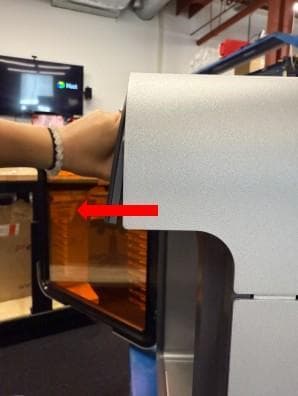
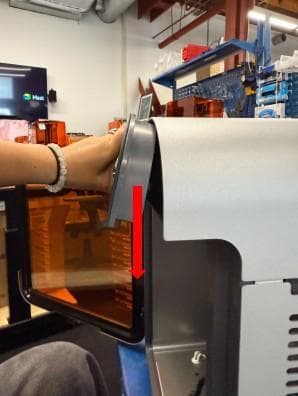
Inclina suavemente la placa base y la pantalla hacia arriba y, a continuación, tira de ellas hacia abajo. El conjunto debería separarse del chasis de la máquina. No tires bruscamente del conjunto de la placa base y la pantalla, ya que sigue conectado a la Form Cure L V2 mediante un conjunto de cables.
Paso 4: Desconecta los cables de la placa base
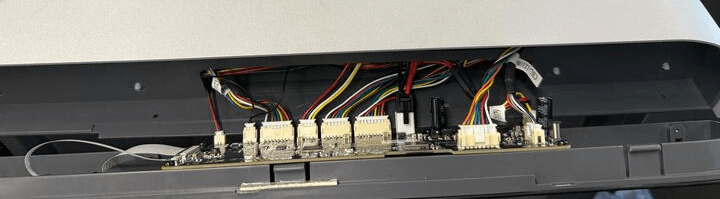
Disconnect all of the cables from the motherboard except for the two ribbon cables. For each, squeeze the tab and slide the cable out of the connector. Take care not to pull on the wires themselves.
Fully separate the motherboard and display assembly from the machine and set it display-side down on your work surface.
Step 5: Uninstall the motherboard
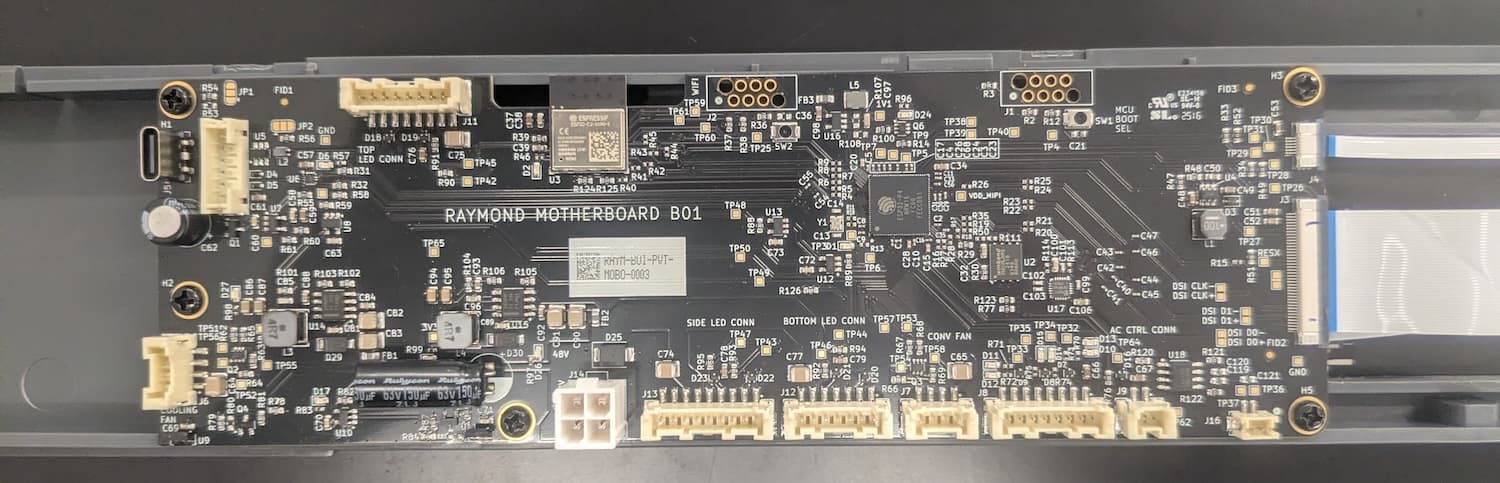
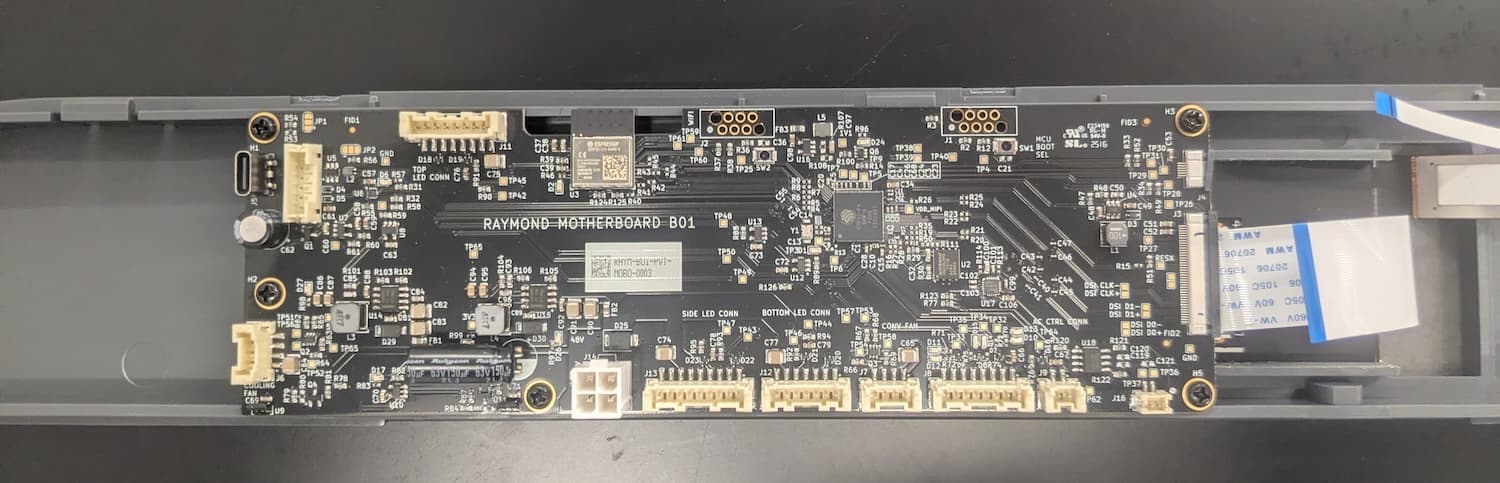
Disconnect the two ribbon cables from the side of the motherboard. For both, slide the black latch on the cable connector away from the white connector body. Once the latch is open, the ribbon cable should separate from the connector with minimal force. Take care not to fold or otherwise damage the ribbon cables.
Using a Phillips driver, loosen and remove the five screws securing the motherboard to the display assembly. Set the screws aside.
Fully separate the motherboard from the display assembly and set it aside for disposal with electronic waste.
Instalación de la placa base de recambio
Overview: Connect, mount, and secure the new motherboard.
Step 1: Mount and secure the motherboard
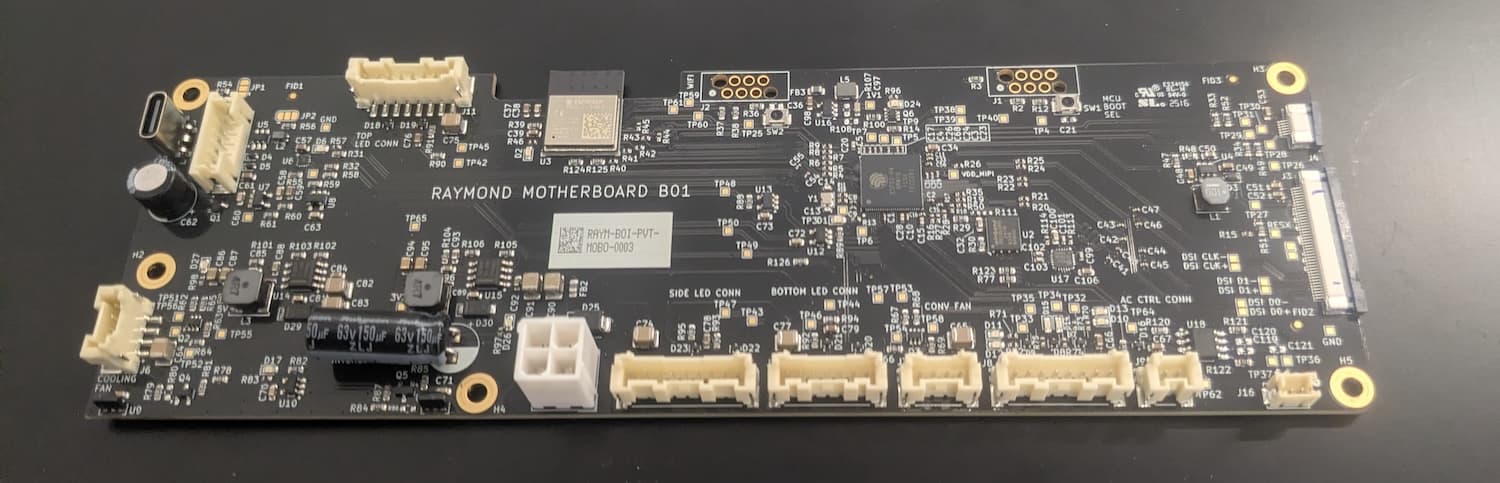
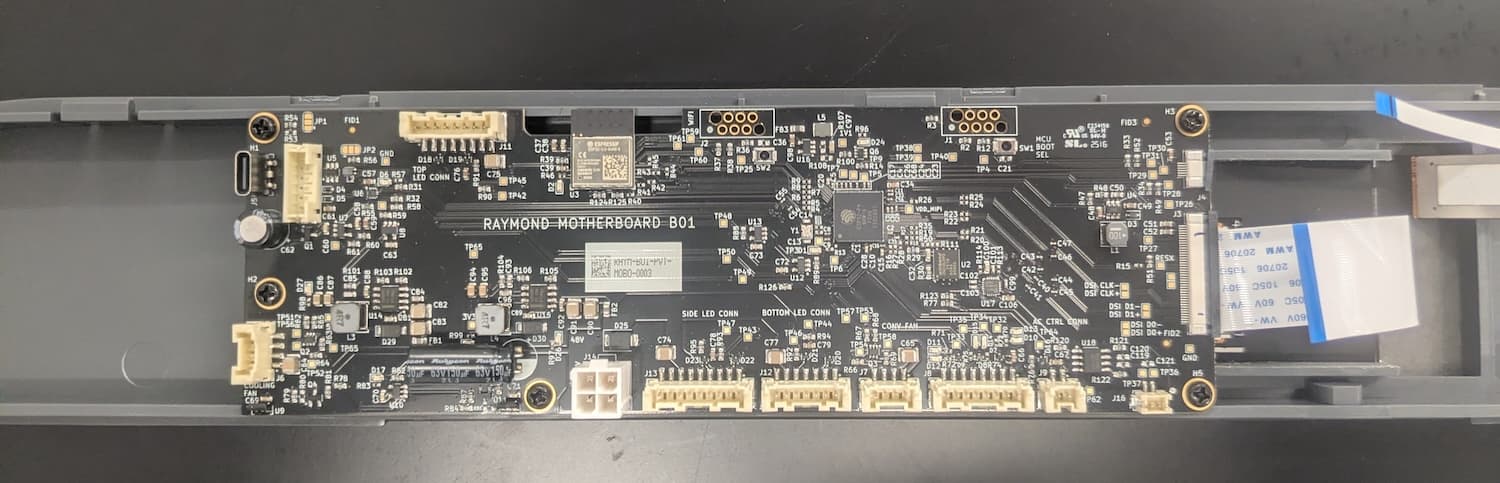
Remove the replacement motherboard from its packaging and place it on the back of the display assembly, aligning the five screw holes in the motherboard with the corresponding screw holes in the display. Thread one motherboard mounting screw into each of the five screw holes, then use a Phillips driver to tighten until snug.
Step 2: Connect the ribbon cables to the motherboard
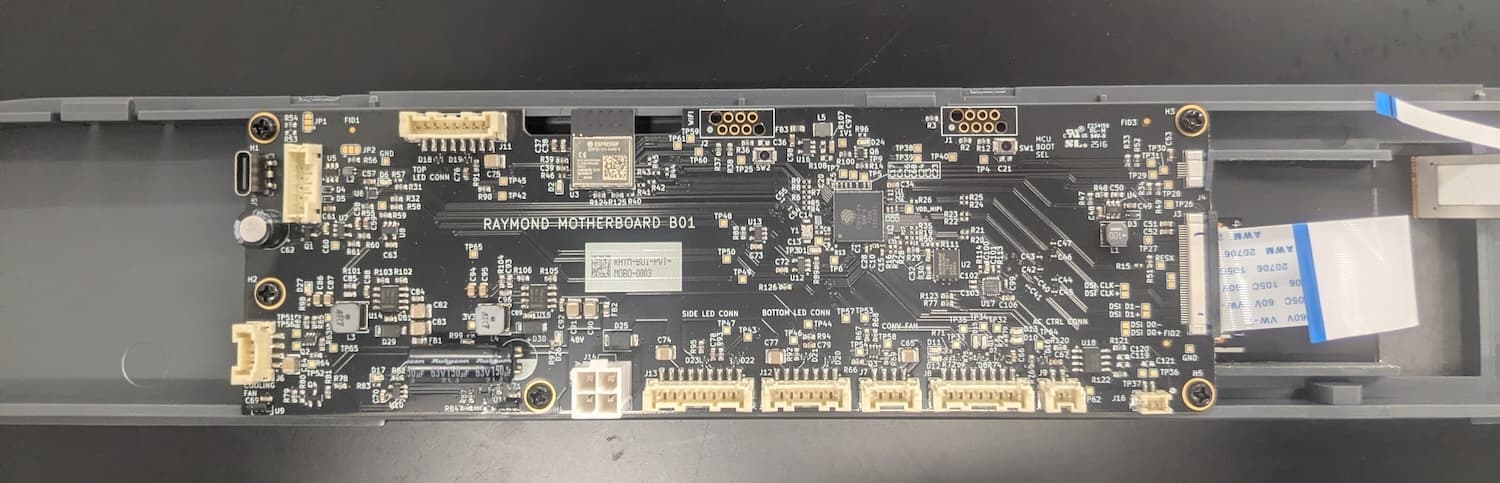
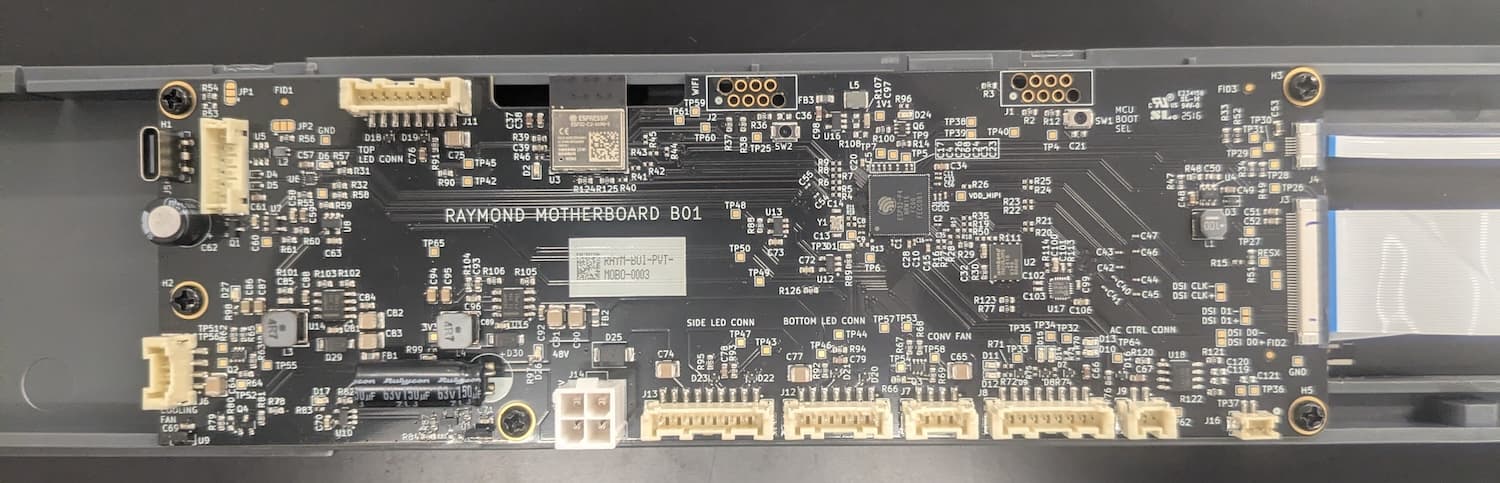
Carefully slide the two ribbon cables into their respective connectors on the motherboard. Push the black latches towards the white connector body. When the latch is flush with the connector body, the ribbon cable is secure.
Step 3: Connect the remaining motherboard cables
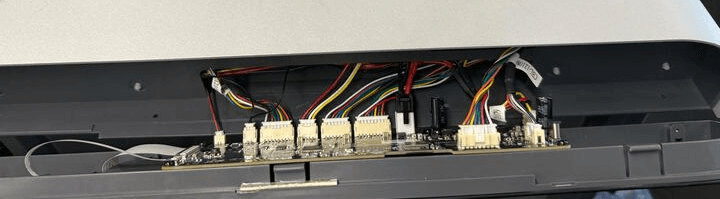
Hold the motherboard and display assembly in front of the machine, near its mounting point. Reconnect all cables to the motherboard, using the image here as a reference. Each cable only fits into its connector in the correct orientation. The locking tab clicks into place when the cable is fully connected.
Step 4: Mount the motherboard and display assembly
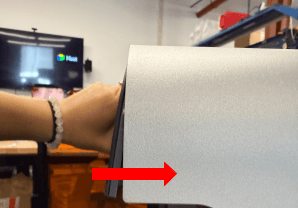
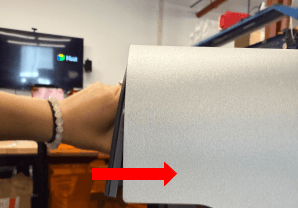
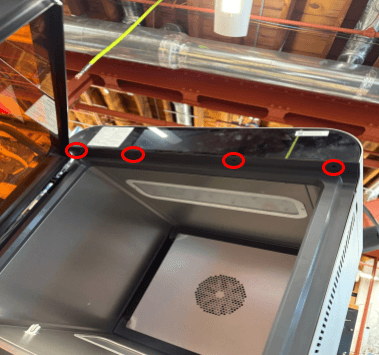
Inclina ligeramente hacia arriba el conjunto de la placa base y la pantalla. Insértalo por debajo del borde frontal de la carcasa superior y, a continuación, inclina la parte inferior del conjunto hasta que encaje en su sitio. Asegúrate de que quede a ras del cuerpo de la máquina y de que los cuatro agujeros para tornillos de la parte inferior de la placa base y el conjunto de la pantalla estén alineados con los agujeros correspondientes de la Form Cure L V2.
Thread one mounting screw into each of the four screw holes in the bottom of the motherboard and display assembly. Using a 2 mm hex driver, tighten the screws until snug.
Finalización de la reparación
Overview: After installing the new motherboard, perform final checks.
Step 1: Power on the machine
Connect the power cable to the machine and its power supply. Turn on the switch at the back of the machine. Start a post-cure cycle and check that the machine operates normally.