LIBRO BLANCO
Formlabs Logo

Replacing the Form Wash L display assembly

Replacing the Form Wash L display assembly

The Form Wash L has a touchscreen in its top shell. The touchscreen is the primary means of interacting with and controlling the machine, so a broken or malfunctioning touchscreen can prevent the machine from being used normally.

Use this guide to replace the Form Wash L display assembly.

fwl-display-top-shell.jpg

Required supplies:

Formlabs:

  • Replacement display assembly
  • Replacement display ribbon cable
  • Electric siphon pump (packaged with Form Wash L)

Third-party:

  • 1.5 mm hex driver
  • 2.5 mm hex driver
  • 5.5 mm socket driver
  • Nitrile gloves
  • Empty solvent container at least 42 L in size

Tiempo estimado: 45-60 minutos

PELIGRO:

Lee y sigue todas las instrucciones de seguridad y las advertencias del manual del usuario. El uso de piezas incorrectas como repuestos puede provocar quemaduras, descargas eléctricas, incendios o explosiones. Desecha todas las piezas de acuerdo con la normativa local.

Preparación del espacio de trabajo

Overview: Prepare the Form Wash L and a dust-free workspace for replacing the display assembly.

Step 1: Prepare the workspace

Clear a workspace around your machine. Ensure that the workspace is well-ventilated and free of dust.

Step 2: Unplug the networking cables and Wi-Fi antenna

Disconnect the Ethernet and USB cables from the unit, if they are connected. Unscrew and remove the Wi-Fi antenna.

Step 3: Unplug the machine

PELIGRO:

Realizar el mantenimiento de la máquina mientras está enchufada aumenta el riesgo de descarga eléctrica. No retires nunca los paneles de la máquina mientras esté enchufada. Nunca vuelvas a conectar la máquina a la alimentación si los paneles están retirados.

Desconecta el cable de alimentación de la máquina antes de continuar con el mantenimiento. No realices el mantenimiento de la máquina mientras esté enchufada a la corriente. Espera cinco minutos después de desenchufar la máquina de la alimentación antes de proseguir.

Paso 4: Vacía la Form Wash L

PELIGRO:

Consulta en todo momento la Ficha de datos de seguridad (FDS) del proveedor de alcohol isopropílico como fuente principal de información. El alcohol isopropílico es inflamable y debe usarse y almacenarse lejos de fuentes de ignición. Almacena pequeñas cantidades de alcohol isopropílico en contenedores debidamente etiquetados y sellados.

Prepara la bomba de sifón eléctrica que venía incluida en el embalaje con la Form Wash L, así como un envase de disolvente vacío de al menos 42 l adecuado para el tipo de disolvente de la máquina. Levanta la tapa de la Form Wash L. Coloca el extremo de entrada de la bomba de sifón eléctrica en la cubeta de lavado. Coloca y asegura el manguito flexible de la bomba dentro del recipiente de disolvente vacío. Enciende el interruptor de la bomba para trasladar el disolvente de la cubeta de lavado al recipiente de disolvente.

Retirada de la carcasa derecha

Overview: Remove the right shell of the machine to access the display assembly.

AVISO:

La Form Wash L contiene componentes electrónicos sensibles. Asegúrate de tener una toma de tierra antes de tocar cualquier componente electrónico de la máquina, sea mediante una cinta de toma de tierra o tocando un trozo de metal con su propia toma de tierra.

Paso 1: Desenrosca los tornillos de la carcasa derecha

fwl-right-no-bg.jpg
fwl-rear-no-bg-1.jpg

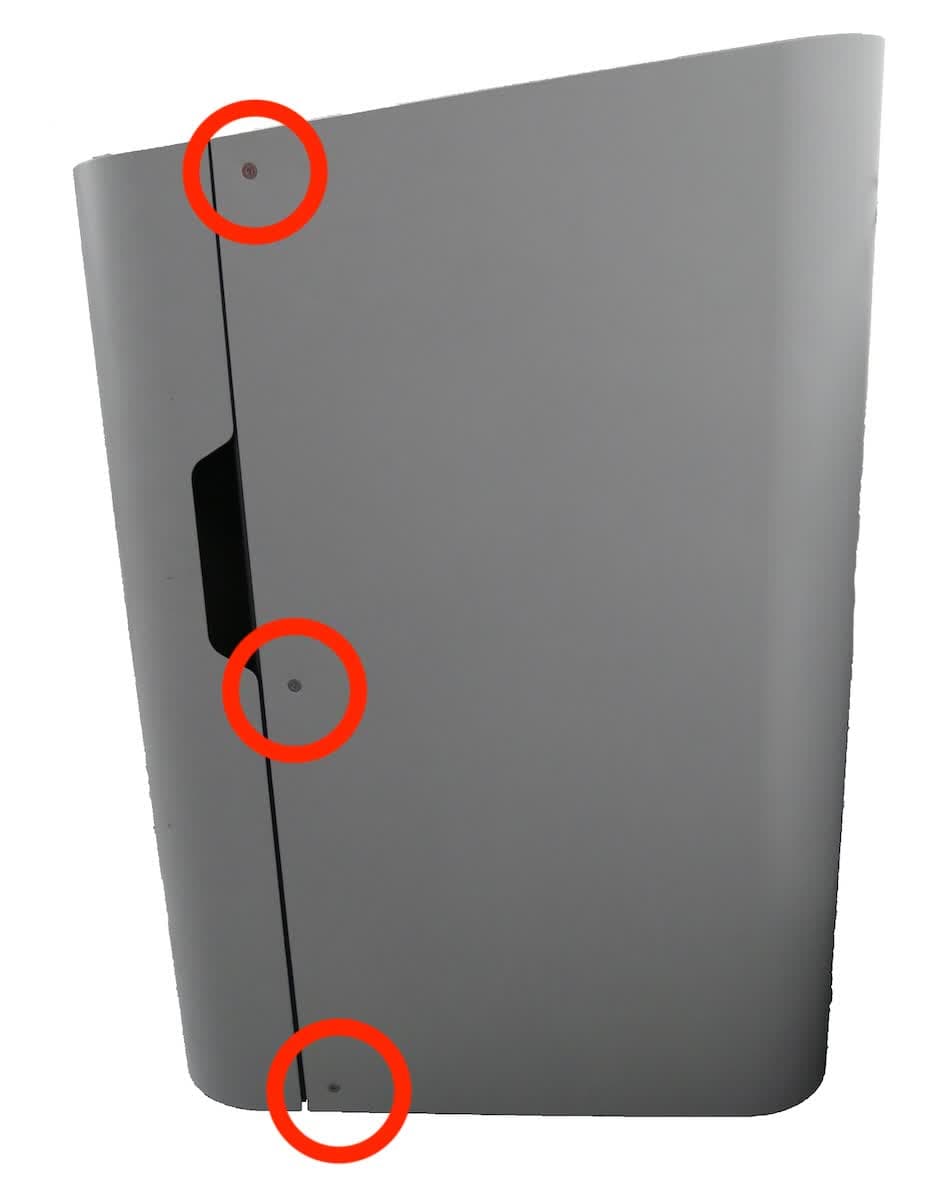
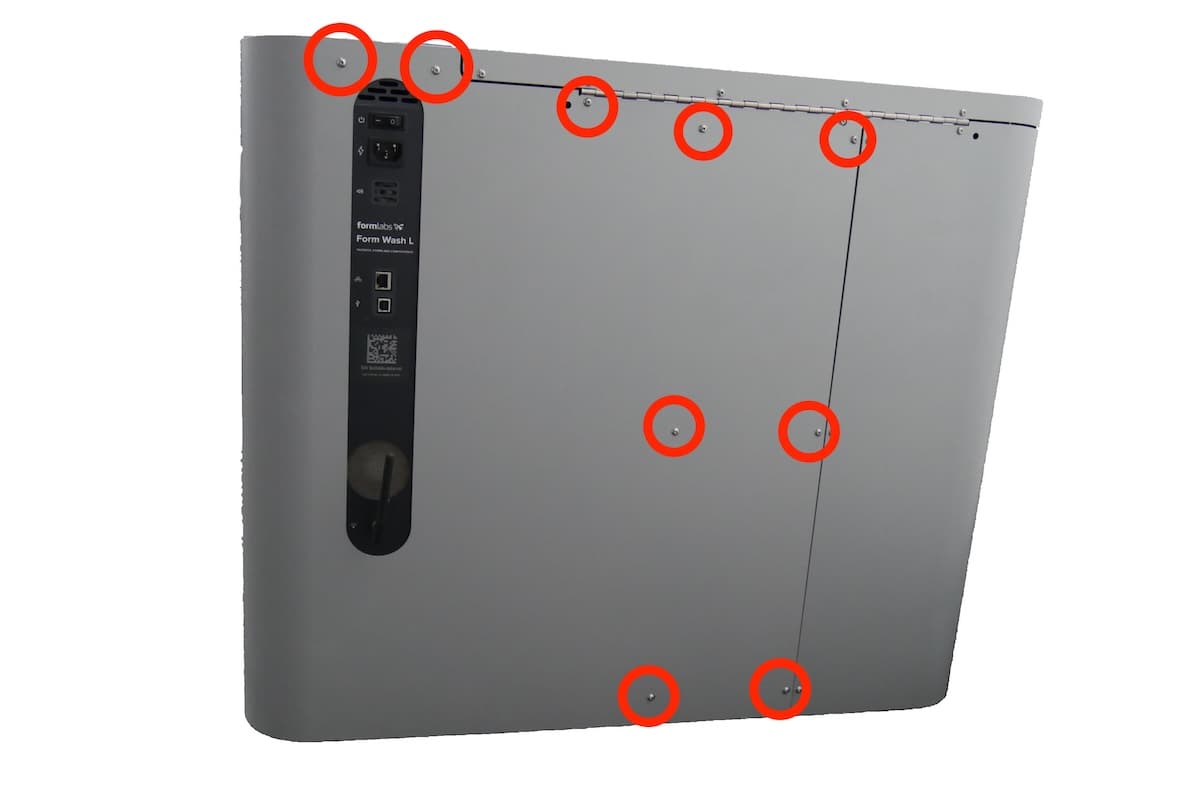
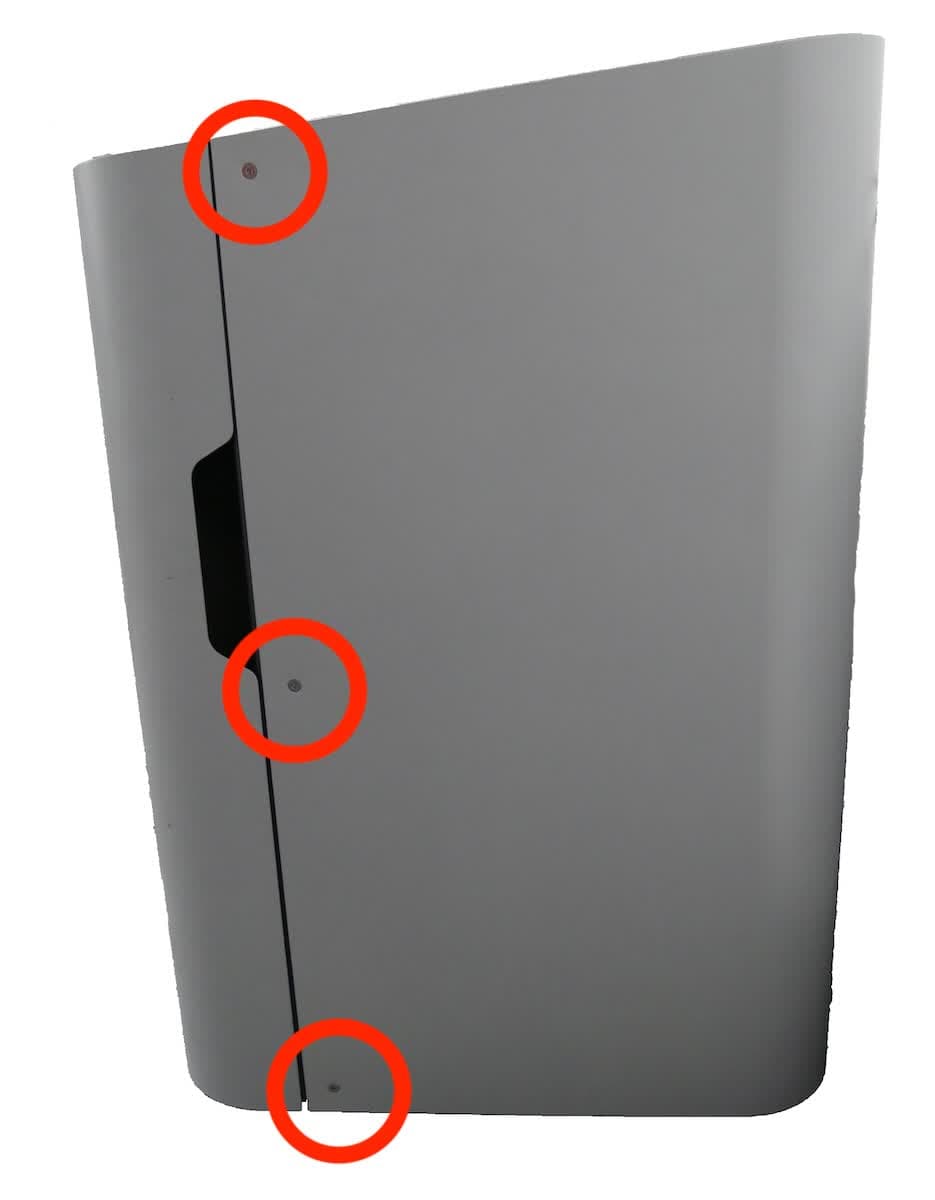
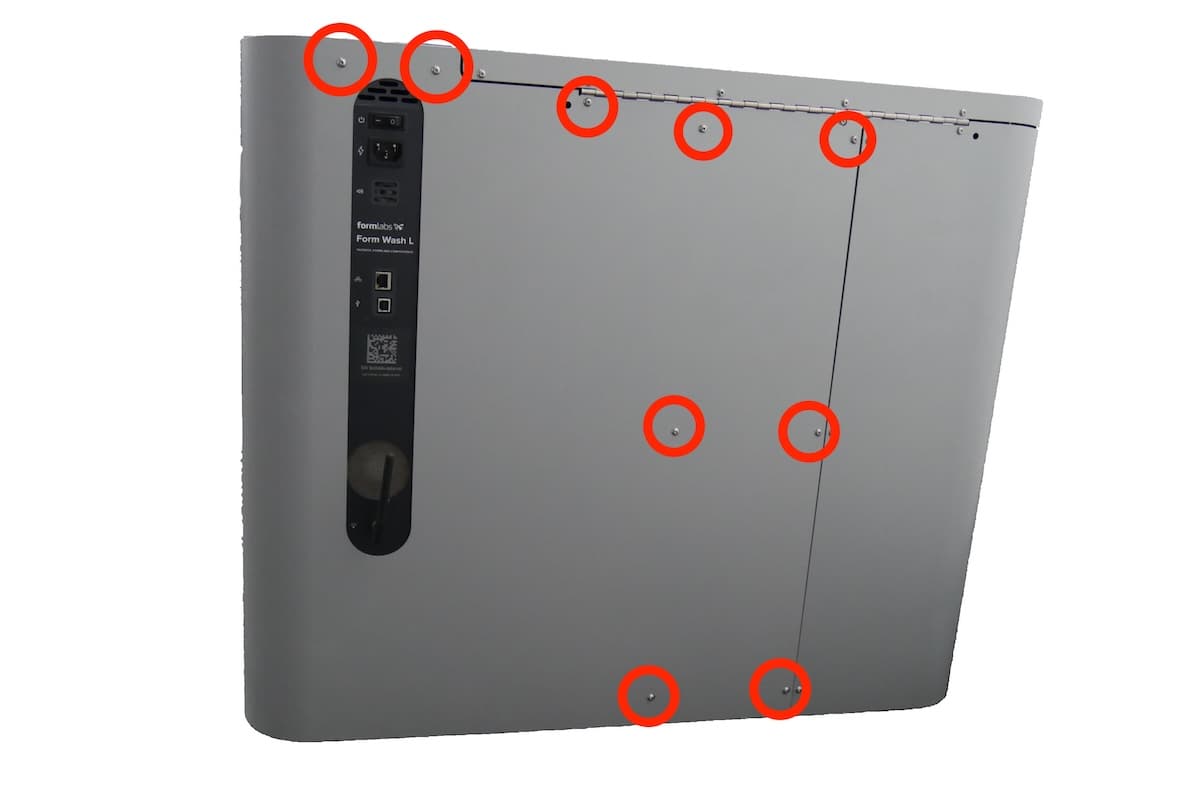
Utiliza la llave Allen de 2,5 mm para aflojar y retirar los 12 tornillos que sujetan la carcasa derecha al bastidor de la Form Wash L. Tres de ellos son tornillos avellanados que se encuentran en el lado derecho de la máquina y los nueve restantes son tornillos de cabeza redondeada que se encuentran en la parte posterior. Deja aparte los tornillos.

fwl-rear-no-bg-2.jpg

AVISO:

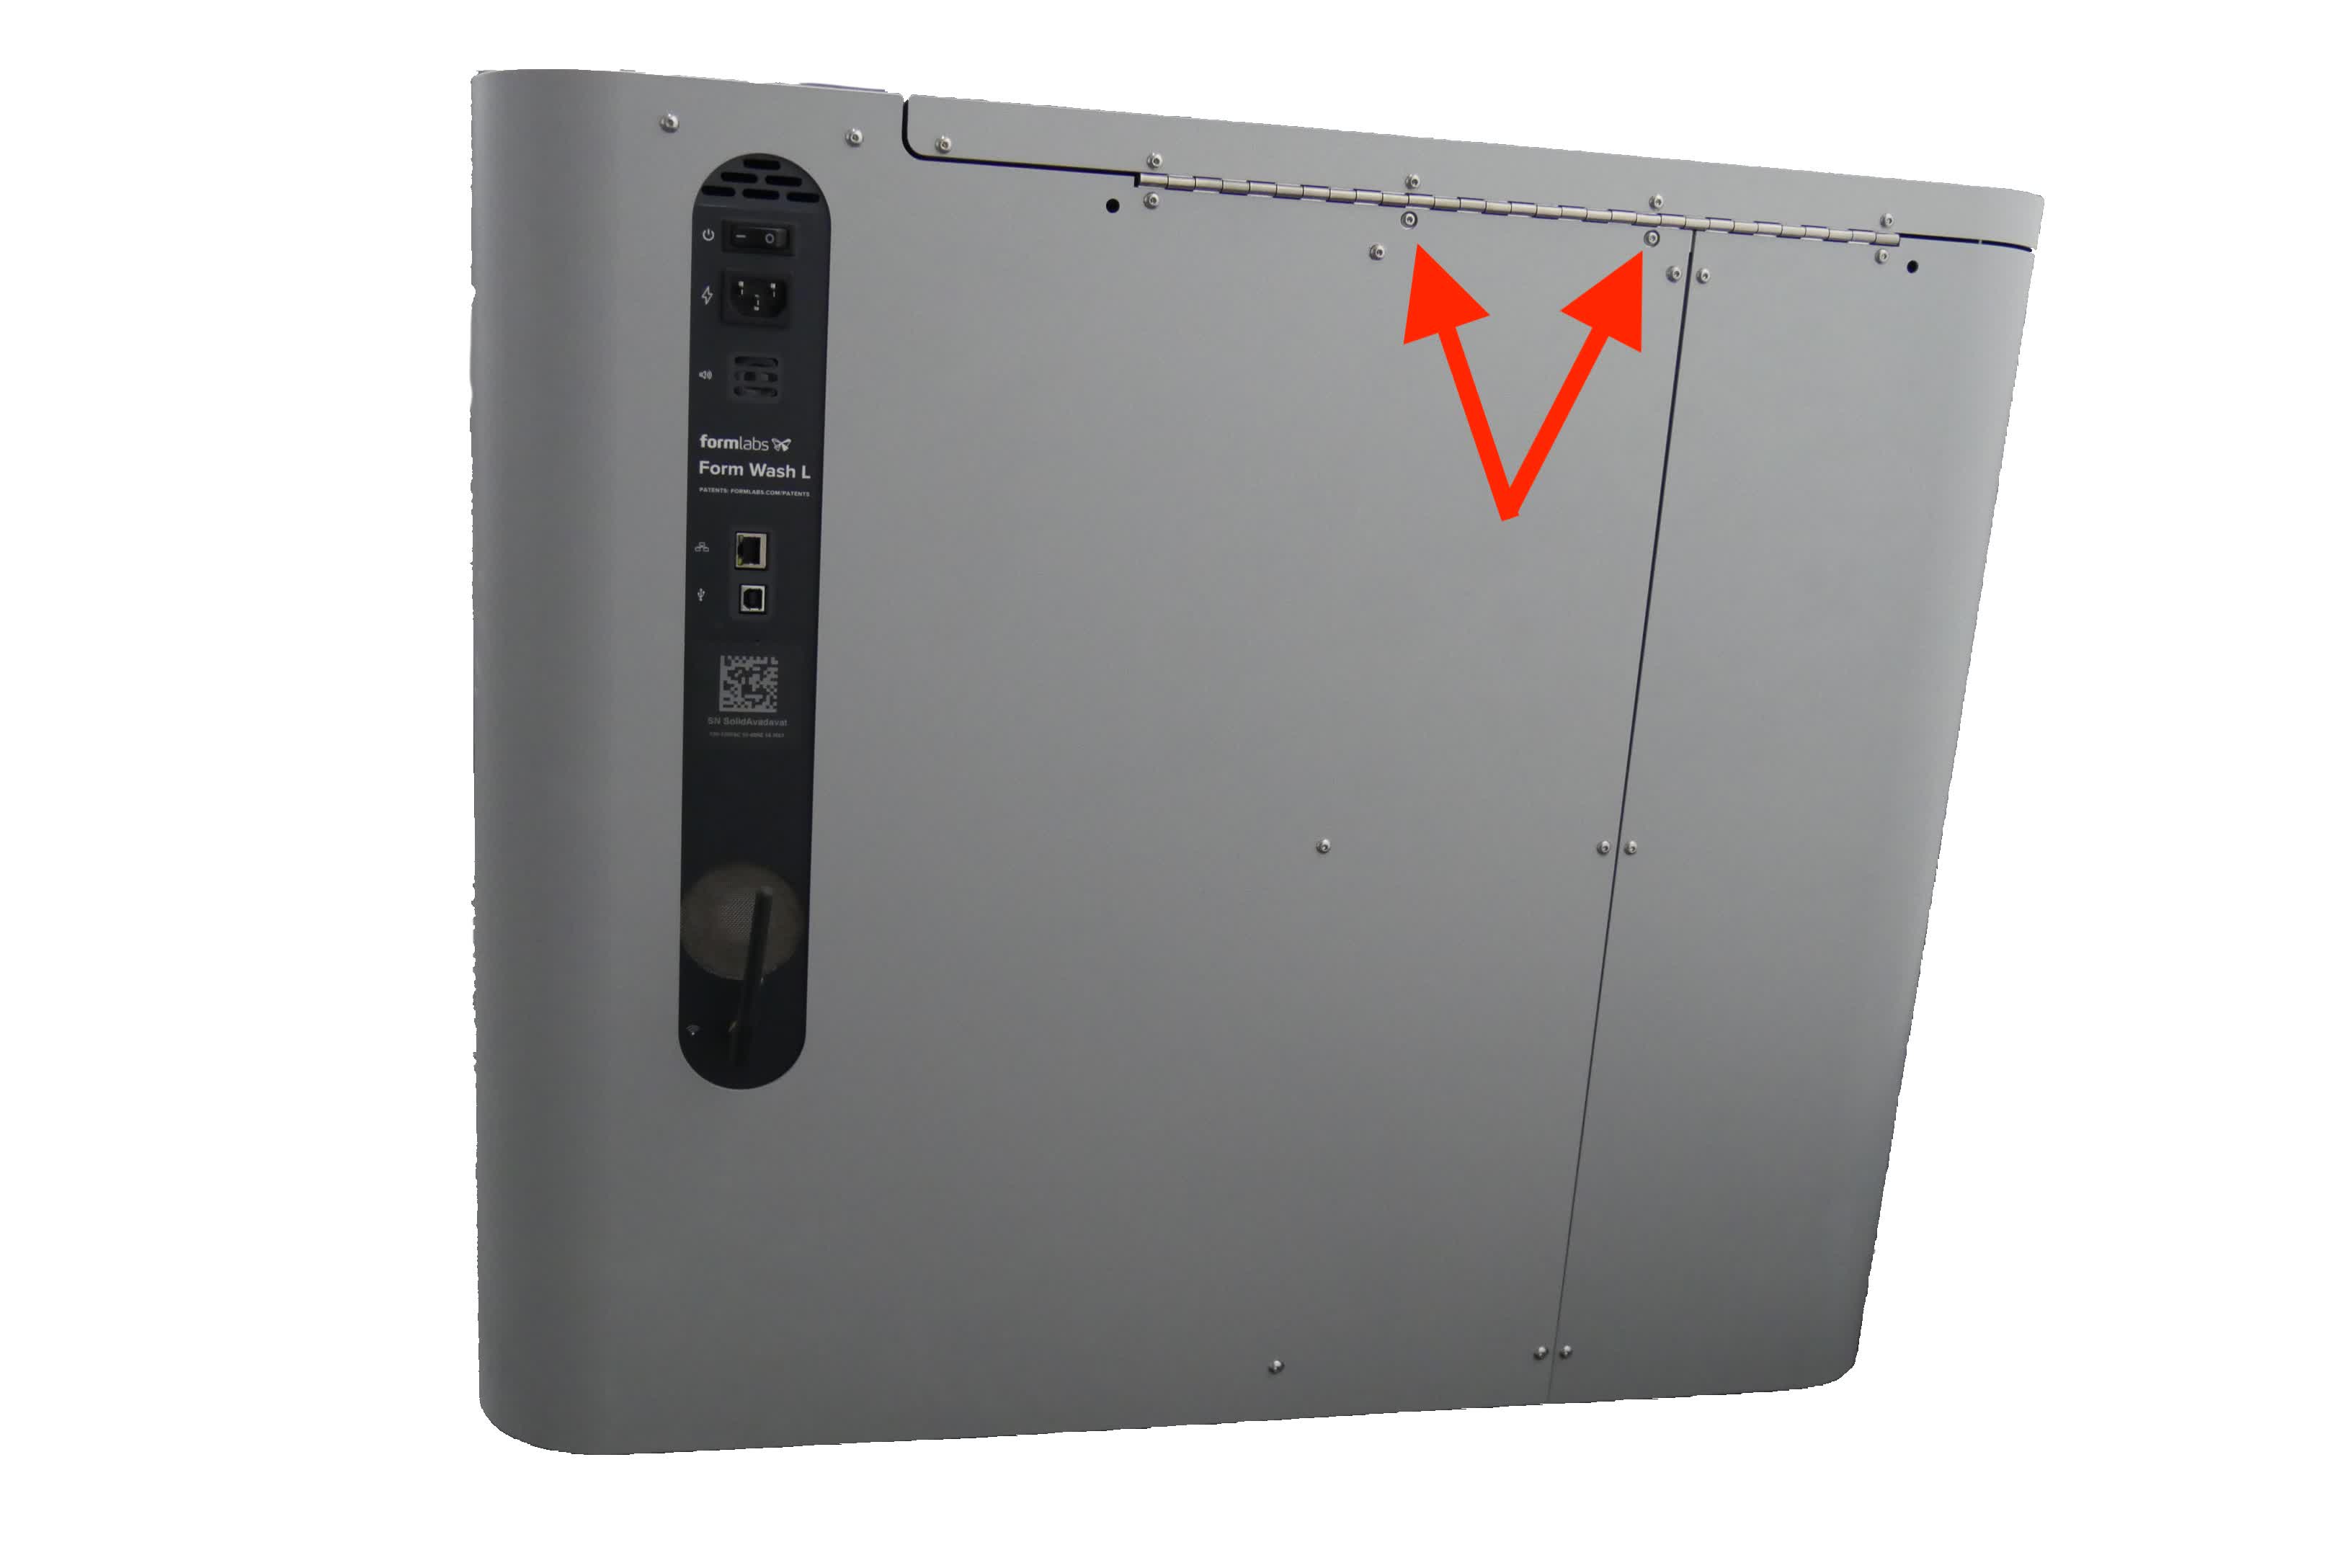
Hay dos tornillos, accesibles a través de recortes en la carcasa derecha, que fijan la tapa al chasis de la máquina. No retires estos tornillos durante este procedimiento.

Step 2: Remove the right shell

Pull the right shell away from the Form Wash L to separate it from the machine’s frame. Set the right shell aside.

Retirada del conjunto de la pantalla

Resumen: Desatornilla y desinstala el conjunto de la pantalla.

fwl-display-cable-retention-clip-display.jpg

NOTICE:

Do not pull on the ribbon cable or pull the display assembly away from the machine. Doing so may damage the display ribbon cable.

Step 2: Remove the display ribbon cable retention clip

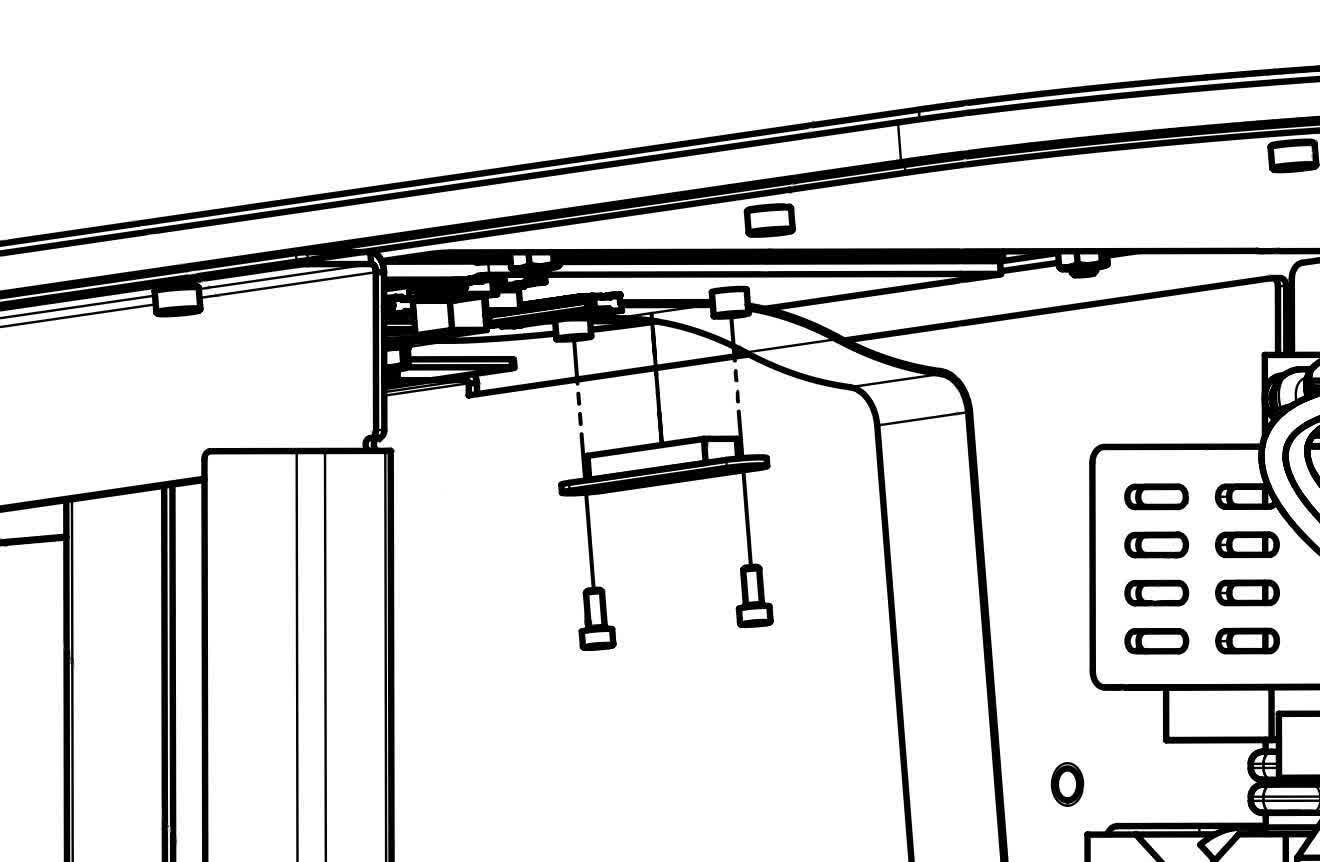
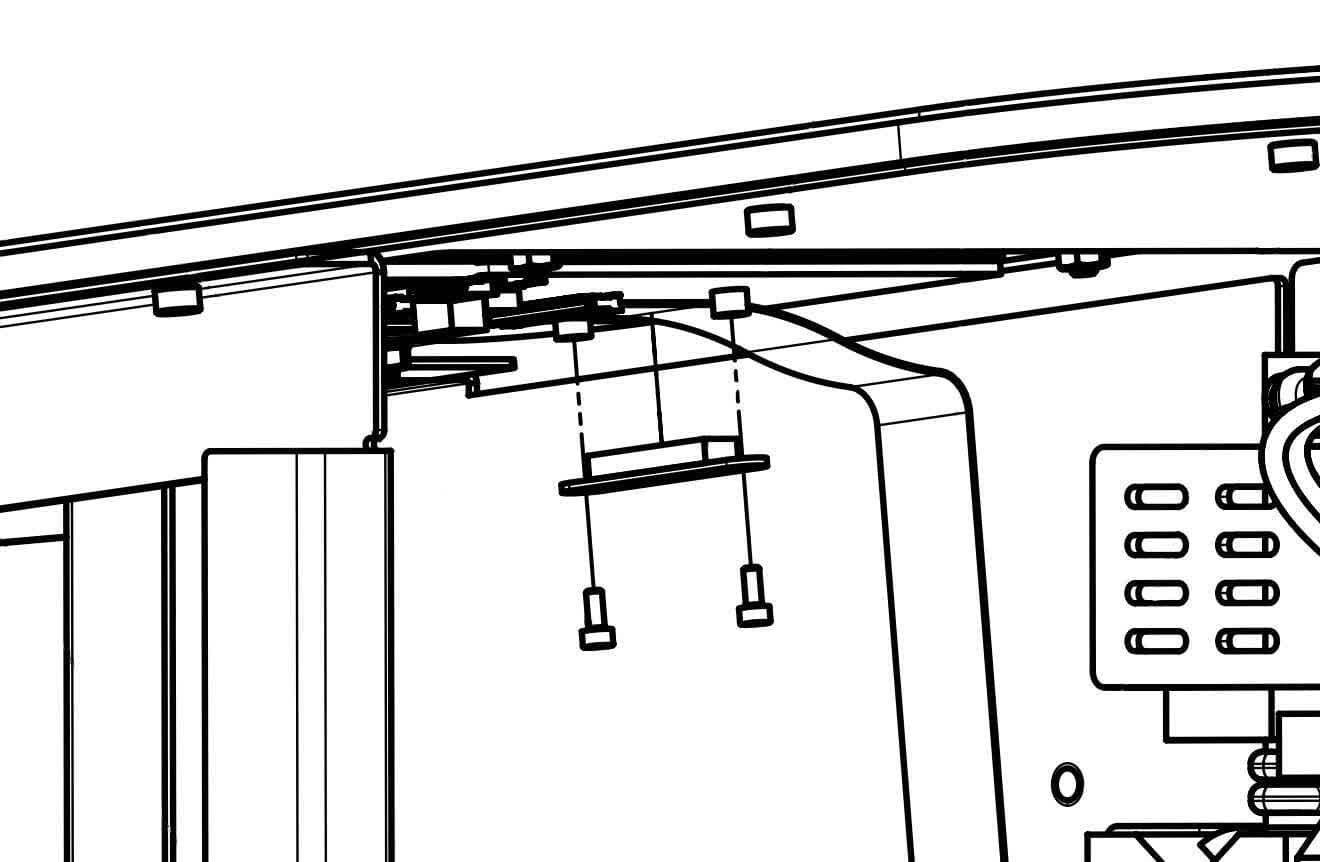
Using a 1.5 mm hex driver, unscrew the two screws. Separate the retention clip from the top shell, but do not pull on the display ribbon cable. Set the screws and the retention clip aside.

Step 3: Unlock the latch

fwl-display-cable-latch.jpg
fwl-display-cable-uninstall.jpg

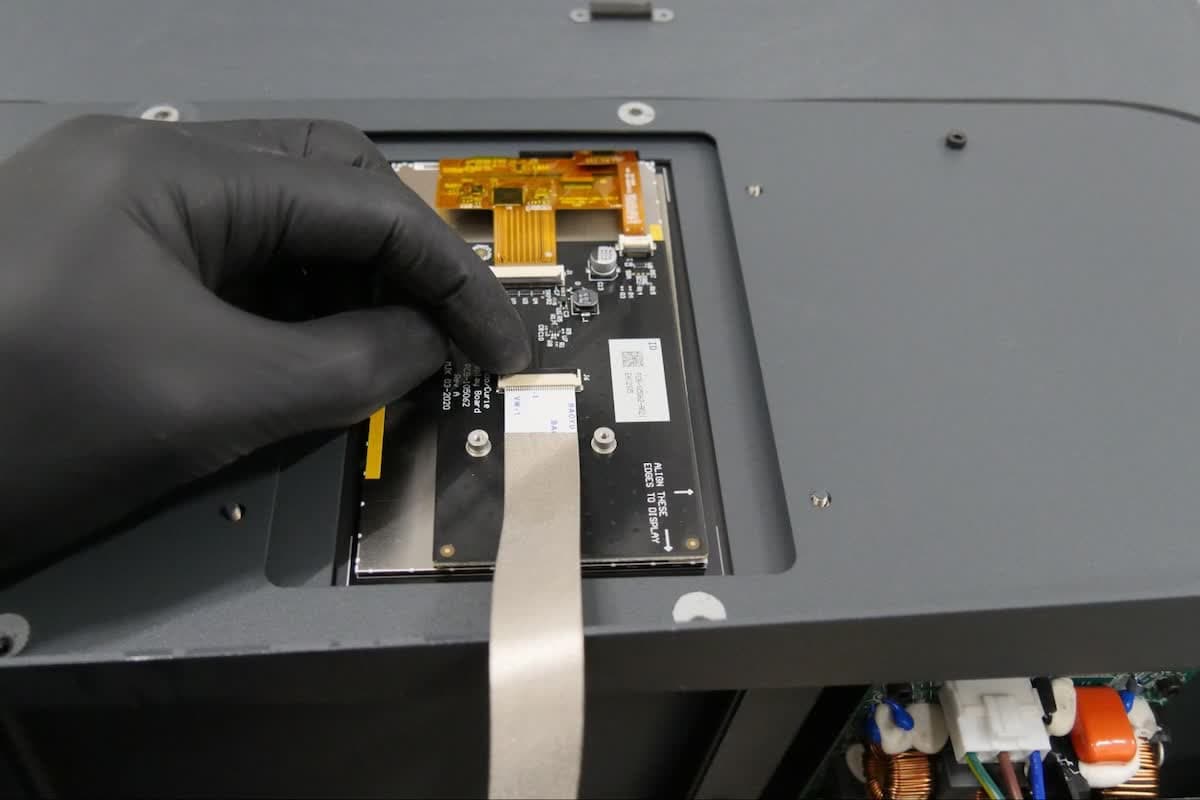
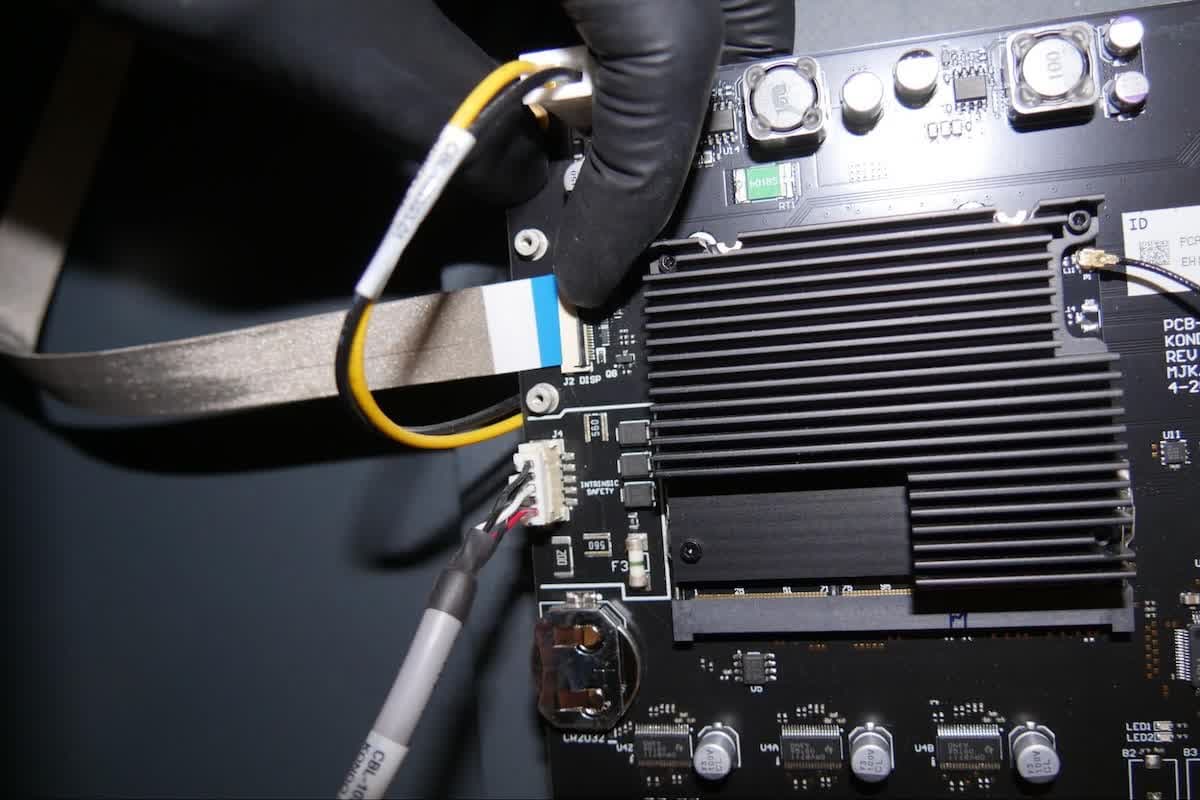
The display ribbon cable is secured to its connector with a latch. Lift the latch away from the display assembly to free the display ribbon cable. The latch is unlocked when it is perpendicular to the display assembly. Once the latch is in the vertical position, the latch is unlocked and the ribbon cable can be disconnected.

Step 4: Disconnect the display ribbon cable

Gently pull the ribbon cable to unplug it from the latch. Note the orientation of the exposed contacts on the ribbon cable for later reinstallation.

NOTE:

If you are reseating the display ribbon cable rather than replacing the display assembly, skip to Optional: Reseat the display ribbon cable.

Step 5: Remove the display assembly retention nuts

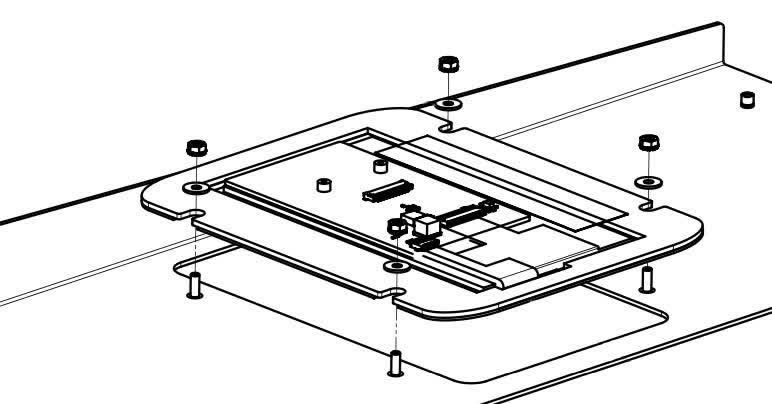
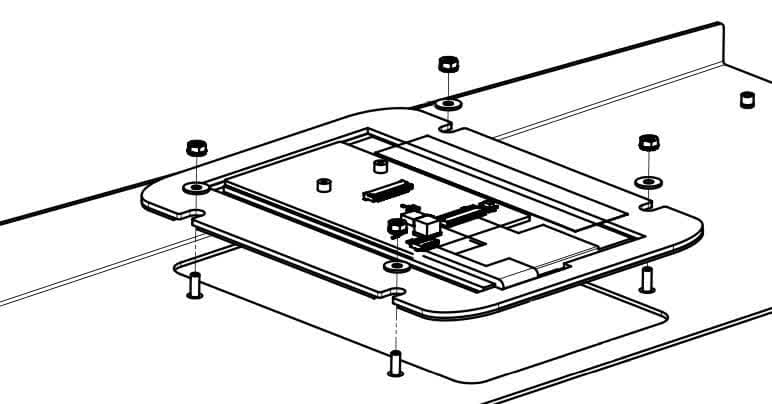
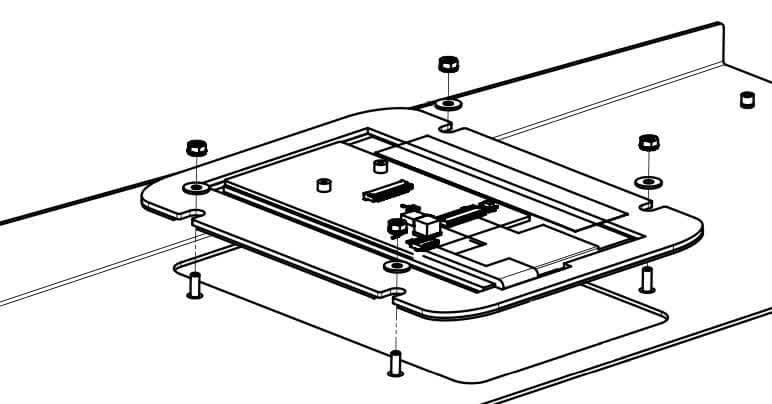
The display assembly is secured to the top shell with four nuts. Use a 5.5 mm socket driver to loosen and remove the nuts. Remove the washer from each of the threaded posts. Set the washers and the nuts aside.

fwl-display-top-shell.jpg
fwl-display-align.jpg

NOTE:

If you are replacing the display assembly, skip to Installing the new display assembly.

Optional: Reseat or replace the display ribbon cable

Overview: If you are reseating or replacing the display ribbon cable rather than replacing the display assembly, perform these additional steps.

Step 1: Remove the display ribbon cable retention clip

fwl-display-cable-motherboard-clip.jpg

NOTICE:

Do not pull on the ribbon cable. Doing so may damage the display ribbon cable.

Step 2: Disconnect the display ribbon cable from the motherboard

fwl-display-cable-motherboard-latch.jpg
fwl-display-cable-motherboard-uninstall.jpg

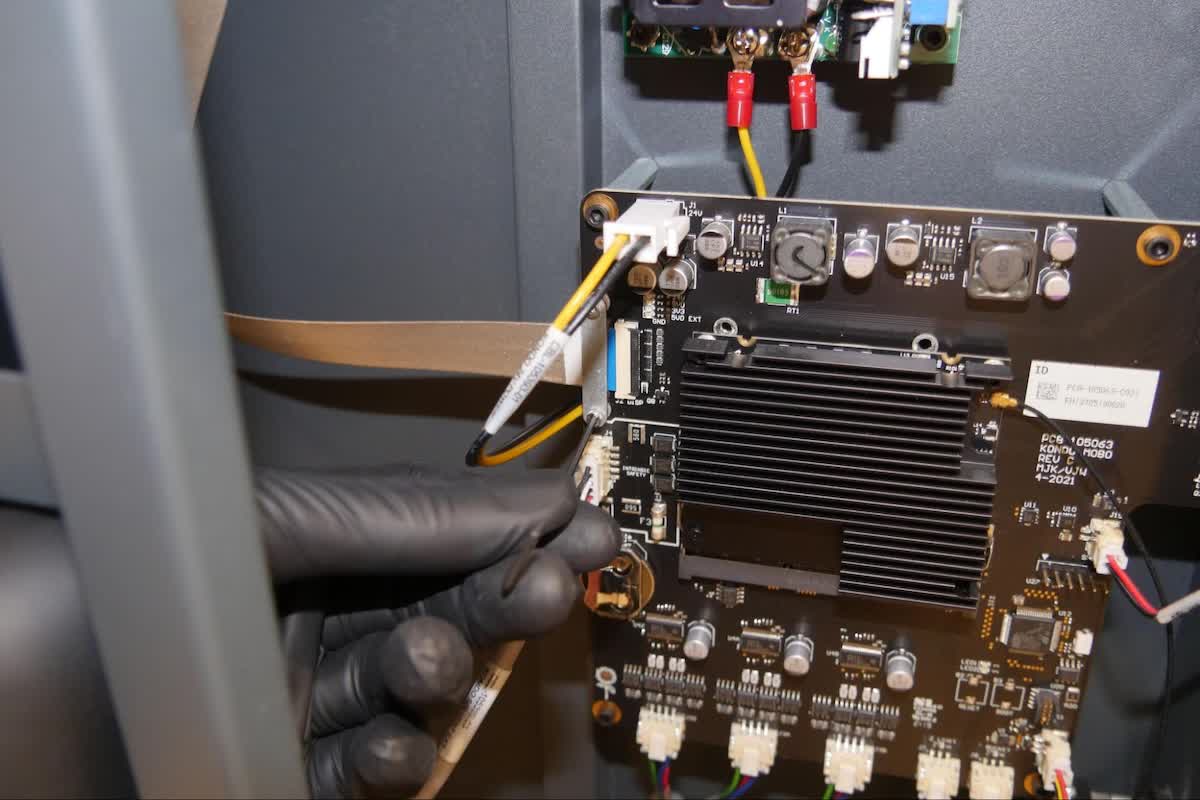
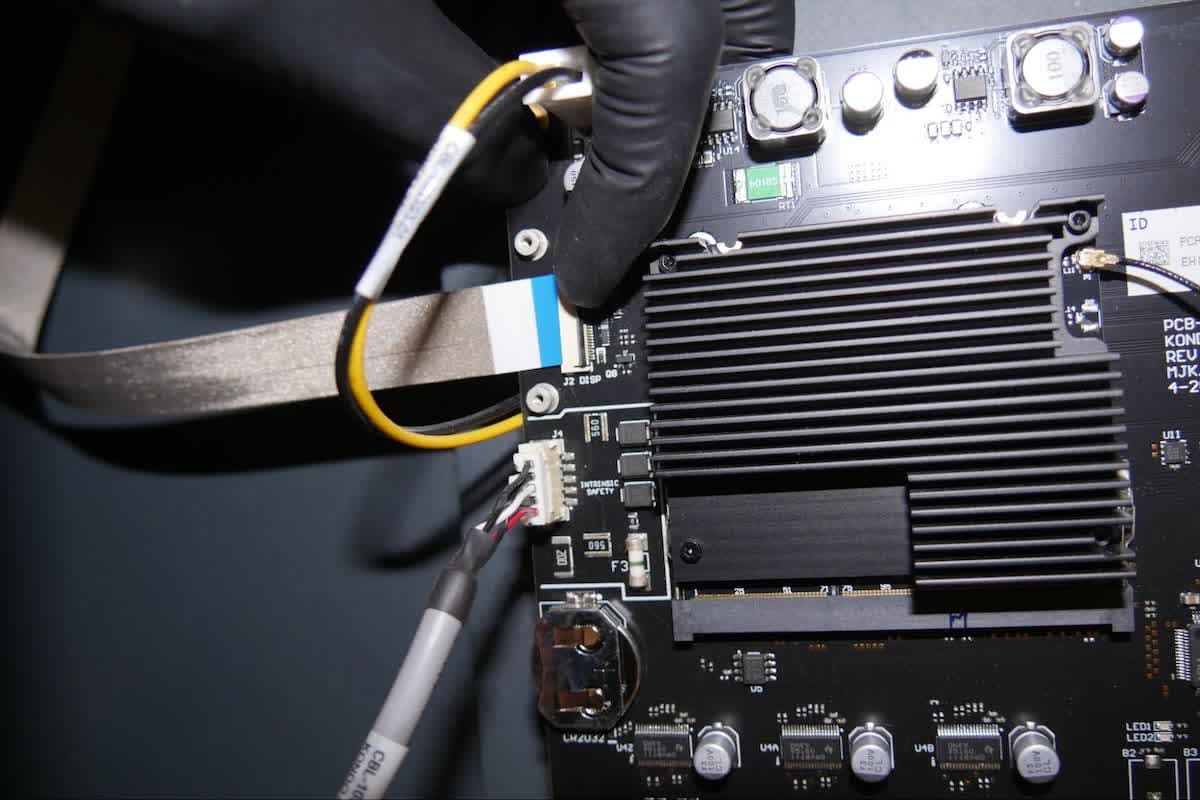
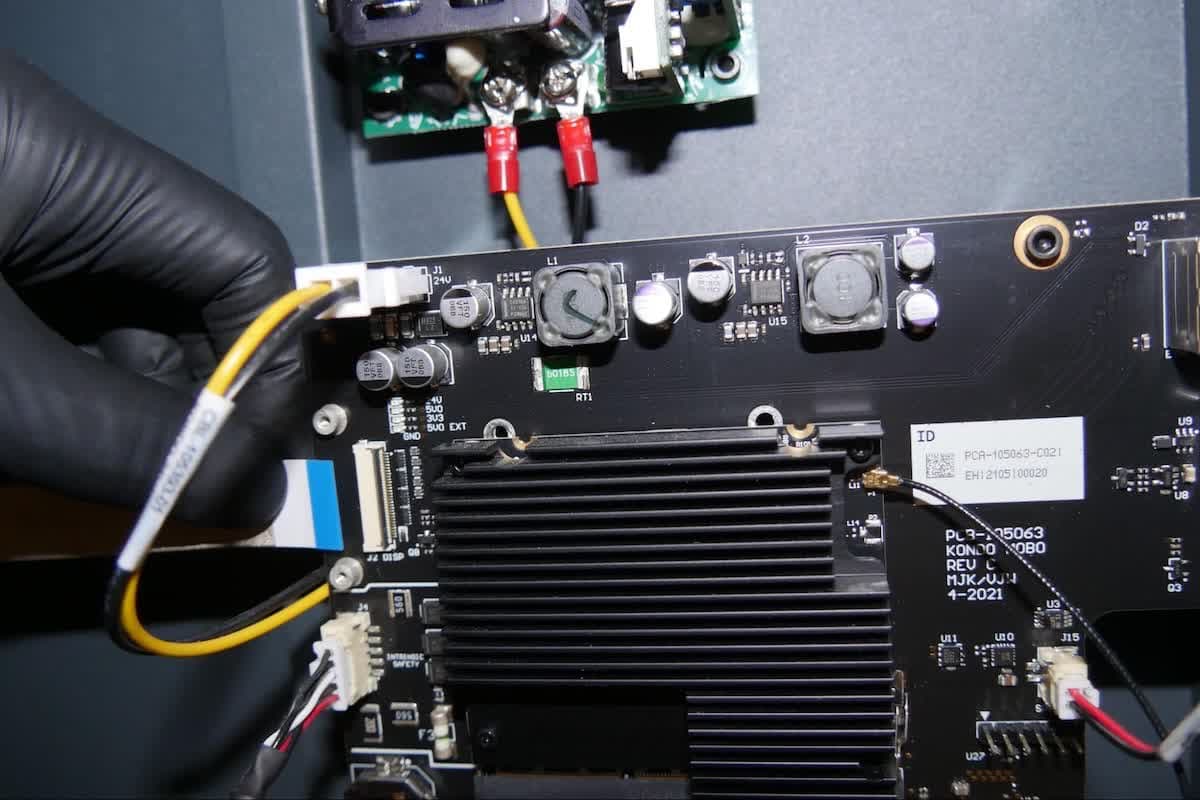
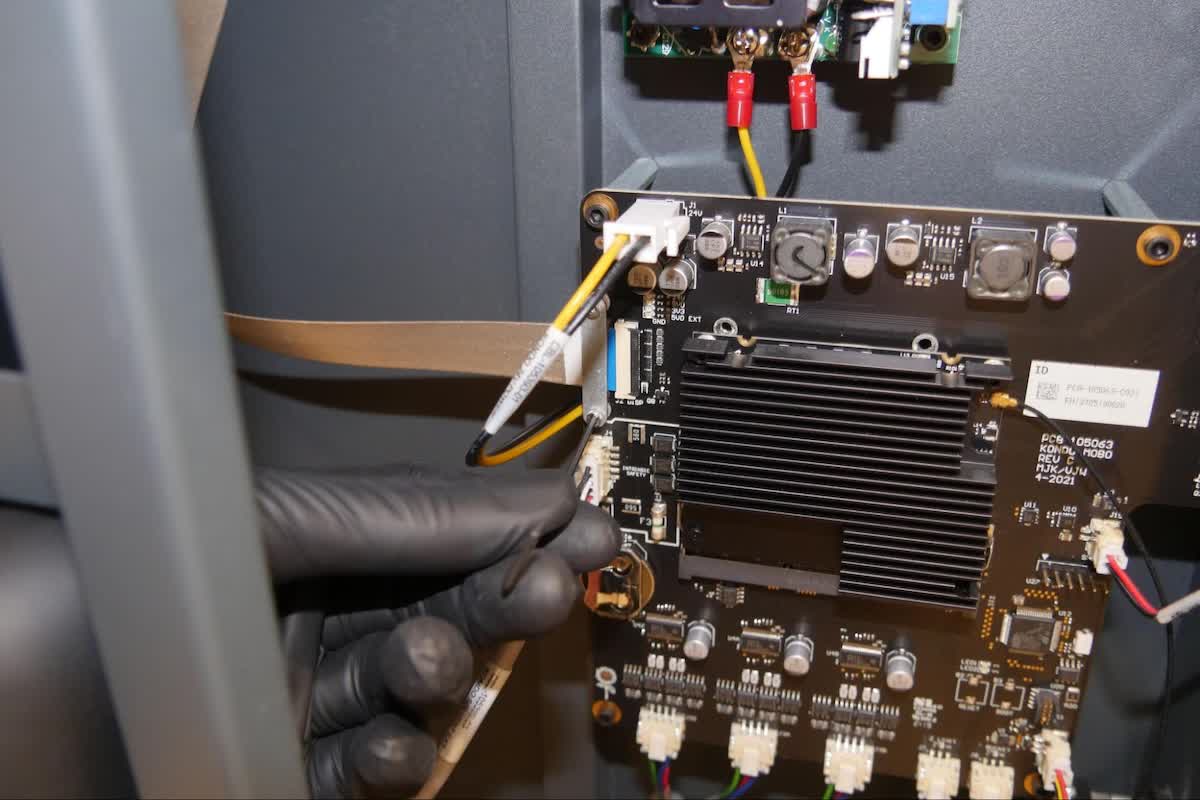
The display ribbon cable is secured in its connector with a latch. Lift the latch away from the display assembly to free the display ribbon cable. Once the latch is in the upright position, gently unplug the ribbon cable. Note the orientation of the exposed contacts on the ribbon cable for later reinstallation.

Step 3: Reconnect the display ribbon cable to the motherboard

Insert the display ribbon cable back into the connector on the motherboard, orienting the exposed contacts on the ribbon cable as they were previously. Ensure that the ribbon cable is not twisted or folded.

Step 4: Secure the display ribbon cable

Rotate the latch towards the display assembly to lock the display ribbon cable in place. The latch is locked when it is parallel to the motherboard.

fwl-display-cable-motherboard-latch.jpg

Step 5: Reinstall the display ribbon cable retention clip

fwl-display-cable-motherboard-clip.jpg

NOTE:

If you are not replacing the display assembly, skip to step 3 under Installing the new display assembly and continue following the steps there to reconnect the display ribbon cable to the display assembly and reassemble the machine.

Instalación del nuevo conjunto de la pantalla

Overview: Mount and secure the new display assembly.

Step 1: Mount the replacement display assembly

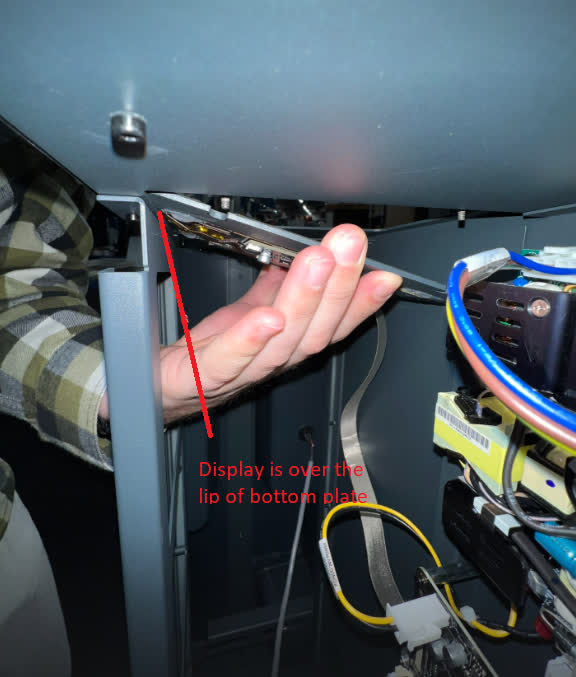
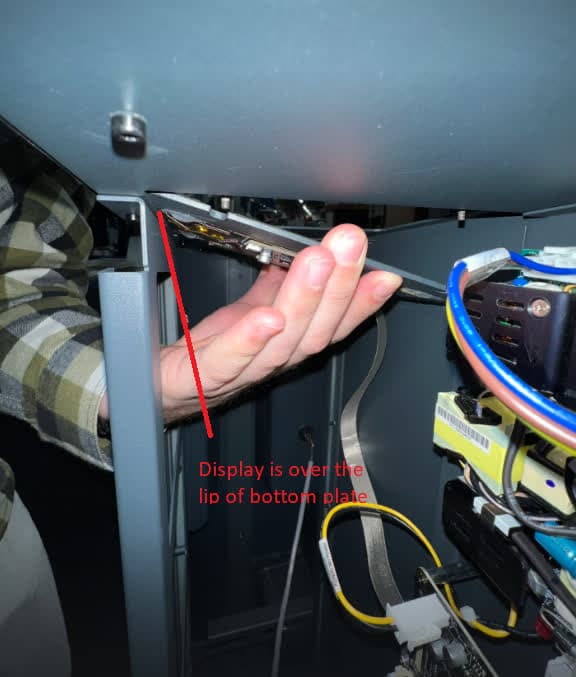
Orient the display assembly so that the mounting points for the ribbon cable retention clip are closer to the inner wall of the machine. Insert the right-hand side of the display assembly between the two plates of the top shell. Raise the display assembly into place, ensuring that the four cutouts in the display assembly are aligned with the four threaded posts in the top shell.

fwl-display-align.jpg

Step 2: Secure the replacement display assembly

For each of the four threaded posts, place one washer on the post and loosely thread a retention nut into place. Tighten the nuts with the 5.5 mm socket driver until finger tight.

fwl-display-top-shell.jpg

Step 3: Reconnect the display ribbon cable

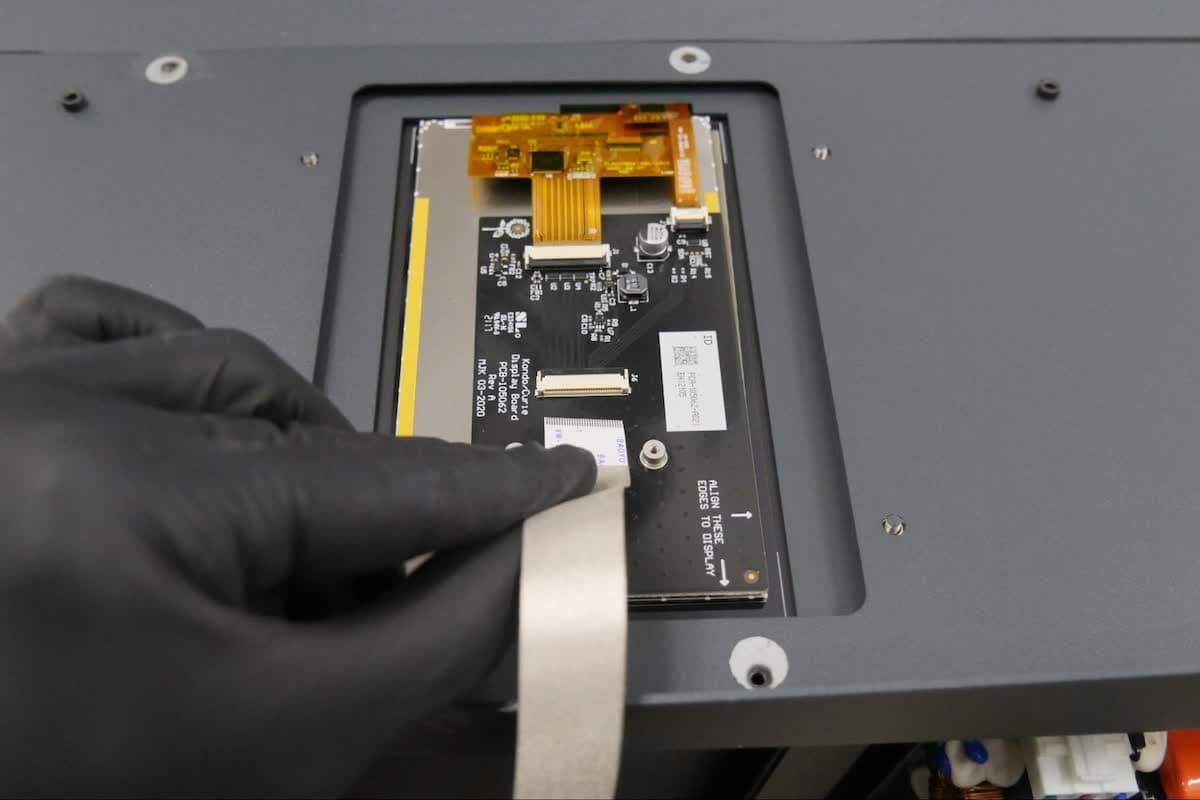
Insert the display ribbon cable into the connector on the new display assembly, orienting the exposed contacts on the ribbon cable as they were on the old display assembly. Ensure that the ribbon cable is not twisted or folded.

Step 4: Secure the display ribbon cable

Rotate the latch towards the display assembly to lock the display ribbon cable in place. The latch is locked when it is parallel to the display assembly.

Step 5: Reinstall the display ribbon cable retention clip

Align the display ribbon cable retention clip with its mounting points on the top shell, ensuring that it holds the ribbon cable flat against the display assembly. Insert one 1.5 mm hex screw into both of the two screw holes in the retention clip and, using a 1.5 mm hex driver, tighten until finger tight.

fwl-display-cable-retention-clip-display.jpg

Reinstalación de la carcasa derecha

Resumen: Vuelve a instalar y fijar la carcasa derecha.

Paso 1: Vuelve a instalar la carcasa derecha

Sujeta la carcasa derecha contra la Form Wash L. Comprueba que los agujeros para tornillos de la carcasa derecha se alinean con los correspondientes agujeros para tornillos del chasis de la máquina. Enrosca con suavidad los tres tornillos hexagonales avellanados de 2,5 mm en los agujeros para tornillos del lado derecho de la máquina y los nueve tornillos de cabeza redondeada en los agujeros para tornillos de la parte posterior de la máquina.

Paso 2: Asegura la carcasa derecha

fwl-right-no-bg.jpg
fwl-right-no-bg.jpg

Empezando por el lado derecho de la máquina, aprieta los tornillos con una llave Allen de 2,5 mm hasta que no se puedan mover con los dedos.

Finalización de la reparación

Overview: After reinstalling the right shell, power on the machine and perform final checks.

Step 1: Power on the machine

Reconnect the power cable to the Form Wash L. Flip the breaker switch on the back of the unit to the ON position to turn on the machine.

Step 2: Test the repair

The touchscreen should respond to touch if the repair is successful. Test a variety of inputs, such as viewing the machine’s settings or starting a wash cycle. Contact Formlabs Support or your authorized reseller to share the results of the procedure.