
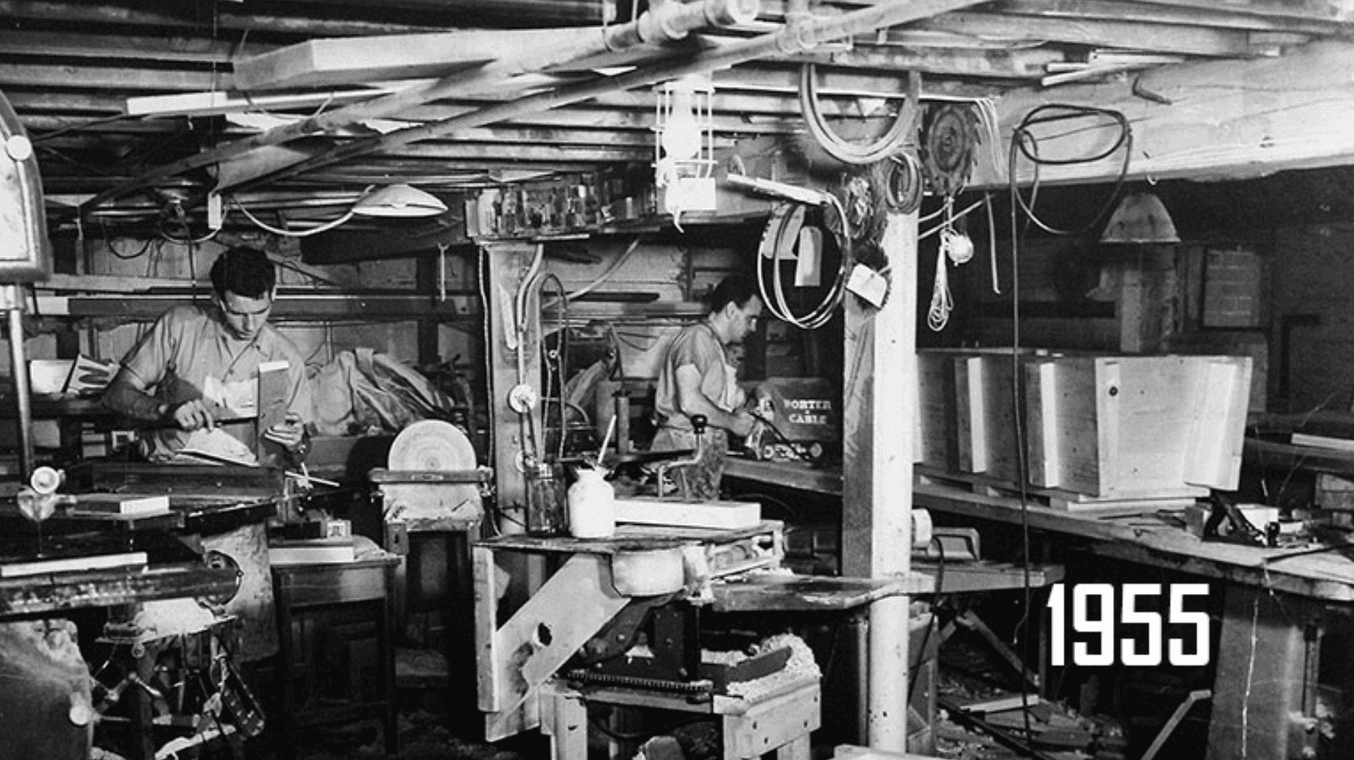
Productive Plastics has been in business since 1955, delivering high quality thermoformed parts for the medical, railway, electronics, and automotive industries, among others.
At industrial thermoformer Productive Plastics, the machines are big, the customers are bigger, and, as the name suggests, the volume is high. At any time, they could be dealing with orders for hundreds of large medical device shrouds for multiple Fortune 500 medical device companies or thousands of armrest components for railway cars.
Customer parts are always changing, but Productive Plastics’ machinery and labor capacity remain constant, so they’ve had to optimize and customize each process to fit new geometries and types of parts. To do so, they’ve created an extensive library of manufacturing aids on the Fuse 1 selective laser sintering (SLS) 3D printer.
On the Manufacturing Floor With Productive Plastics
Thermoforming is a manufacturing process that heats and molds sheets of plastic into a desired shape. There is a wide variety of methods, some of the most popular being vacuum forming, pressure forming, and mechanical forming. Productive Plastics operates six manufacturing ‘cells,’ so that multiple projects can progress simultaneously. Each cell is equipped with an industrial thermoformer, a CNC milling machine, an assembly area, and a computer system to organize and monitor operations.
These six cells are operating continuously, starting new orders as soon as the previous ones are done. Tooling Engineer Dustin Johnson identifies and designs the manufacturing aids necessary for each order. One job might call for a drilling guide to help technicians accurately join two parts together, another might call for a replacement part on a broken piece of machinery.
“The Fuse 1 was our first 3D printer. Before we got it, we might have been machining wood for jigs, outsourcing custom fixtures from injection molding companies, or just forgoing a manufacturing aid altogether and estimating the spacing,” says Johnson.
Incorporating the Fuse 1 has helped reduce costs, improve productivity, and avoid stoppages or delays. Johnson has even started to design end-use 3D printed alternatives for customers’ assemblies. “We can control the timing much better in-house. It’s a lot easier to push print than to request a part from the customer or an outsourced provider. And the more we can do in-house, the more cost-effective it is,” says Kyle Davidson, Sales and Marketing Director at Productive Plastics.
Reducing Costs With In-House Jigs and Fixtures
Productive Plastics specializes in heavy-gauge thermoforming, often using thick sheets of PVC/acrylic alloy such as Kydex for the end-use components they’re forming. The sheets are relatively inexpensive per piece, but avoiding waste by properly aligning the size of clamps, parts, and molding parameters can save them, and their customers, thousands of dollars.
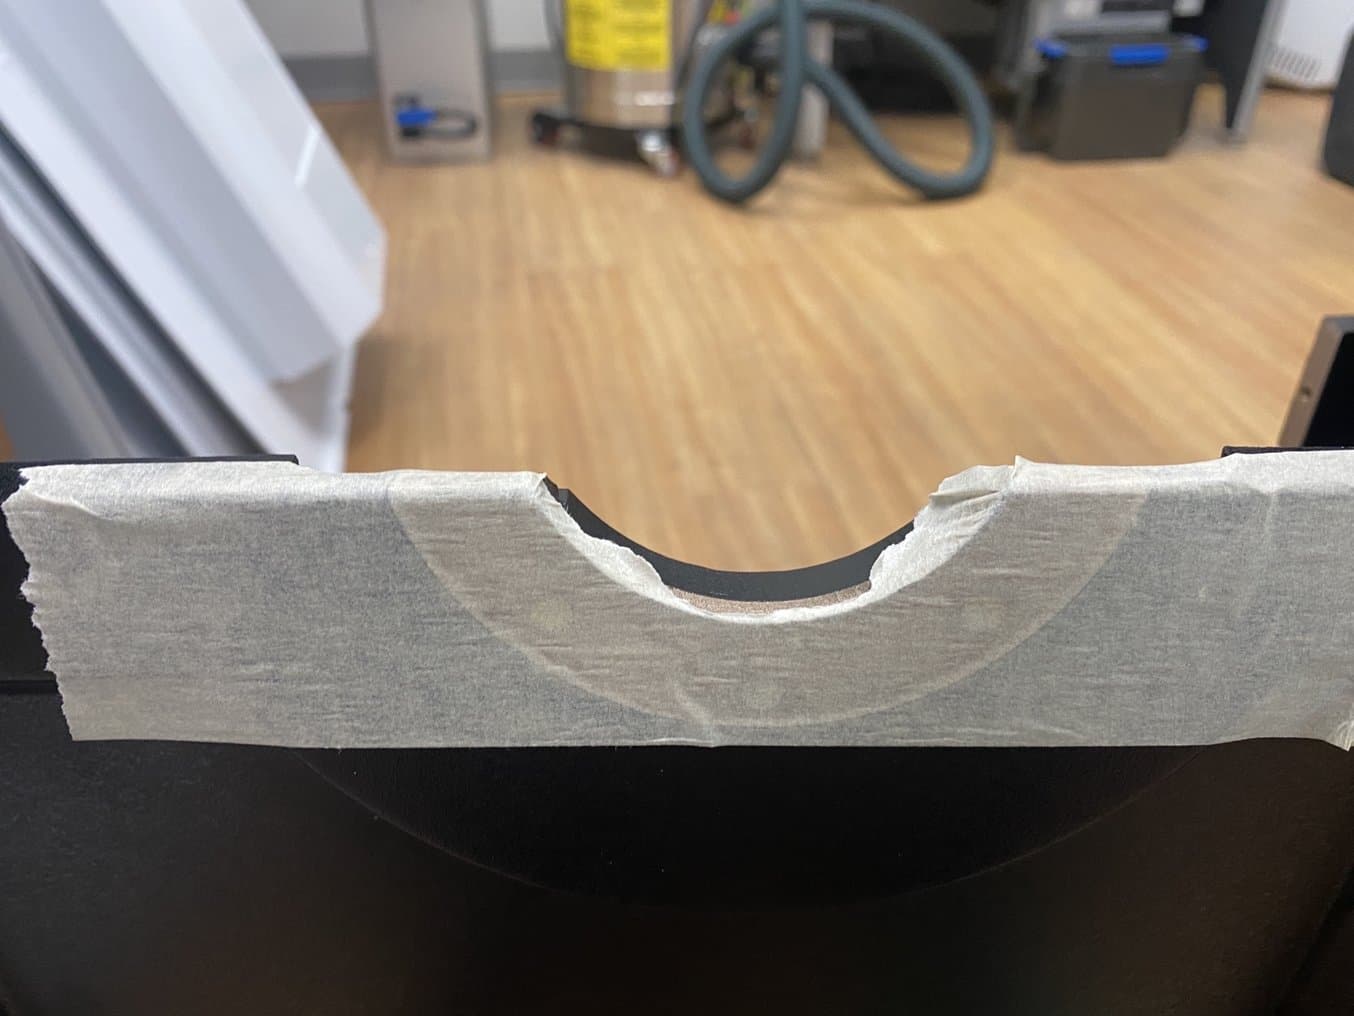
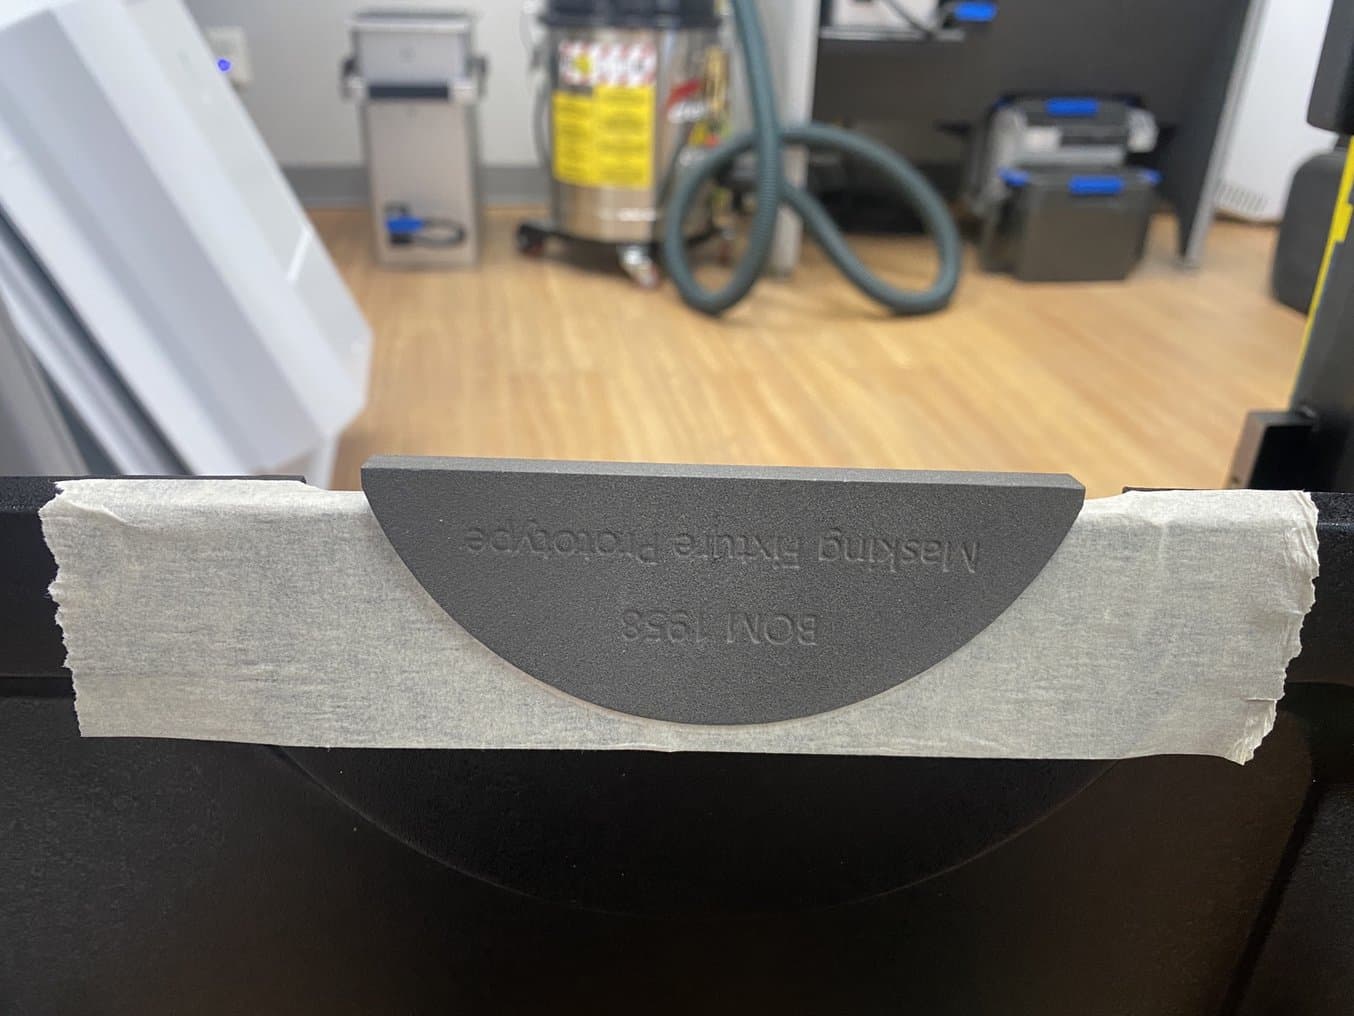
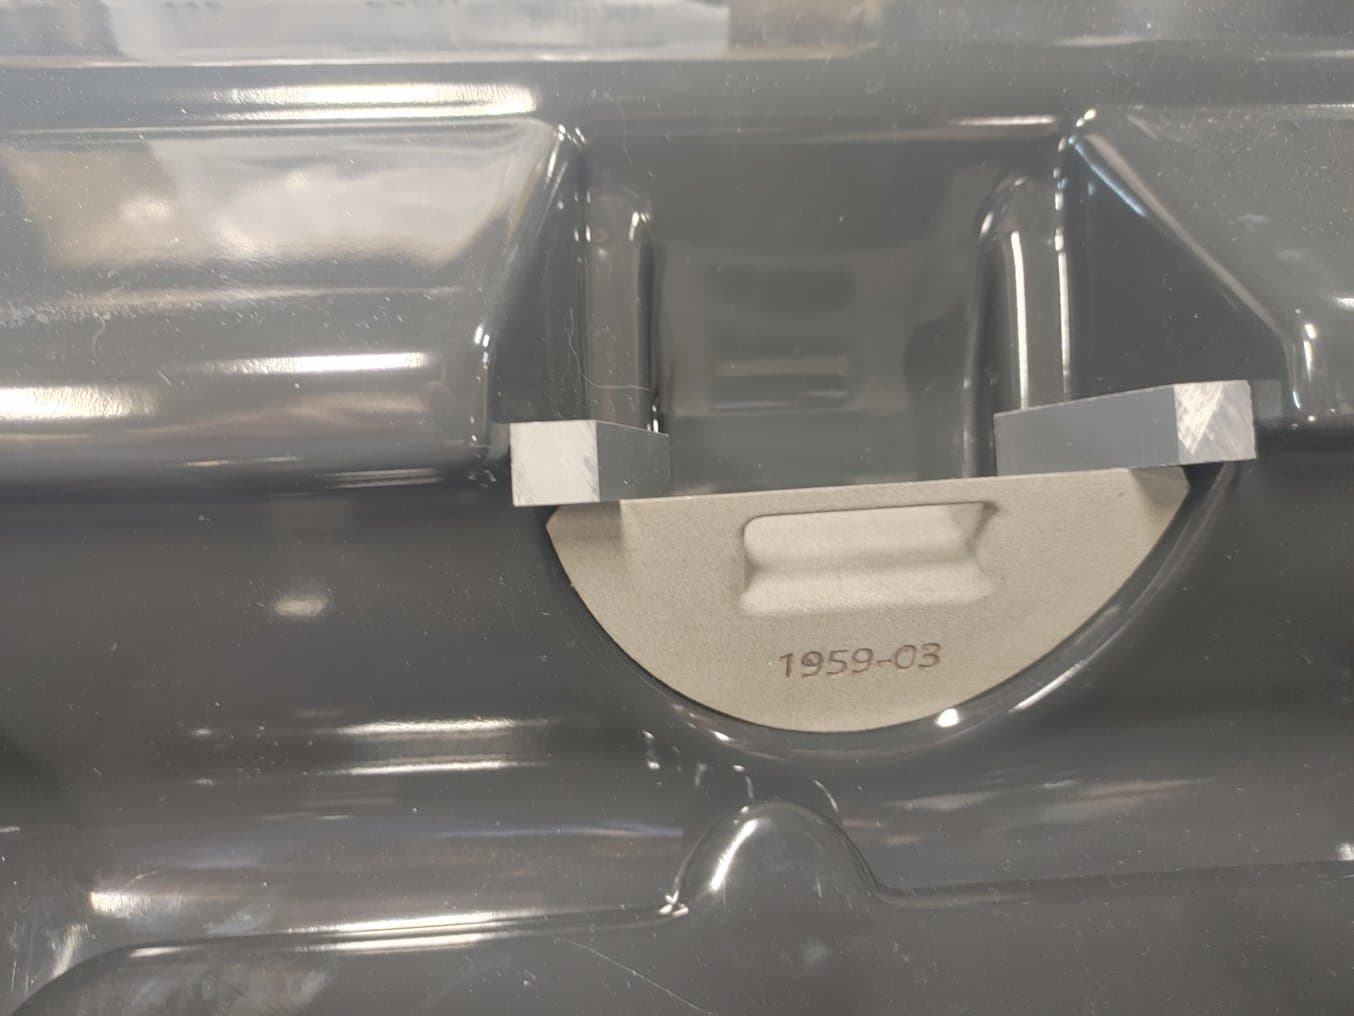
For one railway carriage interior part, the mold parameters meant that the clamps were too far away from the mold. They needed to somehow maintain a ¼ inch distance between the mold and the clamping frame, whether by using a fixture to make up the distance, or choosing a bigger sheet of material.
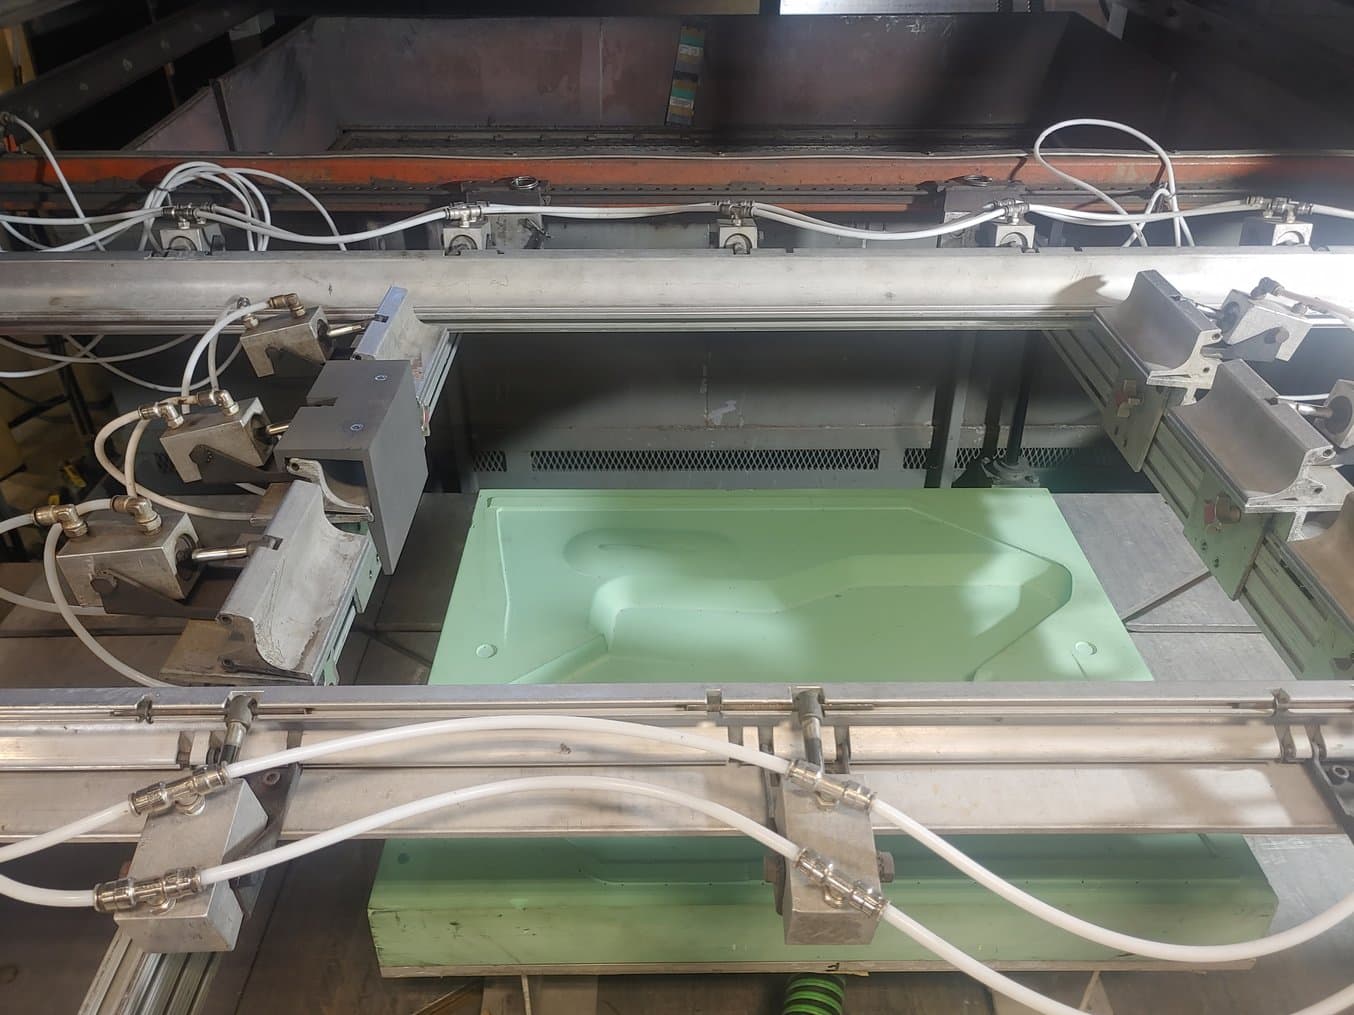
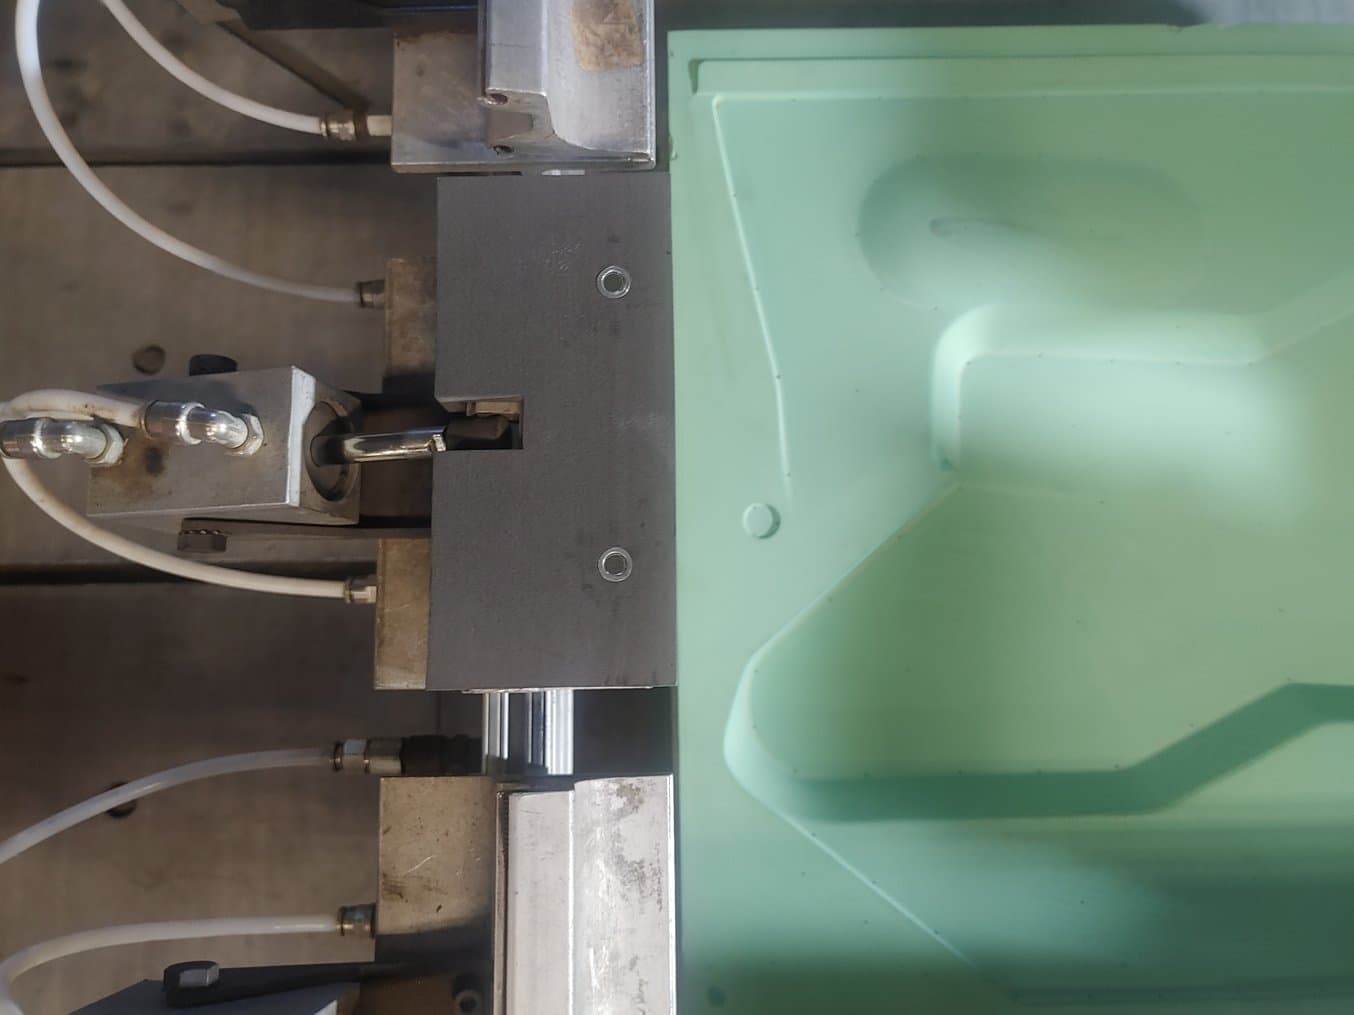
The clamp fixture (light grey part) secures the correct spacing between the mold (light green) and the clamping frame (metal structure).
A bigger sheet would be heavier, leading to higher cost per part and more waste, but getting customized clamps machined from an external business would push the lead time out by two to three weeks. In-house 3D printing of customized clamp fixtures allowed them to use the optimal sheet size, saving money and reducing waste, while avoiding any production delays.
"When we can get very specific about sheet sizes, it saves money for the customer. Using 3D printing allows you to tailor the widths through customized clamps so you can get very granular with it. It took us one day to print and get production running."
Kyle Davidson
Replacement Parts to Keep the Floor Running
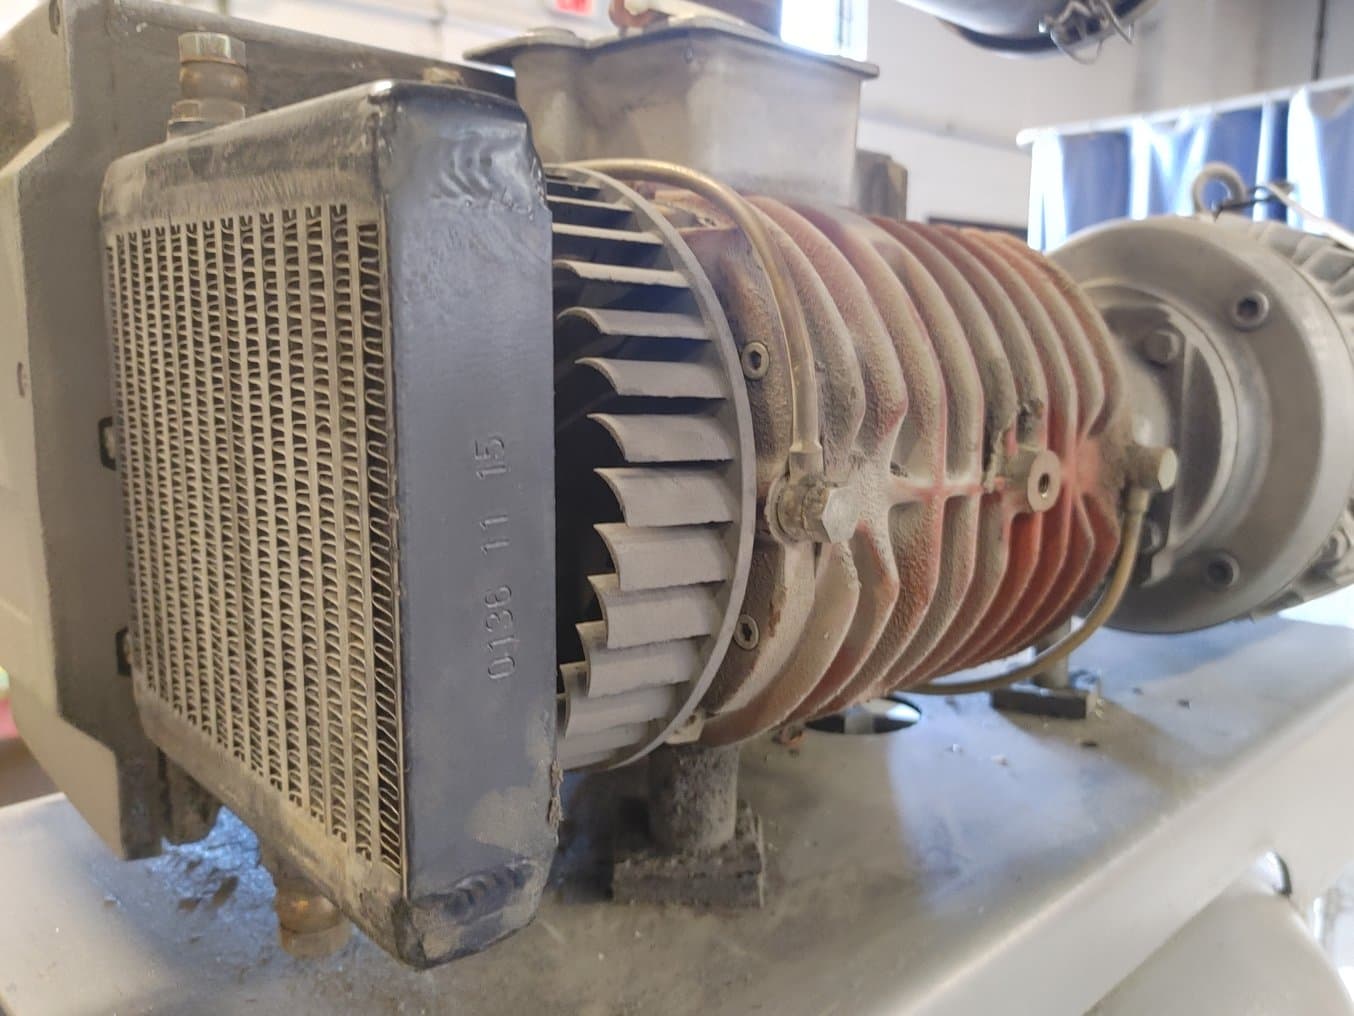
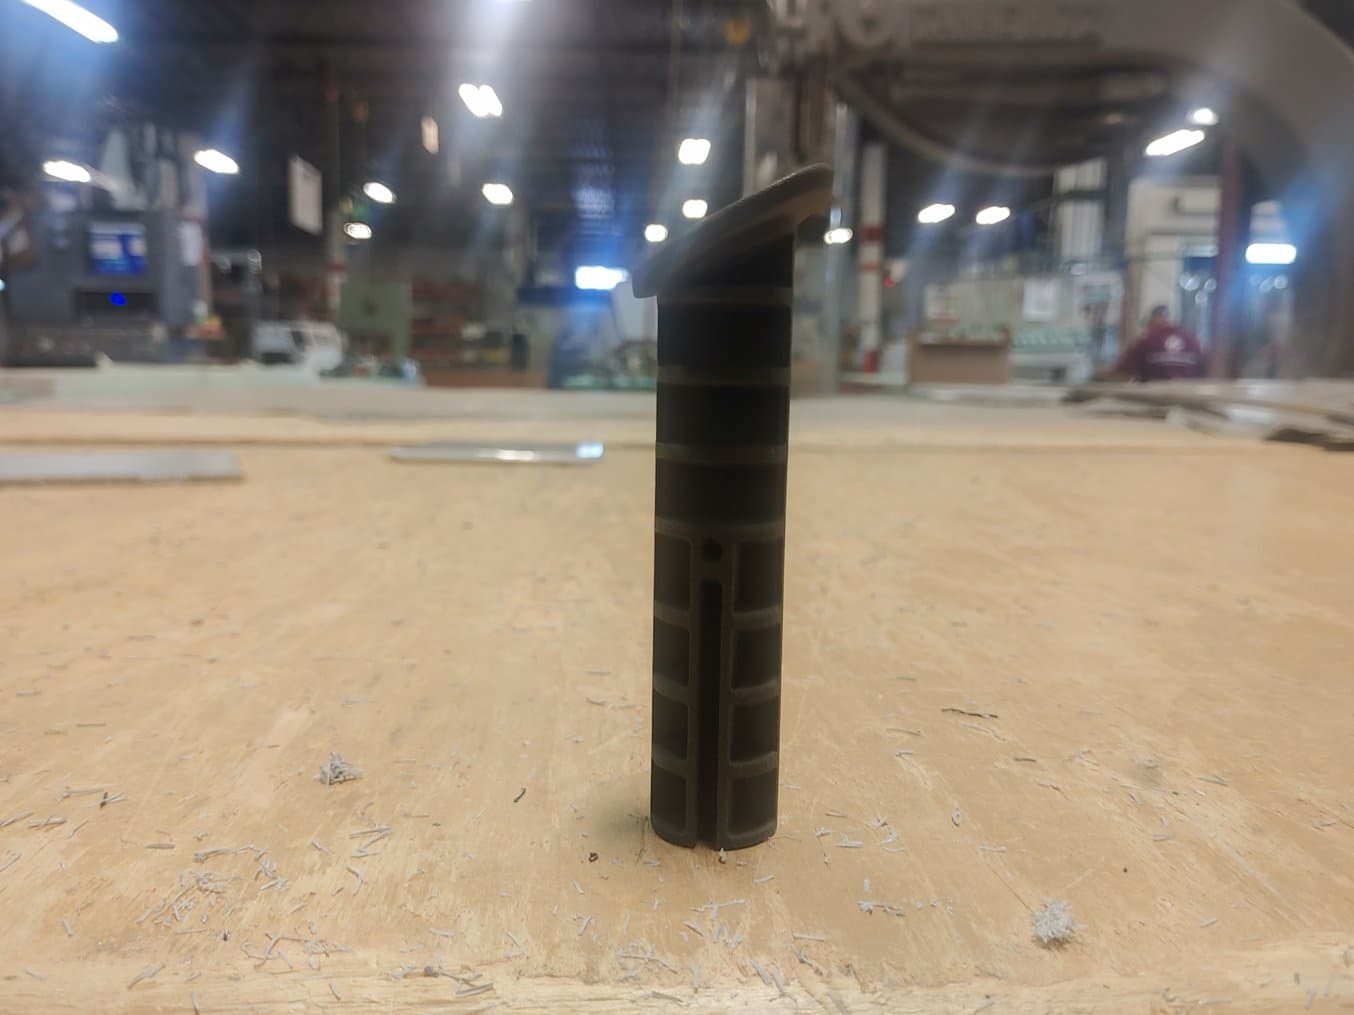
With so many different customers and various orders all expected on time, production stops for no one. Unless, of course, that someone is the vacuum forming machine itself. When one machine’s pump impeller broke, the team was looking at a six to eight week lead time for a replacement part. “If you’re a thermoformer and you don’t have a vacuum pump, you’re not thermoforming. We can’t shut down an entire cell for six weeks, so we needed a stop-gap solution,” says Davidson.
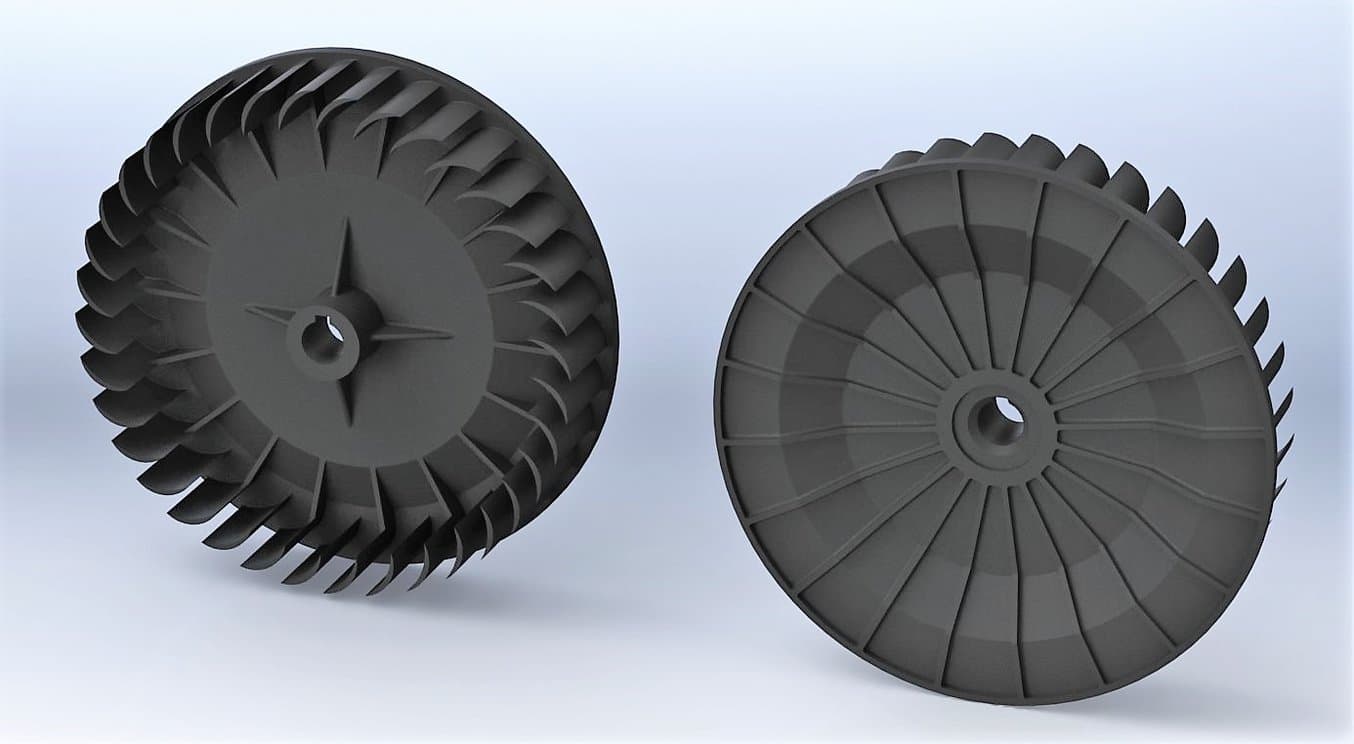
The 3D file of the impeller in Solidworks. Both sides display relevant negative and positive areas, as well as the center bore, eliminating technologies that use support structures, such as FDM and SLA as potential solutions.
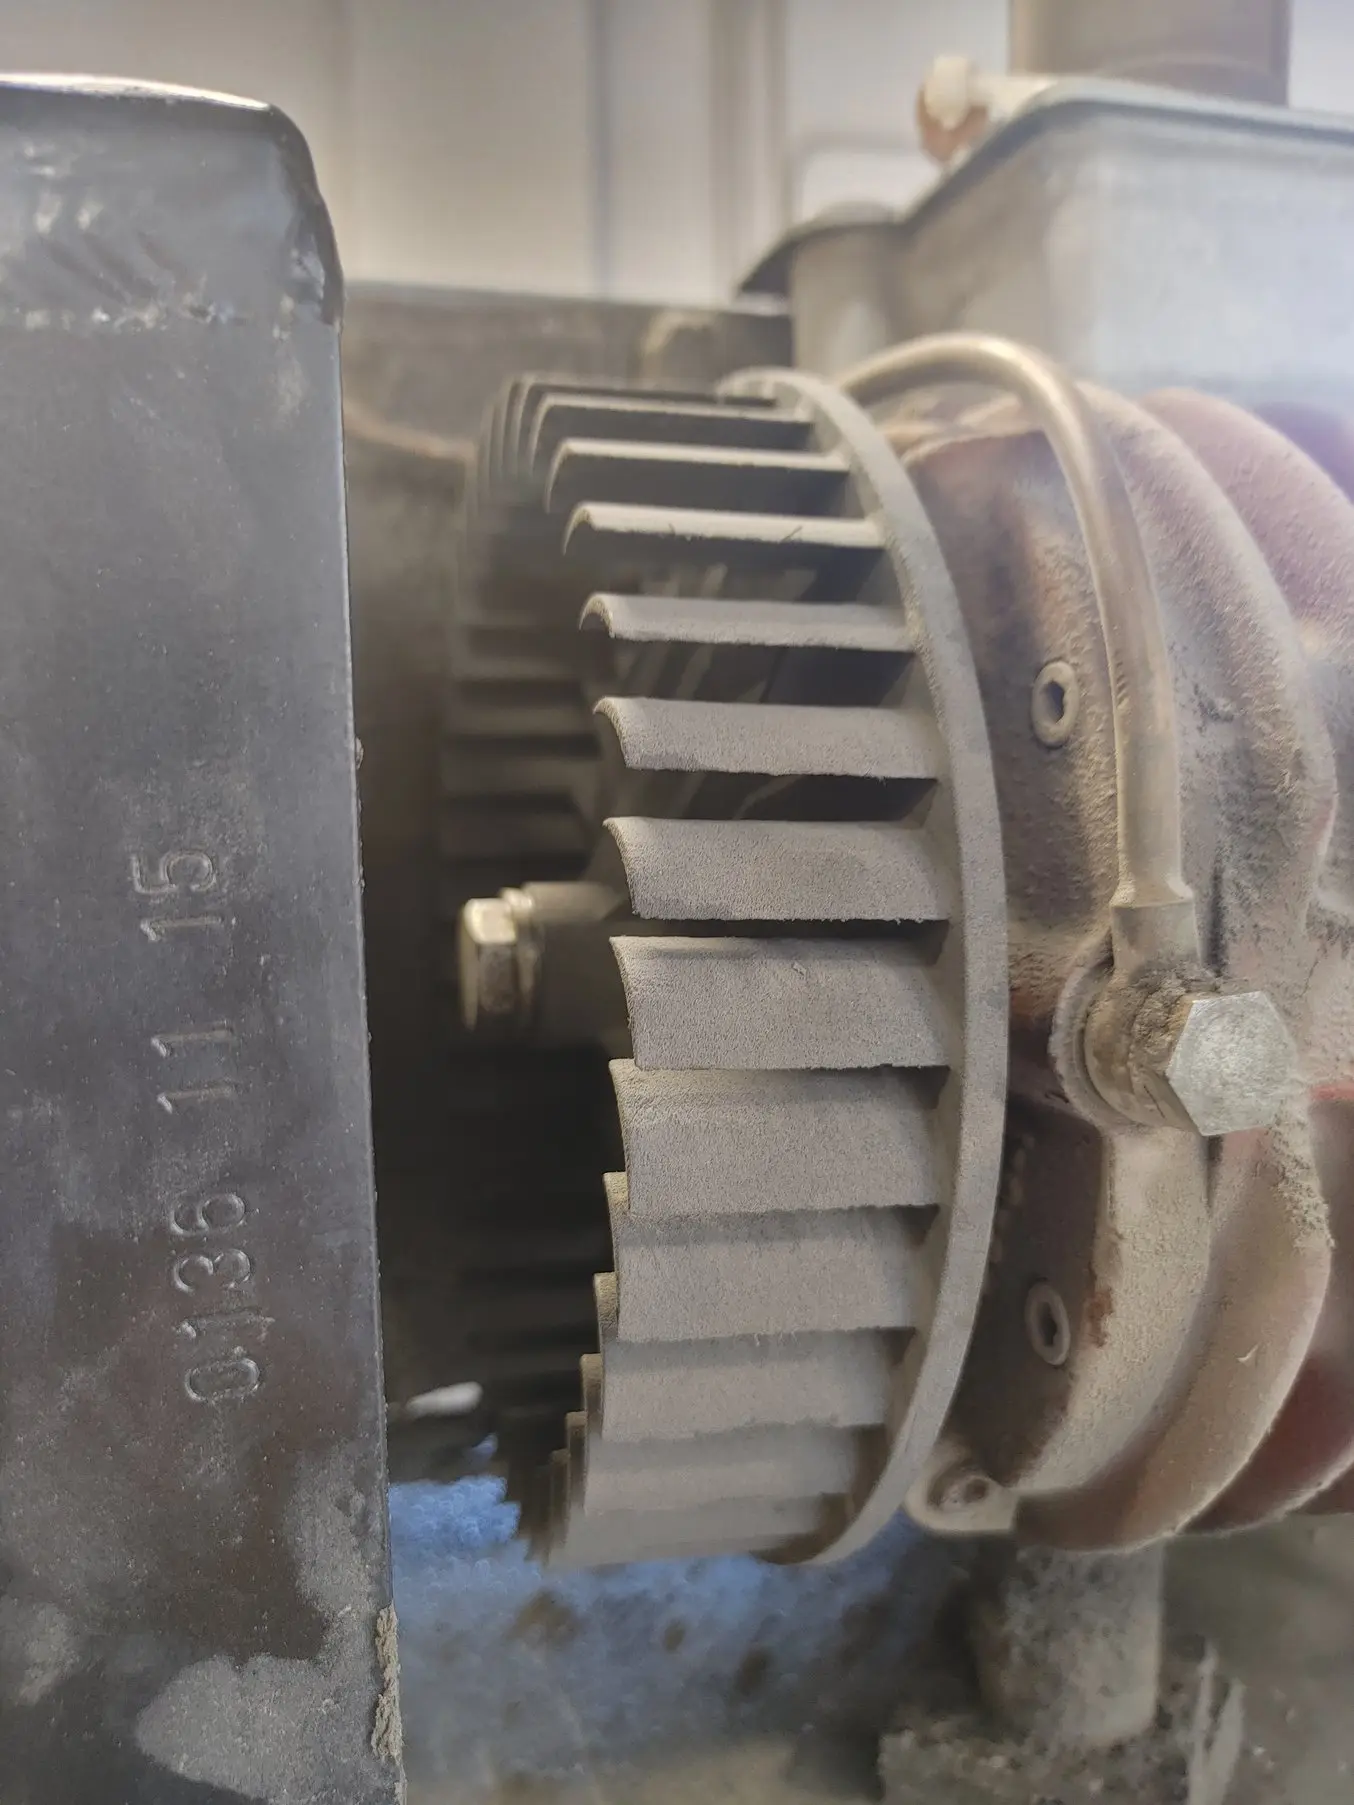
They designed two replacement impeller iterations in Solidworks, then printed them on the Fuse 1 overnight, using Nylon 12 Powder. The impeller worked immediately, fitting into the existing vacuum pump and getting the cell back up and running. The self-supporting nature of SLS 3D printing enabled a dual-sided design with a center bore — without supports to remove or post-process, the impeller was immediately ready to fit into the existing machine.
"Waiting for a replacement would have shut down a whole cell for weeks. That would have been around a $30,000 loss, so just this one replacement part as a stop-gap option pretty much paid for the printer itself."
Kyle Davidson
A close up (right) and expanded view (left) of the 3D printed impeller, fitting seamlessly into the industrial thermoforming vacuum pump.
Saving Seconds Adds Up, Big Time
Parts often go through secondary processes, like assembly or finishing, after being formed. Those secondary processes require specialized tools and handling, like hand-taped masking for painting. For this part, technicians were taping over a critical copperized surface, then stenciling by hand where the copper ended, so that paint could cover the rest of the part. That cut was just being eyeballed, and mistakes, scratches to the copper, or second tries were common. Alternatively, with just one or two 3D printed stencil guides, operators can cut quickly and efficiently.
“Even if it saves only 10 to 15 seconds per part, that adds up to significant cost savings over the entire product lifecycle,” says Johnson. “We had been carving wood to do this by hand, but it was laborious and time-consuming. The 3D printed part costs a couple of dollars and is easy to do with one hand.”
In the first step, tape covers a large section of the part. In the second, the 3D printed part acts as a stencil around which a technician will cut the rest of the tape away, ensuring that the copper-coated part remains free of paint, while the rest of the surface is painted black.
Improving Customer Communication to Avoid Surprises
During the process design, Productive Plastics works with their customers to develop the part, thermoforming process, and the type of blocks that are affixed to the parts in a secondary assembly. Those blocks, needed for structural integrity or functional assembly attachments, need to fit perfectly into the thermoformed sheet, and because they’re needed in the hundreds or thousands, mistakes are costly.
The team used to mock up a drawing of the block with the dimensions and tolerances necessary, but because angled surfaces are hard to communicate through a two-dimensional drawing, blocks were often wrongly shaped or sized. They would arrive directly before a thermoforming run, and when the mistake was discovered, it would bring the whole project to a grinding halt. Having in-house manufacturing capability with the Fuse 1 however, ensures that every customer creates perfectly matching block sets.
“We need thousands and thousands of these blocks, so if even on a simple block, the diameter is slightly wrong, that’s a massive waste, and we can’t finish the project. Sending them a physical product costs us only a few dollars and avoids thousands of parts being made incorrectly,” says Johnson.
The 3D printed customized blocks are used in the assembly stage, where a thermoformed part is functionally assembled. An incorrectly made block can bring the whole production timeline to a screeching halt.
Improving Efficiency For Each Cell
Between the volume of orders, the variation in parts, and the number of steps in the process, there’s a lot going on at Productive Plastics. Anything that can make the communication process smoother between departments has an outsized impact on the efficiency of the team.
Each cell utilizes a computer monitoring system that keeps track of orders, machinery manuals, the manufacturing aid library, and parts. Though they had been trying to transition their computer systems to tablets, there was no easy way to keep the tablets easily accessible yet mobile. The tablets’ industrial strength casings weren’t able to fit any off-the-shelf mounting solution, so they were often left on a shelf or on a crowded workstation. Johnson was able to take apart a typical phone holder and reverse engineer it, designing something bigger that was able to clamp onto the industrial casing of the tablet as well as mount securely into a wood panel.
“It allowed us to keep the mobile if needed, but easily accessible in the best possible area for our operators. We couldn’t find anything off-the-shelf for less than $300, but I printed these for $30 on the Fuse 1, and we have them mounted in each cell, plus a couple extra,” says Johnson.
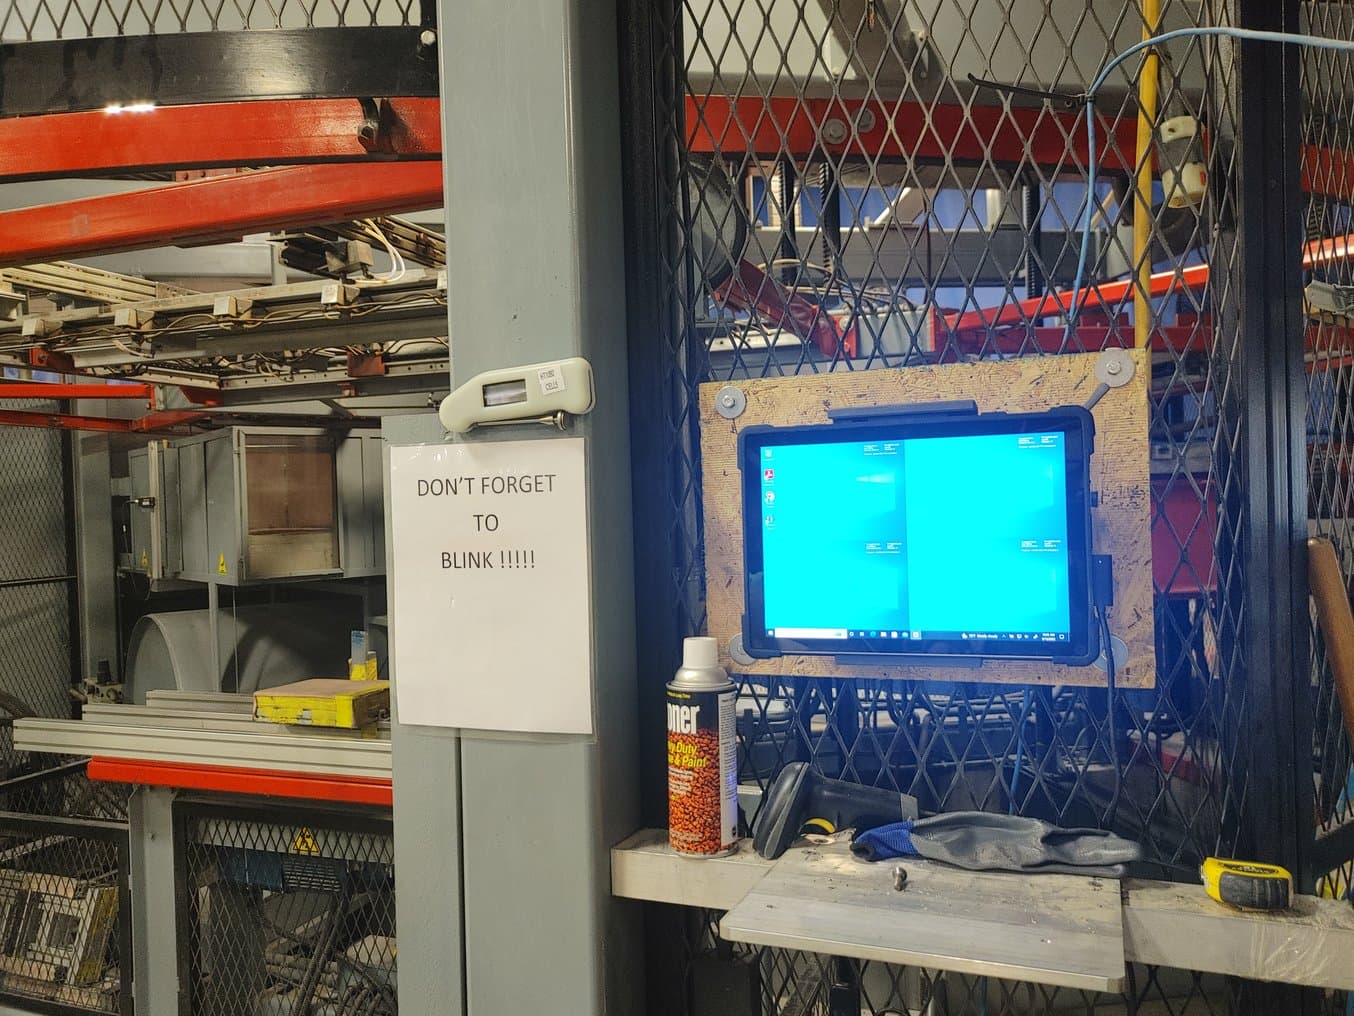
The custom-designed tablet holder is able to clamp onto the tablet for easy access on the wall, yet flexible enough that users can detach the tablet from the holder and move around the cell with it.
Keeping Production At Top Speed
After the initial thermoforming process is over, operators complete whatever secondary processes are necessary, whether fixing blocks to the part for assembly, trimming the part, or otherwise preparing it for the customer. When attaching the blocks to the molded part, Productive Plastics commits to a .003 inch tolerance, so some type of measurement was required to make sure each block was attached perfectly.
The team was either foregoing guides altogether and eyeballing the measurement, or using wooden blocks that had been glued together and then machined to the right dimensions. Both methods were laborious, made the process slower, and created mistakes that needed to be undone. Johnson was able to design a locating jig that precisely maps out where to attach the blocks on the thermoformed piece, allowing operators to correctly attach the blocks in seconds.
“We have multiple sets of these all being used at the same time, so we can keep production running at top speed. They’ve helped us improve the accuracy of block placement and save the time we had been spending on grinding or machining blocks,” says Davidson.
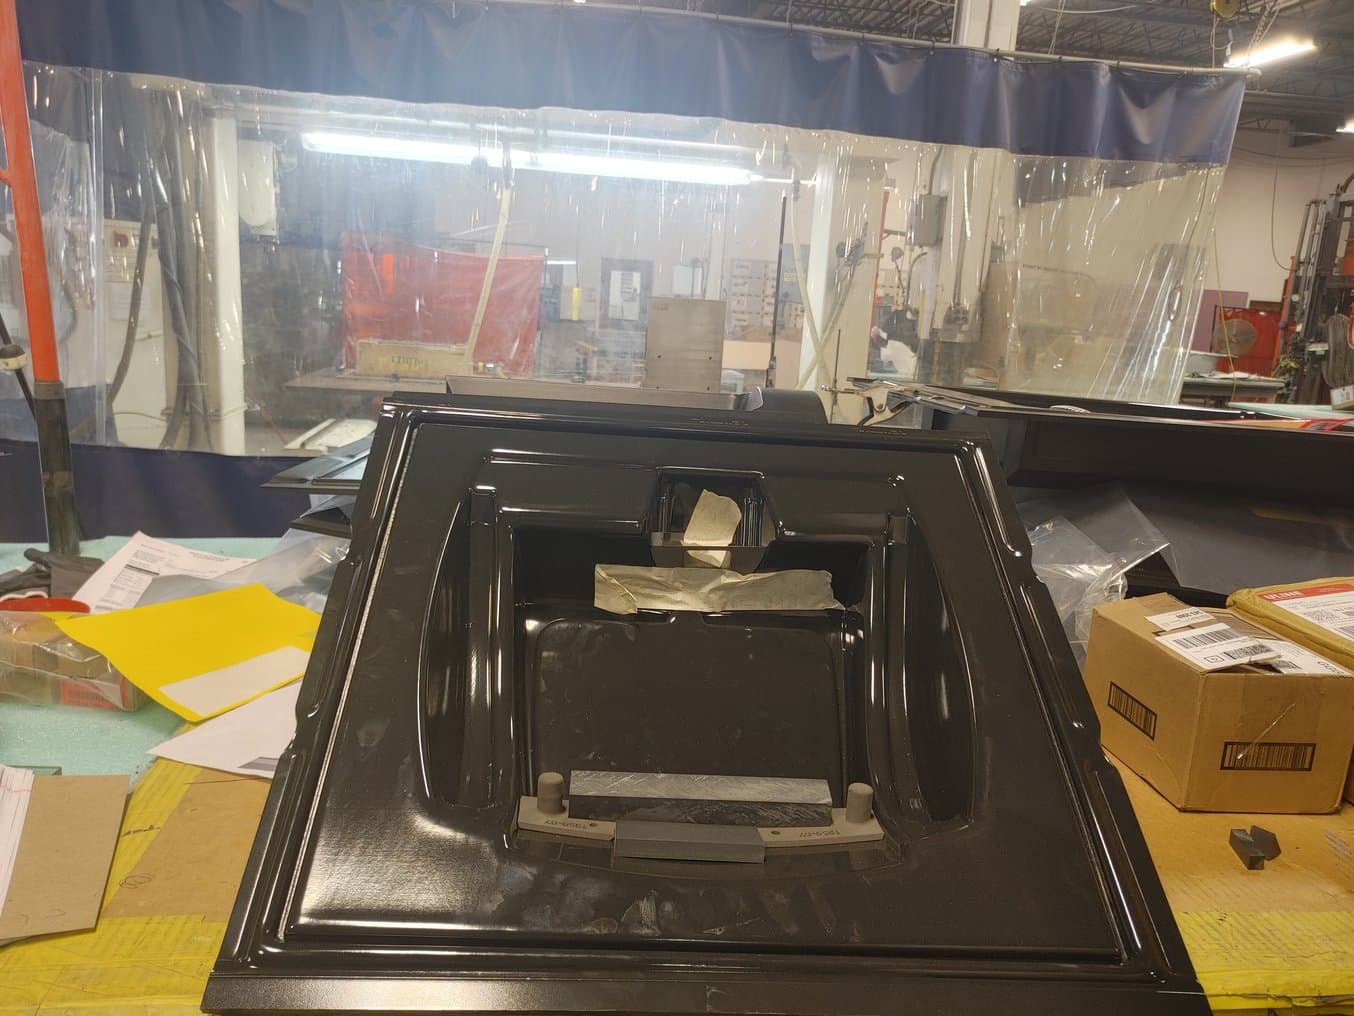
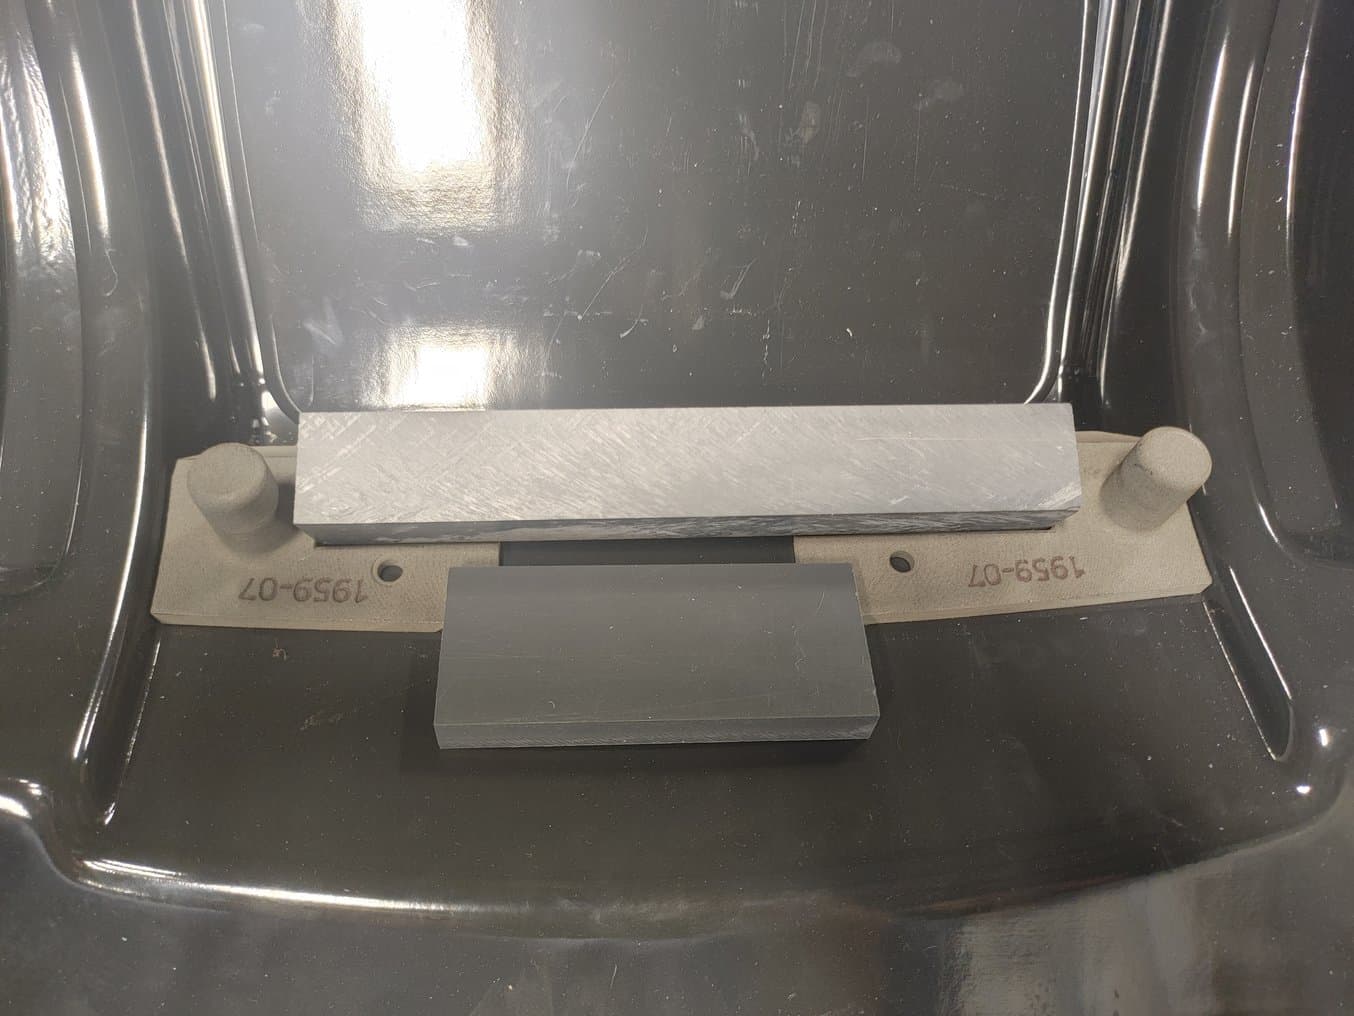
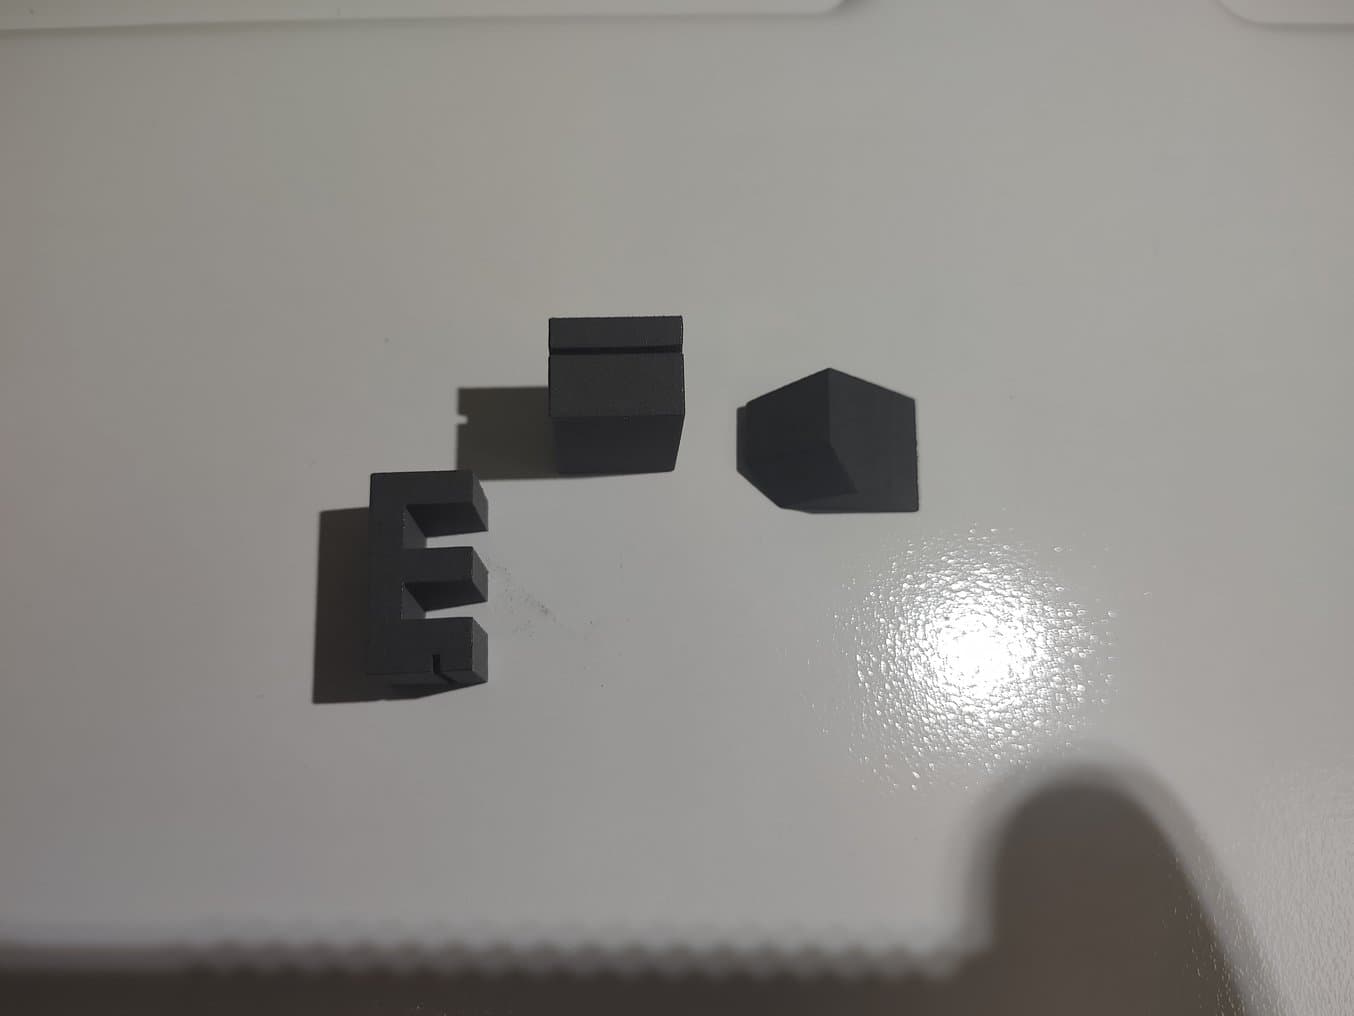
The medical device shroud (black molded part, left photo) needs to have two blocks (long silver bar and shorter darker grey bar) attached. The two locating jigs (left and right light grey parts with knobs) show the operator exactly where to affix them, saving time and ensuring correct placement.
End-Use Alternatives With Nylon 12 Powder
When Productive Plastics had issues sourcing a particular component during the supply chain delays during the last year, Johnson decided to try 3D printing a small component they typically receive from an injection molder. The component fits into a machine used in point-of-care facilities to cover any openings when not in use as connections to IV’s or other fluid dispensing systems. Using Nylon 12 on the Fuse 1, Johnson was able to perfectly recreate the injection molded component, and though it would require specific regulatory approval for use in a medical facility, the team successfully pitched it to the customer as a viable alternative, should any supply chain issues arise.
The Nylon 12 Powder, Fuse 1 printed plug component acts as an in-house manufactured alternative to an injection molded component.
Building a Digital Library of Aids for the Future
When customer orders are molded in the hundreds and thousands, little things make a big difference. If the assembly team can save 10 seconds per part by using a locating jig to attach blocks, or a machine can stay up and running with a 3D printed repair part, those improvements create a more streamlined and efficient operation. Using the Fuse 1 and Nylon 12 Powder allows Johnson to not only fix issues, but preemptively improve processes before they cause a problem. The benefits are passed along to the customer, helping keep cost per part down, and contributing to the overall customer satisfaction as well.
“Guys on the floor will come to me and say, ‘I broke this,’ or ‘can we make this easier,’ and I’ll send it to the printer. The amount of time it’s saved me is huge,” says Johnson. The team has been able to increase overall productivity by preemptively addressing areas on the manufacturing floor where bottlenecks or repairs might slow things down. The Fuse 1, though it was their first 3D printer, has opened up new avenues of production.