
Overmolding and insert molding tend to get confused for one another. Understandably, since both processes are types of injection molding that are used to create structurally similar parts. But if you take a deeper look, you’ll find that insert molding and overmolding are actually quite distinct, and each offers unique advantages.
From embedded electronics to making everyday tools easier to grip, overmolding and insert molding offer plenty of benefits, but you’ll only be able to capitalize on these benefits if you understand what makes these manufacturing methods unique.
Read on to learn:
-
The basics of overmolding and insert molding
-
How to determine which manufacturing method to use when
-
What overmolding and insert molding are commonly used for
-
How to use these processes for prototyping
-
How to create insert molded prototypes with 3D printed molds
Book a Free Consultation
Get in touch with our 3D printing experts for a 1:1 consultation to find the right solution for your business, receive ROI analyses, test prints, and more.
Silicone Molding For Product Design
Read this guide to learn how to make one-piece and two-piece silicone molds.
What Is Overmolding?
Overmolding is a multi-step injection molding process where two or more components are molded over top of one another. Overmolding is sometimes referred to as two-shot molding because it is a two-step process.
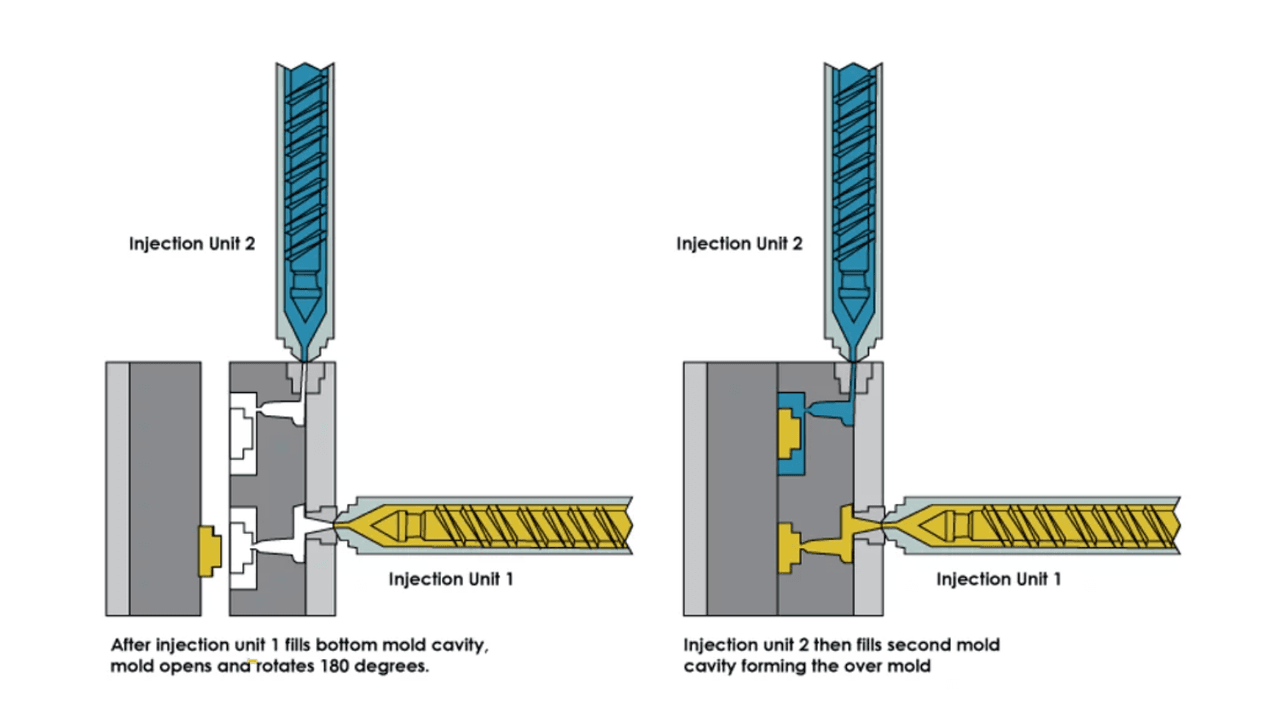
The two-step overmolding process. (image source)
First, a base component (otherwise known as a substrate) is molded and allowed to cure. Overmolded substrates are often made of plastic. Then, a second layer is molded directly on top of the first to create a single solid piece. Overmolding is commonly used to manufacture plastic parts that feature a rubber handle. The two-shot process of overmolding a toothbrush, for example, consists of forming a base layer for the plastic handle and a top layer of rubber (to make the toothbrush less slippery to hold).
Materials Commonly Used in Overmolding
Overmolding can be used with a wide range of materials, including:
-
ABS (Acrylonitrile Butadiene Styrene)
-
HDPE (High-density Polyethylene)
-
PEEK (Polyether Ether Ketone)
-
Nylon (Polyamide)
-
PC (Polycarbonate)
-
PE (Polyethylene)
-
PEI (Polyetherimide)
-
PBTR (Polybutylene Terephthalate)
-
PMMA (Acrylic)
-
POM (Polyoxymethylene)
-
PP (Polypropylene)
-
SI (Silicone)
-
TPE (Thermoplastic Elastomers)
-
TPU (Thermoplastic Polyurethane)
-
TPR (Thermoplastic Rubber)
The Benefits and Limitations of Overmolding
Overmolding offers many benefits. You can manufacture products with multiple materials and/or colors relatively simply. Overmolding also uses fewer man-hours (and thus, costs less) compared to other manufacturing methods where a part would need to be transferred to a completely different mold or machine. Overmolding reduces the need for product assembly because parts are manufactured right on top of one another—resulting in a stronger, more durable overall design.
Overmolding is often the best manufacturing method for large production runs and/or products with colorful and multi-layered designs, but there are a few limitations that you need to be aware of. Similar to injection molding, overmolding has excessive upfront costs. It is time-consuming and expensive to manufacture and modify tooling out of metal, and two-shot injection molding machines are complex to dial in. This means that you need to produce a large number of parts to distribute these costs.
Pro tip: 3D printing parts or molds for overmolding can save you a lot of time and money during the prototyping phase.
What Is Insert Molding?
Insert molding is another form of injection molding where a secondary part is formed over a substrate. The differentiating factor between insert molding and overmolding is that insert molding is performed with a pre-existing substrate (base or inner component). A prefabricated part (often produced in a completely different facility or procured from another company) is inserted into a mold, and then a secondary layer is formed around it.
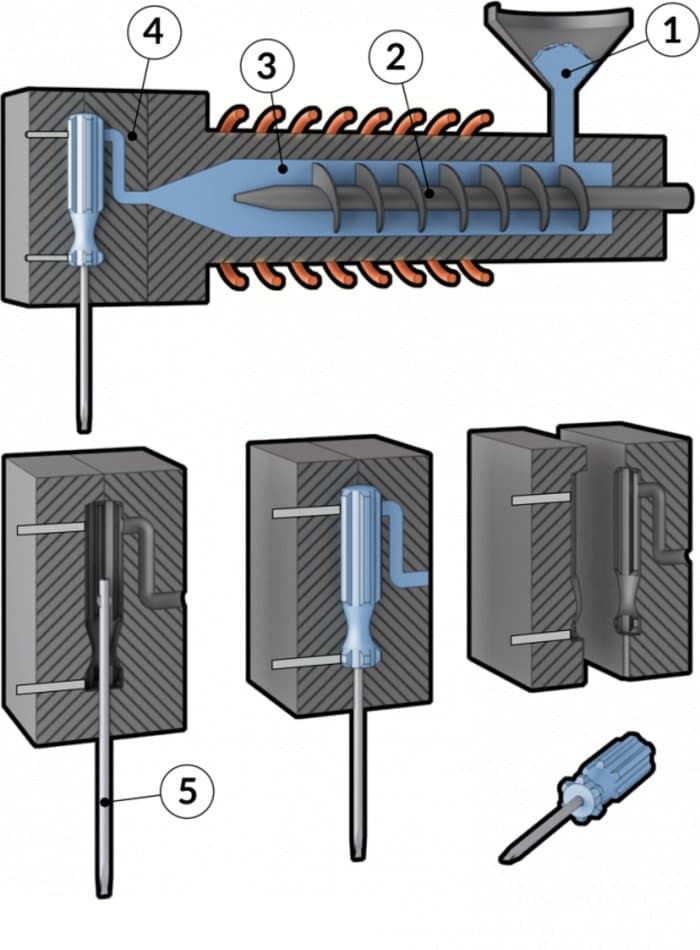
Diagram of screwdriver insert molding process. (image source)
Insert molding is often used to add a plastic layer on top of a metal one, for example, to add a plastic handle to a metal screwdriver. You can also use insert molding to manufacture insulated pipes, wiring, and other similar products, or embed electronics into plastics.
Low-Volume Rapid Injection Molding With 3D Printed Molds
Download our white paper for guidelines for using 3D printed molds in the injection molding process to lower costs and lead time and see real-life case studies with Braskem, Holimaker, and Novus Applications.
Materials Commonly Used in Insert Molding
You can use the same (thermo)plastics listed for overmolding in the previous section to form the exterior or top layer in insert molding.
The Benefits and Limitations of Insert Molding
Insert molding is used to create strong parts that don’t require assembly, much like overmolding, but insert molding allows you to do this using a larger variety of materials. For example, you can take computer chips or wires and protect them in a plastic casing. Perhaps the most impressive benefit of insert molding is that it can be used to create plastic housings (that can be sterilized) for life-saving medical devices and implants.
Insert molding does come with similar limitations as overmolding, however. Prototyping can be a challenge if you don’t use a resin 3D printer for test runs. Tooling must also be very precisely shaped as the substrate often needs to be suspended within the mold in order to form the final product.
How to Know If Overmolding or Insert Molding Is Better for Your Project
Use this table as a guide to determine which manufacturing process is best for your project:
Choose overmolding when:
-
Your finished piece can be made of thermoplastics, and/or rubber.
-
Your finished design consists of multiple layers, materials (limited to those listed above), and/or colors.
-
You will be manufacturing both the substrate and secondary layer.
-
Your completed piece will not need to be taken apart or disassembled.
Choose insert molding when:
-
You are using a prefabricated substrate.
-
Your substrate is made of metal, wires, or computerized parts.
-
You want the finished part to be one solid piece.
Pioneers are constantly adapting manufacturing methods, so there are exceptions to these rules, but the checklists above are a great starting place for deciding which process you should use. Keep in mind that these two manufacturing methods can also be used together.
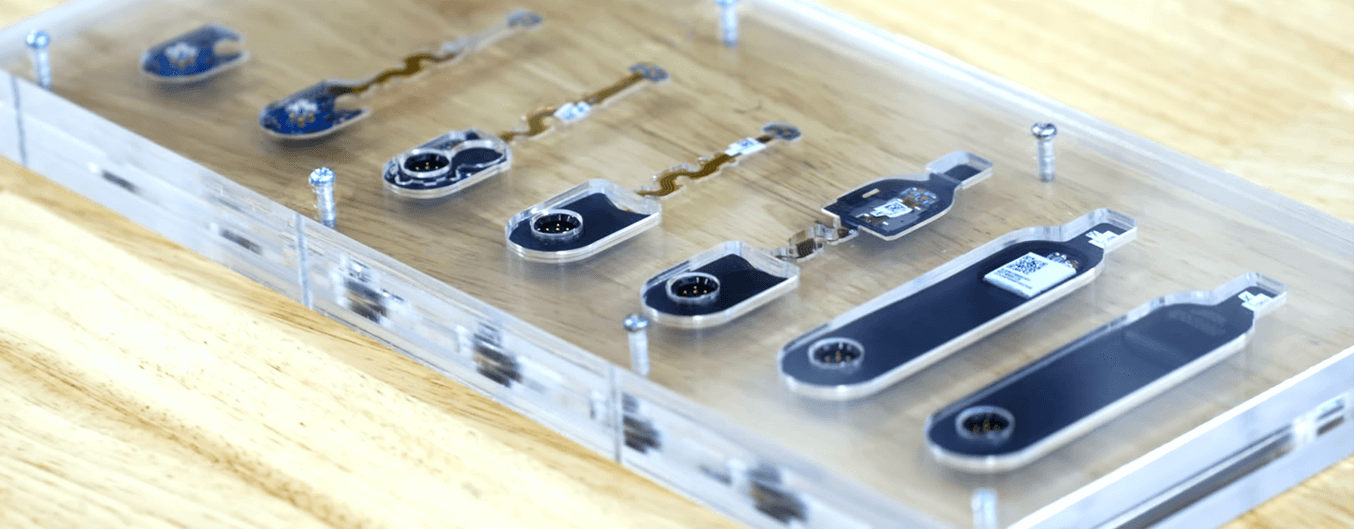
Google’s ATAP team produced a wearable device with a combination of overmolding and insert molding. The device starts as a PCB populated with components. That PCB is encapsulated in a low pressure molding system that turns it into a block of plastic. This PCB and a flexible cable forms the electronic sub-assembly that then gets overmolded in a thermoplastic urethane (TPU) and silicone rubber hybrid. The PCBA then undergoes the final overmolding step.
Applications of Overmolding and Insert Molding
Manufacturers use overmolding and insert molding to produce products for a wide range of industries. Here are some examples of products that are commonly made through one or a combination of these processes:
Consumer Goods
Look around your home, and you’re likely to spot more than a few plastic objects that are one solid piece made up of multiple colors. You can bet that many of those products were manufactured using overmolding. This popular manufacturing process is used to make everything from bowling pins and children’s game pieces to storage bins and plastic containers.
Toothbrushes, cell phone cases, and thumb drives are commonly produced using overmolding and/or insert molding. Overmolding is used to make a variety of two-tone plastic furniture, such as step stools or patio chairs. Plastic housing for GPS units and navigational devices are often manufactured using overmolding and insert molding, as well.
Automotive Industry
Electrical sensors, gears, fasteners, and other automotive parts that consist of a combination of metal and plastic or rubber material are commonly manufactured using insert molding. Overmolding is used to create solid two-tone interior components, such as door and dash panels, handles, knobs, and various controls. Certain motors and batteries also go through a process of insert molding.
Medical Industry
The medical industry relies heavily on insert molded and overmolded parts because plastics are easier to sterilize than electrical and computer components. Defibrillators, medical cables, and wiring are often encased in plastic using insert molding both to protect the fragile interior components and make the finished device easier to clean for use.
Medical devices, such as pacemakers, designed to be implanted inside the body are commonly manufactured using insert molding. Manufacturing facilities also use insert molding to produce a variety of camera equipment used for internal imaging, such as those employed to conduct endoscopies and colonoscopies.
Electrical Industry
Electrical wires are made safer and, in certain cases, weatherproof by insert molding a rubber exterior. Manufacturers often coat wiring components in rubber to make products, like cellphone and computer chargers, safer for consumers. Sometimes, multiple wires are encased in one layer of rubber, and other times, wires are separated out and differentiated using contrasting colors, like blue and red.
Beauty Industry
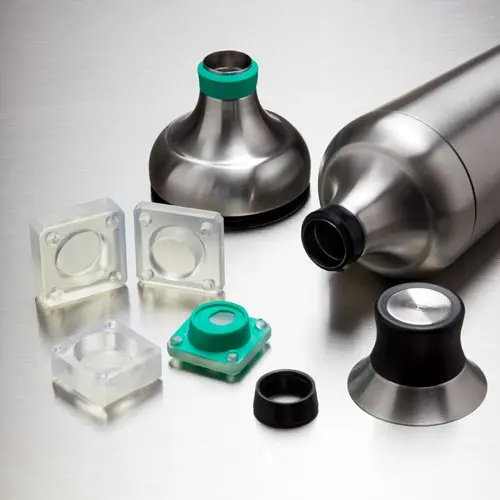
Overmolding and insert molding are routinely used to make cosmetics packaging more attractive. They enable designers to create custom packaging with unique surface textures and multiple colors. Products such as compacts, makeup brushes, and perfume bottles can all be manufactured using overmolding and/or insert molding.
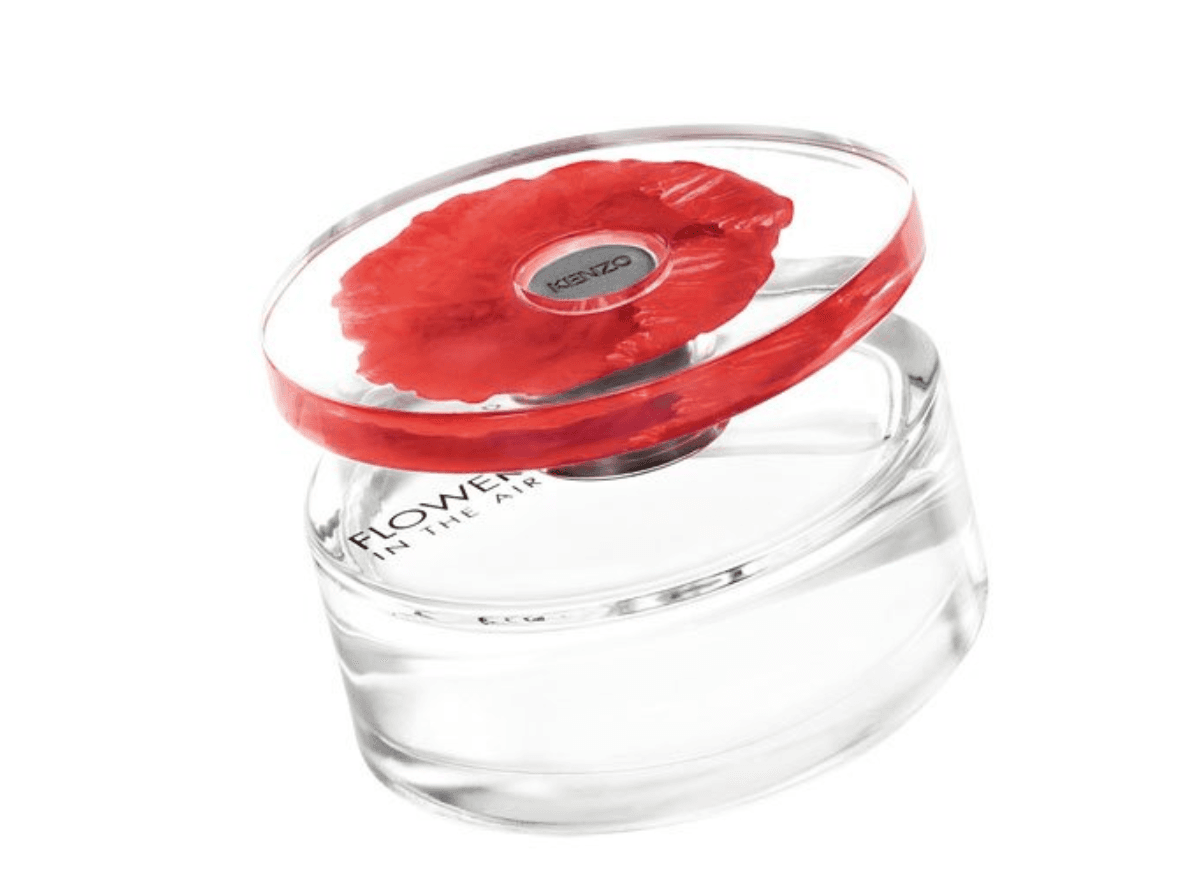
Overmolded perfume bottle created for Kenzo. (image source)
Prototyping Using Overmolding, Insert Molding, and 3D Printing
Prototyping is a crucial part of the product development process. Product designers and engineers need to test out concepts and troubleshoot design elements that have never been used before. But the downside is that prototyping can get very expensive, very fast. And if you’re relying on outside sources to produce components, it can also be time-consuming.
Some of the world’s top innovators are overcoming these prototyping challenges by combining manufacturing processes like overmolding and insert molding with 3D printing.
Designers at the Google Advanced Technology and Projects (ATAP) lab were able to cut costs by more than $100,000 and shorten their testing cycle from three weeks to just three days using a combination of 3D printing and insert molding. Google ATAP’s team found that by 3D printing test parts, they could save time and money over using expensive electronic parts that had to be shipped in from a supplier—just one of the variety of ways businesses use 3D printing with other manufacturing methods.
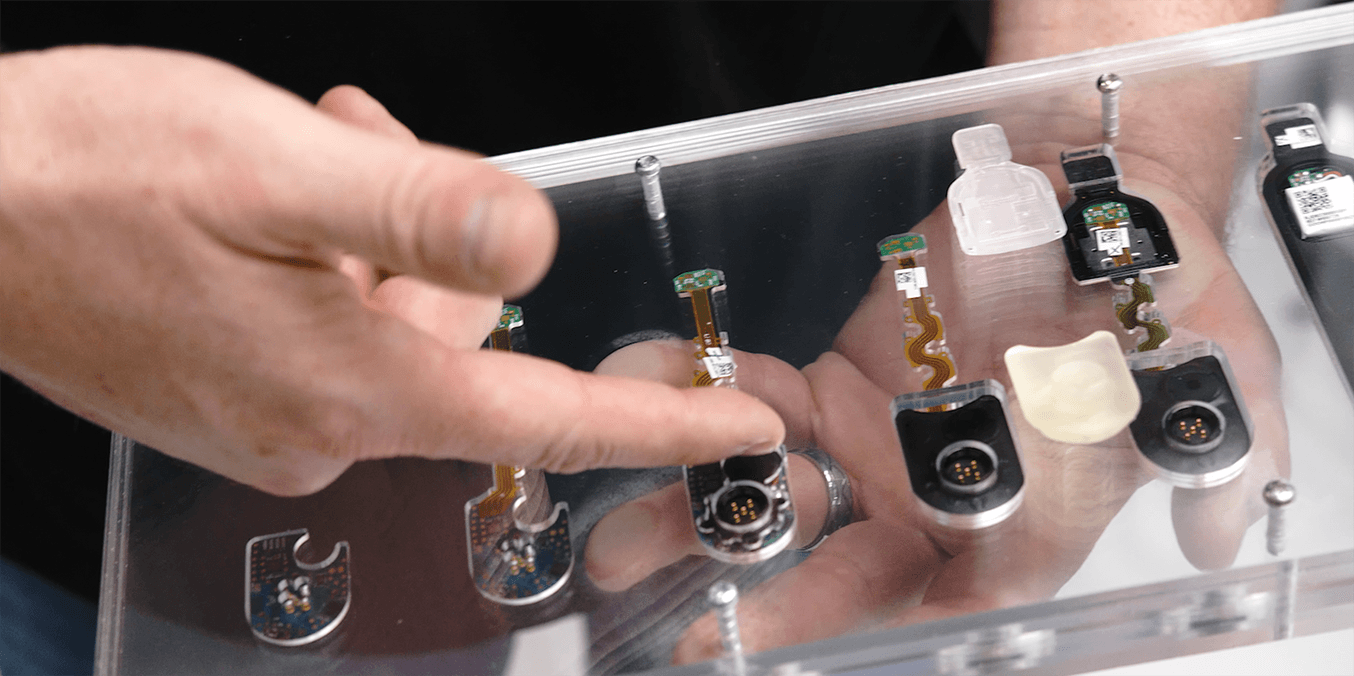
Google’s ATAP team used 3D printed stand-ins, or surrogate parts instead of overmolded electronic sub-assemblies for the initial tool tuning at the factory
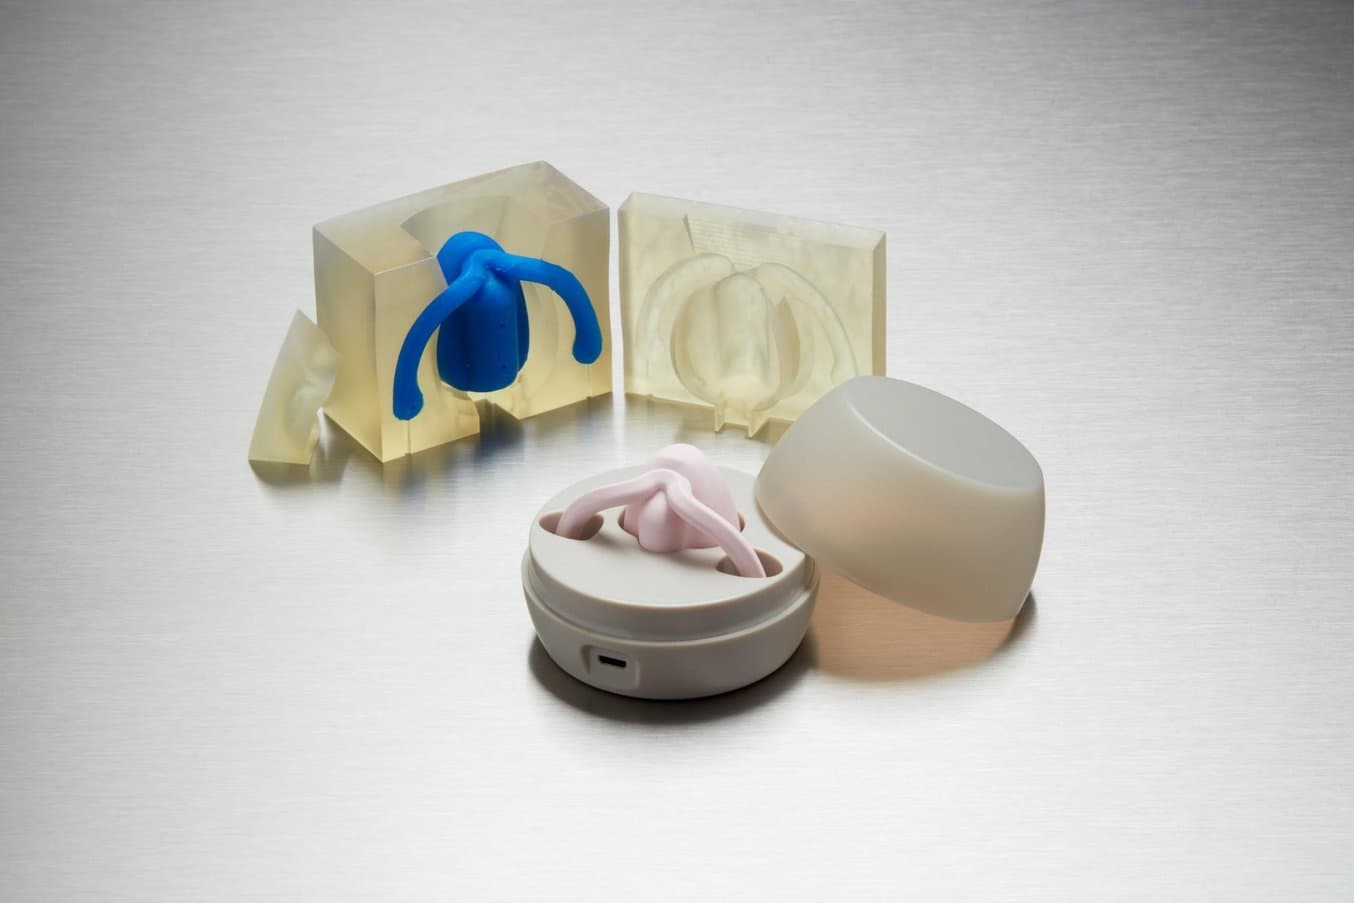
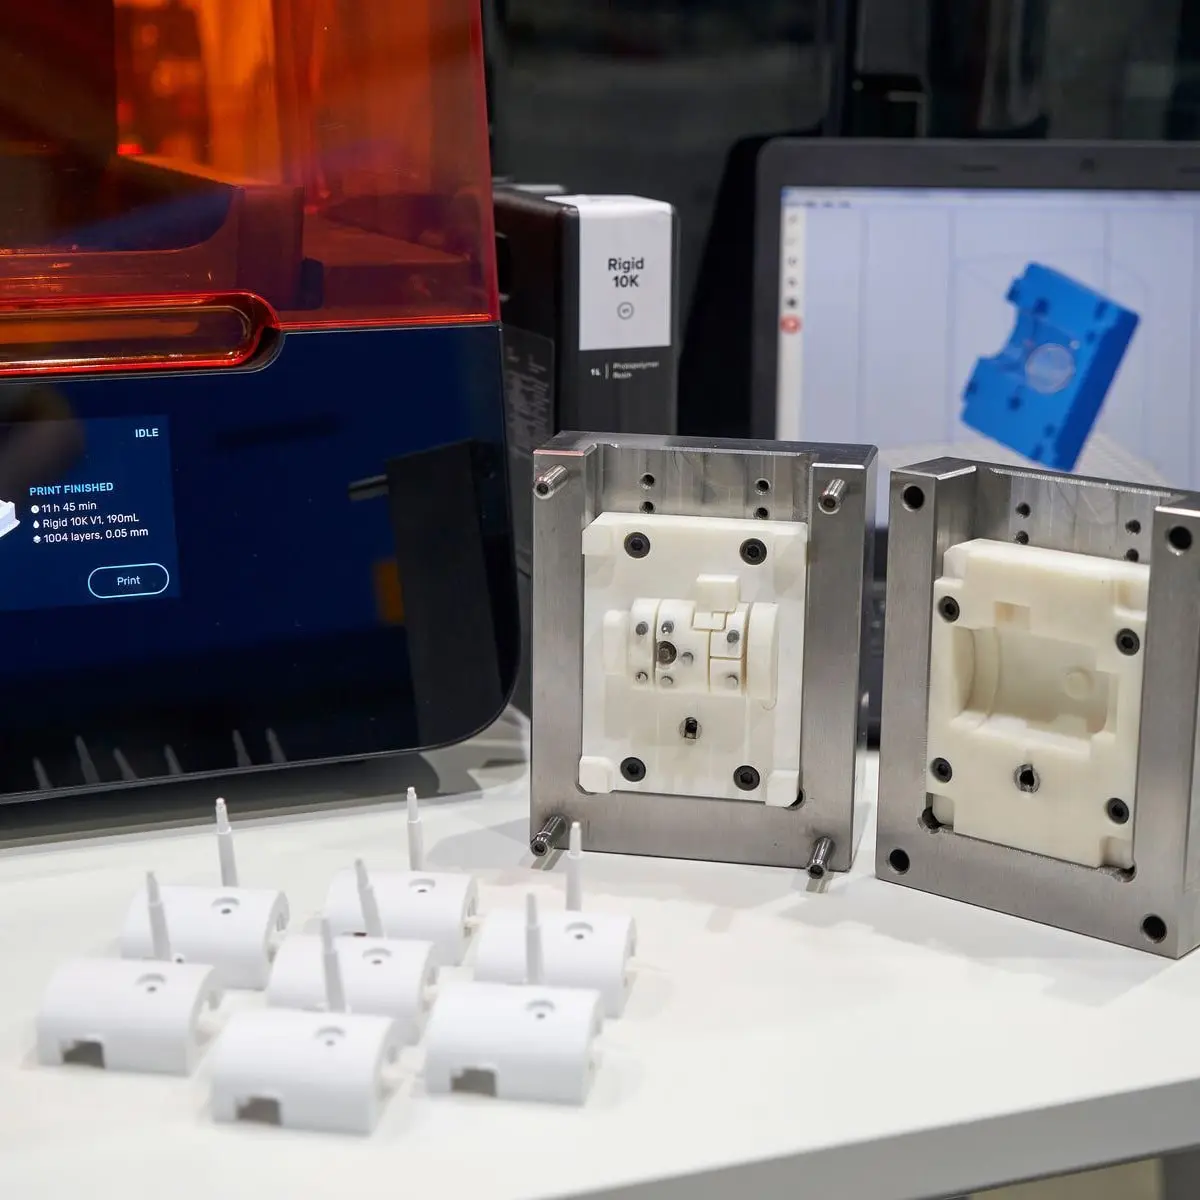
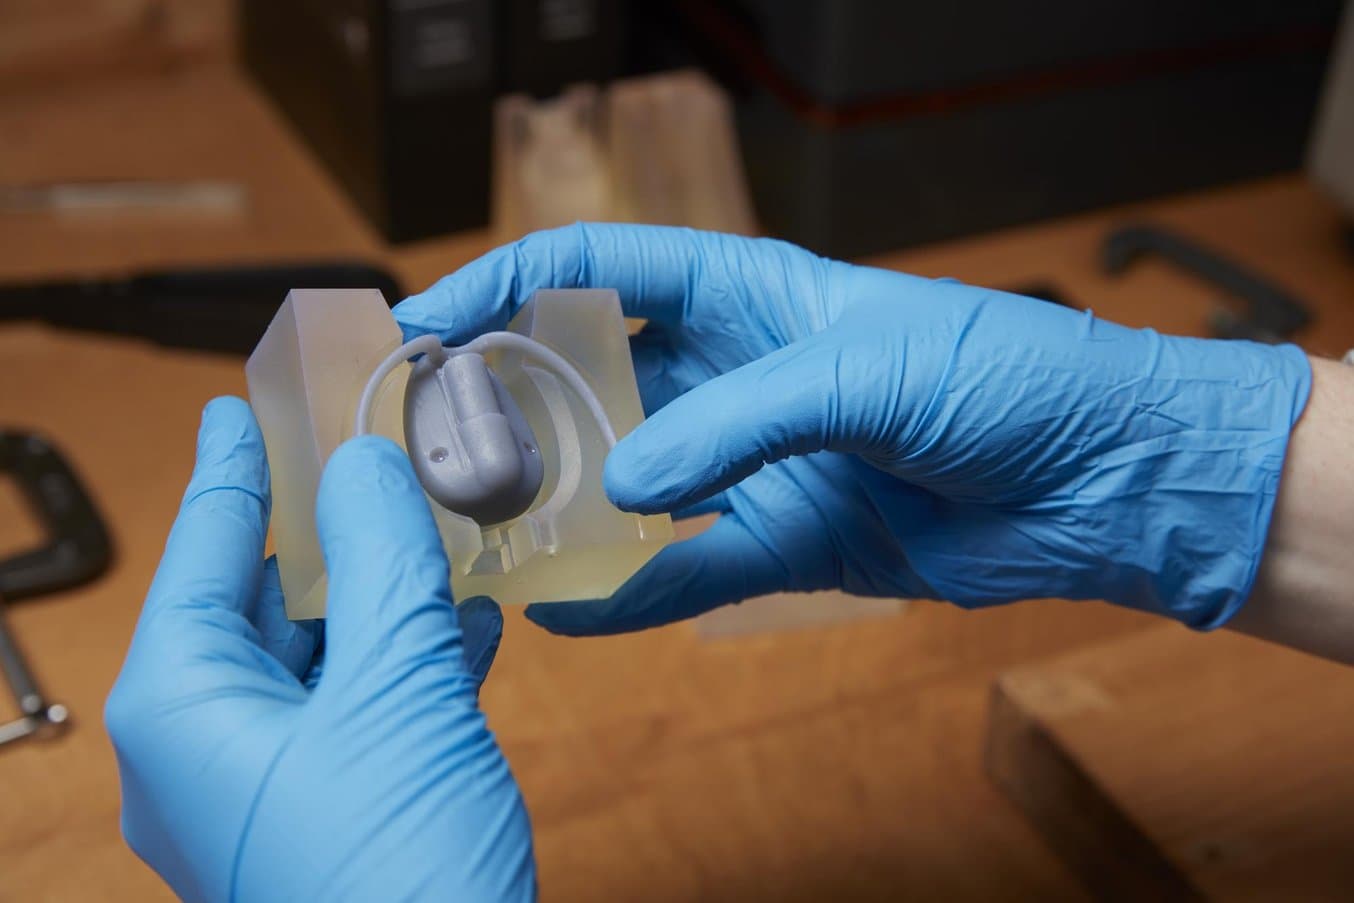
Dame Products, a Brooklyn-based startup, designs products for the health and wellness industry. They employ silicone insert molding to encapsulate internal hardware for customer beta prototypes. The Dame Products product line incorporates complex ergonomic geometries fully encapsulated in a layer of skin-safe silicone in vibrant colors.
Engineers prototype dozens of insert and overmolded devices in a single day by rotating through three or four SLA-printed molds. While the silicone rubber of one prototype is curing, the next can be demolded and prepared for the next fill; the finishing and cleaning of demolded prototypes happens in parallel. When prototype hardware is returned to the company, the beta device is bleached, the thin silicone layer removed, and the internal hardware is reused in a new beta prototype.
Step-by-Step Guide to Insert Molding With 3D Printed Molds
You can use the following instructional guide to encapsulate a piece of hardware in silicone. For this example, we’re using a combination of 3D printing and insert molding.
Materials and Equipment You Will Need:
-
Formlabs industrial-quality 3D printer
-
Formlabs spatula and flush cutters
-
Two-part medical-grade RTV liquid silicone: durometer 20-40 Shore A recommended
-
Syringes
-
Epoxy cartridges
-
Epoxy gun
-
Mixing nozzle
-
Stirring sticks
-
C-clamps
-
Hardware (of your choice) to be encapsulated
Optional Materials and Equipment:
-
Silicone dye
-
Petroleum jelly
-
Vibration source
-
Duct tape
Guide to Rapid Tooling
In this white paper, learn how to combine rapid tooling with traditional manufacturing processes like injection molding, thermoforming, or casting.
Step-by-Step Method:
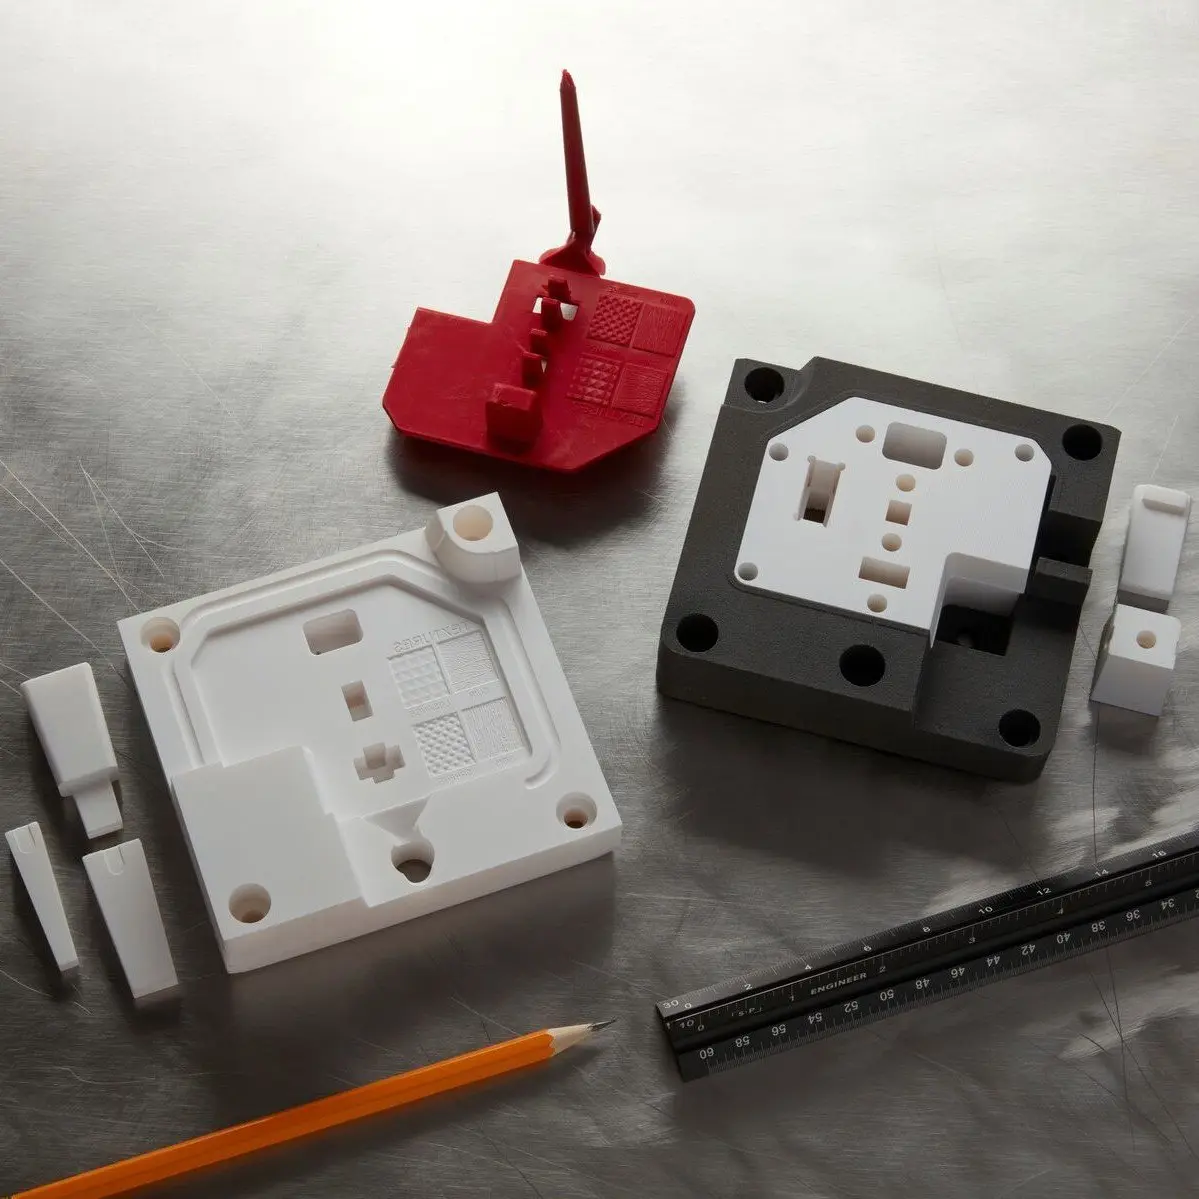
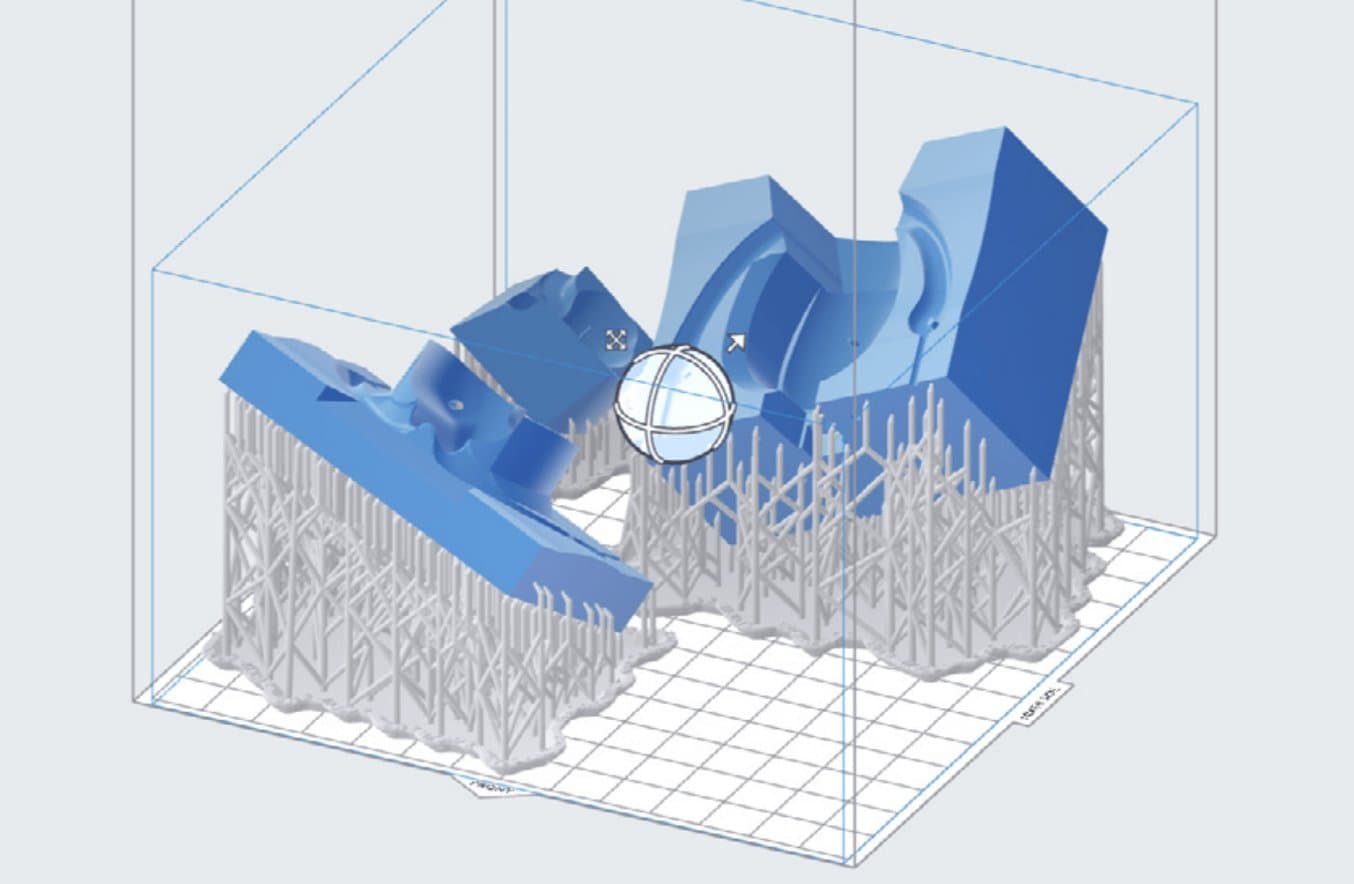
1. Print multipart mold in Formlabs Clear Resin: Printing with 50 μm layer height is recommended. Orient parts so critical interior surfaces are free of support marks.
2. Wash and cure the mold and remove supports: Wash thoroughly with IPA until the parts have a non-tacky finish. We recommend curing at 60˚C for 15 minutes for Clear Resin. It is helpful to polish the exterior of the mold to a highly transparent finish.
3. Prepare silicone at least one hour before insert molding: Fill each side of the epoxy cartridge system with one part (A or B) using separate syringes to transfer the liquids. Stand upright and allow silicone to gently degas for at least one hour or up to one day. An optional step here is to add dye to either the A or B side of the cartridge and mix thoroughly.
4. Apply mold release (optional): Apply a very light layer of petroleum jelly to the internal surfaces of the mold with a small paintbrush. This silicone overmolding technique also works without mold release.
5. Orient internal hardware: The alignment pins on the mold aid the positioning of the hardware.
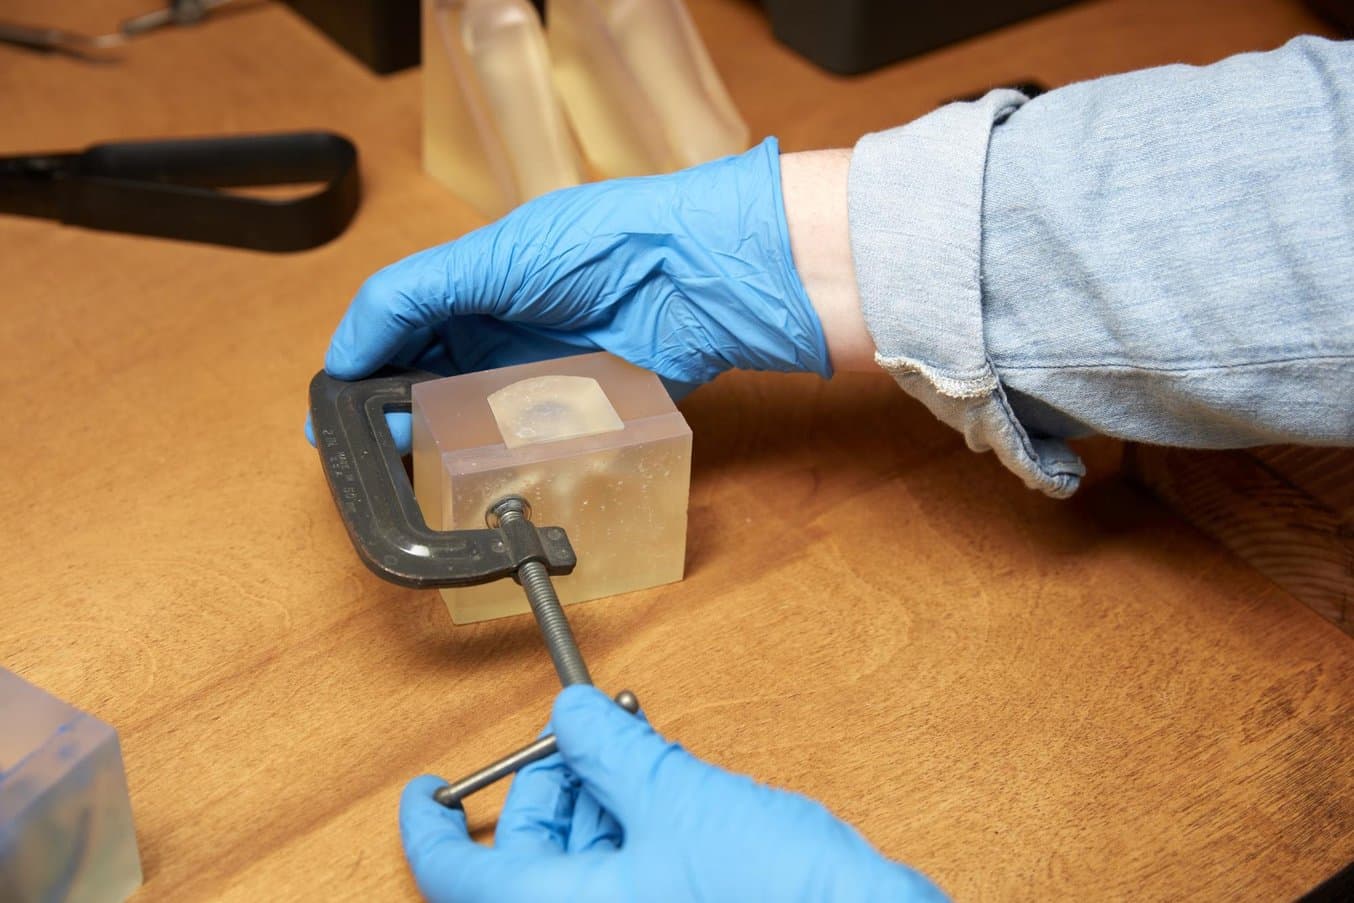
6. Close the mold, and compress it by hand: Check the placement and alignment of the hardware through the exterior of the mold. If the hardware appears out of alignment, repeat steps five and six.
7. Clamp the mold: Start by clamping in the “direction of draw” or perpendicular to the main parting line of the mold. It’s a good idea to check alignment again since clamping may shift the internal hardware. Sealing the edges with duct tape prior to clamping helps reduce any material seepage and flashing that occurs in RTV mold making.
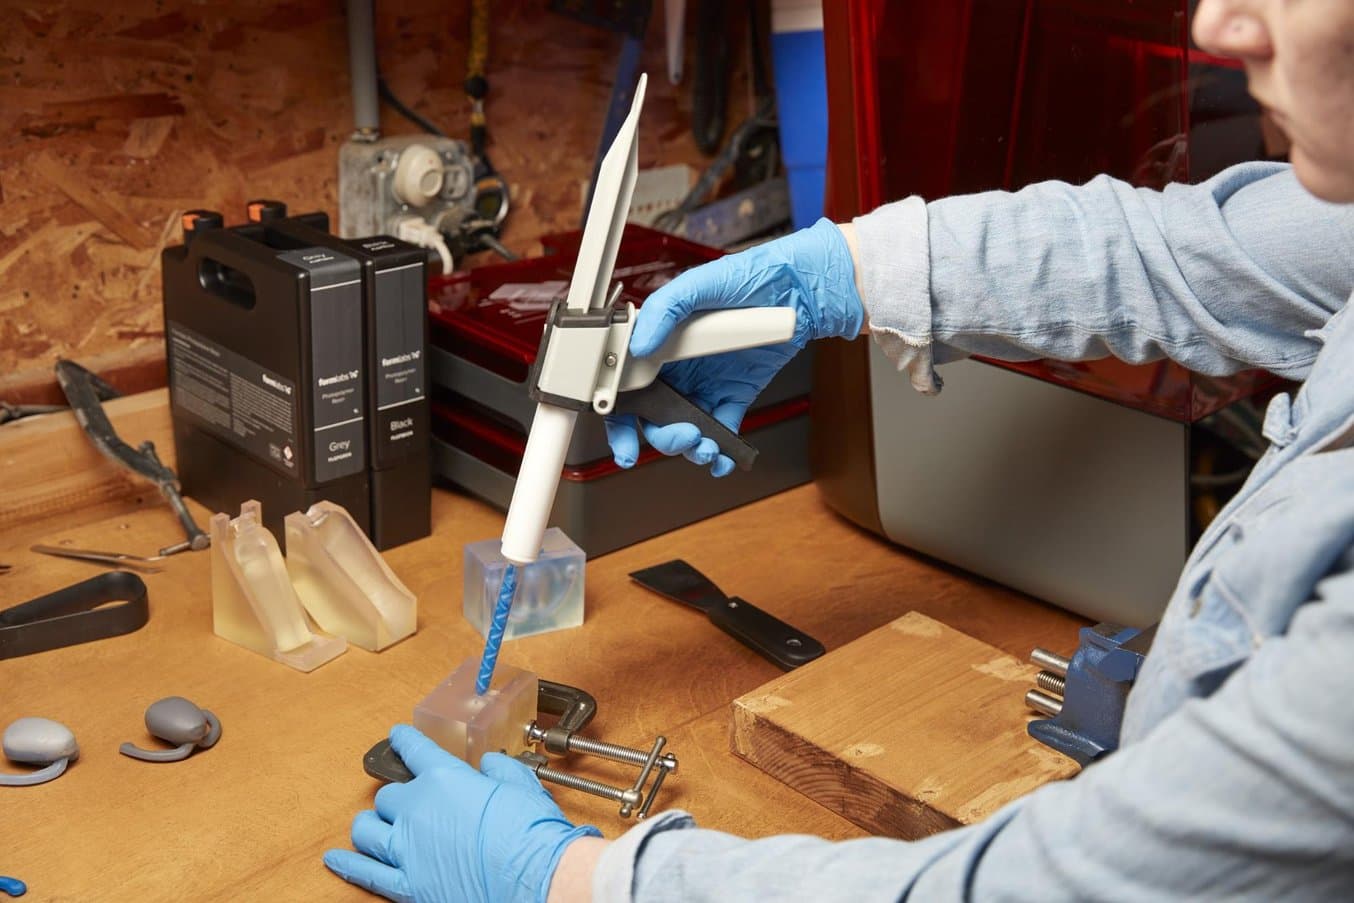
8. Assemble the epoxy gun: Insert the cartridges into the gun and screw on the mixing nozzle. It’s helpful to squeeze a little bit of liquid out of the nozzle tip at this stage to make sure you are getting proper mixing.
9. Inject silicone into the mold: Insert the tip of the mixing nozzle into the mold opening and squeeze the trigger gently. Watch the silicone flow through the mold and continue to pump until the mold is full and silicone is coming out of all of the vent holes. If silicone continues to sink into the mold after you’ve stopped, that’s because air bubbles are settling or material is seeping at the parting lines. You may need to add a little more a few times after the initial fill. After filling, holding a vibrating device (such as a handheld sander) to the surface of the mold can encourage the evacuation of air bubbles.
10. Wait for silicone to cure: Check your silicone instructions for recommended curing time. This is a great time to work on trimming.
11. Demold the prototype: Cut all excess silicone off the exterior of the mold first. Then pry apart the mold with the Formlabs spatula or a flat-head screwdriver. Be mindful of thin strings of silicone that form in the mold’s air vents. Take your time to trim these separately, so they do not stay with the mold and pull the silicone off of your hardware. It can also be helpful to trim away some flashing before the object is completely released.
12. Trim, finish, and clean the prototype: There will always be flashing to trim off with the Formlabs flush cutters or a sharp blade. If any air bubbles create voids on the surface, you can paint on additional liquid silicone patches and allow them to cure. Prototypes should be cleaned using industry-specific guidelines before they are handled by beta testers.
Your mold can be reused multiple times, but you may need to clean out air vents using a sharp object, such as a paper clip or drill bit.
Best Practices
Resin selection: Clear Resin provides a visual queue for mold filling and internal hardware alignment. We recommend printing with a 50 μm layer height for a good balance between smooth surface texture and fast printing time. Orient your parts on the build plate so that interior mold surfaces are free of support marks.
Mold preparation: Residual resin can interfere with the silicone casting chemistry. Thoroughly washing the mold with IPA ensures that the very first cast comes out well. The outlined process works without mold release, however a thin lining of petroleum jelly can aid the demolding process. We caution that if mold release is too thick, it can interfere with casting chemistry or affect the surface finish of the casted part.
Silicone preparation: For this application, an epoxy gun is used to inject silicone into the mold; mixing of parts A and B occurs inside the mixing nozzle. To fill, empty epoxy cartridges are set out vertically, then syringes are used to transfer the silicone A & B from larger containers to the epoxy cartridges. For silicone degassing, move it to cartridges and allow it rest for a day rather than actively degassing in a vacuum chamber. If you also add silicone dye to either part A or B at that time, you can achieve brightly colored silicone rubber.
Alignment pins: The small bumps shown in the mold schematic are alignment pins used to orient and constrain the part and to set the thickness of the silicone shell. Try to have all alignment pins pointing in the “direction of draw” or perpendicular to the main parting line of the mold. The farther that the pin angle skews from this position, the more likely they are to break off and make it difficult to open mold. When defining the silicone layer thickness, try to aim for 1.5 mm at a minimum. Designing for a 2 mm minimum thickness tends to be more reliable, and 1 mm may work in small areas of the coating. Note that alignment pins do tend to leave small holes in the surface. If needed, these can be patched using a small dab of liquid silicone and allowing it to cure.
Air vents: Air is displaced when filling silicone into an enclosed space, so air vent channels are incorporated into molds as narrow outlets. It is natural to place a vent at the point of the mold that is last to fill. However, when designing the mold, it can be helpful to think about areas where air is likely to be trapped, and connect vents specifically to these points. Even when pressure is applied, air bubbles can form around sharp turns, corners, or areas where two flow fronts connect. Bubbles will result in voids in the finished cast part.

The design of an overmold used by Dame Products.
Air channels can be designed to lie along a parting face of the mold or can be embedded in the mold (see diagram above). Avoid placing a channel that bores through two or more parts of the mold. If long air vents are required, they can have a smaller diameter at the base (against the casted part) and a larger diameter at their outlet.
A note about iterating on your 3D models: If you’re always getting an air bubble in the same place, add another air vent to that spot in the mold.
Mold filling: For complex shapes, the fill direction is quite important. You should try to fill from the highest point of the object, and consider the flow fronts that develop. Wait until silicone is coming out of all air vents before you stop filling. If one area is filling too fast, you can block it with a finger until the rest of the mold fills.
Trimming, finishing, and cleaning: An area to consider carefully during demolding is the silicone trapped in air vents. Take care to not yank the mold open as the air vent connection points are areas where the rubbery surface can tear. Often you can do some flash trimming while the part is half demolded, cutting with a sharp blade against the mold itself.
Get More Tips and Ideas for Manufacturing and Prototyping
Interested in learning more molding best practices? Read our guide on How to Make Silicone Molds: A Practical Guide, which offers more advice and proven methods for silicone molding.
Not sure which 3D printing solution fits your business best? Book a 1:1 consultation to compare options, evaluate ROI, try out test prints, and more.