
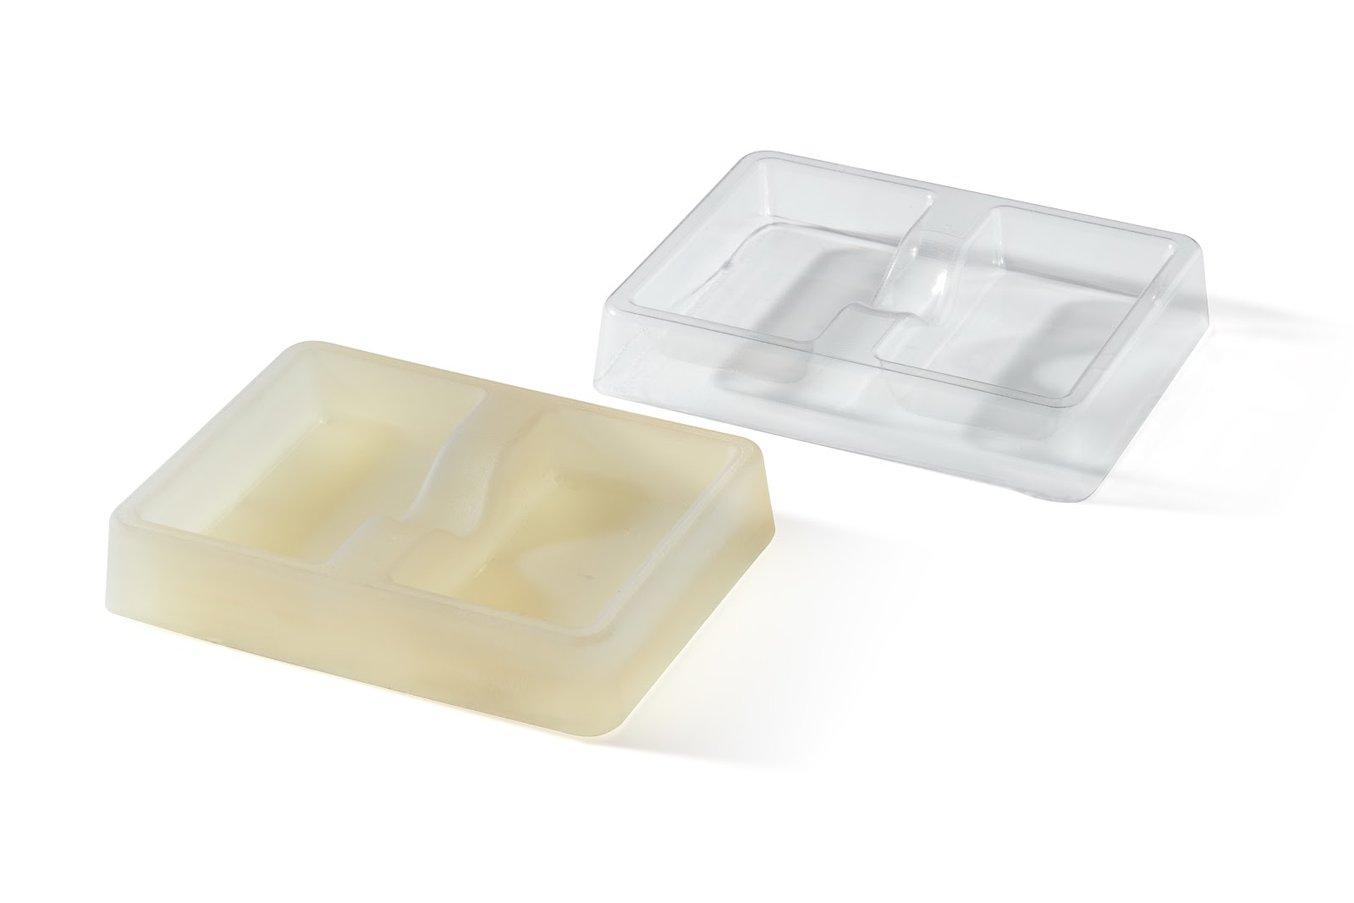
Vacuum forming is among the most ubiquitous manufacturing methods for creating the packaging of various goods. From grocery store salad mixes, the lid of your to-go cup of coffee, and high-end consumer electronics, vacuum forming is useful for producing lightweight, cost-effective packaging.
The process of vacuum forming is quite simple. It requires four basic elements: a mold or tool that will create the shape of the final part, a sheet of plastic, a heat source, and a source of vacuum.
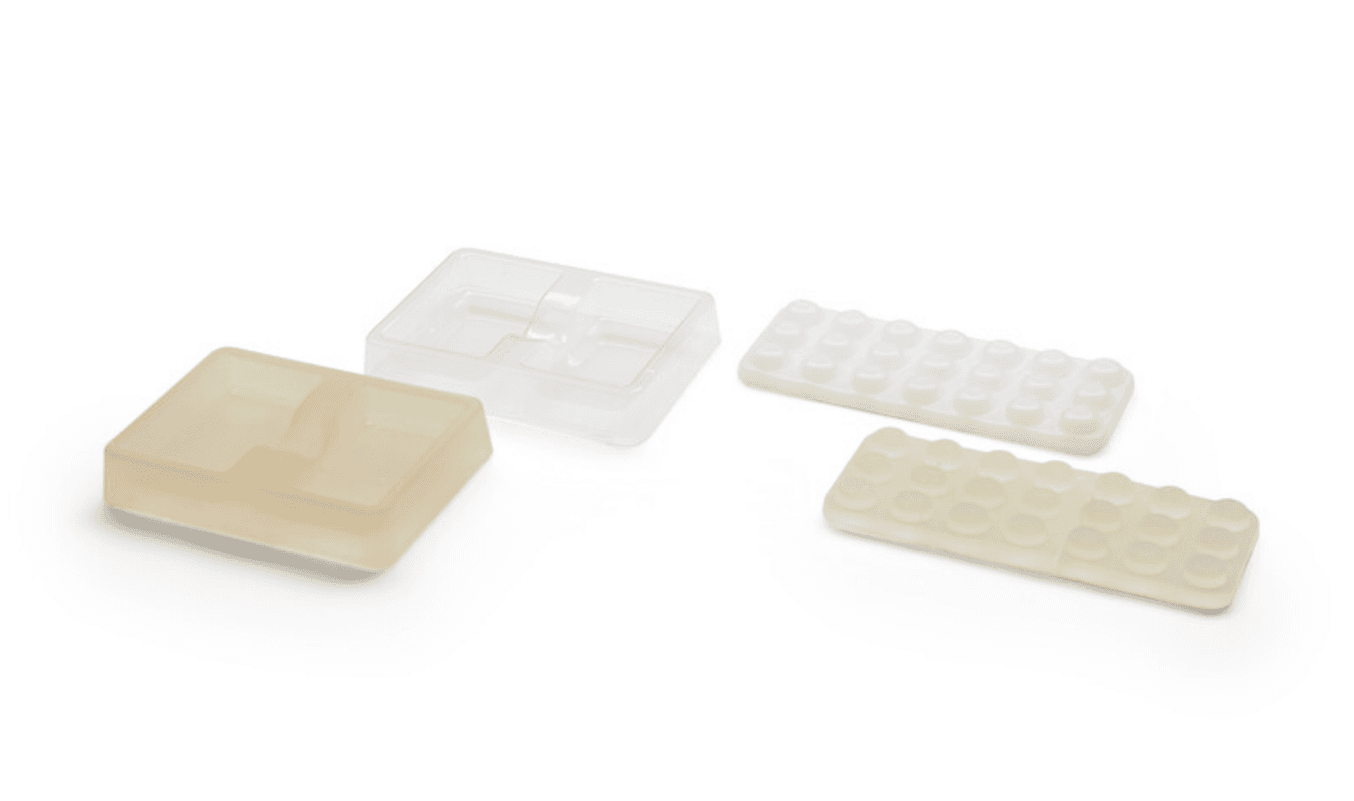
The sheet of plastic is heated as evenly as possible, until it becomes soft and pliable, and is brought down onto the mold or tool. Then the vacuum is applied, and the part is allowed to cool before being removed from the mold.
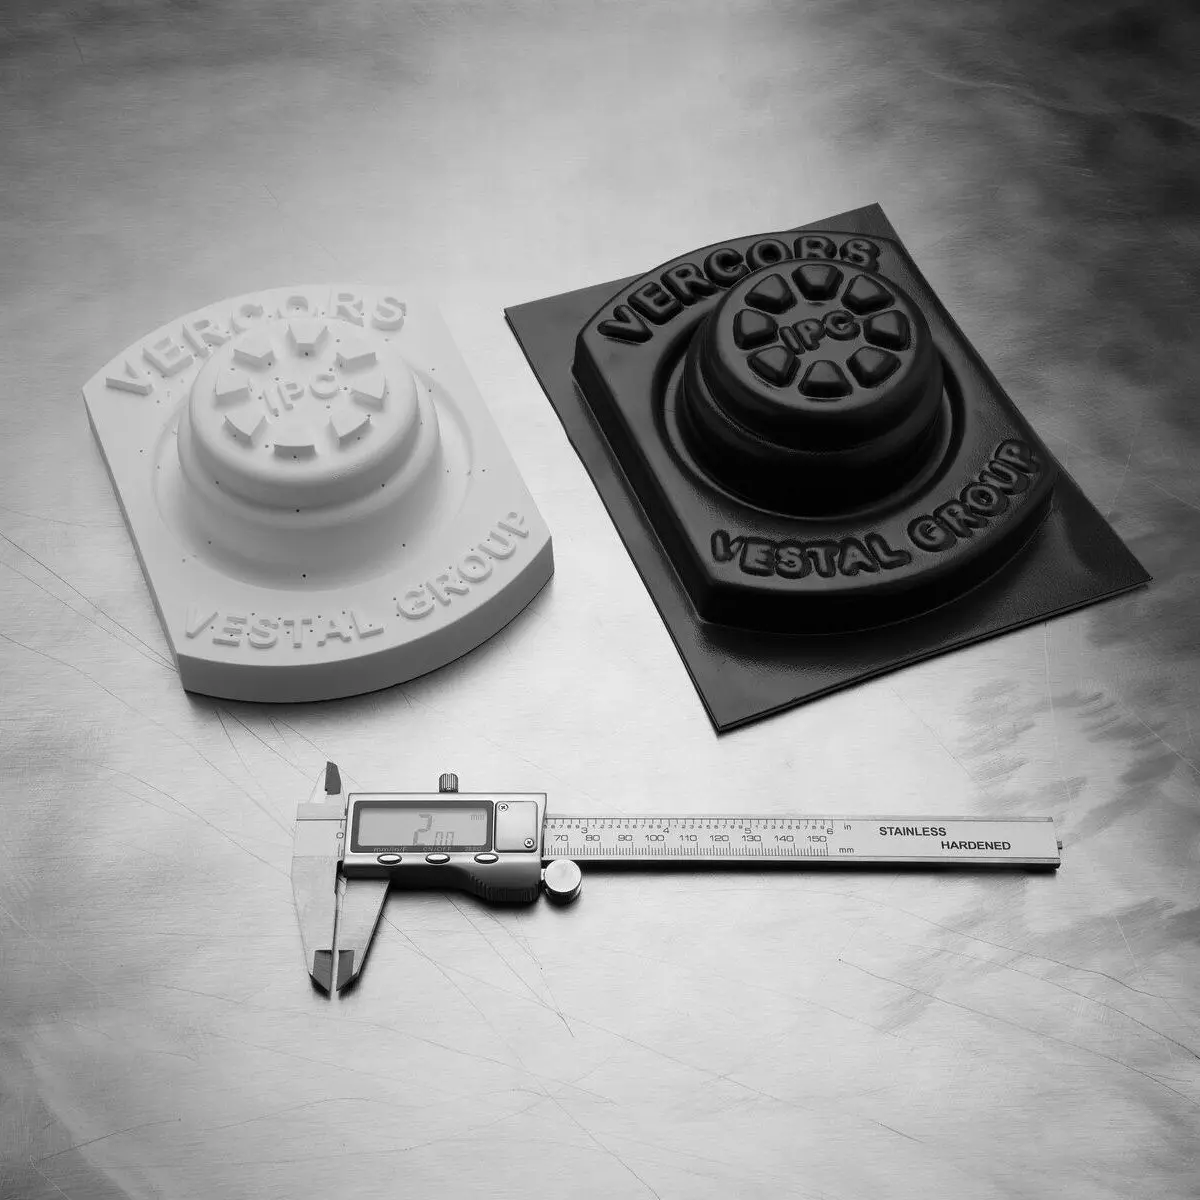
Creating vacuum forming molds with traditional manufacturing processes like machining or casting is time consuming and costly, especially for complex geometries, textured surfaces or fine features. Increasingly, designers and engineers are turning to 3D printed molds and tools for vacuum forming for significant cost and time savings. Additionally, 3D printed molds and tools can easily incorporate small features like text and intricate textures without impacting part cost.
Low-Volume Rapid Thermoforming With 3D Printed Molds
Download our white paper to see how to create complex molds with 3D printing fast and learn about tips and guidelines that you’ll want to follow when preparing your mold parts.
Design Guidelines
As with any manufacturing process, there are design guidelines to follow for successful vacuum forming. First, let’s define some terminology before we look at best practices for designing vacuum forming tooling.
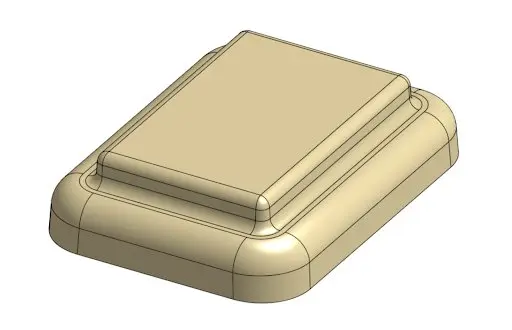
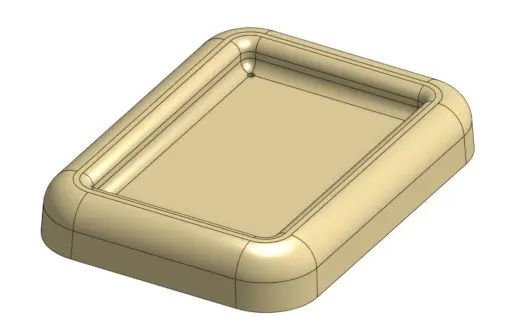
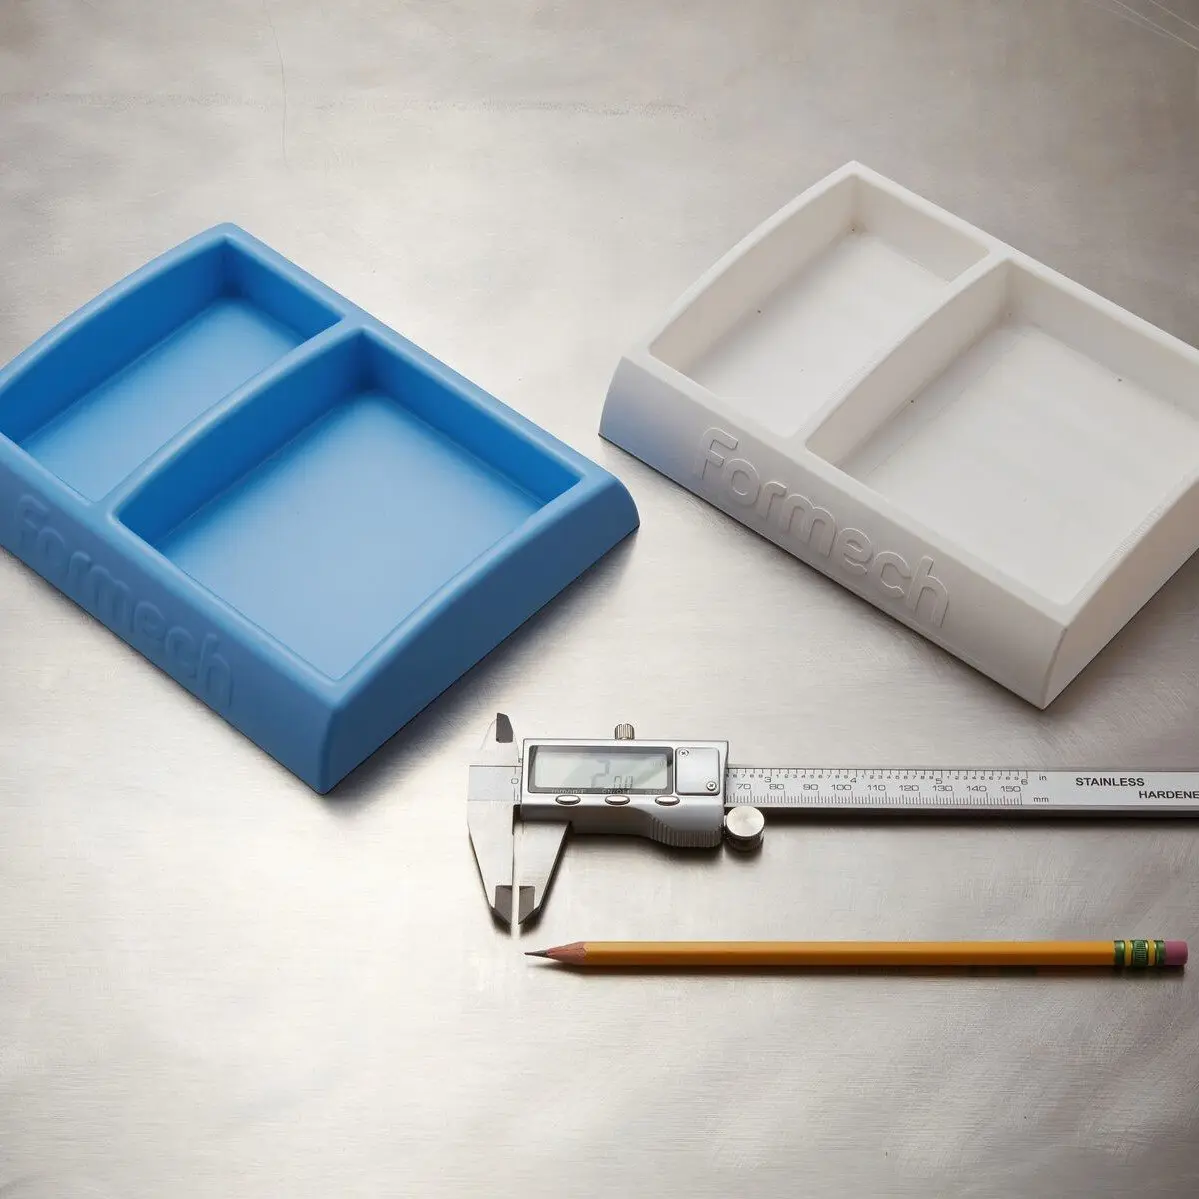
Mold Styles
There are two basic styles of vacuum forming molds: male and female. When creating a dome style part, a male mold would use a convex geometry, while a female mold would be concave.
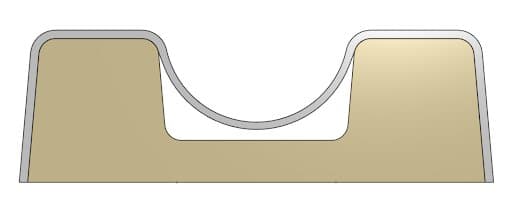
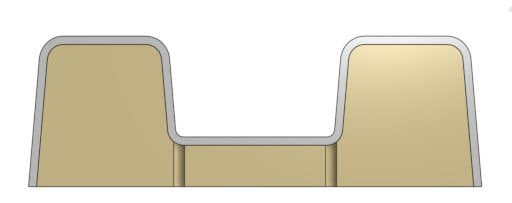
Draft Angles and Part Removal
While certain part geometries can be formed without any draft angle, draft is beneficial in aiding part removal and getting consistent finish on your vacuum formed parts.
For male molds, 4-5 degrees of draft is recommended. For female molds, draft recommendations are lower, at 1.5-3 degrees of draft. For deeper parts, adding additional degrees of draft can be helpful to yield quality parts that are easy to remove from the mold.
The use of textured surfaces will increase the draft angle requirements in most cases, so keep that in mind if your design is highly textured.
Pockets, Corners, and Radii
For internal pockets, it’s often necessary to add vent holes through the mold or pattern. This allows the vacuum to reach all areas of the mold, pulling down the softened plastic sufficiently.
Whenever possible, sharp edges of the mold should be broken with chamfers or radii both to reduce stress concentrations in the finished part, and to decrease the chance of tearing or webbing during vacuum forming.
Part Depth and Draw Ratios
It is important to keep the mold and vacuum formed part as shallow as possible. The deeper the draw required to produce the part, the more the sheet of plastic needs to stretch. This means deeper draw parts will require thicker stock, have more variation in wall thickness, and generally be more difficult to produce successfully.
There is a simple formula, known as the the draw ratio, which can be used to understand whether or not a part is likely to form successfully, and what thickness of plastic sheet you will need, at a minimum, to achieve the ultimate part thickness desired.
The draw ratio is expressed as the surface area of the part divided by the footprint of the part. A 3:1 draw ratio is generally considered to be the maximum for most vacuum forming operations.
To determine what sheet thickness to start with, multiply the desired gauge of the finished part by the draw ratio: draw ratio multiplied by the desired gauge of the finished part will produce the minimum sheet gauge.
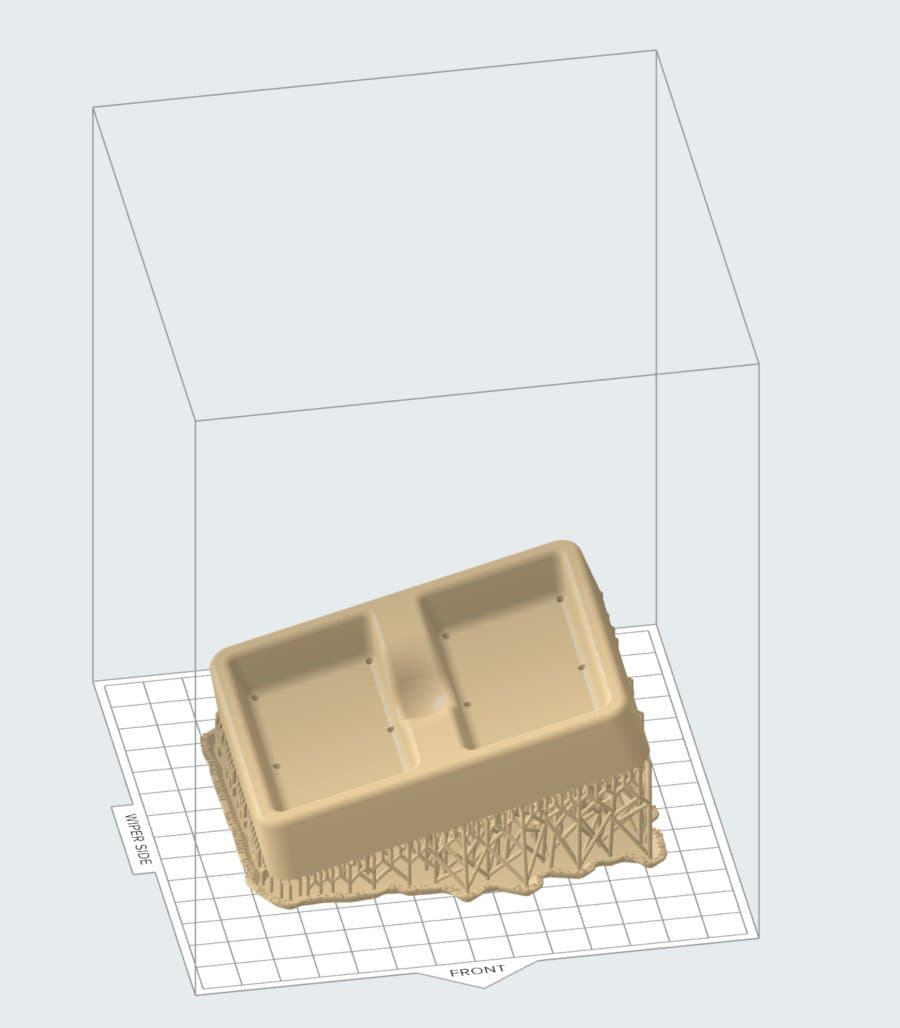
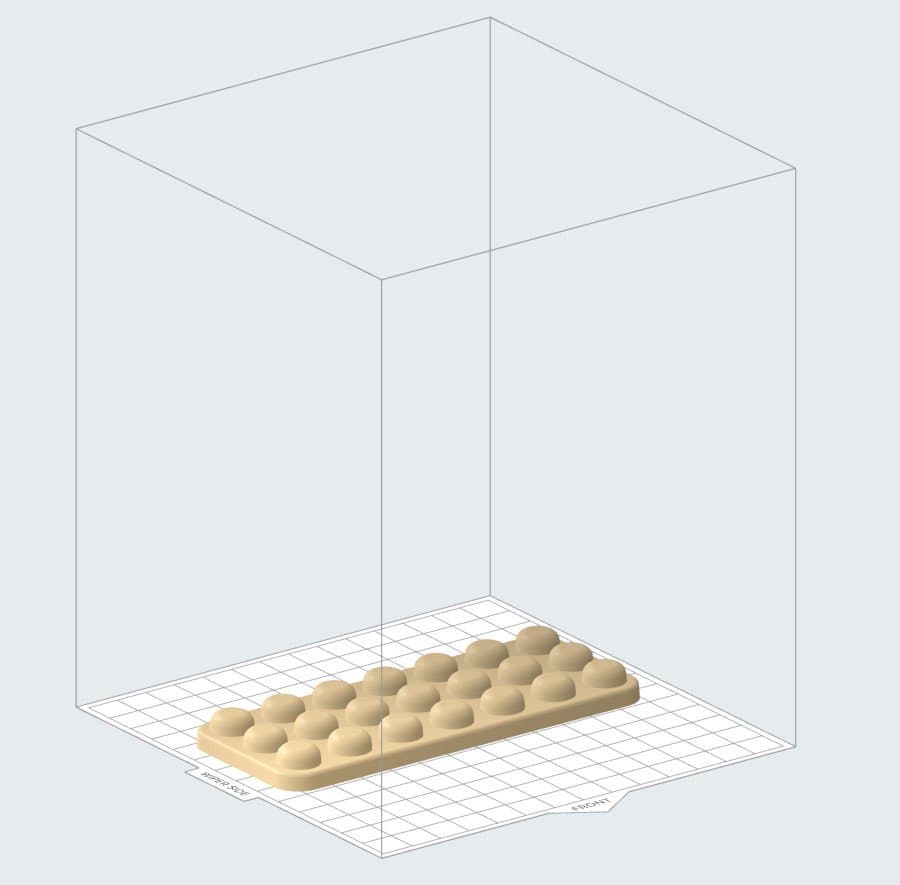
Differences in Print Set Up for Male and Female Molds
The peel forces that separate parts from the resin tank during printing vary based on part size and geometry.
A closed volume, such as you might have with a female mold oriented parallel to the build platform, will have higher stresses during printing due to cupping from closed internal volumes. Solid male molds will not have the same likelihood of cupping, and are better candidates for printing directly on the build platform.
Post-Processing Printed Molds
When a print build finishes, the next steps are to wash away any residual resin left on surfaces and post-cure the parts to achieve optimal physical properties.

There are several post-curing options for High Temp v2. Refer to the technical data sheet to understand how different options affect mechanical properties, and choose the post-cure option that is best suited to the intended application. To achieve the highest HDT of 238 °C @ 0.45 MPa: (1) Post-cure parts in Form Cure for 120 min at 80 °C. (2) Thermally post-cure parts in a non-food oven for 3 hours at 160 °C. For applications that do not require the maximum heat resistance, post-cure parts in Form Cure for 60 min at 60 °C.
Cleaning Up Vacuum Formed Parts
More often than not vacuum forming will produce near-net shape parts, which means there are aspects of the part that need to be processed in some way before the full manufacturing process can be considered complete.
Most vacuum formable plastics can be easily trimmed either by hand with a sharp knife, or using a machine tool like a router or mill.
Conclusion
3D printing is a powerful tool for expediting design, engineering, and manufacturing workflows. Hopefully you now have a better sense of what materials to use when creating quick-turn vacuum forming molds, and if you’re new to vacuum forming, how best to design mold geometries. With proper care, 3D printed molds will last for dozens and dozens of vacuum formed parts.
Explore our Engineering Resins and request a free sample to evaluate materials like High Temp Resin first hand.
Rapid Thermoforming With 3D Printed Molds: A Practical Guide
Accelerate product development, reduce costs and lead times, and create custom or low volume products with ease by combining 3D printed rapid tooling and thermoforming.