Materiales necesarios:
Formlabs:
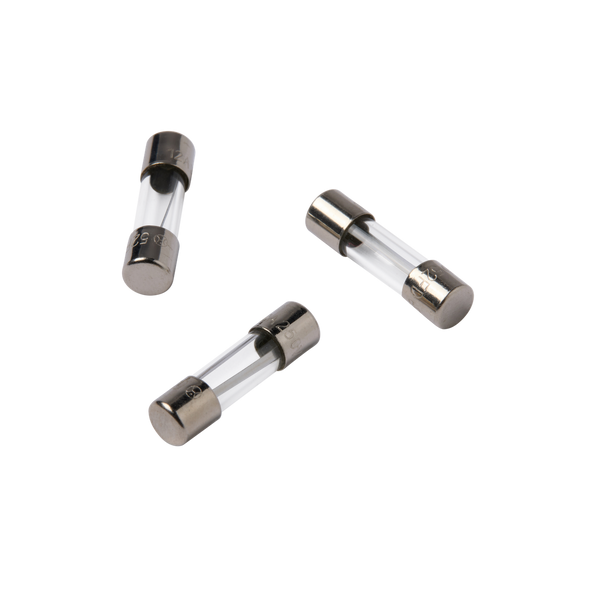
- Fuse
De otros fabricantes:
- Guantes de nitrilo
- Destornillador de cabeza plana
- Correa de conexión a tierra antiestática


El fusible evita que las subidas de tensión o los cortocircuitos dañen la Form Cure. Si el fusible funciona mal o se funde, puede indicar otro problema con el dispositivo. Reemplaza el fusible para restablecer el funcionamiento correcto.
Utiliza esta guía para reemplazar el fusible de la Form Cure (2.ª generación).
Materiales necesarios:
Formlabs:
De otros fabricantes:
Tiempo estimado: 20 minutos
Aviso:
Los dispositivos de Formlabs contienen componentes electrónicos delicados. Asegúrate de tener una toma de tierra antes de tocar cualquier componente electrónico de la máquina, sea mediante una pulsera antiestática o tocando un trozo de metal con su propia toma de tierra.
Preparación del espacio de trabajo
Resumen: Prepara la Form Cure (2.ª generación) y el espacio de trabajo para reemplazar el fusible.
Paso 1: Prepara el espacio de trabajo
Despeja un espacio de trabajo alrededor de tu máquina. Asegúrate de que el espacio de trabajo esté bien ventilado y libre de polvo.
Paso 2: Desconecta la máquina
Apaga la máquina con el interruptor de la parte posterior de la unidad. Desconecta el cable de alimentación antes de continuar con el mantenimiento. No realices el mantenimiento de la máquina mientras esté enchufada a la corriente. Espera cinco minutos después de desconectar la máquina de la alimentación antes de continuar.
Peligro:
Realizar el mantenimiento de la máquina mientras está enchufada aumenta el riesgo de descarga eléctrica. No retires nunca las carcasas de la máquina mientras esté enchufada. No vuelvas a conectar la máquina a la corriente eléctrica mientras las carcasas estén desinstaladas.
Extracción del fusible
Resumen: Retira la caja de fusibles para acceder al fusible fundido y retirarlo.
Paso 1: Coloca la máquina
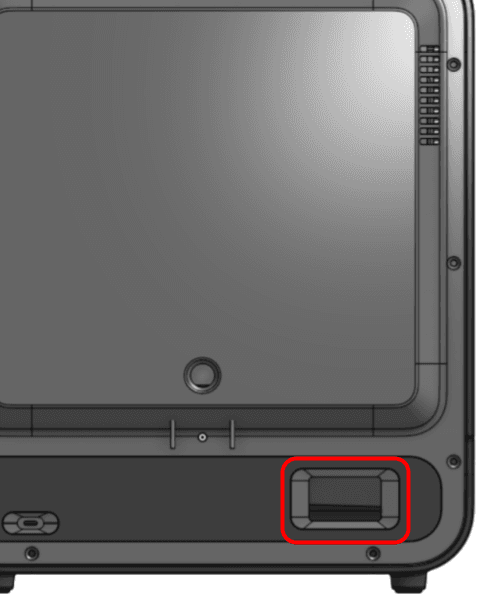
Coloca la Form Cure en el espacio de trabajo de forma que puedas acceder a la parte posterior de la máquina.
Paso 2: Retira la caja de fusibles
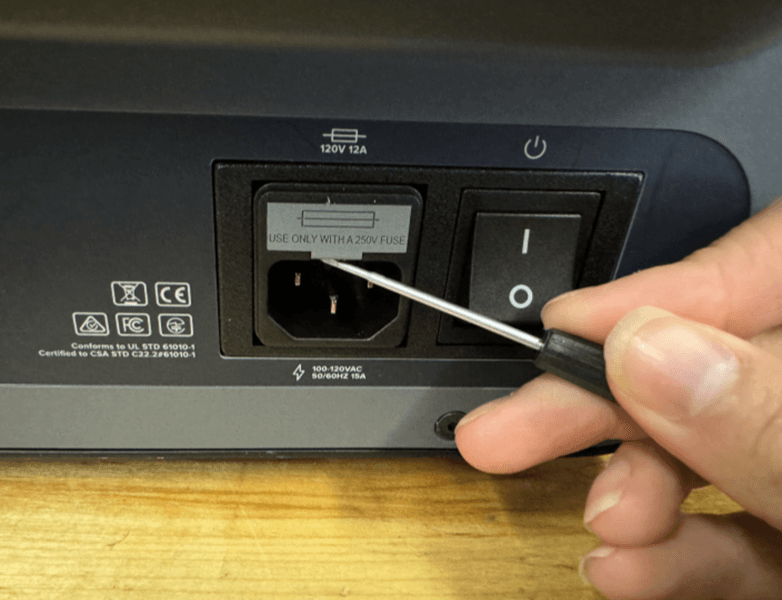
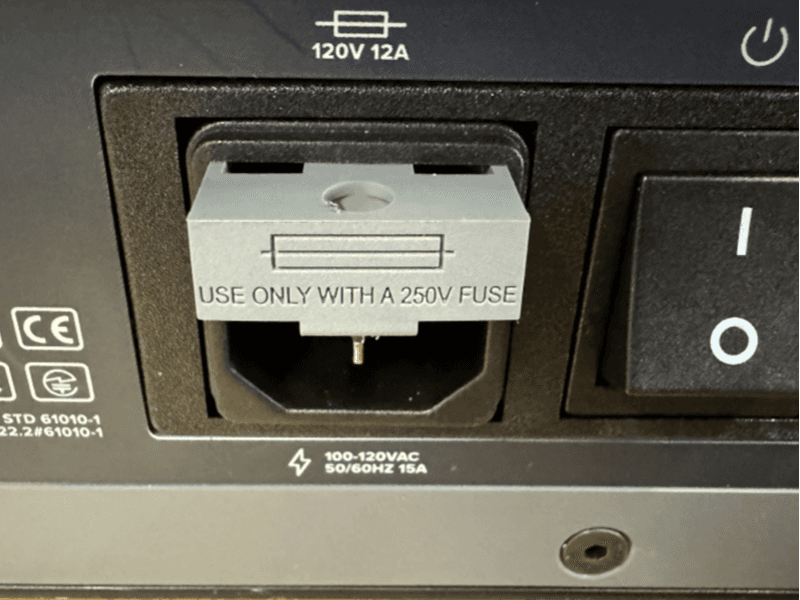
Utiliza un destornillador de cabeza plana para hacer palanca contra la caja de fusibles y sacarla de la máquina. Cuando haya suficiente palanca, retira la caja de fusibles de la máquina.
Paso 3: Inspecciona la caja de fusibles
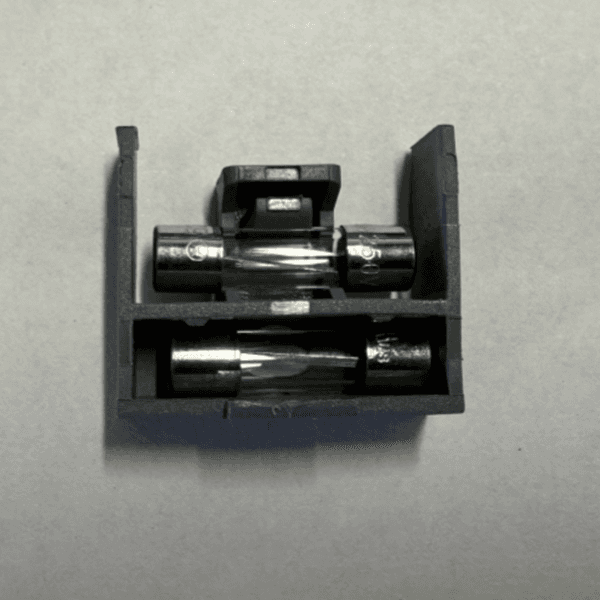
La caja de fusibles contiene dos fusibles: un fusible instalado en la parte inferior y un fusible de repuesto en la parte superior. Si solo hay un fusible, compra fusibles de repuesto adicionales.
Paso 4: Retira el fusible fundido
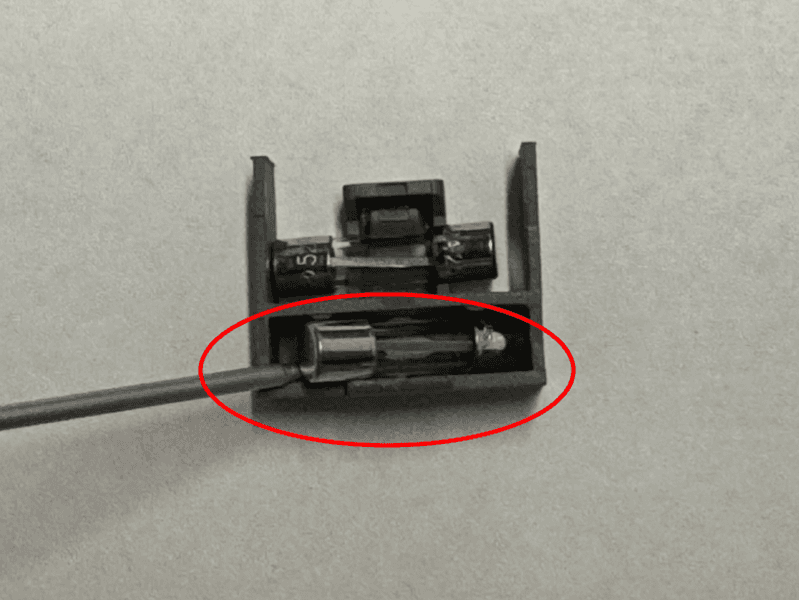
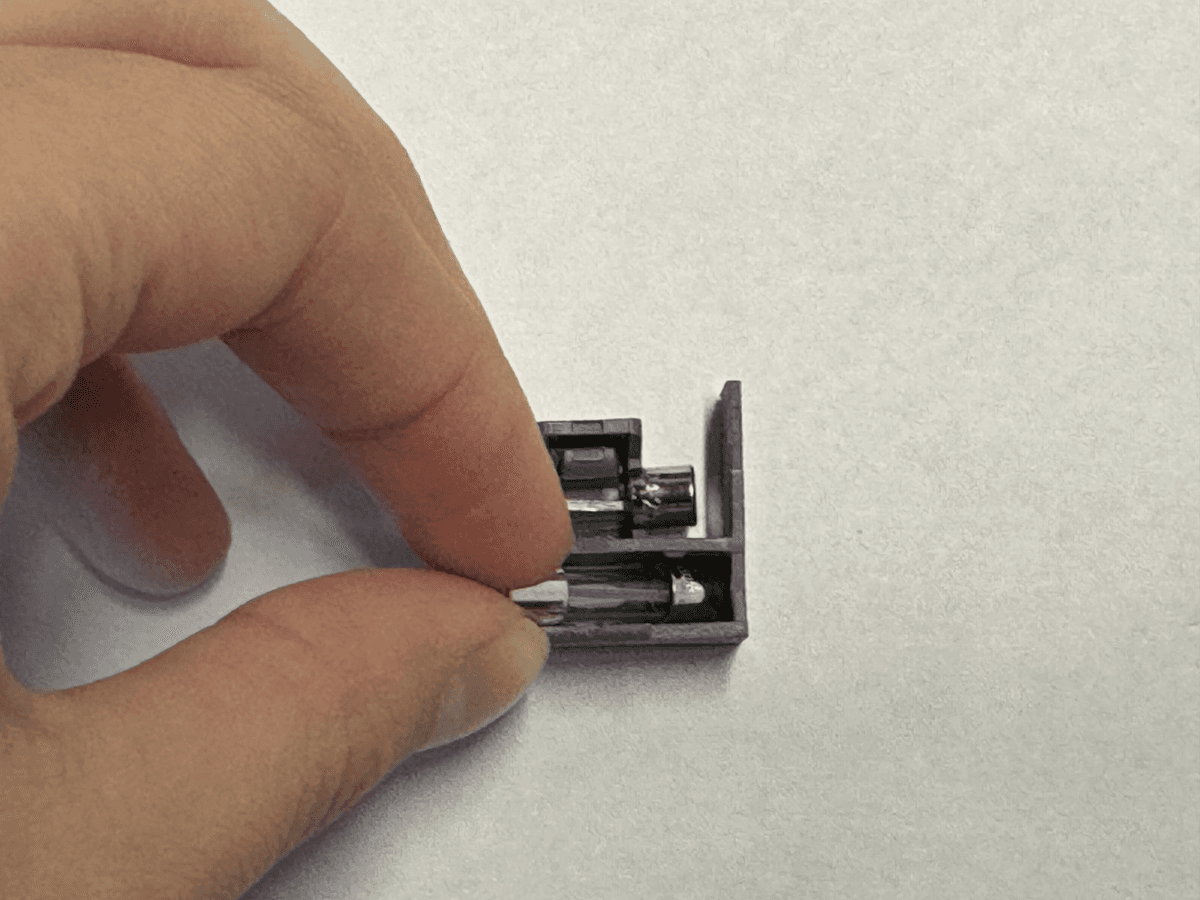
Utiliza un destornillador de cabeza plana para hacer palanca con cuidado y sacar el fusible fundido de la caja de fusibles. Deja a un lado el fusible fundido para desecharlo con los residuos electrónicos.
Instalación del fusible de recambio
Resumen: Instala el fusible de recambio y vuelve a instalar la caja de fusibles.
Paso 1: Retira el fusible de recambio
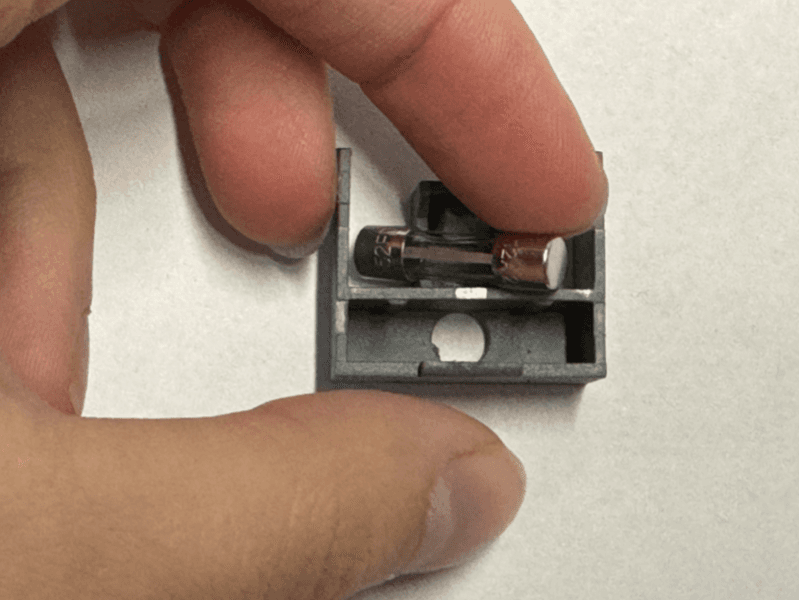
Utiliza un dedo para hacer palanca con cuidado y sacar el fusible de recambio de la caja de fusibles. Ten cuidado al retirar el fusible de recambio para no dañarlo.
Paso 2: Instala el fusible de recambio
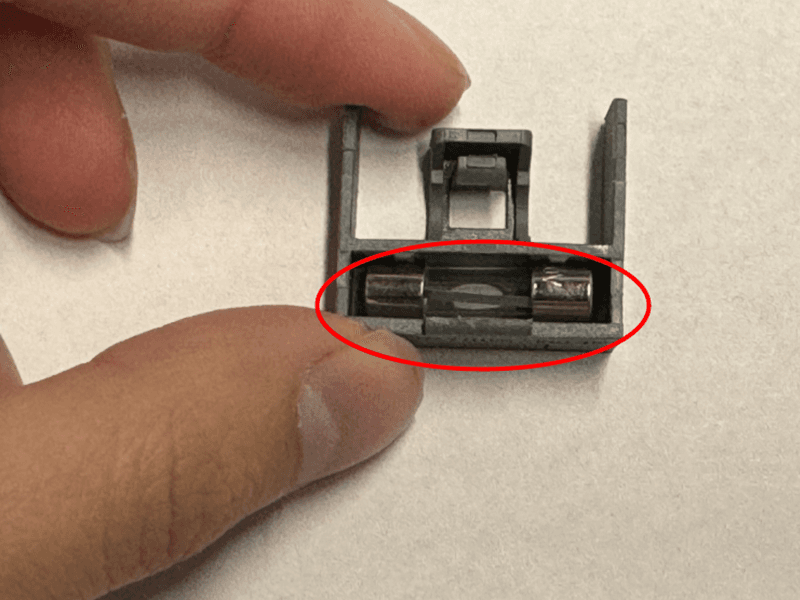
Empuja suavemente el fusible de recambio dentro de la caja de fusibles. Asegúrate de que el fusible está completamente asentado. Ten cuidado al instalarlo para evitar daños.
Paso 3: Vuelve a instalar la caja de fusibles
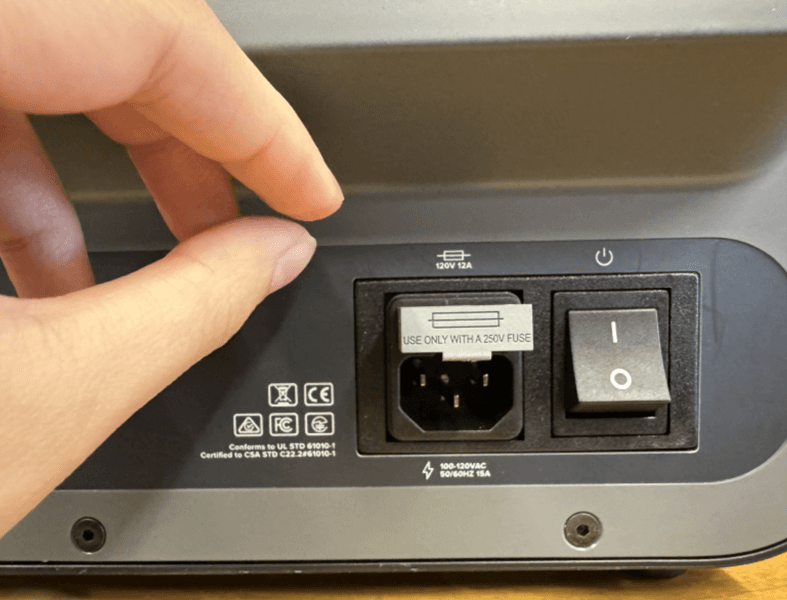
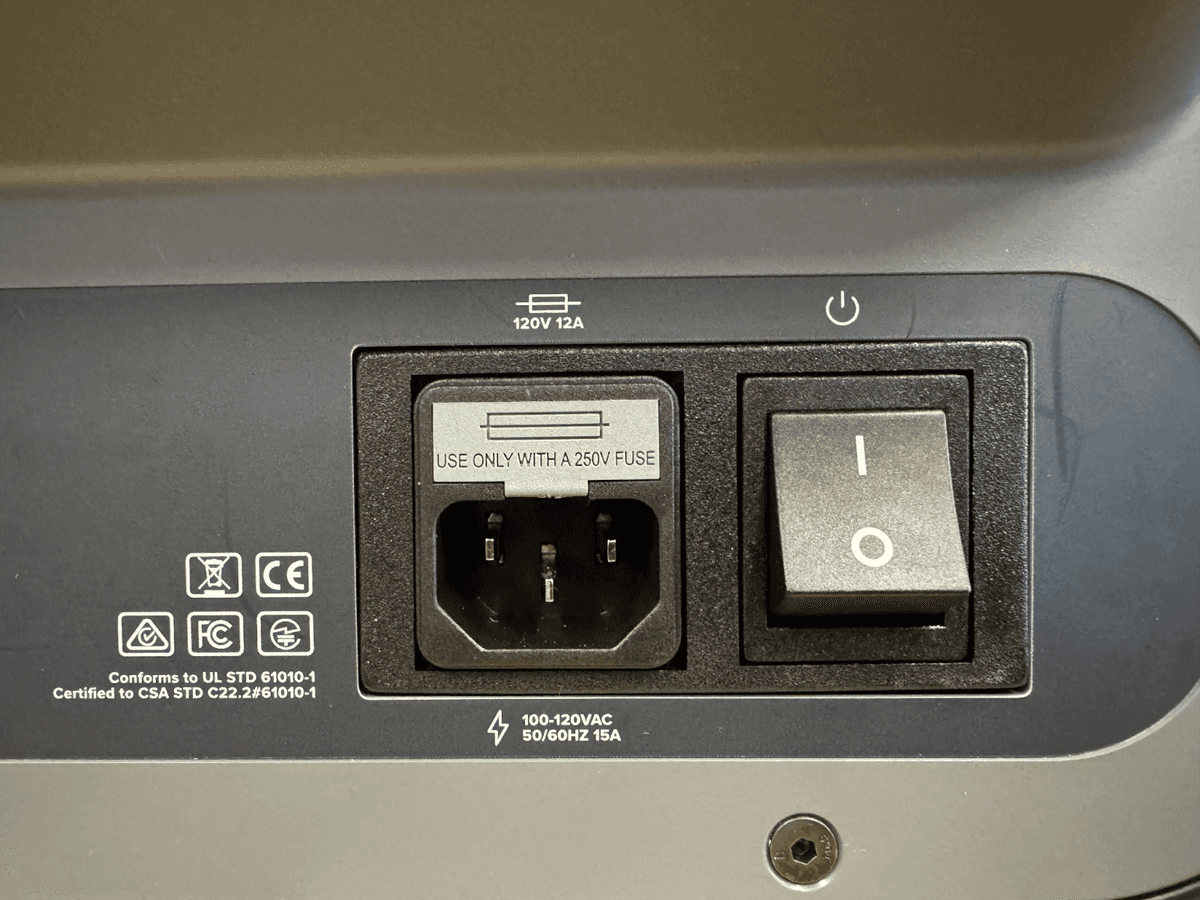
Vuelve a introducir el fusible en la máquina en la orientación correcta hasta que quede a ras de la máquina.
Finalización de la reparación
Resumen: Después de instalar el fusible de recambio, enciende la máquina y realiza las comprobaciones finales.
Paso 1: Enciende la máquina
Conecta el cable de alimentación a la Form Cure y a la toma de corriente. Coloca el interruptor de la parte posterior de la unidad en la posición ON para encender la máquina. La Form Cure se iniciará.
Paso 2: Probar la reparación
Inicia un ciclo de poscurado. Contacta con el servicio de asistencia de Formlabs o con tu revendedor autorizado si el problema persiste.