
Watch the video to learn the basics of how to use the Form 3, from software and materials to printing and post-processing.
With the new advanced Low Force Stereolithography technology behind the Form 3 (and its large format counterpart, the Form 3L), we have completely re-engineered resin-based 3D printing to deliver incredible part quality and printer reliability, giving anyone from individual designers to large production teams the ability to bring their ideas to life.
The Form 3 is a part of a 3D printing ecosystem that’s easy to learn and use and requires little intervention or maintenance.
The basic printing process looks like this: Import your design into PreForm print preparation software, choose a material from our extensive materials library and insert the resin cartridge, and click print. Our automated post-processing machines, Form Wash and Form Cure, are compatible with both the Form 2 and Form 3.
Watch the video above or read on to learn the basics of how to use the Form 3, from the software and materials to printing and post-processing.
Order Your Form 3 Printer Tech Specs
1. Design

Our print preparation software, PreForm, makes 3D printing setup, management, and monitoring simple. To start printing, first, export your design as an STL or OBJ file from your favorite CAD software. Open the file in PreForm.
Free Download: Try PreForm With Your Files
Choose your material. Formlabs offers a wide variety of 3D printing resins formulated specifically for our printers, including Standard Resins, Engineering Resins, Dental Resins, and Jewelry Resins.
Choose your desired layer thickness. A higher setting, like 100 microns, will lead to faster printing, while lower settings, like 25 microns, offer the best surface detail.
Use One-Click Print to automatically set up supports, layout, and orientation in one step or make advanced manual adjustments such as support size, density, and position as needed.
Once your print is ready, send it to the printer via USB, Ethernet, or WiFi.
You can also uploaded to a primed printer via the cloud with Remote Print, allowing you to work anywhere, anytime. During printing, the online Dashboard allows you to monitor print progress and check material supplies, effectively managing a fleet of printers and users across multiple locations.
2. Print
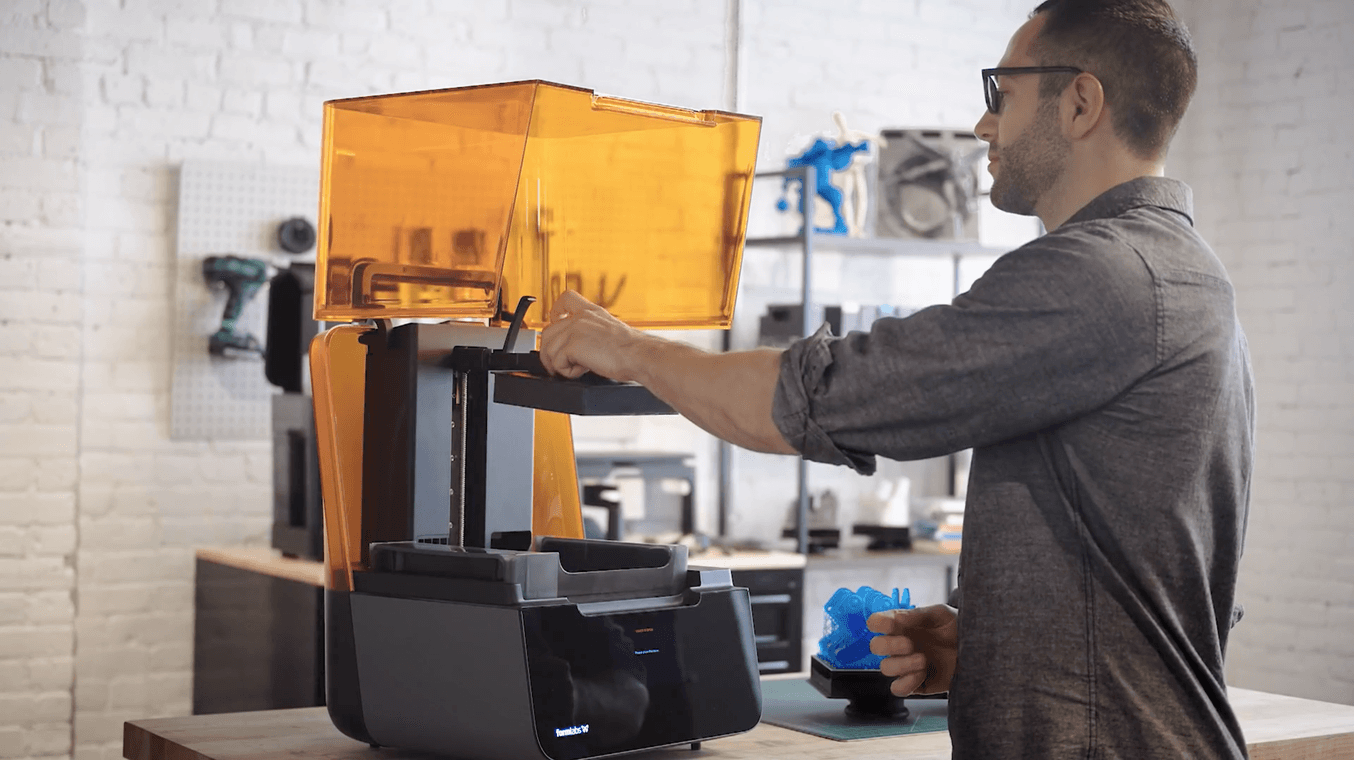
Once uploaded, you’re ready to print. The Form 3’s versatile cartridge and tank system allows you to easily change materials without having to handle resin.
Before starting the print, make sure the build platform, resin cartridge, and resin tank are ready inside the printer. Unless you change materials, you’ll only need to set them up once. The Form 3’s resin cartridges and build platform are the same as those used with the Form 2.
The resin cartridge is part of our hassle-free resin system that automatically senses the resin level and fills the tank as you print so your print won’t be interrupted.
The Form 3 resin tank, which makes up the print surface, features a strong, flexible film held in tension. This cutting-edge technology reduces the force on your part during the peel process to produce detailed parts with smooth surface finish.
To minimize user error, the Form 3 will automatically sense when everything is inserted correctly and you’re ready to start a print. Many sensors integrated throughout the printer help maintain ideal print conditions and send you alerts about print progress and the state of your machine.
Once you press print, you can leave the printer to complete the print and focus on other work.
3. Post-Process
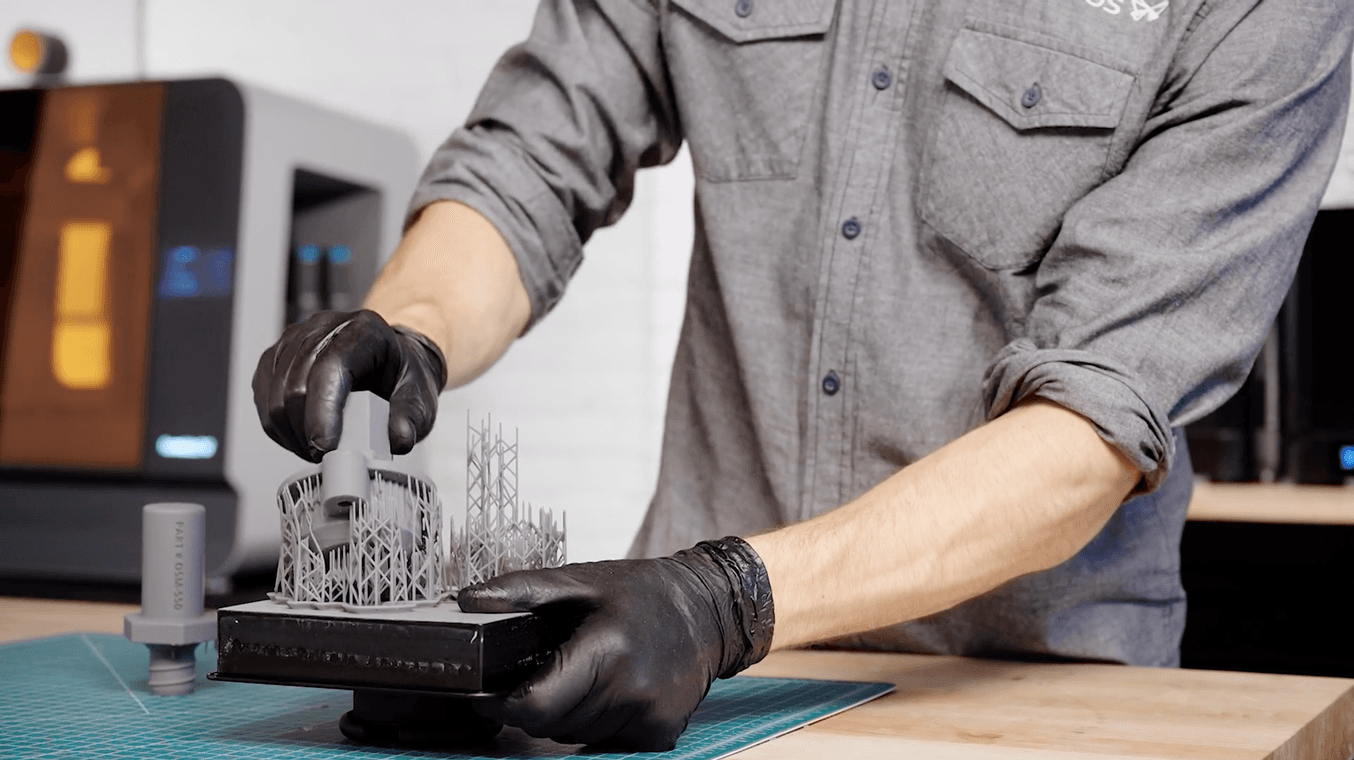
After the print is finished, there are three main steps in post-processing stereolithography parts: rinsing in isopropyl alcohol (IPA), removal of supports, and post-curing. Formlabs has made each of these steps as easy as possible to save you time and increase your throughput.
To rinse your part, insert the build platform directly into Form Wash after printing for a consistent, automatic rinse.
The Form 3’s light-touch supports are designed to tear away with ease, leaving behind minimal support marks for easier post-processing. Depending on the model and the material, you may want to remove supports before or after post-curing.
Next, transfer the part to our automated post-curing station, Form Cure. Form Cure includes custom settings that maximize mechanical properties for each Formlabs material.
Learn More: Form 3 Resources
Welcome to the Form 3: Onboarding
Getting ready to add the Form 3 to your workflow? Learn everything you need to be successful with the Form 3, including unboxing, resin tank handling, and more in-depth guidance for setting up and post-processing prints.