
If there’s one thing Formlings love, it’s extracurricular activities, and we’re lucky enough to be surrounded every day by 3D printers that supplement and enable our hobbies. For electrical engineer Matt Keeter, one of those hobbies is creating DIY electronic devices like Bumpy, a simple open source MP3 player with a 3D printed case.
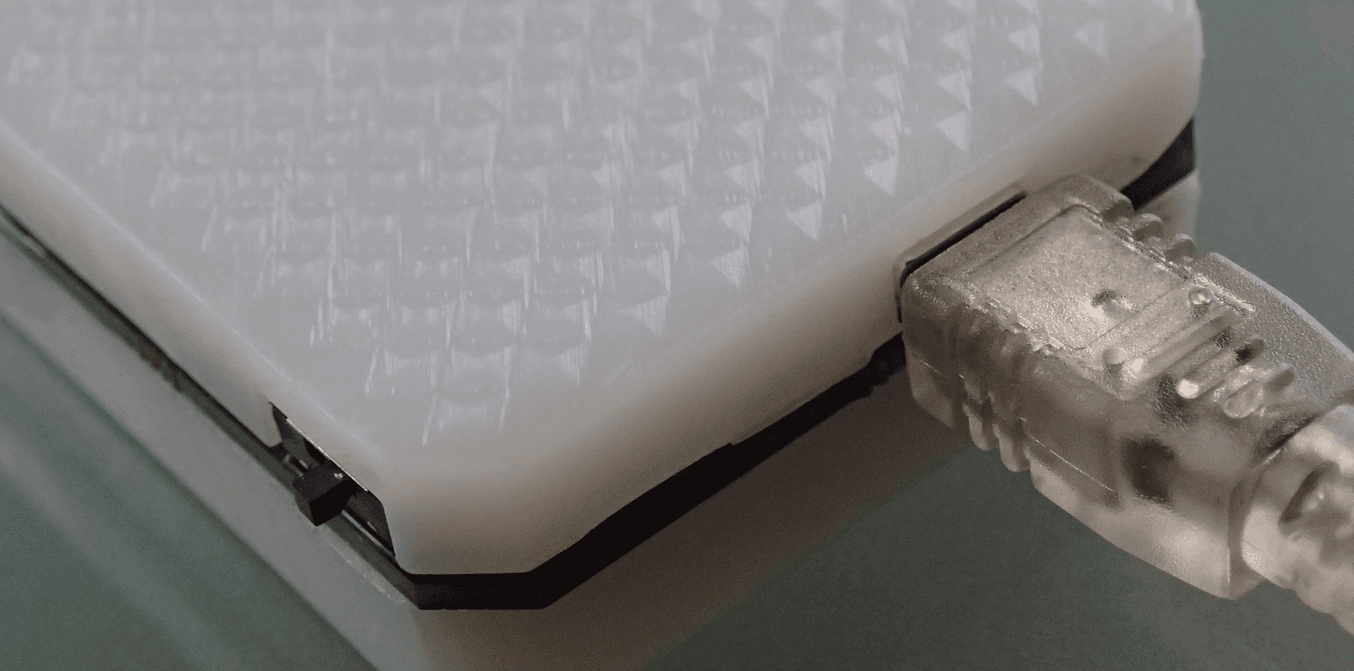
Matt designed Bumpy from the ground up, with a custom printed circuit board (PCB), homespun firmware, and a custom-designed case. About the size of a pack of gum, Bumpy stores your favorite jams on a micro-SD card and is controlled by a scroll/click wheel. Animated LEDs show Bumpy’s status when you change and play songs, and power is delivered via a lithium rechargeable battery, which is charged via a standard USB-mini plug.

Curious to learn more about the thought process behind this project? Read on for our interview with Matt for behind-the-scenes details on designing this project, particularly the case, printed on the Form 1+ 3D printer.
Behind The Scenes: Building Bumpy
What were your main design considerations for this project?
One of my goals for this project was to make something that looked like an actual consumer product. I didn’t want to finish the project with a bunch of bare circuit boards–I wanted to make a complete package, including the case.
In designing the case, I was trying to make it as thin and minimal as possible. The two case halves are bonded directly to the bare circuit board, and are very thin. The back case is only about 1 mm thick where it presses up against the battery, and the top has small cutouts on the order of 1 mm to fit electronics on the circuit board.
The eponymous texture was actually an afterthought. I printed a few versions with flat tops and bottoms, but thought that it needed a little more character. It’s fairly subtle. The individual bumps are only 2 x 2 x 0.3 mm, but it came out great.
How did the printing go?
There were a few self-inflicted issues with early prints, because I turned down support point touch size to minimize the amount of post-processing I would need to do. Unfortunately, this led to parts breaking off of the supports mid-print. Once I reverted back to the defaults, the prints came out on the first try.
I also switched from Clear to White Resin after an early test print, and I’m very happy with how the White Resin diffuses the LEDs on the circuit board!
What kind of post-processing was involved?
The post-processing was very simple: Because I printed with the textured side up, all I needed to do was sand the bottom of each part flat so that it could fit cleanly onto the circuit board. The support marks were pretty minimal to begin with, so it wasn’t hard to clean up.
Once I got a good fit, I smeared a thin film of resin along the sides of the case, then hit it with a 405 nm laser pointer to seal it up. It’s not a very rugged seal, but that’s by design: if I have any issues with the electronics, I can crack it open to get to the circuit board.

Documentation
To check out the documentation and source files, visit the Bumpy project page, look at the PCB and firmware repositories on GitHub, or download the .STL files for the case from Pinshape.