
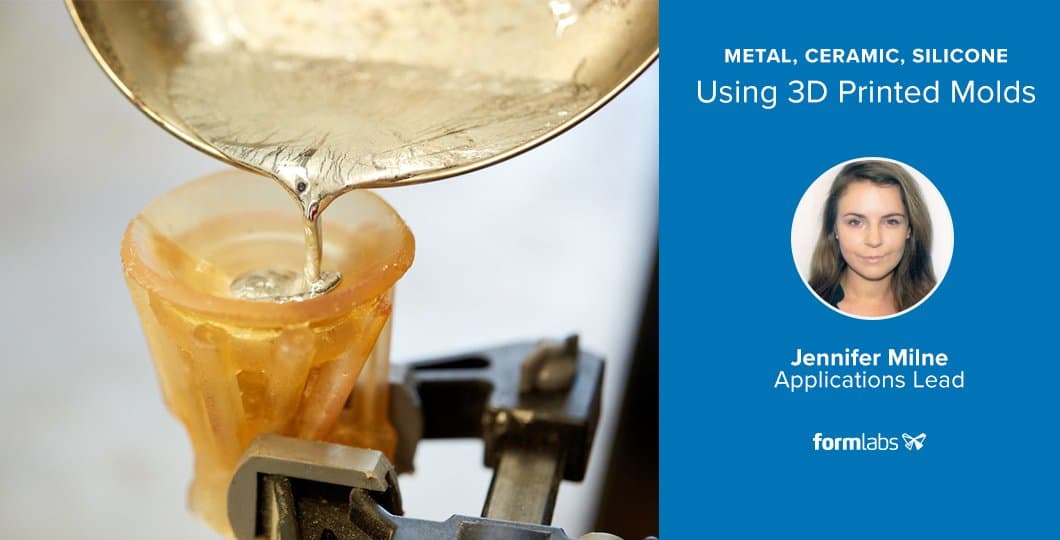
Ever wanted to turn your digital sculpture into a figurine made out of metal? As much as we love resin 3D prints, metal has a unique weight and cold, smooth surface that is hard to match. With recent developments in temperature resistant 3D printing materials, like High Temp Resin for Formlabs stereolithography (SLA) 3D printers, it’s now possible to 3D print molds for direct pewter casting.
Compared to directly printing metal, the casting pewter in 3D printed molds offers significantly better detail and surface finish at a small fraction of the cost. Compared to wax casting, directly 3D printing a mold saves you steps and effort, while preserving the most possible detail. If something goes wrong with your casting and you need to re-try, or if you get tired of a model, just melt it down and use the metal again and again!
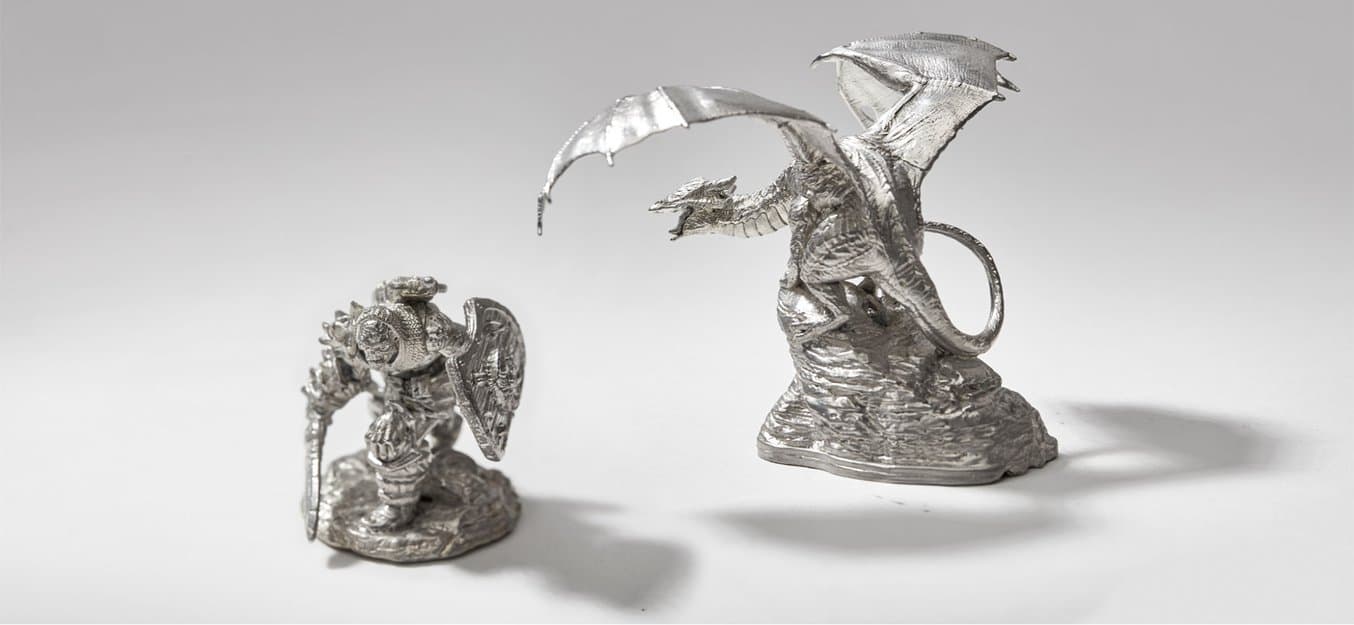
In this tutorial, we’ll walk through a process for making fully metal objects out of pewter for decorative applications such as detailed metal miniatures, jewelry, scale models, and replicas of antiques. We teamed up with Hero Forge to make a mini figure from their online customizer.
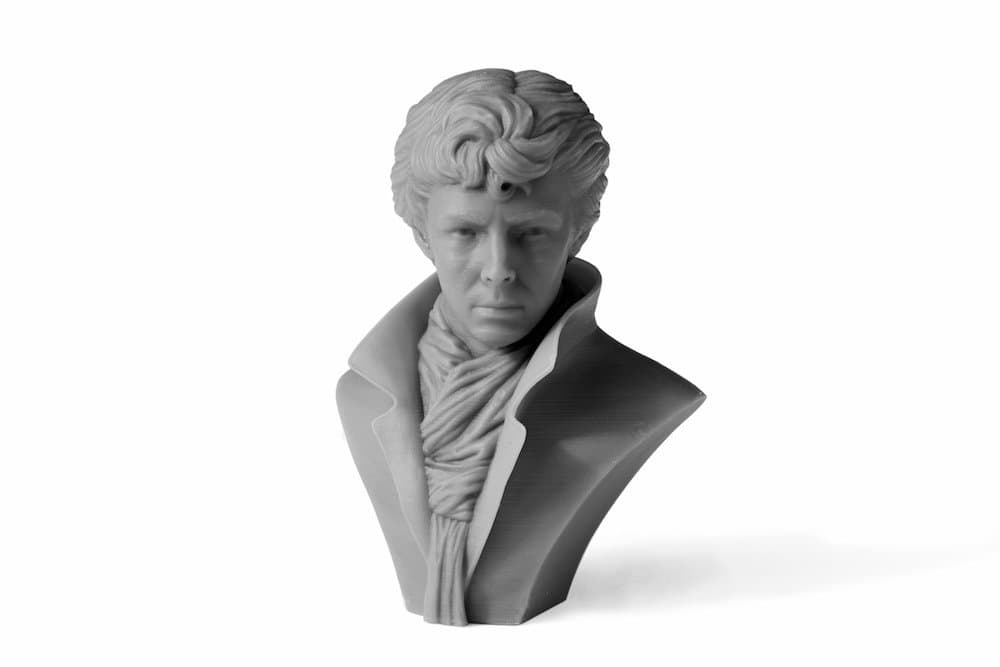
SLA 3D printing is also the most popular process to directly 3D printing miniatures for model making and entertainment. Learn how to bring hyper-realistic digital models to life with 3D printing and request a free sample part.
Request a Free Sample Part
See and feel Formlabs quality firsthand. We’ll ship a free 3D printed sample part to you.
Request a Free Sample PartWhat You’ll Need
- A model of your choosing (STL or OBJ)
- Formlabs SLA 3D printer
- Formlabs High Temp Resin
- Cure chamber (such as Form Cure)
- Autodesk Meshmixer (free)
- CAD software of your choosing
Step 1: Design or Find the Right Model
This guide assumes you’re starting with an STL or OBJ file, which is the format for most custom miniatures and models in digital sculpting, such as in ZBrush. If you’re using a solid model from SolidWorks or Rhino, the workflow will be a bit different.
We started with a mini figure model from Hero Forge, where you can download your own custom configured characters.
Design Tip: Most models will be castable at some scale. The thinnest part of the model should be at least 1.5 mm, and around 15 mm at the thickest. If features are too thin, the metal part will be too fragile. If features are too thick, the casting won’t develop a smooth surface due to shrinkage. Small features under 1.5 mm are fine.
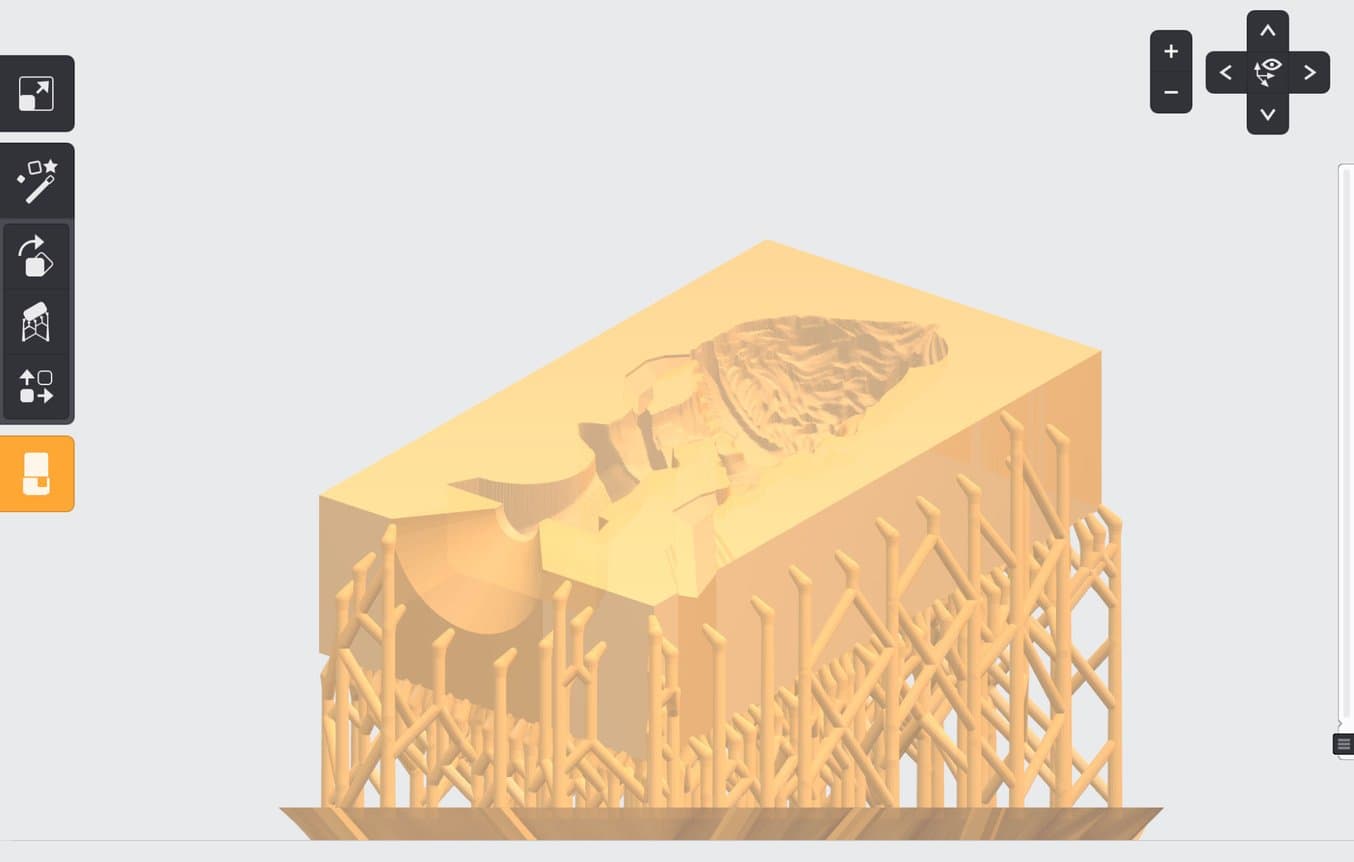
Step 2: Prepare the Pewter Mold Design
You can prepare the pewter mold design using either a sacrificial mold or a pull-apart mold.
Option A: Sacrificial Mold
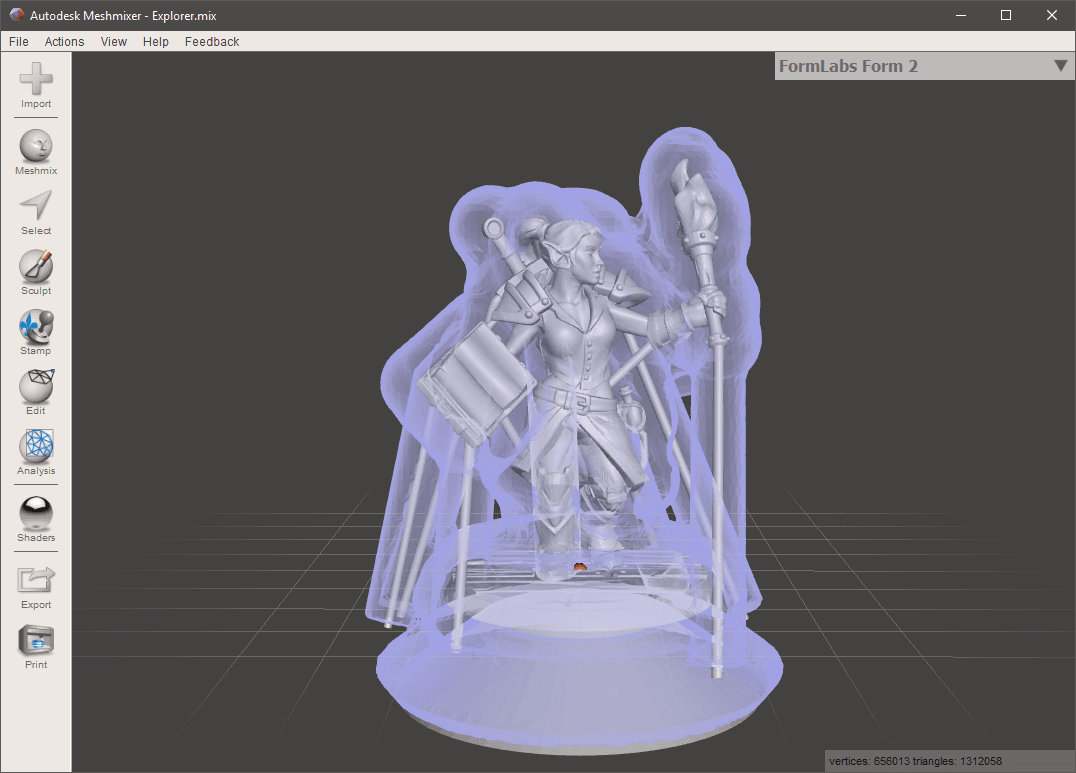
Most models aren’t designed from the get-go to be moldable. Luckily, you can still create almost anything in metal with a shell mold designed to be broken off later. You can make a shell in Meshmixer or 3D editing software like Blender or Maya. Learn how to make a shell mold from an STL in Autodesk's video.
For larger models (2 - 10 cm in tall), making a uniform shell will save a lot of resin, print time, and money. If you are making a shell, it should be uniformly 3 mm thick to withstand the shrinkage and expansion forces from the molten pewter.
For small models (1 - 2 cm tall), designing a uniform thickness shell may not be worth the effort. Simply subtracting your model from a rectangular volume can save design time.
Whatever the size of the model you’re working with, make sure the inside of the mold can be reached by light during post-curing. We split our mold in half to make post-curing simpler, then glued and clamped it back together before pouring.
Option B: Pull-Apart Mold
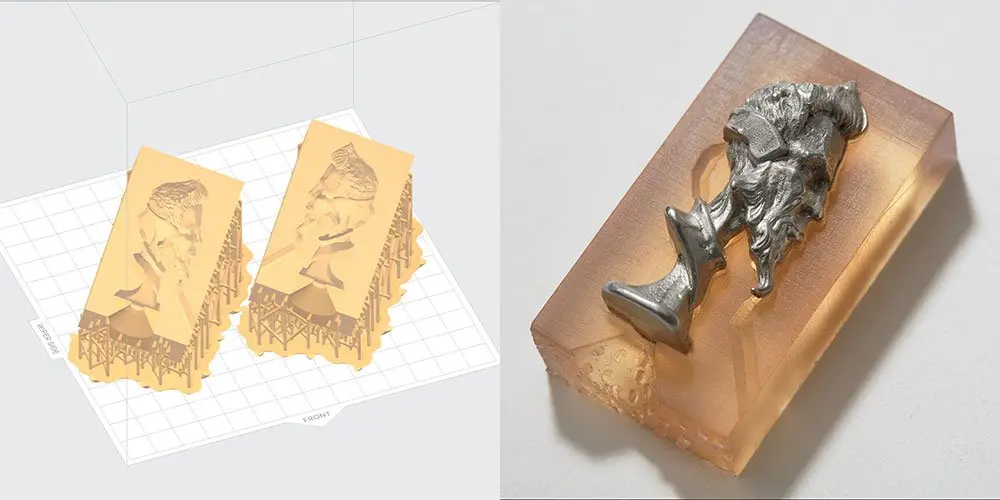
Did you design your mold in CAD to pull apart in halves? A conventionally designed two-sided mold, with draft) and no undercuts), will work well and can even be reused. However, this method puts limits on your design, and most organic models aren’t designed with molding in mind. If you have a mold already designed, move on to step 3.
Metal, Ceramic, and Silicone: Using 3D Printed Molds in Advanced Hybrid Workflows
Watch our webinar to learn how moldmaking using 3D printed masters and reusable or sacrificial molds can allow you to produce parts in porcelain, precious and non-precious metals, silicone and biocompatible flexible materials, and more.
Watch the Webinar NowAir Vents
No matter what type of mold you use, air vents are a must. Metal will flow downwards and air will bubble up, so make sure to add air vents wherever there is an isolated high point in the model (when oriented as it will be filled). Good venting will always improve how well a model fills with pewter.
Step 3: 3D Print the Mold for Casting
3D print your mold in High Temp Resin. Try to orient your model in PreForm such that it doesn’t require internal supports. This is very simple with a two-sided, pull-apart mold: just point the cavity upwards.
With a shell, this can be more challenging, but usually you can find an orientation that does not need interior support. Splitting the shell in half for gluing later is very helpful if you are having trouble finding an orientation that doesn’t require unremovable supports, and also enables uniform post-curing for the interior of the mold.
Step 4: Wash and Post-Cure
In order for High Temp Resin to reach its required thermal properties, it must be fully post-cured. The print will transition from nearly clear to orange as it cures.
Form Cure is designed to make post-curing as fast and easy as possible. Your mold can also be cured in a UV nail spa, which will require several hours of curing time. Heat also accelerates part curing. Learn more about how post-curing works.
Make sure parts are fully dry from washing before use. Moisture will cause air bubbles in your mold and lower the surface quality of your casting.
Tip: Dust the cavity of your mold with graphite powder lubricant. Graphite powder acts as an effective mold release.
Step 5: Clamp the Mold and Pour
Fix your mold in a vise or clamp. You can also partially embed it in a bucket of sand for extra safety, but make sure your air vents are not blocked.
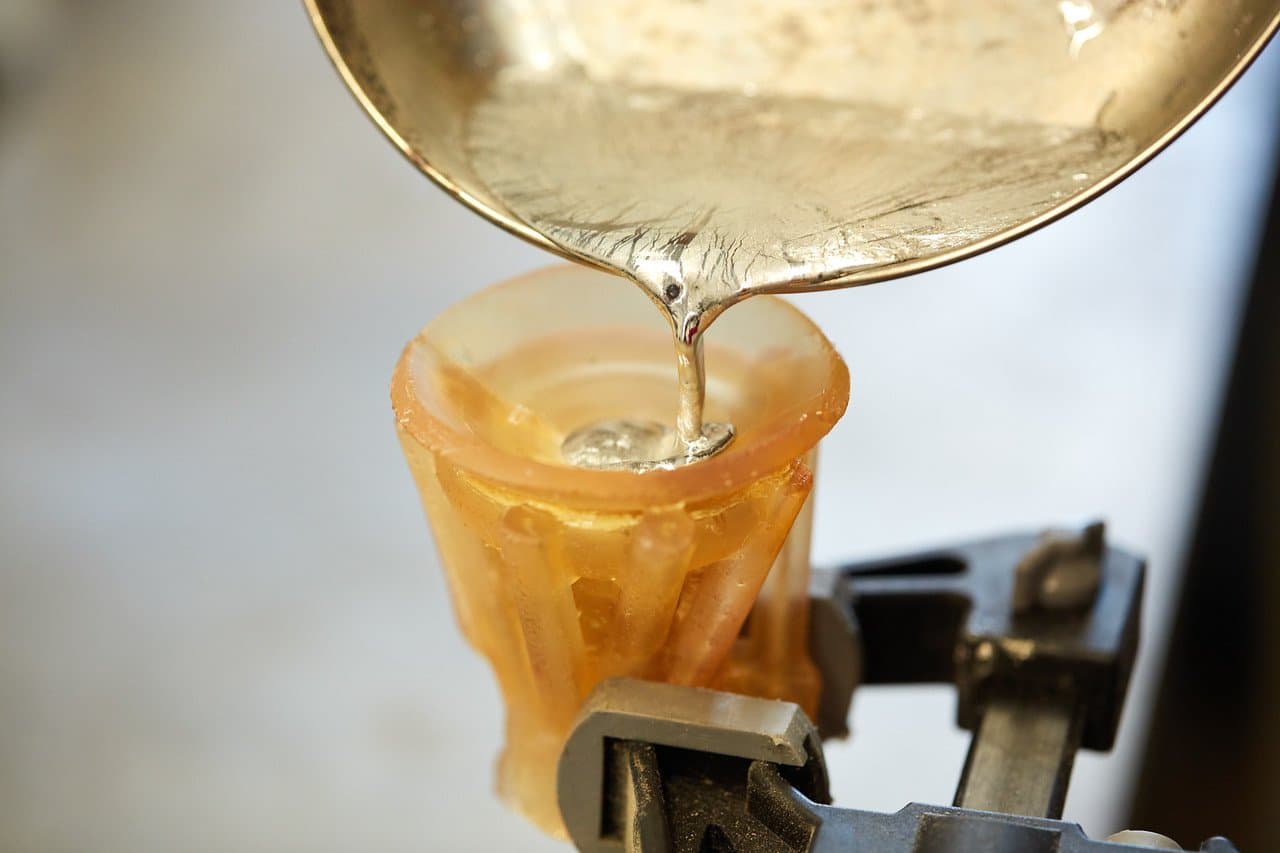
Safety Warning: When casting pewter, make sure no skin is exposed in case of splashing. Wear long pants, closed-toe shoes, long sleeves, and leather gloves. Eye protection is essential. Always cast pewter outdoors or in a well-ventilated area.
There are numerous pewter alloys with different melt temperatures. We use Alloy R98 from Rotometals. R98 is a sturdy pewter alloy which melts around 260 °C.
We melted our pewter ingot on a dedicated small frying pan atop a Primus portable stove, which allowed us to cast outside. As the pewter melts, it will form an oxide layer on top of the puddle. Before pouring, scrape off the oxide with a spoon. Go slowly, and fill your mold in one continuous pour.
It can be tricky to tell when the pewter is at the correct temperature. A low-tech but effective method is to test the molten pewter with a piece of dry wood. If the wood starts smoking, the pewter is too hot and you should let it cool for a few seconds before pouring.
Step 6: Demolding
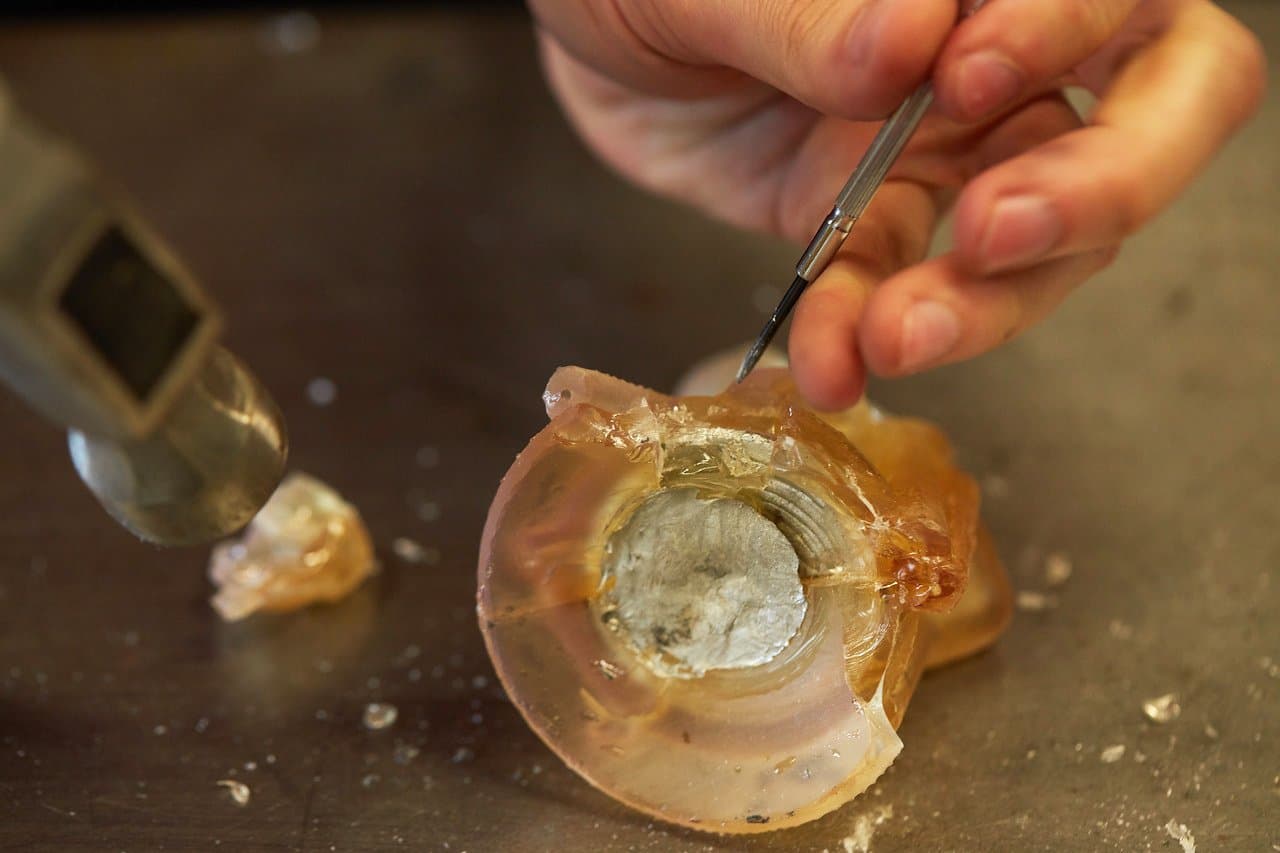
Wait for your mold to completely cool. This can take up to 20 minutes for models with large or thick sections, or only a minute or two for small models. If you are using a sacrificial shell mold, running cold water over the model will help it cool faster.
Finally, demold the part. For a sacrificial shell mold, a small screwdriver works very well as a chisel to break the shell away from the model. Don’t use too much force, or you risk chiselling into your part.
The Power of Pewter Casting
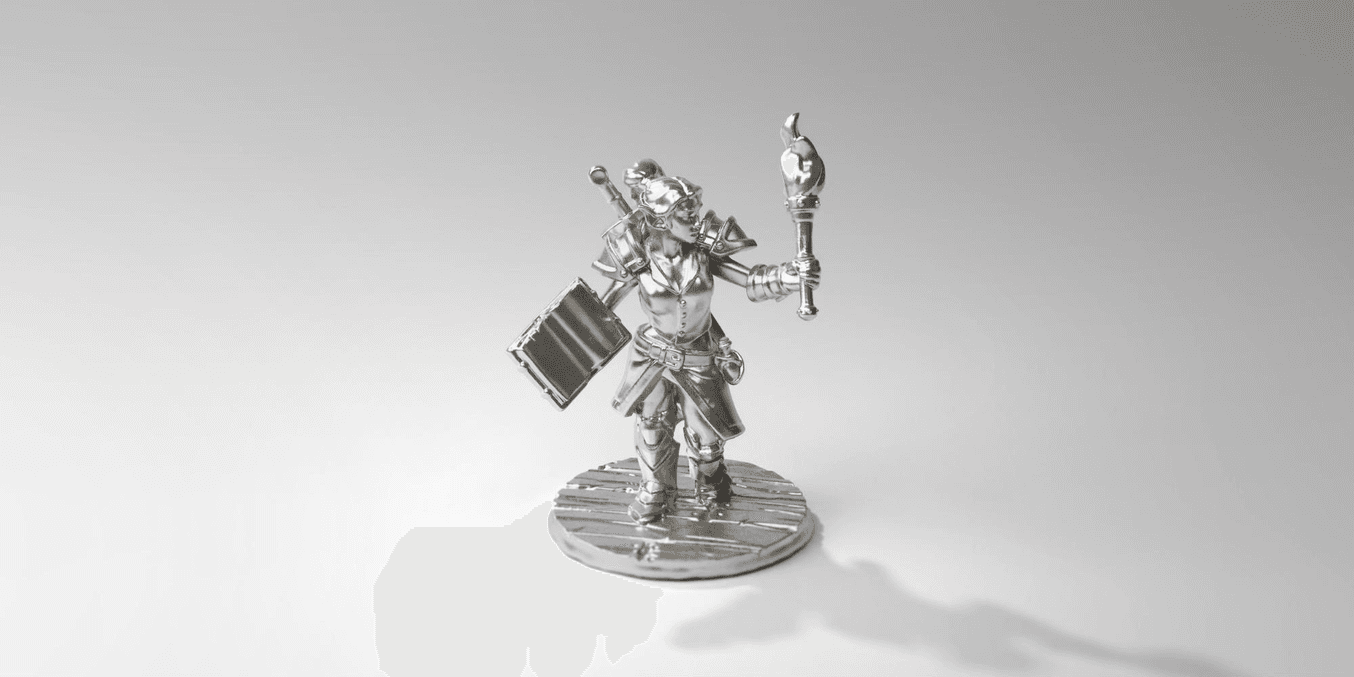
Pewter metal miniatures have their own unique color and patina. The relatively soft alloy can be buffed and polished by hand or with a rotary tool to achieve a high gloss finish. The parts can be easily electroplated in precious metals to simulate gold or silver for beautiful jewelry, or nickel plated for higher mechanical strength. Create replica keys and hood ornaments, the possibilities are endless.
Plunk down your beautiful 3D printed custom miniature with pride! Try making your own heroes in pewter, and show us your results in the forums.
Try High Temp Resin for Yourself

High Temp Resin offers a heat deflection temperature (HDT) of 238 °C @ 0.45 MPa, ideal for static applications that will undergo higher temperatures.