
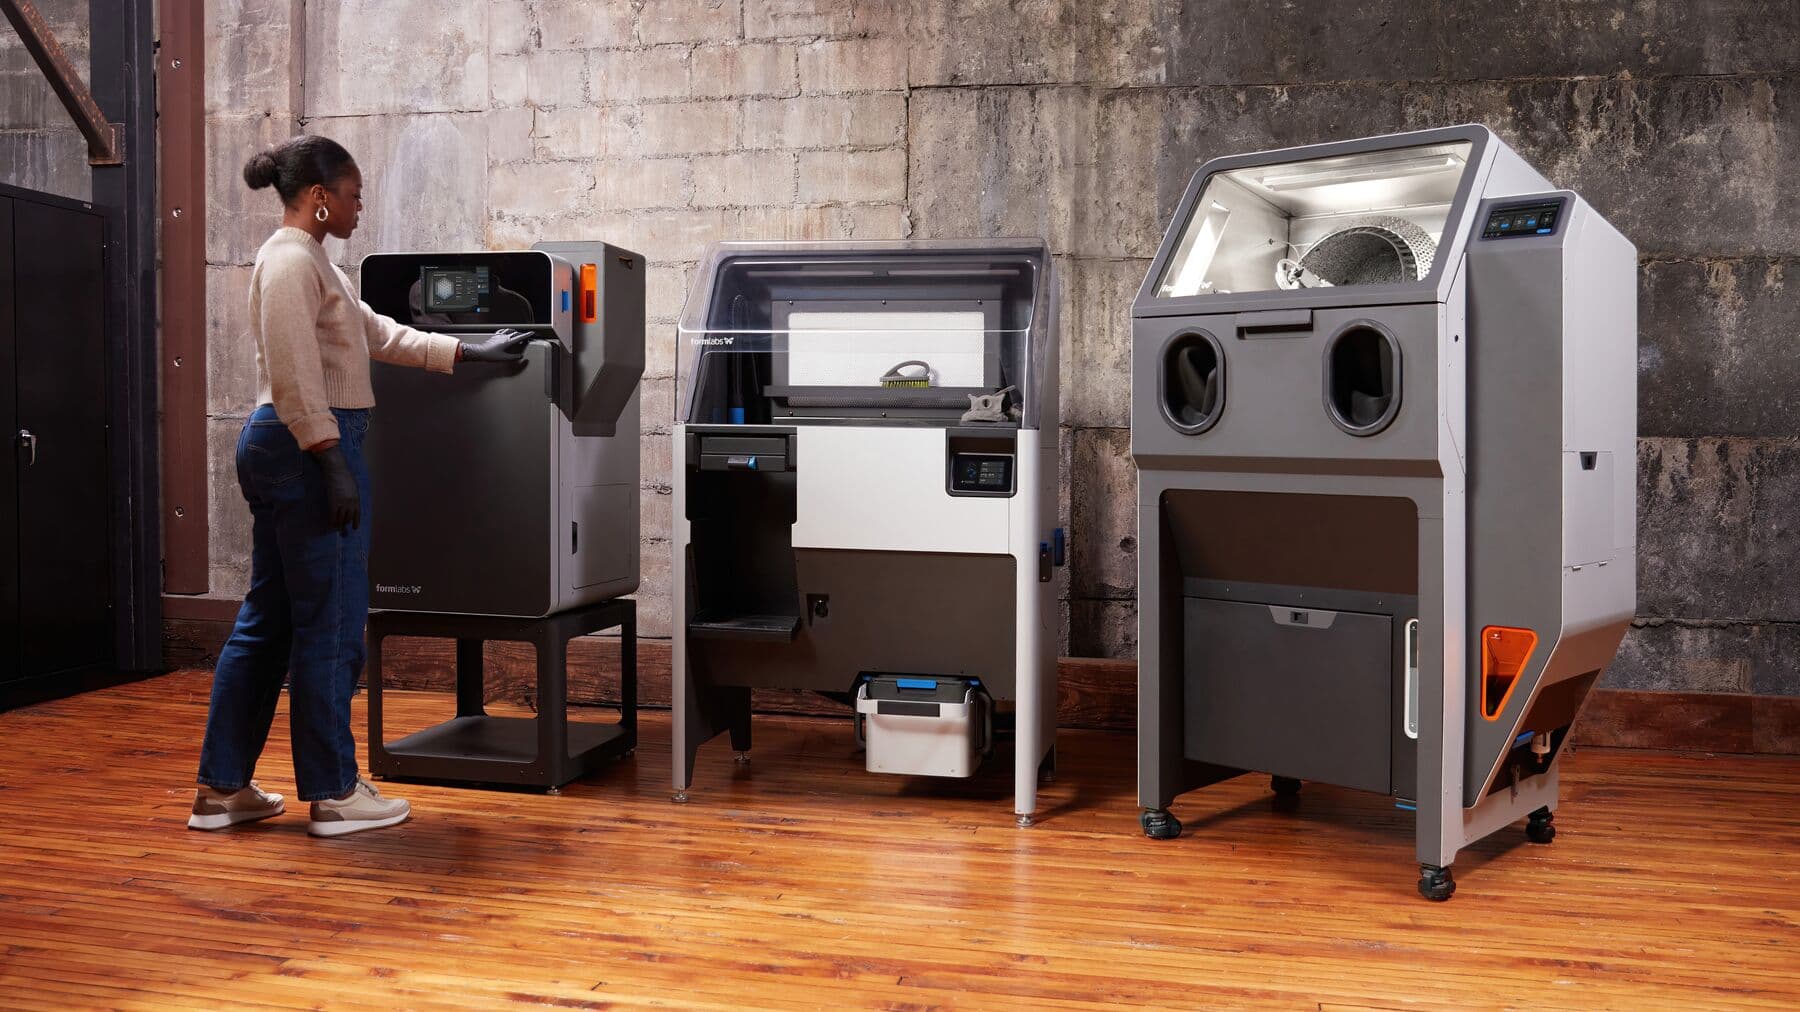
Fuse Series Technology and Workflow Overview
Fuse Series SLS 3D printers are not just printers, they are an entire ecosystem for turning CAD files into fully-functional end-use parts with industrial thermoplastics. Let’s take a look at the workflow for setting up, printing, extracting parts, and reclaiming material from prints.
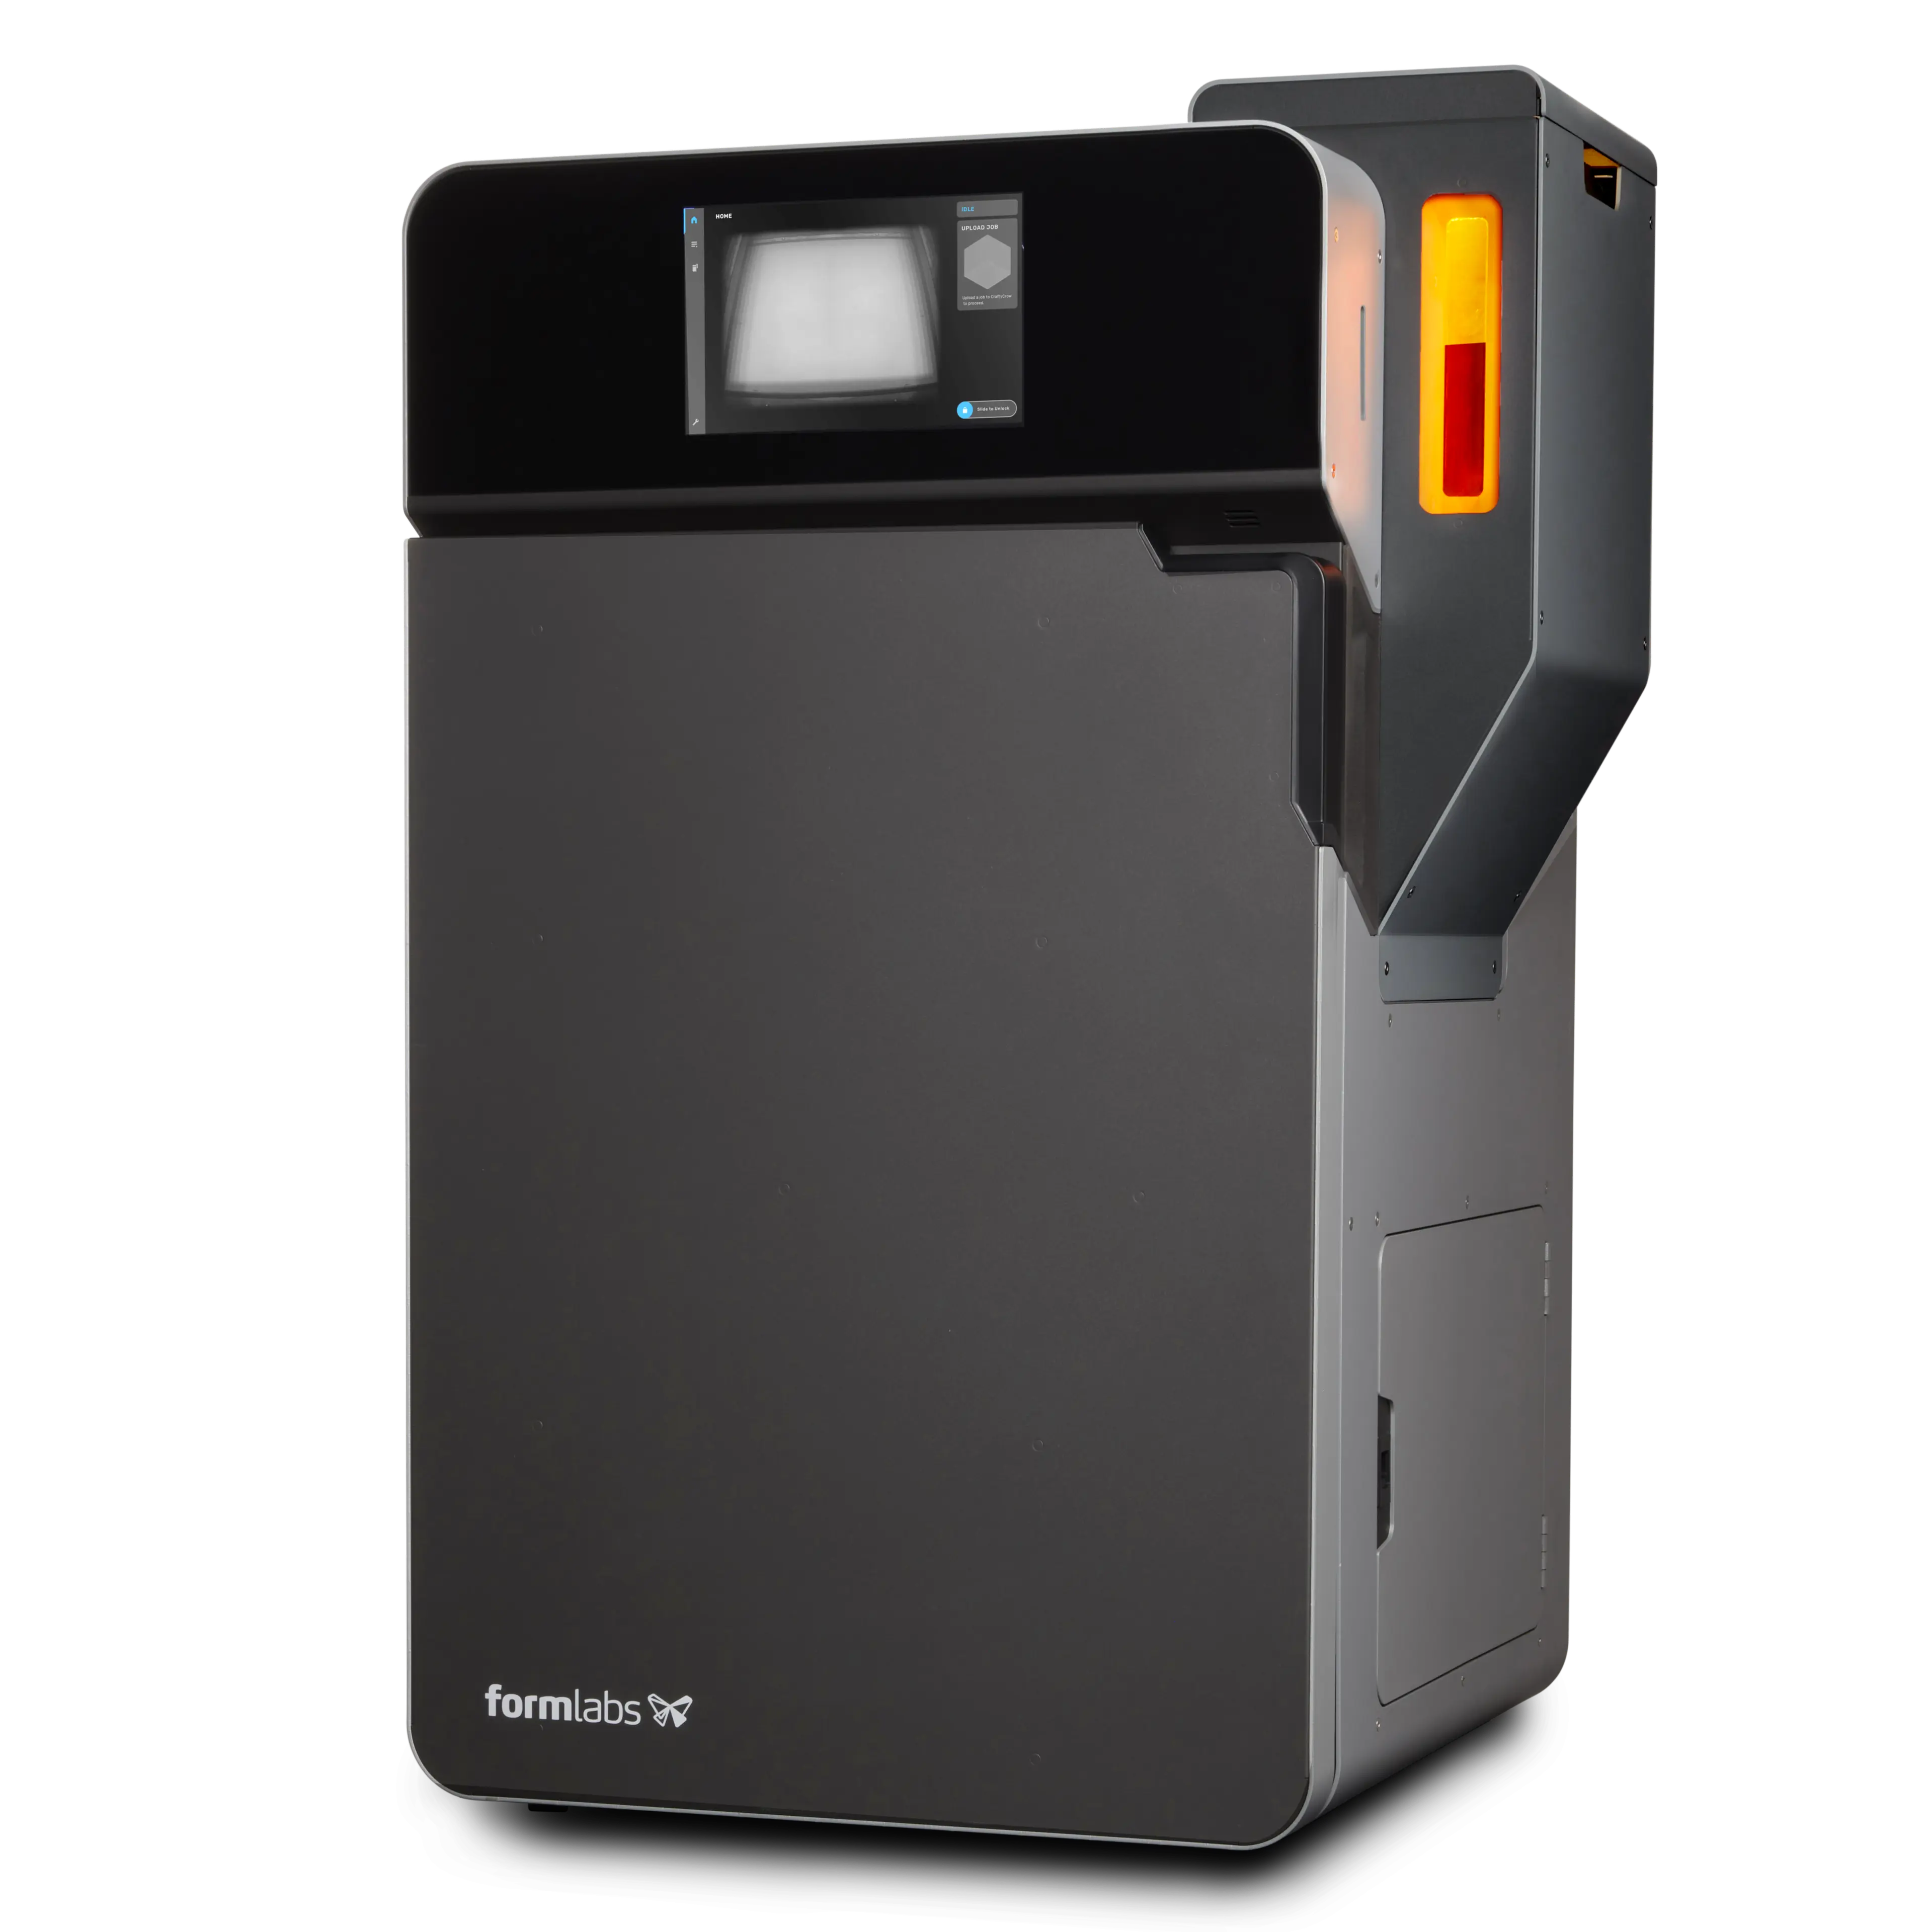
Fuse 1+ 30W
TRULY RAPID SLS 3D PRINTING, FOR HIGH PERFORMANCE PARTS IN HOURS, NOT DAYS.
Designed for maximum output and minimum waste, Fuse 1+ 30W is our compact SLS 3D printer that packs an industrial punch. Unlock unprecedented print speeds and material enablement to deliver truly rapid production in-house.
| TECH SPEC HIGHLIGHTS | |
|---|---|
| BUILD VOLUME (W X D X H) |
165 x 165 x 300 mm (6.5 x 6.5 x 11.8 in) |
| LAYER THICKNESS |
110 microns (0.004 in) |
| STARTUP TIME | < 60 minutes |
| LASER TYPE | Ytterbium Fiber |
| LASER SPECIFICATIONS | EN 60825-1: 2014 1065 nm Maximum 30 Watts 3.24 mrad beam divergence (nominal, full angle) Class 1 Laser Product |
| LASER SPOT SIZE (FWHM) |
247 microns (0.0097 in) |
| HOPPER CAPACITY | 14.5 L |
| BUILD CHAMBER | Modular, compatible with Fuse Series and Fuse Sift |
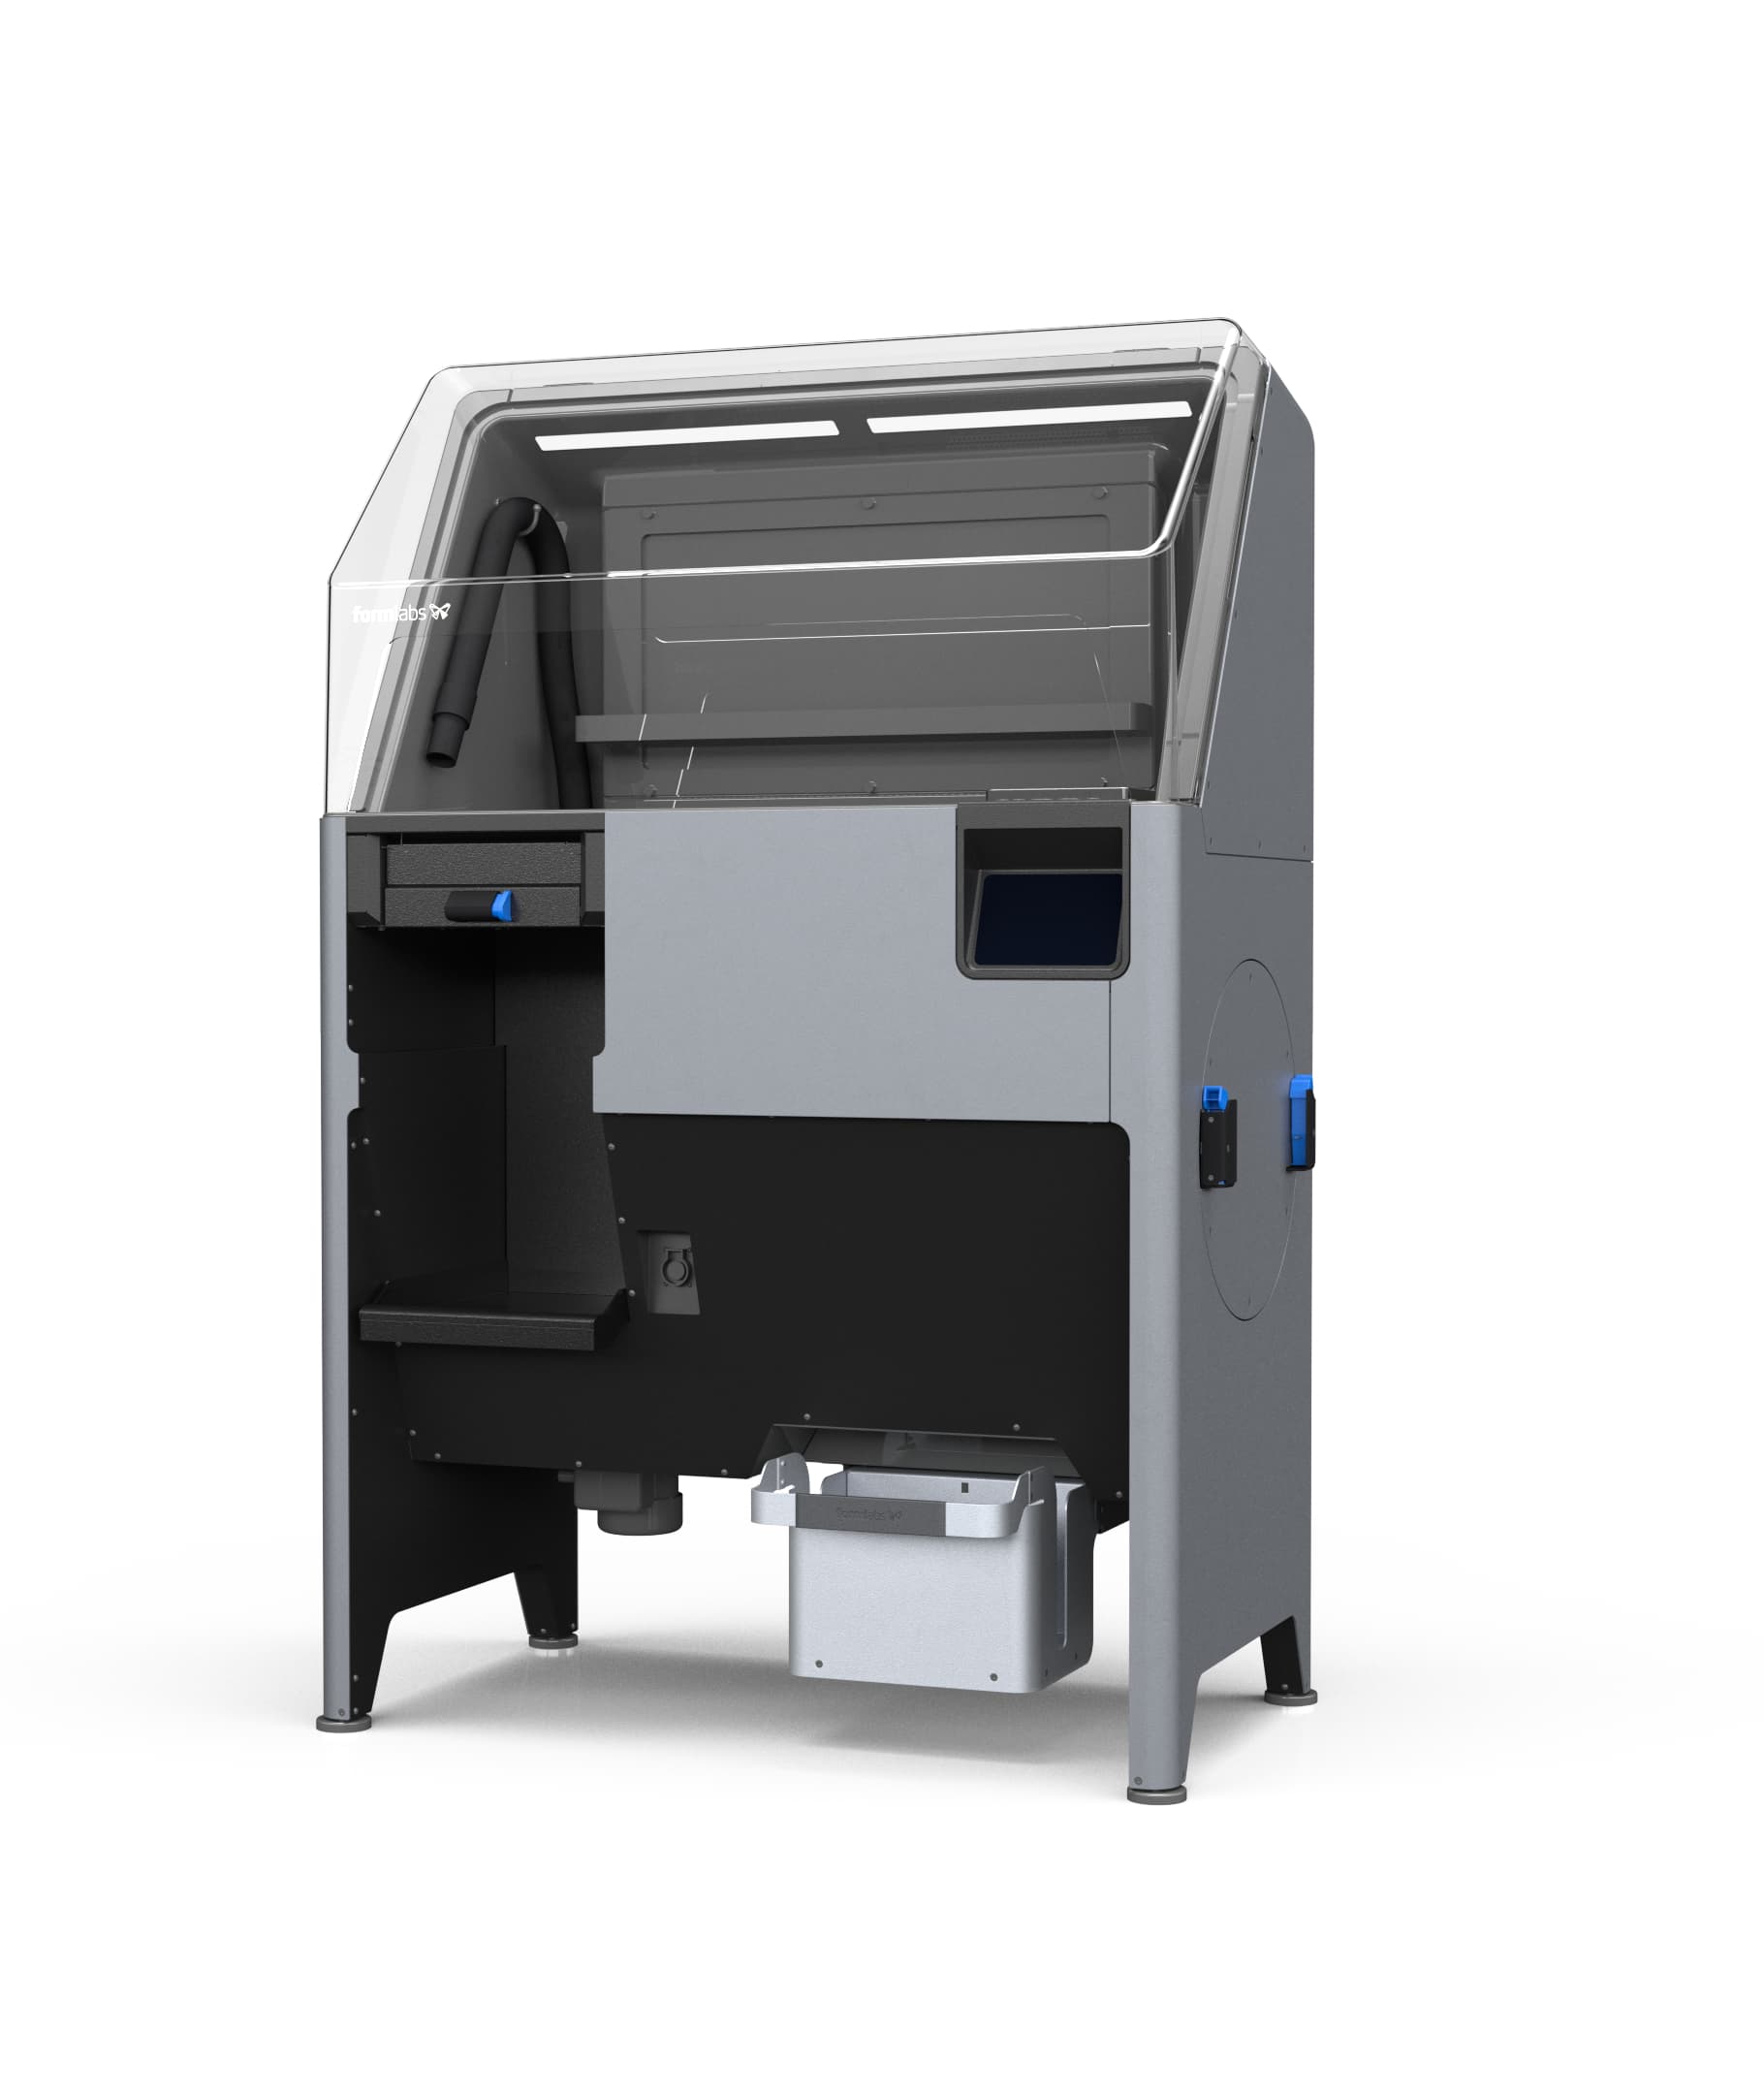
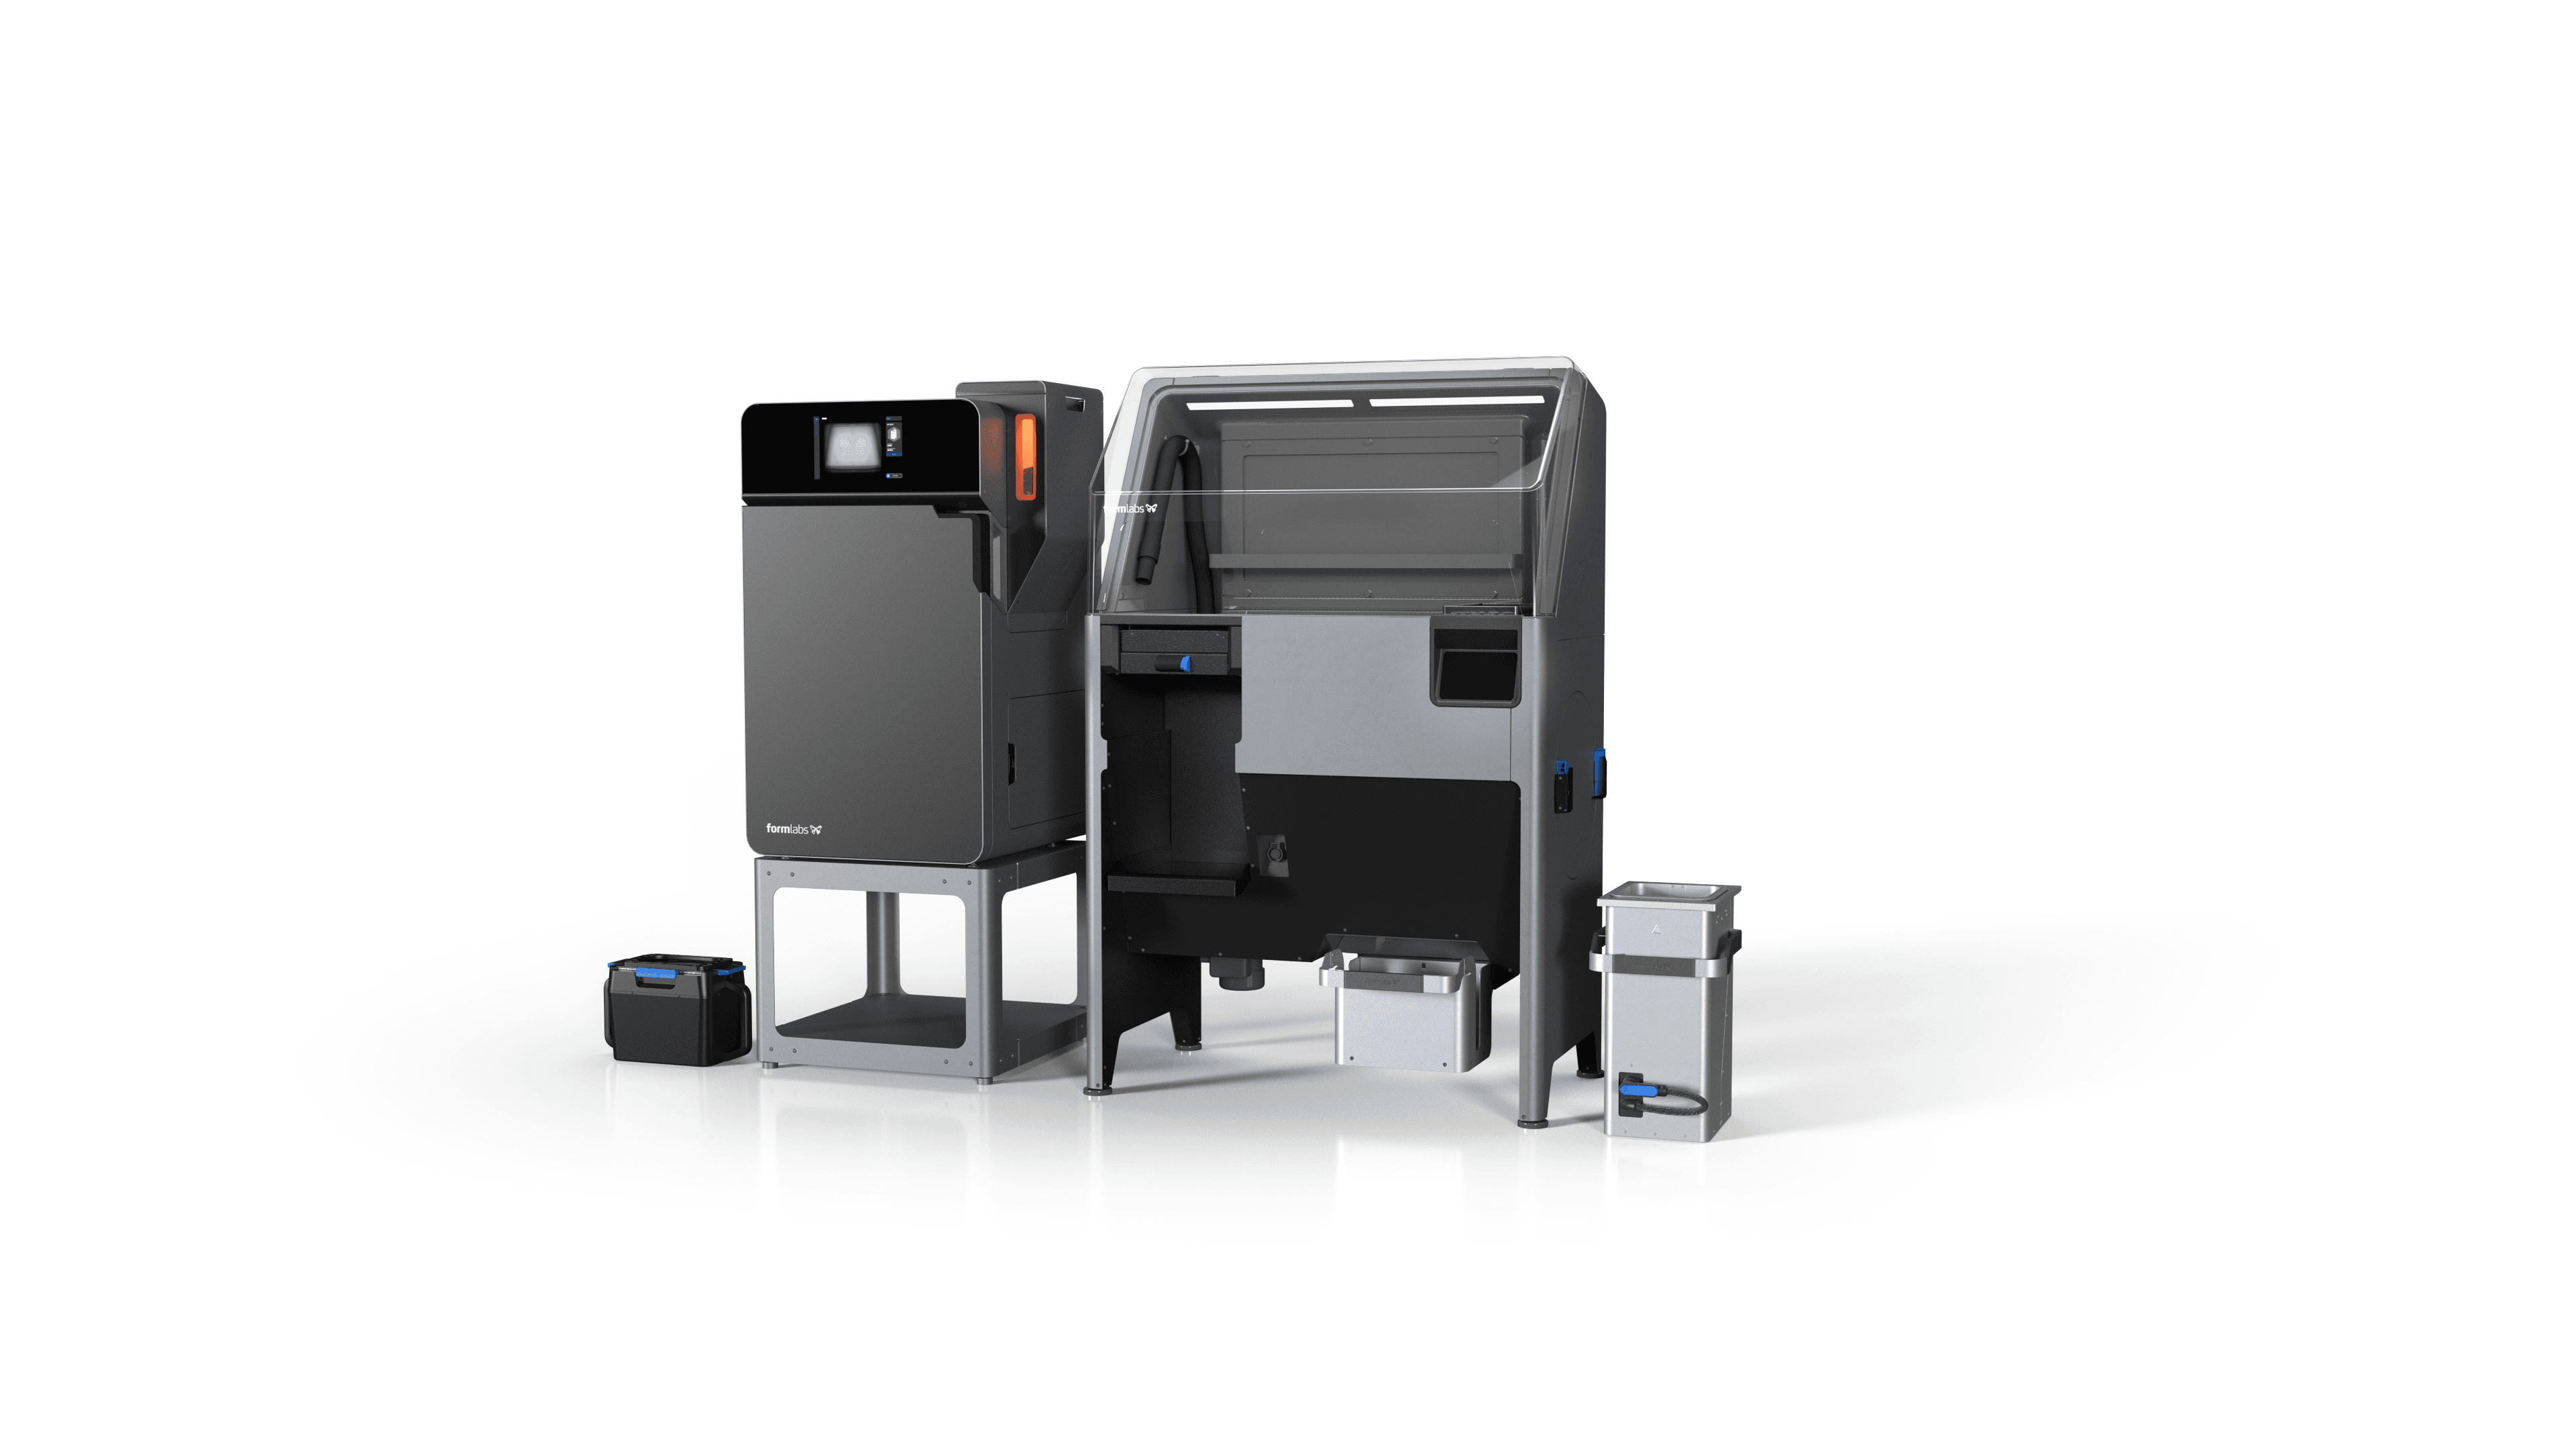
Fuse Sift
The Fuse Sift is the best sidekick an SLS printer could ask for, combining powder reclamation with part extraction, powder, storage, and mixing in a single freestanding device. A negative air pressure system prevents powder from escaping into your workshop or studio while also enabling open access under the hood and easy cleanup with the integrated vacuum hose. Fuse Sift will dispense and mix used and new powder automatically so you can reduce waste and control your powder supply. No other SLS system on the market today provides this level of functionality from one device.
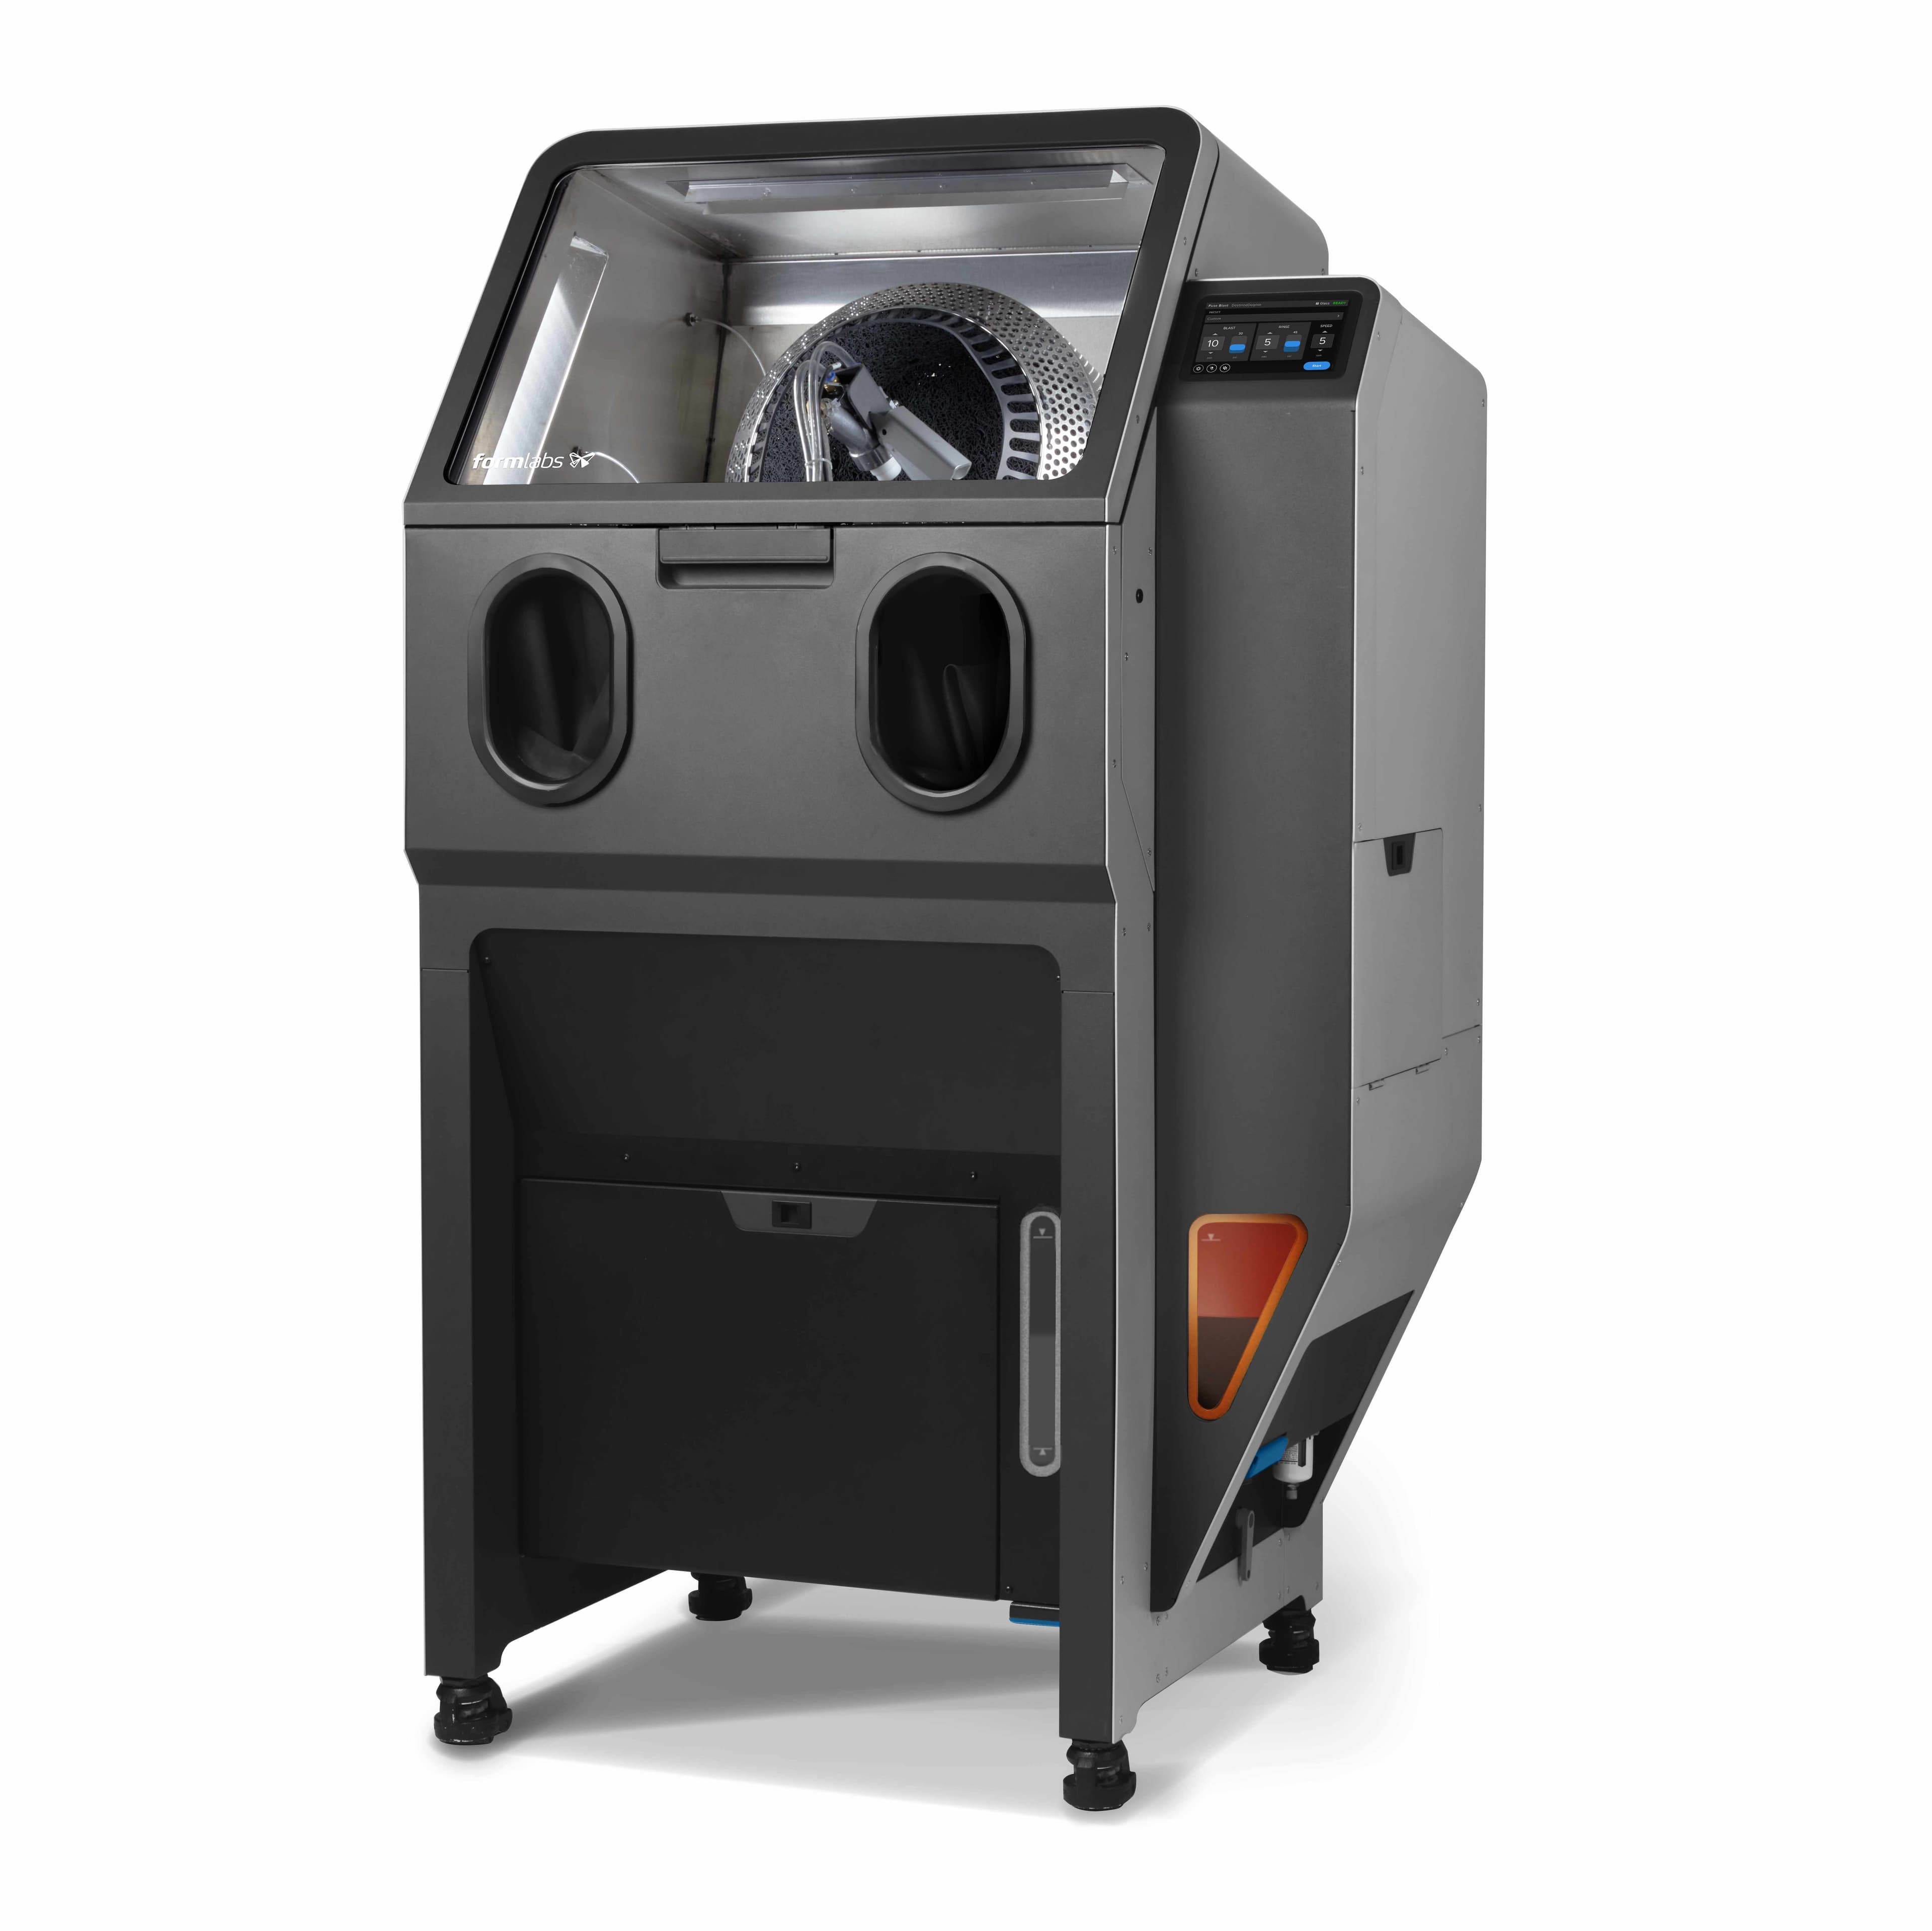
Fuse Blast
Fuse Blast is an advanced automated cleaning solution for SLS parts that quickly removes powder and consistently delivers professional parts that are clean to the touch in as little as 15 minutes, and offers an optional polishing function.
Fuse Depowdering Kit
Perfect for low-volume users, this all-in-one manual post-processing kit for SLS is an alternative to Fuse Sift that enables you to easily extract parts and recover and mix the used powder to prepare for the next print, all at an affordable price point. The Fuse Depowdering Kit also enables you to seamlessly switch between materials on Fuse Series printers without requiring you to clean Fuse Sift.

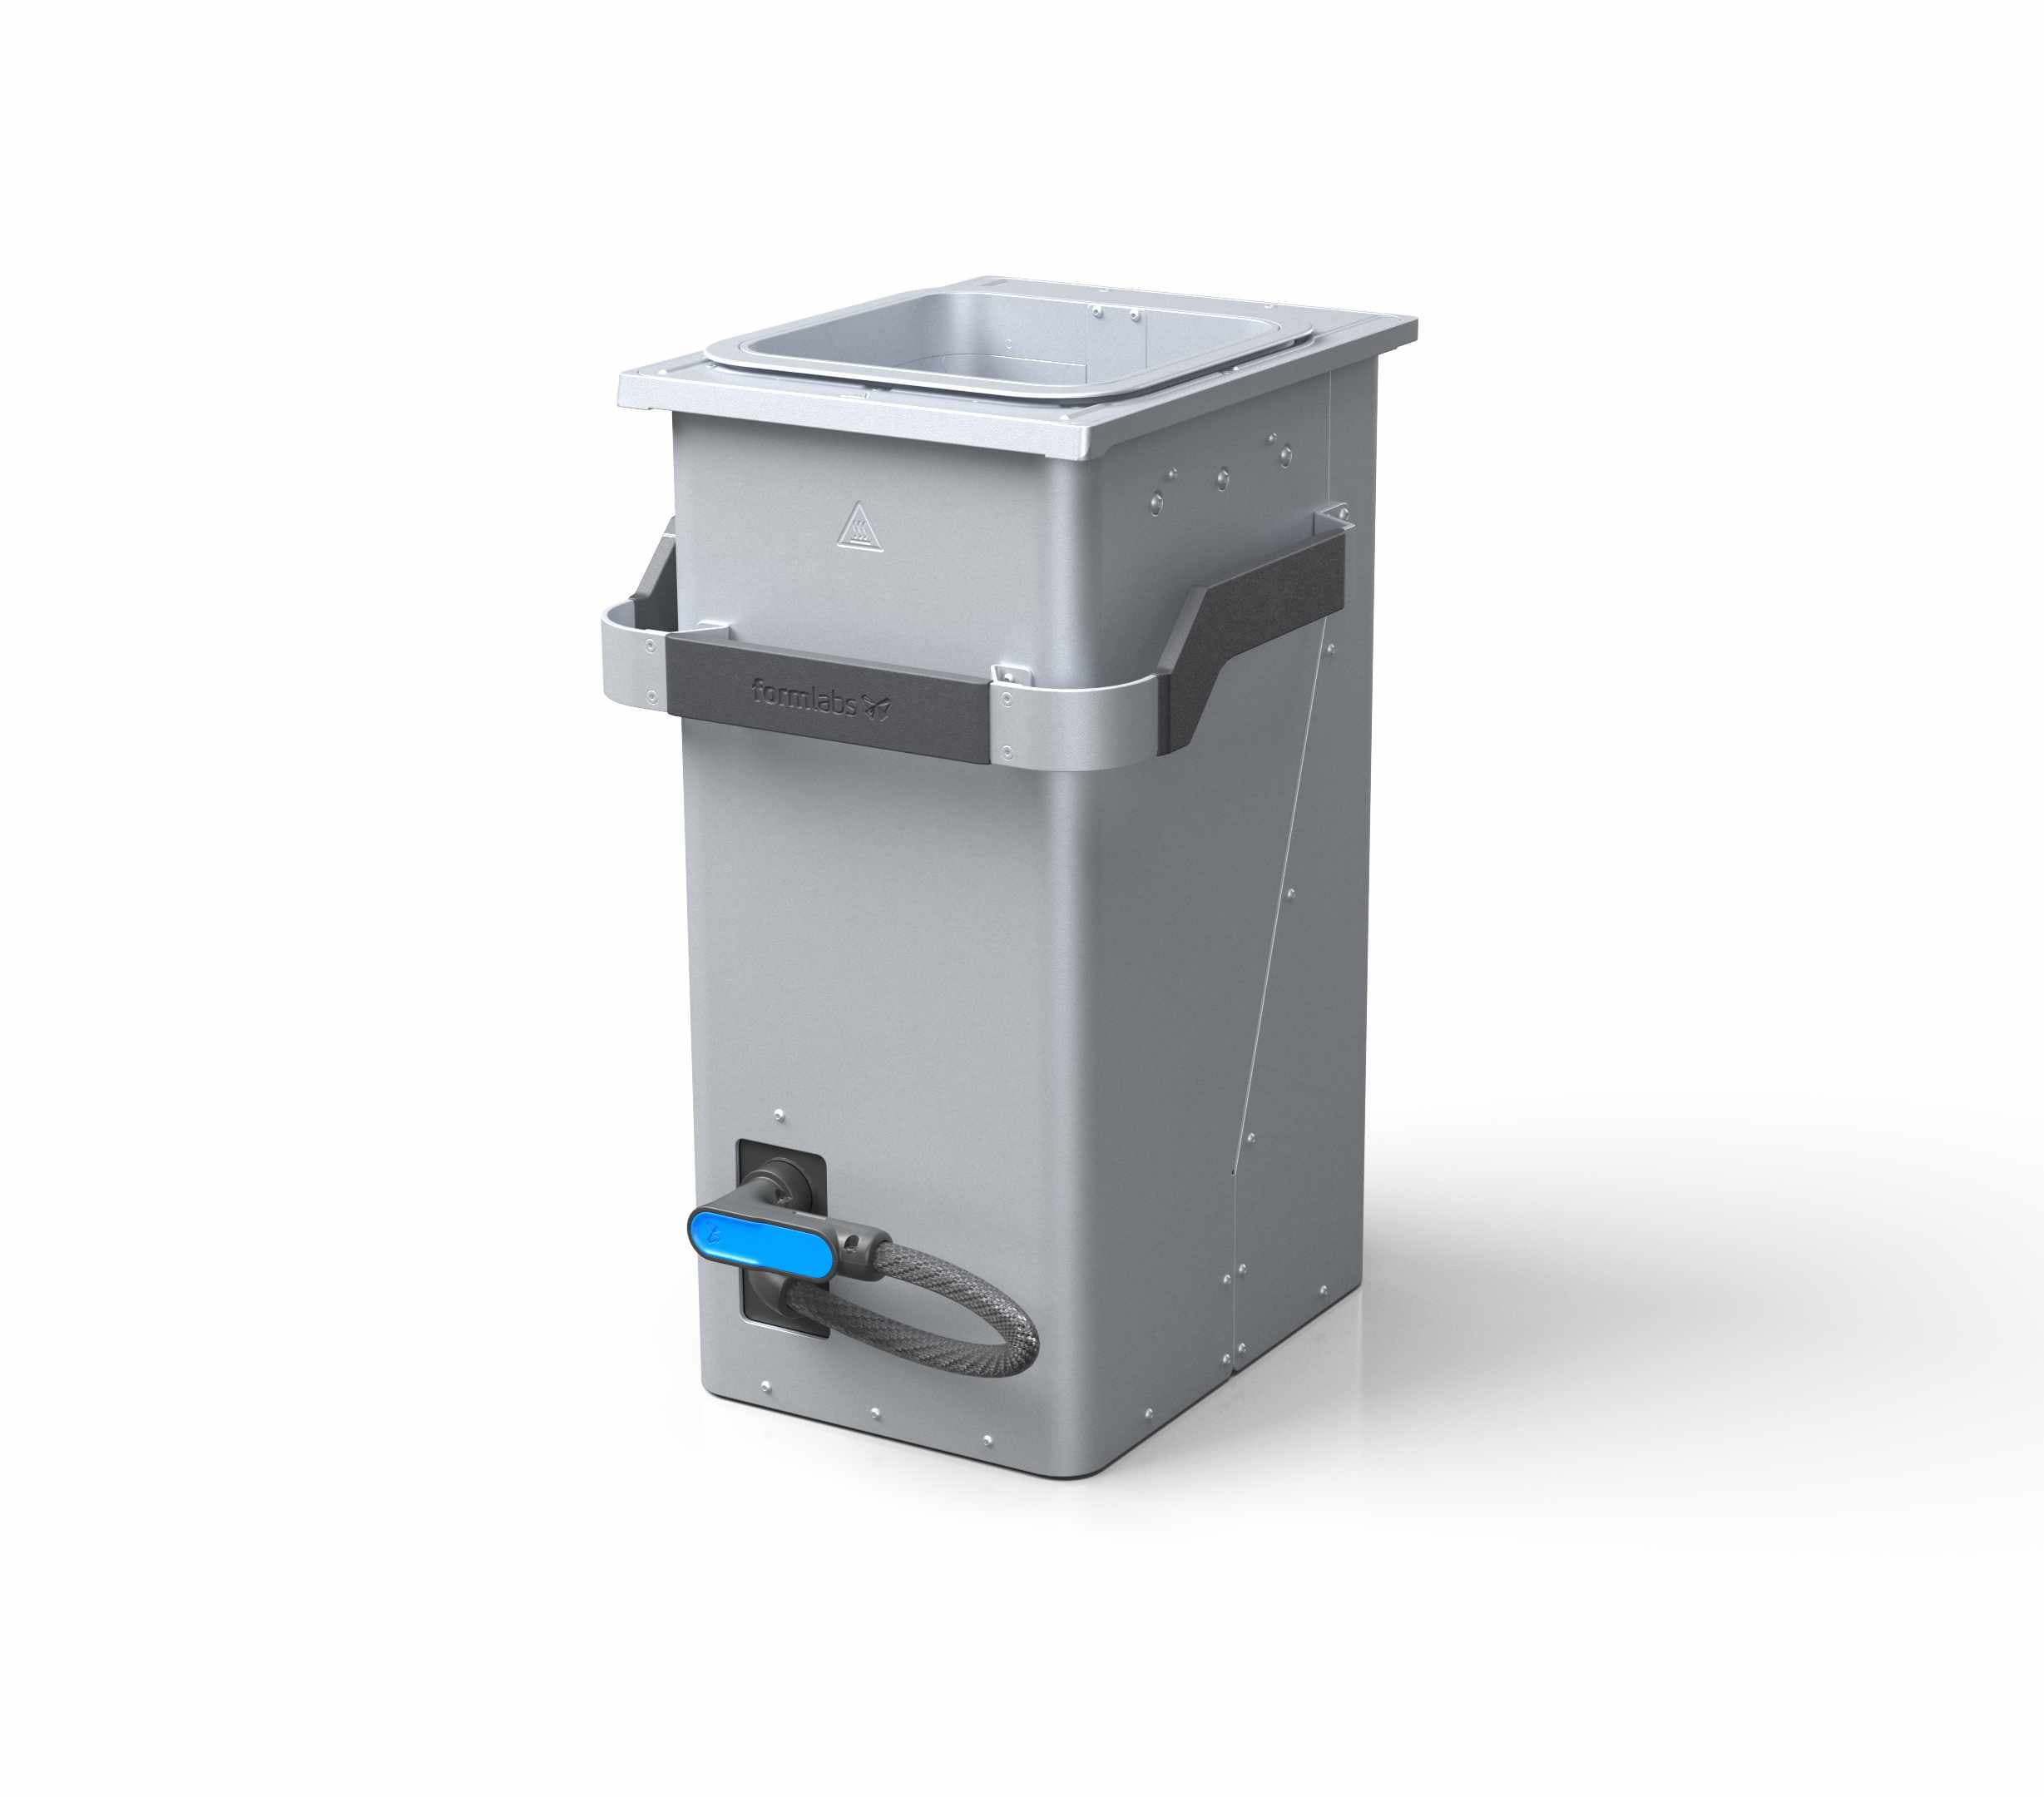
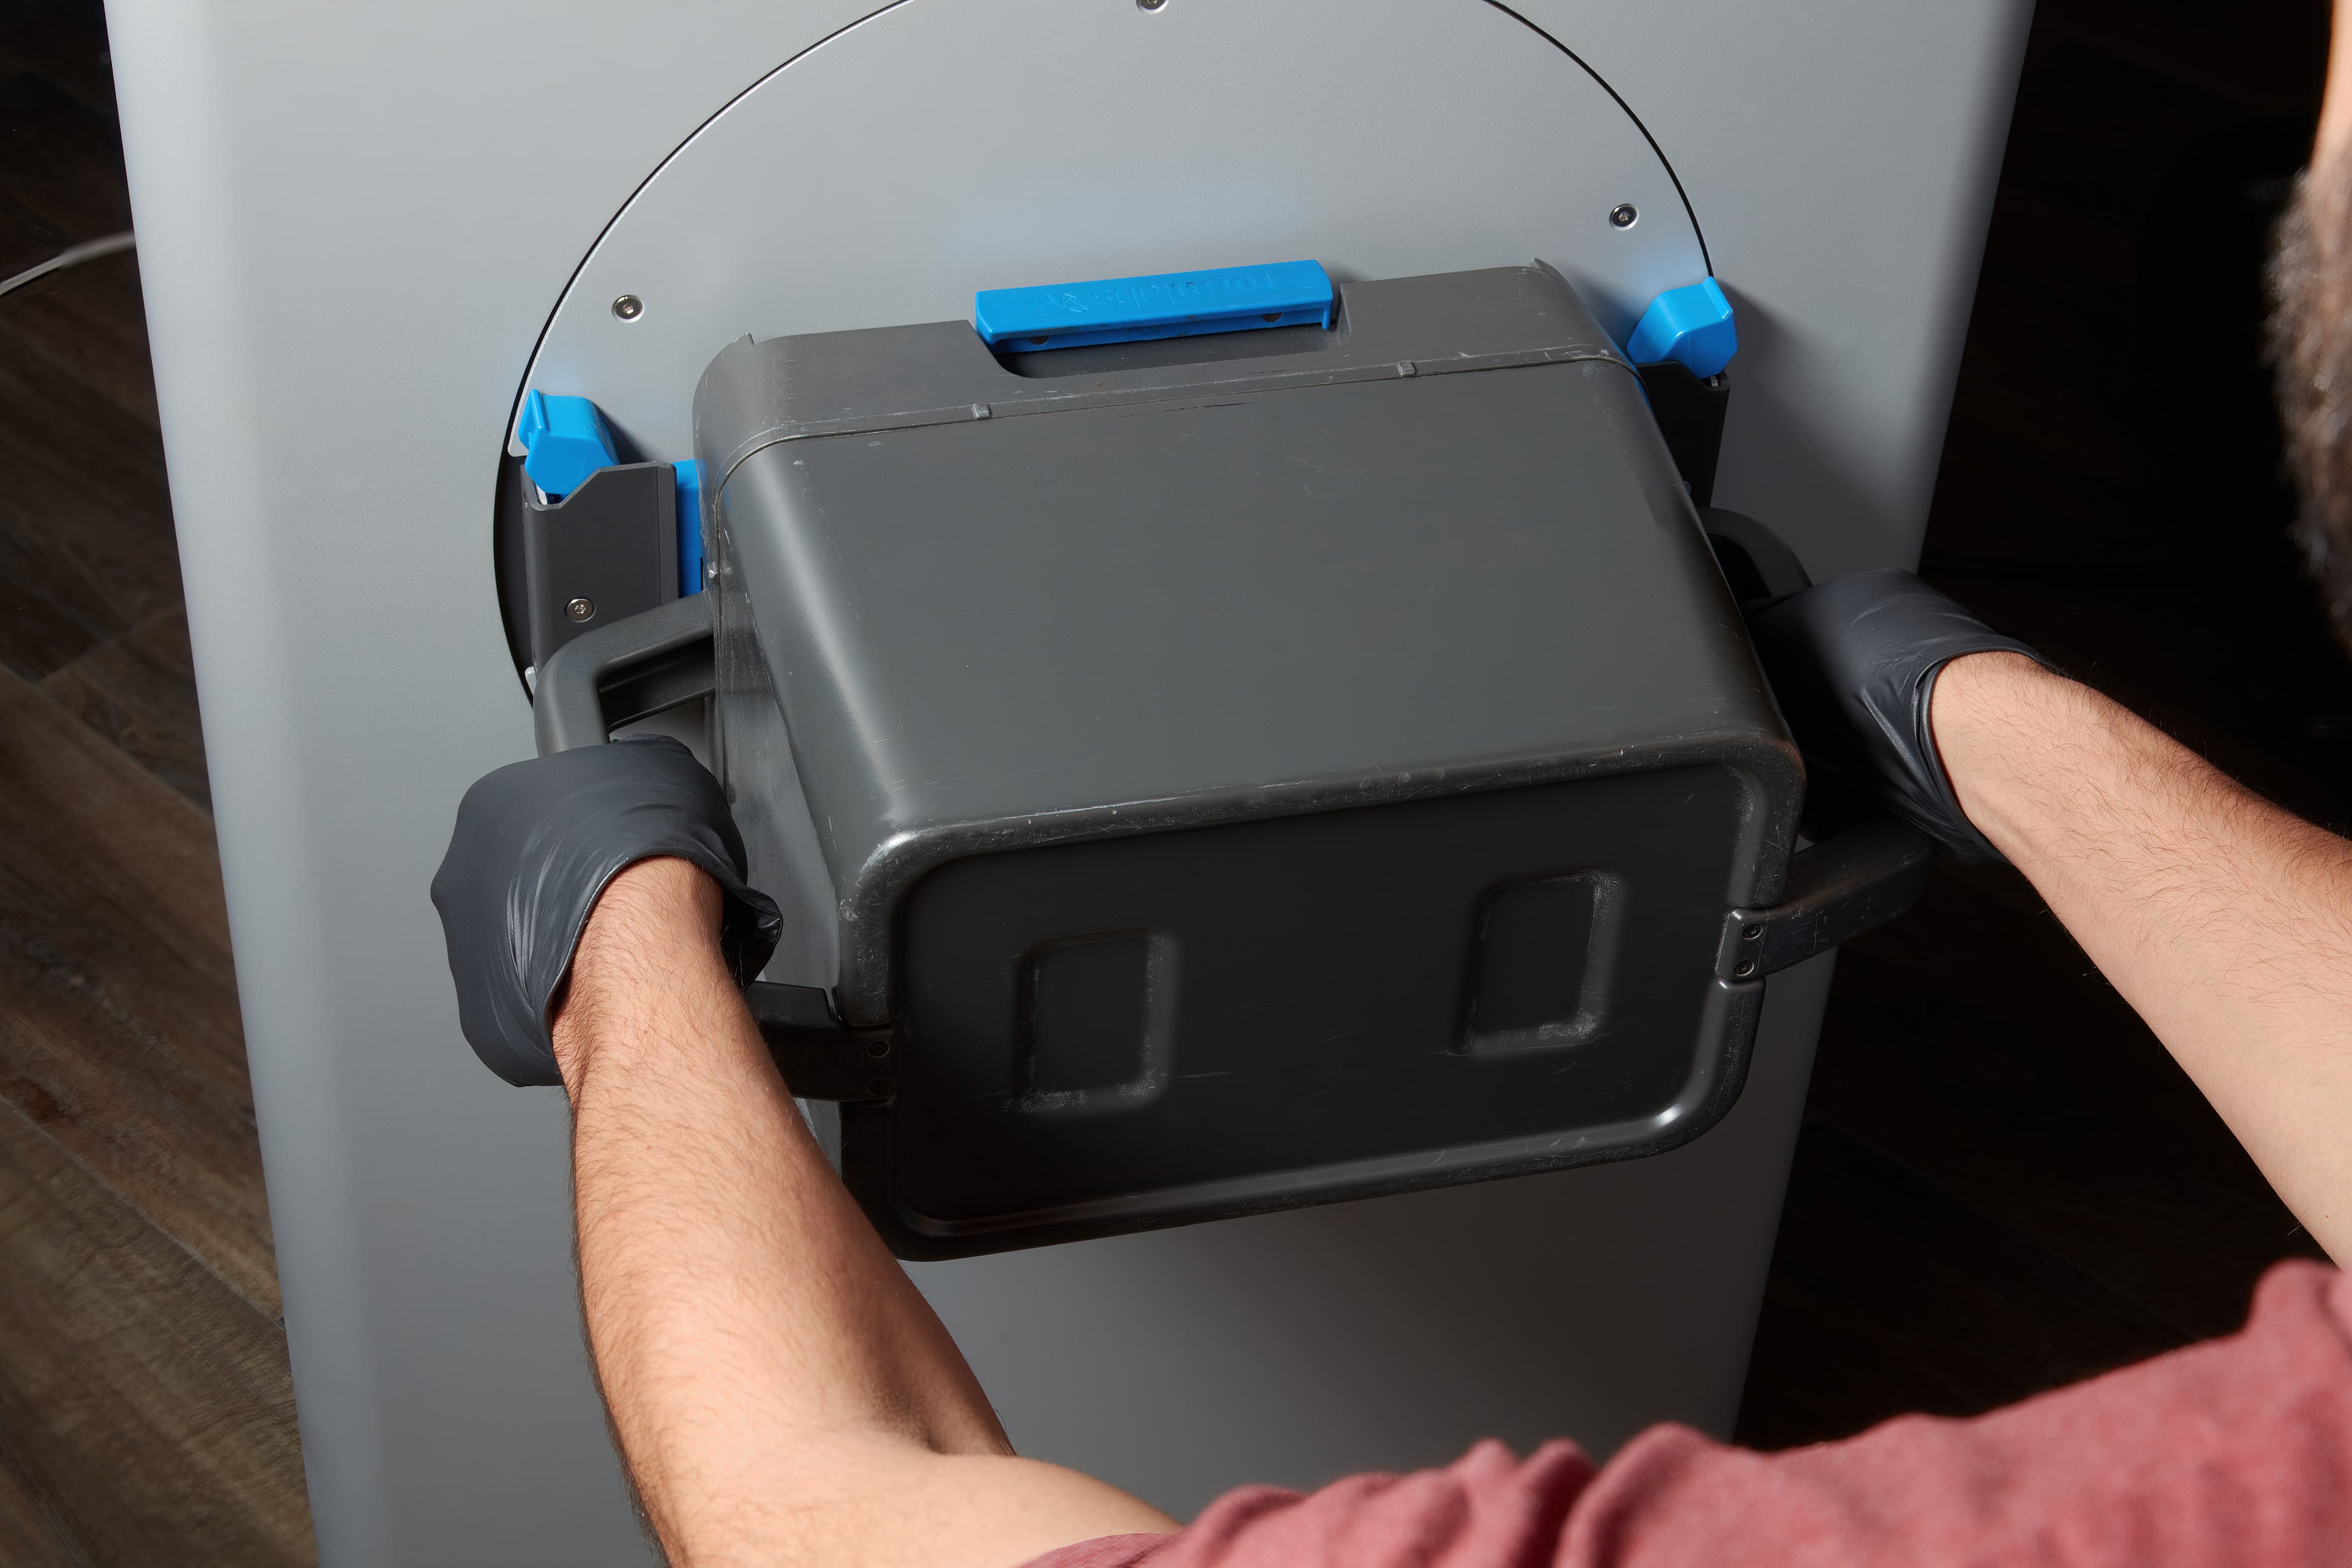
Build Chamber
SLS 3D printing uses a fiber laser and a moving print platform to fuse powder into near-isotropic parts. The build chamber, a key component of the process, is the container into which the print bed lowers the cake of sintered parts and unsintered powder while printing. After completing a print, you can remove the build chamber from any Fuse Series printer and load it into the Fuse Sift for cooling, part extraction, and material reclamation. Keeping an extra build chamber in your toolkit allows you to run a new print shortly after a previous job is completed, similar to working with multiple build platforms on our stereolithography printers like the Form 3. Each Fuse Series printer includes one build chamber, and additional units are available for purchase.
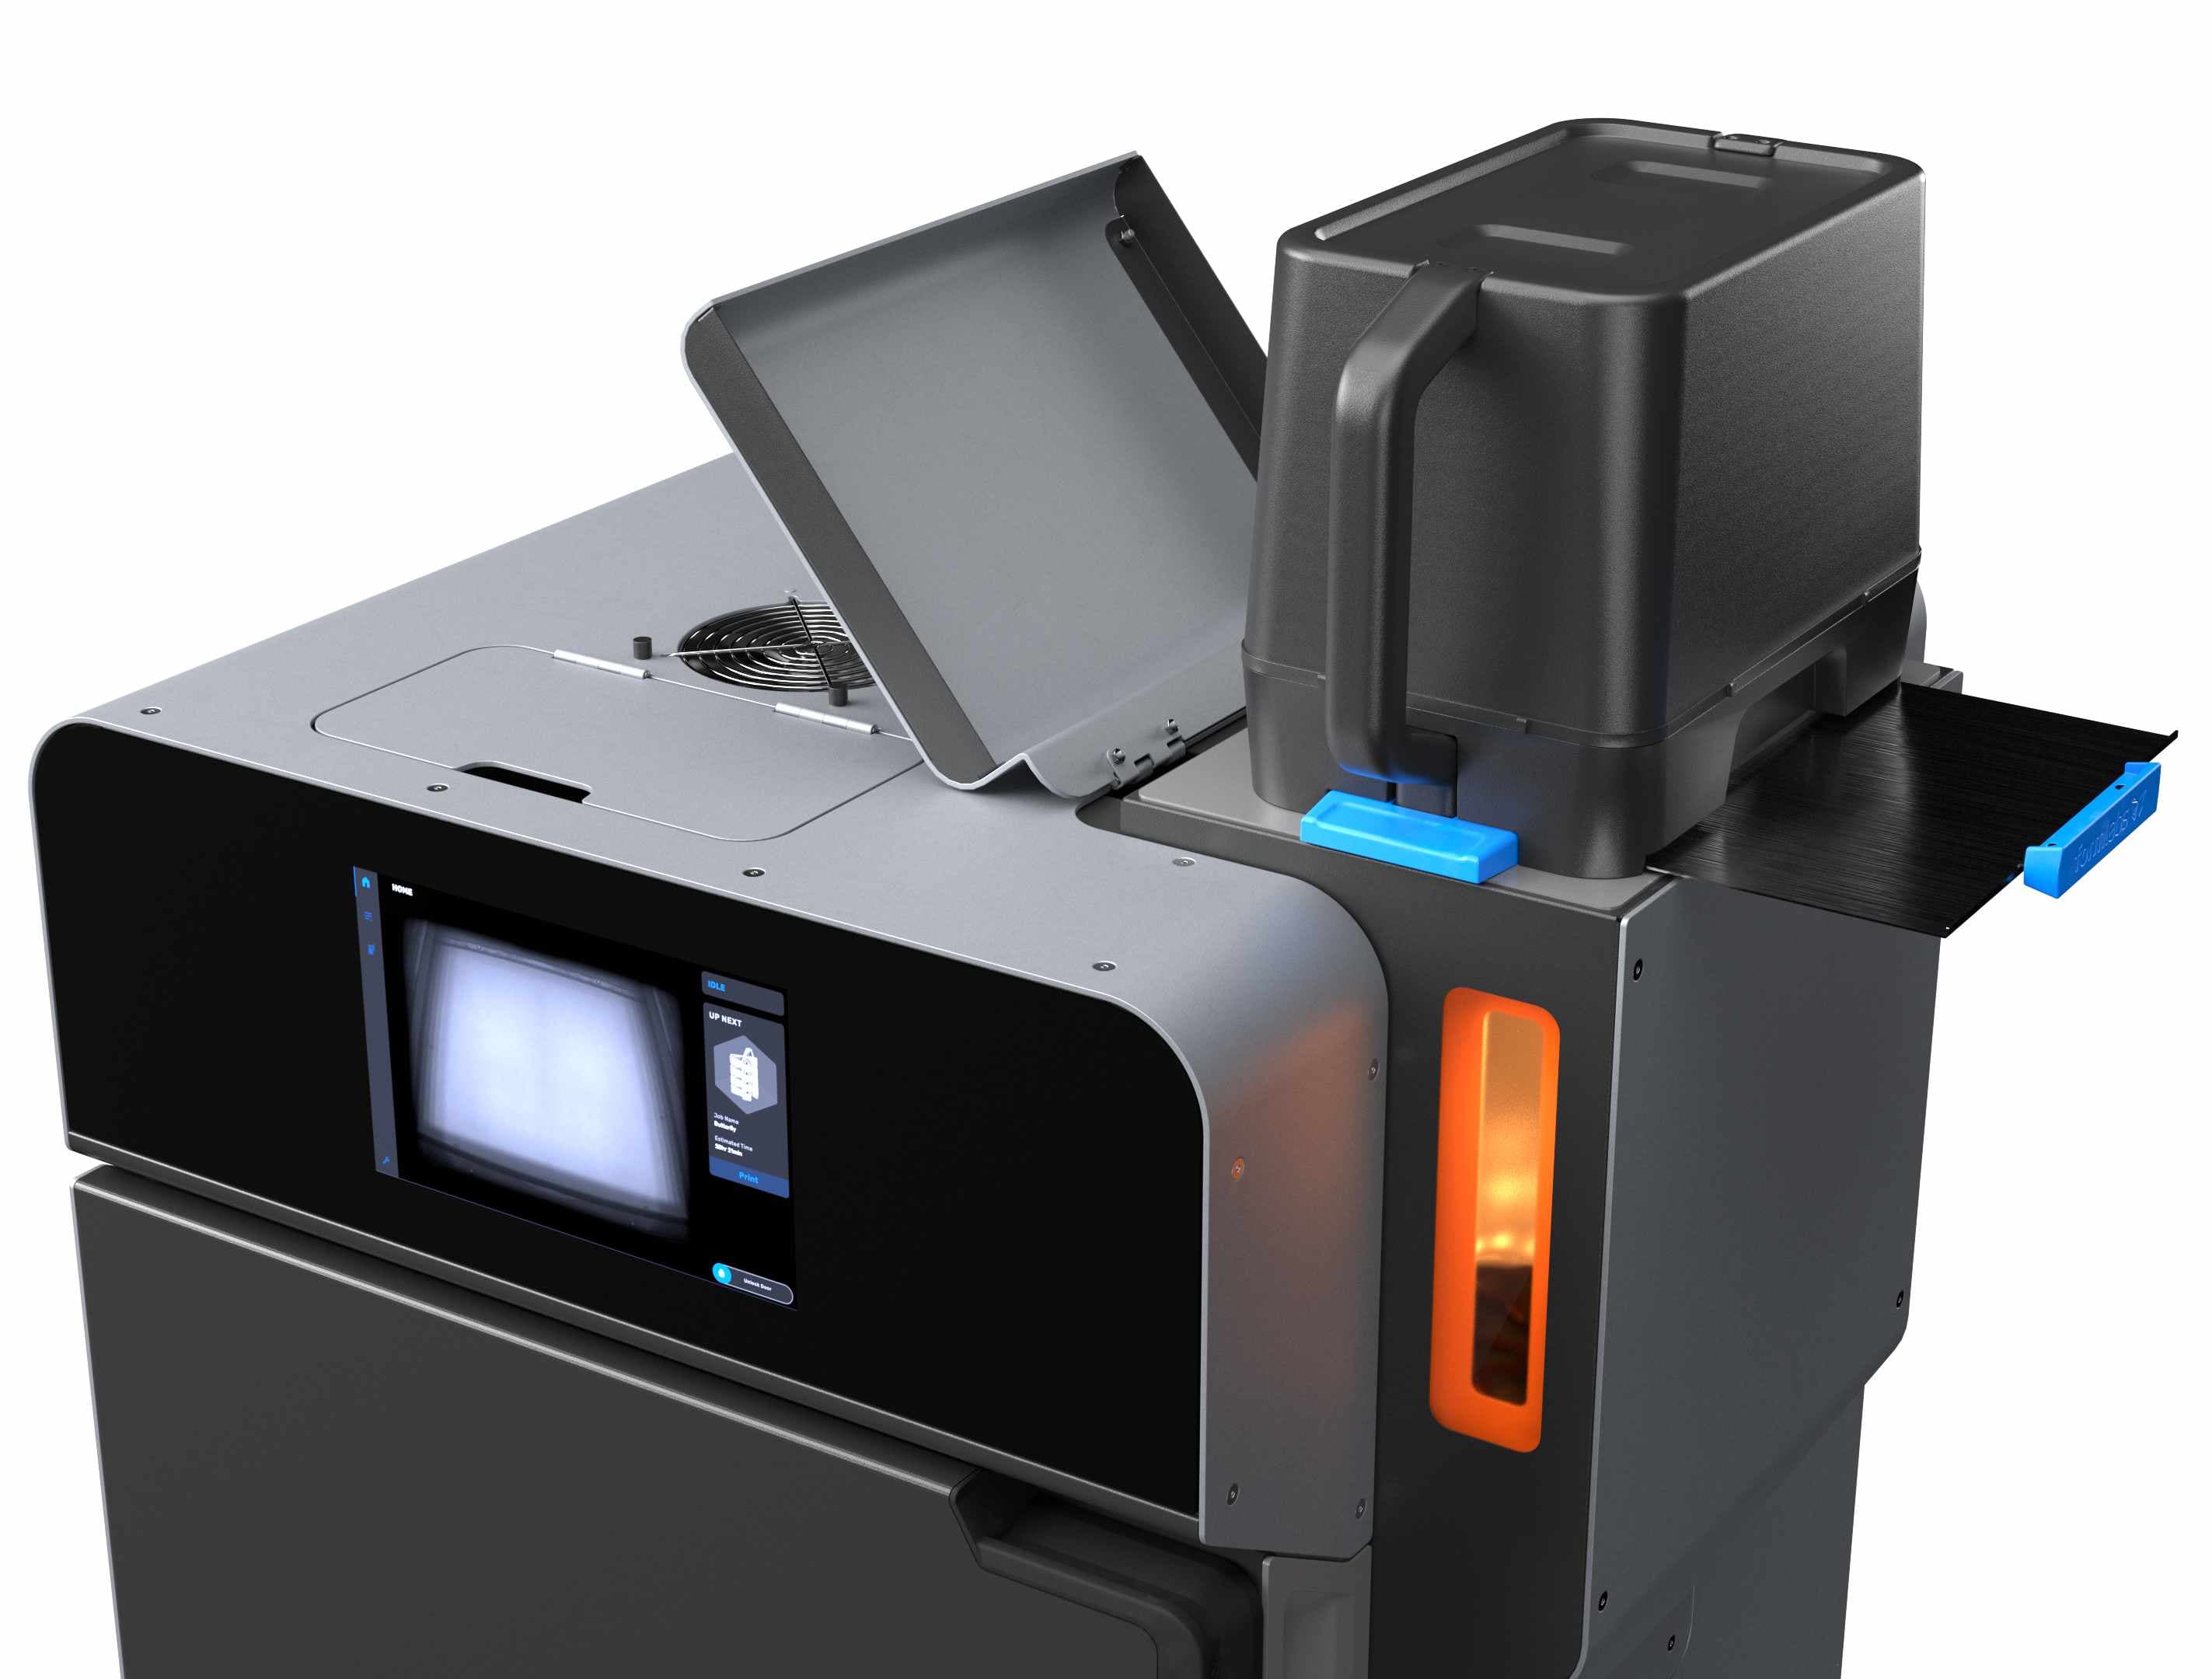
Powder Cartridge
Fuse Series uses a powder cartridge to load material dispensed from the Fuse Sift into its hopper. The powder cartridge is also used as a mixing vessel when combining fresh and used powder.
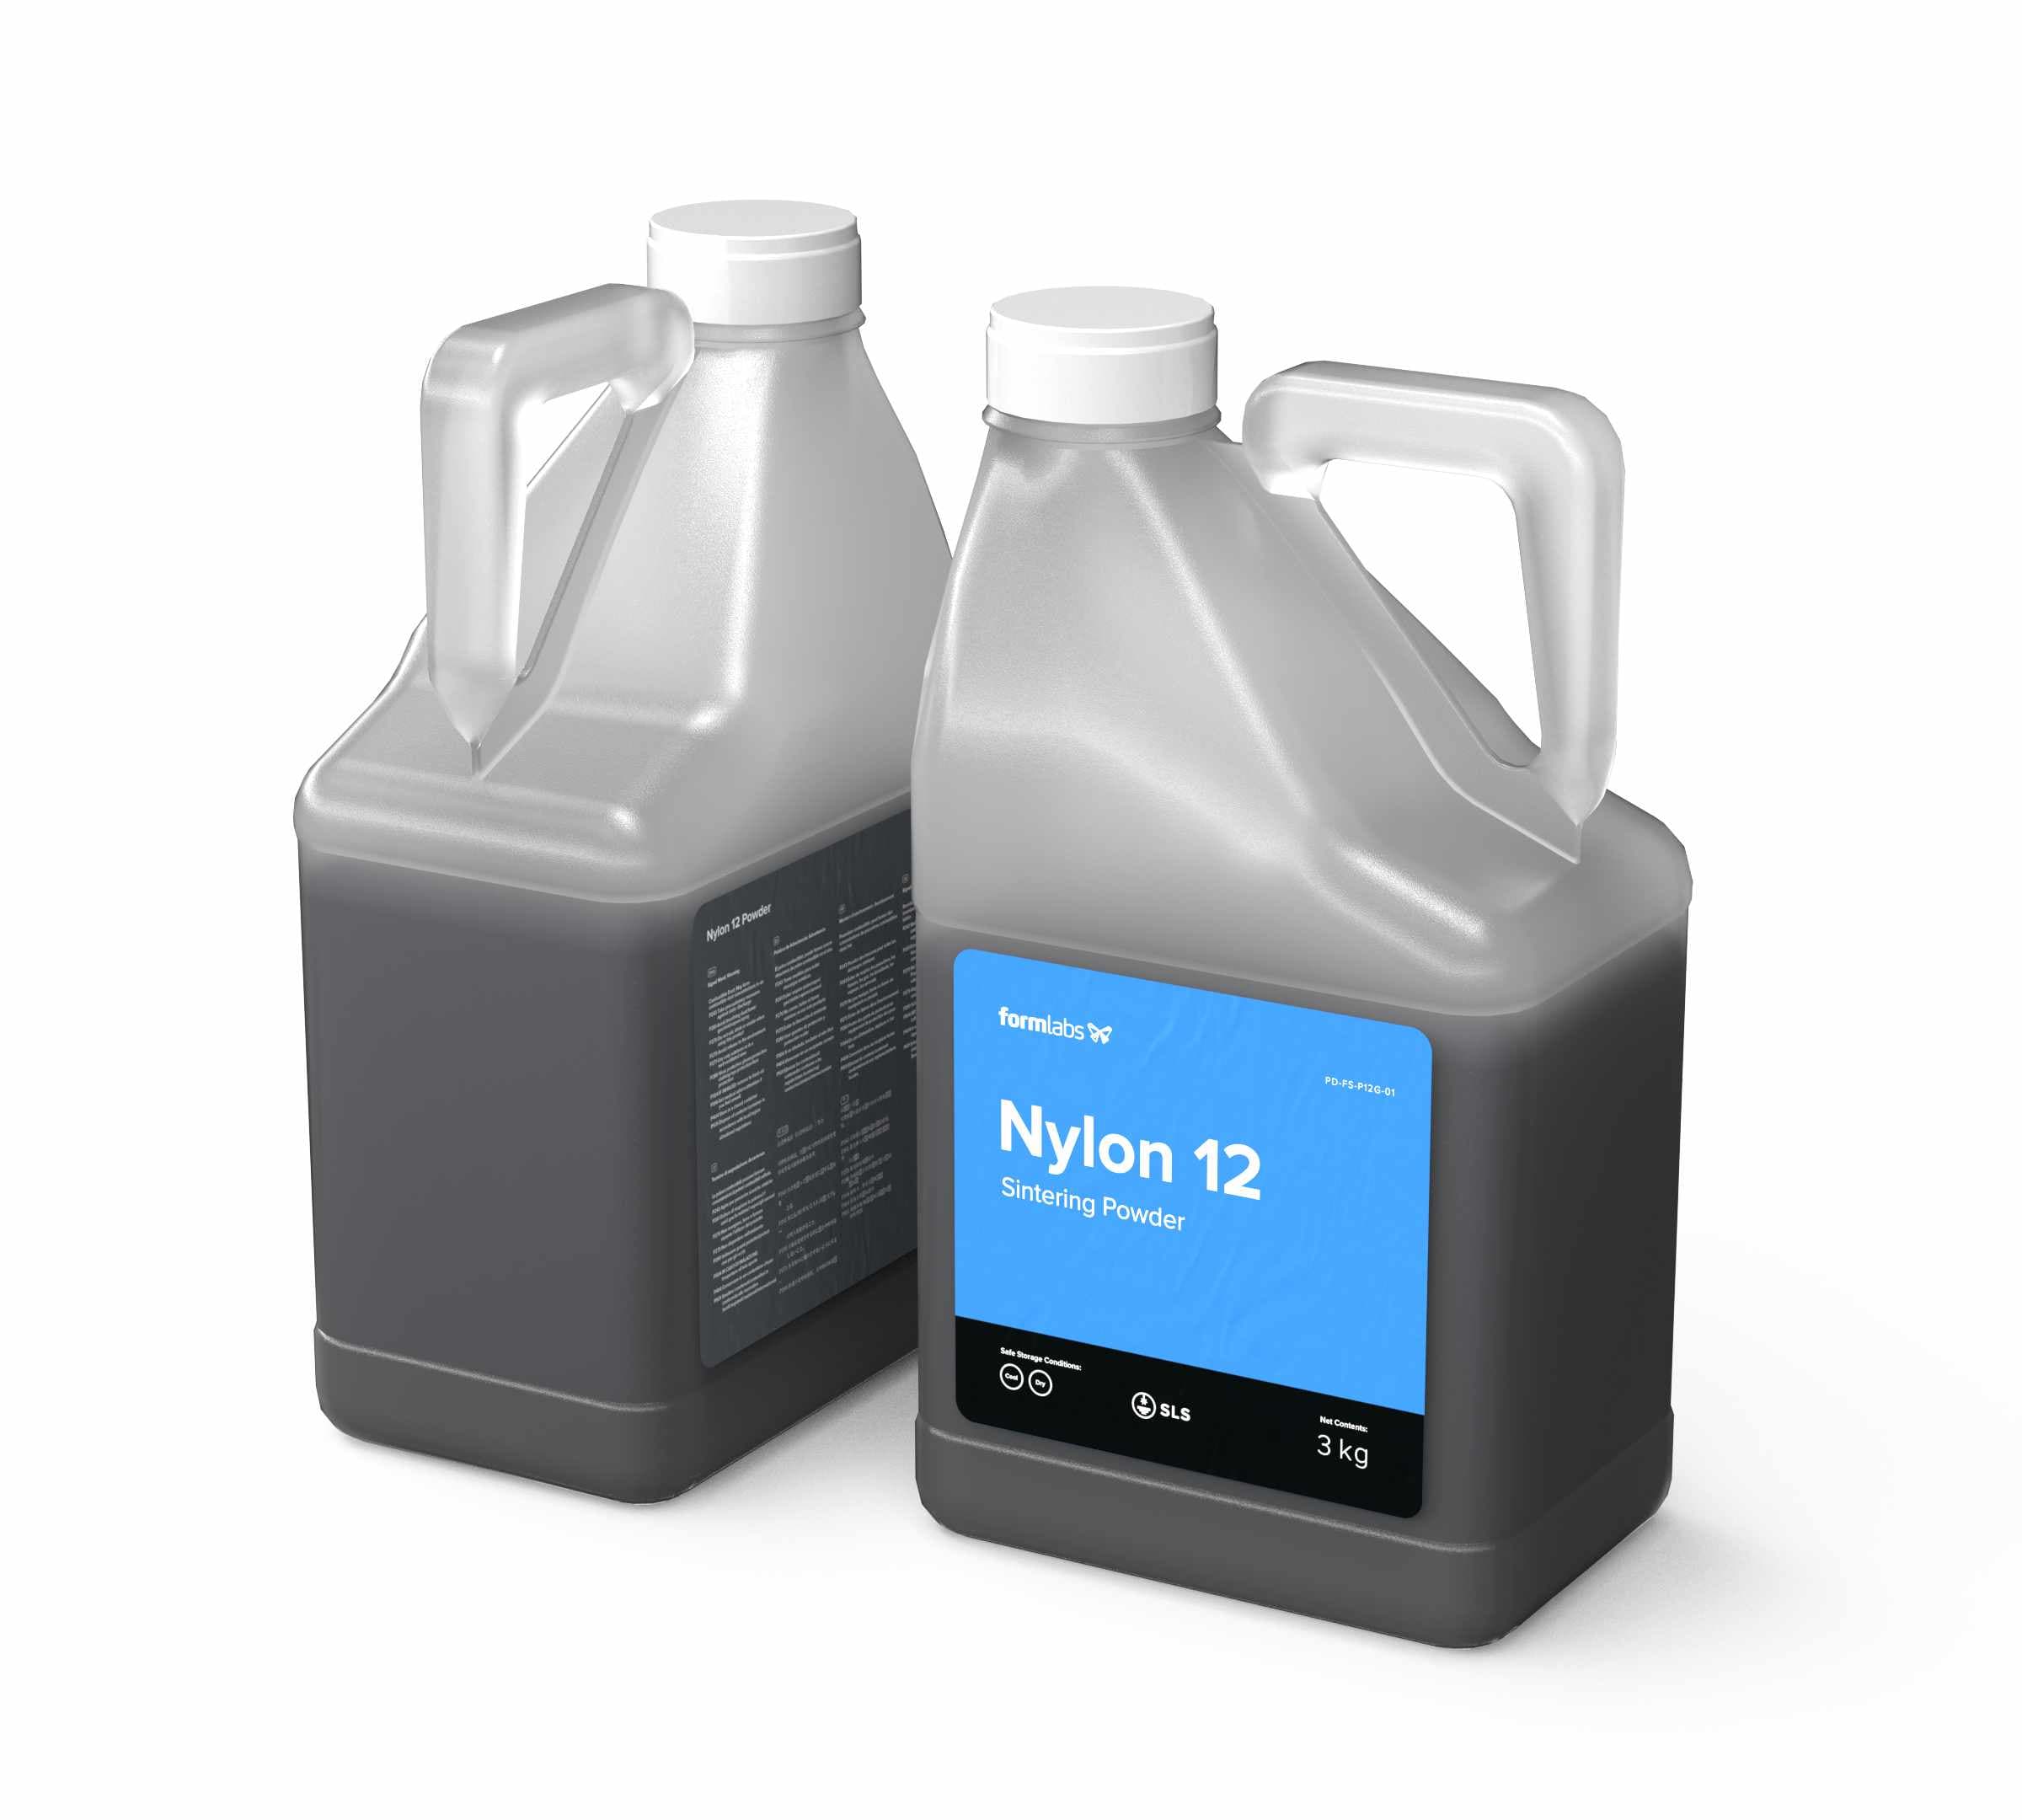
Powder Containers
Formlabs SLS printing powder ships in a box containing two 3 kg containers, and an RFID card preloaded with virtual print credit. Fresh powder is added to the Fuse Sift, while powder credit is added to Fuse Series printers for tracking material usage and available unsintered powder.
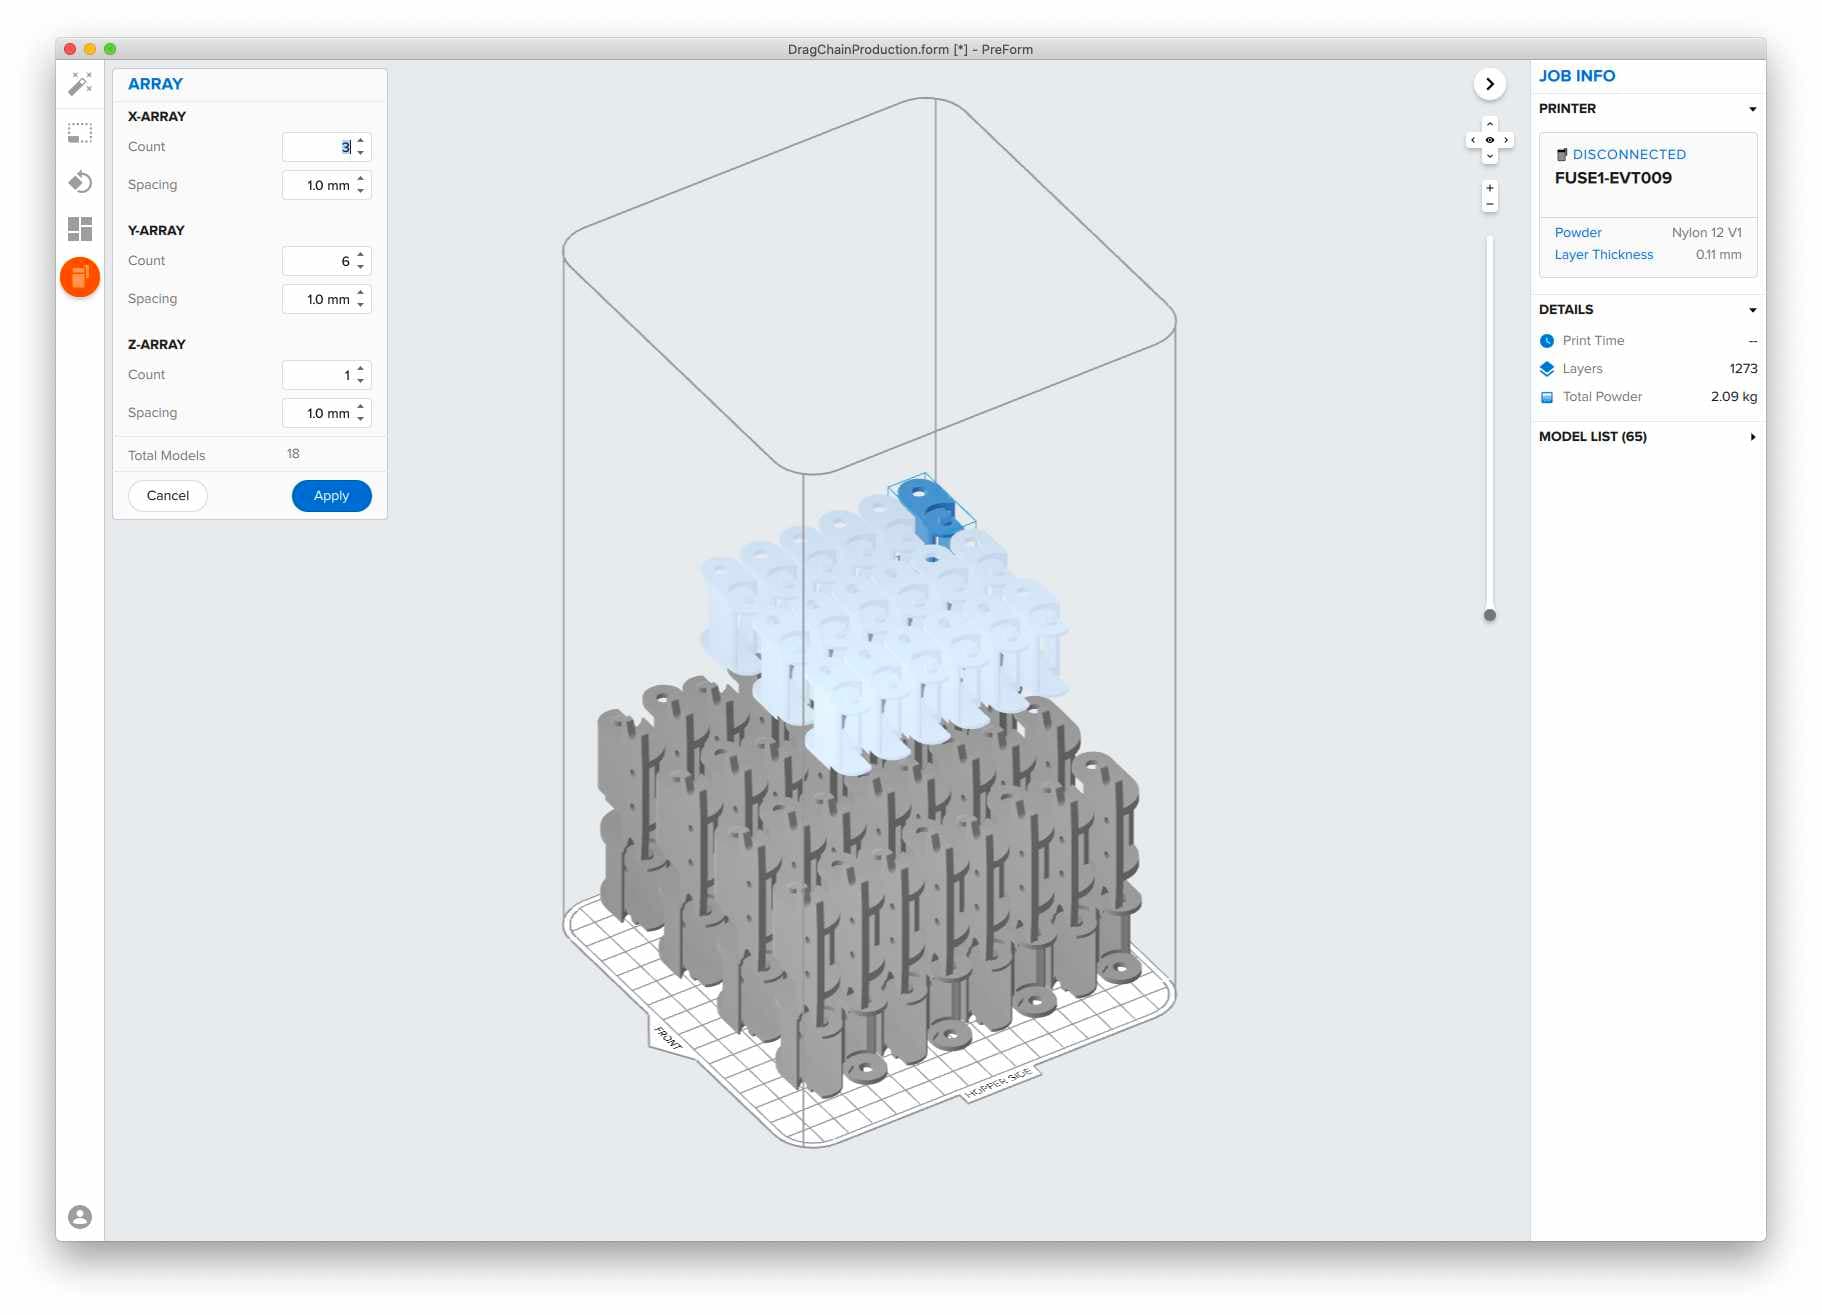
PreForm
Fuse Series printers use intuitive PreForm print preparation software to automate print setup as much as possible and allow for powerful manual refinement as needed. PreForm for SLS offers advanced setup and monitoring tools, including a live video feed of the print bed. Those familiar with Formlabs stereolithography printers will be able to use the same software across their fleet, and FORM files are cross-compatible across machines.
Inert Gas Atmosphere
Fuse 1+ 30W comes with the option to connect a nitrogen supply which provides an inert gas environment to prevent powder oxidation during printing. This feature enables superior and more consistent material properties, as well as low refresh rates, for high-performance prints at an affordable cost per part.
Get Started with 3D Printing
Formlabs' complete, easy-to-use ecosystem makes it simple to get started with 3D printing. Explore our 3D printers and materials to find the right fit for your needs.
Service Plans
Maximize your return, protect your investment, and eliminate unexpected costs with our service plans for Fuse Series SLS 3D printers, Fuse Sift, and Fuse Blast. The Fuse Series Complete Service Plan provides one, three, or five years of support, with the flexibility to renew at any time. Purchase three years upfront and receive one year free, or purchase five years upfront and receive two years free. Priority phone and email access to our team of dedicated experts is included, along with onsite visits from trained experts to perform routine maintenance so you can stay focused on running your business. Our team will work with you to quickly resolve any issues through remote support, including shipping replacement parts free of charge. If we determine that an onsite visit is necessary, Formlabs or your certified local partner will send a Certified SLS Expert to your facility at no extra charge. Customers also have the opportunity to watch our onboarding videos to get started and schedule a live Q&A with one of our experts to answer any questions about the workflow or applications. Production plan customers get access to repair certification at a Formlabs site. Other customers can purchase training at their site by a Certified SLS technician.
Visit this link for further information.
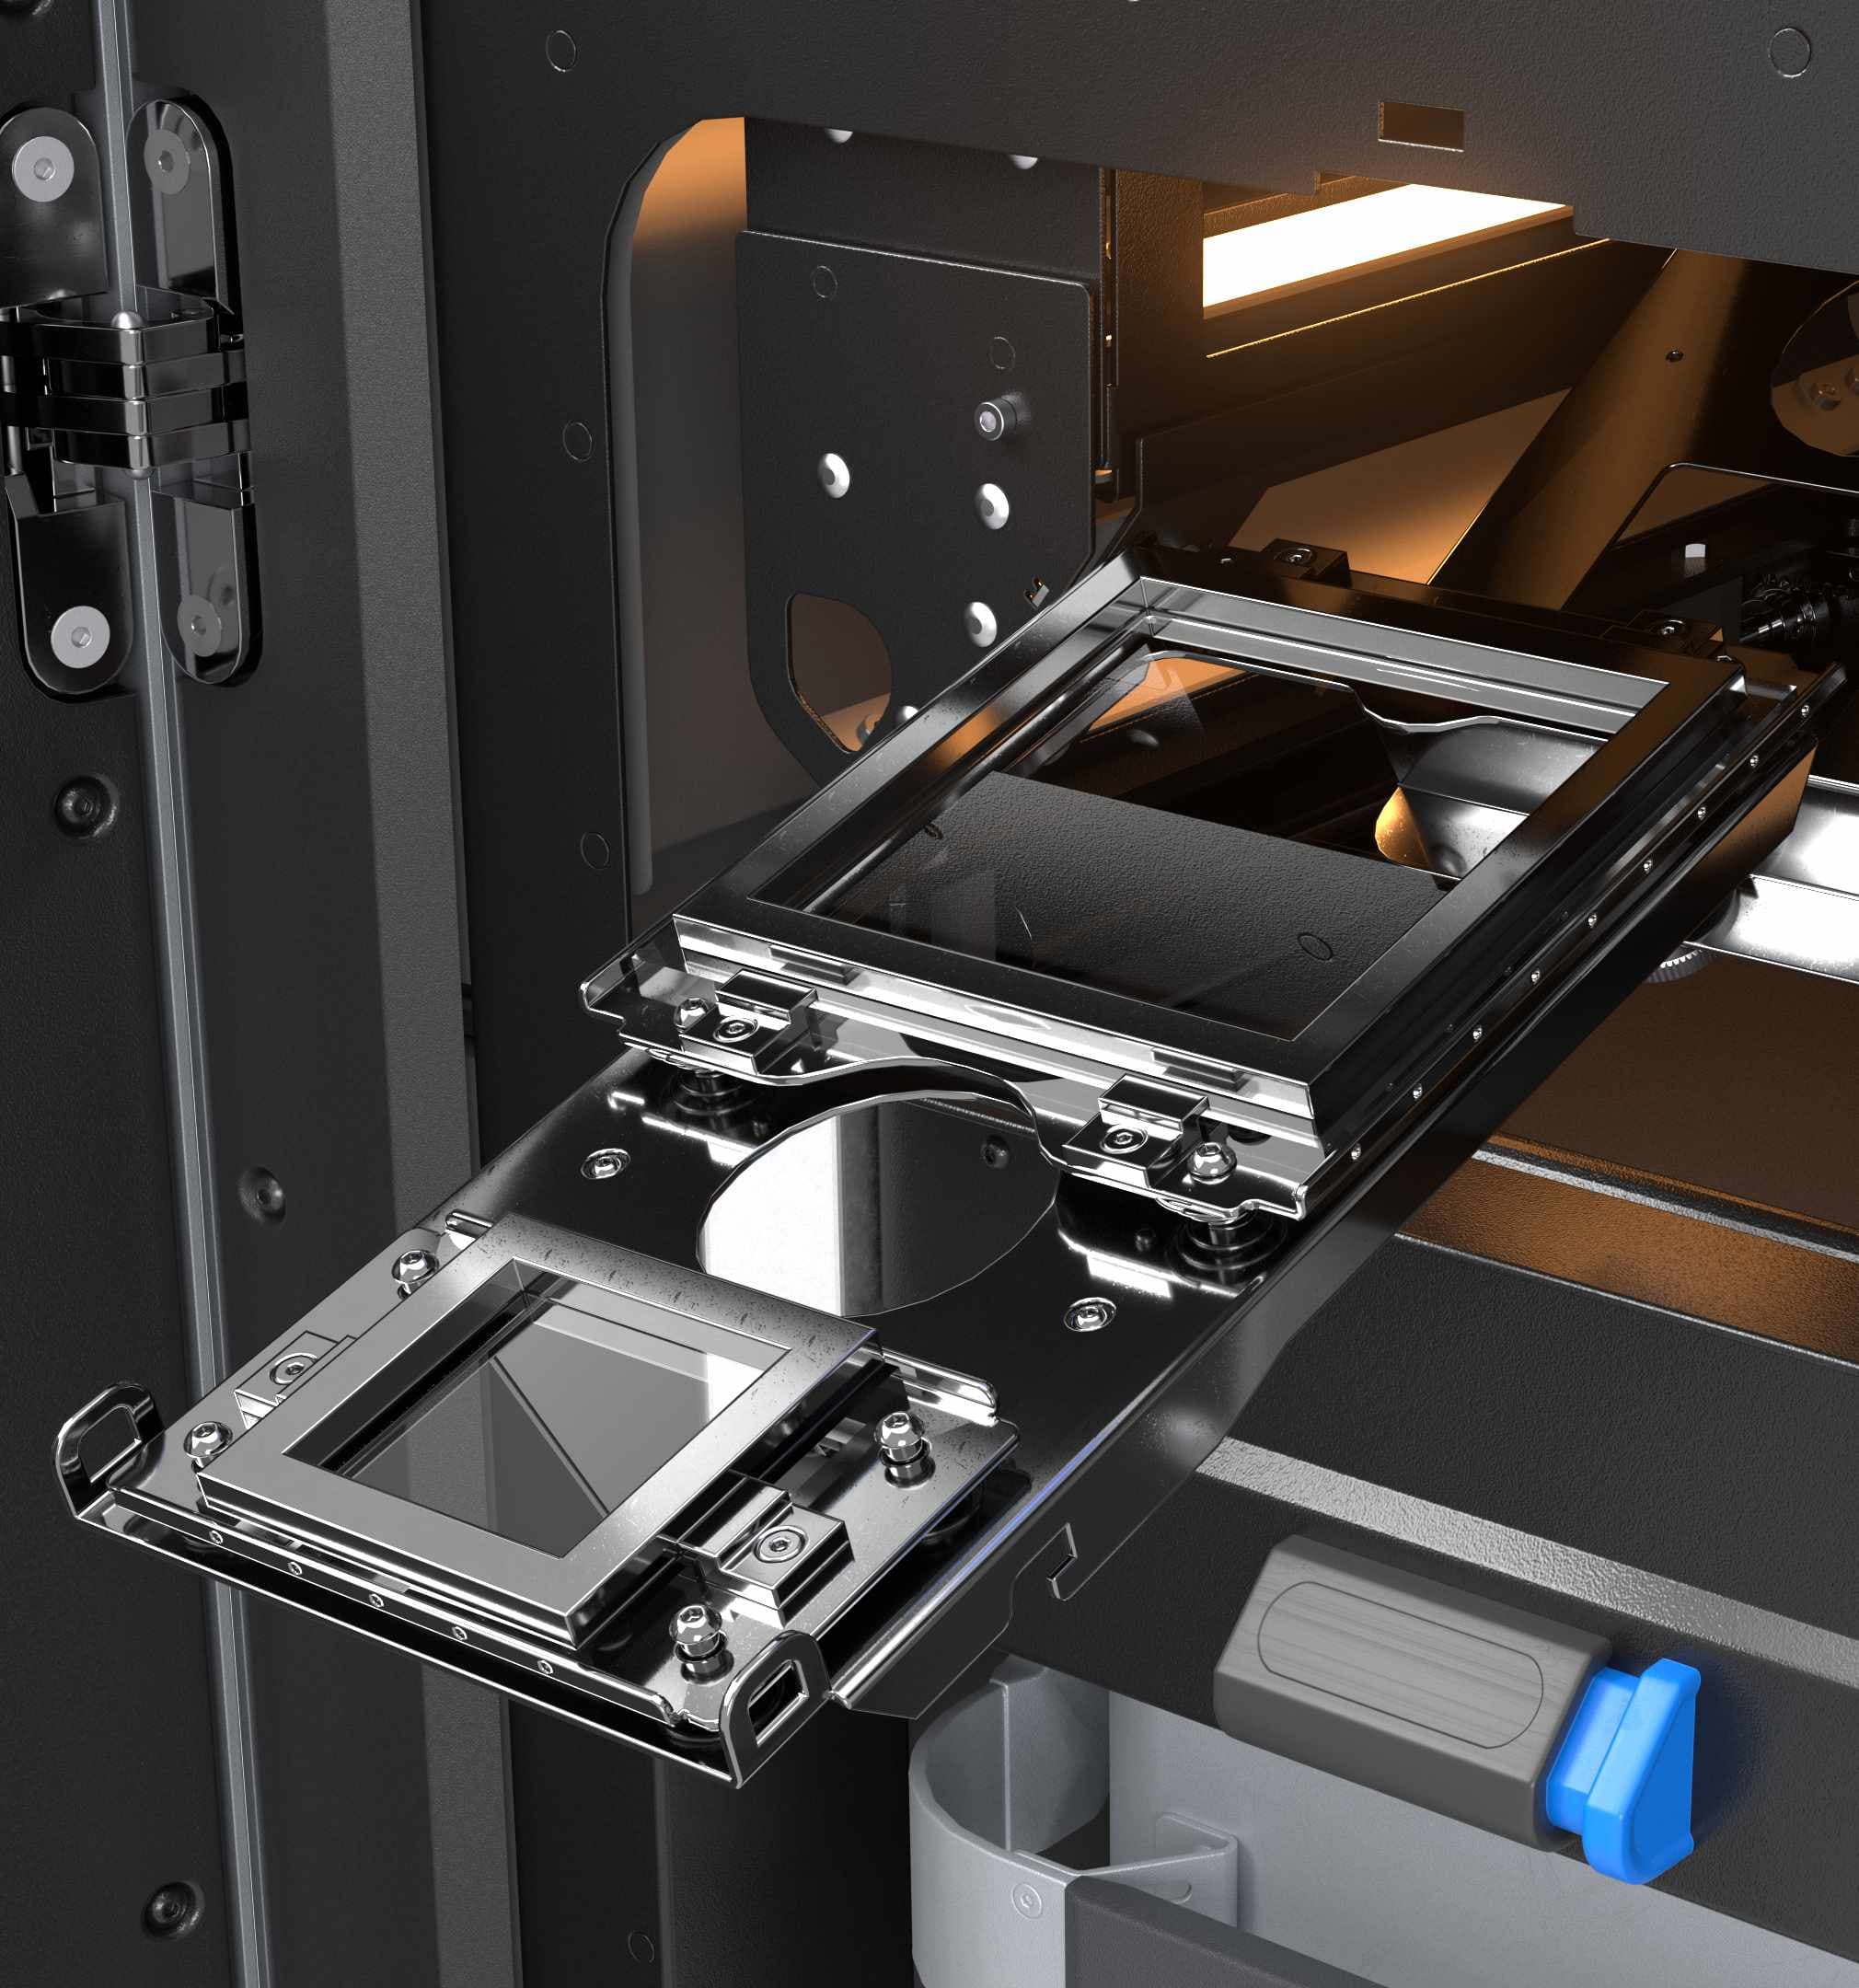
Optical Cassette
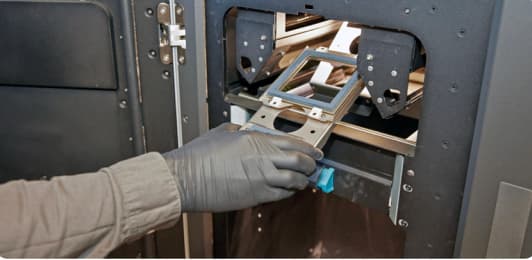
The environment inside an SLS printer is filled with off-gases that result from sintering thermoplastic. These gases collect onto optical surfaces as stains that degrade the accuracy of the laser. All SLS printers require operators to clean the optics before every print, which often involves disassembling complex systems. Fuse Series printers protect their optics with an optical cassette designed for tool-free removal and installation. To remove the optical cassette, simply turn the thumb screw that holds it in place.
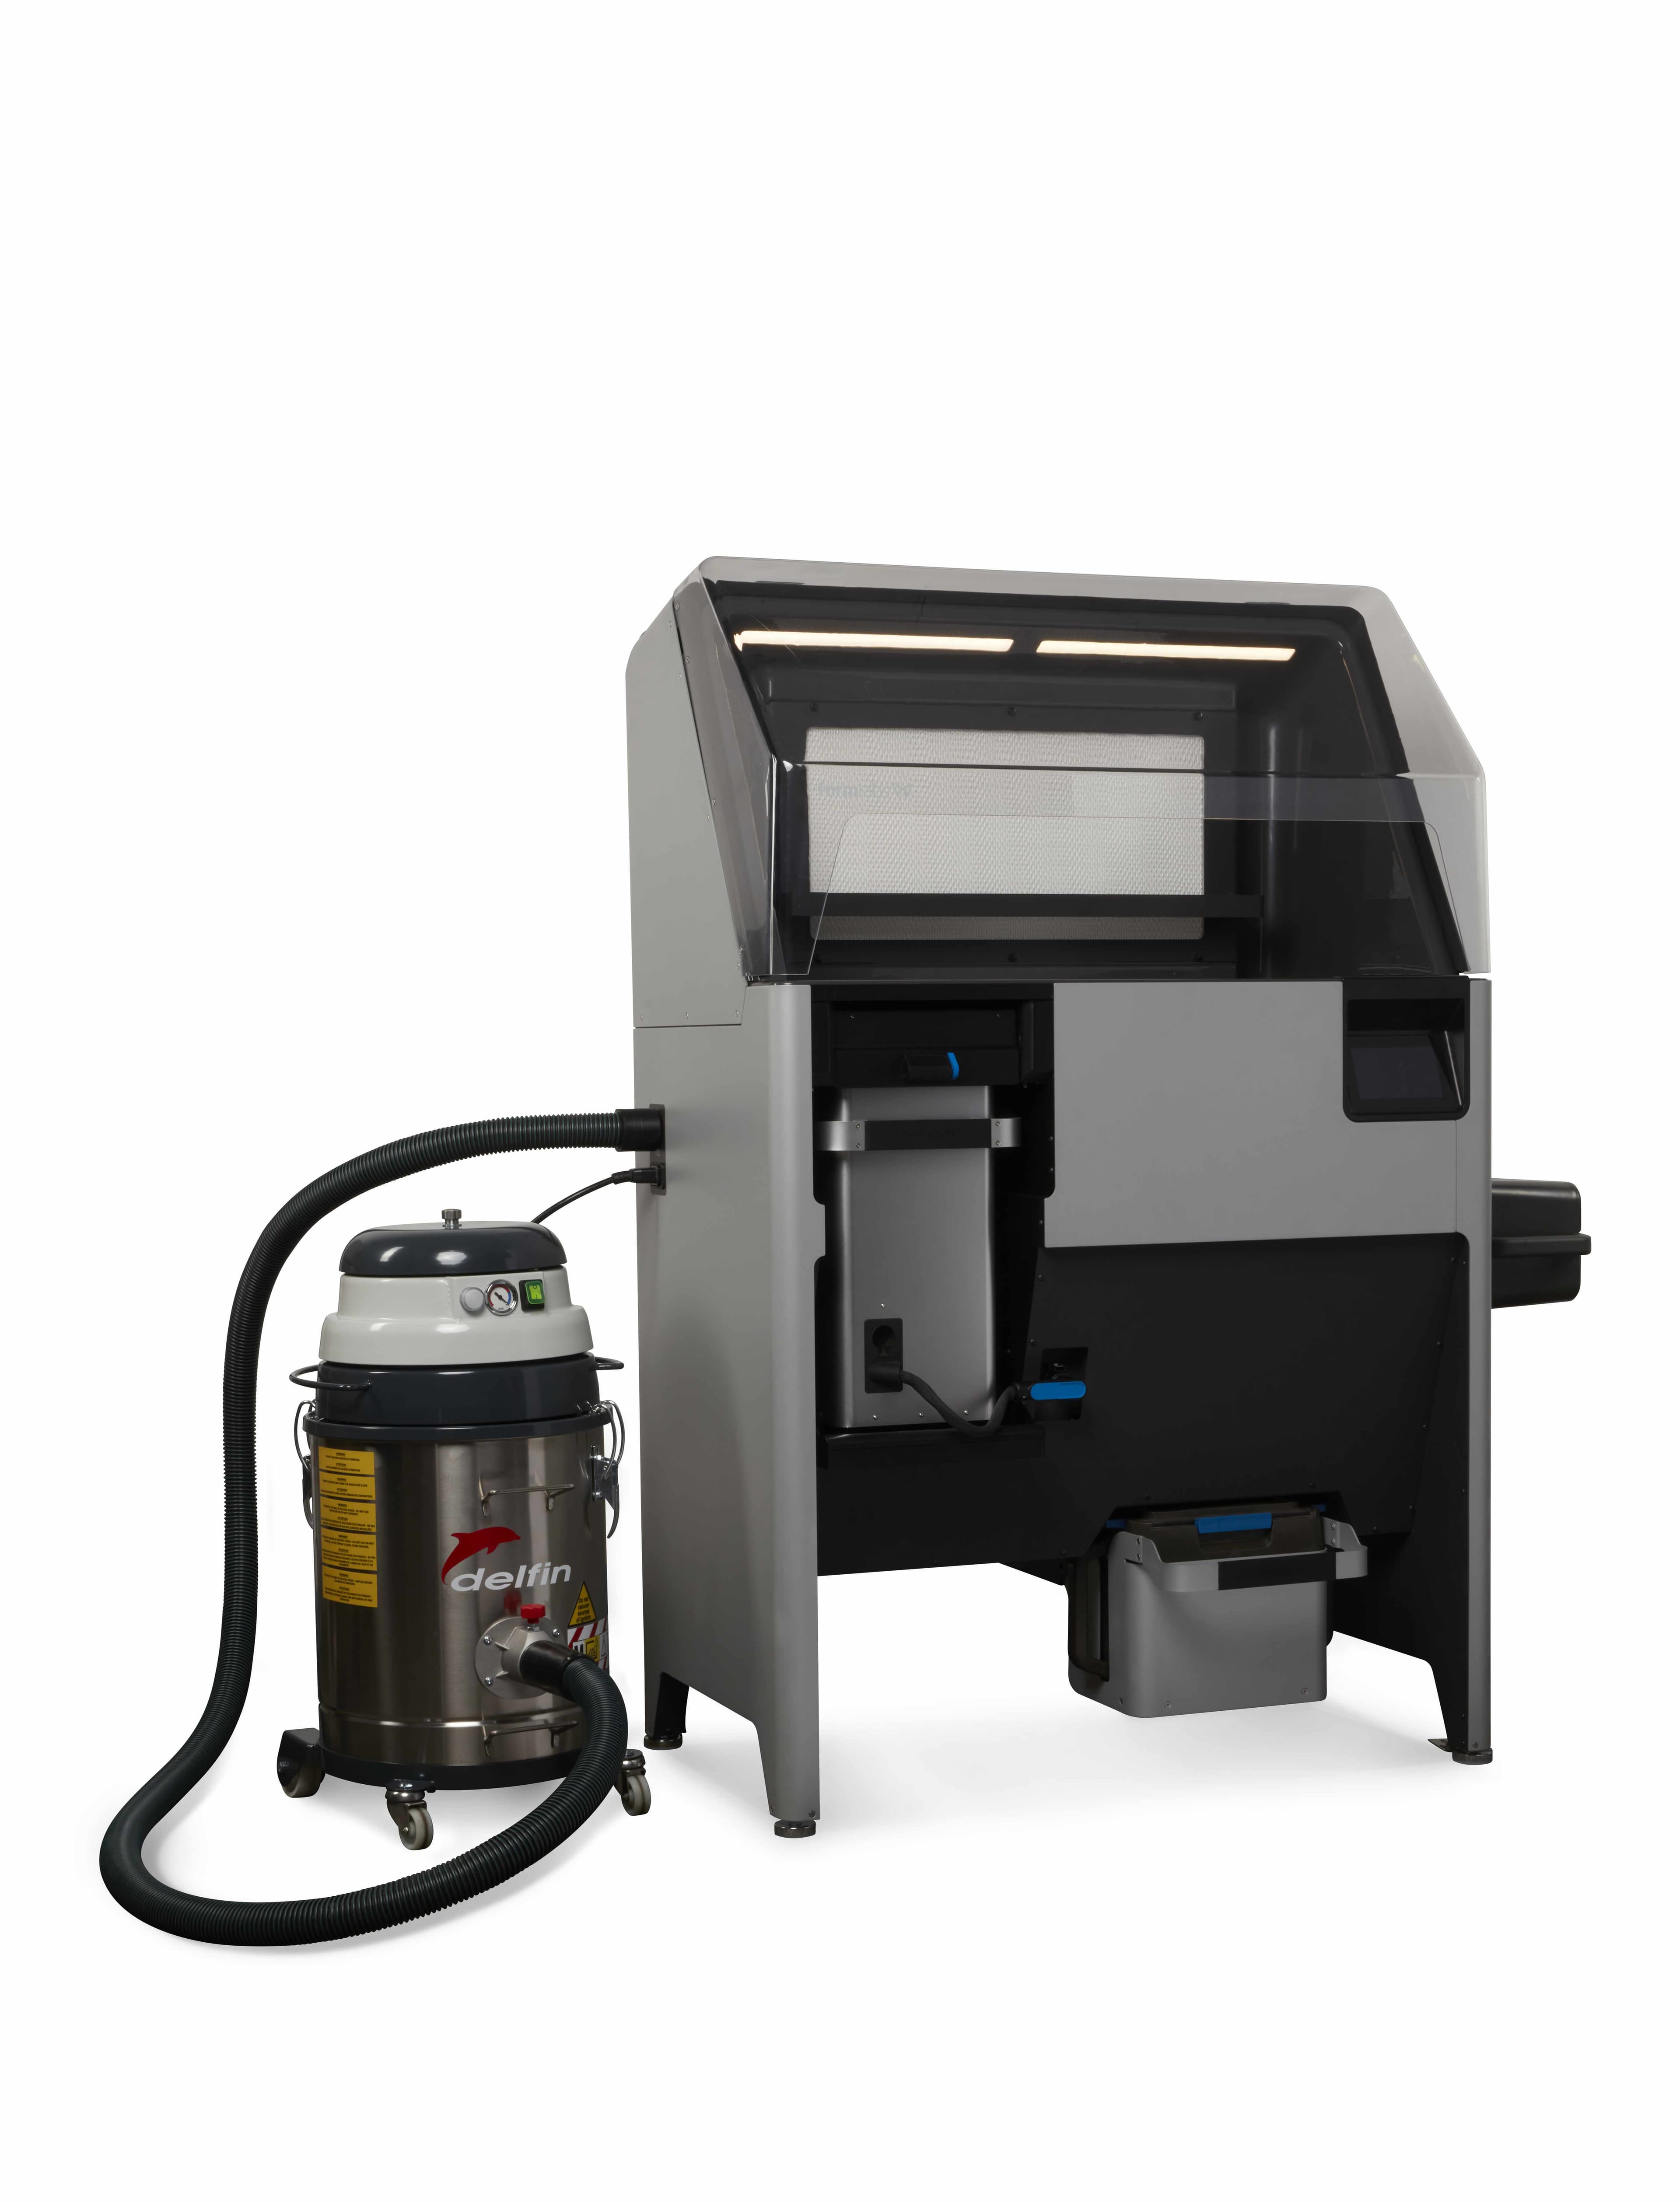
Vacuum
A clean workspace is important both for efficiency and safety. SLS post-processing can get messy, so the Fuse Sift incorporates an external vacuum. The integrated hose and controls allow you to easily tidy up your workspace, clean off a build chamber, or remove debris from the sifter mesh. A standard hose socket means you can use any vacuum that is safe for use with fine powders. For customers with environments that have more stringent safety requirements, an optional purchase of a ATEX / Class II Division 2 vacuum is available from Formlabs. Please contact your Formlabs representative for more information.
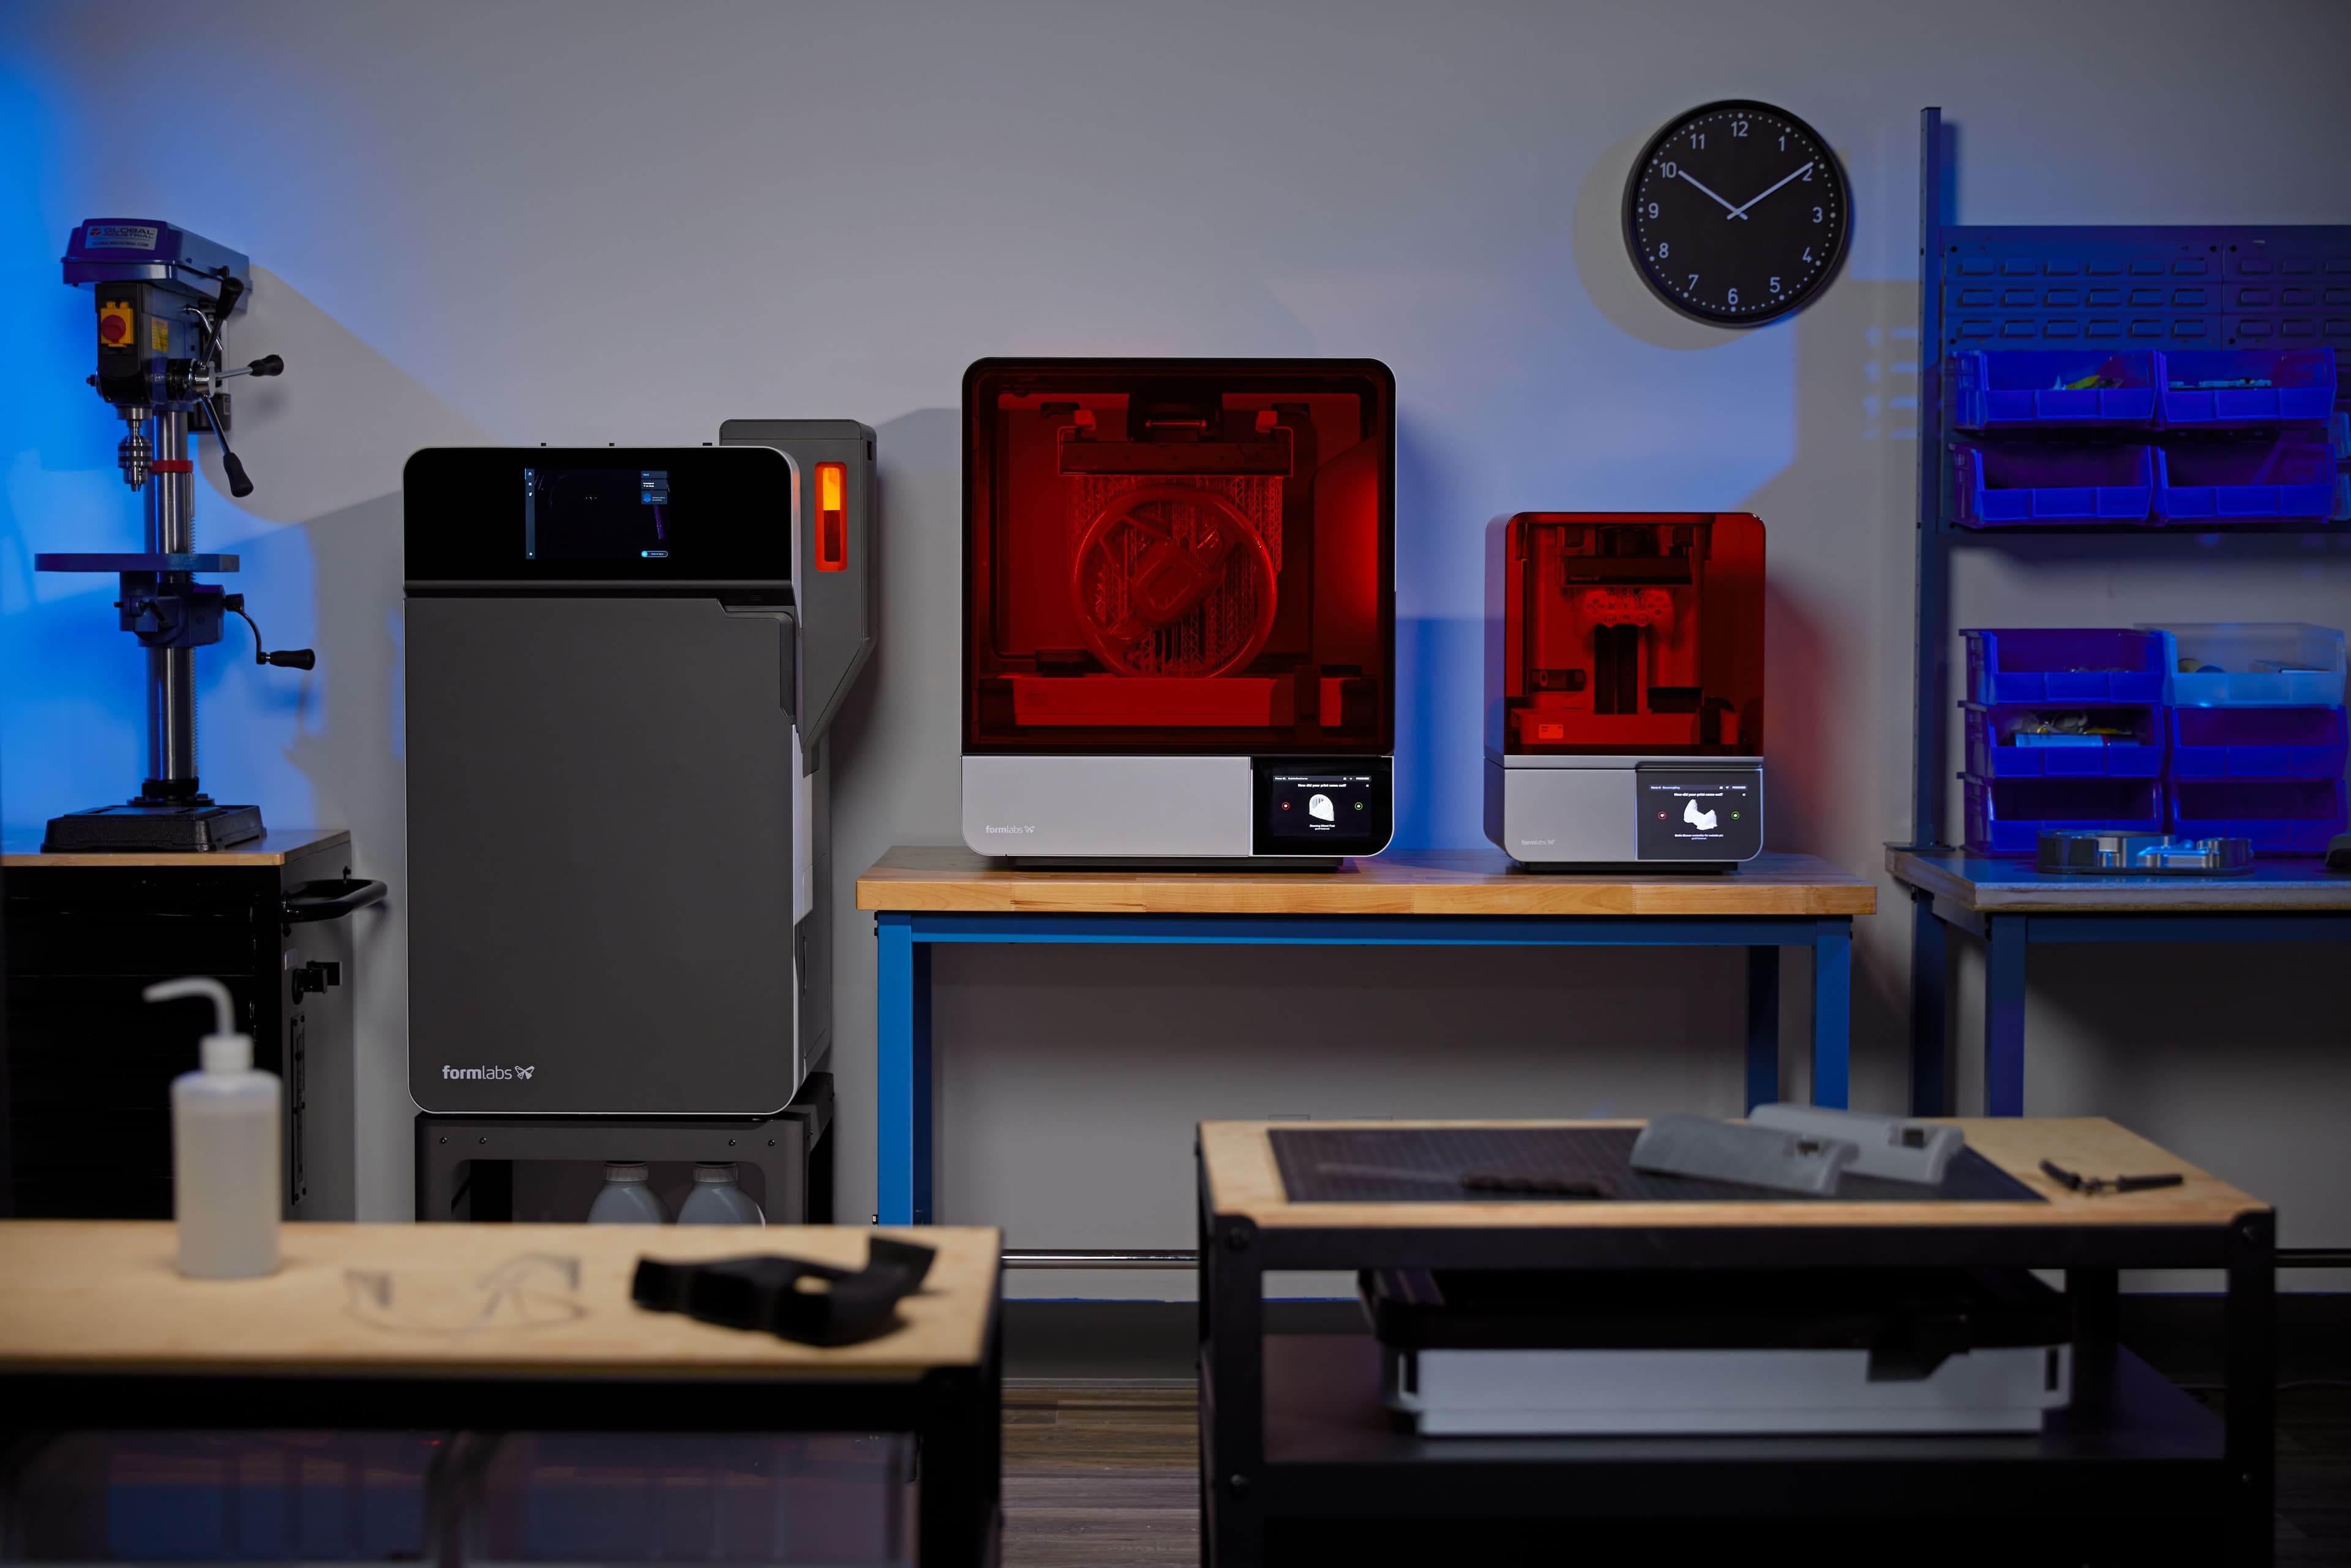
A DAY IN THE LIFE OF A FUSE SERIES PRINTER
Fuse Series SLS 3D printers are not just printers, they are an entire ecosystem for turning CAD files into fully-functional end-use parts with industrial thermoplastics. Let’s take a look at the workflow for setting up, printing, extracting parts, and reclaiming material from prints.
1. File Setup
The printer uses PreForm print preparation software to import STL or OBJ part files, orient and arrange models, estimate print times, monitor your printers, and upload job files. The PreForm workflow has been tried and tested over millions of stereolithography prints, and we’re excited to bring the same level of intuitivity to SLS.
A FEW NEW FEATURES SPECIFIC TO SLS PRINTS ARE:
- Pack and Array allows you to seamlessly duplicate and organize multiple parts within a 3D grid to use as much of the build space as possible for a single print.
- Z-Manipulator can be used to position parts along the Z-axis of the build space.
- Camera Feed provides a livestream of the print bed to watch each new layer take shape without ever walking away from your computer.
Interested in trying it out? Download the latest version of PreForm to use a virtual printer and explore setting up parts for the Fuse Series printers.
2. Printing
Most SLS systems require extensive training, tools, and physical effort to prepare and maintain. Fuse Series printers change changes the SLS landscape, bringing the ease of use central to Formlabs products to SLS. Let’s take a look at printing with the Formlabs SLS ecosystem.
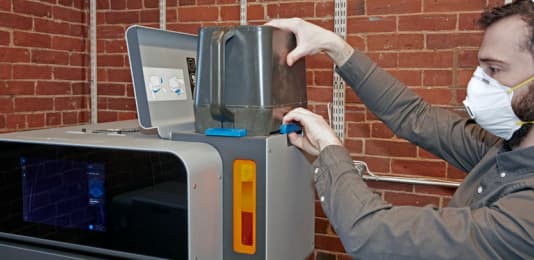
1. Add powder: Load powder to the printer using the powder cartridge. Credit included with fresh powder is stored on the printer so it knows which material is currently loaded and how much is available for printing.
2. Insert a clean optical cassette: Removal, maintenance, and reinstallation of the optical cassette do not require any tools or disassembly. A second cassette enables you to run another print without cleaning one used for a previous print.
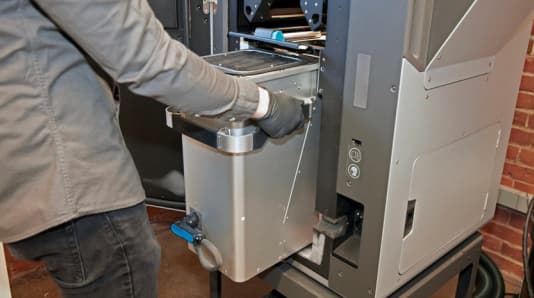
3. Insert a build chamber: Carry the build chamber between the printer and Fuse Sift using its integrated handles, no casters or support frames necessary. Having multiple build chambers in your workflow enables you to run another print while a previous one is still cooling.
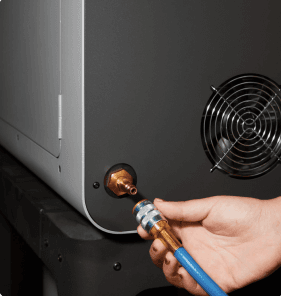
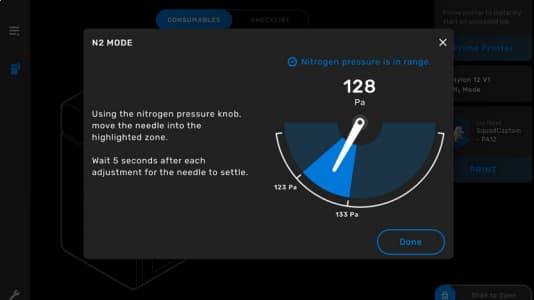
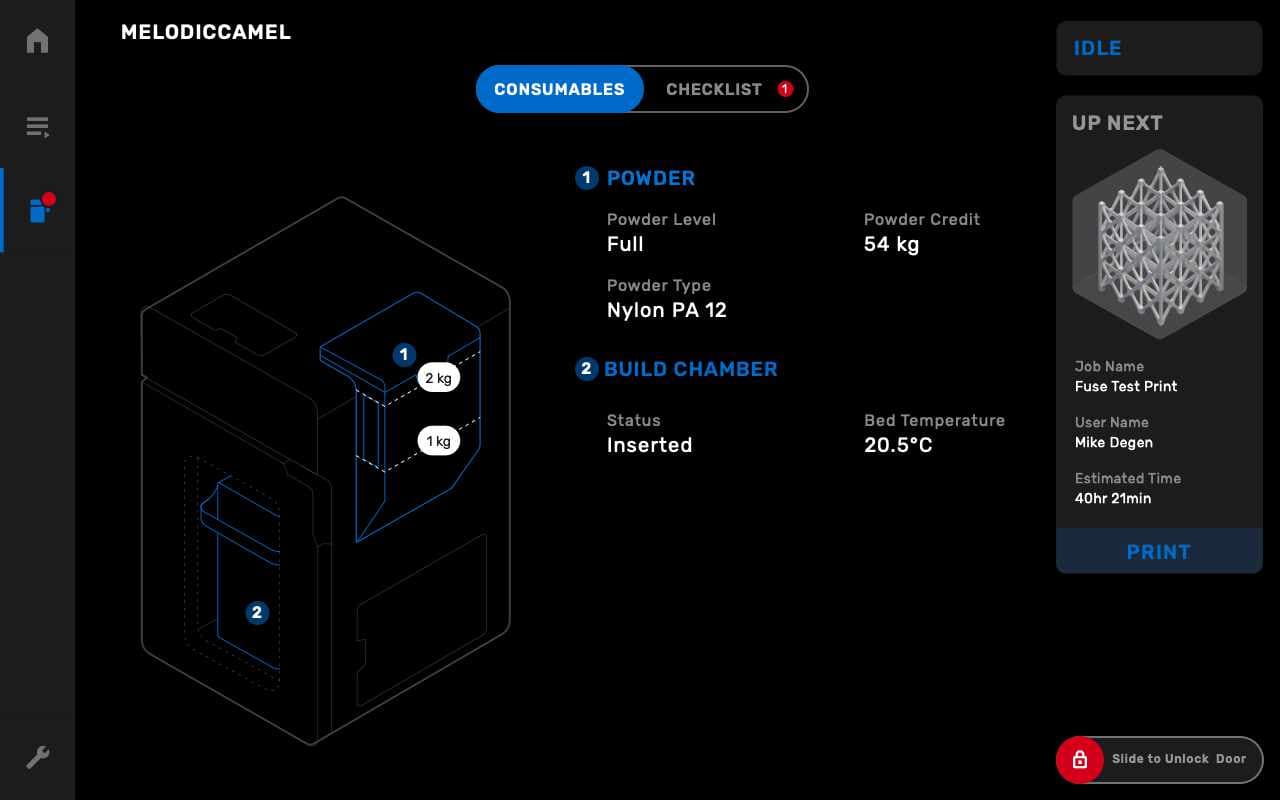
4. Connect Nitrogen Supply (Fuse 1+ 30W only): If your material requires an inert gas environment, connect your nitrogen supply to the back of your printer, then tap the printer icon in the left sidebar to access the printer status screen and toggle "Nitrogen System" to ON. Confirm that the touchscreen shows "N2 Mode" and that both the Inlet Pressure and the Valve Pressure are in range.

5. Preprint checks: A checklist on the touchscreen with written and visual instructions explains each procedure step by step. The printer monitors itself over time, and automatically notifies you when a maintenance procedure is required.

6. Start the print: Once all preprint checks have been completed, the printer is ready to print. The home screen transitions to display a live stream of the print bed so you can watch each new layer take shape. This camera view is also available in PreForm.

3. Cooling a Print
After a print completes, the build chamber needs to cool down in the print enclosure before post-processing. This allows parts to steadily dissipate heat, preventing them from warping or developing suboptimal mechanical properties.
1. Cool in print enclosure: Immediately after a print completes, allow it to cool down in the print enclosure for 30-50% of the total print time. If a print takes 10 hours to complete, leave it in the print enclosure for up to 5 hours.
2. Finish cooling in Fuse Sift: After completing the initial cooldown in the printer, transfer the build chamber to the Fuse Sift. Plug the build chamber into the Fuse Sift to monitor the temperature, and receive a notification when the print is ready for extraction.
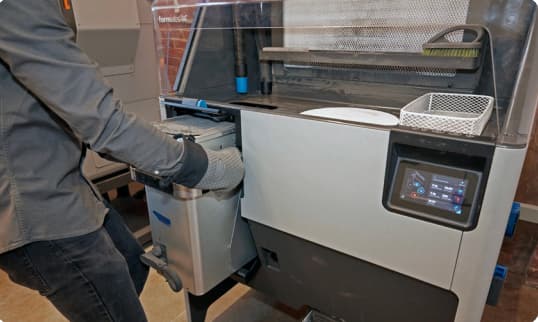
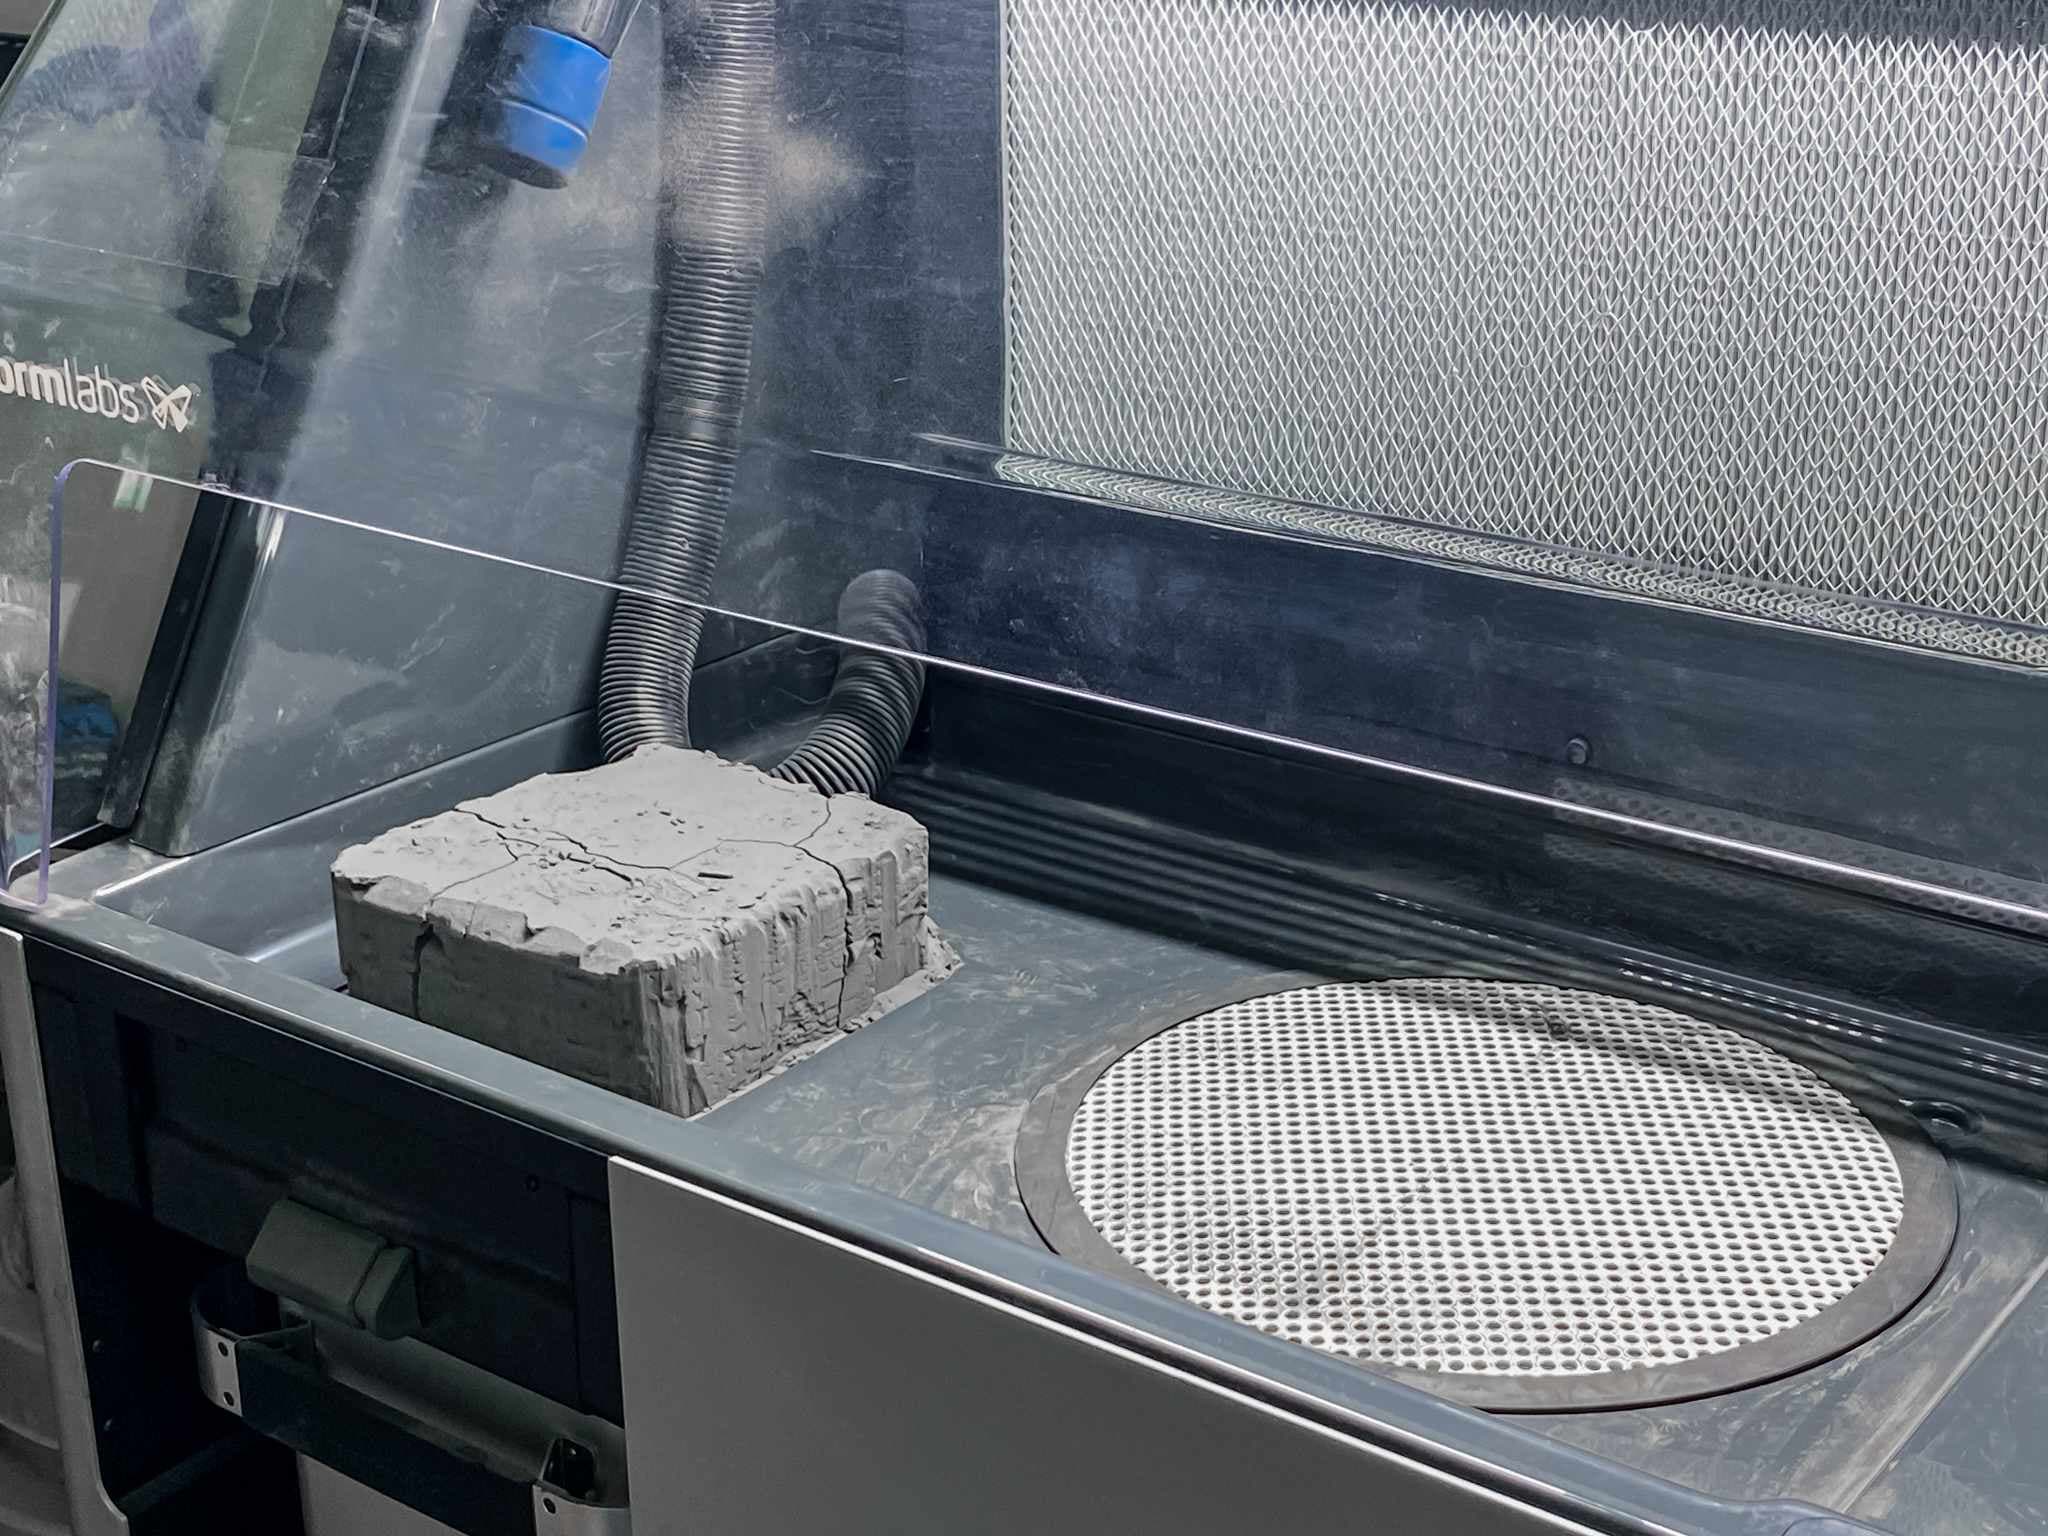
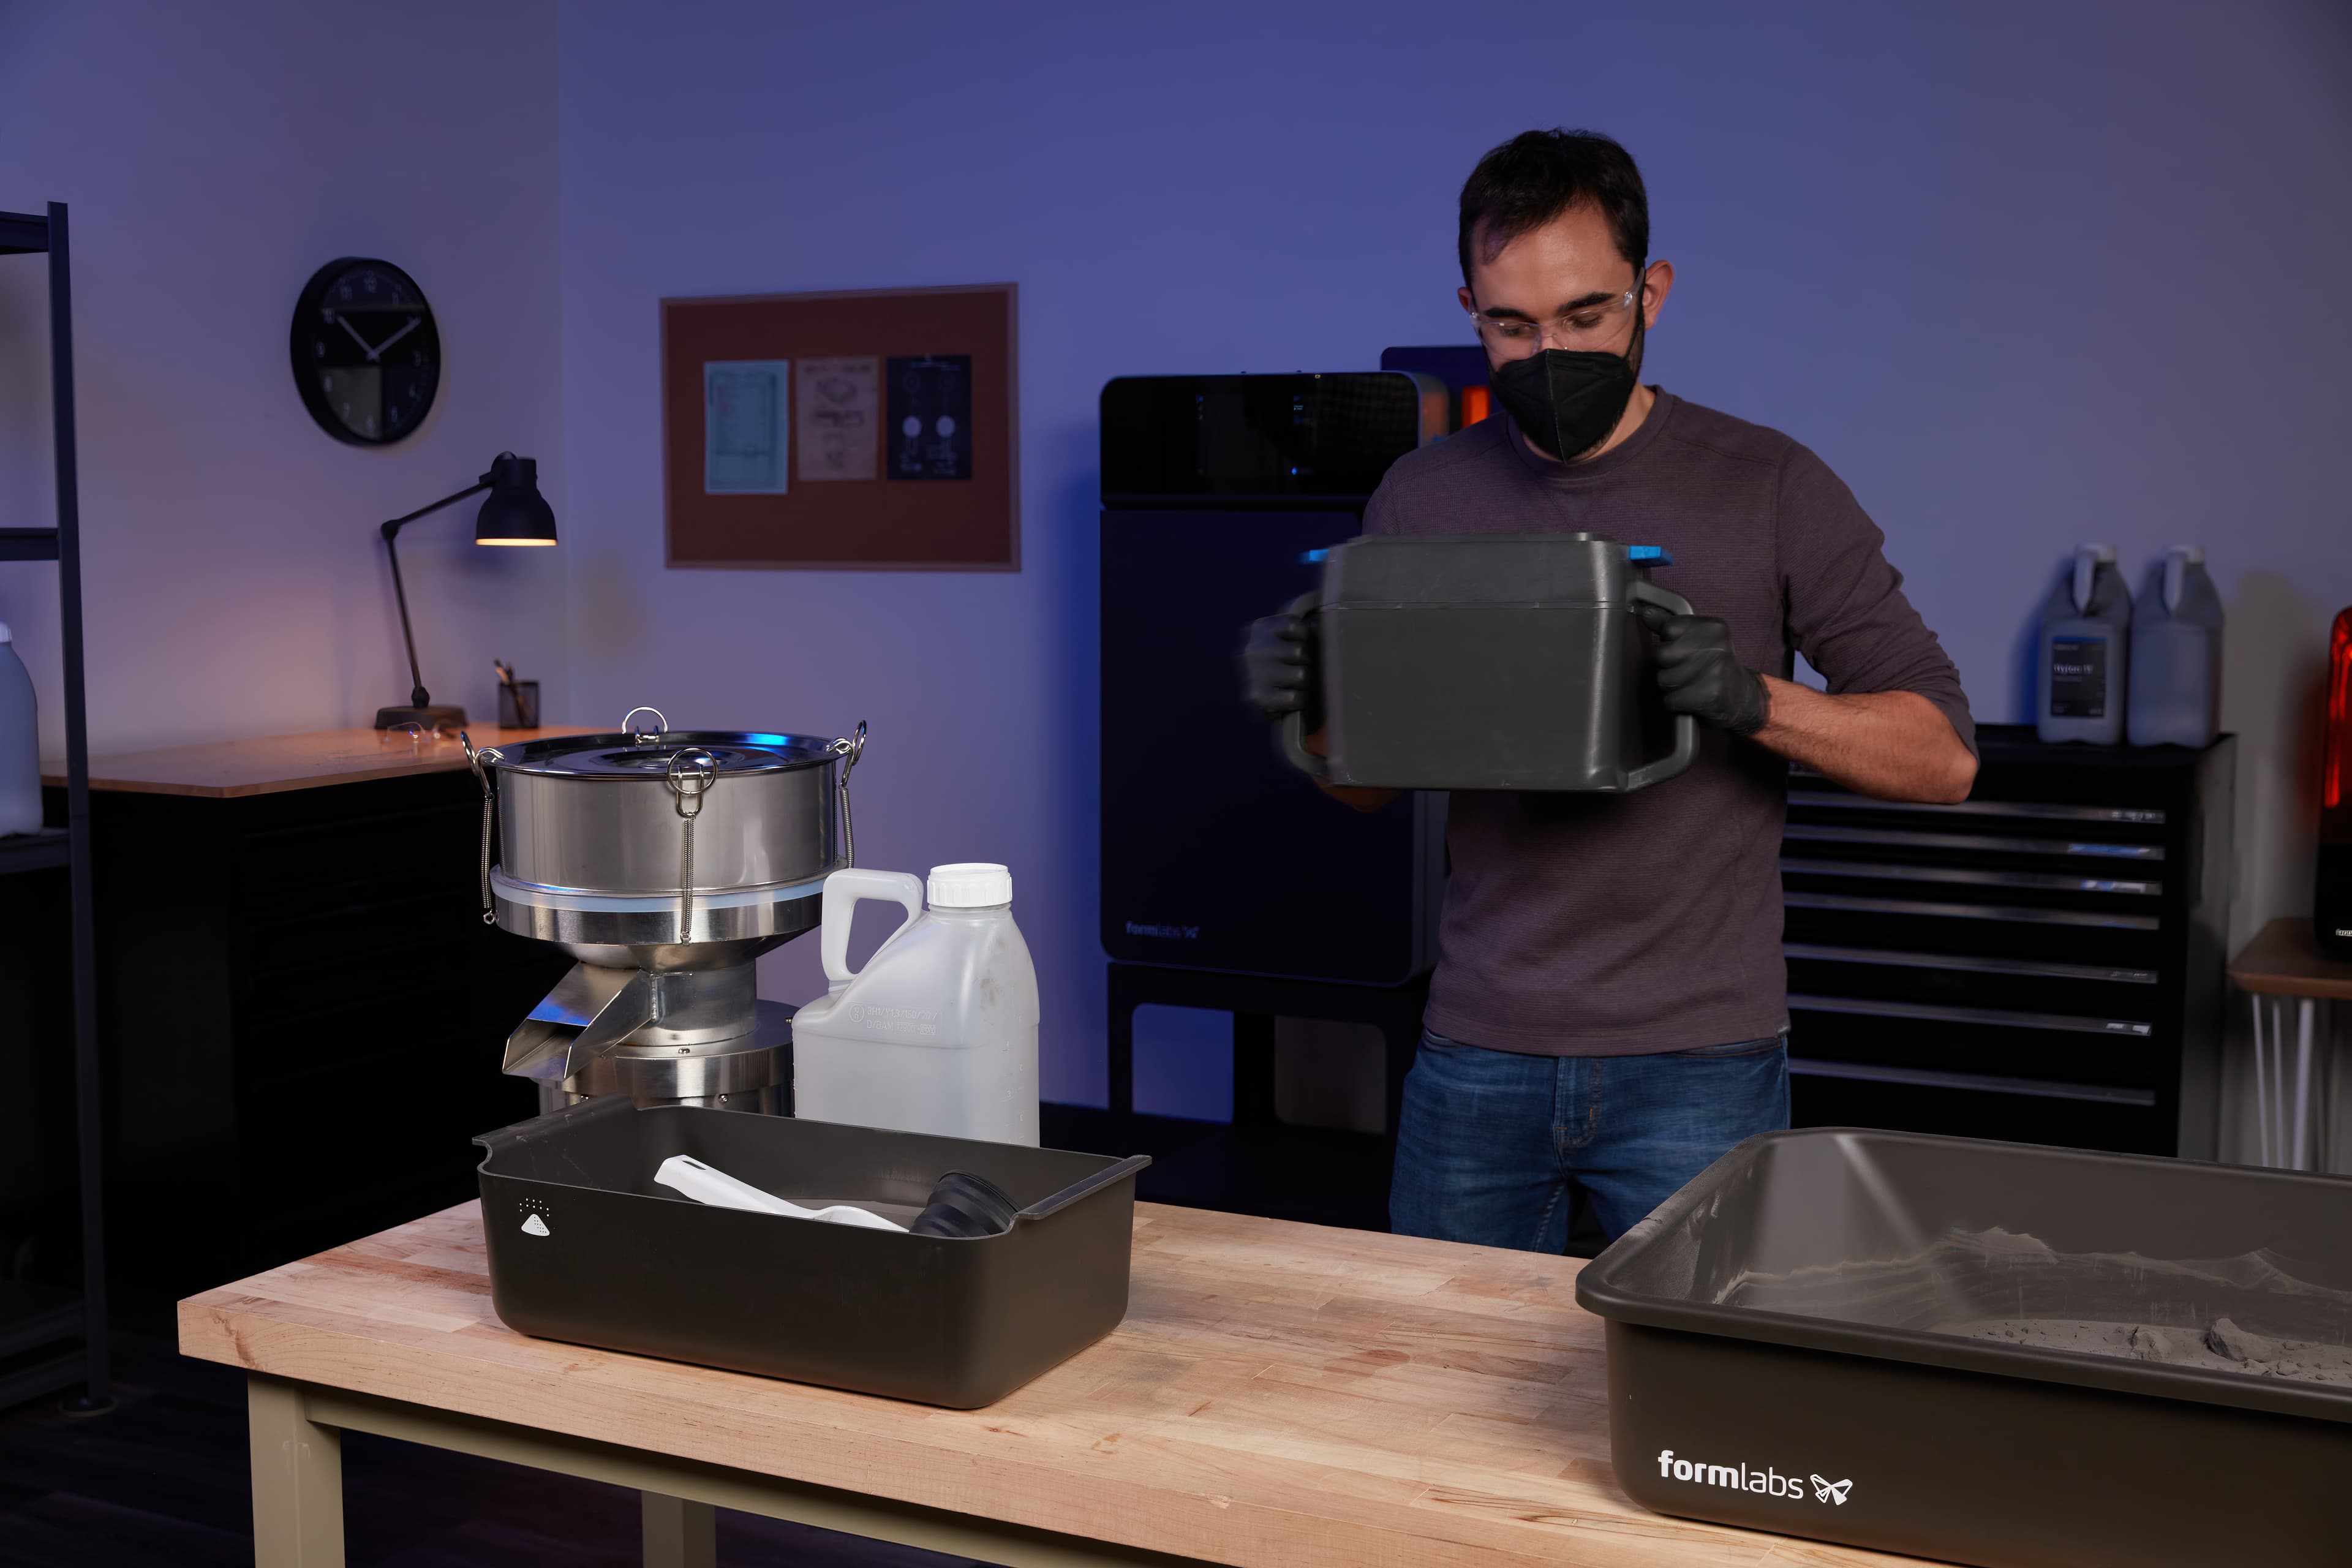
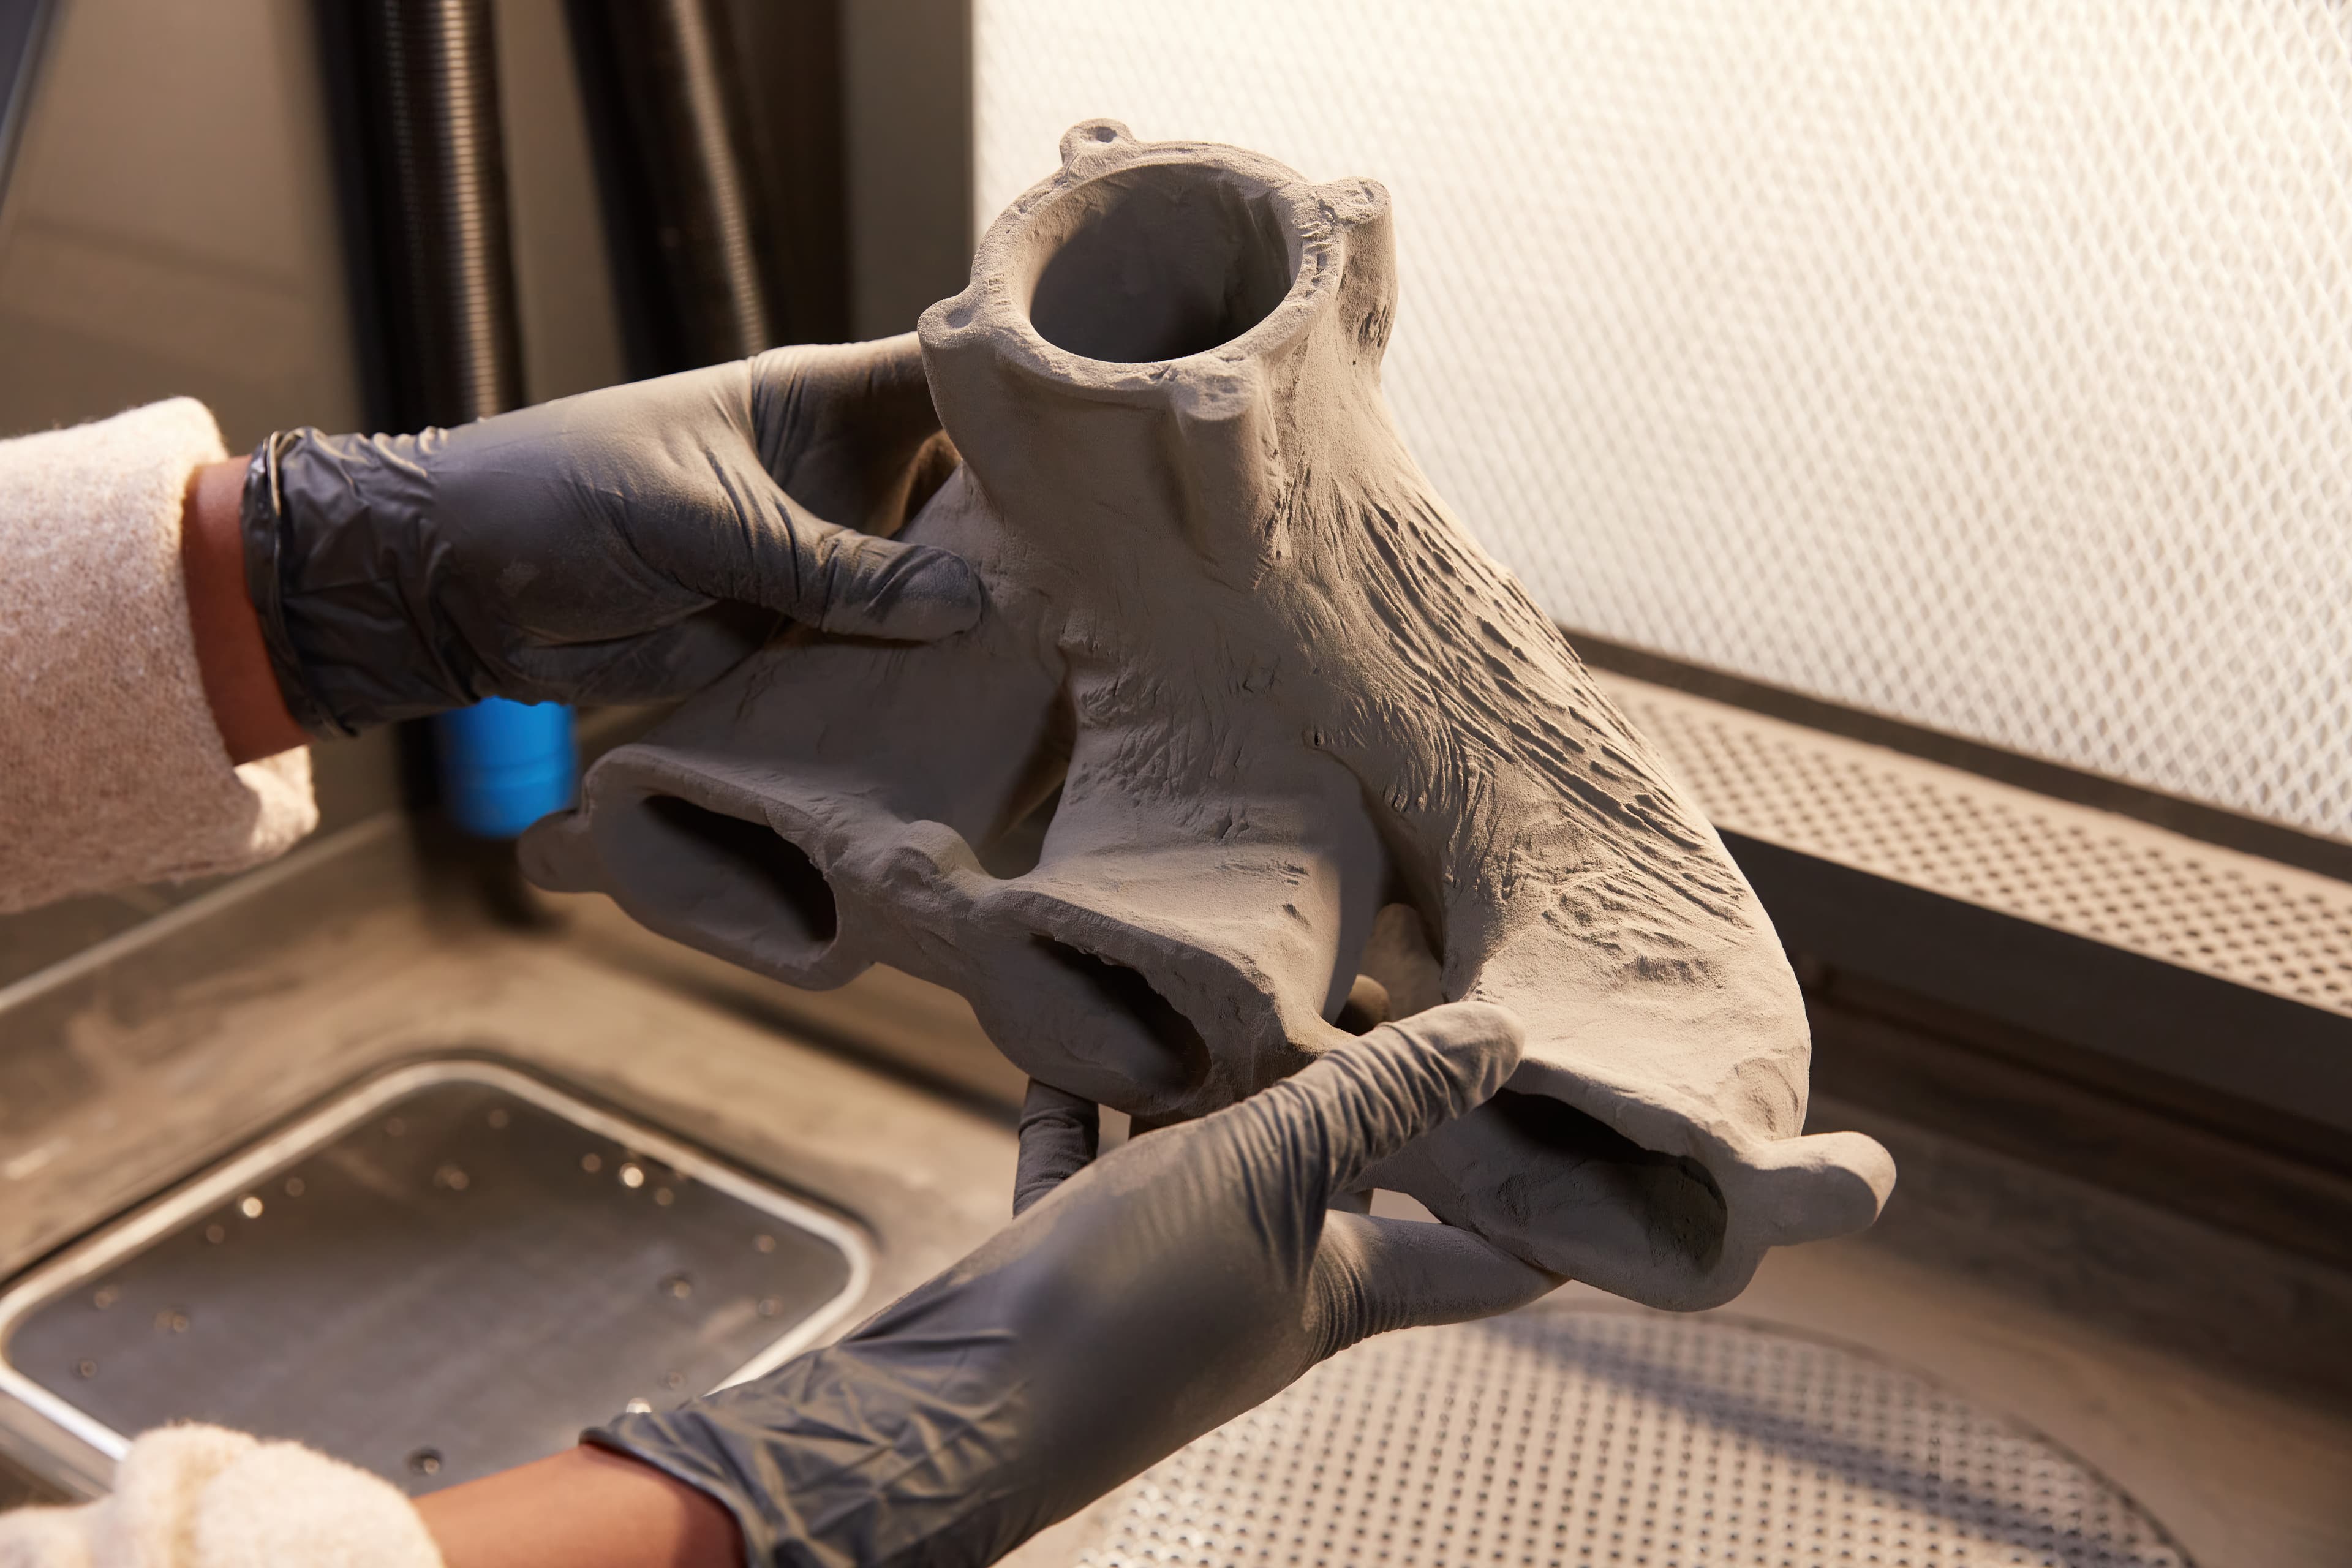
4.A Extracting Parts With Fuse Sift
The Fuse Sift is the multi-tool of the Fuse product line. It not only stores and dispenses powder, it is also the workstation for extracting parts and reclaiming unsintered powder from a print. Let’s take a look at extracting parts from a print with the Fuse Sift.
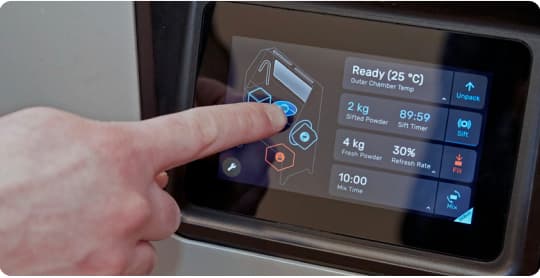
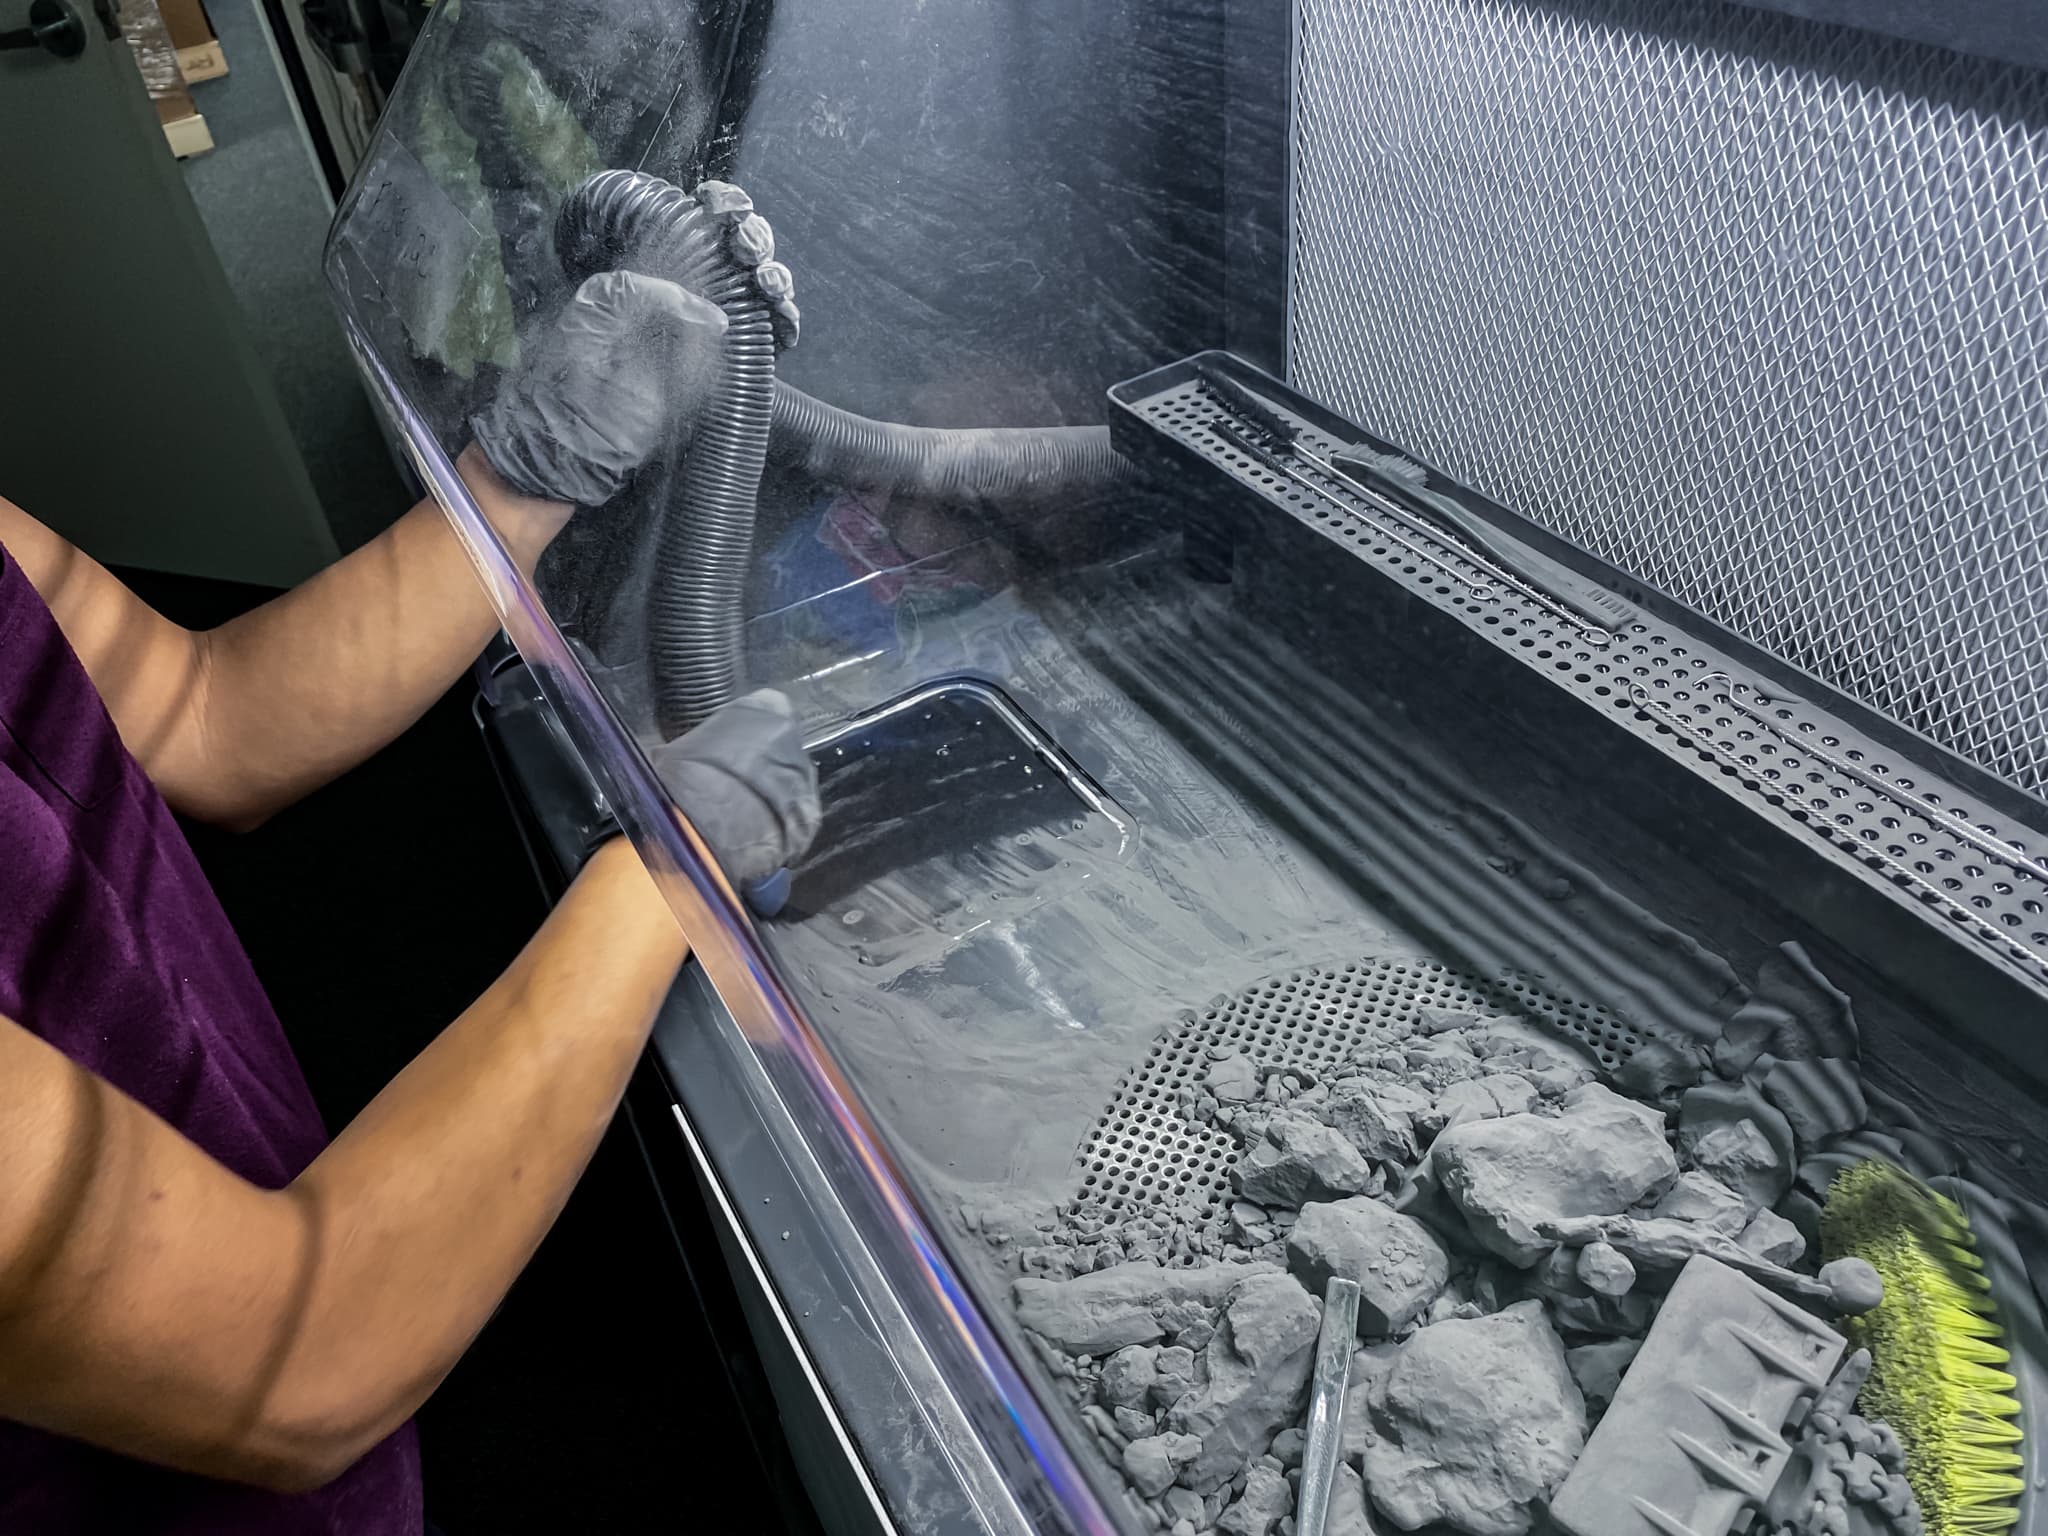
1. Start the vent: Before using the Fuse Sift, turn on the vent to create a negative draft that prevents powder from blowing out of the workspace. A HEPA filter picks up any mobilized powder for later disposal.
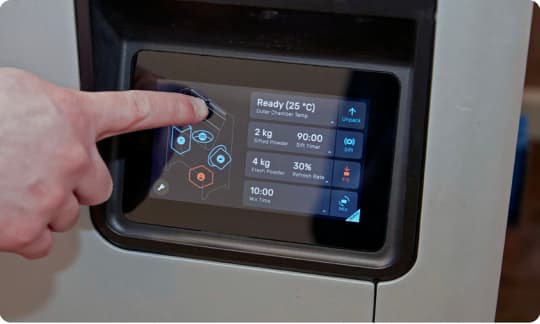
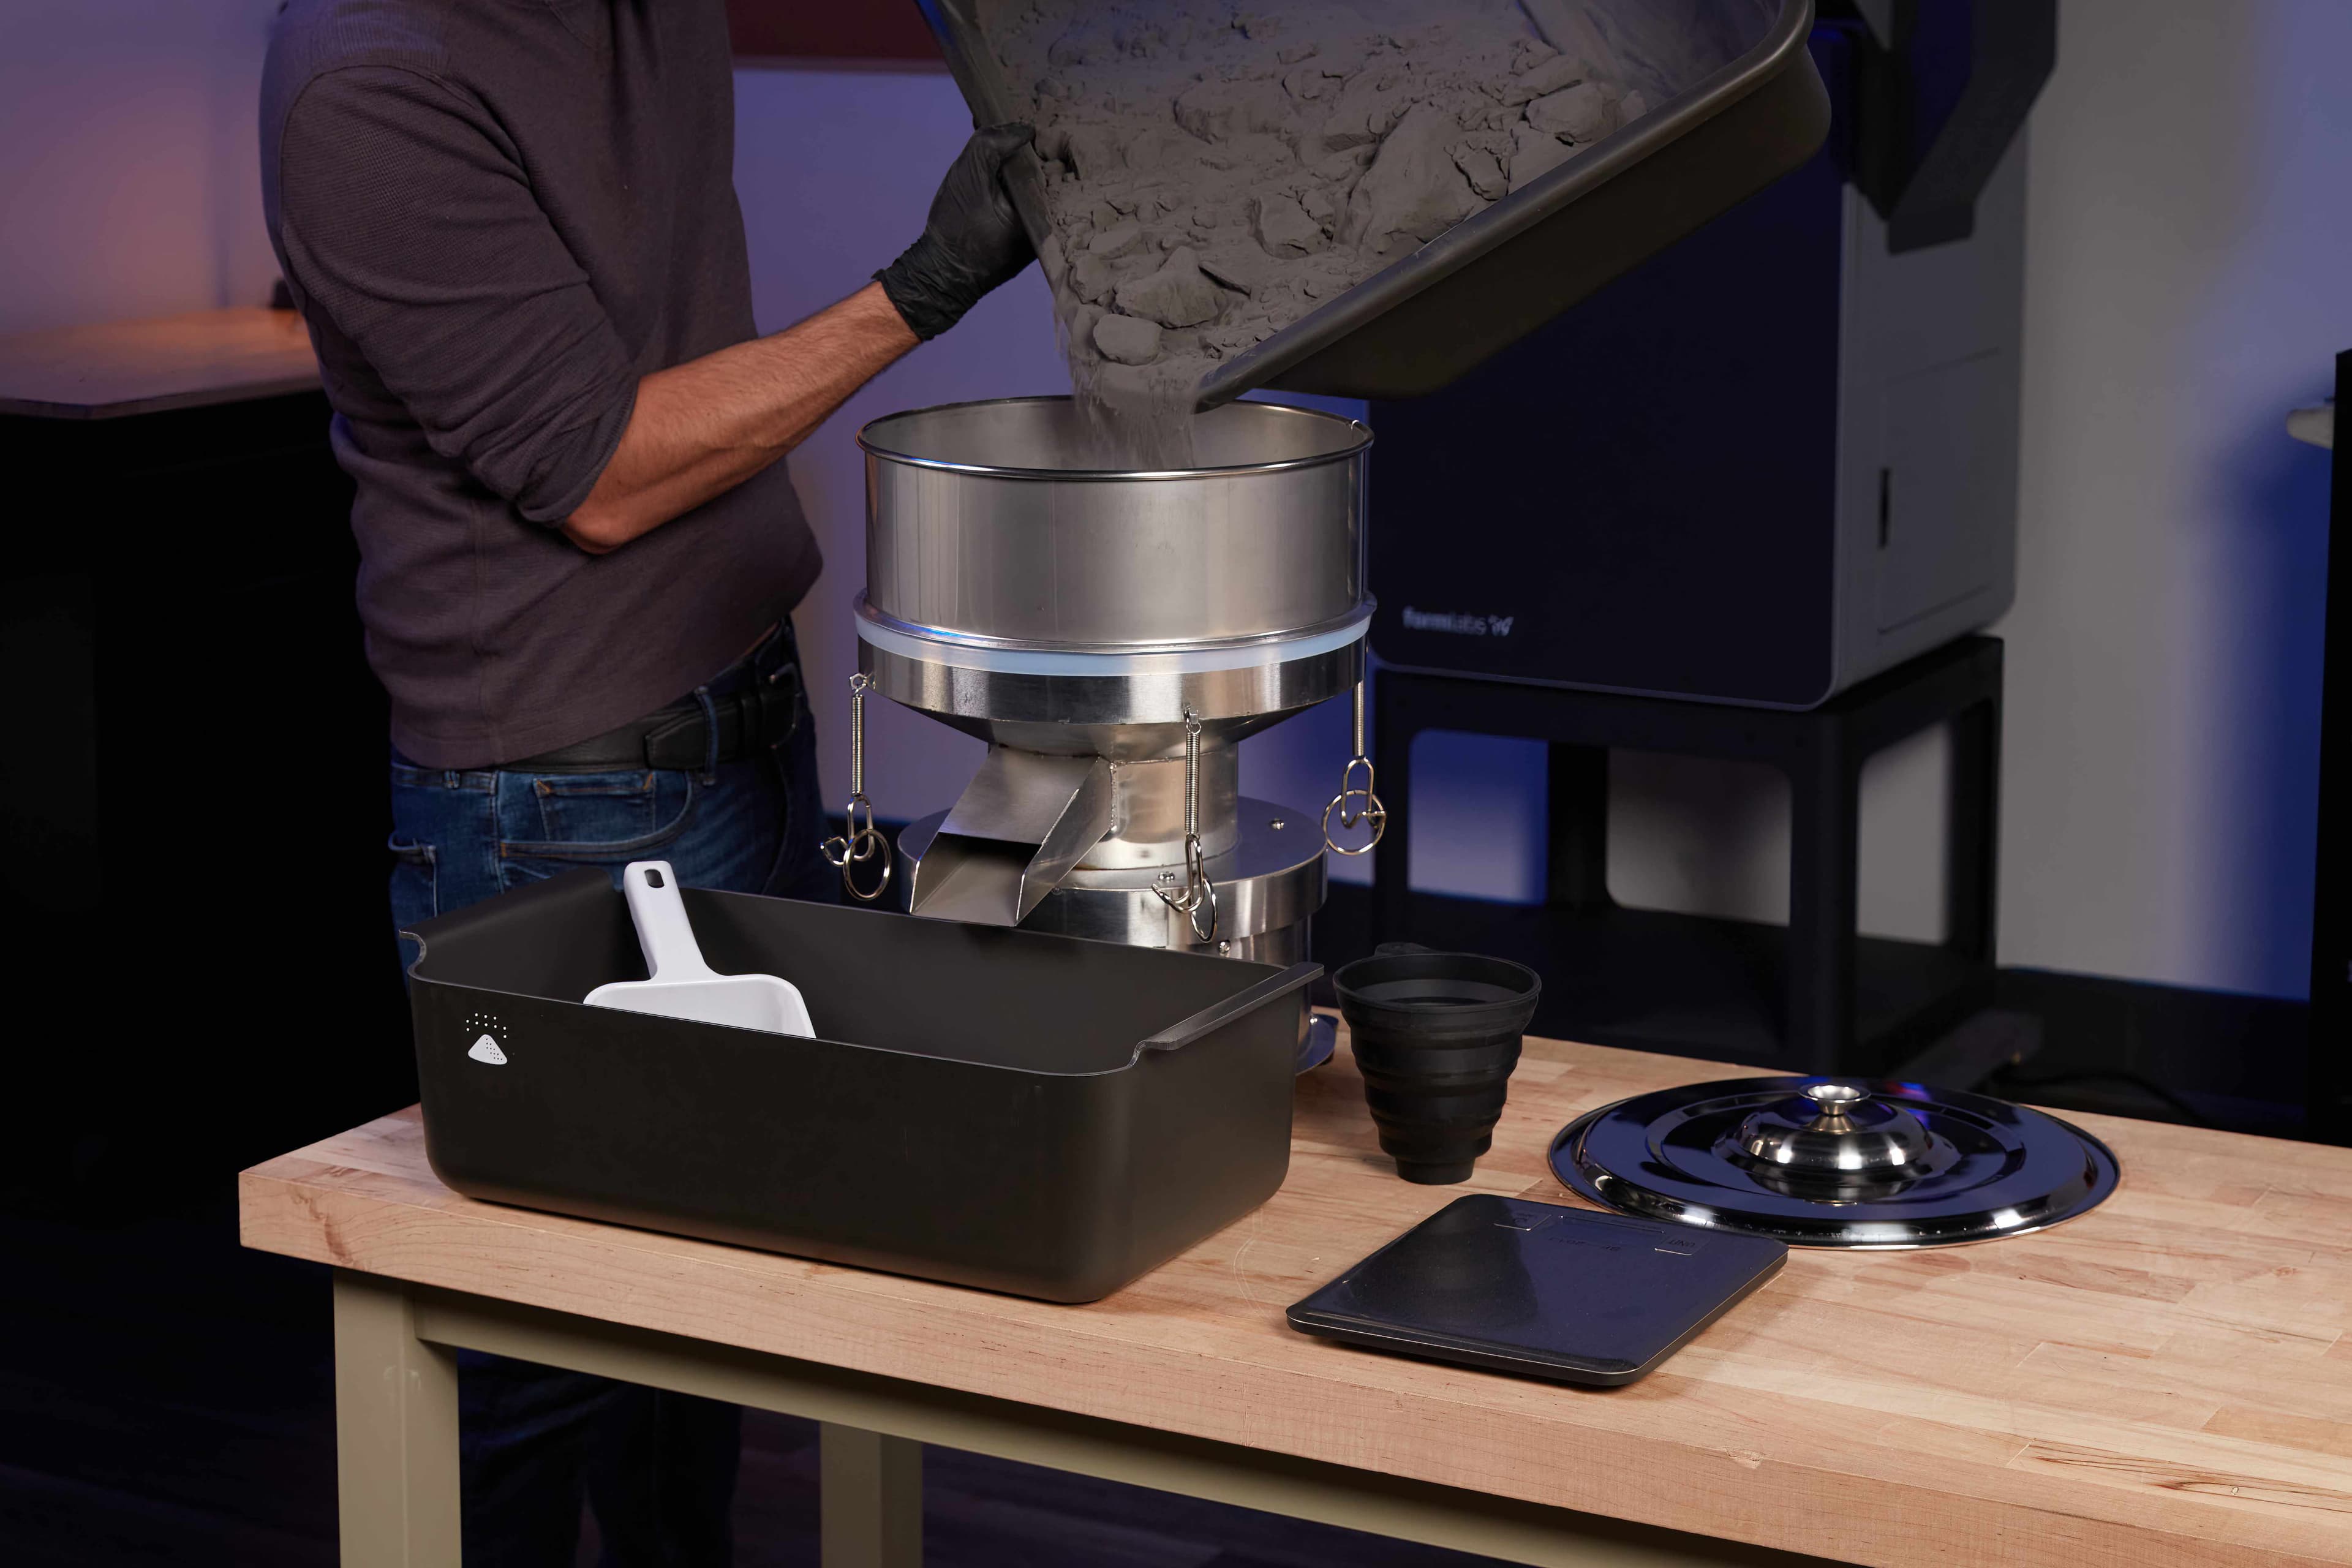
2. Start the sifter: As parts are extracted from the cake, unsintered powder is dislodged and funneled into the sifter below the workspace. A sieve filters out any small chunks or debris to keep the powder clean. The reclaimed powder is then stored in a dedicated hopper until mixing with fresh powder for the next print.
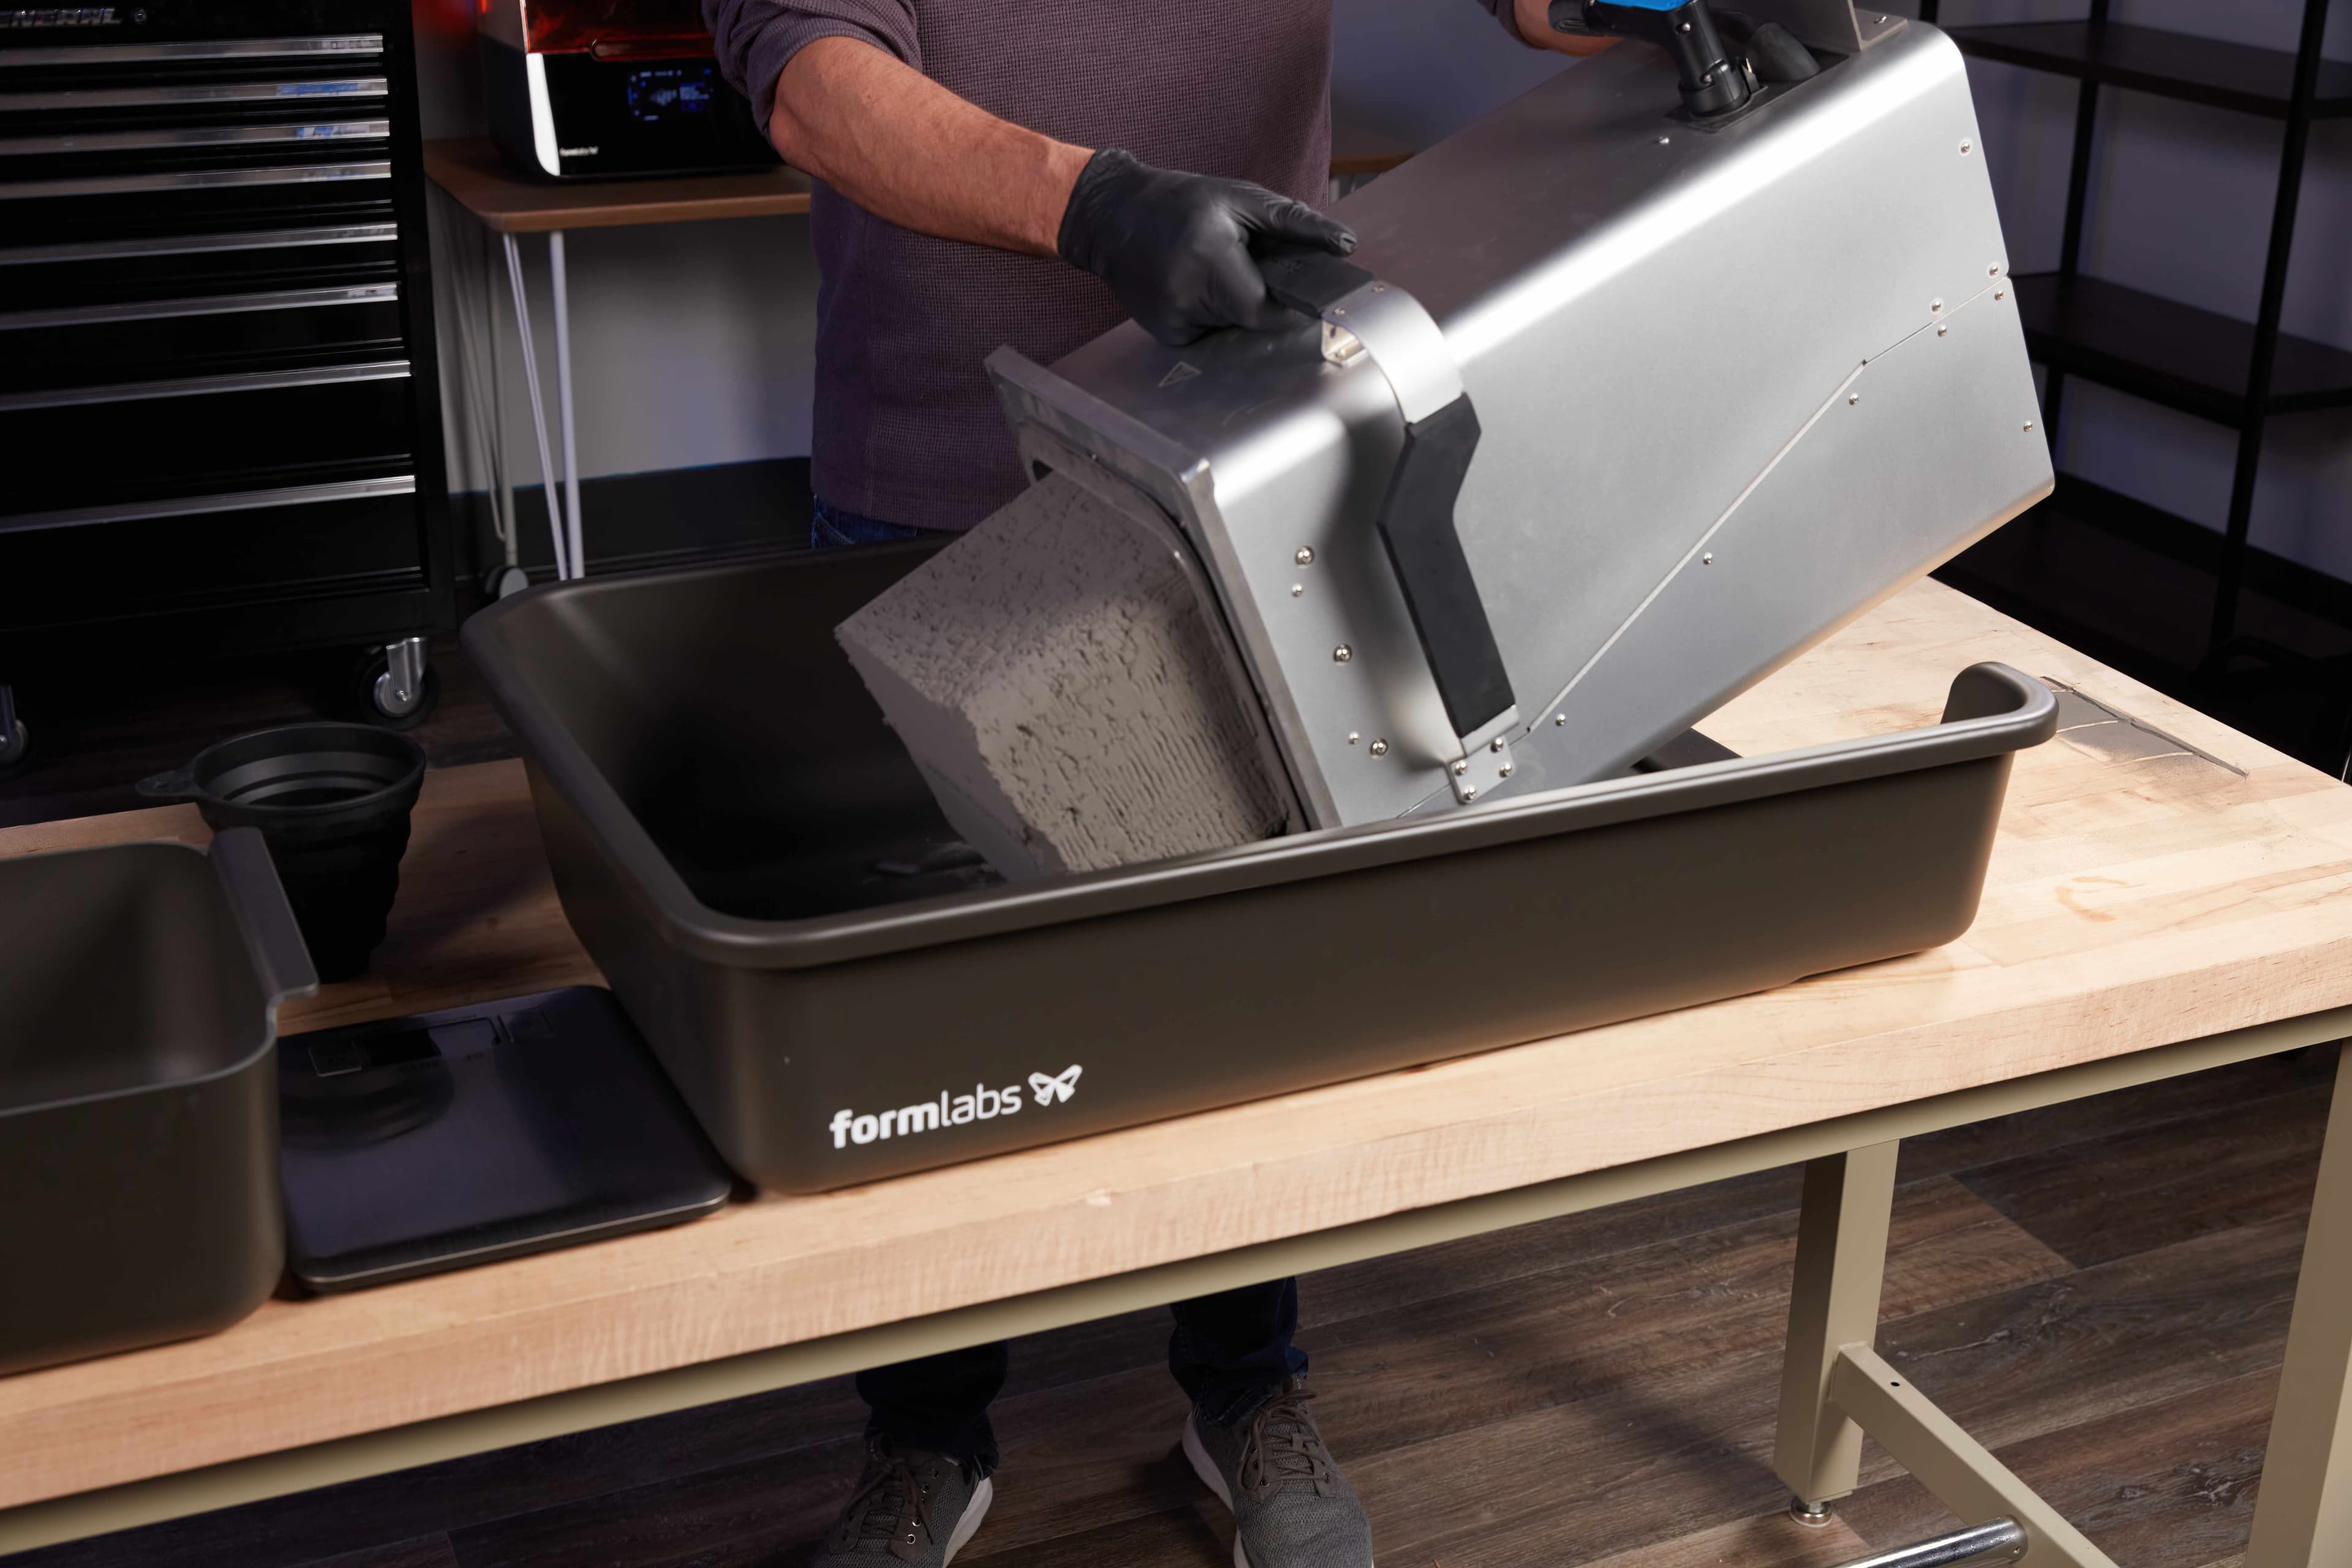
3. Ejecting the cake: Use the physical and virtual touch controls to raise and lower the print bed, allowing you to stagger the cake as it ejects from the build chamber into the Fuse Sift workspace. This is helpful for prints that contain a densely packed assortment of small or various parts.
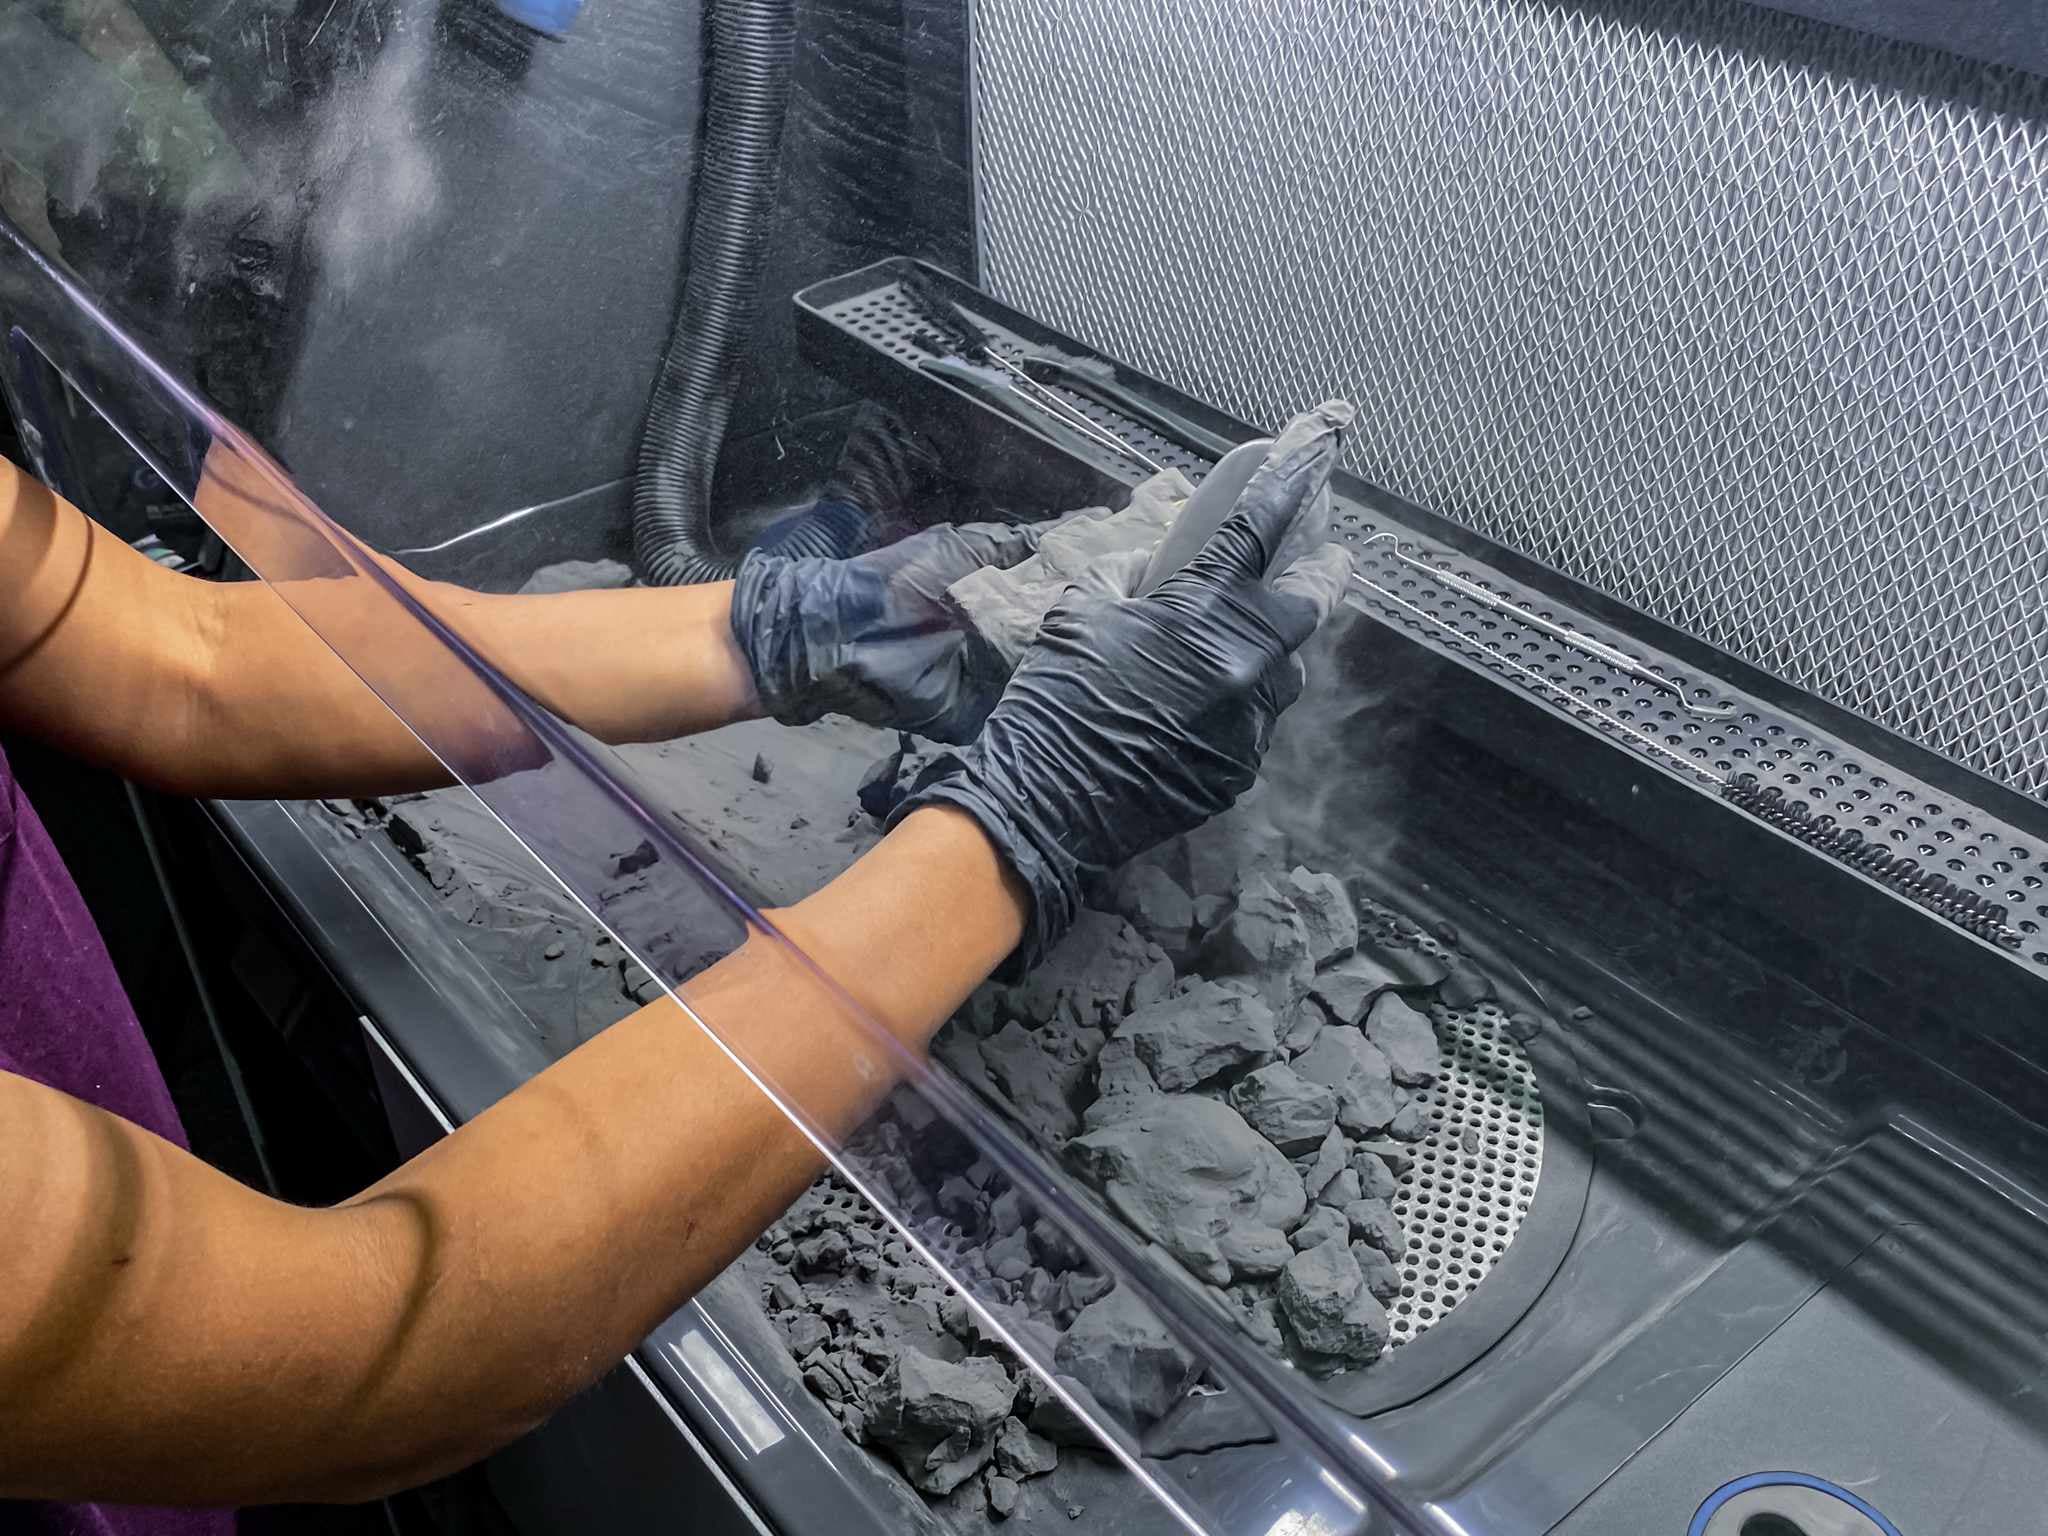
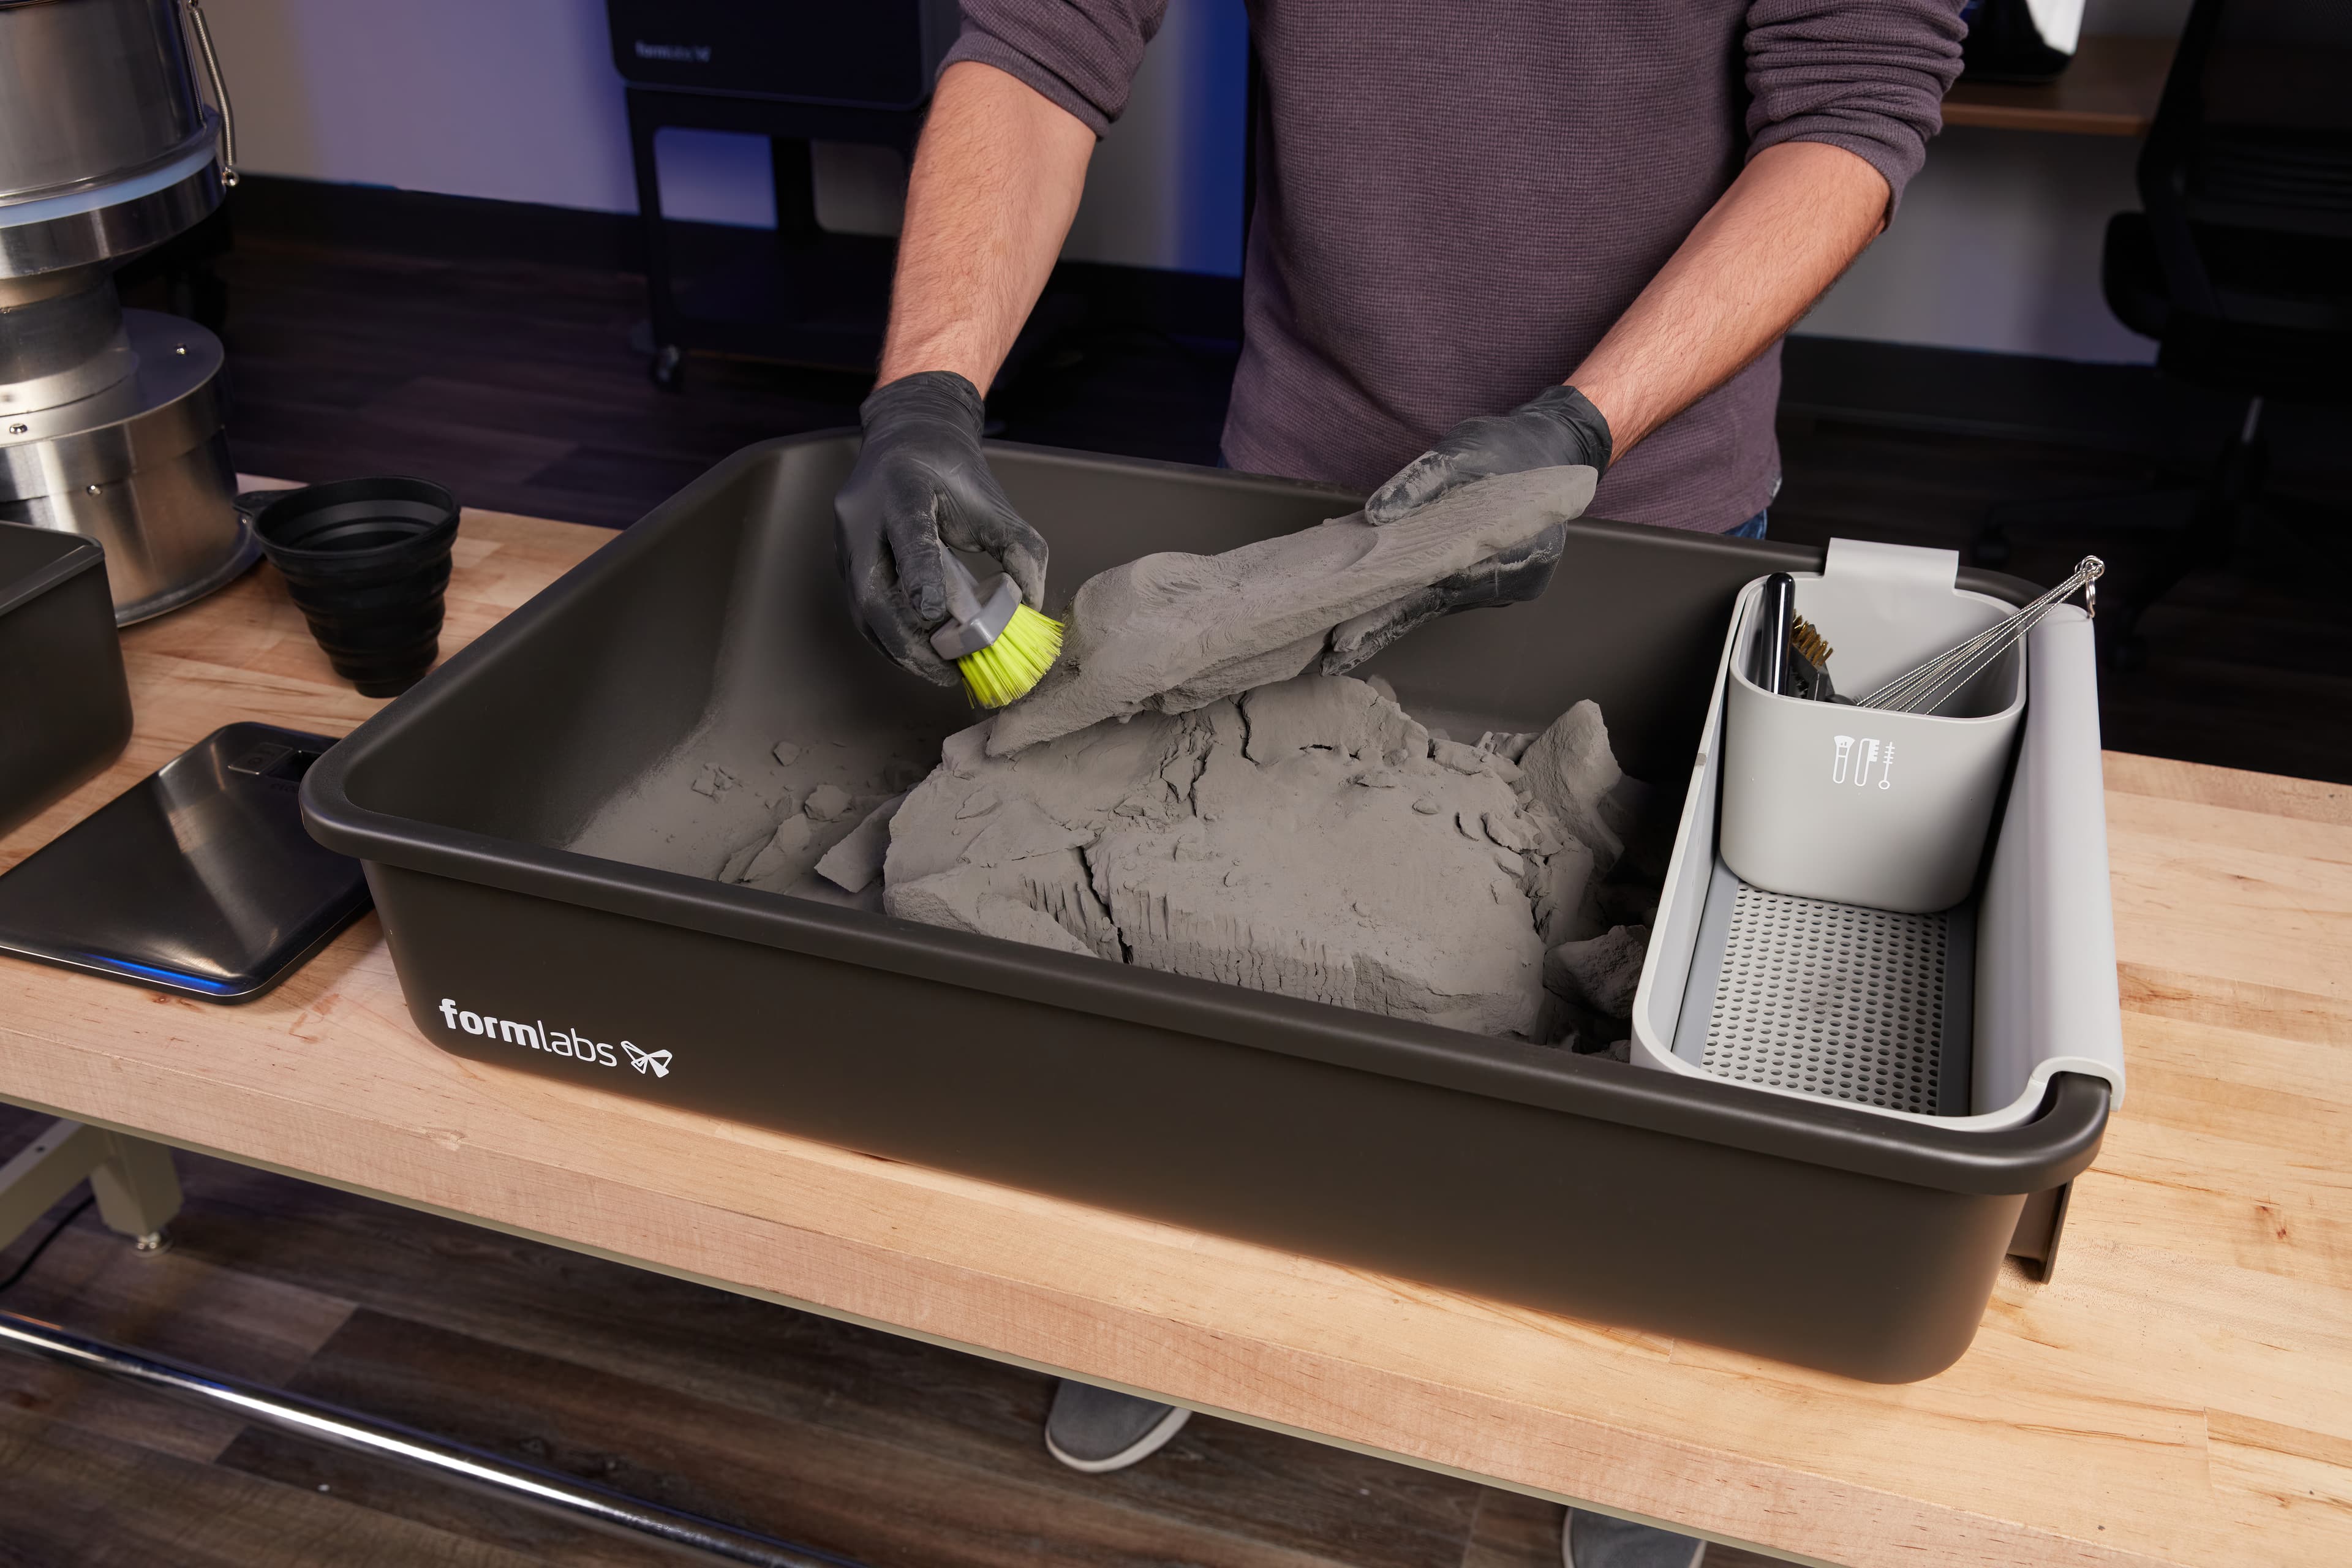
4. Extracting parts: Extract the parts from the cake of unsintered powder, breaking chunks by hand and shaking off the loose powder. When using Fuse Blast for the cleaning step, parts only need to be roughly depowdered and placed in the transfer container. This step should only take 5 minutes. If you are using a manual media blaster or a model not equipped with media separation (or skipping the media-blasting step), you can scrub off the unsitered powder and semisintered shell with the included brushes. A wire basket is provided to neatly collect your parts while you continue processing a print.
5. Cleanup: After extracting parts, begin cleanup. Powder that accumulates within the workspace can be wiped into the sifter and recaptured for later use. Smaller deposits around the workspace, within the build chamber enclosure, and on the hood can be picked up with the integrated vacuum hose for later disposal. The vacuum is controlled by a physical button conveniently located on the control panel.
6. Reclaim Powder: Insert an empty cartridge into the drawer below the machine, then set the desired refresh rate on the interface and tap "Fill". Fuse Sift will automatically dose the new and used powder into the cartridge for your next print. Once the cartridge is full, remove it from the drawer and slide it onto the mixer on the right side of Fuse Sift then tap "Mix." Once this is complete, the powder is ready for your next print!
4.B Extracting Parts With Fuse Depowdering Kit
Fuse Depowdering Kit is an all-in-one manual post-processing kit that contains the accessories to easily extract SLS parts and recover and mix used powder to prepare for the next print.
1. Remove the cake: After the cooldown is complete, unplug and remove the Build Chamber from the Fuse Series printer, bring it to the Fuse Depowdering Kit workspace and lie it flat, handle facing up, on the opening. Remove the cake from the Build Chamber by tilting the bottom of the build chamber upwards until the cake slides out of the build chamber and into the workspace.
2. Extract parts & separate powder: Break the parts out of the unsintered powder by hand. When using Fuse Blast for the cleaning step, you on only need to take 5mn to roughly depowder your parts. If you are using a manual media blaster or a model not equipped with media separation, you can scrub off the unsitered powder and semi-sintered shell with the included brushes and picks..
3. Sift used powder: Pour the used powder out of the workspace and into the vibratory sifter. Collect the sifted powder in the provided container. The sifter removes any debris or larger particles, ensuring that the powder is safe for reuse
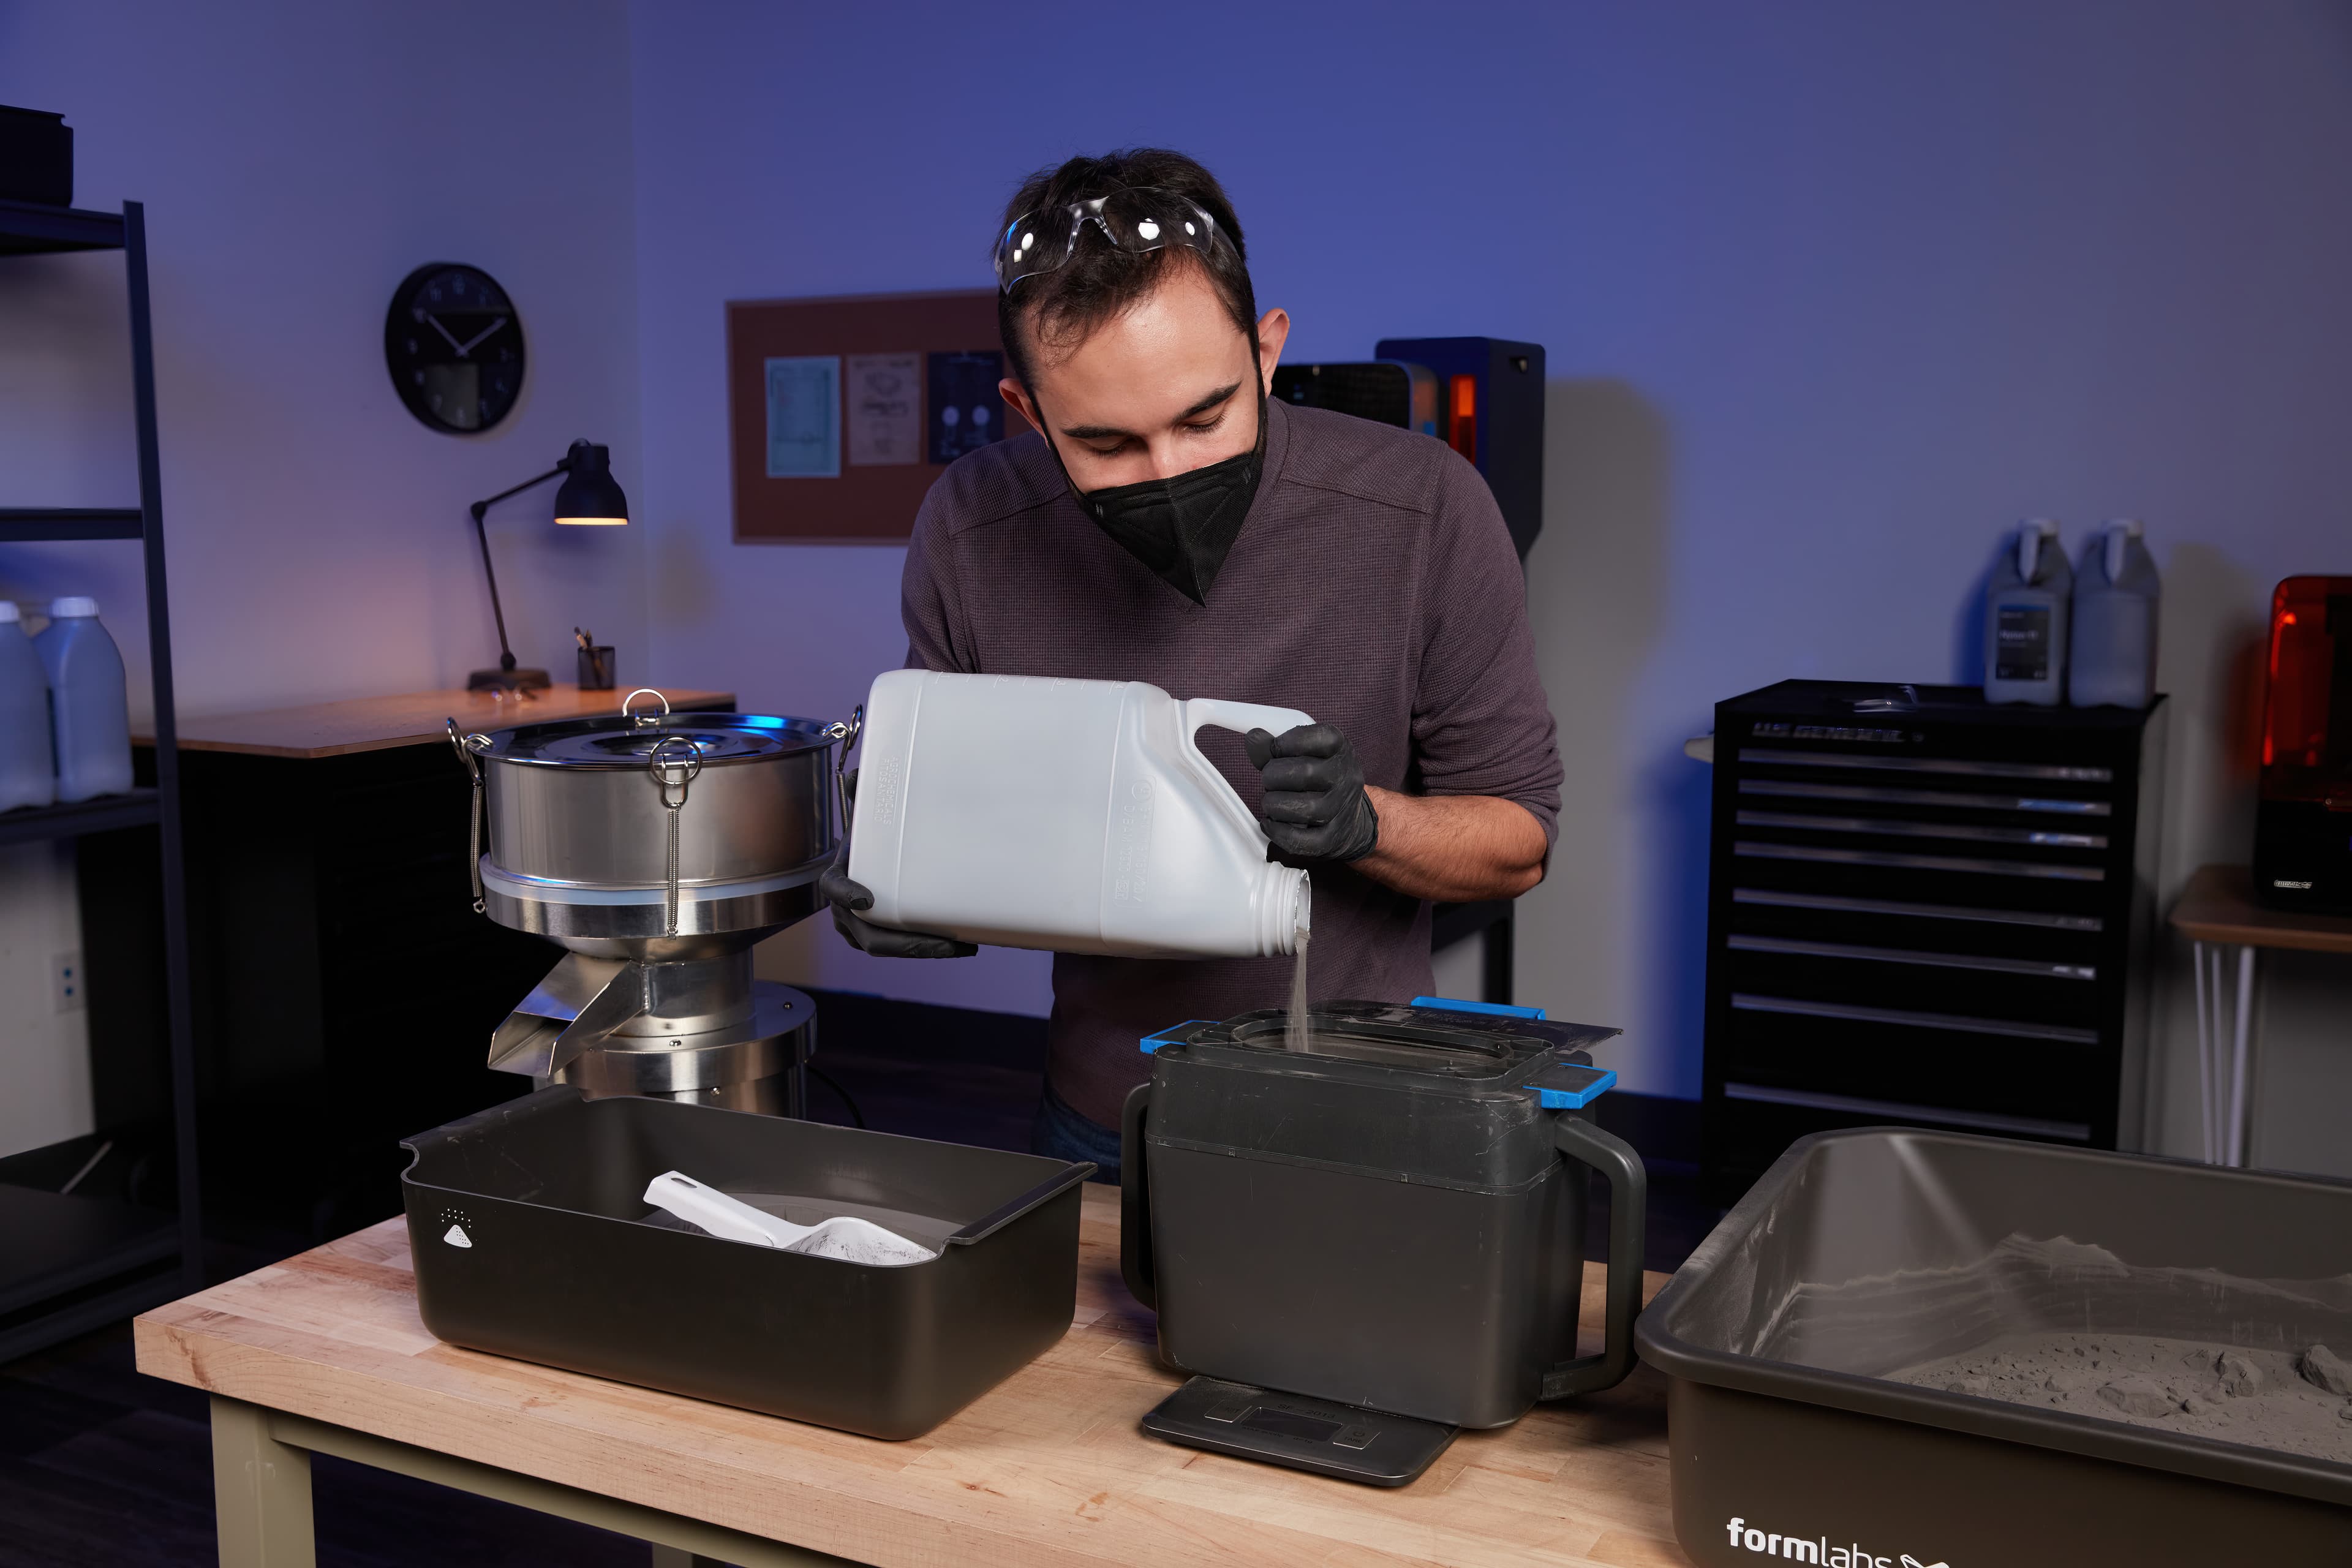
4. Dose powder: Use the scale to measure new and used powder and pour it into the Fuse Cartridge. Manually shake the cartridge for at least 1 minute, changing shaking direction multiple times, to ensure both are well mixed. The powder is now ready for your next print!

5. Reclaiming Powder
The dirty secret of SLS printing is waste. Most systems cannot actually achieve their advertised refresh rates, as print quality and properties degrade after just a handful of cycles, forcing users to throw away used powder and start anew. Fuse Series printers produce high-quality prints using a refresh rate ranging from 20% to 50%, depending on the material used. In extensive internal and external testing, no degradation in quality was seen, even after dozens of print cycles. Combined with the high print densities possible on Formlabs SLS printers, current customers are able to print with little to no waste at all, reusing all of their used powder.
Refresh rate: The ability of an SLS 3D printer to print with a mix of recycled powder, minimizing material waste and optimizing cost per part. The powder refresh rate is the minimum ratio of fresh powder required to print.
| THE COMPETITION | FUSE SERIES PRINTERS | |
|---|---|---|
| Quality degrades after as few as 5–9 prints of mixed used/new powder | 20-50% powder refresh rate for minimal material waste | |
| Requires all used powder to be thrown away, increasing actual material costs by upwards of 30% | VS. | Consistent mechanical properties, proven through extensive internal and external testing |
| Messy, manual powder recycling processes | Simplified powder recycling using the Fuse Sift powder recovery station |
A refresh rate of 30% (for Nylon 12) means you can print with up to 70% reclaimed powder. Our approach to SLS enables low-to-zero waste, meaning reduced material costs, and ultimately more printing.
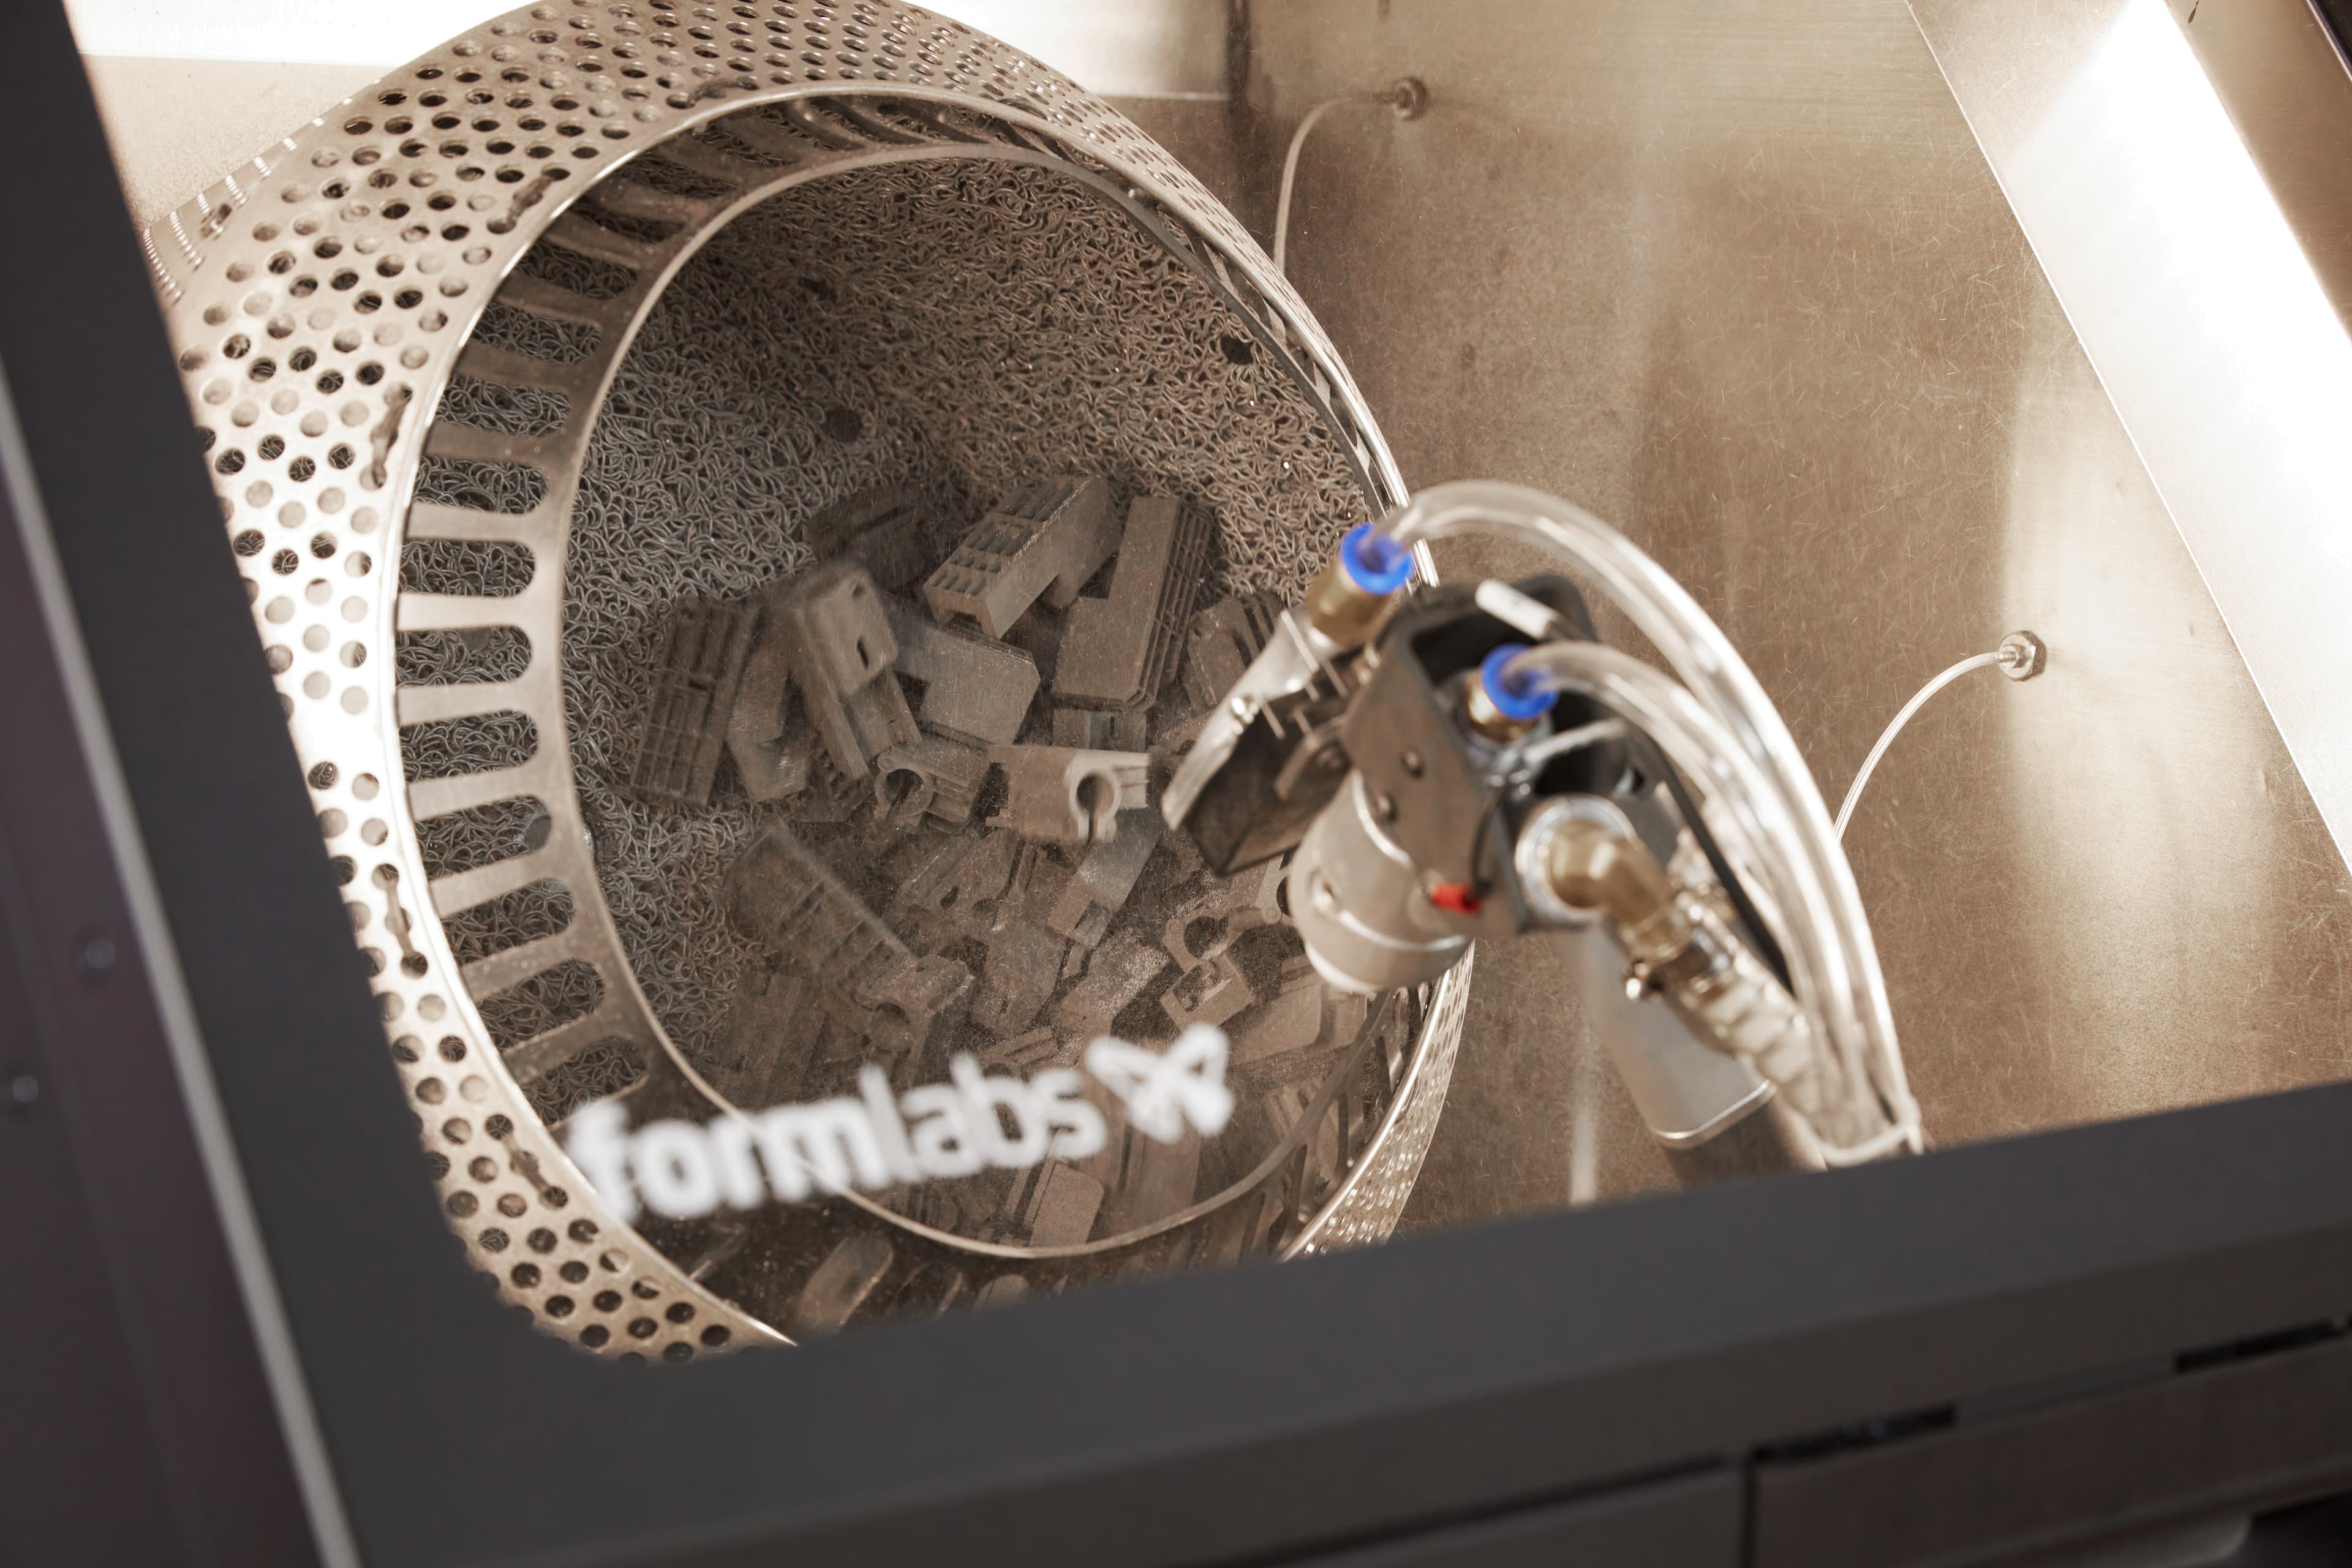
6. Media Blasting
Media blasting is a critical step to clean SLS parts. Fuse Blast is an advanced automated postprocessing solution that quickly removes powder and consistently delivers professional parts that are clean to the touch in as little as 15 minutes, and offers an optional polishing function.
1. Transfer Parts: Open Fuse Blast, then bring the transfer container from Fuse Sift. You can clip it to the front of the Fuse Blast and then place the parts in the tumbling basket.
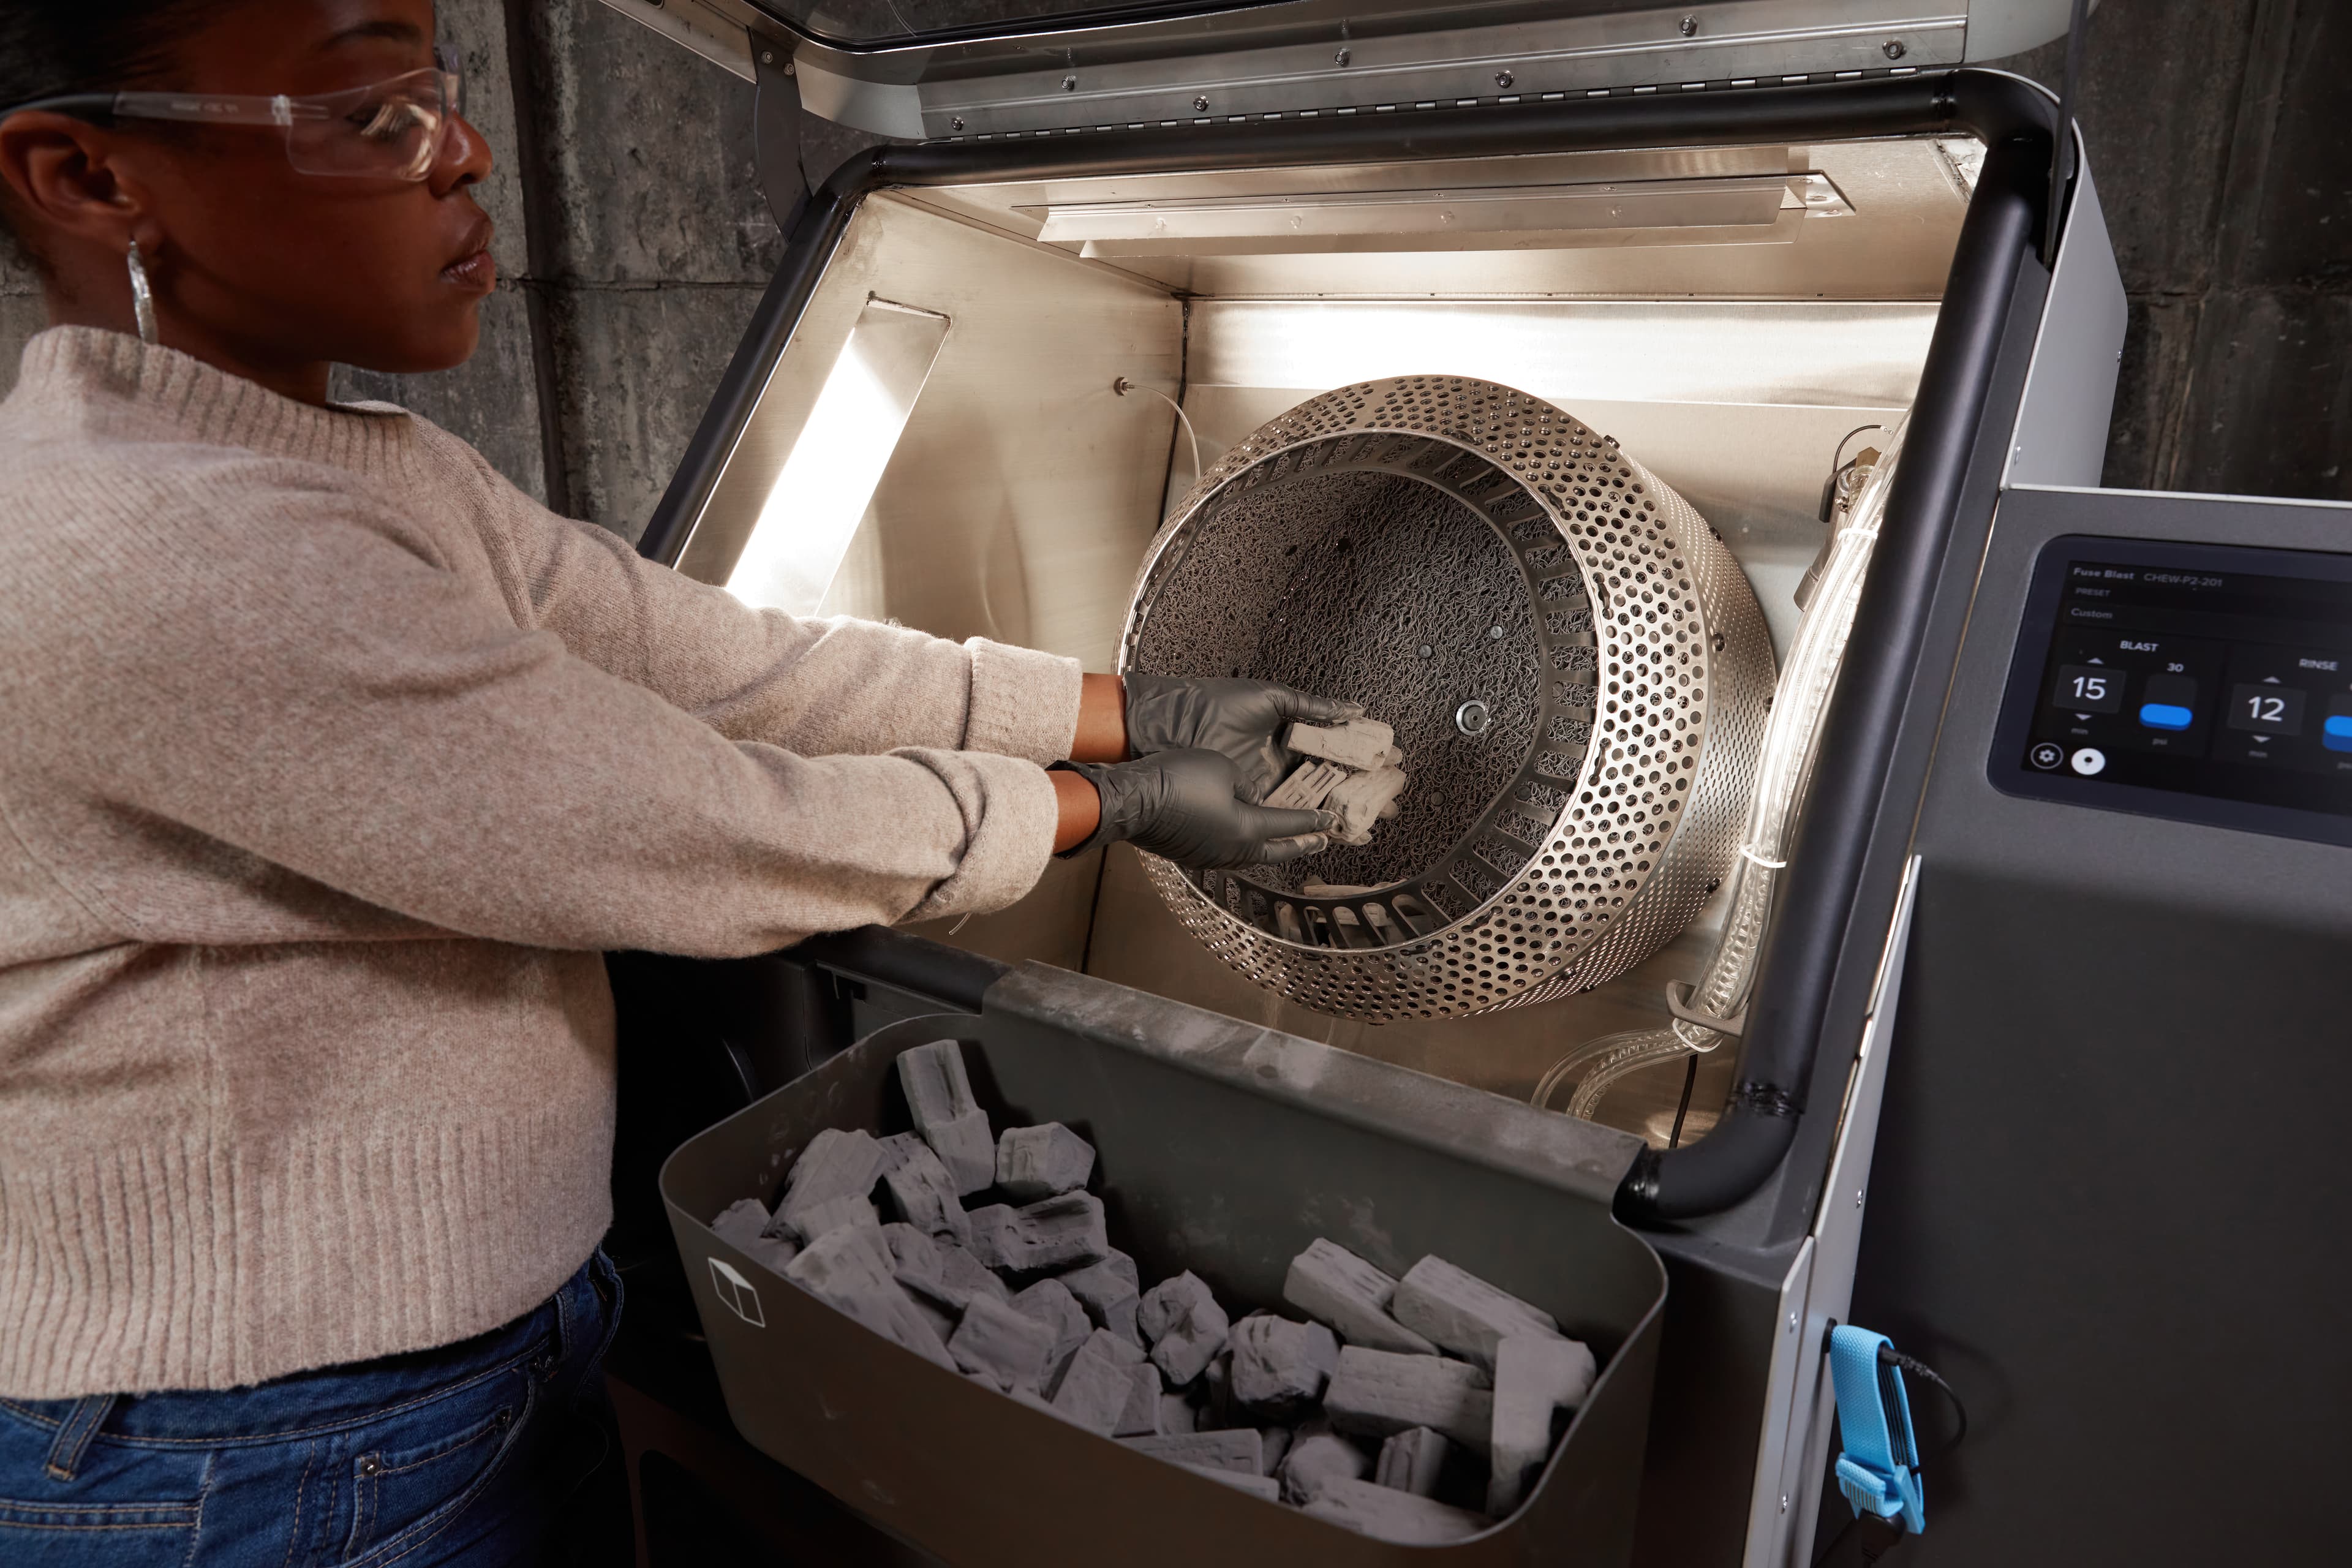
2. Set Up A Cleaning Cycle: The easiest way to clean your parts is to pick one of the preprogrammed routines. Choose the setting that best fits your parts, or adjust the settings of your cycles manually to match your part requirements. Click "Start" and let Fuse Blast do the work for you.
Note: To clean your parts with Fuse Blast, we recommend using glass media with a nominal diameter range of 200-300 µm.
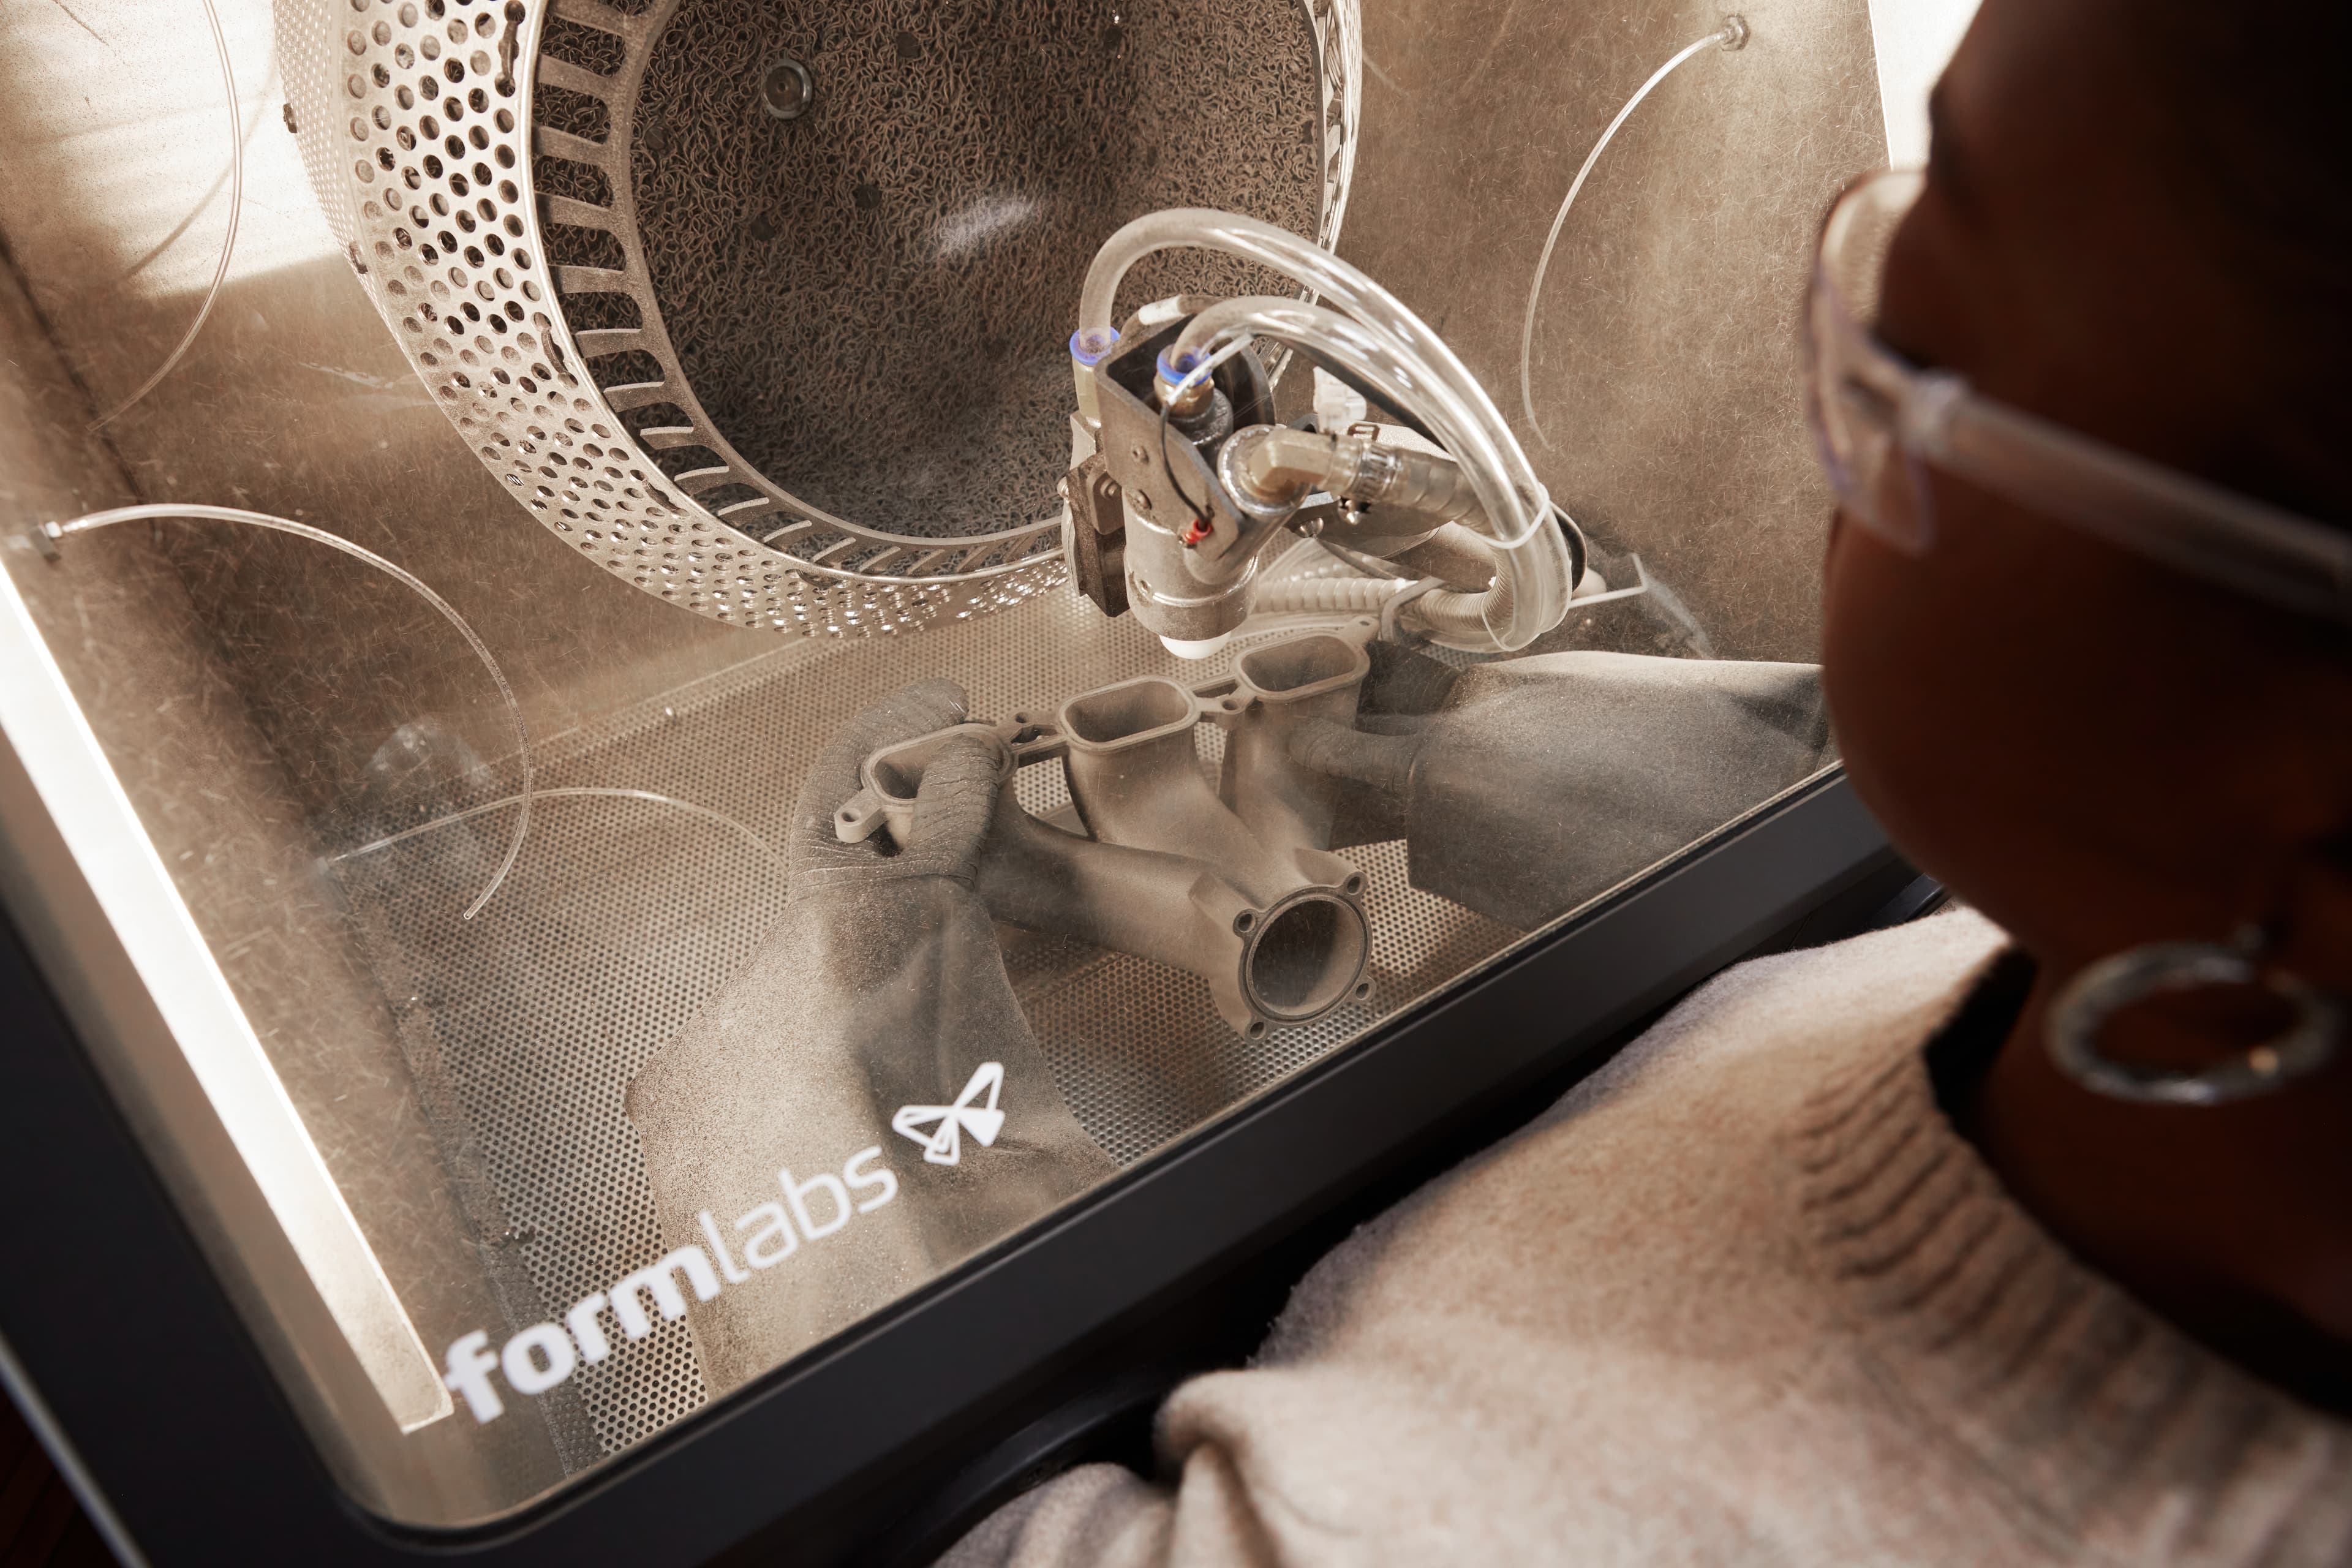
3. Manual Cleaning: For large or intricate parts, Fuse Blast comes with the option to switch to manual blasting. Simply adjust the nozzle and hold your parts with both hands under the jet, or pick up the blasting gun for handheld media blasting.
4. Change Media: In case of media saturation, or if you want to switch from cleaning to polishing, you will need to discard or change your media. For this, simply collect it by opening the valve over a container and running the machine for a minute.
Note: Fuse Blast's passive media separation extends media life four to eight times and enables you to clean parts without thoroughly removing powder first.
5. Polishing: Fuse Blast comes with the option to polish parts with a simple add-on. Simply insert the polishing system into Fuse Blast and switch your media to the Formlabs polishing media, then select a cycle or choose your custom settings.
Note: The polishing cycle enables you to clean and polish parts in one step. As the polishing media is larger than the cleaning media, it might be less effective in getting powder out of small negative features.

Request a free sample part to see Formlabs 3D printed materials firsthand and contact our 3D printing specialist to find the right solution for your application.