
L'utilizzo di parti stampate in 3D tramite sinterizzazione laser selettiva (SLS) si sta diffondendo nei settori più diversi: da quello aerospaziale fino alla progettazione di occhiali, questa tecnica viene scelta perché offre ottime proprietà meccaniche e metodi di produzione convenienti. Per migliorare ulteriormente le proprietà meccaniche ed estetiche, chi si affida alla stampa 3D SLS spesso implementa anche tecniche di post-elaborazione, come la tintura, il rivestimento, la placcatura o la verniciatura.
La tintura delle parti stampate in 3D in Nylon 12 White Powder sulle stampanti 3D SLS della serie Fuse permette di realizzare prototipi convincenti e parti pronte per la produzione in un'ampia gamma di colori.
Questa guida illustra il processo di tintura delle parti stampate in 3D tramite sinterizzazione laser selettiva e i numerosi vantaggi di questa tecnica.
Perché tingere le parti 3D SLS
L'utilizzo di parti stampate in 3D tramite sinterizzazione laser selettiva è sempre più diffuso in tutte le fasi dei processi, dalla progettazione alla fabbricazione. A causa della superficie leggermente granulosa delle parti 3D SLS, è in incremento anche l'adozione di soluzioni di post-elaborazione, tra cui levigazione, rivestimento e tintura.
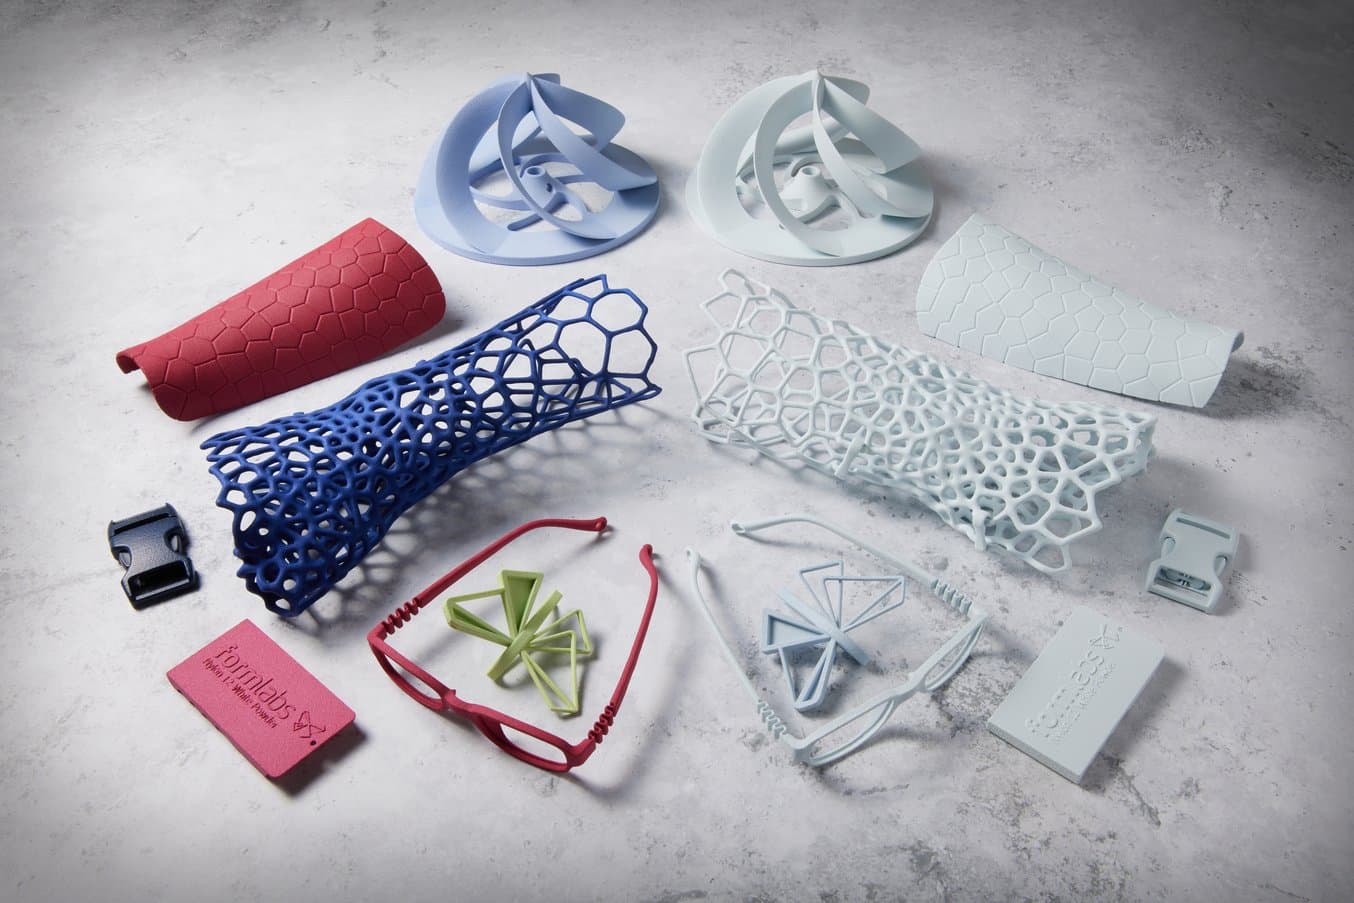
La tintura è un metodo conveniente che consente di colorare parti SLS e migliorarne l'aspetto estetico senza alterare le proprietà meccaniche. Esistono metodi di tintura per qualsiasi workflow: dalla colorazione di piccoli lotti fino alla produzione in grandi quantità di parti con precise tonalità Pantone. La combinazione di Nylon 12 White Powder e Fuse 1+ 30W permette di ottenere in modo affidabile a una vasta gamma di tonalità, dagli arancioni ai rosa, passando per i blu e praticamente qualsiasi altro colore. La tintura è una soluzione valida quando il colore è richiesto per differenziare il prodotto, per soddisfare norme estetiche specifiche o per scopi di visibilità legata alla sicurezza.
Il nostro team ha testato quattro metodi di tintura comuni e ha raccolto i risultati in un rapporto. Questa guida illustrerà questi metodi e condividerà il workflow di tintura di un cliente che progetta e realizza prodotti per utilizzo finale con l'ecosistema della serie Fuse e la Nylon 12 White Powder.
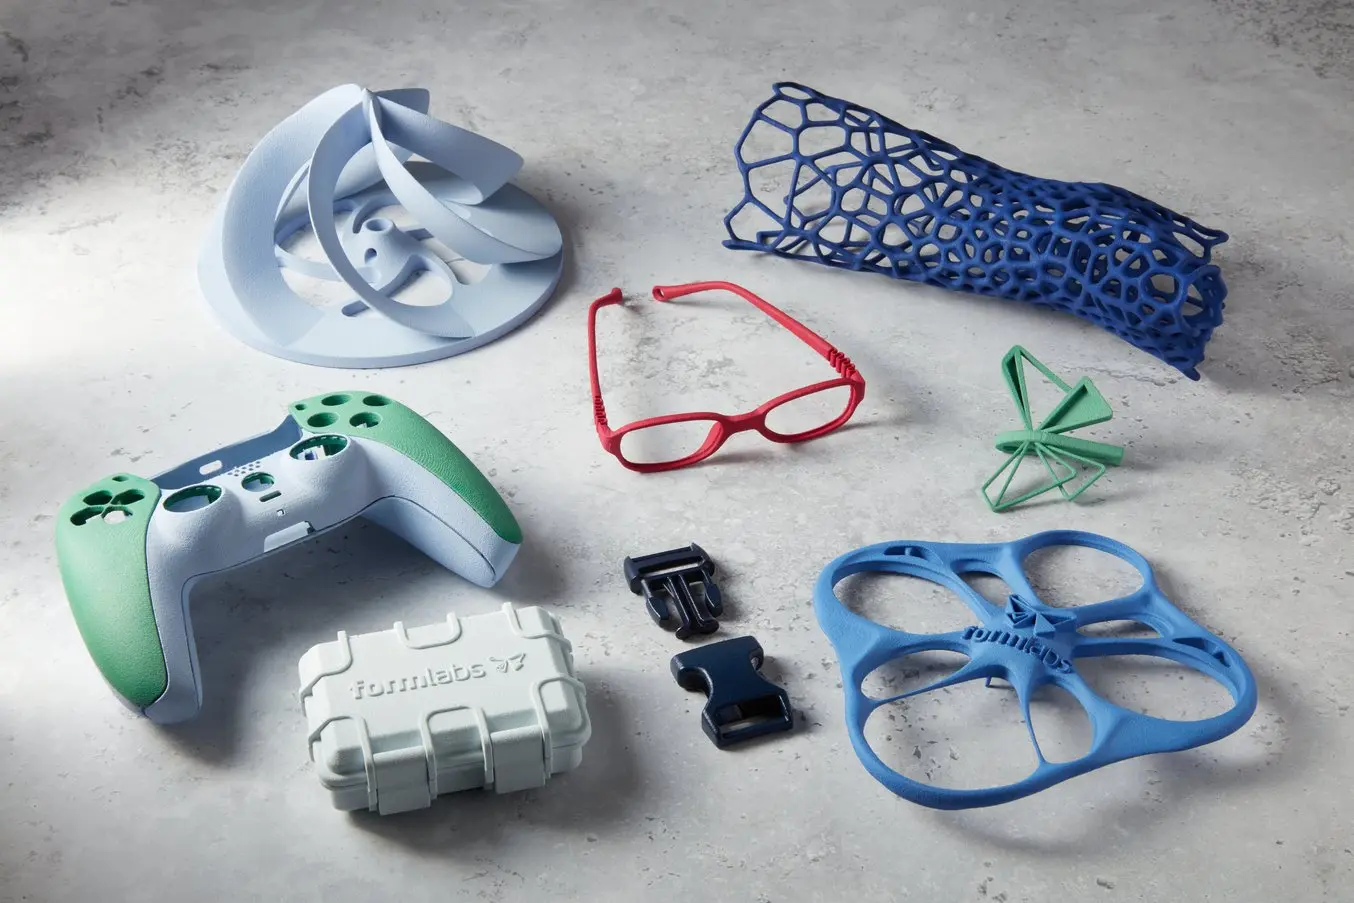
La tintura è ideale sia per la prototipazione funzionale che per la produzione di parti per utilizzo finale con colori personalizzati che rispecchiano il branding aziendale.
Richiedi un campione SLS gratuito
Guarda e tocca con mano la qualità di Formlabs. Saremo lieti di inviare presso la tua azienda una parte stampata in Nylon 12 White Powder con la Fuse 1+ 30W come campione gratuito.
Attrezzatura per tintura
Abbiamo testato varie attrezzature di tintura per individuare la configurazione ottimale per tingere la Nylon 12 White Powder. Di seguito illustriamo i parametri relativi ad hardware, miscela di tintura e bagno di tintura che hanno permesso di ottenere i migliori risultati nei nostri test.
Stazione di tintura
Quando si sceglie un sistema di tintura, bisogna considerare dimensioni e quantità delle parti, nonché prezzo e livello di uniformità del colore richiesto. I costi dei sistemi di tintura vanno da poche centinaia a decine di migliaia di euro e il prezzo è spesso commisurato al grado di qualità e uniformità offerto. I quattro metodi più comuni per la tintura di parti stampate in 3D presentano ciascuno vantaggi diversi: prima di sceglierne uno, è importante stabilire le proprie aspettative in termini di budget e qualità del colore.
La tintura in pentola è il metodo più accessibile, in quanto richiede soltanto un recipiente resistente al calore e una soluzione colorante. Tuttavia, rispetto a tutti gli altri metodi, offre risultati meno uniformi, richiede più manodopera e il calore e la miscelazione possono talvolta danneggiare le parti.
La tintura a ultrasuoni offre risultati migliori rispetto a quella in pentola in termini di uniformità e integrità delle parti. Questo metodo richiede inoltre meno manodopera, in quanto il lavoro manuale si limita a selezione della temperatura desiderata su un pulitore a ultrasuoni, inserimento delle parti nella macchina e impostazione del timer. Le vibrazioni a ultrasuoni che agitano la soluzione forniscono risultati uniformi e riducono il rischio di danneggiamento delle parti durante il processo.
La tintura a pressione è effettuata all'interno di una pentola a pressione, simile a quelle usate in cucina, come la Instant Pot. Con questo metodo si riescono a raggiungere temperature più elevate rispetto alla tintura in pentola o a ultrasuoni. Dopo aver inserito le parti in una soluzione all'interno della pentola a pressione, quest'ultima viene sigillata e può raggiungere i 120 °C. La combinazione di calore e pressione favorisce la copertura delle parti con una colorazione intensa. Tuttavia, l'elevata temperatura può potenzialmente danneggiare le parti; ad esempio, la temperatura di rammollimento Vicat della TPU 90A Powder di Formlabs è inferiore ai 120 °C.
Le soluzioni industriali come la DM60 di DyeMansion sono convenienti per la realizzazione di grandi quantità di parti e nei casi in cui sia necessario ottenere risultati estremamente uniformi. Queste soluzioni di grande formato eliminano gran parte del lavoro manuale dal processo e includono impostazioni predefinite adatte a diversi tipi di parti e di colori. Macchine come la DM60, che una volta impostate non richiedono alcun intervento umano, consentono a chi utilizza la stampa 3D SLS di concentrarsi maggiormente su attività più importanti, come la progettazione delle parti e l'ottimizzazione dei processi di stampa.
| Metodo | Dimensioni | Quantità | Colore | Resistenza ai raggi UV | Costo |
|---|---|---|---|---|---|
| Tintura in pentola | ★★ | ★★ | ★★ | No | Sotto i 50 € |
| Tintura a ultrasuoni | ★★★ | ★★★ | ★★★ | No | 100 € - 1000 € |
| Tintura a pressione | ★★ | ★★ | ★★★★ | No | 100 € - 500 € |
| DM60 di DyeMansion | ★★★★★ | ★★★★★ | ★★★★★ | Sì | Oltre 50 000 € |
La macchina che consigliamo per la tintura è l'ESVC-28 - Spectrum Thermal Circulator di Winco. È una soluzione conveniente, acquistabile da diverse aziende e facile da configurare e utilizzare.
Acquisto dagli Stati Uniti: 699,99 $
Acquisto dall'area EMEA: 659,99 €
Acquisto dall'area APAC: 299 $
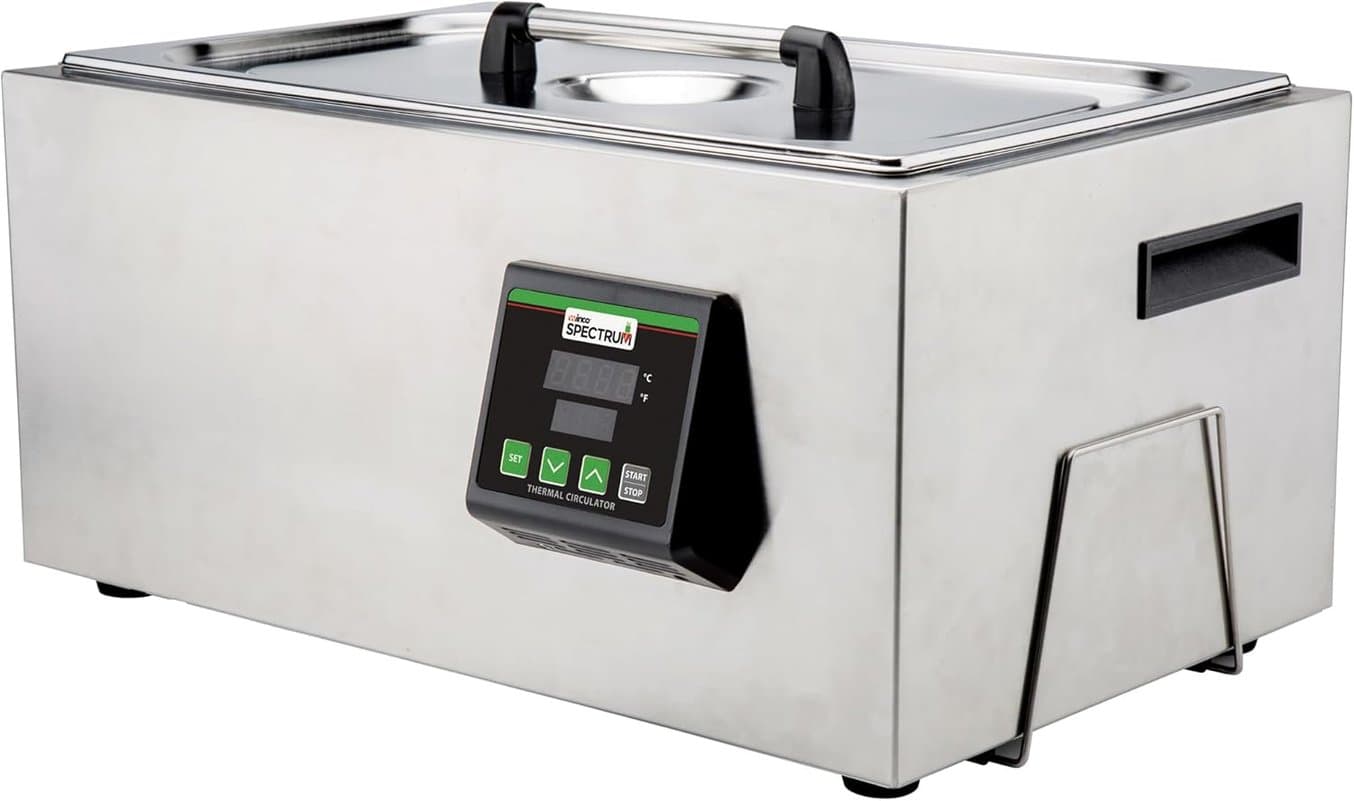
L'ESVC-28 Spectrum Thermal Circulator di Winco è la soluzione ideale per la tintura a ultrasuoni.
Qualsiasi sistema in grado di far circolare la soluzione e di raggiungere le temperature necessarie alla tintura, pari a 80-90 °C, è in linea di massima adatto a questa tecnica di colorazione. Consigliamo inoltre di avere a portata di mano delle pinze in acciaio inossidabile per aiutarti a rimuoverne le parti dal bagno di tintura.
Sul mercato sono disponibili anche soluzioni industriali per la tintura di parti SLS, come la DM60 di Dyemansion, che risultano convenienti per volumi elevati di parti e quando sono necessari risultati estremamente uniformi. Questa macchina può contenere una quantità di componenti pari a 60 litri per lotto di tintura e immette automaticamente il colorante, oltre a lavare le parti al termine del processo.
La DM60 offre un livello di uniformità molto più elevato rispetto alla tintura in pentola, nonché una migliore stabilità dei coloranti ai raggi UV. Un ulteriore servizio proposto da Dyemansion è lo sviluppo di colori su misura. Per chi ha requisiti in termini di colore estremamente precisi o desidera tingere un volume molto elevato di parti (nello specifico, parti per utilizzo finale con cicli di produzione pari a oltre 1000 unità), l'utilizzo di una macchina industriale come la DM60 può essere una buona scelta.
Queste soluzioni di grande formato eliminano gran parte del lavoro manuale e includono impostazioni predefinite adatte a diversi tipi di parti e colori. Tuttavia, i maggiori costi iniziali permettono un ritorno d'investimento più rapido solo in caso di volumi di stampa molto elevati.
Attrezzatura anticorrosione
Un bagno con soluzione circolante e riscaldata può corrodere il rivestimento in acciaio della vasca in cui si trova. Alcuni dei coloranti consigliati in questo whitepaper possono corrodere gradualmente l'acciaio in caso di riscaldamento ripetuto. Si tratta di un fenomeno molto simile alla corrosione che si verifica negli elementi riscaldanti di uso domestico. La soluzione più semplice per affrontare la potenziale corrosione è inserire nel bagno un anodo di magnesio, assicurandosi che entri in contatto elettrico con il rivestimento in acciaio, ad esempio tramite un morsetto conduttore o una giuntura stretta. I test interni di Formlabs hanno dimostrato che l'utilizzo di un anodo di magnesio prolunga la vita utile della macchina per bagno di tintura di oltre 8 volte rispetto a un bagno di tintura senza anodo. Gli anodi di magnesio possono essere reperiti senza difficoltà tramite canali diversi, tra cui Amazon e negozi di ferramenta locali. Durante i test sui bagni di tintura, Formlabs ha utilizzato questo anodo di magnesio.
Altre opzioni per prolungare la vita utile del bagno di tintura includono l'utilizzo di soluzioni di tintura più blande, come i coloranti acidi Jacquard, o il ricorso a una temperatura più bassa per il bagno di tintura.
Soluzione colorante
A chi desidera semplicemente ottenere risultati facili e veloci, consigliamo di utilizzare il colorante RIT ProLine. Sebbene non permetta di formulare colori specifici o diversi da quelli attualmente offerti da RIT, questo prodotto rappresenta comunque una soluzione semplice. Modificando la durata e la temperatura del bagno di tintura si possono ottenere diverse sfumature dei colori disponibili. Ulteriori informazioni sugli effetti della temperatura e della durata sono contenute nella sezione "Workflow di tintura". Il RIT ProLine può essere acquistato su Amazon o sul sito Internet di RIT.
Durante i test, sono stati messi alla prova anche i coloranti acidi Jacquard, che si sono rivelati una soluzione efficace. La saturazione del colore ottenuta con un colorante acido Jacquard non è si è dimostrata migliore rispetto a quella fornita dal colorante di RIT, ma questa soluzione fornisce una più ampia gamma di colori.
Se si utilizza il colorante RIT ProLine, la concentrazione che consigliamo è 100 g di colorante e 100 g di acido citrico per 1 L di acqua circa. L'aggiunta di ulteriore colorante e/o acido citrico può aumentare la capacità di assorbimento di colorante da parte della parte stampata. Un maggiore assorbimento del colorante porta a una saturazione più elevata e a un colore più intenso del prodotto finale. Inizia con la concentrazione consigliata e usa alcune parti di prova per valutare l'impatto del colore e della durata sull'aspetto finale della parte, quindi aggiungi altro colorante o scegli un colore diverso per ottenere il risultato desiderato.
Sono state testate sia acqua deionizzata che acqua di rubinetto e non è stata rilevata alcuna differenza misurabile tra le due. L'acqua di rubinetto utilizzata è stata prelevata a Somerville, nel Massachusetts, e ha una durezza media di 16 mg/L. È possibile che utilizzando acqua con una durezza più elevata i risultati varino a seconda che si usi acqua di rubinetto o acqua deionizzata.
Come descritto in dettaglio più avanti in questa guida, il cliente di Formlabs e produttore di parti per utilizzo finale Ken Pillonel ha scoperto che il colorante dell'azienda francese Techniques Chimiques Nouvelles offriva un colore più vivace. Nei test interni, nonostante questo colorante abbia effettivamente conferito vivacità al colore, emanava un odore piuttosto forte. Se non si dispone di un'adeguata ventilazione nell'area di lavoro, la tintura RIT è probabilmente l'opzione migliore.
Come tingere parti 3D SLS
Formlabs ha effettuato test approfonditi per determinare quali colori è possibile ottenere con le parti stampate mediante SLS utilizzando tecniche di tintura accessibili e a basso costo. Abbiamo utilizzato il colorante RIT ProLine, una polvere conveniente e facilmente accessibile che contiene una miscela di coloranti diretti, acidi e dispersi ed è efficace sulle fibre di nylon. Tra le altre variabili testate vi erano temperatura, acidità, saturazione del colorante, durata della tintura e additivo detergente presente nella soluzione colorante. Sono state testate sia le parti create con la Nylon 12 Powder sia quelle realizzate in Nylon 12 White Powder. L'impatto di ciascuna variabile è illustrato di seguito.
1. Preparazione della parte
È fondamentale assicurarsi che le parti siano state pulite a fondo prima della tintura. La polvere in eccesso che rimane sulla superficie della parte può assorbire il colorante in modo diverso rispetto alla polvere sinterizzata, dando luogo a una finitura superficiale meno precisa e uniforme e rendendo la parte meno adatta al lavaggio. Consigliamo di pulire le parti con la soluzione di pulizia e lucidatura automatica Fuse Blast, per assicurarsi che tutta la polvere in eccesso venga rimossa senza aggiungere ulteriore tempo di manodopera al workflow. In alternativa, per garantire la pulizia delle parti è possibile utilizzare una sabbiatrice manuale.
Quando si puliscono le parti stampate con la Nylon 12 White Powder, si sconsiglia di utilizzare una sabbiatrice precedentemente impiegata per le polveri di colore grigio, poiché la polvere residua rischia di conferire alle parti bianche riflessi di questo colore.
2. Tintura
Riscalda il bagno a 90 °C per ottenere fin da subito il massimo dalla saturazione del colore. Il riscaldamento può richiedere diverse ore, a seconda del bagno di tintura utilizzato. Una volta che il bagno ha raggiunto la temperatura massima, testa una parte al suo interno per una durata pari a un minuto. Questo tempo è sufficiente per valutare il colore e decidere se occorre apportare ulteriori modifiche al colorante o alla sua durata di permanenza nel bagno.
Temperatura e durata
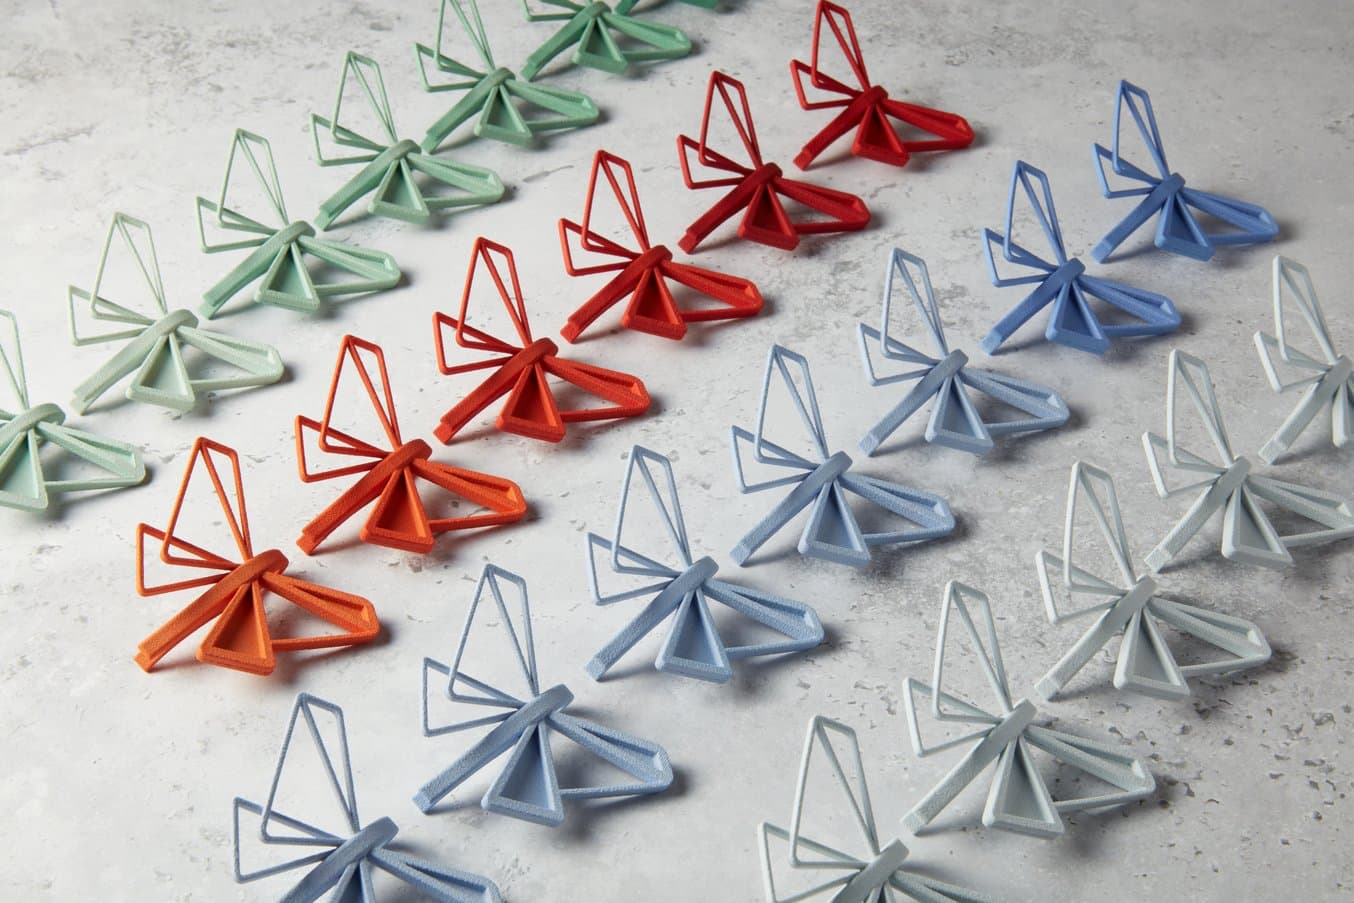
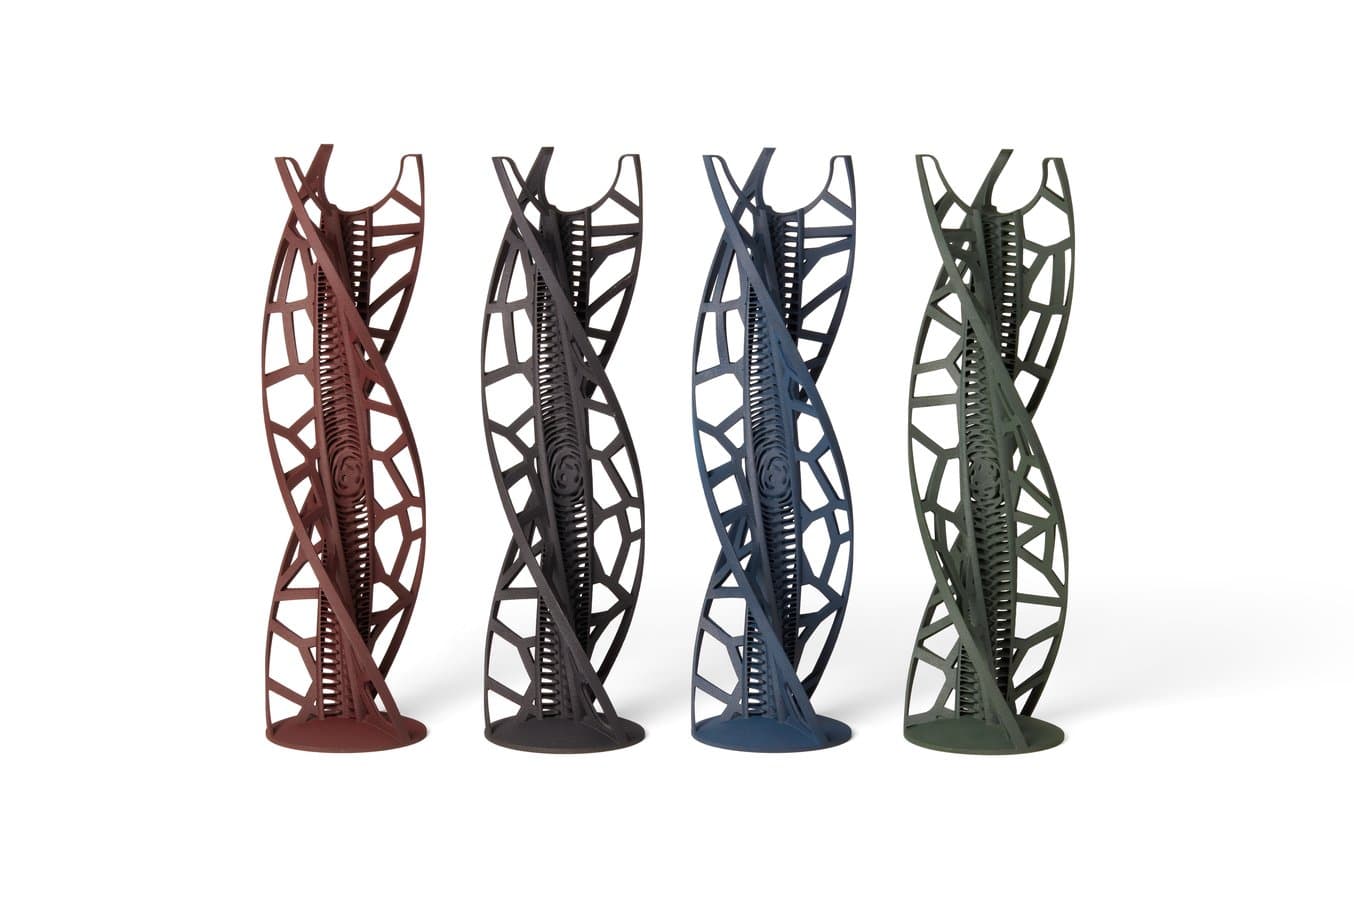
La temperatura e la durata hanno un impatto enorme sul colore finale della parte. In base ai nostri test, temperature più elevate consentono di ottenere un colore più saturo in un tempo più breve.

Queste parti sono state tinte nello stesso bagno di tintura a 90 °C, ma rimosse a intervalli di 3 minuti l'una dall'altra da destra verso sinistra.
Se si desidera ottenere una tonalità più chiara, si consiglia di ridurre la temperatura della soluzione di tintura a massimo 70 °C. A temperature più elevate, la saturazione può avvenire in modo estremamente rapido, lasciando pochissimo margine di variazione e causando potenziali differenze nelle parti finite. L'assorbimento del colorante da parte della parte stampata aumenta nel tempo, ma questa tendenza si stabilizza intorno ai 20-25 minuti, quando si raggiunge un punto di saturazione oltre il quale un'ulteriore estensione della durata non provoca alcun effetto.
Additivi
Alcuni additivi possono modificare il processo di tintura, migliorando l'uniformità o l'assorbimento del colorante. Per il RIT ProLine e i coloranti acidi di Jacquard, in genere si utilizza acido citrico o acetico per acidificare il bagno di tintura.
Anche il solfato di ammonio può essere utilizzato come sostituto 1:1 della maggior parte o della totalità dell'acido citrico o acetico. Il solfato di ammonio è una fonte di acido più blanda e serve inoltre come agente di uniformazione, ovvero rallenta la velocità di assorbimento del colorante nella parte. Ciò è utile per ottenere uniformità in caso di tonalità più chiare o per i workflow di tintura in cui si desidera avere maggiore controllo sulle tonalità. Altri agenti di uniformazione che possono essere utilizzati in aggiunta a una fonte di acido sono il solfato di sodio, l'acetato di sodio e i tensioattivi cationici o non ionici.
I tensioattivi possono essere utili sia nel bagno di tintura che nella successiva procedura di lavaggio. L'aggiunta di tensioattivi al bagno di tintura può facilitare l'infiltrazione del colore nei pori di piccole dimensioni o nei canali delle parti e contribuisce a uniformare il colorante. È possibile utilizzare detergenti non ionici per uso domestico, come l'Alcojet Low-Foaming Detergent, alla dose raccomandata di 10 g per 1 L circa di bagno di tintura. I tensioattivi ionici, come il sapone per i piatti, sono sconsigliati perché possono generare schiuma o bolle.
Per ridurre al minimo il rilascio di colorante dalle parti, queste possono essere lavate con un tensioattivo delicato dopo la tintura per rimuovere eventuale colorante in eccesso o non assorbito. Bisogna prestare attenzione, perché i tensioattivi forti e/o l'acqua calda possono far sbiadire il colorante. Consigliamo di utilizzare detergenti appositamente studiati, come Synthrapol, seguendo le istruzioni dell'azienda di produzione.
Dopo il lavaggio, il rilascio di colorante può inoltre essere evitato utilizzando un fissante per coloranti. Questi prodotti vengono usati sulla parte lavata, asciugata e tinta, e sono disponibili in diverse soluzioni online. Assicurati di scegliere un fissativo indicato per l'uso con coloranti acidi o adatti a nylon, seta o lana. In aggiunta o in alternativa all'uso di un fissativo, le parti tinte possono essere rivestite per ottenere una resistenza ottimale al lavaggio e alla luce. I rivestimenti in poliuretano sono spesso scelti per i tessuti tinti, ma possono essere più difficili da impiegare. Per workflow più semplici o in scala ridotta, i rivestimenti e gli agenti protettivi per tessuti possono essere utilizzati come rivestimenti superficiali per le parti tinte. Assicurati di scegliere un rivestimento compatibile con il tessuto di nylon.
Sostituzione dei colori del bagno di tintura
Quando si cambiano i colori di un bagno di tintura, è prima necessario rimuovere tutta la soluzione precedente, smaltendola secondo le normative locali e le istruzioni riportate sulla scheda dati di sicurezza del colorante. In alternativa, il bagno di tintura può anche essere conservato in forma liquida per essere utilizzato in un secondo momento, nel rispetto delle normative di sicurezza locali.
Quando una soluzione colorante viene riscaldata e messa in circolo, possono crearsi depositi di materiale. Per questo motivo, dopo aver tolto la soluzione, le pareti e la base della macchina devono essere pulite per evitare la contaminazione tra colori diversi. Una volta completate queste due fasi, si consiglia di effettuare un lavaggio con acqua pulita per assicurarsi di rimuovere eventuali tracce di colorante rimaste nel sistema di circolazione.
Solo dopo aver pulito la macchina si può preparare una nuova soluzione colorante. Se si utilizzano spesso colori diversi, si può valutare di acquistare più circolatori per evitare di doverli sostituirli frequentemente.
Ken Pillonel ha progettato una soluzione semplice per questo passaggio, utilizzando grandi cilindri pieni di soluzione colorante all'interno della vasca e un magnete rotante sul fondo per agitare il liquido. In questo modo, è possibile utilizzare cilindri diversi per ogni colore di tintura, senza dover aspettare il raffreddamento e la pulizia. Per scoprire di più su questo metodo e su questa soluzione alternativa, guarda il suo video che si trova alla fine dell'articolo.
Degradazione del bagno di tintura
A mano a mano che più lotti consecutivi di parti vengono sottoposti a cicli di tintura nel bagno, il pigmento colorante viene assorbito dalla superficie delle parti, riducendo la concentrazione del colorante nel bagno stesso. Per bilanciare questa perdita di colorante, potrebbe essere necessario aggiungerne dell'altro alla soluzione. Per ottenere risultati più uniformi in termini di colore, l'opzione migliore è ricorrere a un bagno di tintura nuovo per ogni ciclo.
3. Fasi post-tintura
Lavaggio
Dopo la tintura, le parti devono essere lavate con acqua. Questo lavaggio post-tintura permette di rimuovere dalla superficie delle parti eventuali residui di soluzione colorante. Il colorante in eccesso può tingere in modo non uniforme le parti durante l'asciugatura e può rilasciare colore se esposto all'umidità. Per lavare le parti, è sufficiente sciacquarle sotto acqua tiepida per una durata variabile da uno a cinque minuti o fino a quando l'acqua non sarà pulita. Se si rimuovono molte parti contemporaneamente da un bagno, occorre metterle in acqua fredda subito dopo la rimozione. Se il colorante in eccesso si asciuga sulle parti prima del lavaggio, questo può causare una colorazione non uniforme.
Asciugatura
Asciugare le parti dopo il lavaggio aiuta a prevenire la creazione di macchie. Si tratta di una fase facoltativa, ma è particolarmente consigliata per le parti con cavità interne che possono intrappolare liquidi all'interno. Queste parti rischiano di asciugarsi in modo non uniforme, causando la formazione di macchie d'acqua lineari su alcune superfici dei componenti. Per ridurre questo rischio, assicurati di rimuovere accuratamente i residui di colorante al termine del ciclo di tintura e, se possibile, usa aria compressa per eliminare il più possibile l'umidità in eccesso e favorire il processo di asciugatura. Abbiamo osservato che i disidratatori per alimenti sono una buona soluzione a basso costo per ottenere risultati uniformi e ripetibili.
Lucidatura
L'utilizzo del Fuse Blast Polishing System dopo la tintura è un metodo efficace per aumentare la riflettività delle parti tinte, ottenendo così un aspetto più lucido. Per ottenere una finitura superficiale lucida si può anche ricorrere alla levigazione a vapore delle parti prima della tintura.
Combinazioni di colori e materiali
Tintura di parti bianche
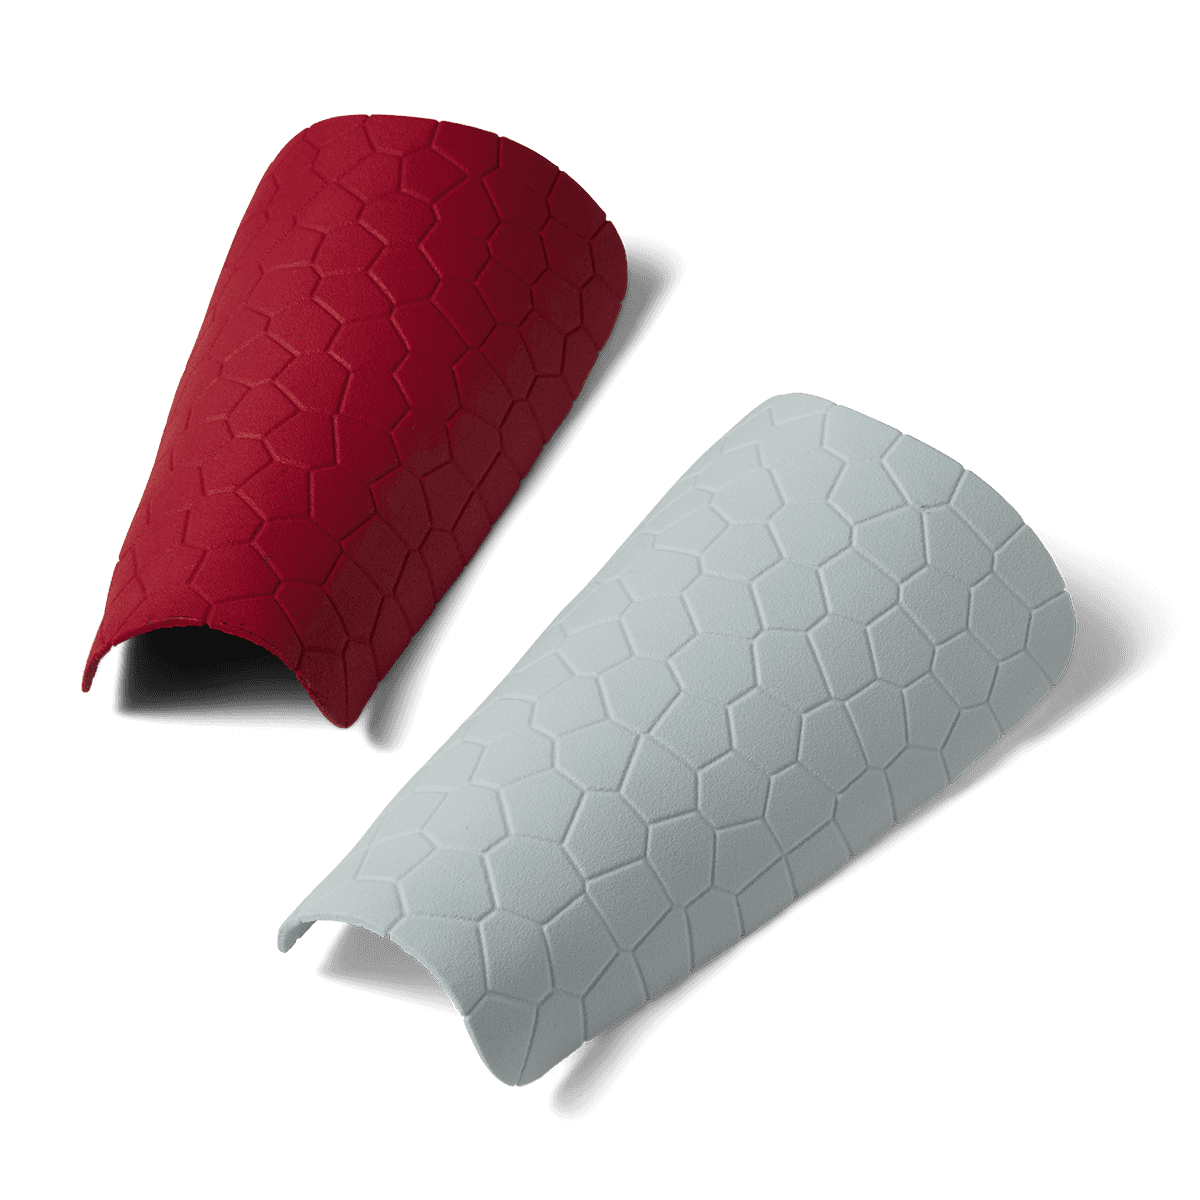
La tintura della Nylon 12 White Powder è l'opzione migliore per ottenere la gamma di colori più ampia. Questa resina si presta alla tintura in tutti i colori chiari, compresi quelli pastello, ma anche in colori vivaci.
Parti stampate in 3D in Nylon 12 White Powder sottoposte a tintura in una postazione a ultrasuoni.
Tintura di parti grigie
Lo stesso processo può essere utilizzato per tingere le parti in Nylon 12 Powder. Tuttavia, poiché le parti stampate con la Nylon 12 Powder sono di colore grigio scuro, è possibile ottenere solo tonalità più scure, che spesso risultano meno vivaci.
Parti in Nylon 12 Powder di colore grigio scuro tinte in tonalità più scure.
Tintura delle parti di nero
Se il colore finale desiderato è il nero, consigliamo di utilizzare la Nylon 12 Powder standard di Formlabs con il colorante Rit ProLine Black. Questo materiale ha un substrato più scuro che rende più uniforme il passaggio al nero.
Tingere di nero parti realizzate con la Nylon 12 White Powder, pur essendo fattibile, non è consigliato. Il substrato più chiaro di questa resina rende più difficile ottenere colori scuri rispetto alla Nylon 12 Powder, che invece parte da un substrato scuro.
Vantaggi della tintura
La tintura è in genere impiegata come alternativa al rivestimento. I vantaggi della tintura rispetto alle vernici e ai rivestimenti tradizionali sono la riduzione di costi e manodopera e la possibilità di colorare parti con geometrie complesse.
Costo
Le attrezzature richieste per portare la tintura in-house sono molto accessibili. Una volta acquistate, i costi di svolgimento delle prove di colorazione sono incredibilmente bassi. Per questo motivo, nella maggior parte dei casi la tintura è più conveniente delle vernici e dei rivestimenti.
Manodopera
Il processo di tintura è in gran parte automatizzato; una volta preparata la soluzione colorante, la macchina regola automaticamente la temperatura del bagno di tintura. L'unica operazione manuale richiesta è l'immersione delle parti da tingere nel bagno mentre questo è in circolazione, e le successive fasi di rimozione e lavaggio una volta completato il ciclo di tintura. La manodopera ridotta è un altro grande vantaggio dell'uso della tintura per colorare parti stampate in 3D tramite SLS.
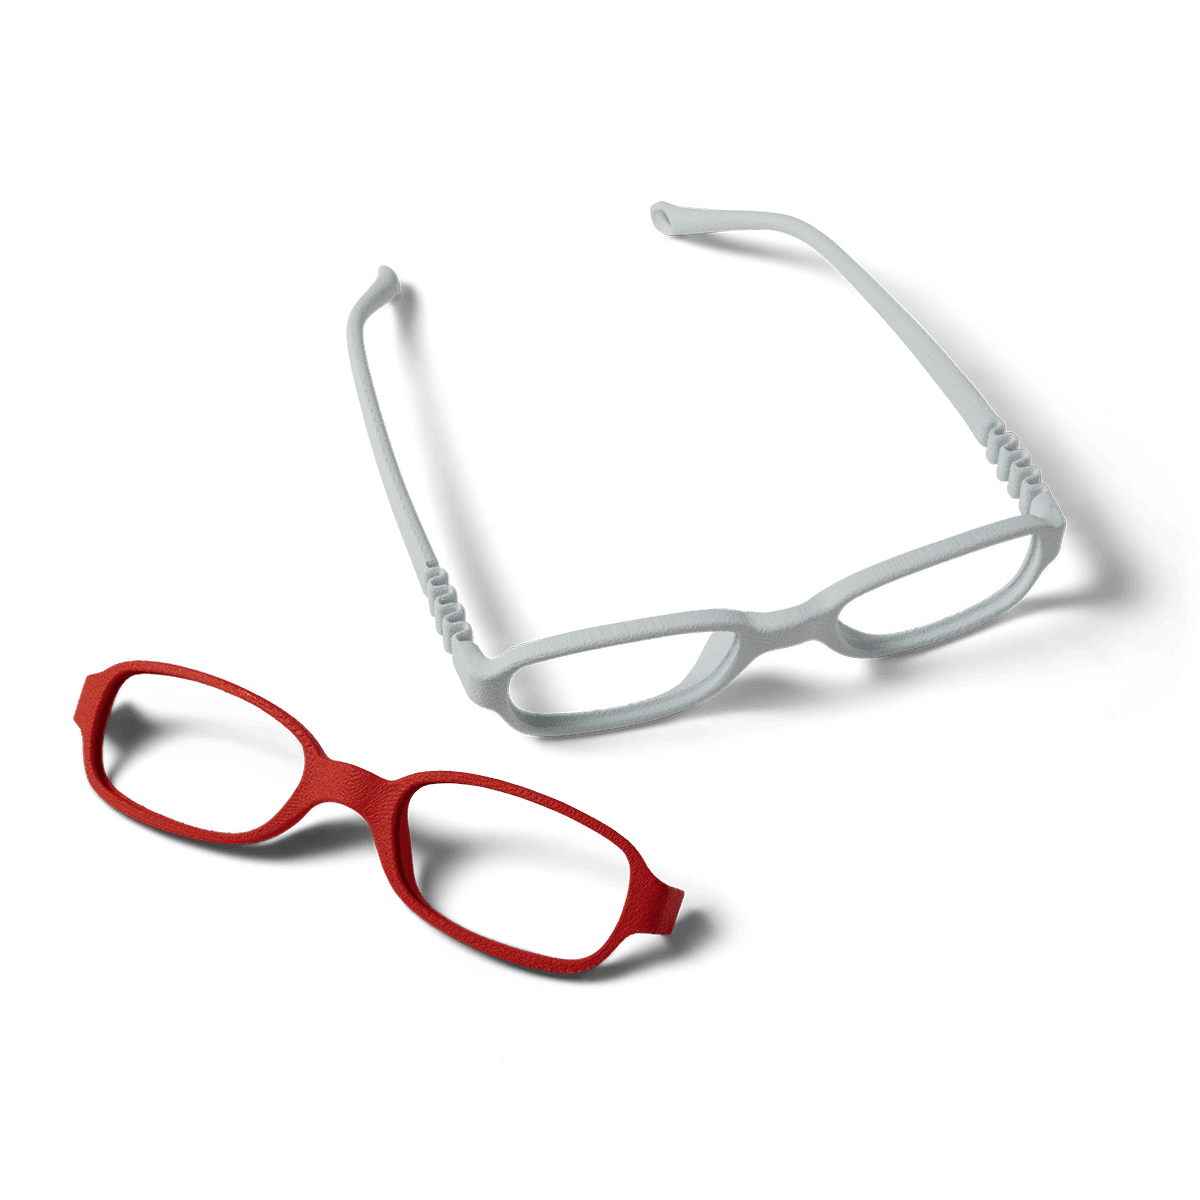
Geometria delle parti
Le stampanti 3D SLS della serie Fuse sono in grado di stampare parti con geometrie molto complesse. Queste possono essere dotate di dettagli difficili o impossibili da ricoprire con i rivestimenti tradizionali, che di solito vengono spruzzati sulle aree visibili. Poiché il processo di tintura si basa sull'utilizzo di una soluzione acquosa per l'applicazione del colore, le complesse geometrie interne vengono tinte con la stessa efficacia dei dettagli esterni.
Requisiti per la tintura
Quando si tingono le parti, per ottenere risultati ripetibili occorre tenere in considerazione alcuni requisiti.
Geometria
Quando si tingono parti con volumi concavi/convessi, assicurati che i pezzi stampati siano completamente immersi. Le parti che contengono cavità interne tendono a intrappolare l'aria e galleggiare. Ciò impedisce al colorante di penetrare nella superficie che galleggia sopra la soluzione e nelle facce interne che contengono le bolle d'aria intrappolate. L'immersione forzata della parte e l'agitazione per rimuovere l'aria intrappolata dovrebbero risolvere efficacemente il problema.
Requisiti relativi al colore
Quando si tinge con tonalità più chiare, il tempo trascorso nel bagno di tintura e la temperatura dello stesso modificano drasticamente il colore finale delle parti. Se si desidera ottenere una tonalità specifica o se tutte le parti devono avere un colore uniforme anche usando più bagni di tintura, assicurati che le parti vengano rimosse sempre dopo la stessa quantità di tempo nella soluzione e che vengano tinte alla stessa temperatura.
Requisiti relativi all'area di lavoro
Il processo di tintura può creare disordine nell'area di lavoro. Quando aggiungi o rimuovi le parti dalla soluzione colorante, possono verificarsi schizzi e gocciolamenti. Gli schizzi che finiscono sulla pelle o sui vestiti tingono, quindi è necessario utilizzare opportuni dispositivi di protezione individuale. Consigliamo inoltre di posizionare l'attrezzatura per la tintura lontano da superfici che non devono essere macchiate, come ad esempio le pareti bianche. Anche lo smaltimento dei coloranti può essere problematico, a seconda del prodotto utilizzato. Assicurati di verificare i requisiti locali del sistema idrico e segui le istruzioni riportate sulle schede dati di sicurezza per accertarti che le soluzioni coloranti vengano smaltite correttamente. Un ultimo requisito da considerare in termini di area di lavoro è quello relativo ai fumi. Poiché il processo di tintura richiede il riscaldamento della soluzione, si possono sprigionare fumi a seconda del contenuto del bagno di tintura. Nei nostri test, alcune marche hanno prodotto odori molto più forti di altre, ma in tutti i casi si raccomanda vivamente di svolgere il processo in locali con una ventilazione adeguata. Il colorante RIT ProLine ha sprigionato odori meno forti rispetto ad altre marche.
Resistenza alla luce e al lavaggio
Il colore delle parti tinte può degradarsi nel tempo quando se vengono esposte alla luce o all'acqua. In questi casi, le parti possono avere proprietà note come resistenza alla luce e al lavaggio. Se le parti non vengono adeguatamente lavate dopo la tintura, queste possono rilasciare colorante se si trovano in ambienti umidi. Per maggiori informazioni, consulta la sezione dedicata al lavaggio post-tintura. Anche se le parti vengono lavate e asciugate correttamente dopo la tintura, il colore può comunque sbiadire. Temperature elevate o lavaggi frequenti accelerano il processo di sbiadimento. Questo fenomeno può verificarsi anche in caso di esposizione prolungata alla luce solare o ai raggi UV.
Qualsiasi forma di protezione dai raggi UV, come un rivestimento trasparente resistente agli stessi, può aiutare a migliorare la resistenza alla luce. Prodotti di marche come Krylon e Rustoleum sono facilmente reperibili sul mercato a prezzi convenienti. Nei test è stato osservato che le parti stampate con la Nylon 12 White Powder e tinte con il colorante nero RIT ProLine hanno mantenuto una tonalità uniforme dopo l'equivalente di una settimana di esposizione alla luce solare. Allo stesso modo, le parti tinte si sono sbiadite di circa il 3% (ovvero al limite della percezione umana comune) dopo essere state immerse in acqua a 60 °C per sei ore. È stato osservato che queste parti perdevano una notevole quantità di colorante, macchiando l'acqua in cui erano immerse, nonché la pelle o i tessuti con cui entravano a contatto.
La tintura è ideale sia per la prototipazione funzionale che per la produzione di parti per utilizzo finale con colori personalizzati che rispecchiano il branding aziendale.
Caso di studio del cliente: tintura di parti SLS in nylon con Ken Pillonel
Ken Pillonel, ingegnere e fondatore del popolare canale YouTube Exploring the Simulation, ha creato un'azienda individuale di produzione in materie plastiche basata sull'ecosistema SLS della serie Fuse. Dopo aver ampliato le sue capacità e aver aggiunto una seconda stampante Fuse 1+ 30W, una Fuse Sift e una Fuse Blast, è stato in grado di produrre e tingere le sue custodie di ricarica per AirPods per utilizzo finale in Nylon 12 White Powder. Per una discussione approfondita sulla stampa 3D SLS di parti per utilizzo finale, sull'impostazione di un processo in atmosfera di azoto e su come ottenere risultati di tintura precisi, ripetibili e di alta qualità, guarda il video di Pillonel qui sotto.
Inizia a tingere le parti 3D SLS

L'esistenza di workflow convenienti come quello a ultrasuoni rende la tintura di parti realizzate tramite sinterizzazione laser selettiva un modo facile e accessibile per migliorare l'aspetto estetico delle parti.
La tintura di parti in Nylon 12 White Powder e Nylon 12 Powder utilizzando hardware e coloranti facilmente reperibili è un metodo conveniente ed efficiente per colorare parti finite indipendentemente dalla tonalità desiderata. Questo processo offre una valida alternativa alle soluzioni di rivestimento tradizionali, in quanto richiede manodopera minima e consente di colorare in modo efficace anche le geometrie complesse.
Seguendo le linee guida consigliate descritte in questo whitepaper, è possibile ottenere risultati uniformi e auspicabili, ampliando le potenziali applicazioni delle parti stampate in 3D SLS con il nylon. Che sia per motivi estetici, funzionali o di sicurezza, la tintura rappresenta una valida soluzione per colorare i componenti stampati in 3D.
Se stai valutando un'applicazione che richiede l'uso di parti colorate realizzate tramite stampa 3D SLS, contatta i nostri rappresentanti per scoprire di più sull'ecosistema Fuse e sulla tintura di parti in nylon.