
Required Supplies:
Formlabs:
- Replacement Form Cure L V2 foot (RP-CU2L-FOOT-01)
- 2.5 mm hex driver (included in the Form 4 or Form 4L tool caddy)
Third-party:
- Nitrile gloves

The Form Cure L V2 sits on four rubber feet. If any of the feet are broken or missing, the machine will not sit level.
Use this guide to replace one or more feet on a Form Cure L V2.
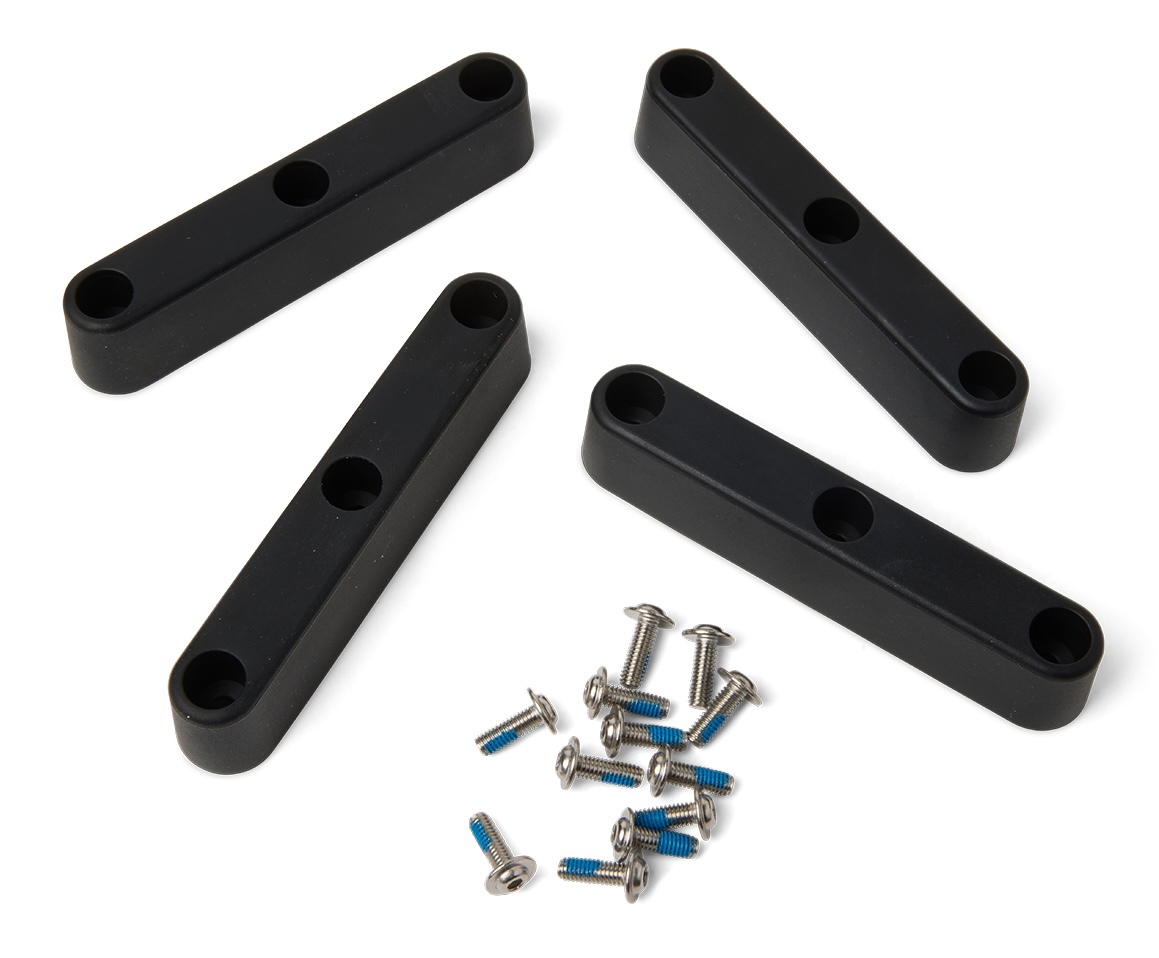
Required Supplies:
Formlabs:
Third-party:
Estimated time: 5–10 minutes
Preparing the workspace
Overview: Prepare the Form Cure L V2 and workspace for replacing the machine’s feet.
Step 1: Prepare the workspace
Clear a workspace around your machine. Ensure that the workspace is well-ventilated and free of dust.
Step 2: Unplug the machine
Turn off the machine using the power switch on the back of the unit. Disconnect the power cable before continuing with maintenance. If the machine was recently in use, the post-cure chamber will be warm. Wait at least 10 minutes for the chamber to cool.
Step 3: Remove the glass turntable
Open the curing chamber door. Gently lift the glass turntable off of the turntable coupler and set it aside. Close the chamber door.
Replacing a Form Cure L V2 foot
Overview: Remove the foot or feet to be replaced. Install the new rubber feet.
Carefully rotate the Form Cure L V2 so you can access the bottom of the machine.
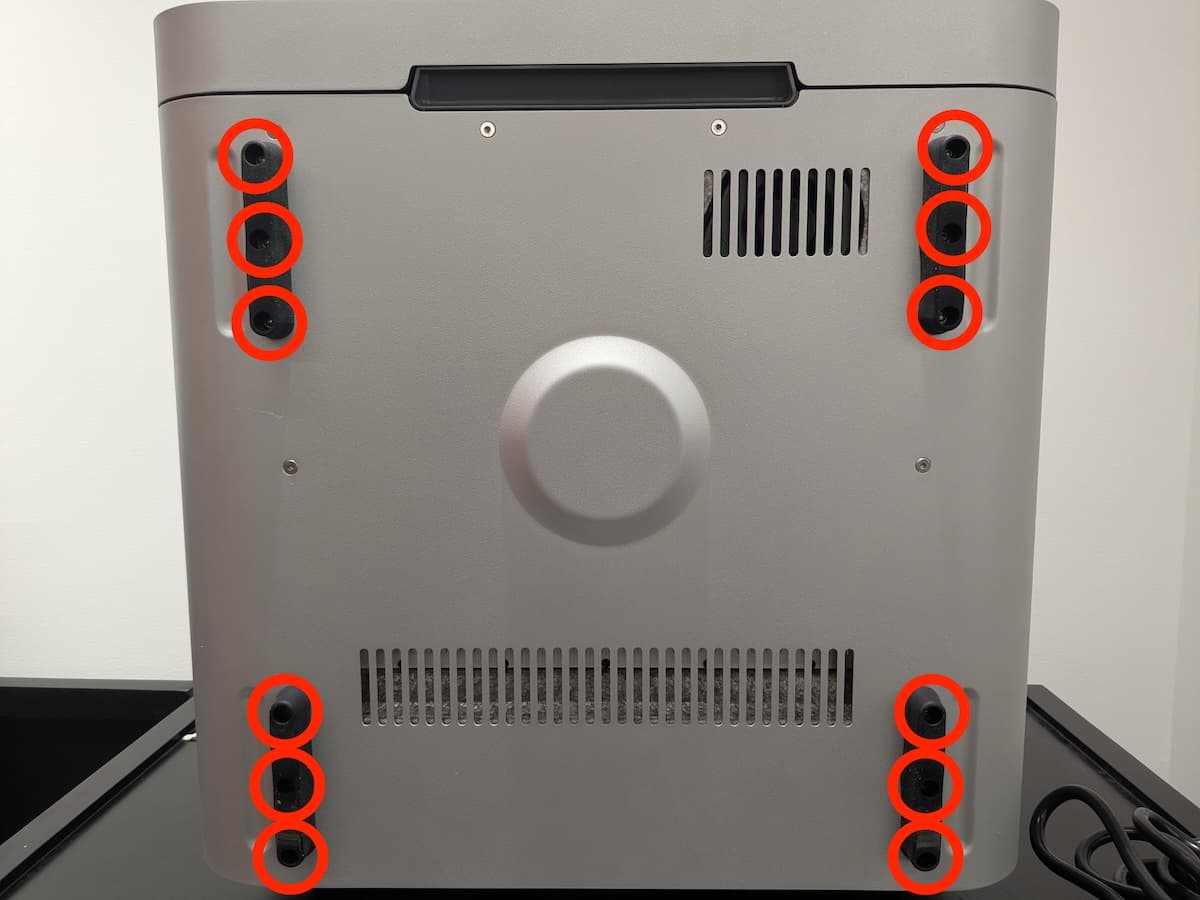
Each of the machine’s four rubber feet is secured to the bottom shell with three screws. For each of the feet you plan to replace, use a 2.5 mm hex driver to remove the three screws. Set the screws and the feet aside for disposal.
Align the three screw holes in the replacement foot with the corresponding screw holes in the bottom shell. Thread one of the included mounting screws into each of the screw holes. Using a 2.5 mm hex driver, tighten until snug. Repeat for any remaining replacement feet.
Finalizing the repair
Overview: After installing the new feet, perform final checks.
Step 1: Rotate the machine
Carefully rotate the machine so it is upright on its four feet.
Step 2: Insert the turntable
Place the turntable onto the turntable mount.
Step 3: Test the repair
Check that the machine is stable and level on your work surface.