WHITE PAPER
Formlabs Logo

Inserting and removing a build chamber (Fuse Sift)

Inserting and removing a build chamber (Fuse Sift)

The build chamber is the container into which the Fuse 1 deposits powder. That powder is then sintered into solid parts or left loose to support parts as they print. The Fuse Sift allows you to easily, cleanly, and safely remove prints from a build chamber before starting a new print job.

Inserting a build chamber into the Fuse Sift

When your print is complete, remove the build chamber from the printer and move it to the Fuse Sift to recover and post-process your printed parts.

To insert a build chamber into the Fuse Sift:

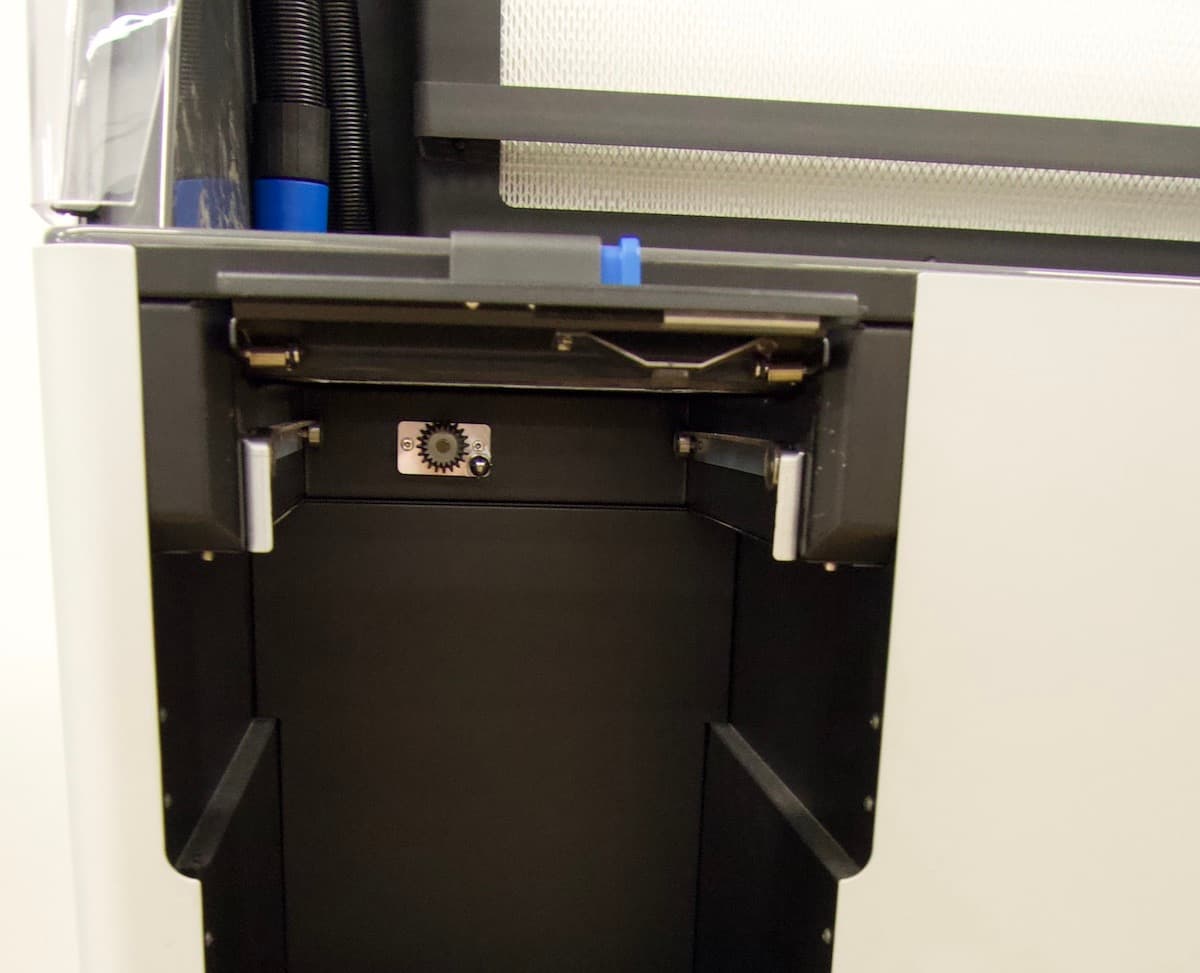
  1. Unlock and open the latch on the Fuse Sift by pushing the release trigger to the left.
Opening the Fuse Sift's build chamber latch
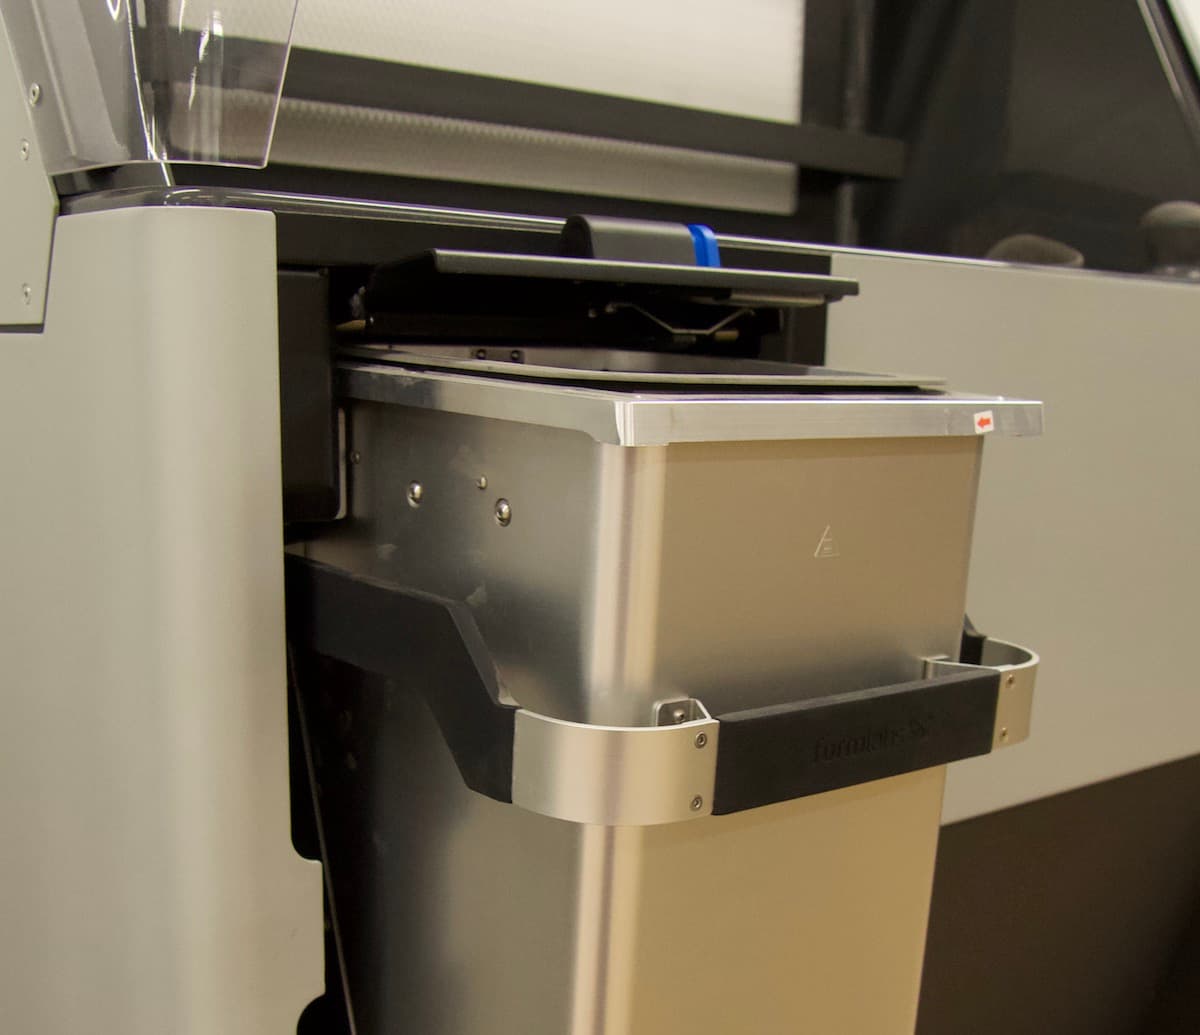
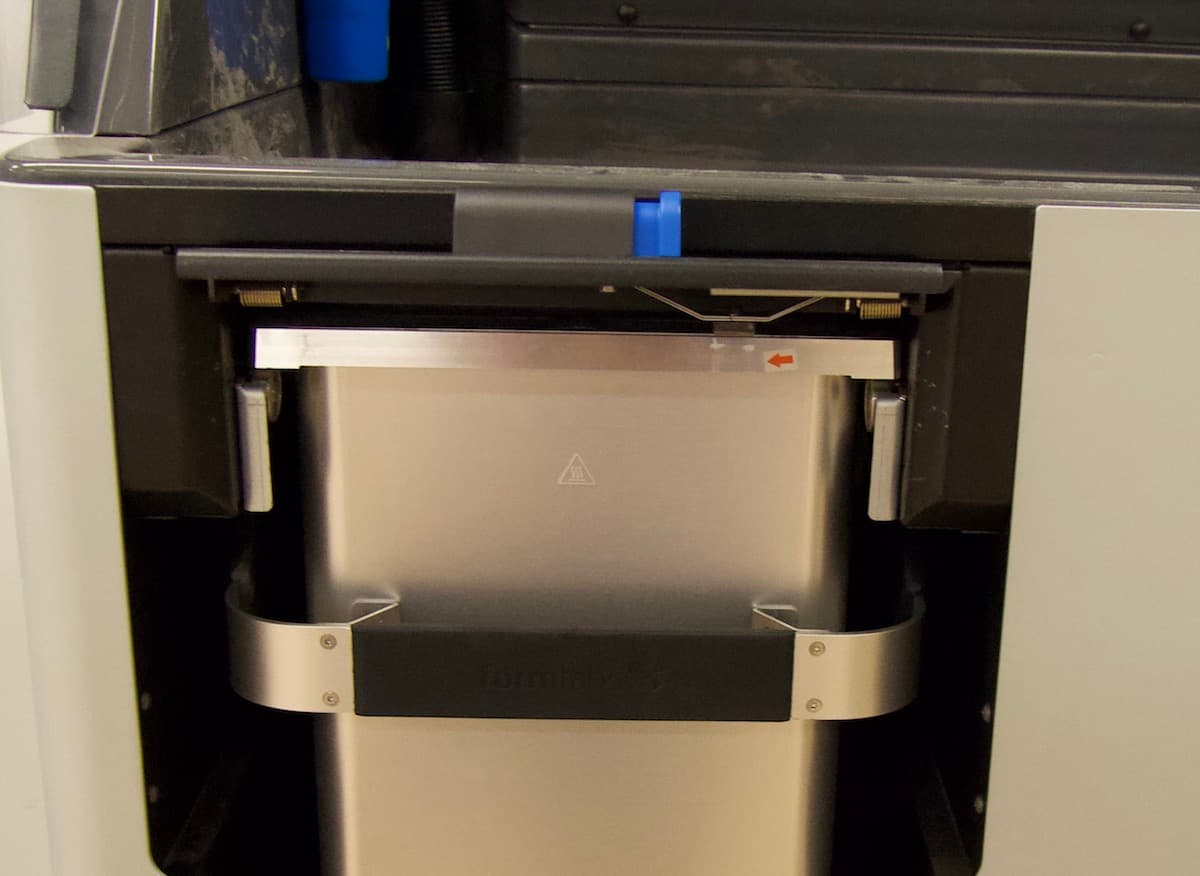
  1. Place the upper lip of the build chamber onto the rails in the Fuse Sift, with the build chamber plug facing out. Firmly push the build chamber into place until it hits a hard stop.
Inserting a build chamber into the Fuse Sift
  1. Lock the build chamber latch by pushing the release trigger and lowering the latch back into the closed position. Release the trigger once the latch is parallel to the print enclosure. An audible click indicates that the latch is locked.
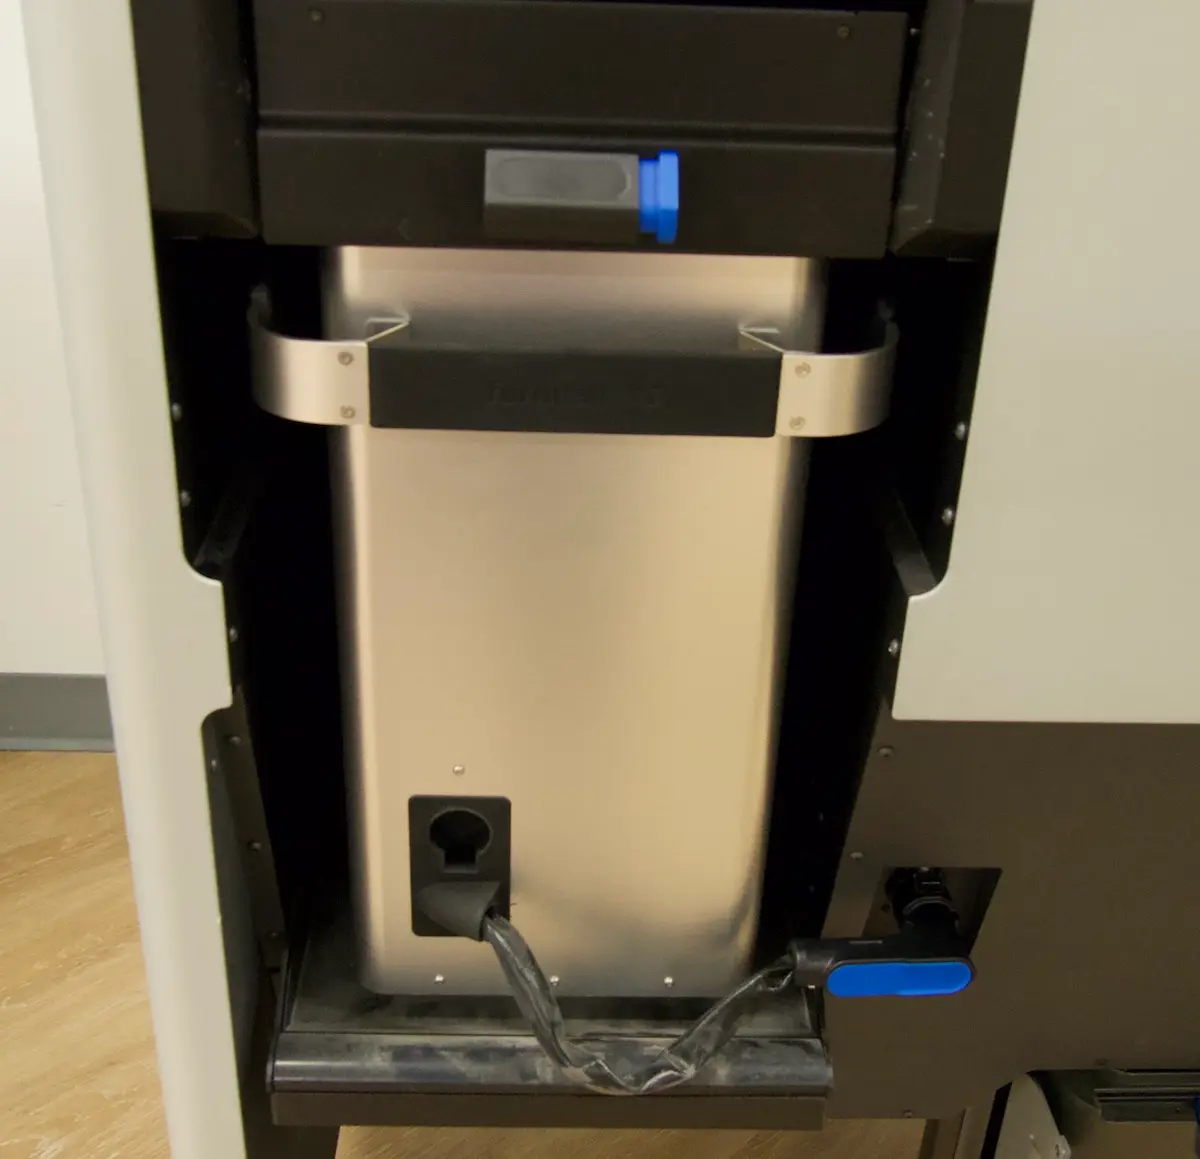
  2. Insert the build chamber plug into the adjacent socket. An audible click indicates the plug is properly connected.
A build chamber inserted and plugged into the Fuse Sift
  1. Check the build chamber’s status on Fuse Sift’s touchscreen. When the status reads Cool, proceed with removing the printed parts from the build chamber.

Removing a build chamber from the Fuse Sift

When the build chamber is empty and clean, remove it from the Fuse Sift and return it to the printer for your next print job.

To remove a build chamber from the Fuse Sift:

  1. Push the Vac button on the Fuse Sift’s control panel to turn on the vacuum. Use it to clean up the workspace and hood. Lift the hood for easier access.
  2. Use the vacuum to clean any remaining powder from the top of the inserted build chamber.

Notice:

The print bed and its surroundings must be free of all powder before the build chamber can be used for another print.

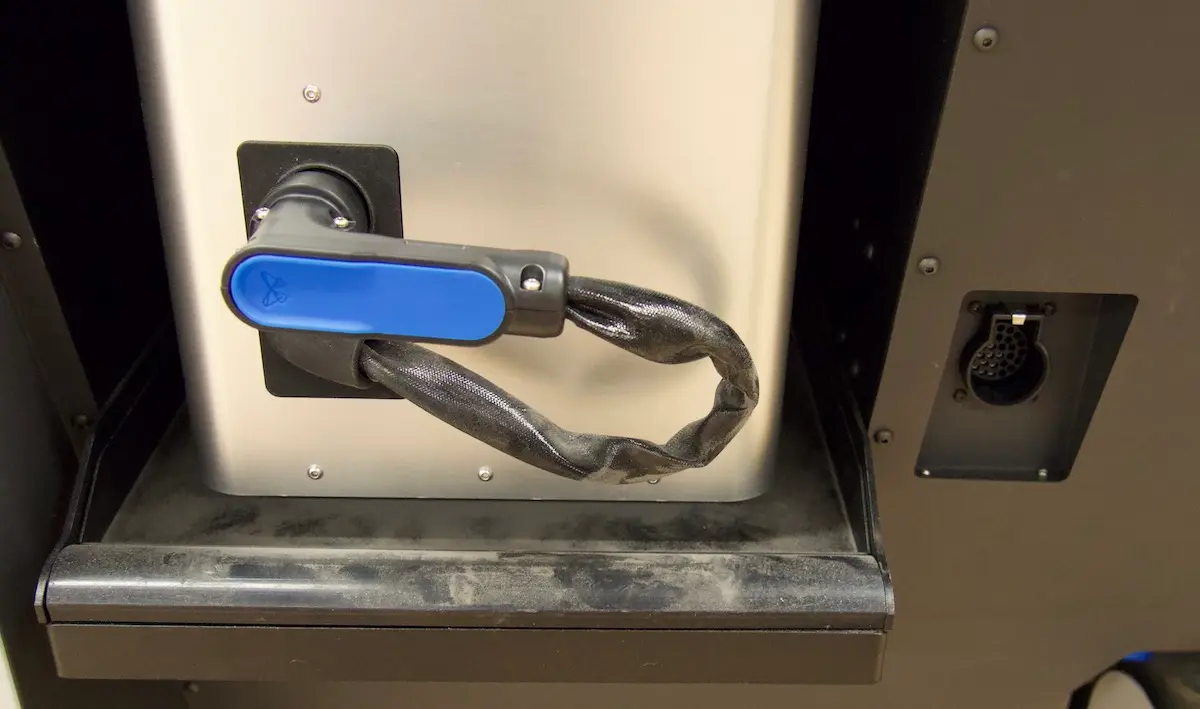
  1. Press the clip on the top of the build chamber plug to unlock and unplug it from the Fuse Sift. Store the plug in the plug retainer on the build chamber body.
Build chamber plug disconnected from the Fuse Sift
  1. Unlock and open the latch by pushing the release trigger to the left.
A build chamber inserted into the Fuse Sift, with the build chamber latch open
  1. Use the handle on the build chamber to slide it out of the Fuse Sift.
  2. If you are ready to start another print, insert the build chamber into the printer.
  3. Lock the latch on the Fuse Sift by pushing the release trigger and lowering the latch into its original position. Release the trigger once the latch is oriented vertically. An audible click indicates that the latch is locked.
  4. Clean the powder catch at the bottom of the Fuse Sift’s build chamber enclosure. Vacuum any loose powder, or remove the powder catch and dispose of accumulated powder.