
Required Supplies:
Formlabs:
- Replacement mixer motor
- Replacement mixer coupler
Third-party:
- 2.5 mm hex driver
- 2 mm hex driver
- Nitrile gloves
- Precision tweezers (optional)
- Flathead screwdriver (optional)

At the start of each print, the LPU housing pulls the tank mixer back and forth across the tank film several times. A motor in the LPU housing rotates the mixer coupler into place below the mixer in the tank. The mixer coupler has a set of magnets that couple to magnets in the mixer, allowing the mixer to move with the LPU housing. This motion mixes the resin in the tank while also checking for cured resin on the film and on the build platform. A malfunctioning mixer motor or mixer coupler will prevent the printer from moving the mixer.
Use this guide to replace the mixer motor and mixer coupler.
Required Supplies:
Formlabs:
Third-party:
Estimated time: 30–40 minutes
Preparing the workspace
Overview: Prepare the Form 3L and a dust-free workspace for replacing the mixer motor and coupler.
NOTICE:
The LPU and optical window are sensitive to dust and contaminants. Do not touch the optical window or the surrounding surfaces, located on top of the LPU housing, during maintenance.
Step 1: Remove the build platform
Remove the build platform first to avoid dripping resin onto the LPU or into the printer cavity.
Step 2: Remove the resin cartridges
Remove the resin cartridges and close the vent caps to prevent resin from dripping off of the bite valves and into the printer.
Step 3: Remove and store the resin tank
Remove the resin tank, place it in the resin tank case, and cover it with its lid. Set the case and tank aside on a clean, flat surface.
NOTICE:
Wear gloves and hold the resin tank by the tank grips on either side to avoid contamination or damage to the underside of the tank.
Step 4: Prepare the workspace
Clear a workspace around your printer. Ensure that the workspace is well-ventilated and free of dust.
Step 5: Clean the printer cavity
WARNING:
Resin may cause skin irritation or an allergic skin reaction. Wear gloves when handling liquid resin or resin-coated surfaces. Wash skin with plenty of soap and water.
Open the printer cover. Clean any resin pooled on the printer floor, inside the printer cavity, with paper towels. Dampen the paper towels with isopropyl alcohol if necessary to fully remove the resin.
DANGER:
Fire hazard. IPA is flammable. Keep containers closed, and keep out of the reach of children.
Tap the wrench icon to access the Maintenance screen, then tap Motor Moves. The Motor Moves screen appears. Tap and hold Left (<) to move the LPU housing to the middle of the printer cavity. Other controls on this screen fully sweep the LPU housing across the printer cavity and control the build platform carriage.
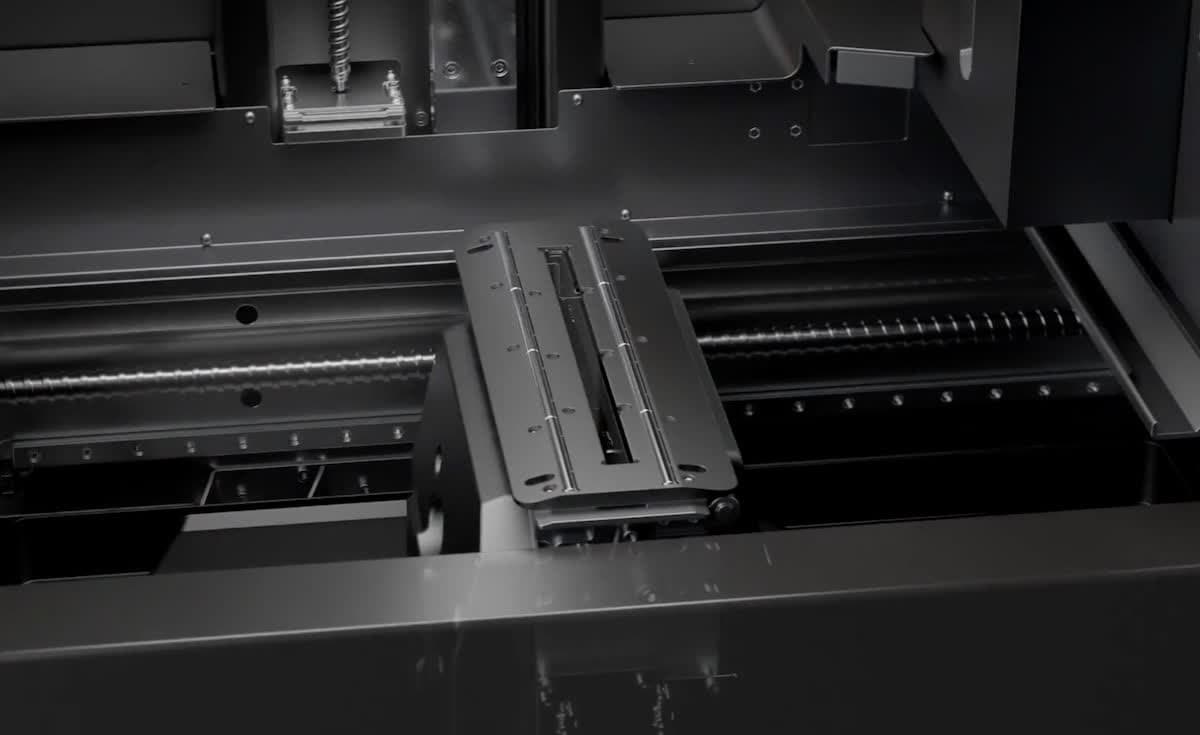
Step 7: Unplug the printer
When prompted by the touchscreen, disconnect the power cable before continuing with maintenance. Do not perform maintenance on the printer while it is connected to power.
WARNING:
Moving parts and lead/ball screws present crushing and tangling hazards. Be sure that the printer is unplugged from its power source and powered down before interacting with the LPU.
Step 8: Clean the LPU housing
Clean any resin in the area of the LPU housing or on the printer with paper towels. Dampen the paper towels with isopropyl alcohol if necessary to fully remove the resin.
Removing the right-hand LPU
Overview: After moving the LPU housing into its maintenance position, remove and unplug the right-hand LPU.
Step 1: Remove the right-hand LPU
The mixer motor and coupler are located on the right side of the LPU housing. The right-hand LPU must be removed to access the mixer motor.
To remove the right-hand LPU, follow the instructions in the guide for Replacing the Form 3L Light Processing Unit.
Removing the mixer motor and coupler
Overview: After removing the right-hand LPU, uninstall the mixer motor and coupler.
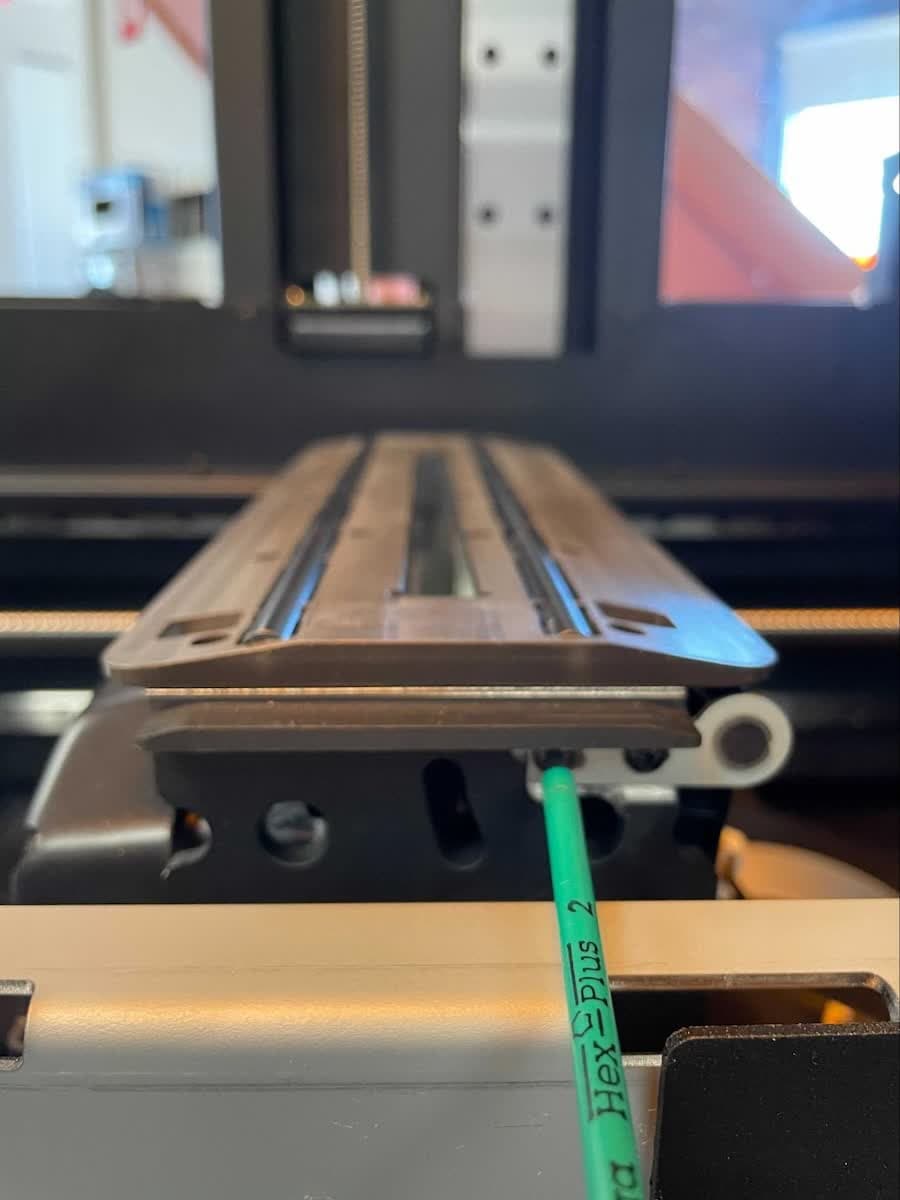
The mixer coupler retention bracket is located on the front of the LPU housing, directly below the roller holder. Use a 2 mm hex driver to loosen and remove the two screws securing the mixer coupler retention bracket to the LPU housing. Set the screws and the retention bracket aside.
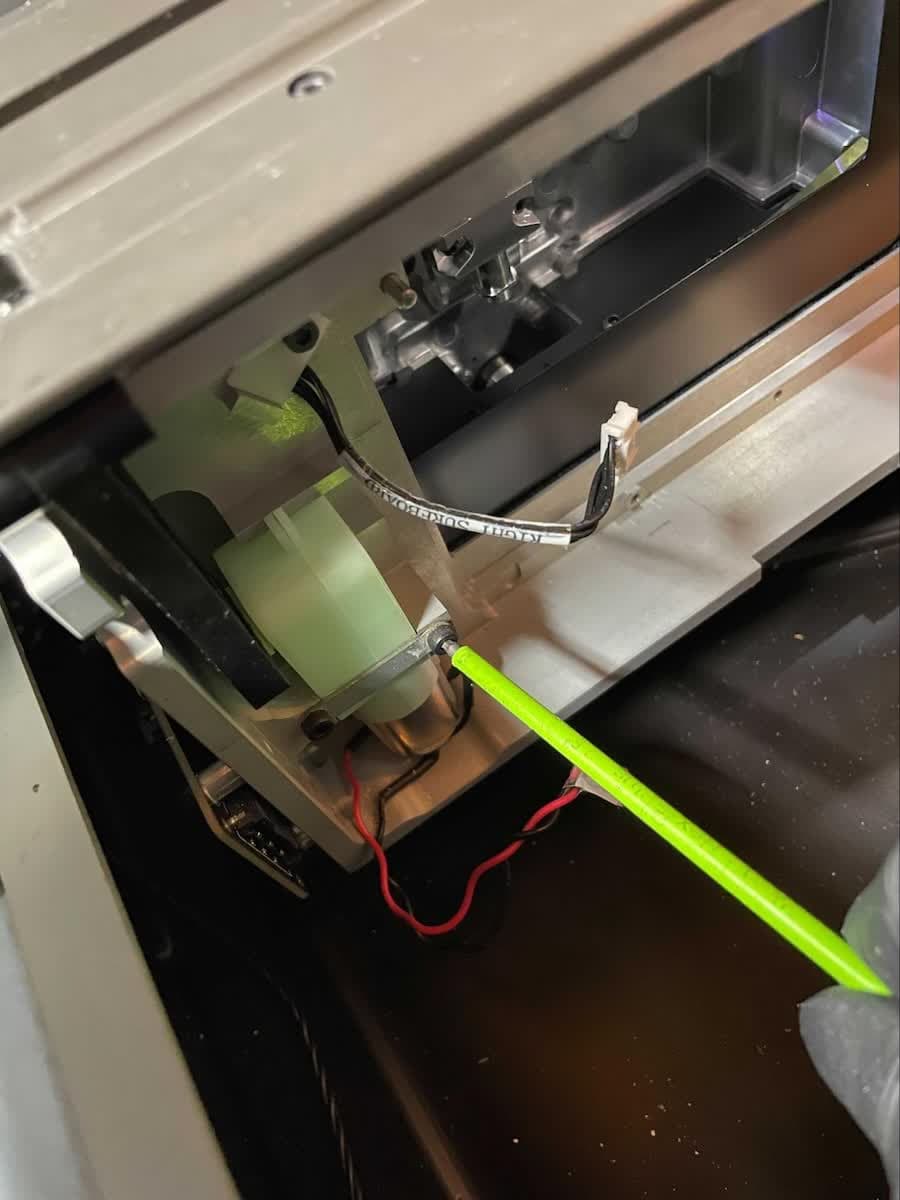
The mixer motor is located in the LPU housing, in the area previously occupied by the right-hand LPU. It is also held in place with a retention bracket. Use a 2.5 mm hex driver to loosen and remove the two screws securing the mixer motor retention bracket to the LPU housing. Set the screws and the retention bracket aside.
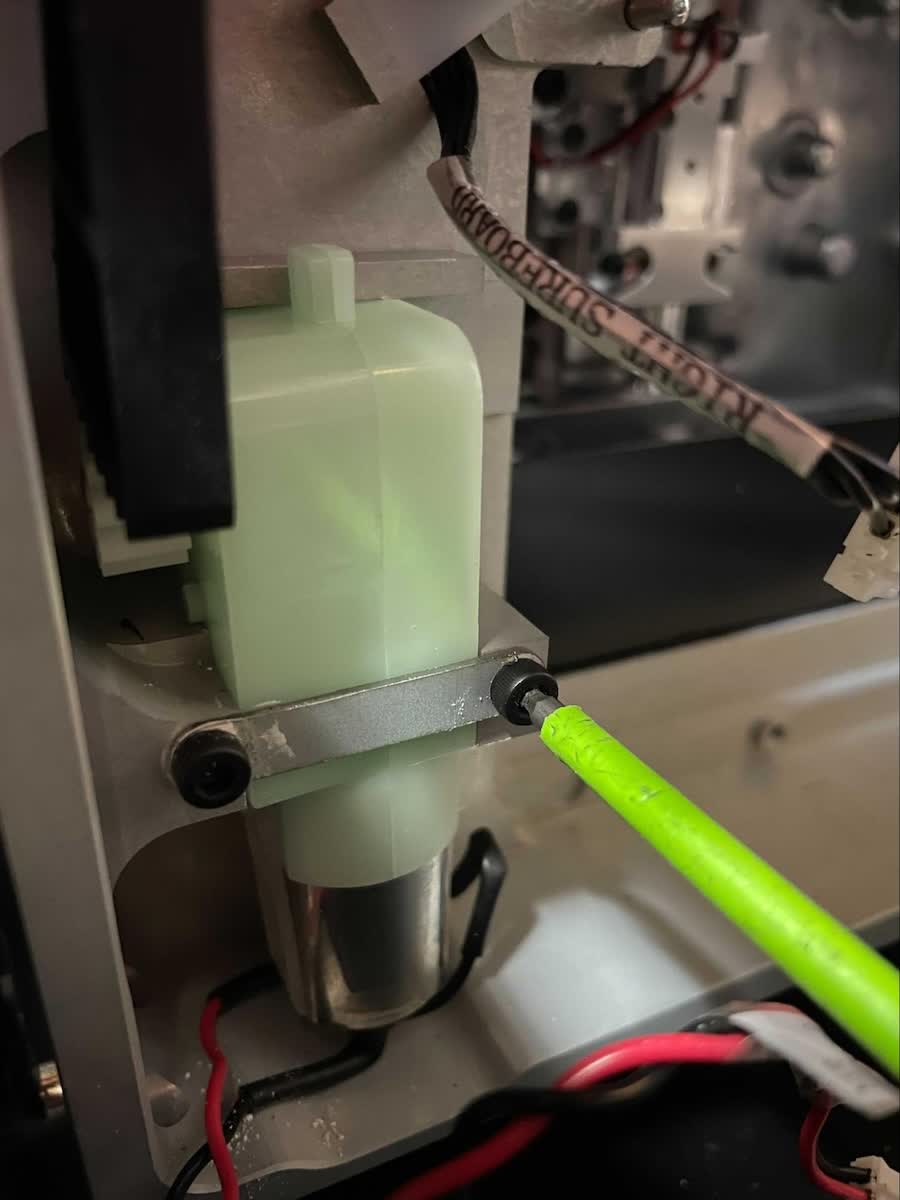
Grip the mixer motor by its housing. Pivot the motor upward about its drive gear and slide the motor away from the LPU housing to remove. Set the mixer motor aside.
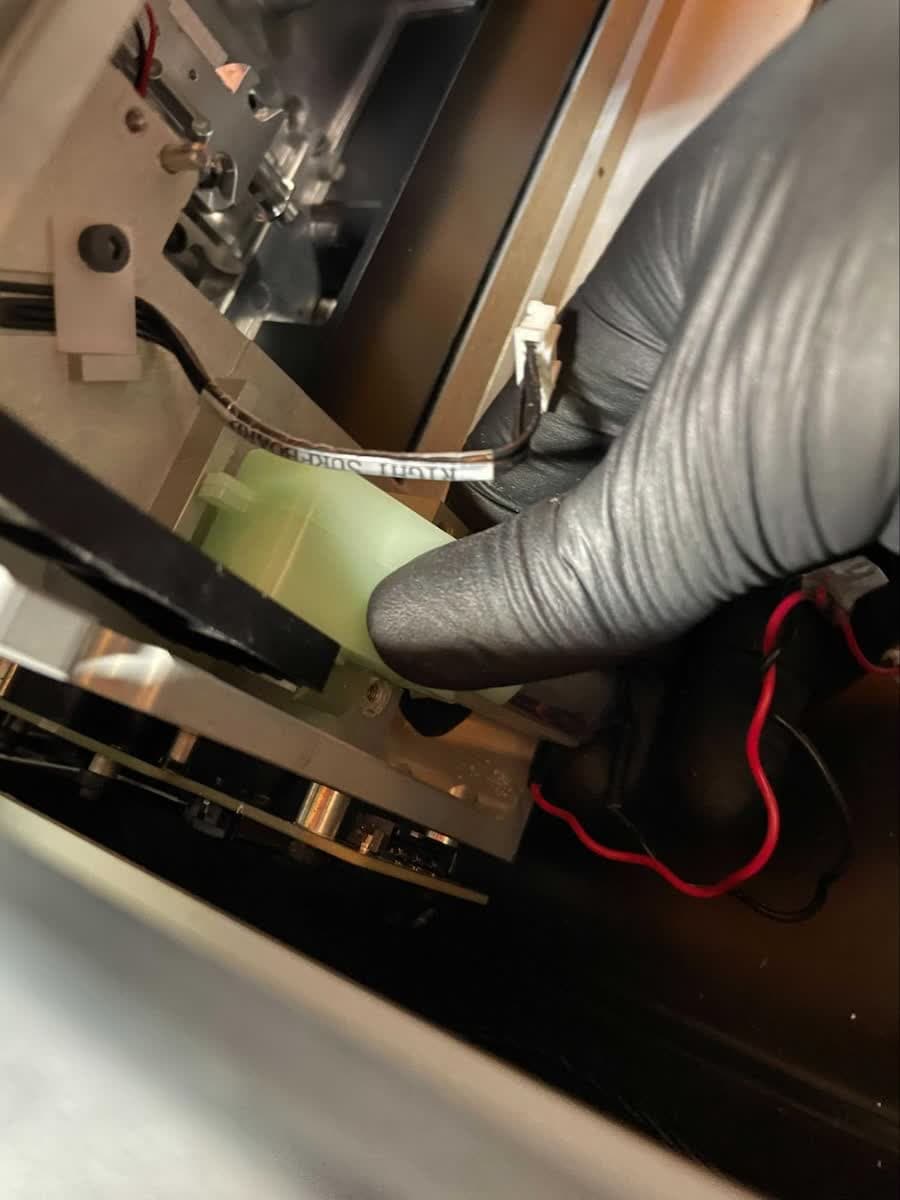
The mixer coupler is still connected to the LPU housing via a second retention bracket at the rear of the LPU housing. Grip the back end of the mixer coupler. Pull the end of the mixer coupler forward and out of the rear retention bracket to disengage the mixer coupler.
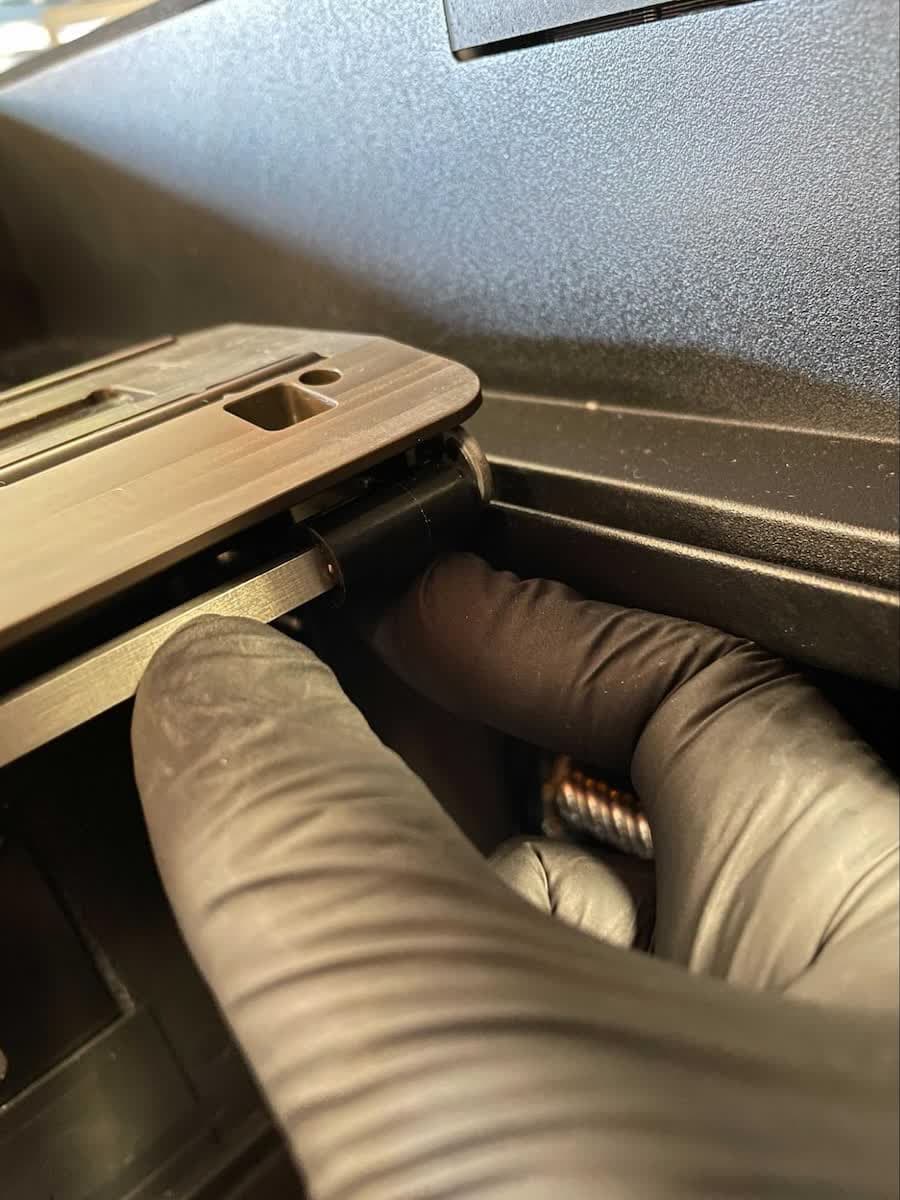
Grip the mixer coupler and roll it clockwise, away from the LPU housing. Pull the mixer coupler down and away from the LPU housing to remove. Set the mixer coupler aside.
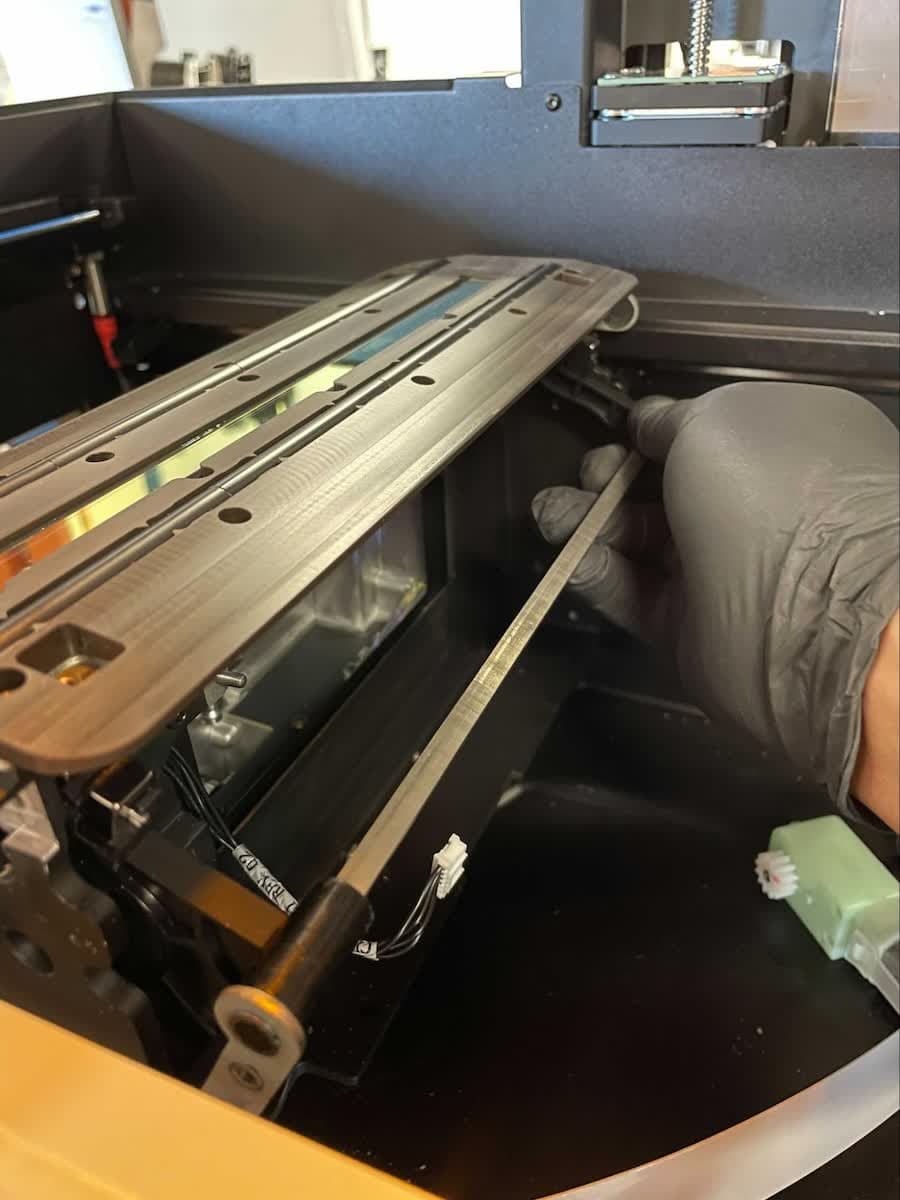
Installing the new mixer motor and coupler
Overview: After removing the old mixer motor and coupler, connect and install the replacement mixer motor and coupler.
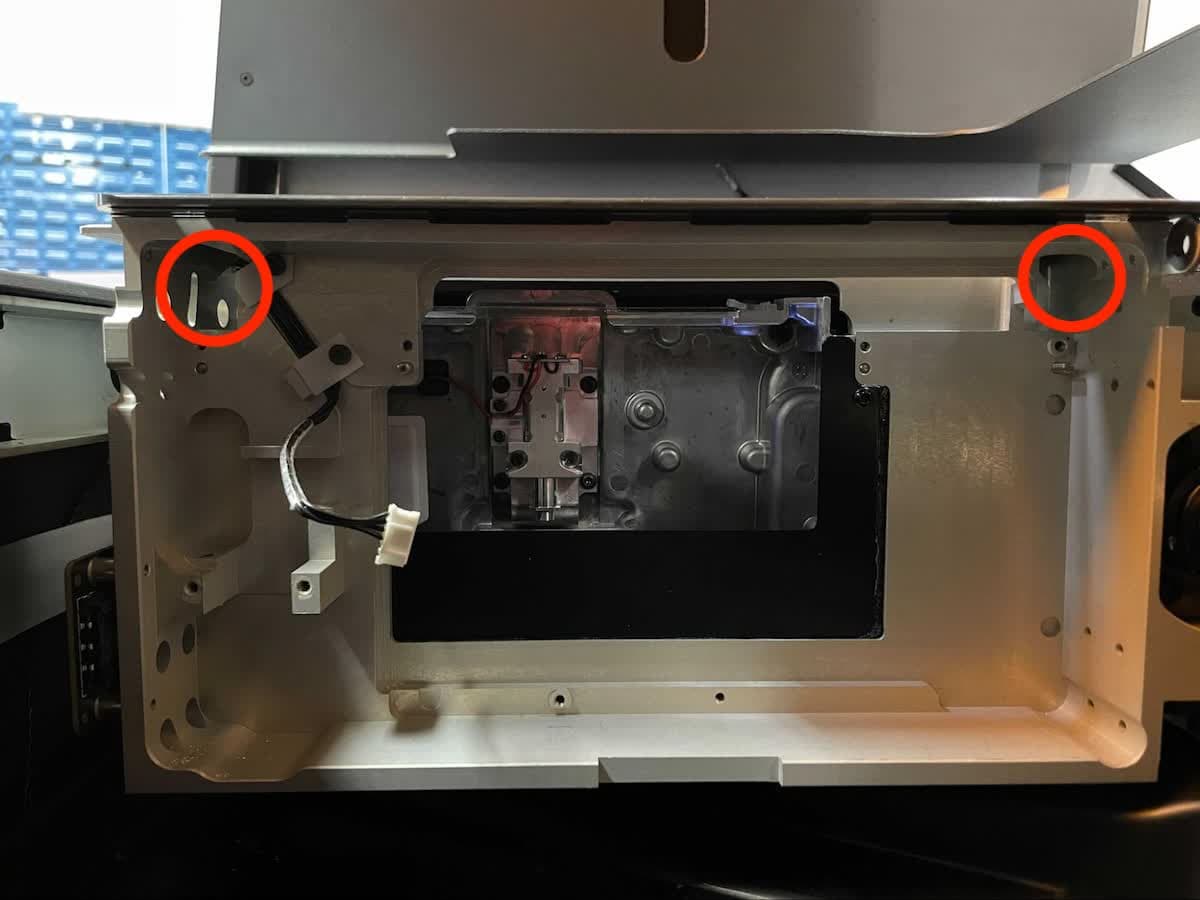
Insert the ends of the mixer coupler into the two rectangular holes in the upper corners of the right side of the LPU housing, circled in the image above. Push the mixer coupler toward the LPU housing and rotate it into place, reversing the motion used to remove the old mixer coupler.
Press the mixer motor’s drive gear into the mixer coupler arm and rotate the motor into place, reversing the motion used to remove the old mixer coupler. Hold the mixer coupler in place while installing the motor to keep it from shifting.
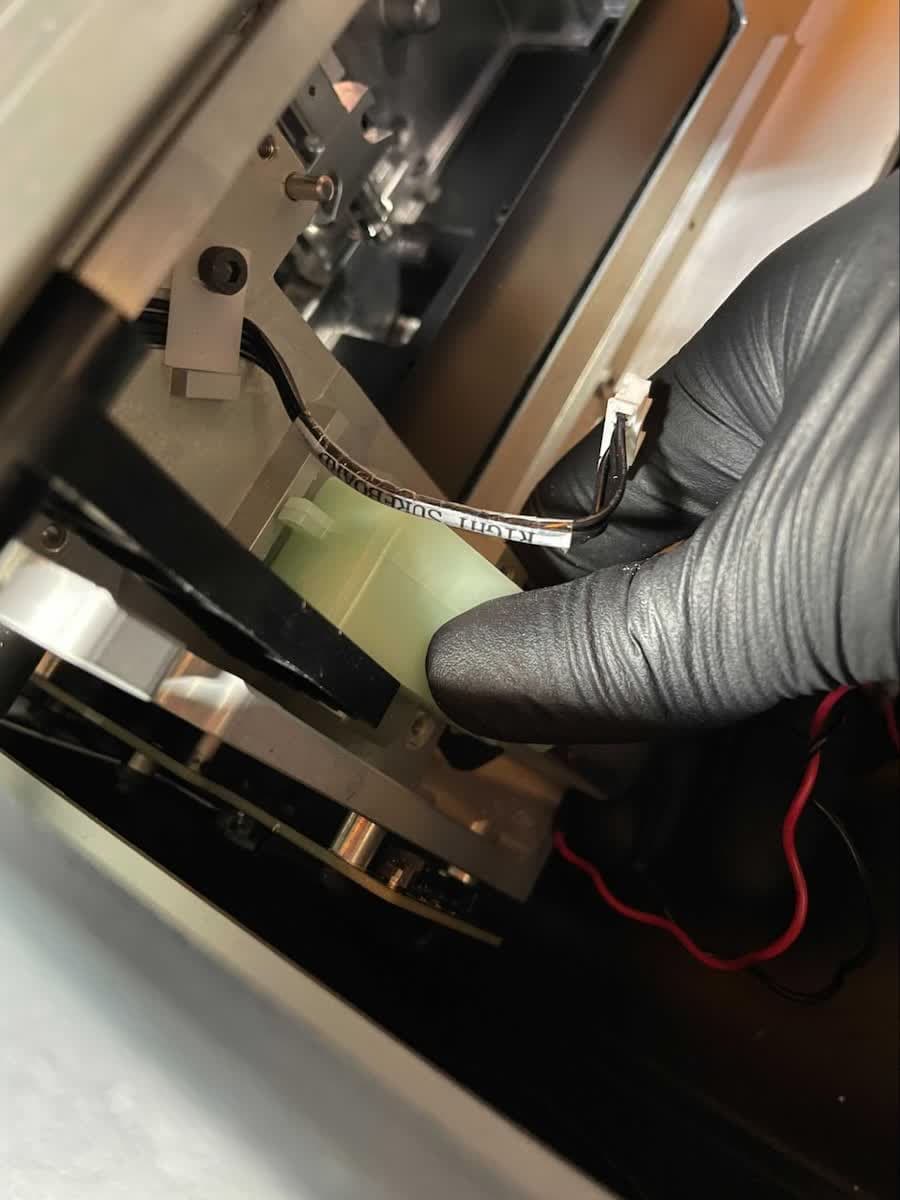
Align the screw holes in the mixer motor retention bracket with the corresponding holes in the LPU housing. Thread the two mixer motor retention bracket screws into the holes and tighten with a 2.5 mm hex driver until finger tight.
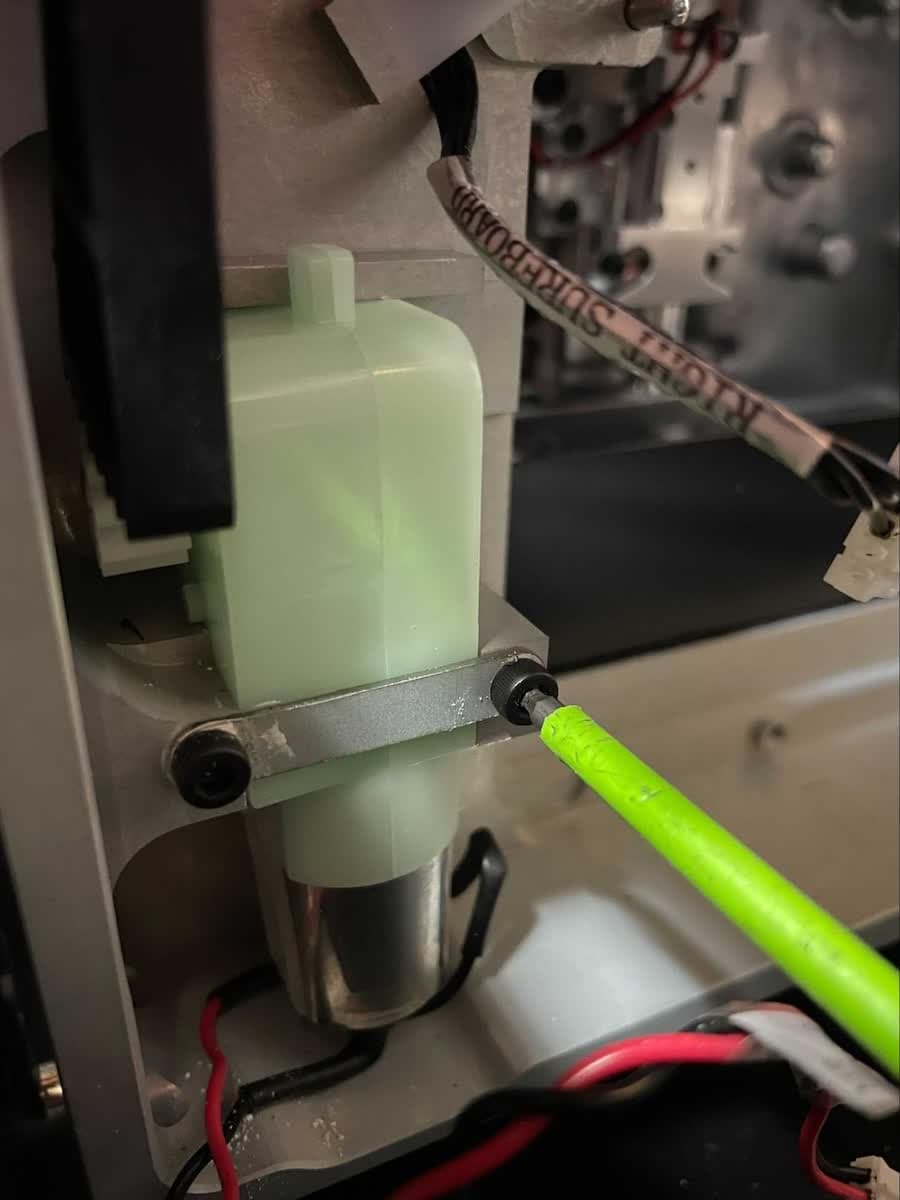
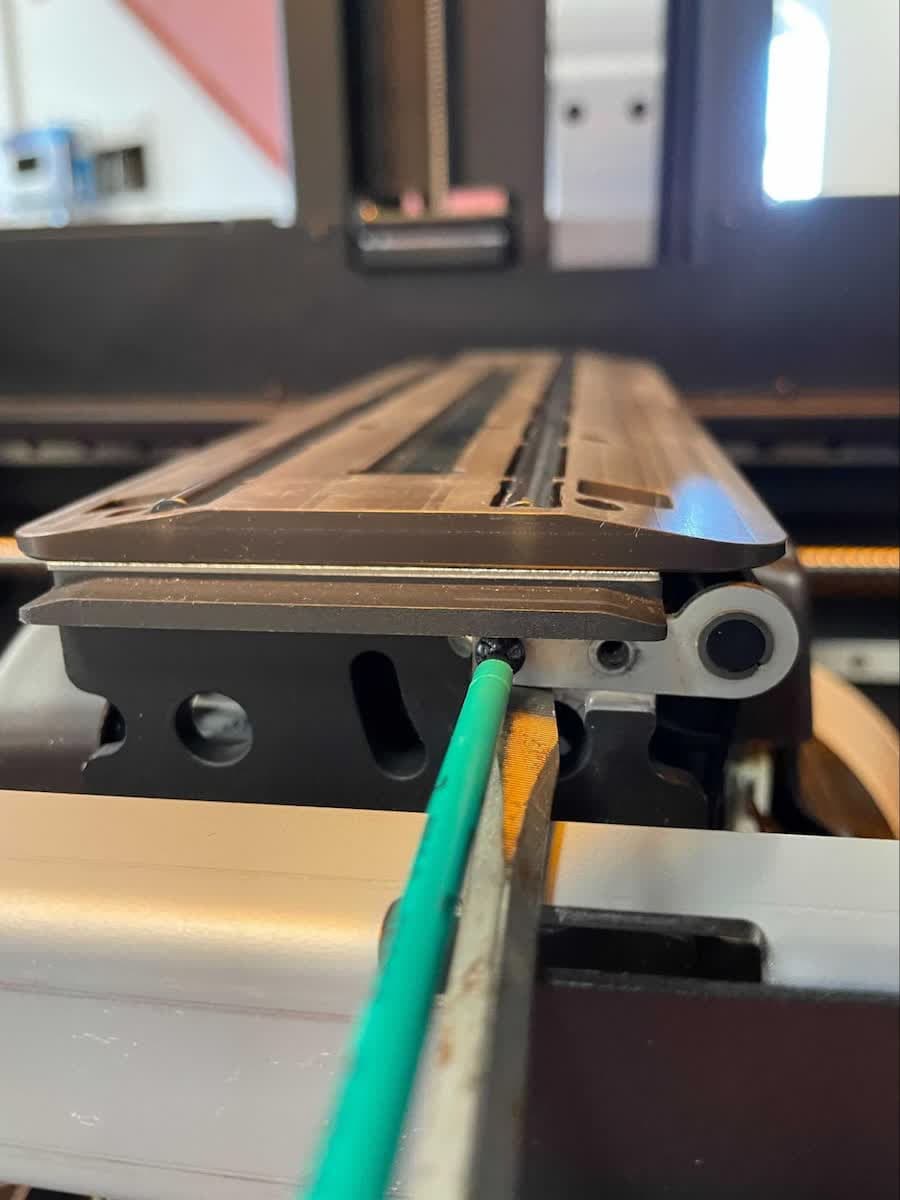
Align the screw holes in the mixer coupler retention bracket with the corresponding holes in the LPU housing. Thread the two mixer coupler retention bracket screws into the holes and tighten with a 2 mm hex driver until finger tight. You may find it helpful to use a flathead screwdriver or similar tool for leverage as shown to hold the bracket in place. If needed, use a pair of precision tweezers to align the screws with the screw holes.
Reinstalling the right-hand LPU
Overview: After replacing the mixer motor and coupler, reinstall the right-hand LPU.
Step 1: Reinstall the right-hand LPU
Reinstall the right-hand shell following the instructions in the guide for Replacing the Form 3L Light Processing Unit.
Finalizing the repair
Overview: After installing the new mixer motor and coupler, power on the printer and perform final checks.
Step 1: Power on the printer
Close the printer cover and connect the power cable to the printer and the power supply. The printer will initialize, move the LPU housing back to their home position, and perform a calibration.
Step 2: Recalibrate the mixer sensor
On the printer touchscreen, tap the wrench icon. The Maintenance screen appears. Tap Calibration > Calibrate Tank Mixer Sensor and follow the onscreen prompts to calibrate the tank mixer sensor.
Step 3: Test the repair
Insert a resin tank, build platform, and resin cartridge. Start a print. Monitor the printer during the pre-print process and ensure that the printer moves the mixer across the tank film properly. Contact Formlabs Support or your authorized reseller to share the results of the procedure.