
Required Supplies
Provided by Formlabs
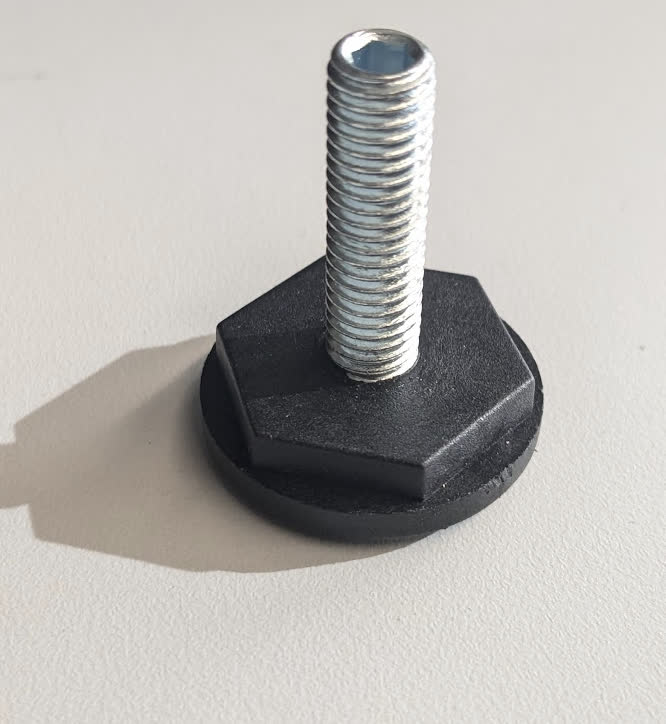
- Leveling feet
Third party
- Nitrile gloves

Form 4L generation printers have four adjustable feet that raise the printer off the work surface and allow it to be leveled before printing. If one or more of the leveling feet is damaged or missing, it may be difficult to keep the printer level.
Use this guide to replace the leveling feet on a Form 4L generation printer.
Required Supplies
Provided by Formlabs
Third party
Estimated time: 15 minutes
Preparing the workspace
Overview: Prepare the printer and a dust-free workspace for replacing the leveling feet.
Step 1: Remove the build platform
Remove the build platform first to avoid dripping resin onto the Light Processing Unit (LPU).
Step 2: Remove the resin cartridges
Remove the resin cartridges and close the vent caps to prevent resin from dripping off of the bite valve and into the printer.
Step 3: Remove and store the resin tank and mixer
Unlatch the mixer and resin tank. Remove the resin tank and cover it with its lid. Set the tank aside on a clean, flat surface.
Notice:
Wear gloves and hold the resin tank by the tank grips on either side to avoid contamination or damage to the underside of the tank.
Step 4: Prepare the workspace
Clear a workspace around your printer. Ensure that the workspace is well-ventilated and free of dust.
Step 5: Clean the printer
Warning:
Resin may cause skin irritation or an allergic skin reaction. Wear gloves when handling liquid resin or resin-coated surfaces. Wash skin with plenty of soap and water.
Open the printer cover and clean any resin pooled on and around the LPU with non-abrasive wipes. Dampen the wipes with isopropyl alcohol if necessary to fully remove the resin.
Danger:
Fire hazard. IPA is flammable. Keep containers closed, and keep out of the reach of children.
Step 6: Unplug the printer
Turn the power switch off at the back of the printer. Unplug the power cord from the printer.
Step 7: Remove the Wi-Fi antenna
Remove the Wi-Fi antenna, if present, from the back of the printer. Set it aside.
Replacing the leveling feet
Overview: Rotate the printer so that it lies on its back, remove the leveling feet, and install the new leveling feet.
Step 1: Rotate the printer
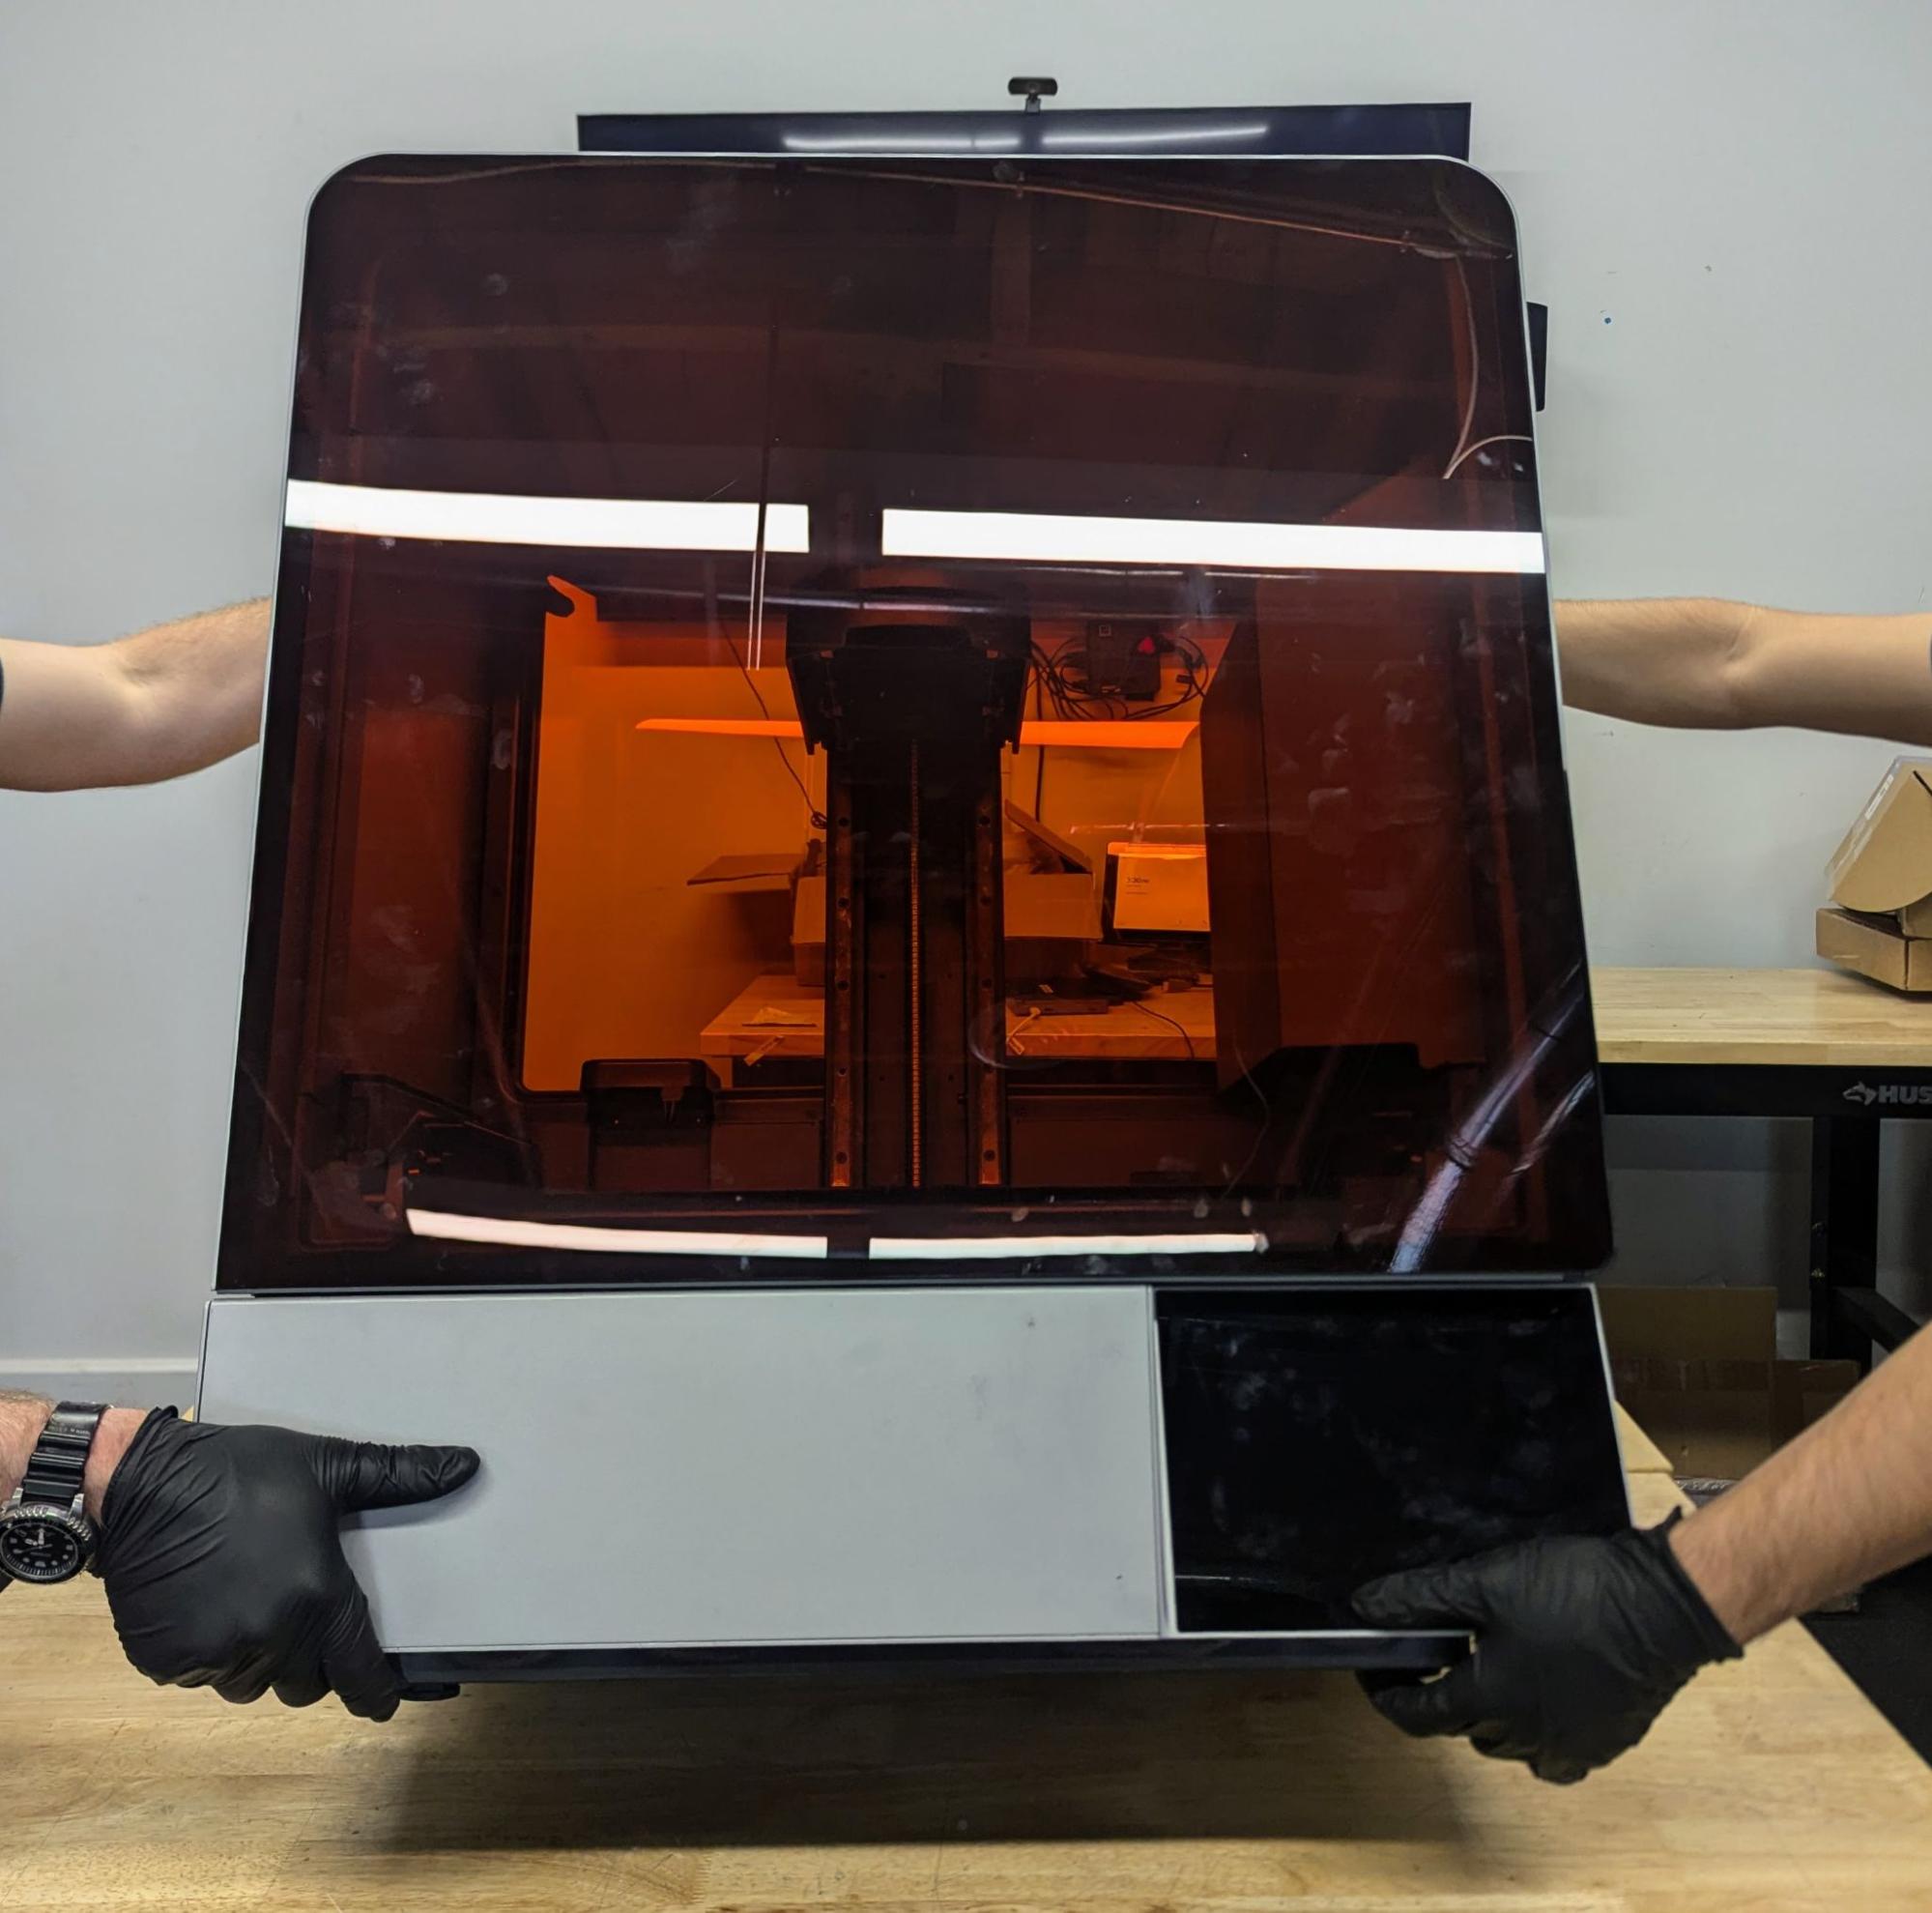
With a second person, rotate the printer so it lies flat on its back with the bottom facing you.
Caution:
The Form 4L is a heavy object. A two person lift is required to prevent injury and avoid damage to the printer.
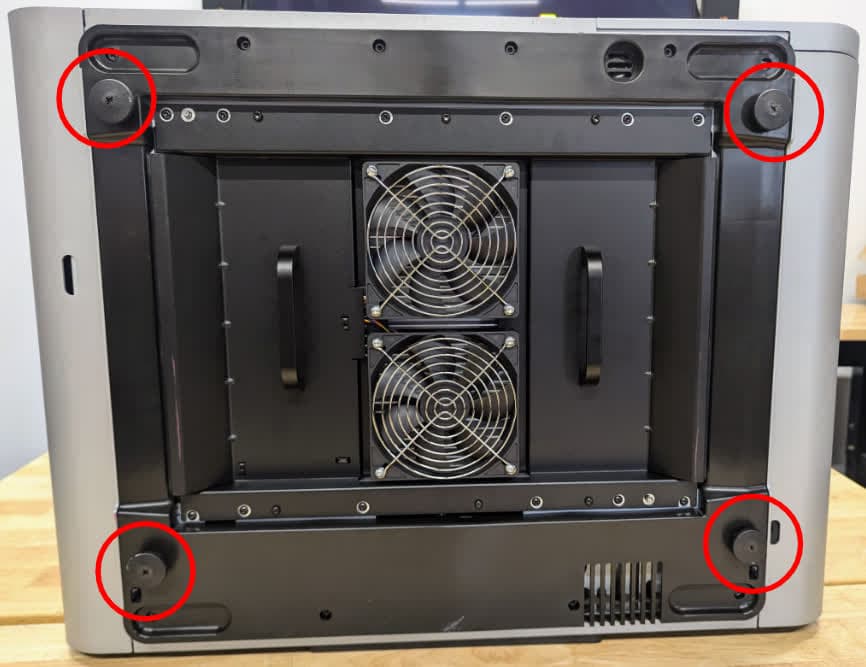
Remove the damaged leveling feet by rotating them counterclockwise until they come loose. Set aside for disposal.
Install the replacement leveling feet by threading them into the holes at the bottom of the printer. Turn the replacement leveling feet clockwise until they are roughly even with the other leveling feet.
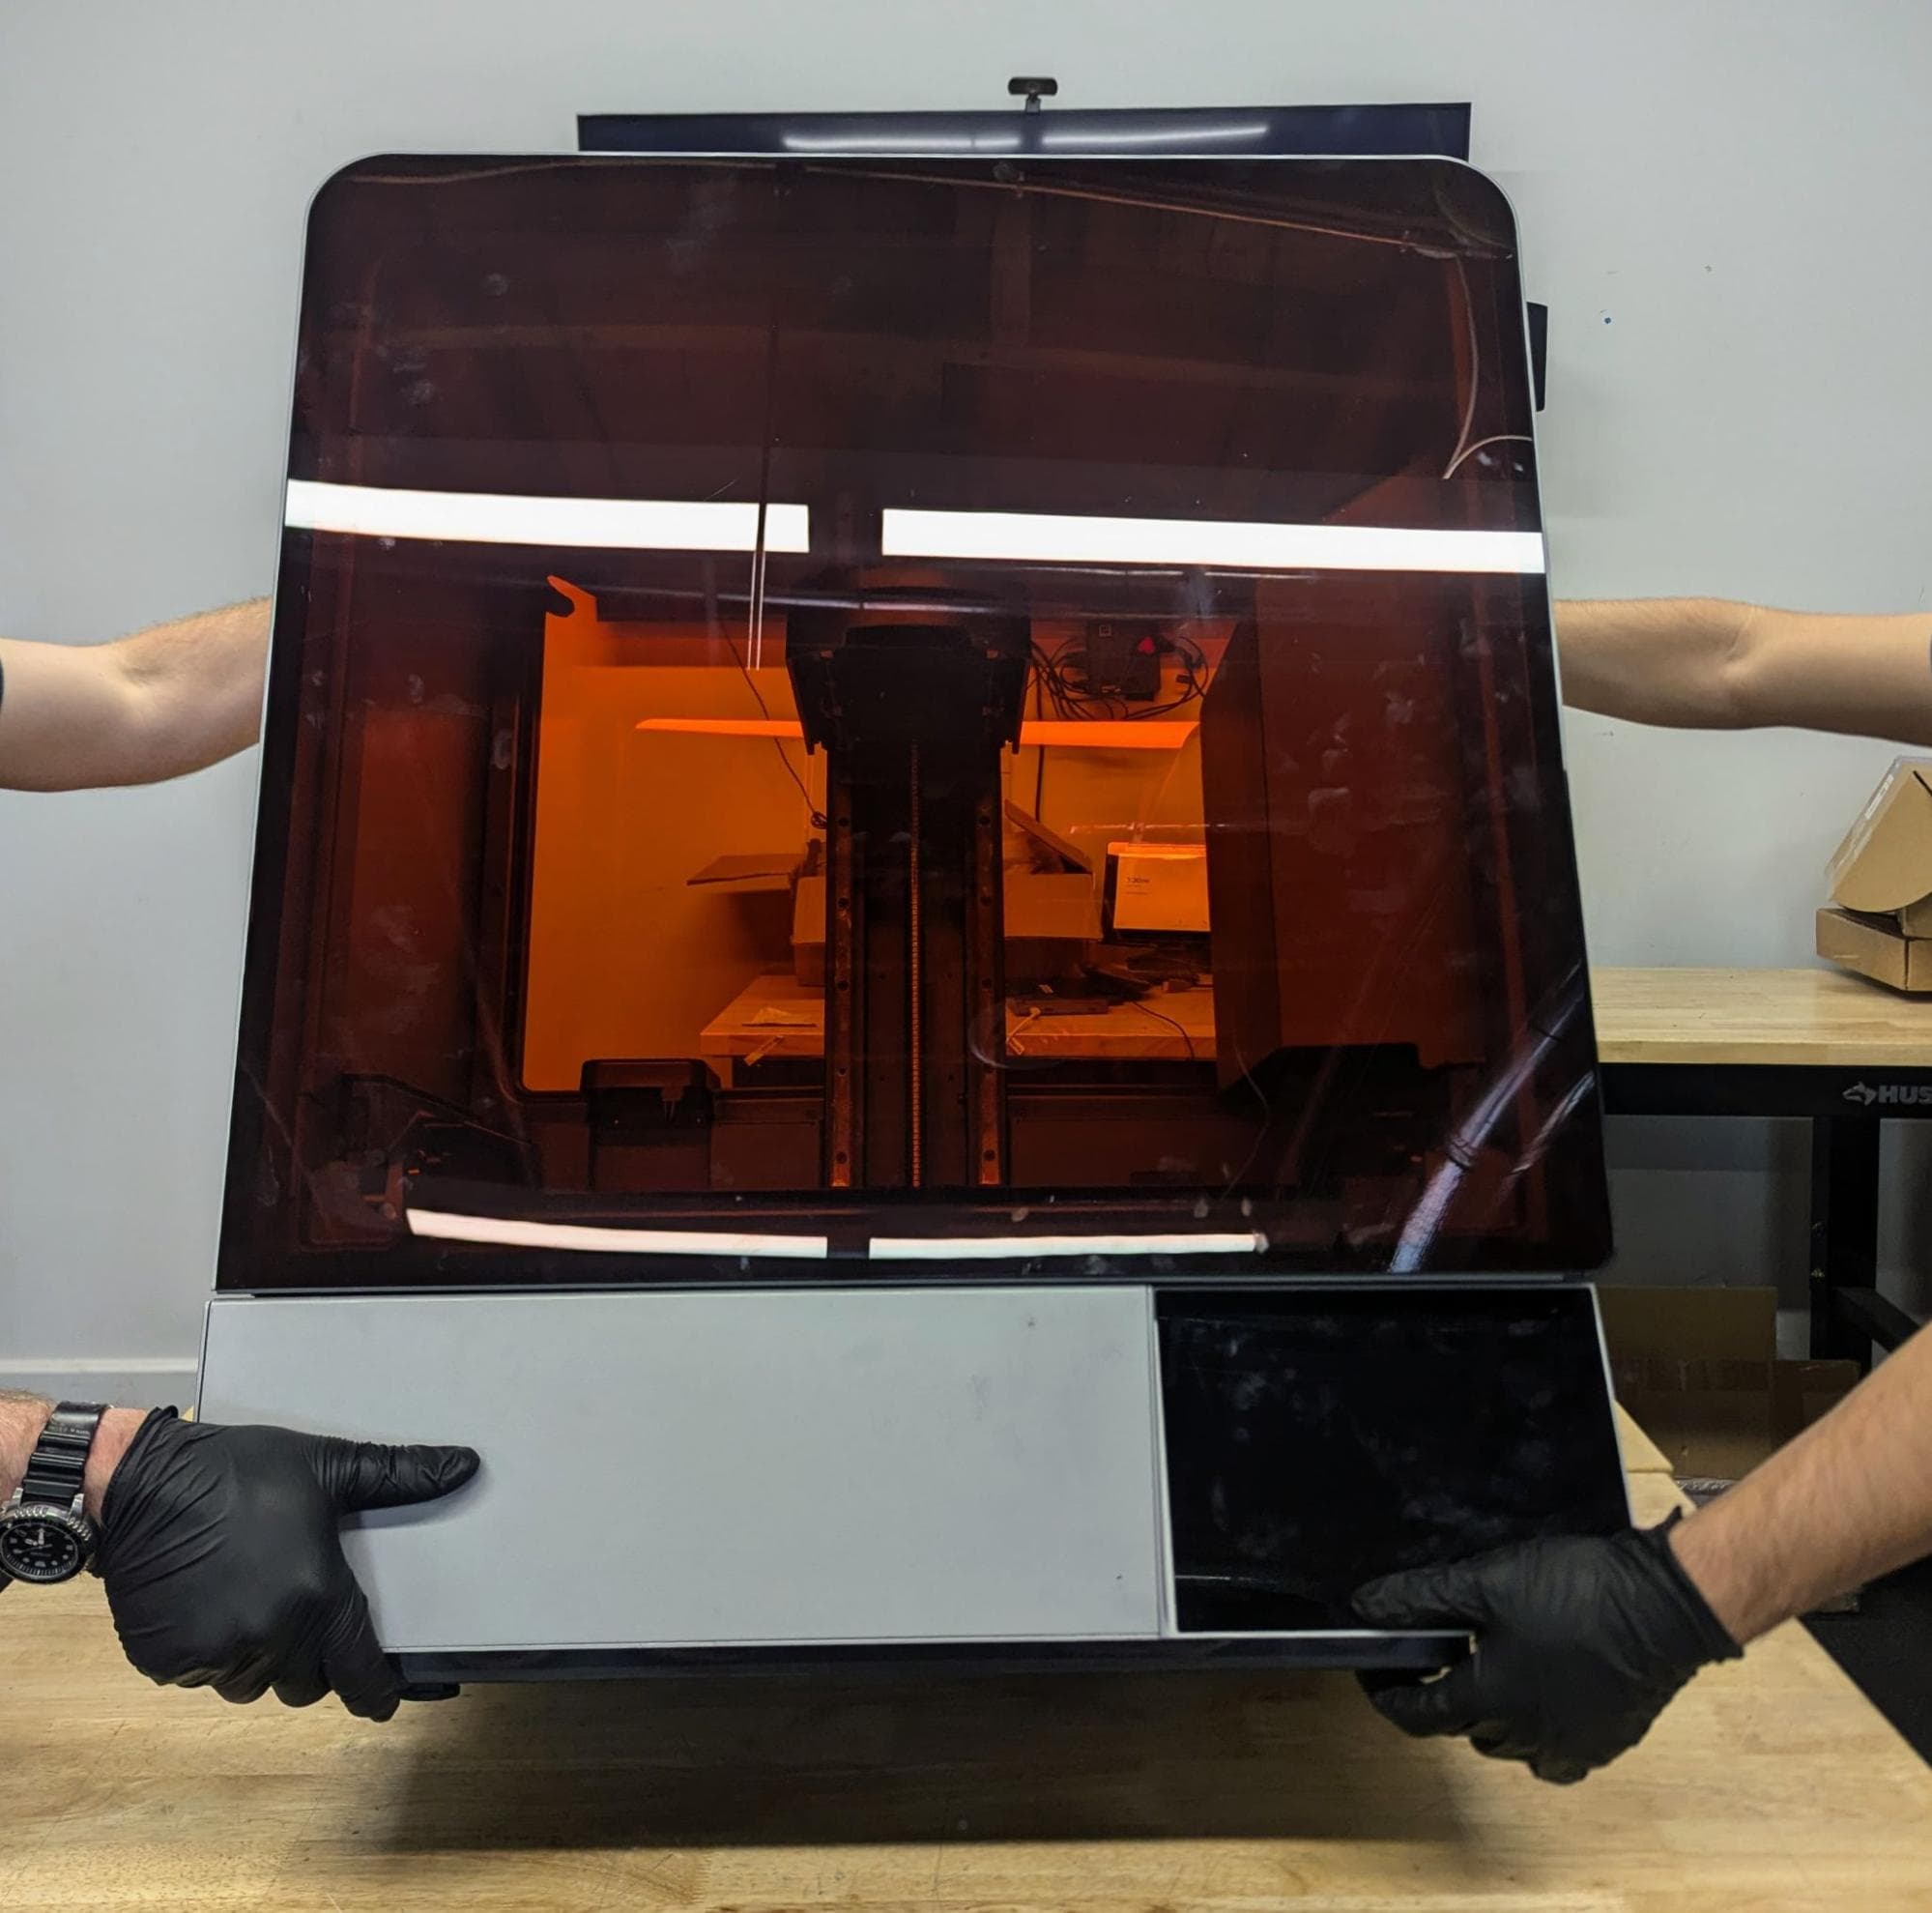
With a second person, grip the printer by the bottom front and top rear corners and rotate it onto its feet.
Reinstall the Wi-Fi antenna into the back of the printer.
Finalizing the repair
Overview: After installing the replacement leveling feet, power on the printer and perform final checks.
Step 1: Power on the printer
Connect the power cable to the printer and the power supply. Turn on the switch at the back of the printer. The printer turns on and initializes.
Step 2: Level the printer
On the printer touchscreen, tap the gear icon. The Settings screen appears. Tap Tools > Level printer . Follow the on-screen instructions.