
Required supplies:
Formlabs:
- Replacement wash bucket interlock switch
- Electric siphon pump (packaged with the Form Wash L)
Third-party:
- 2.5 mm hex driver
- Empty solvent container at least 42 L in size
- Nitrile gloves

The Form Wash L determines whether the wash bucket is fully seated using a switch at the back of the machine. If that switch is unplugged or broken, the machine will not be able to detect the wash bucket and will not start a wash cycle.
Use this guide to replace the Form Wash L wash bucket interlock switch.
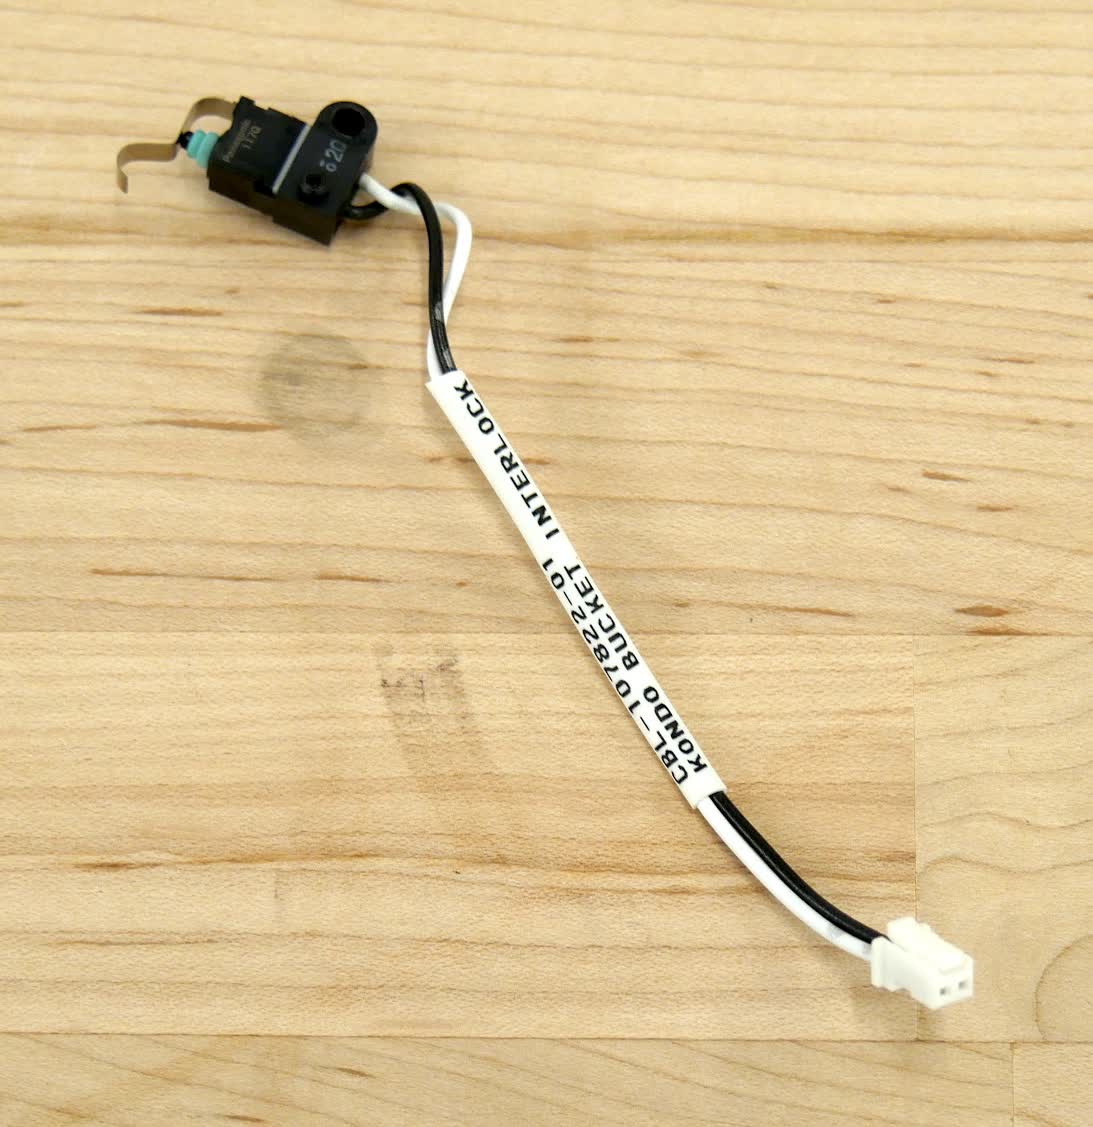
Required supplies:
Formlabs:
Third-party:
Estimated time: 30–45 minutes
Preparing the workspace
Overview: Prepare the Form Wash L and a dust-free workspace for replacing the wash bucket interlock switch.
Step 1: Prepare the workspace
Clear a workspace around your machine. Ensure that the workspace is well-ventilated and free of dust.
Step 2: Unplug the networking cables and Wi-Fi antenna
Disconnect the Ethernet and USB cables from the unit, if they are connected. Unscrew and remove the Wi-Fi antenna.
Step 3: Unplug the machine
DANGER:
Performing maintenance on the machine while it is plugged in increases the risk of electric shock. Never remove the panels of the machine while it is plugged in. Never reconnect the machine to power while the panels are uninstalled.
Disconnect the power cable from the machine before continuing with maintenance. Do not perform maintenance on the machine while it is connected to power. Wait five minutes after disconnecting the machine from power before proceeding.
Step 4: Empty the Form Wash L
DANGER:
Always consult the safety data sheet (SDS) from the IPA supplier as the primary source of information. IPA is flammable and should be used and stored away from ignition sources. Store small quantities of IPA in appropriately labeled and sealed containers.
Prepare the electric siphon pump that was packaged with the Form Wash L, as well as an empty solvent container at least 42 L in size suitable for the type of solvent in the machine. Lift the Form Wash L lid. Place the intake end of the electric siphon pump into the wash bucket. Securely place the flexible pump hose into the empty solvent container. Turn on the pump switch to transfer solvent from the wash bucket to the solvent container.
Removing the right shell
Overview: Remove the right shell of the machine to access the interlock switch.
NOTICE:
The Form Wash L contains sensitive electronic components. Ground yourself before touching any electronics in the machine by using a grounding strap or touching a grounded piece of metal.
Step 1: Unscrew the right shell screws
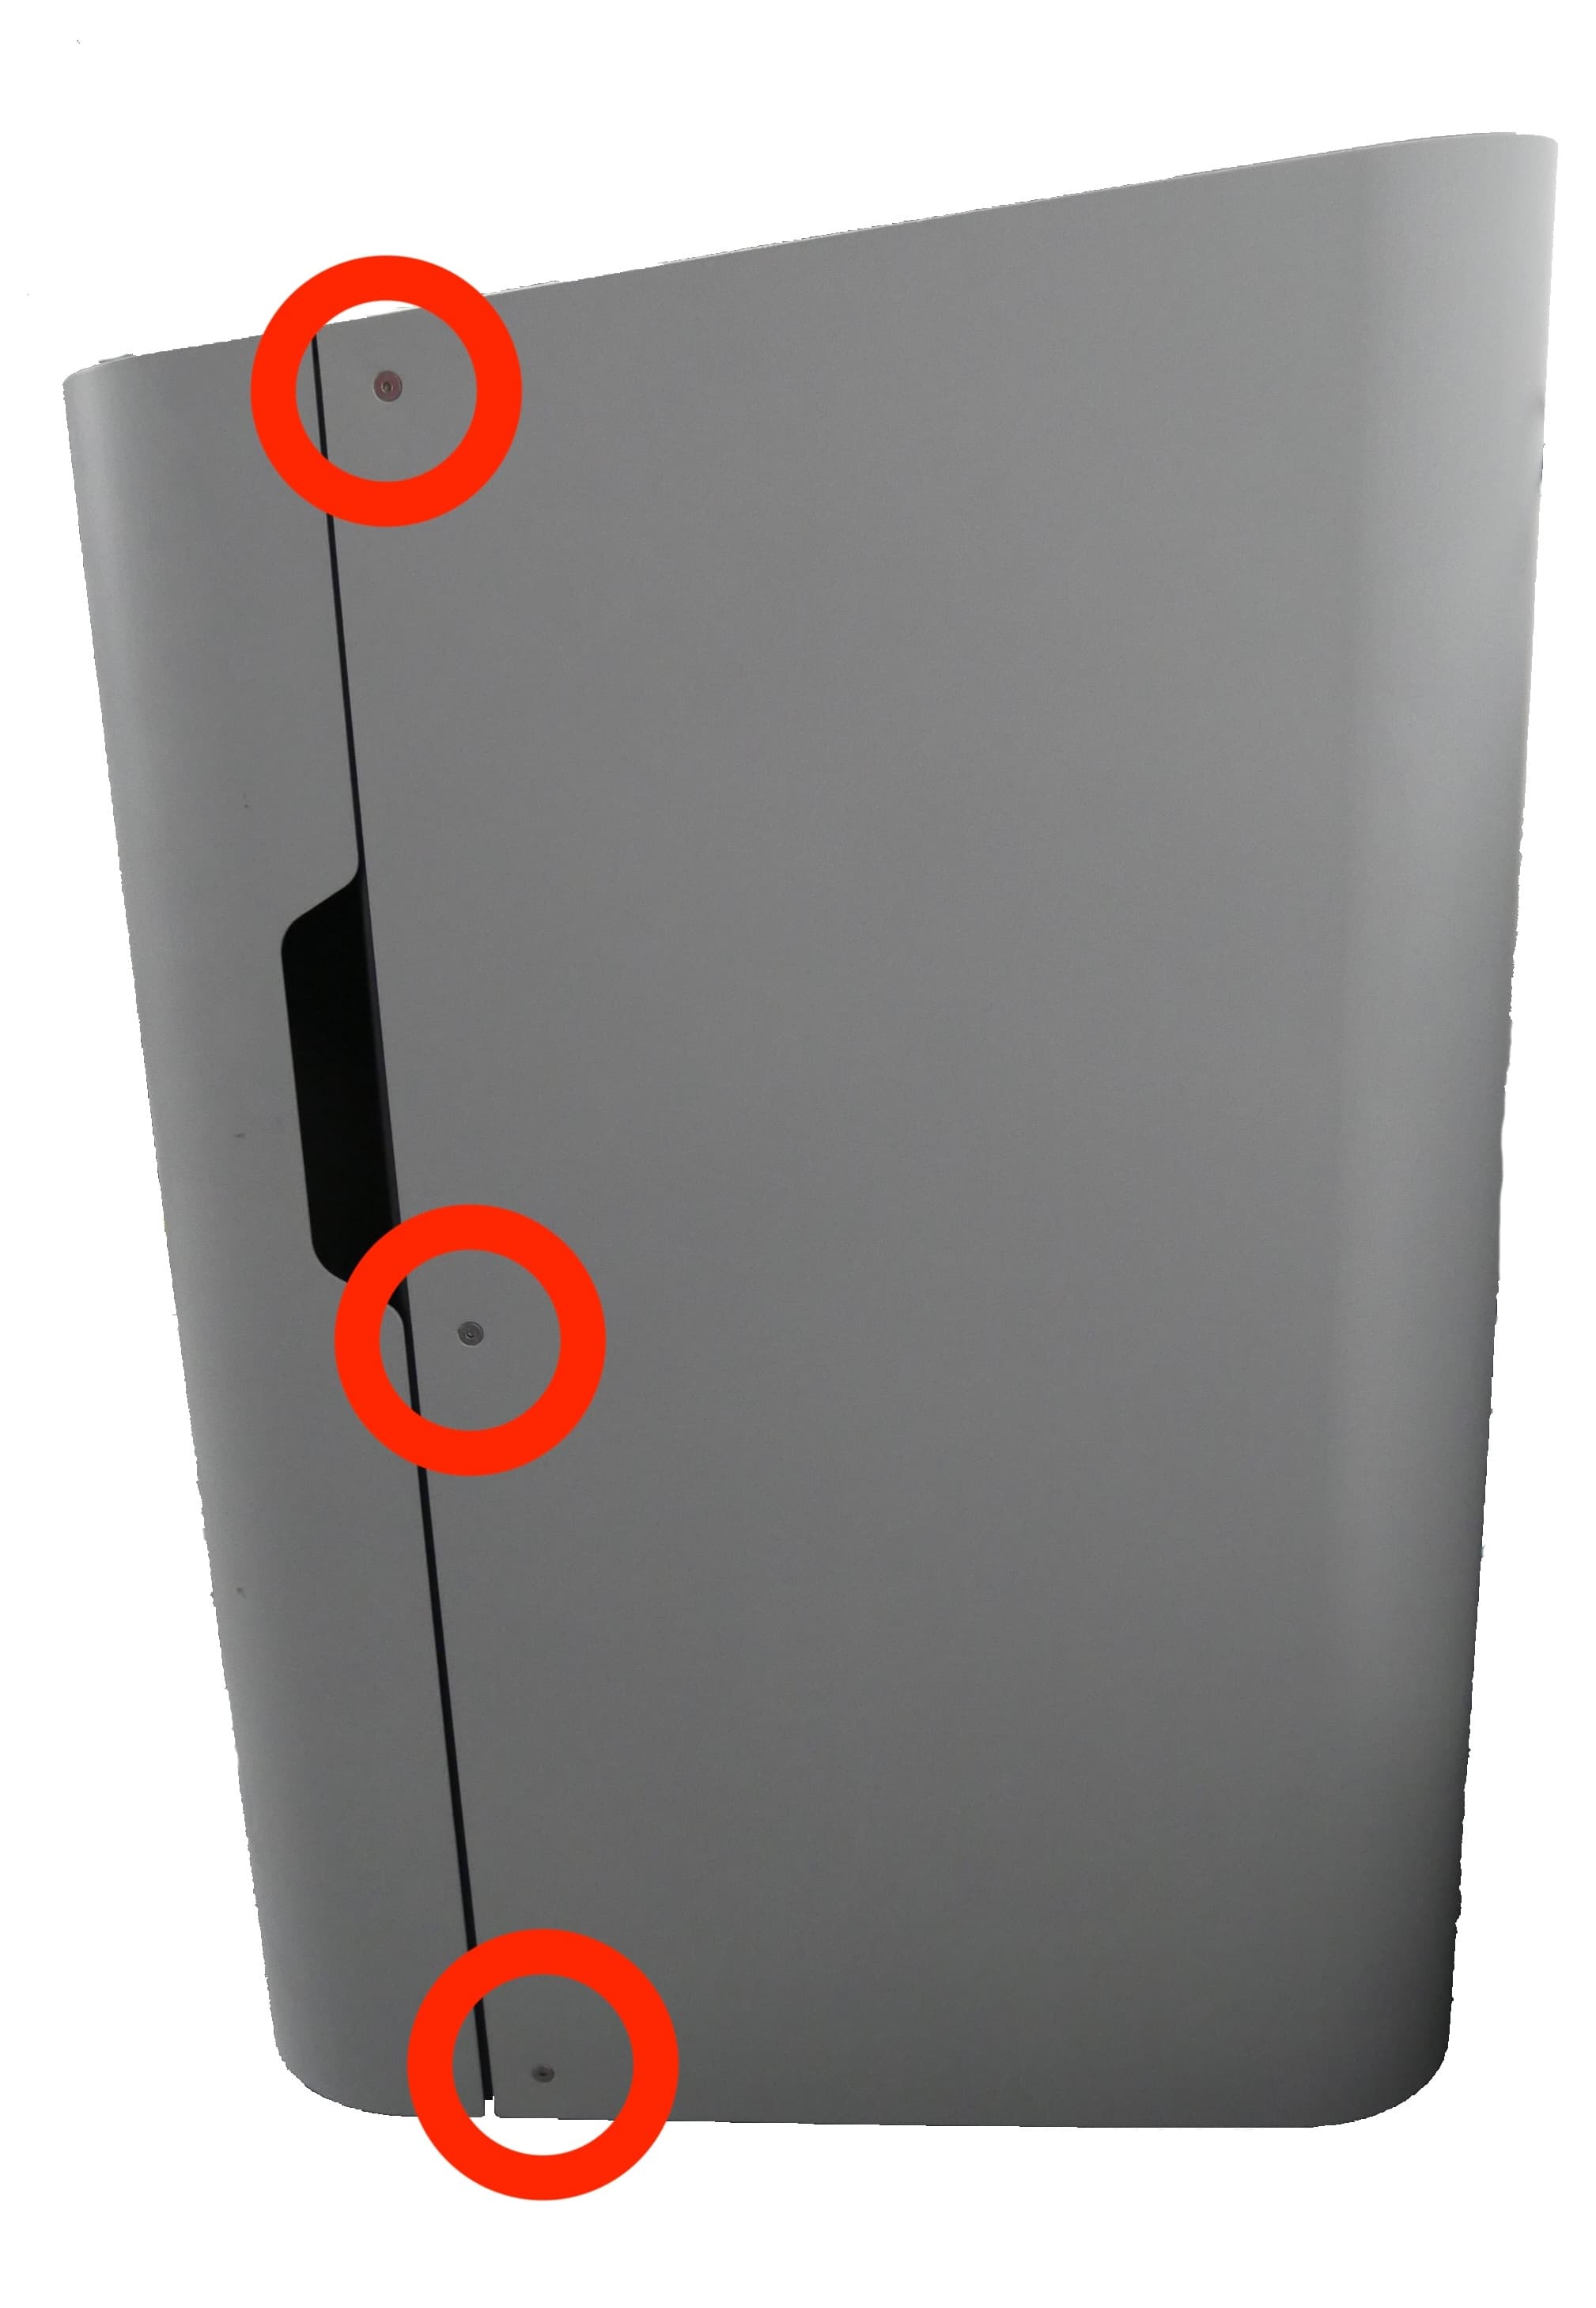
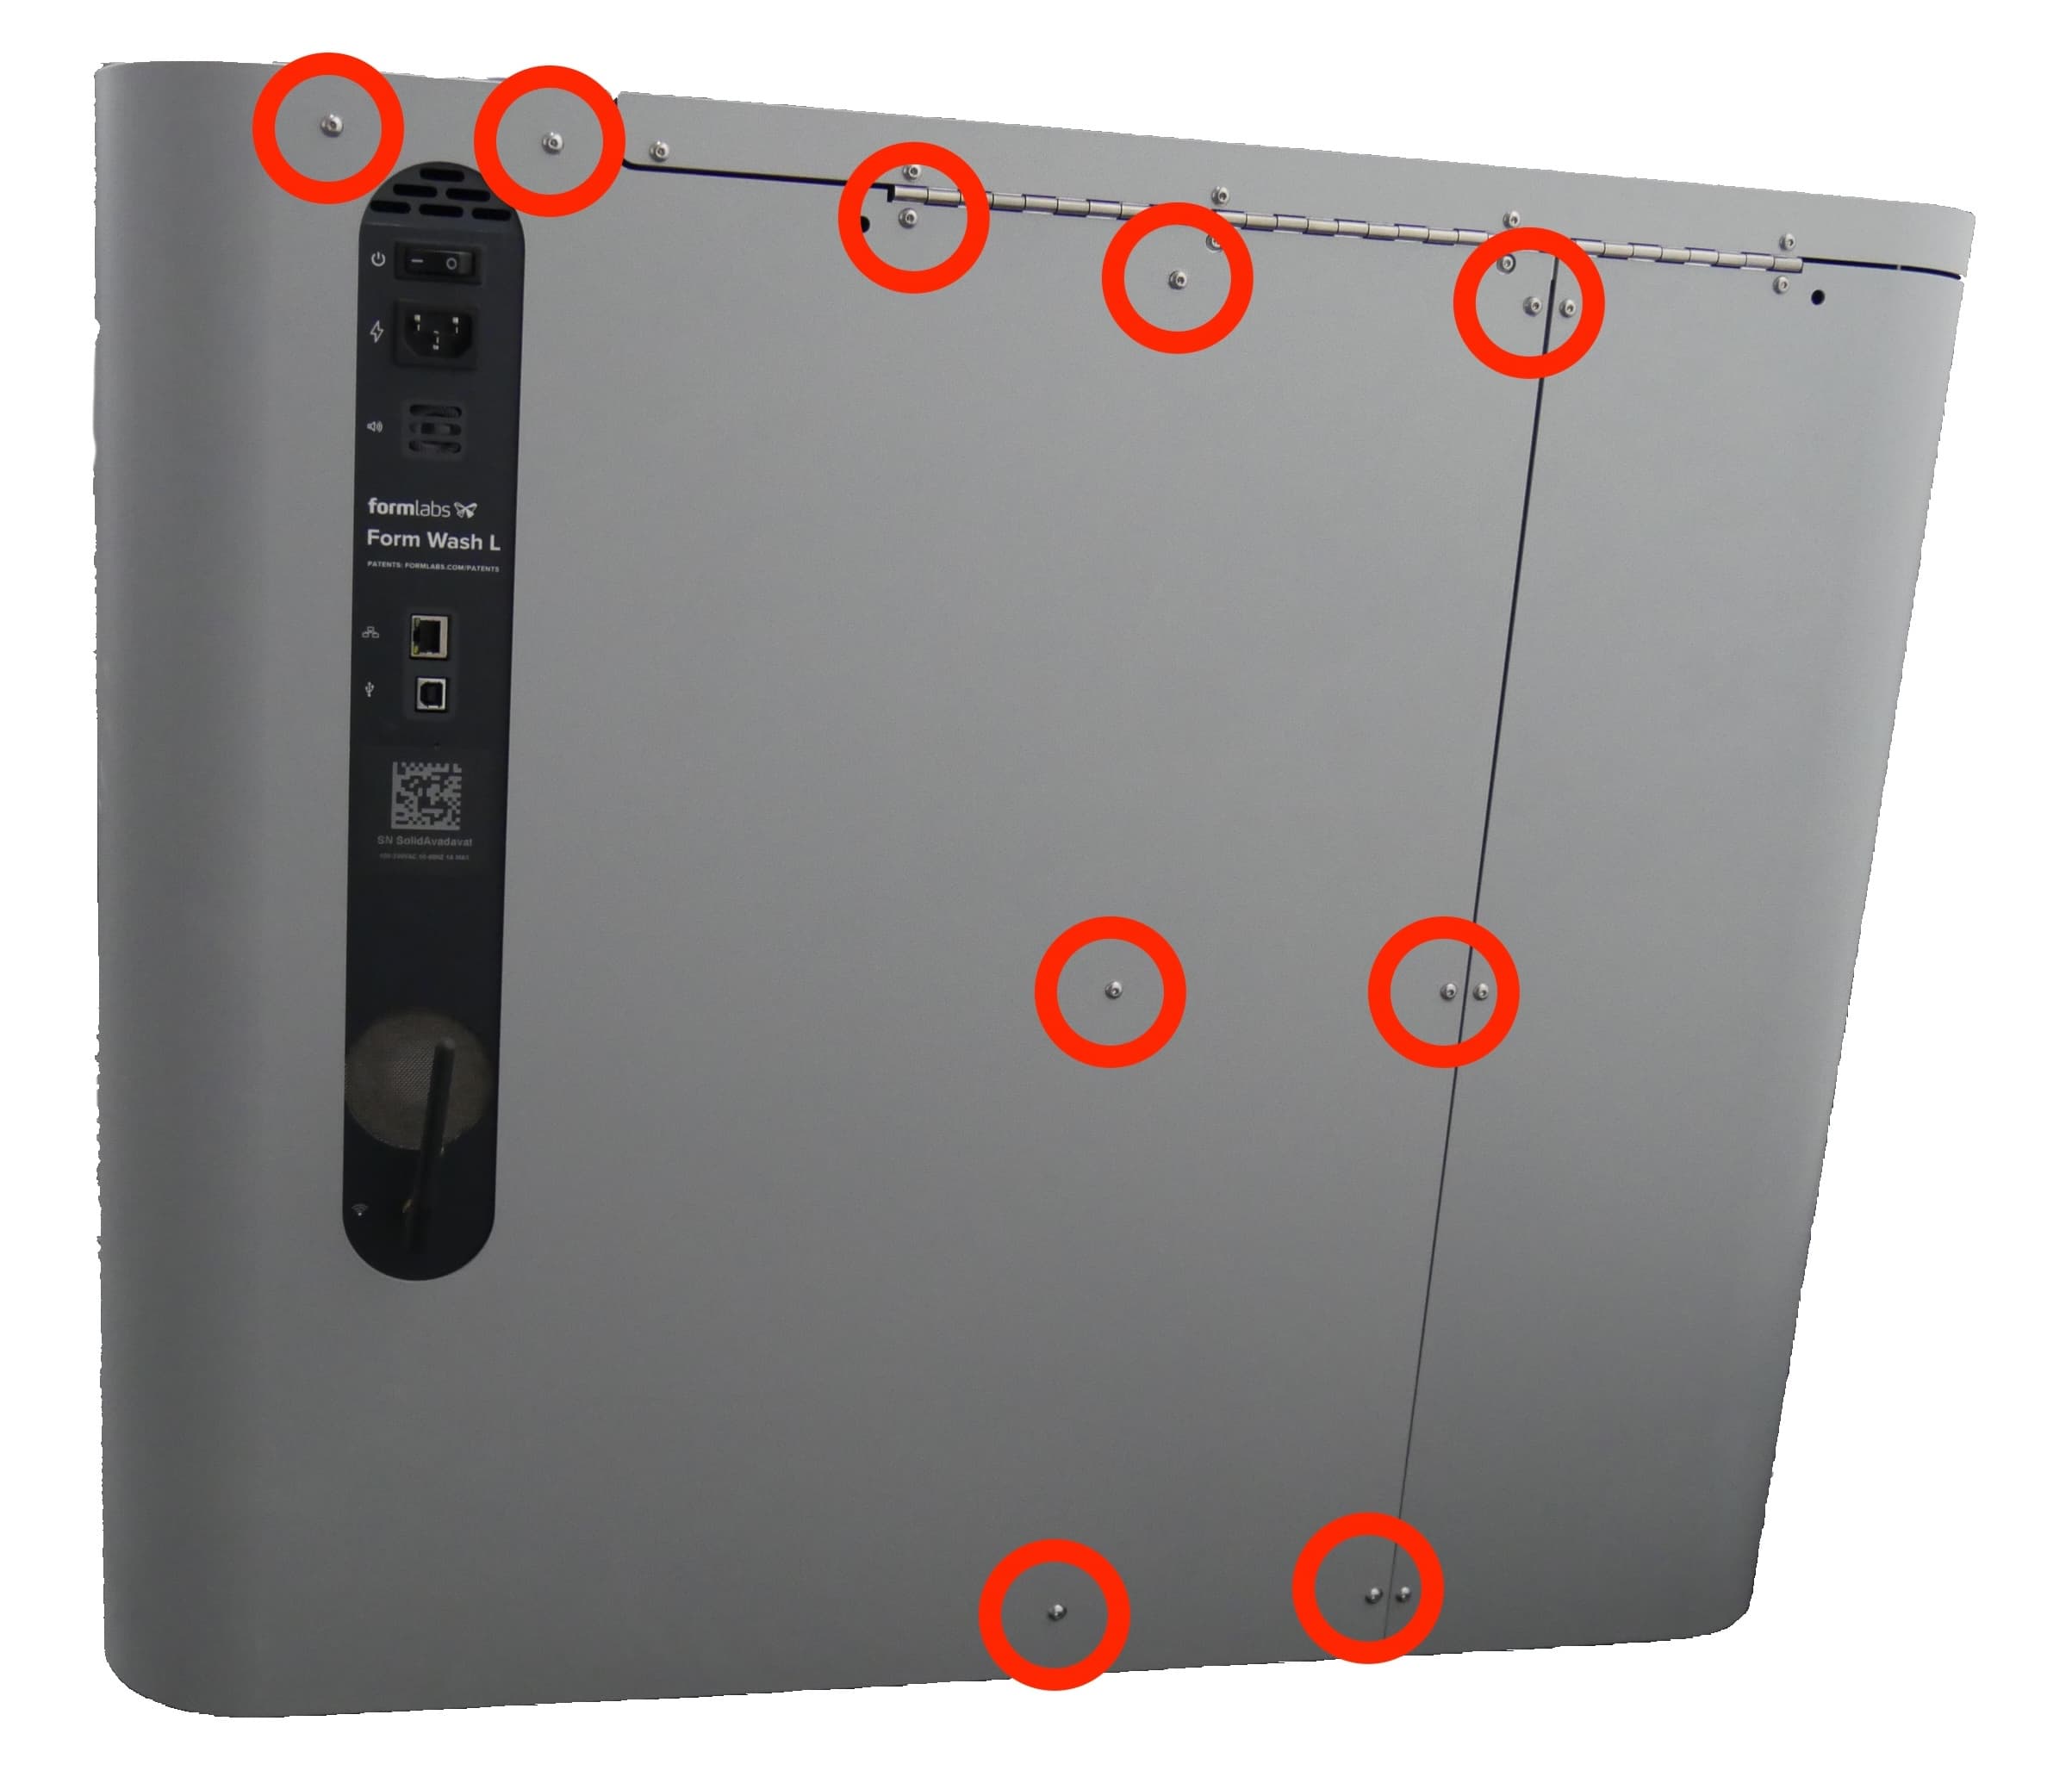
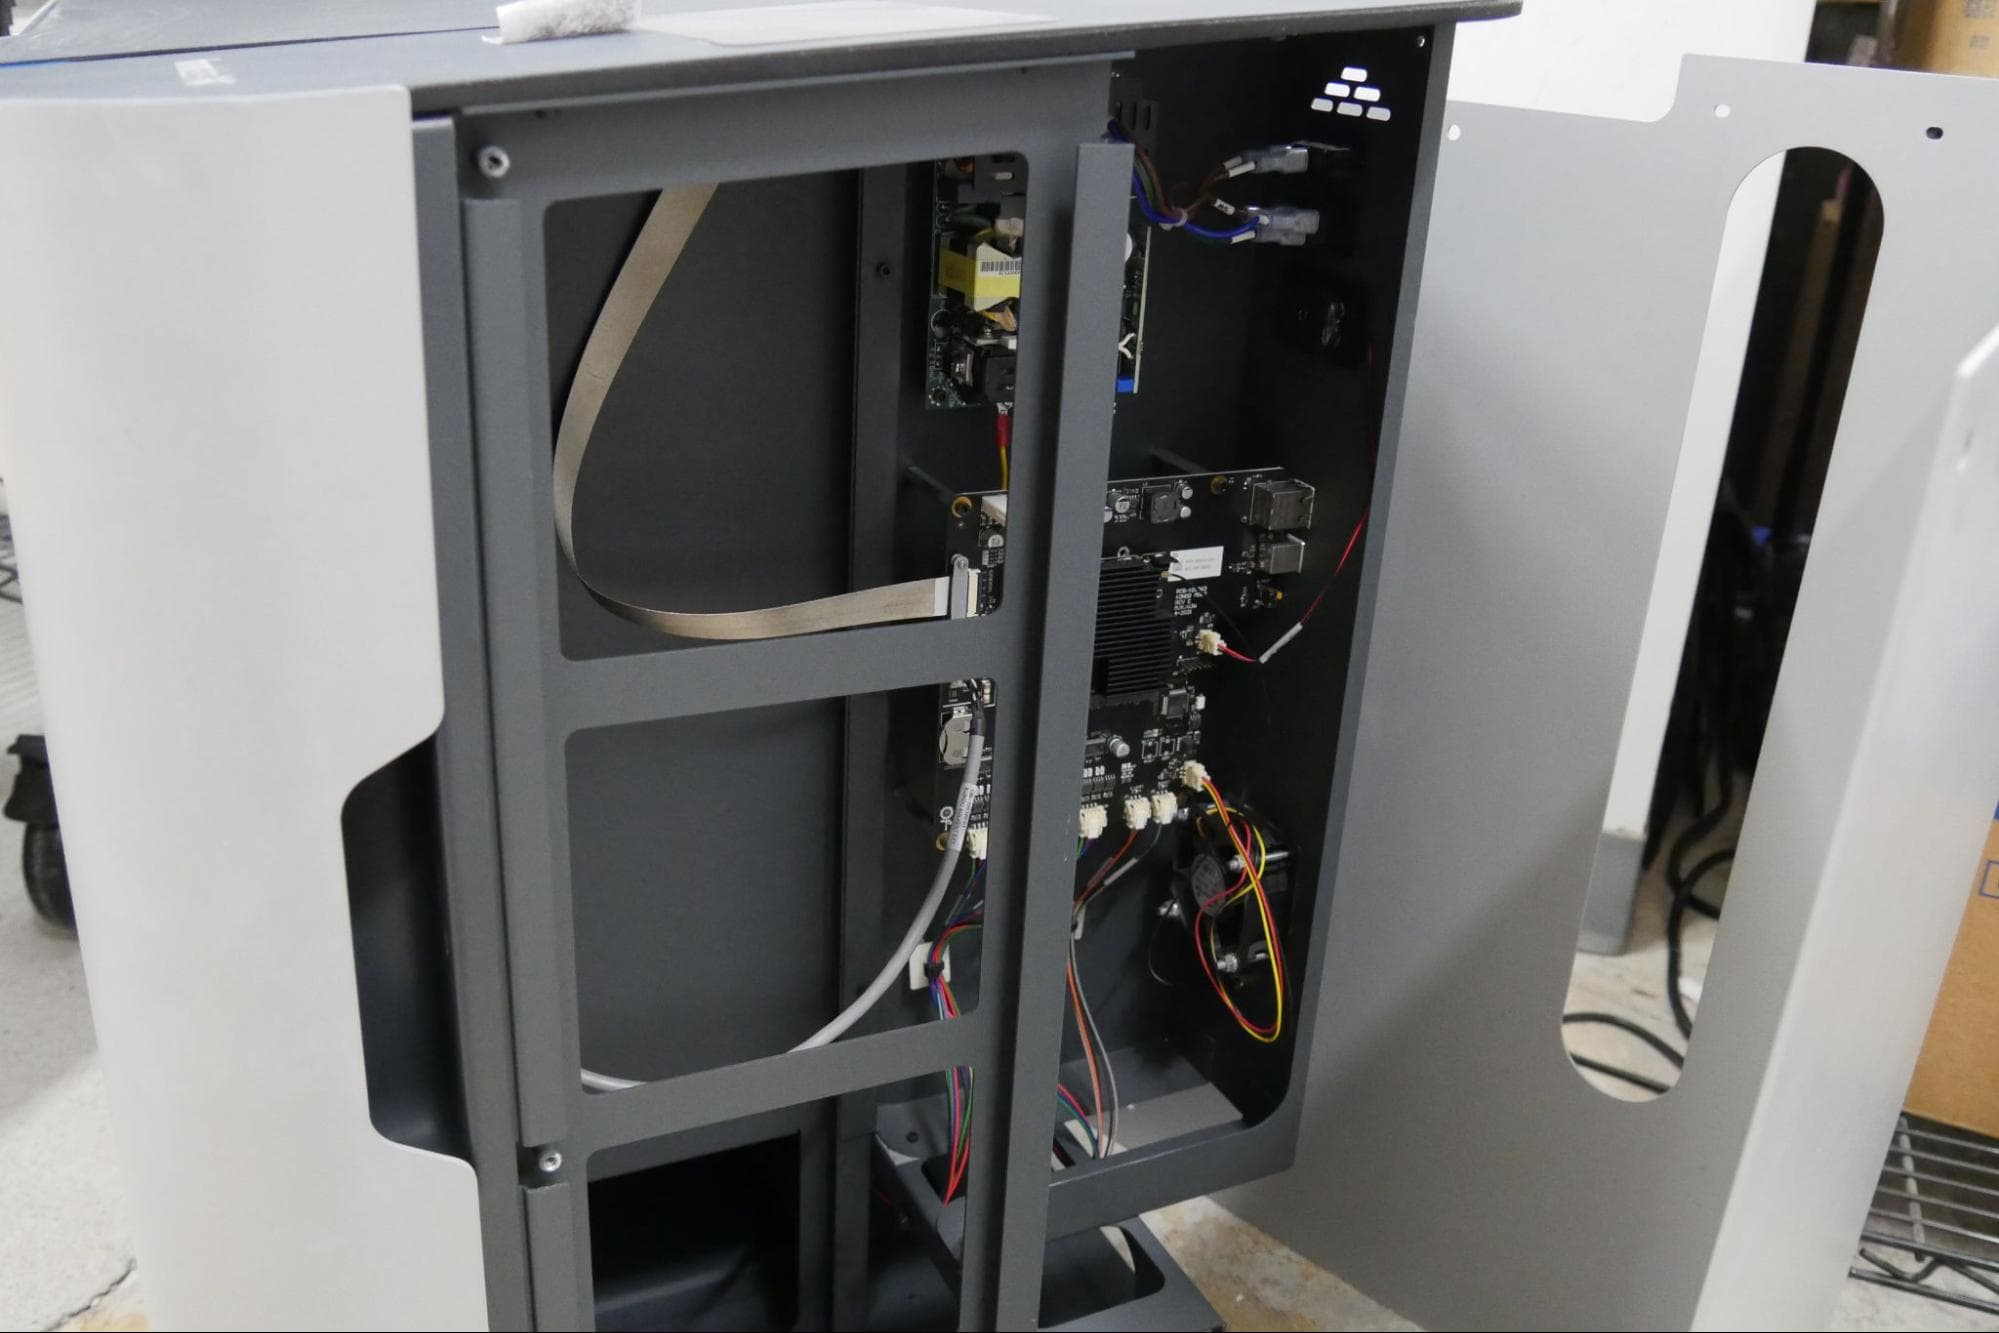
Use the 2.5 mm hex driver to loosen and remove the 12 screws holding the right shell to the frame of the Form Wash L. Three countersunk screws are located on the right side of the machine and nine button head screws are located on the rear. Set the screws aside.
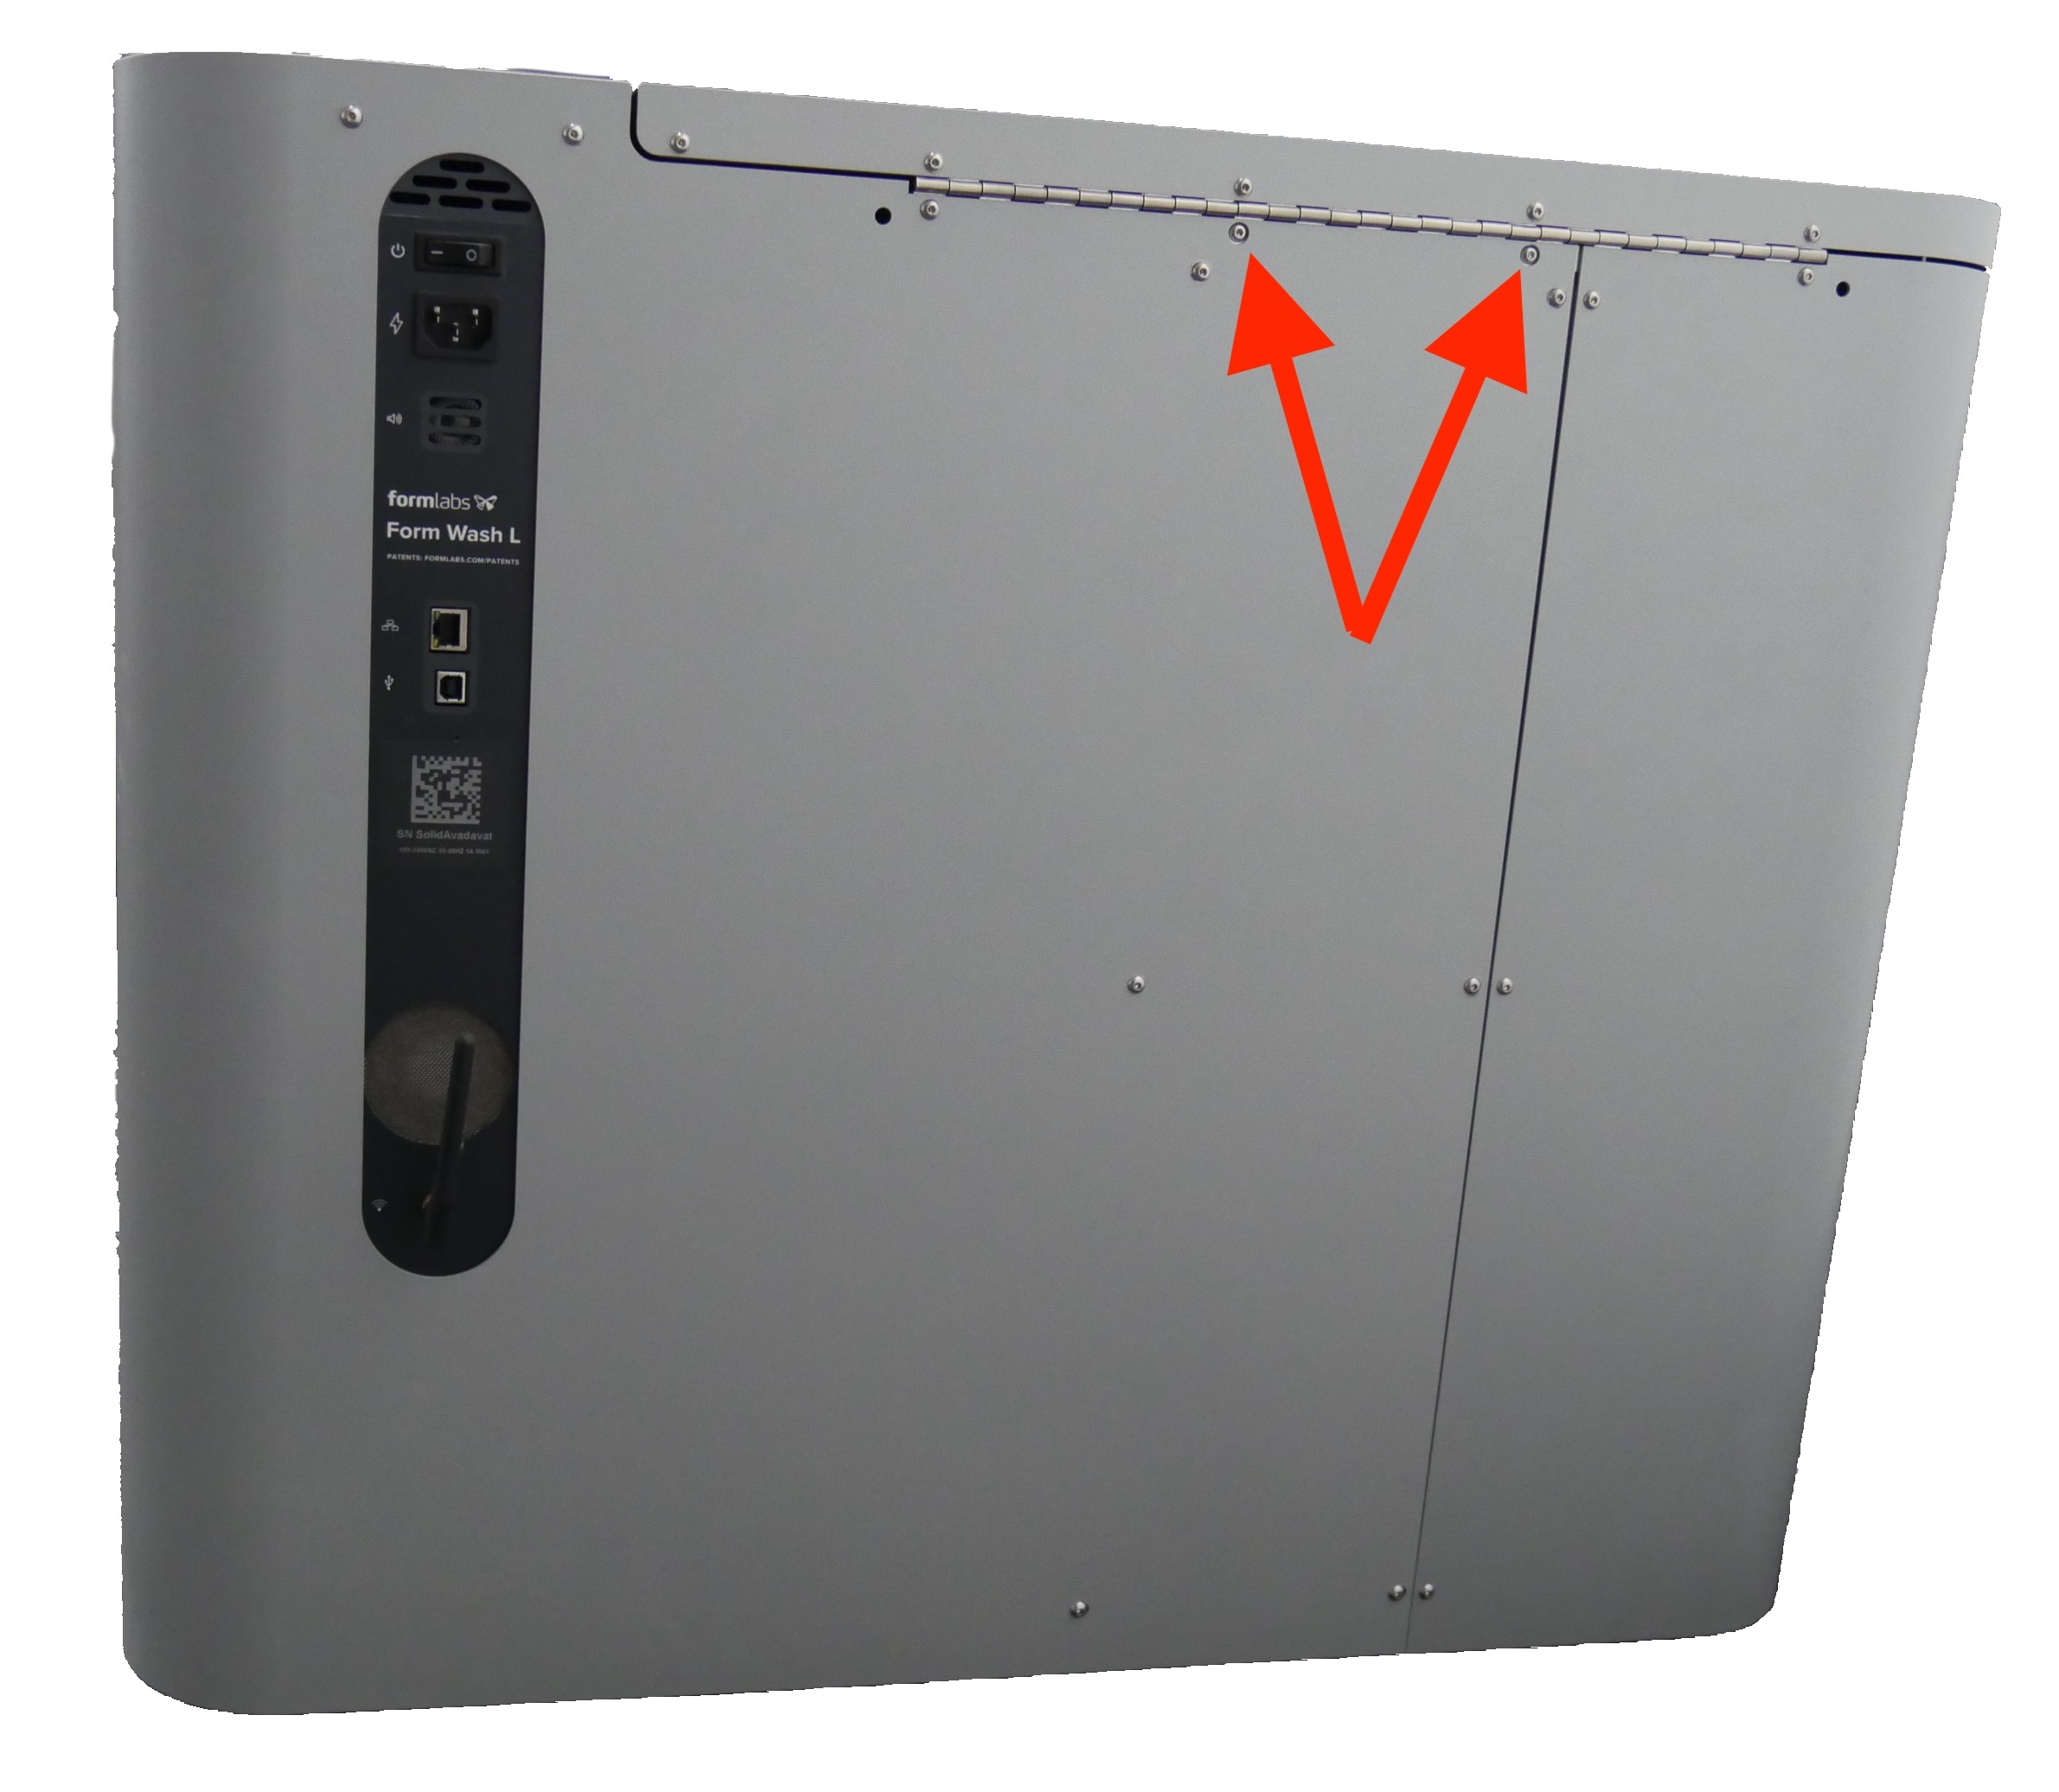
NOTICE:
There are two screws, accessible through cutouts in the right shell, that secure the lid to the frame of the machine. Do not remove these screws during this procedure.
Pull the right shell away from the Form Wash L to separate it from the machine’s frame. Set the right shell aside.
Removing the wash bucket interlock switch
Overview: Unscrew and uninstall the interlock switch.
Step 1: Locate the wash bucket interlock switch
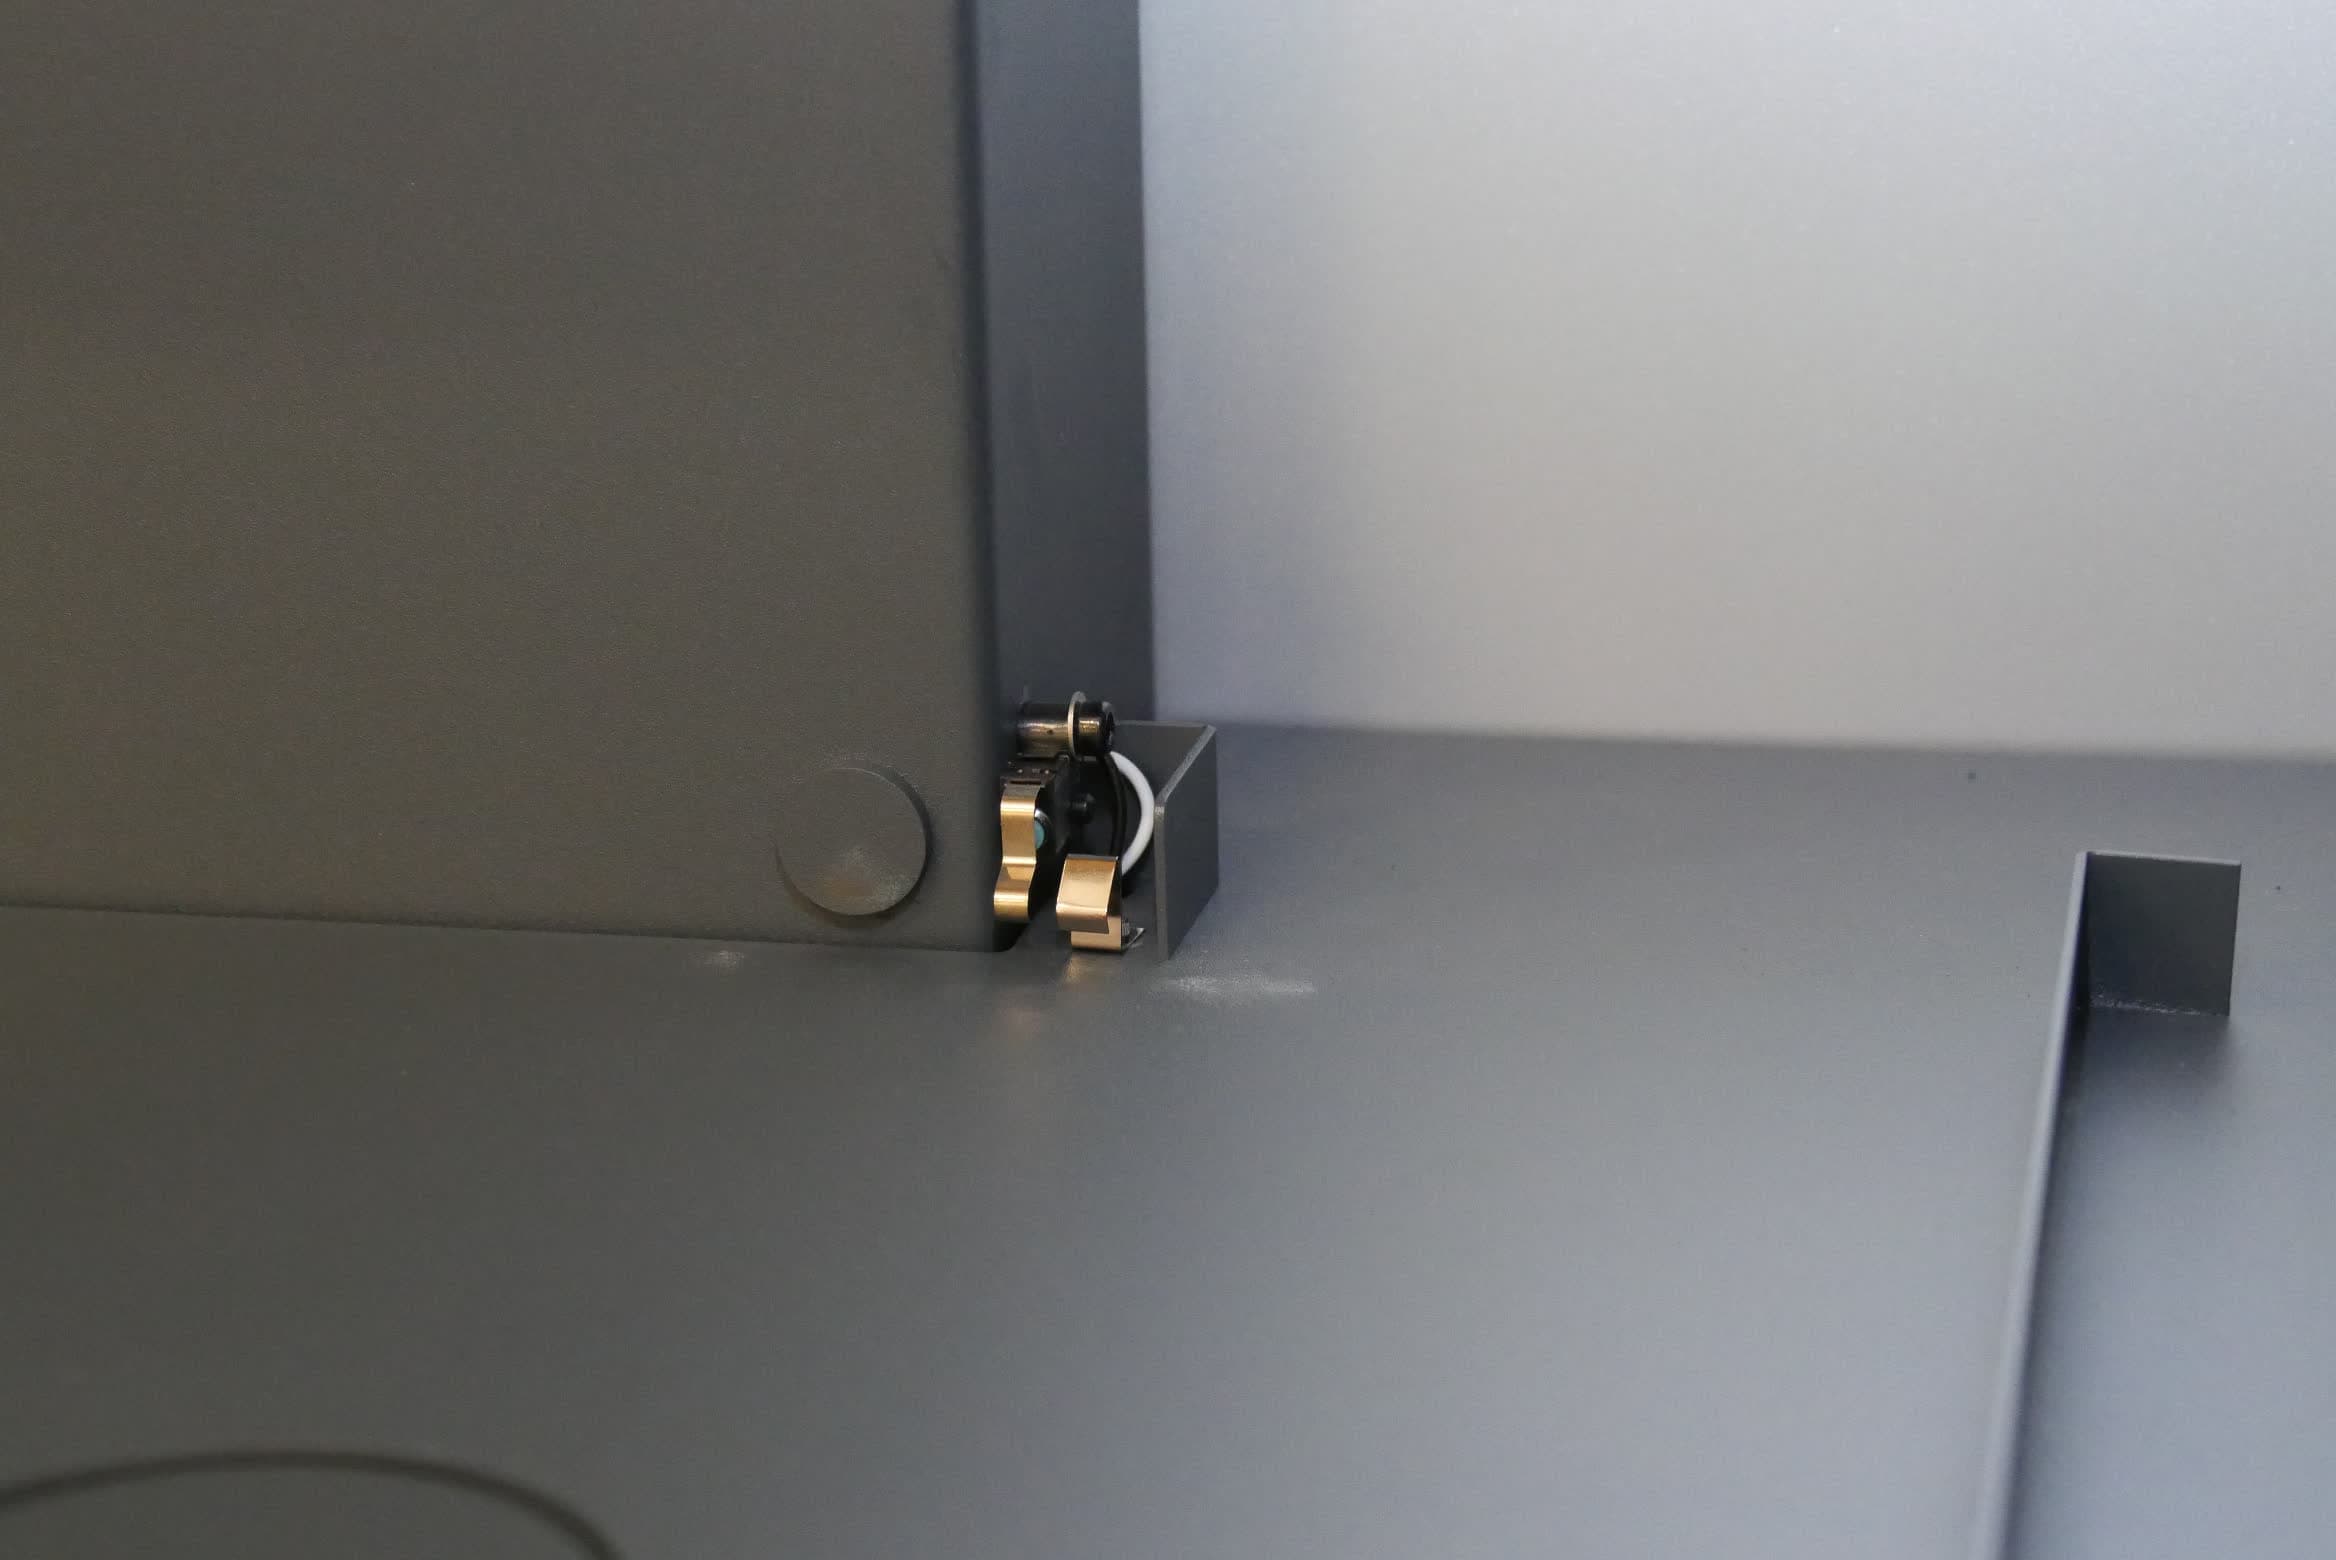
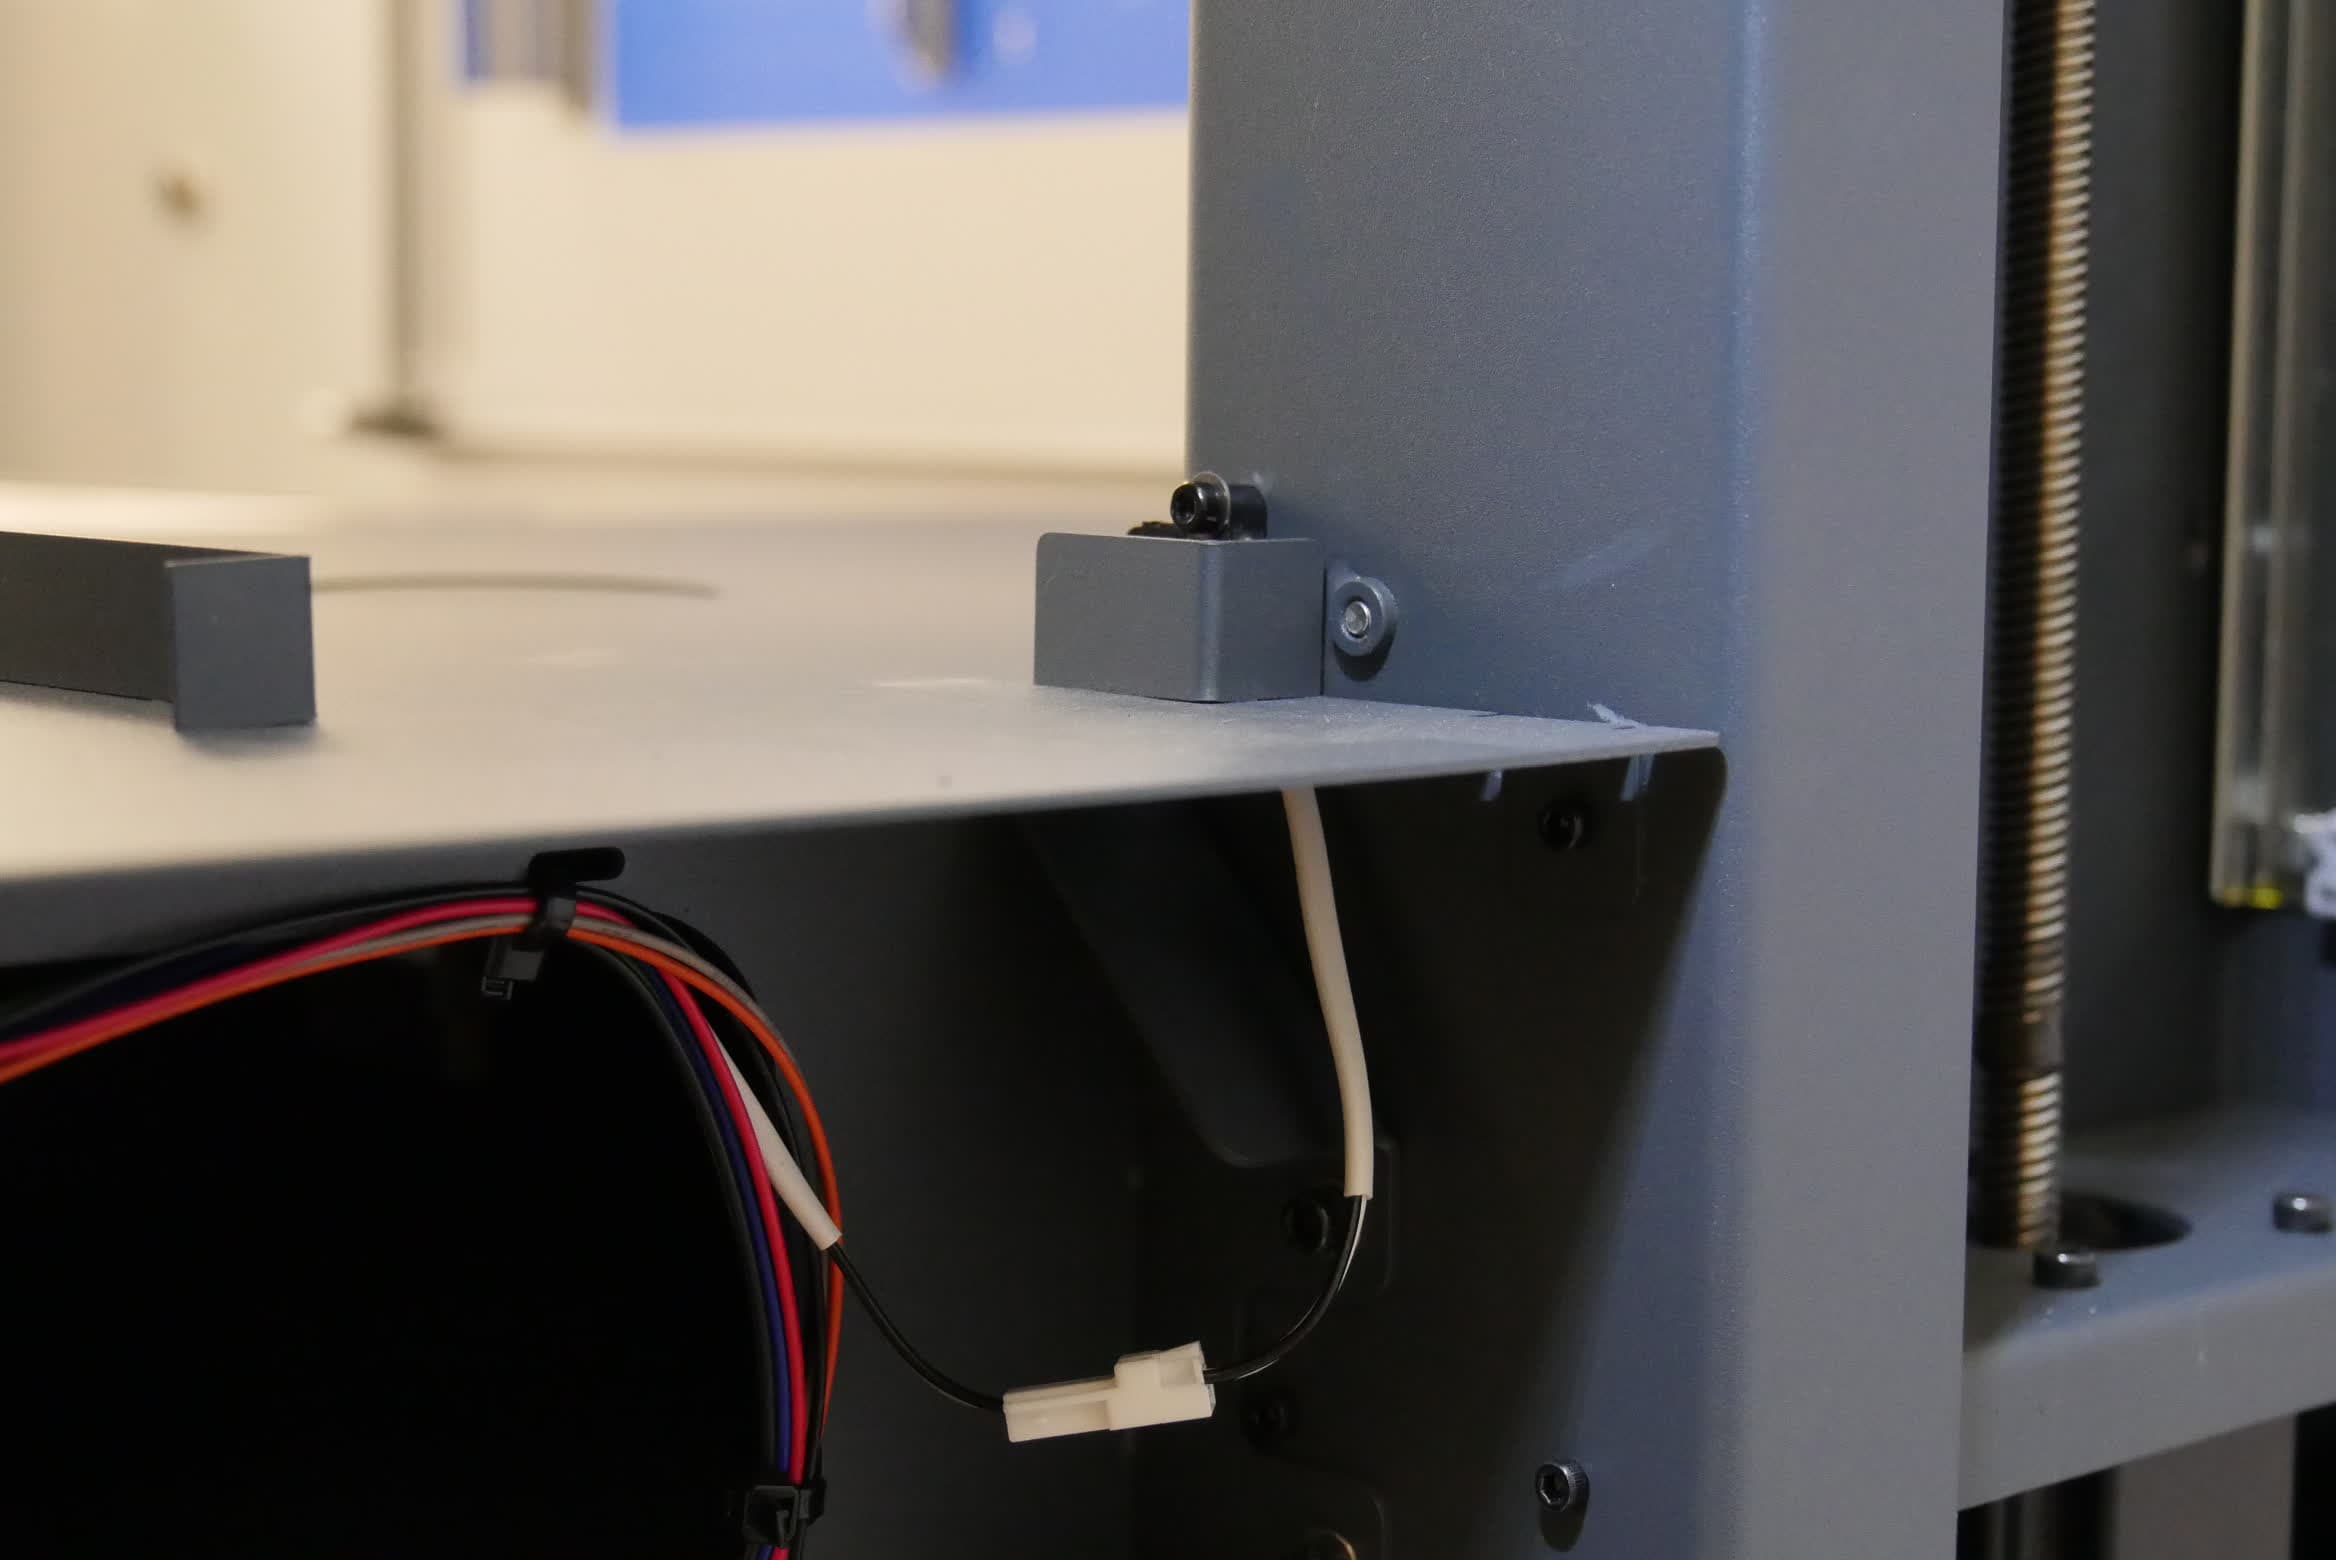
Locate the wash bucket interlock switch, positioned to the right of the Z-tower (when facing the Form Wash L from the front).
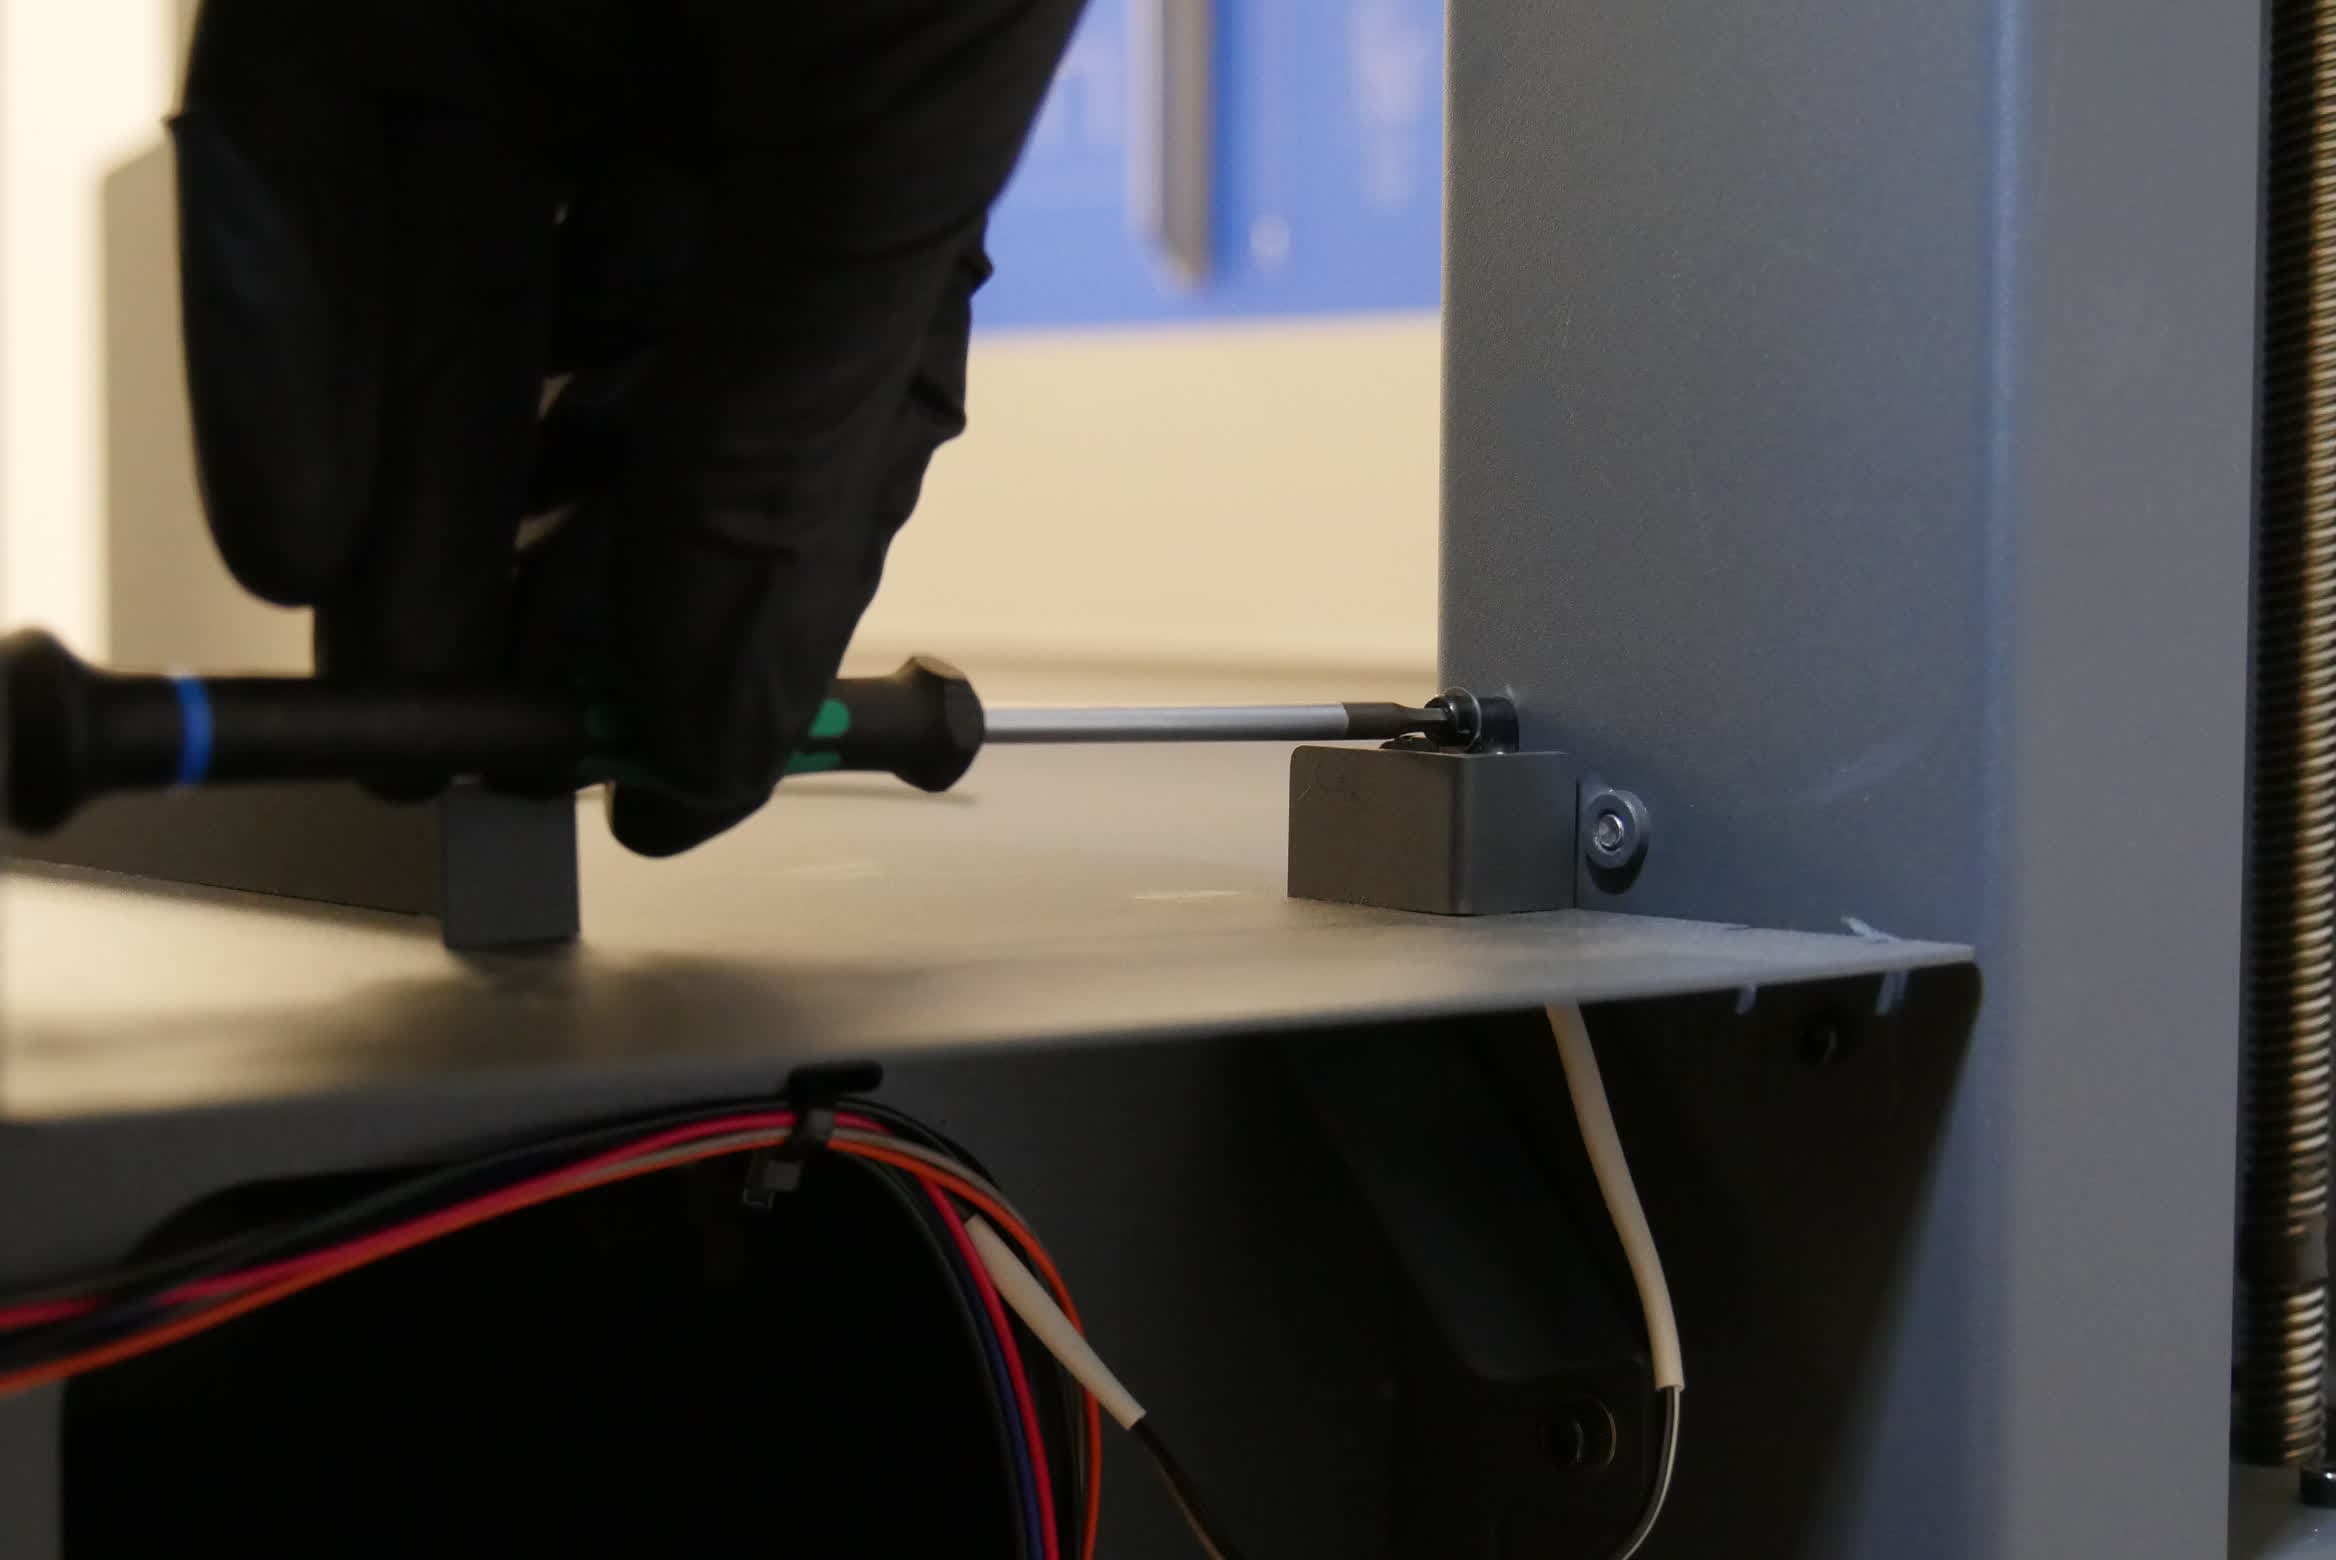
Using a 2.5 mm hex driver, loosen and remove the screw and washer securing the interlock switch to the Form Wash L. Set the screws and washer aside.
Step 3: Disconnect the interlock switch cable
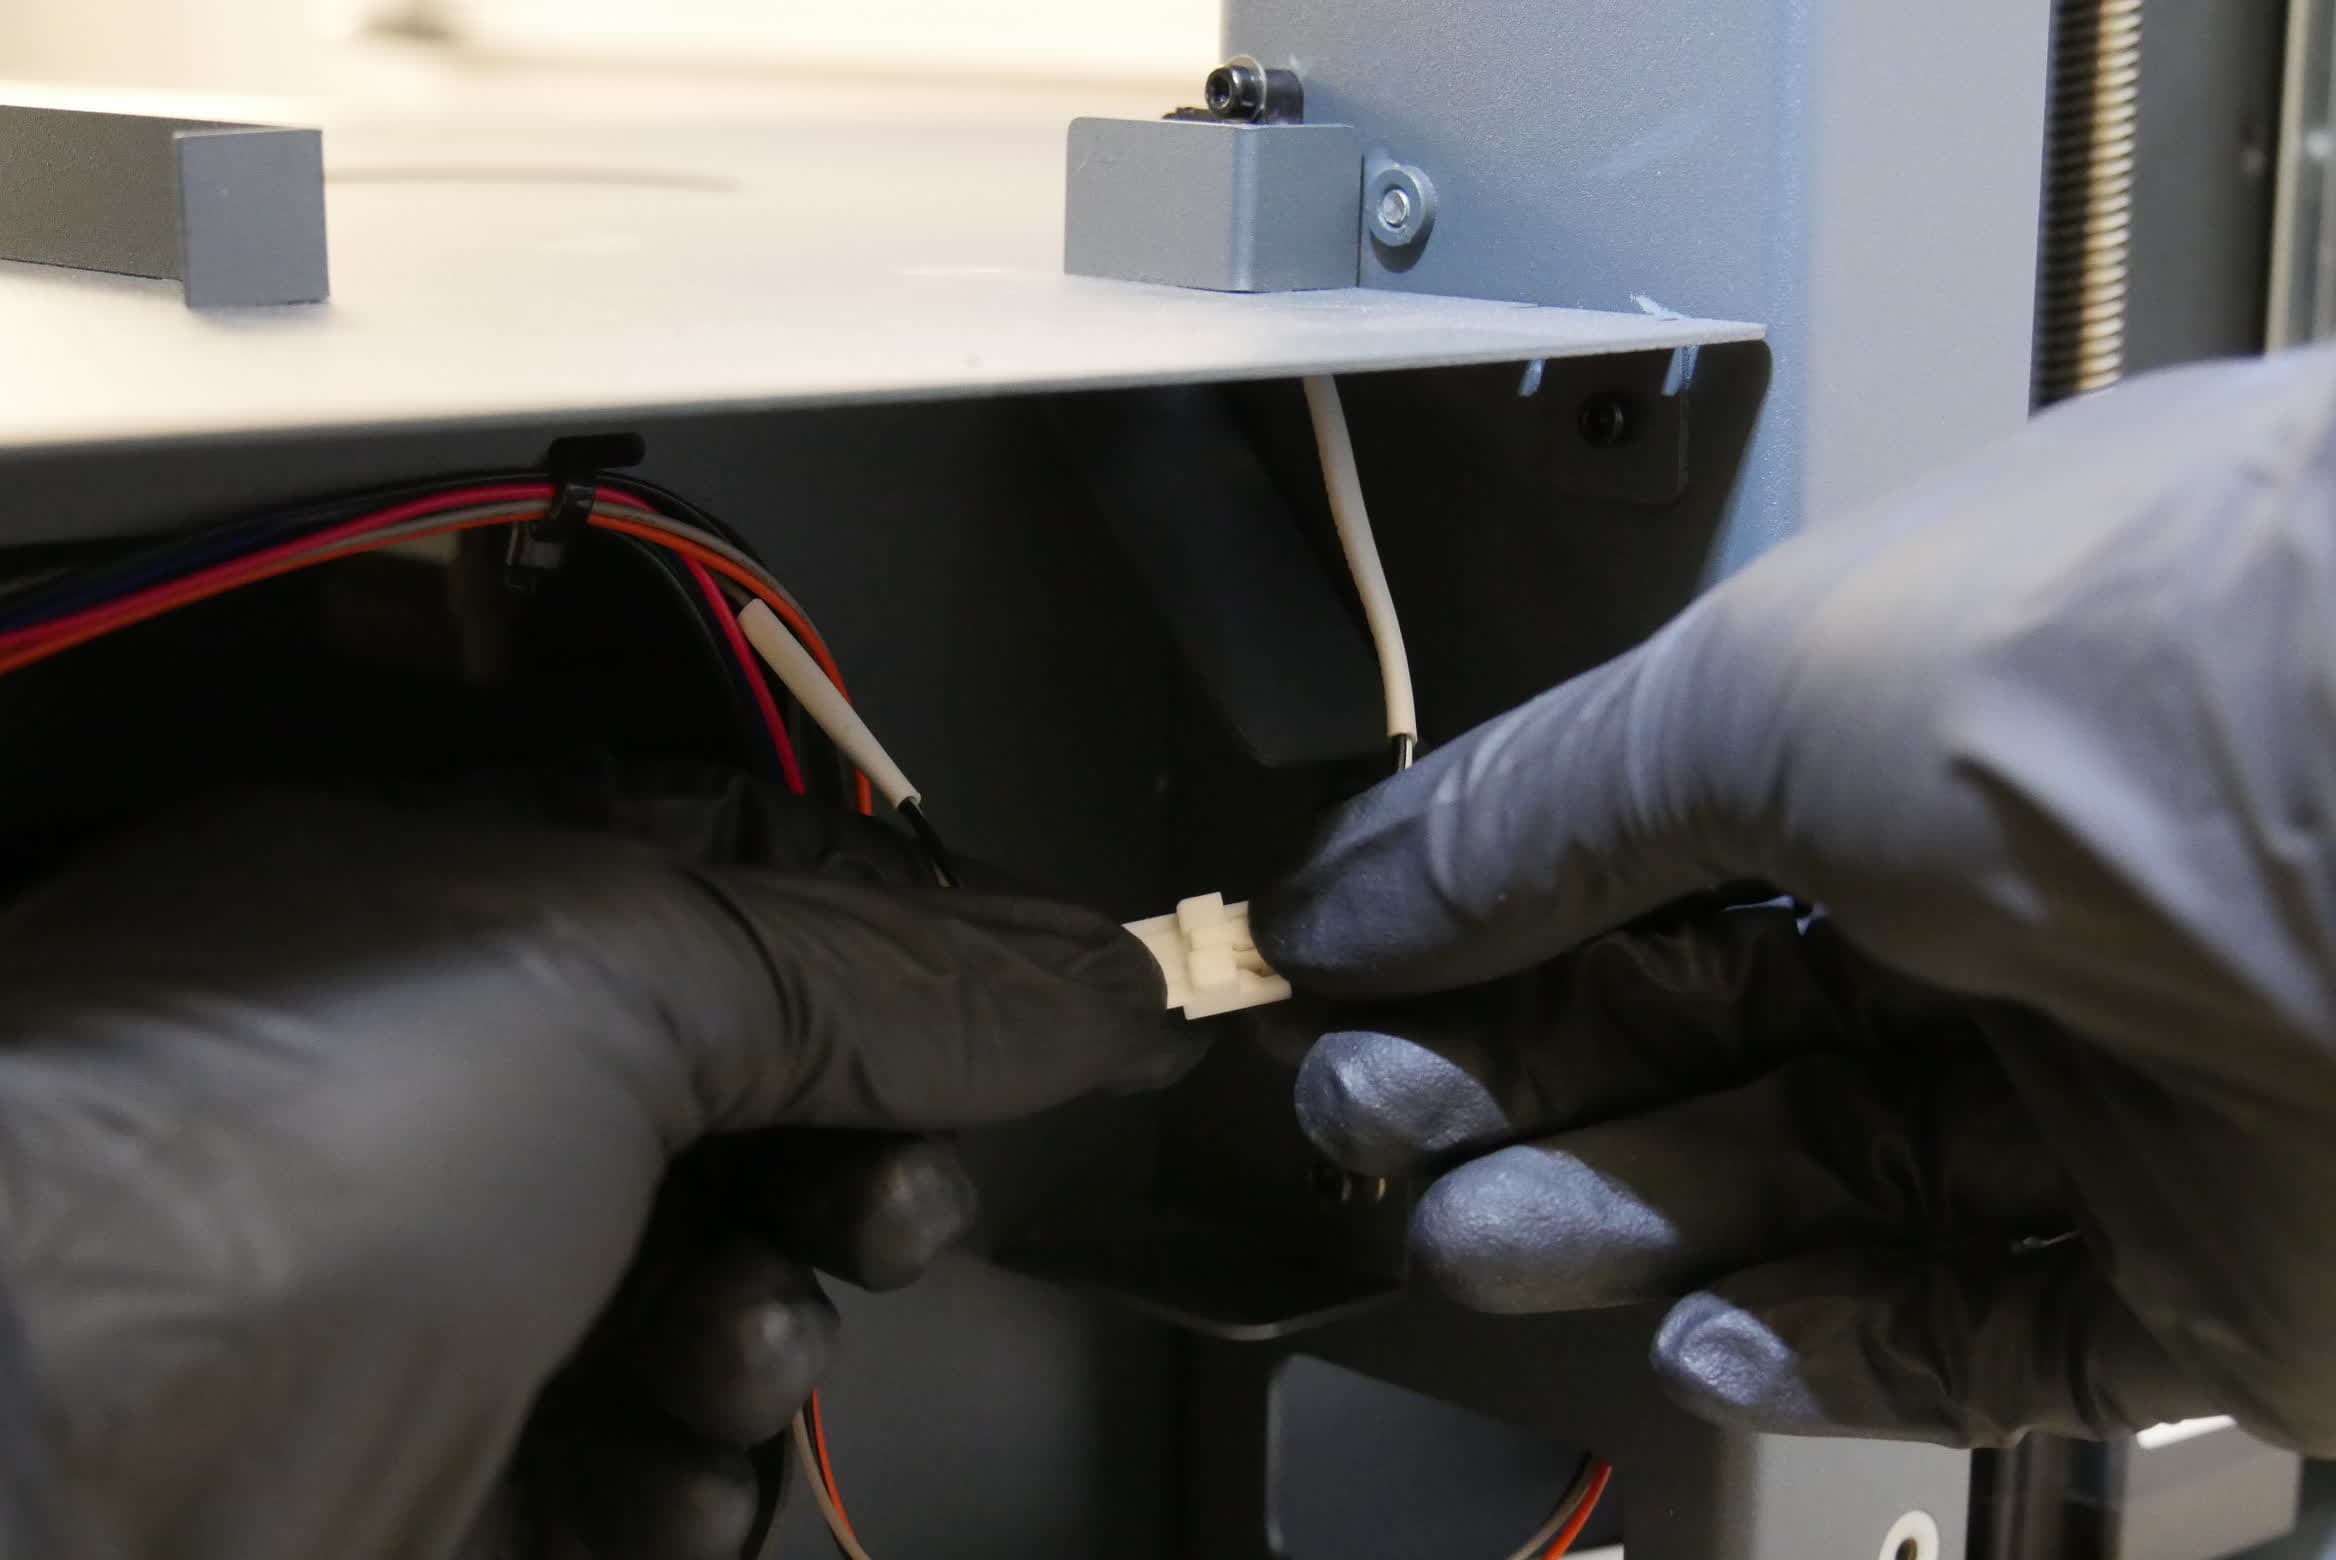
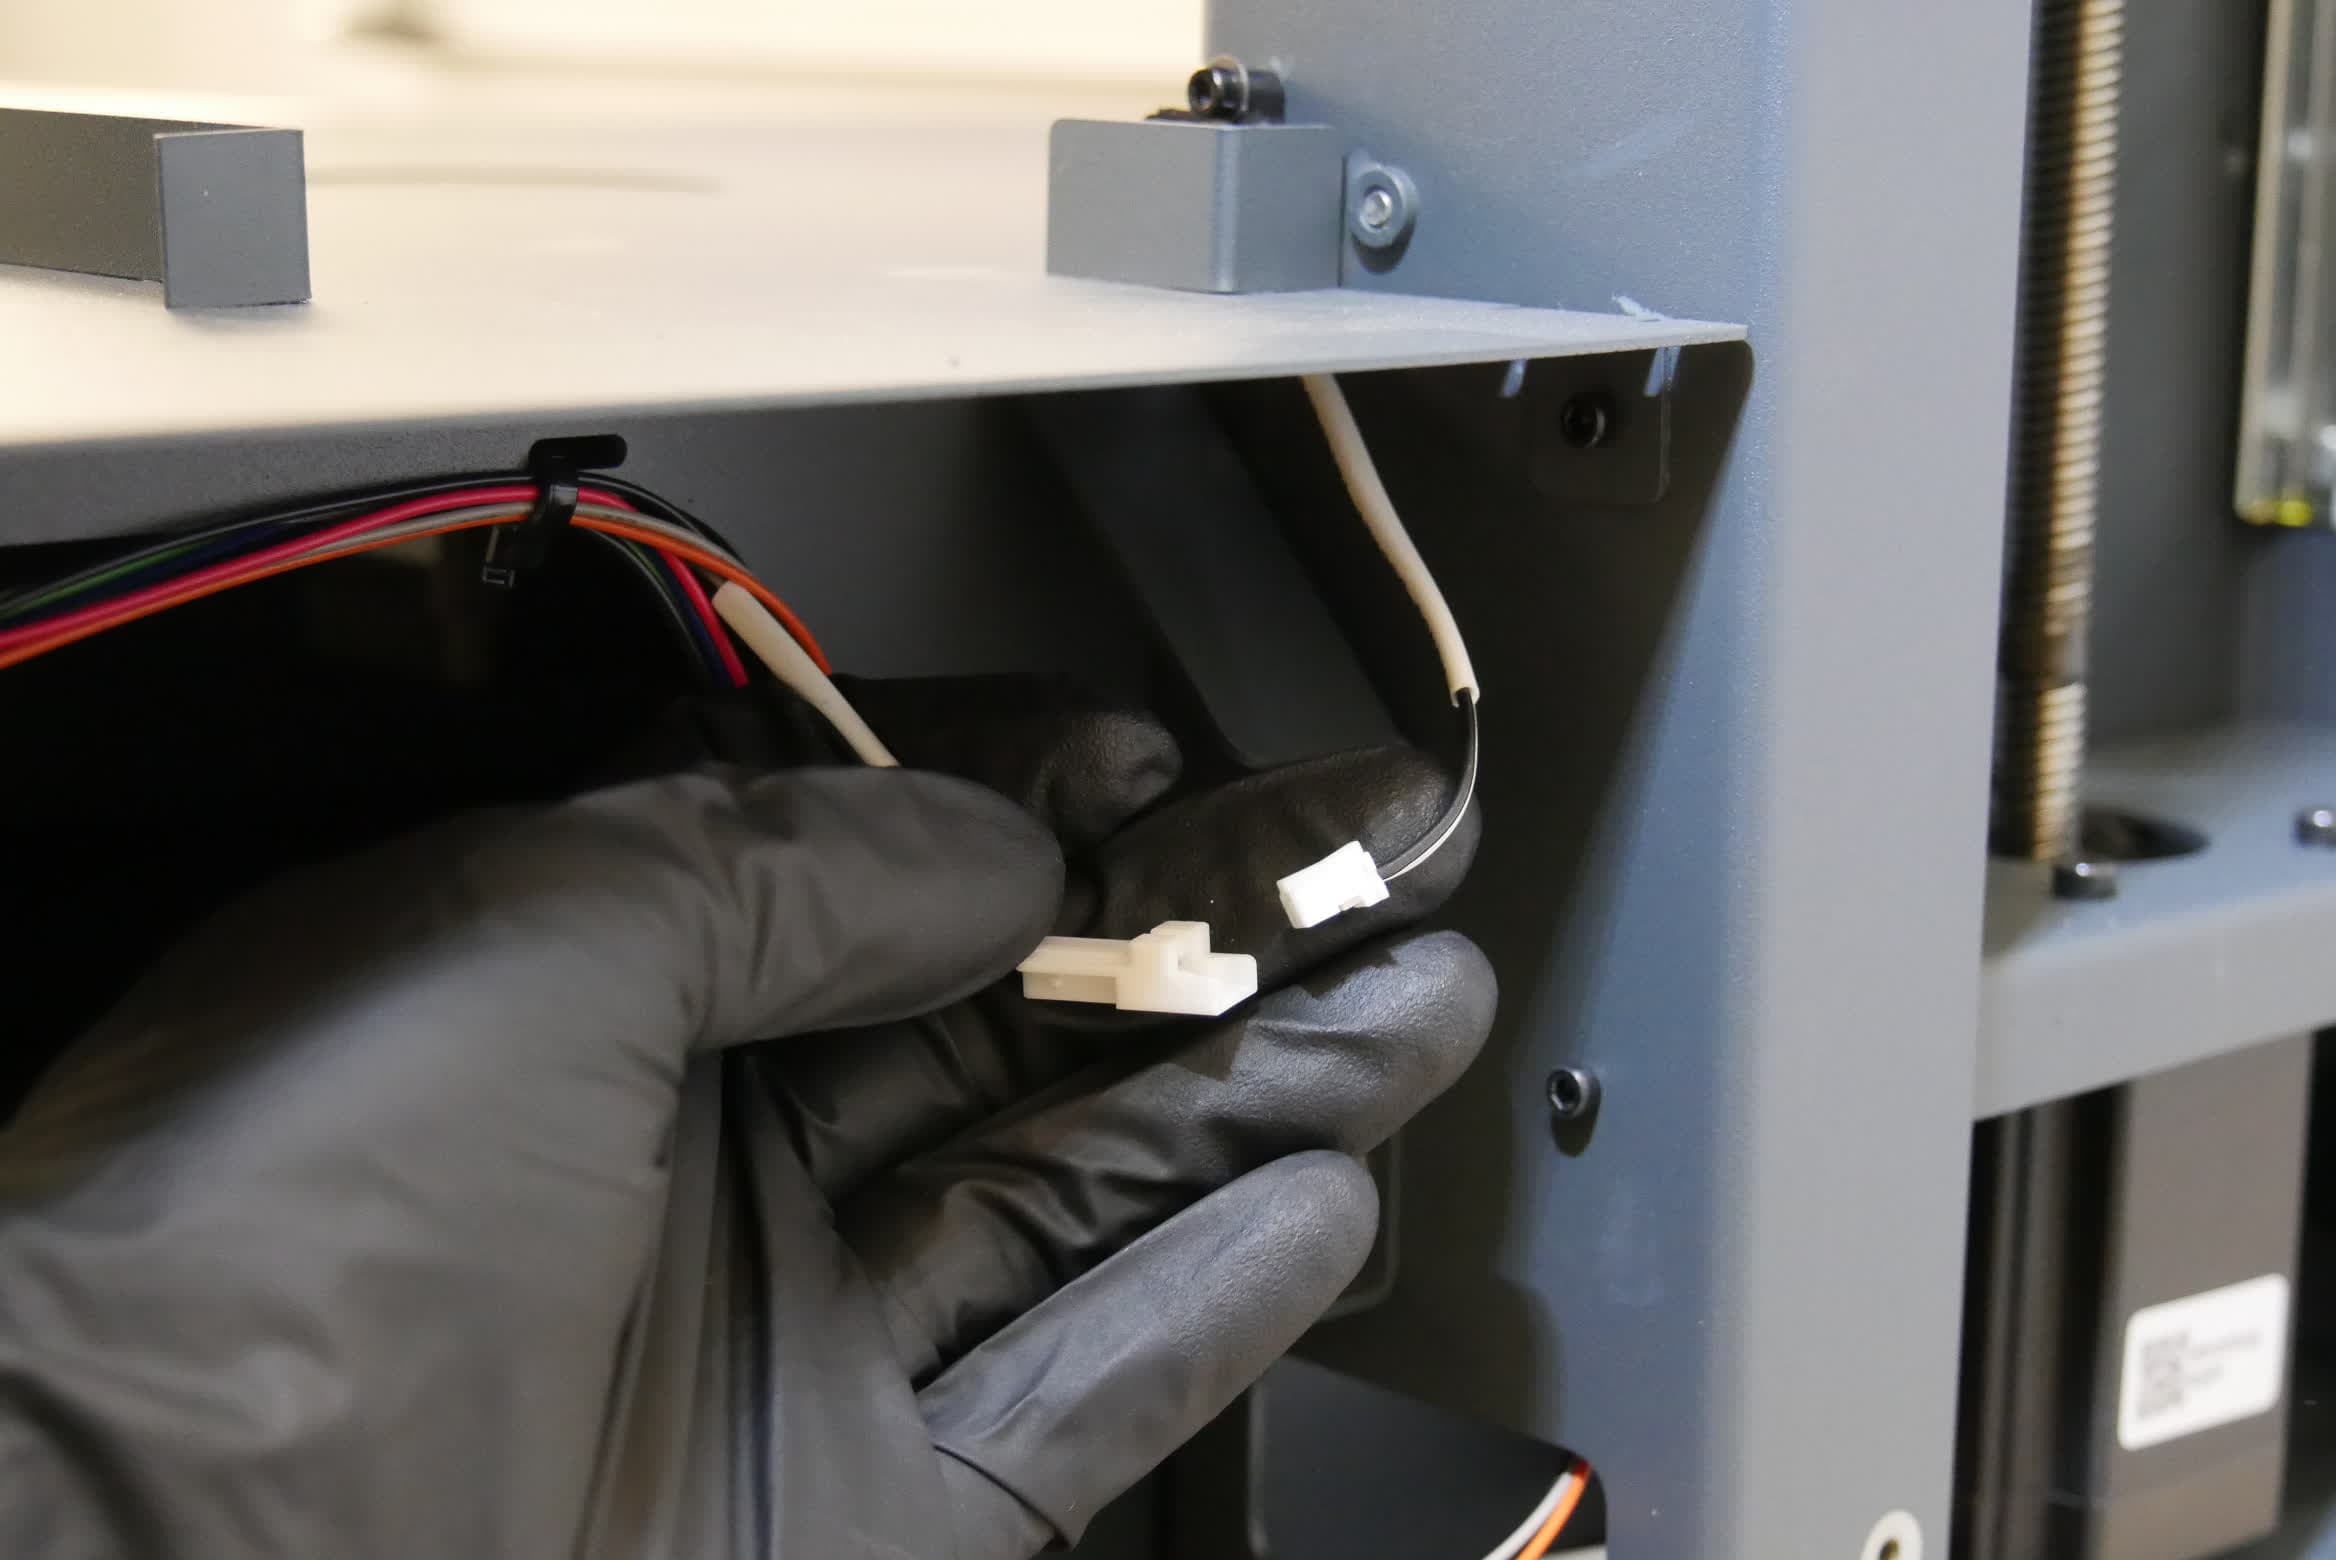
The interlock switch is plugged into an extension cable that runs to the Form Wash L motherboard. Disconnect the switch from the extension cable. Squeeze the latch on the connector to unplug the cable. Do not pull on the wires themselves.
Remove the interlock switch from the Form Wash L and set it aside for disposal.
Installing the new wash bucket interlock switch
Overview: Mount and secure the new wash bucket interlock switch.
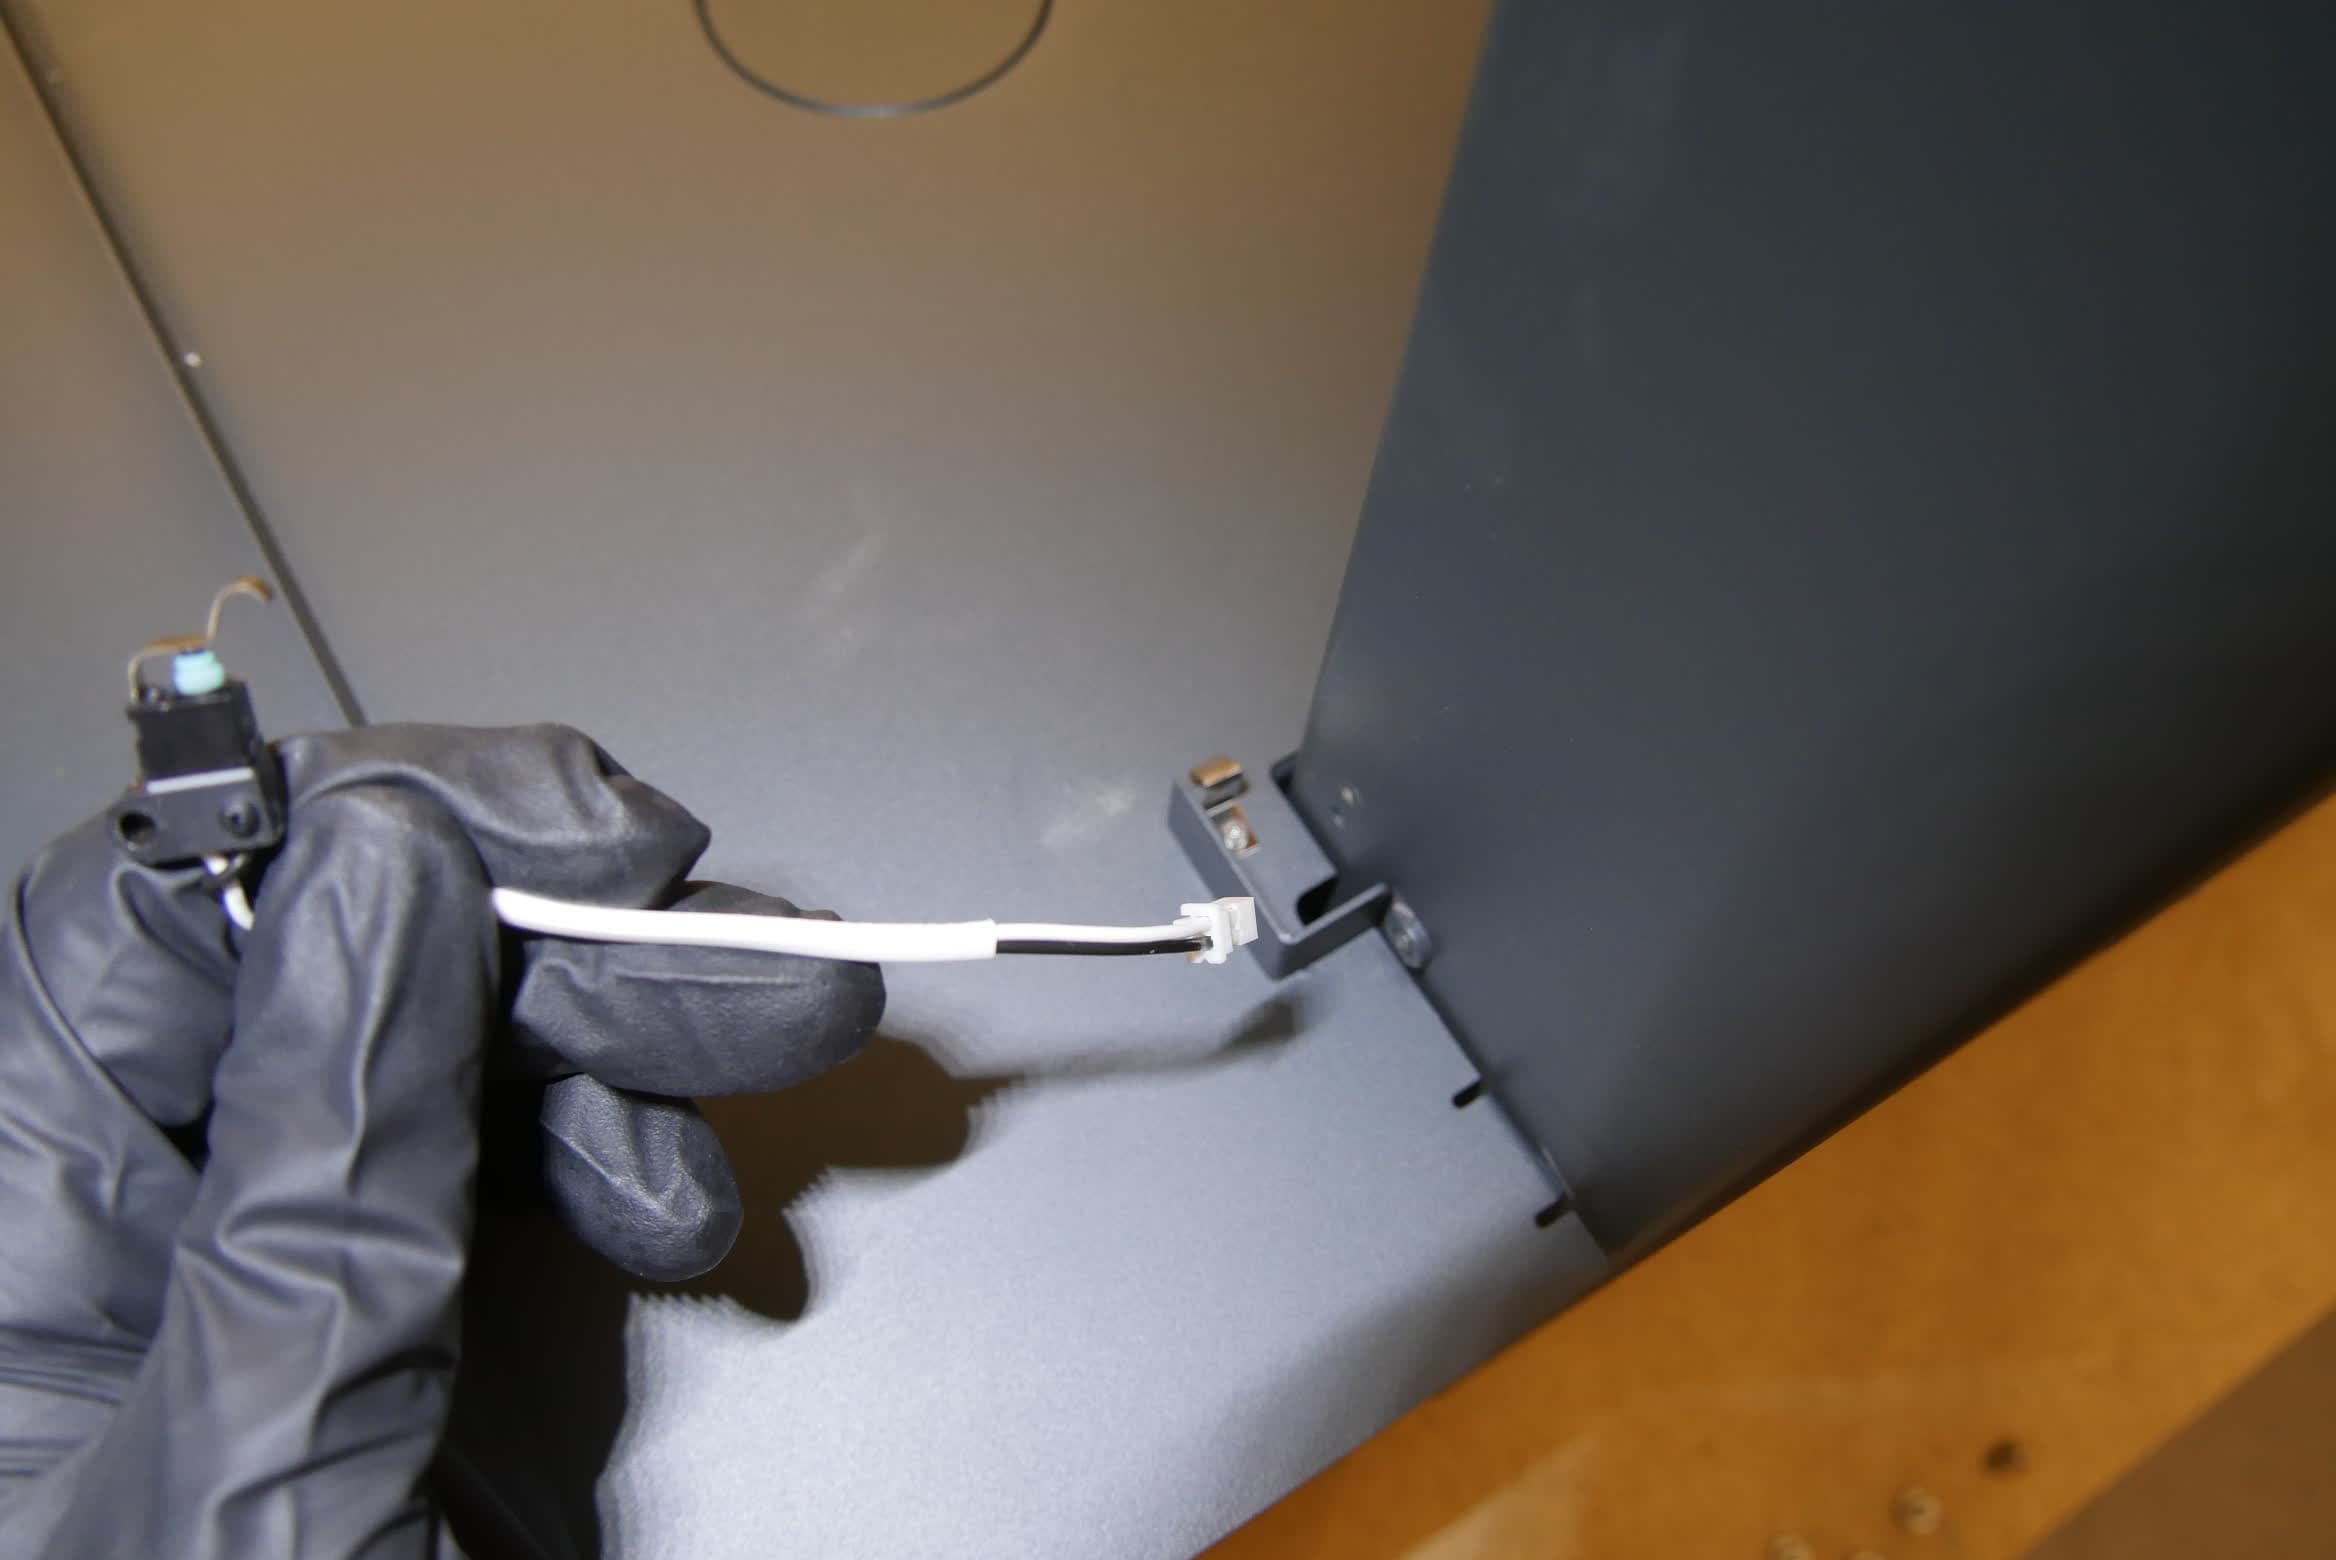
Thread the interlock switch cable down through the hole beneath the switch’s mount point. Orient the switch with the screw hole on top and the metal tab facing the front of the machine. Lower the interlock switch until the screw hole in the switch aligns with the corresponding screw hole in the side of the Z-tower.
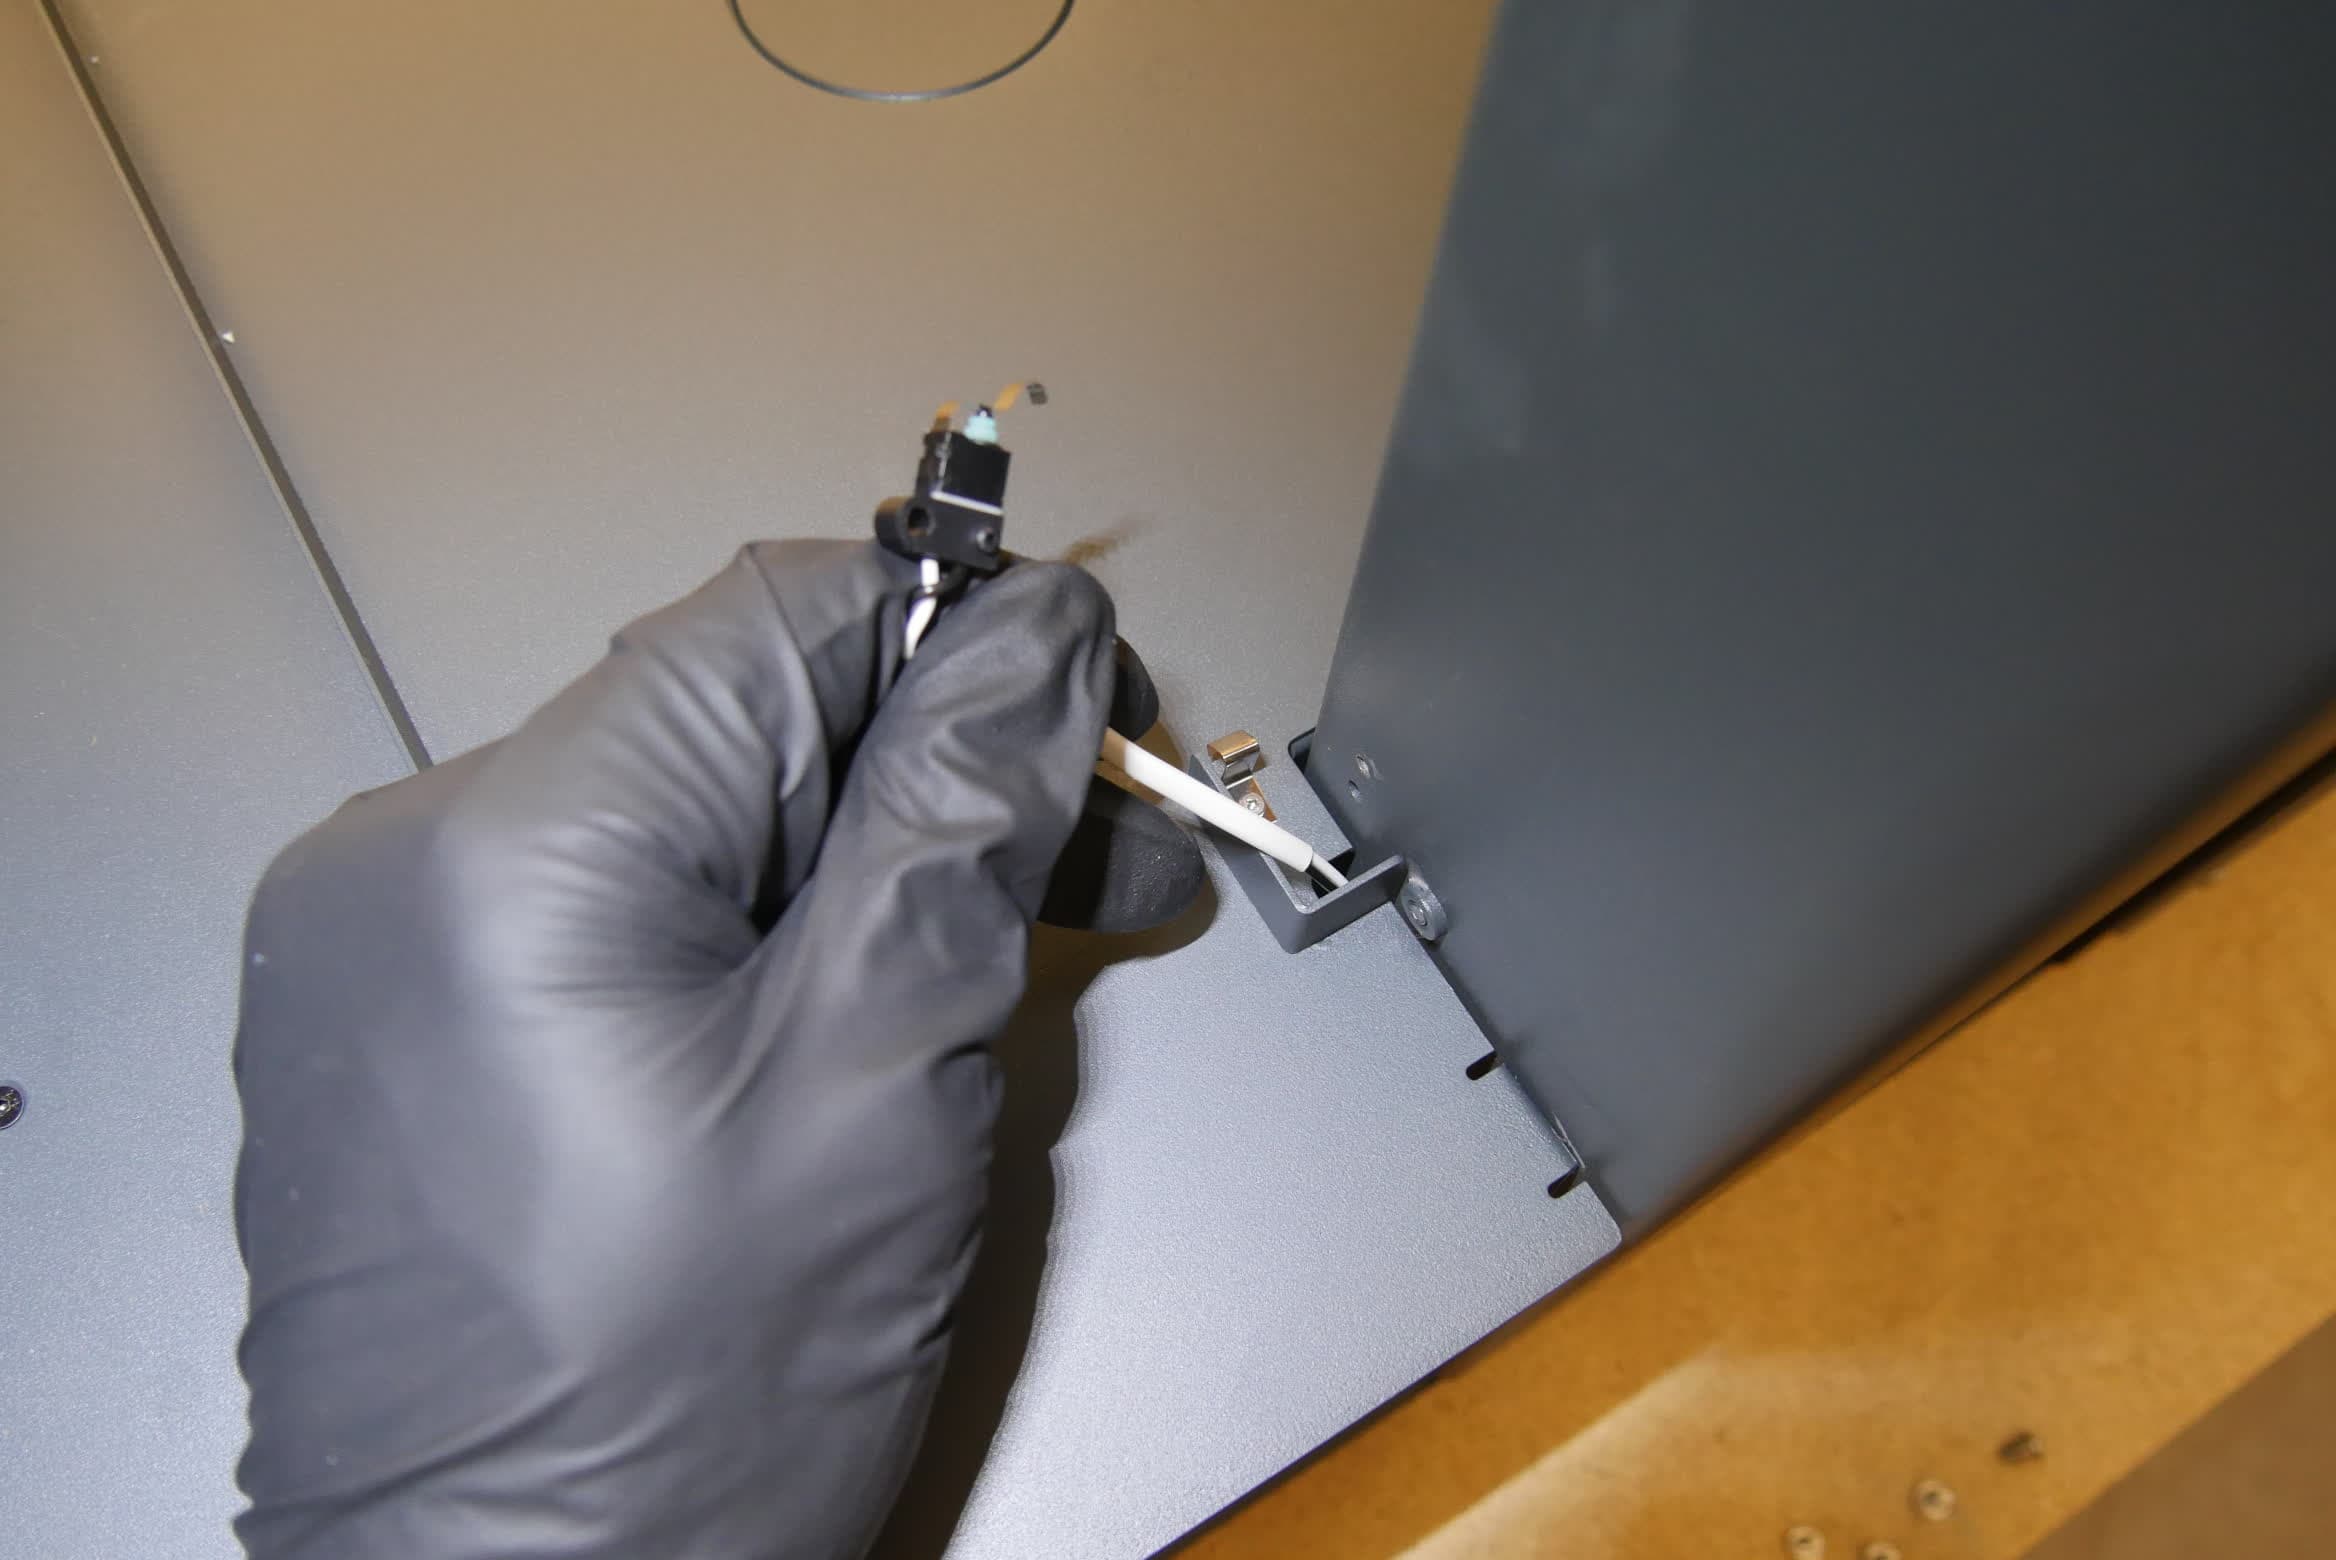
Place the washer onto the interlock switch retention screw. Thread the screw into the screw hole in the switch. Use a 2.5 mm hex driver to tighten until snug.
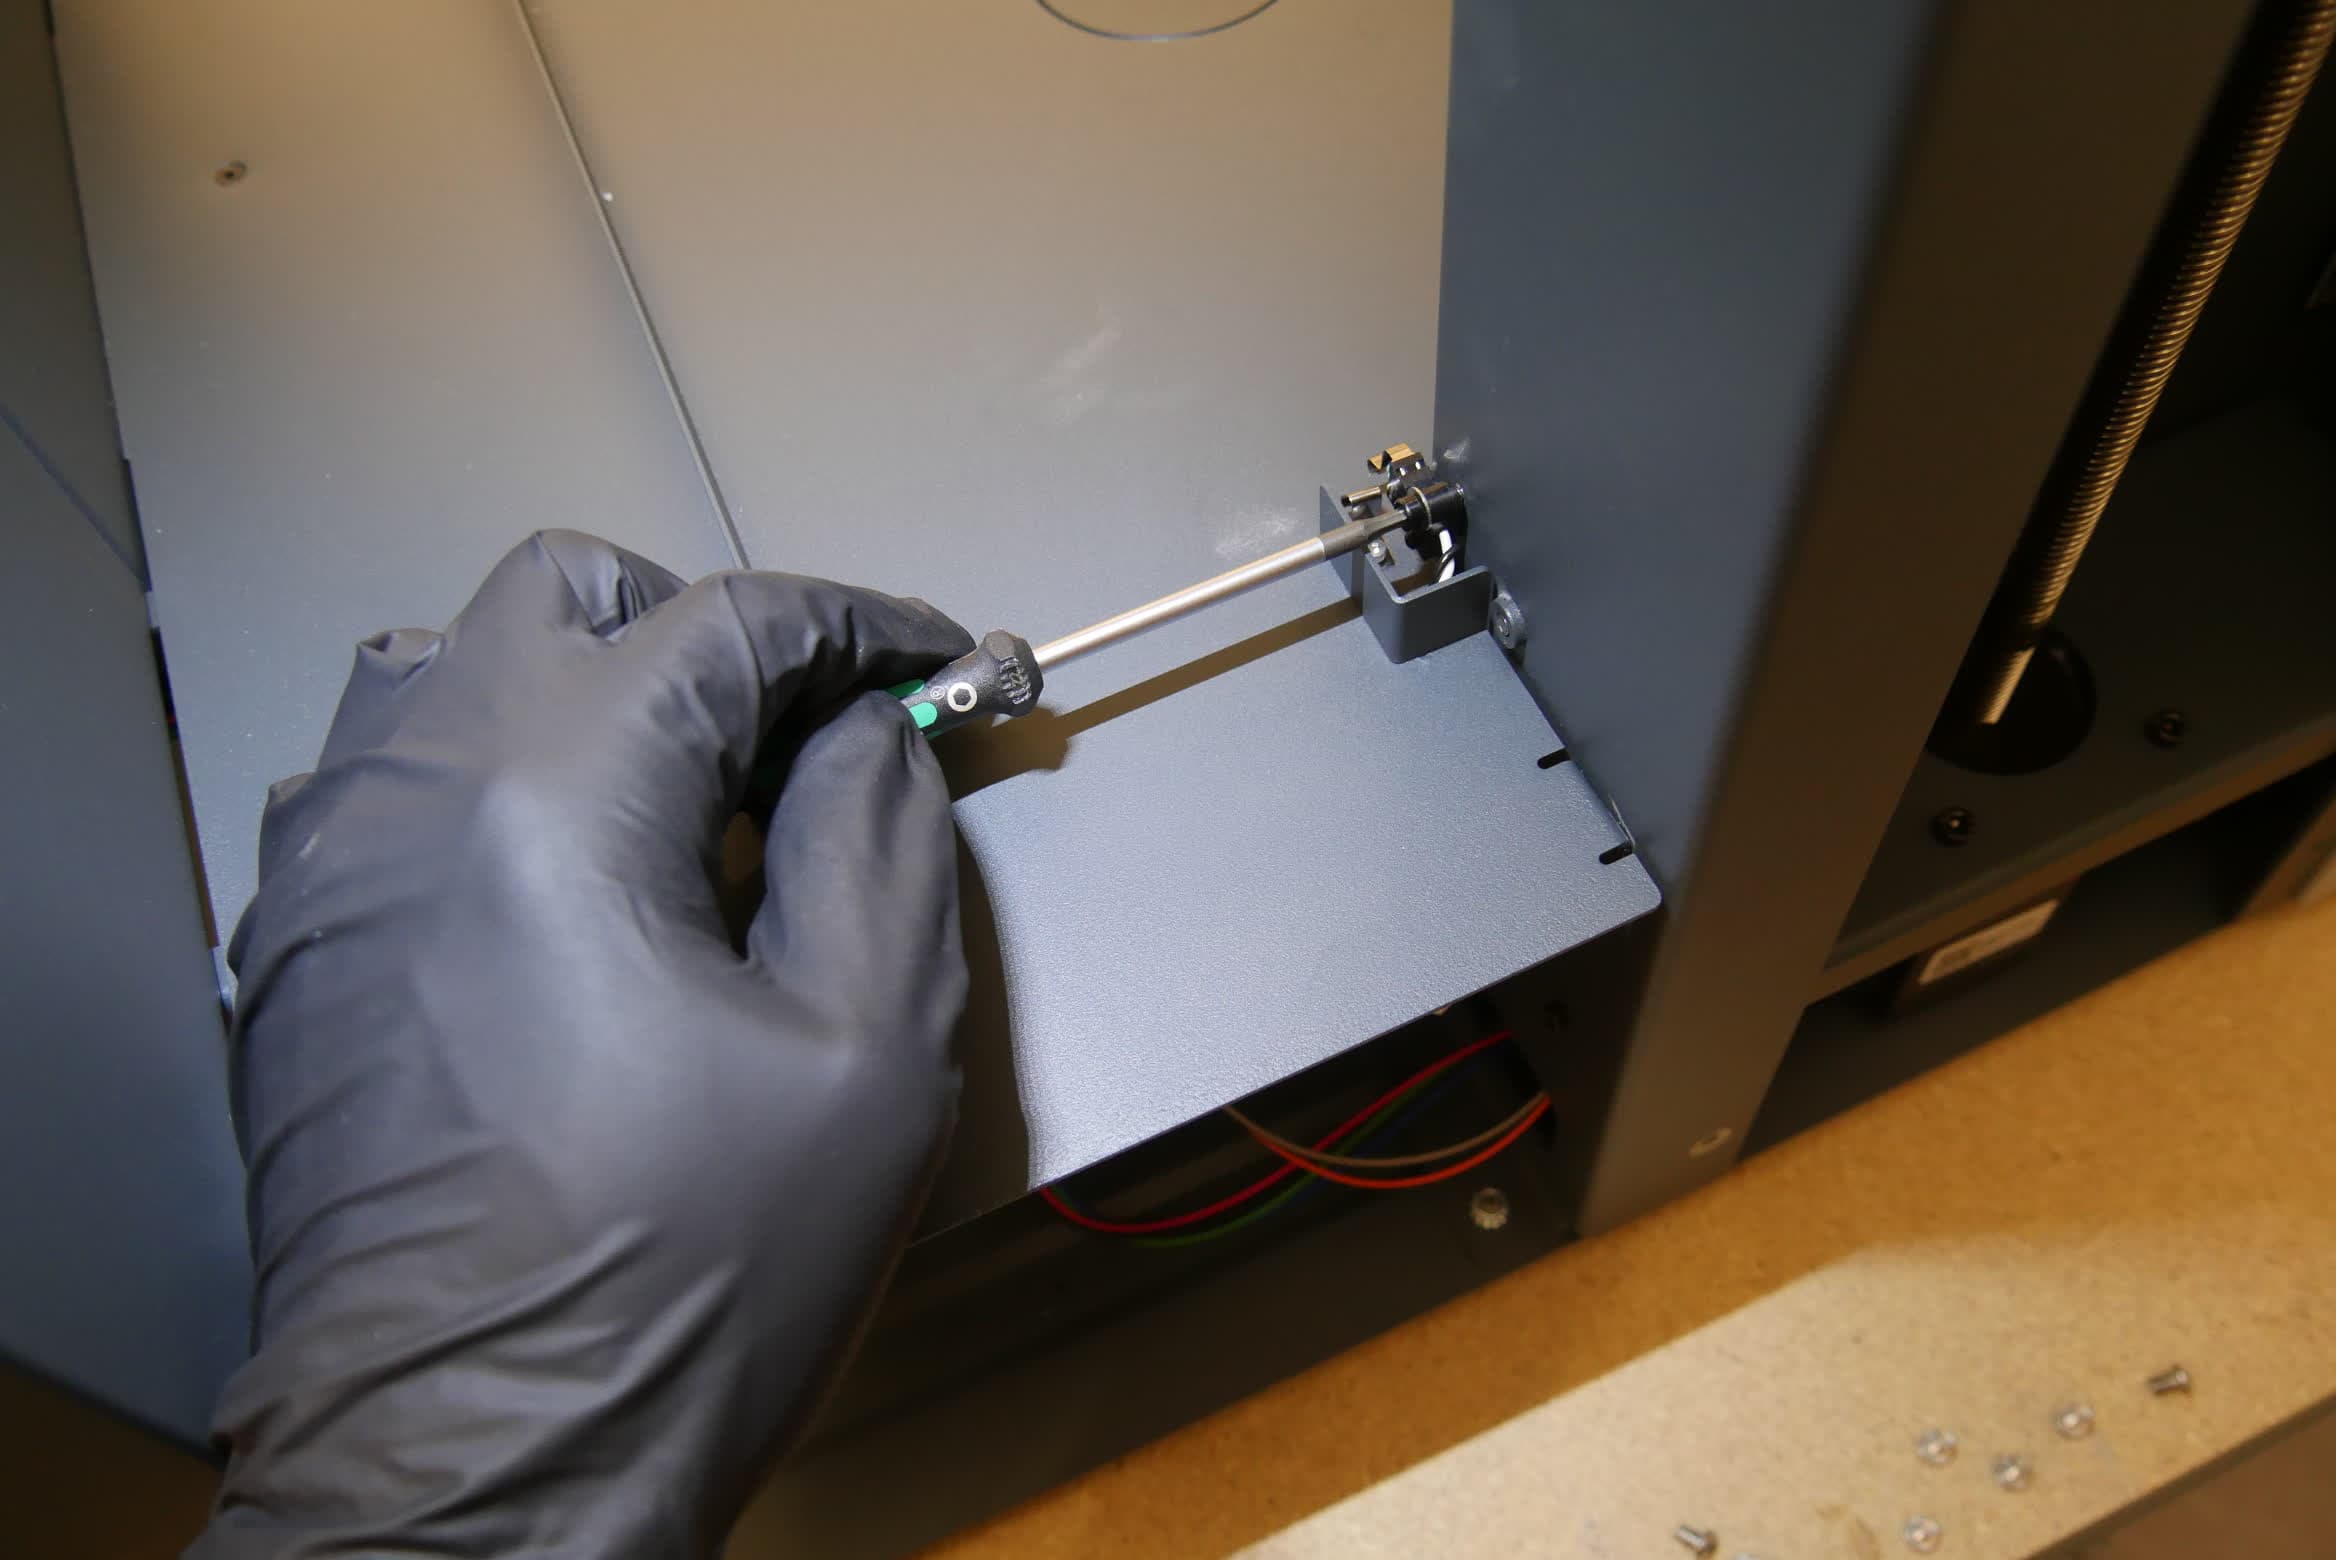
Step 3: Reconnect the interlock switch cable
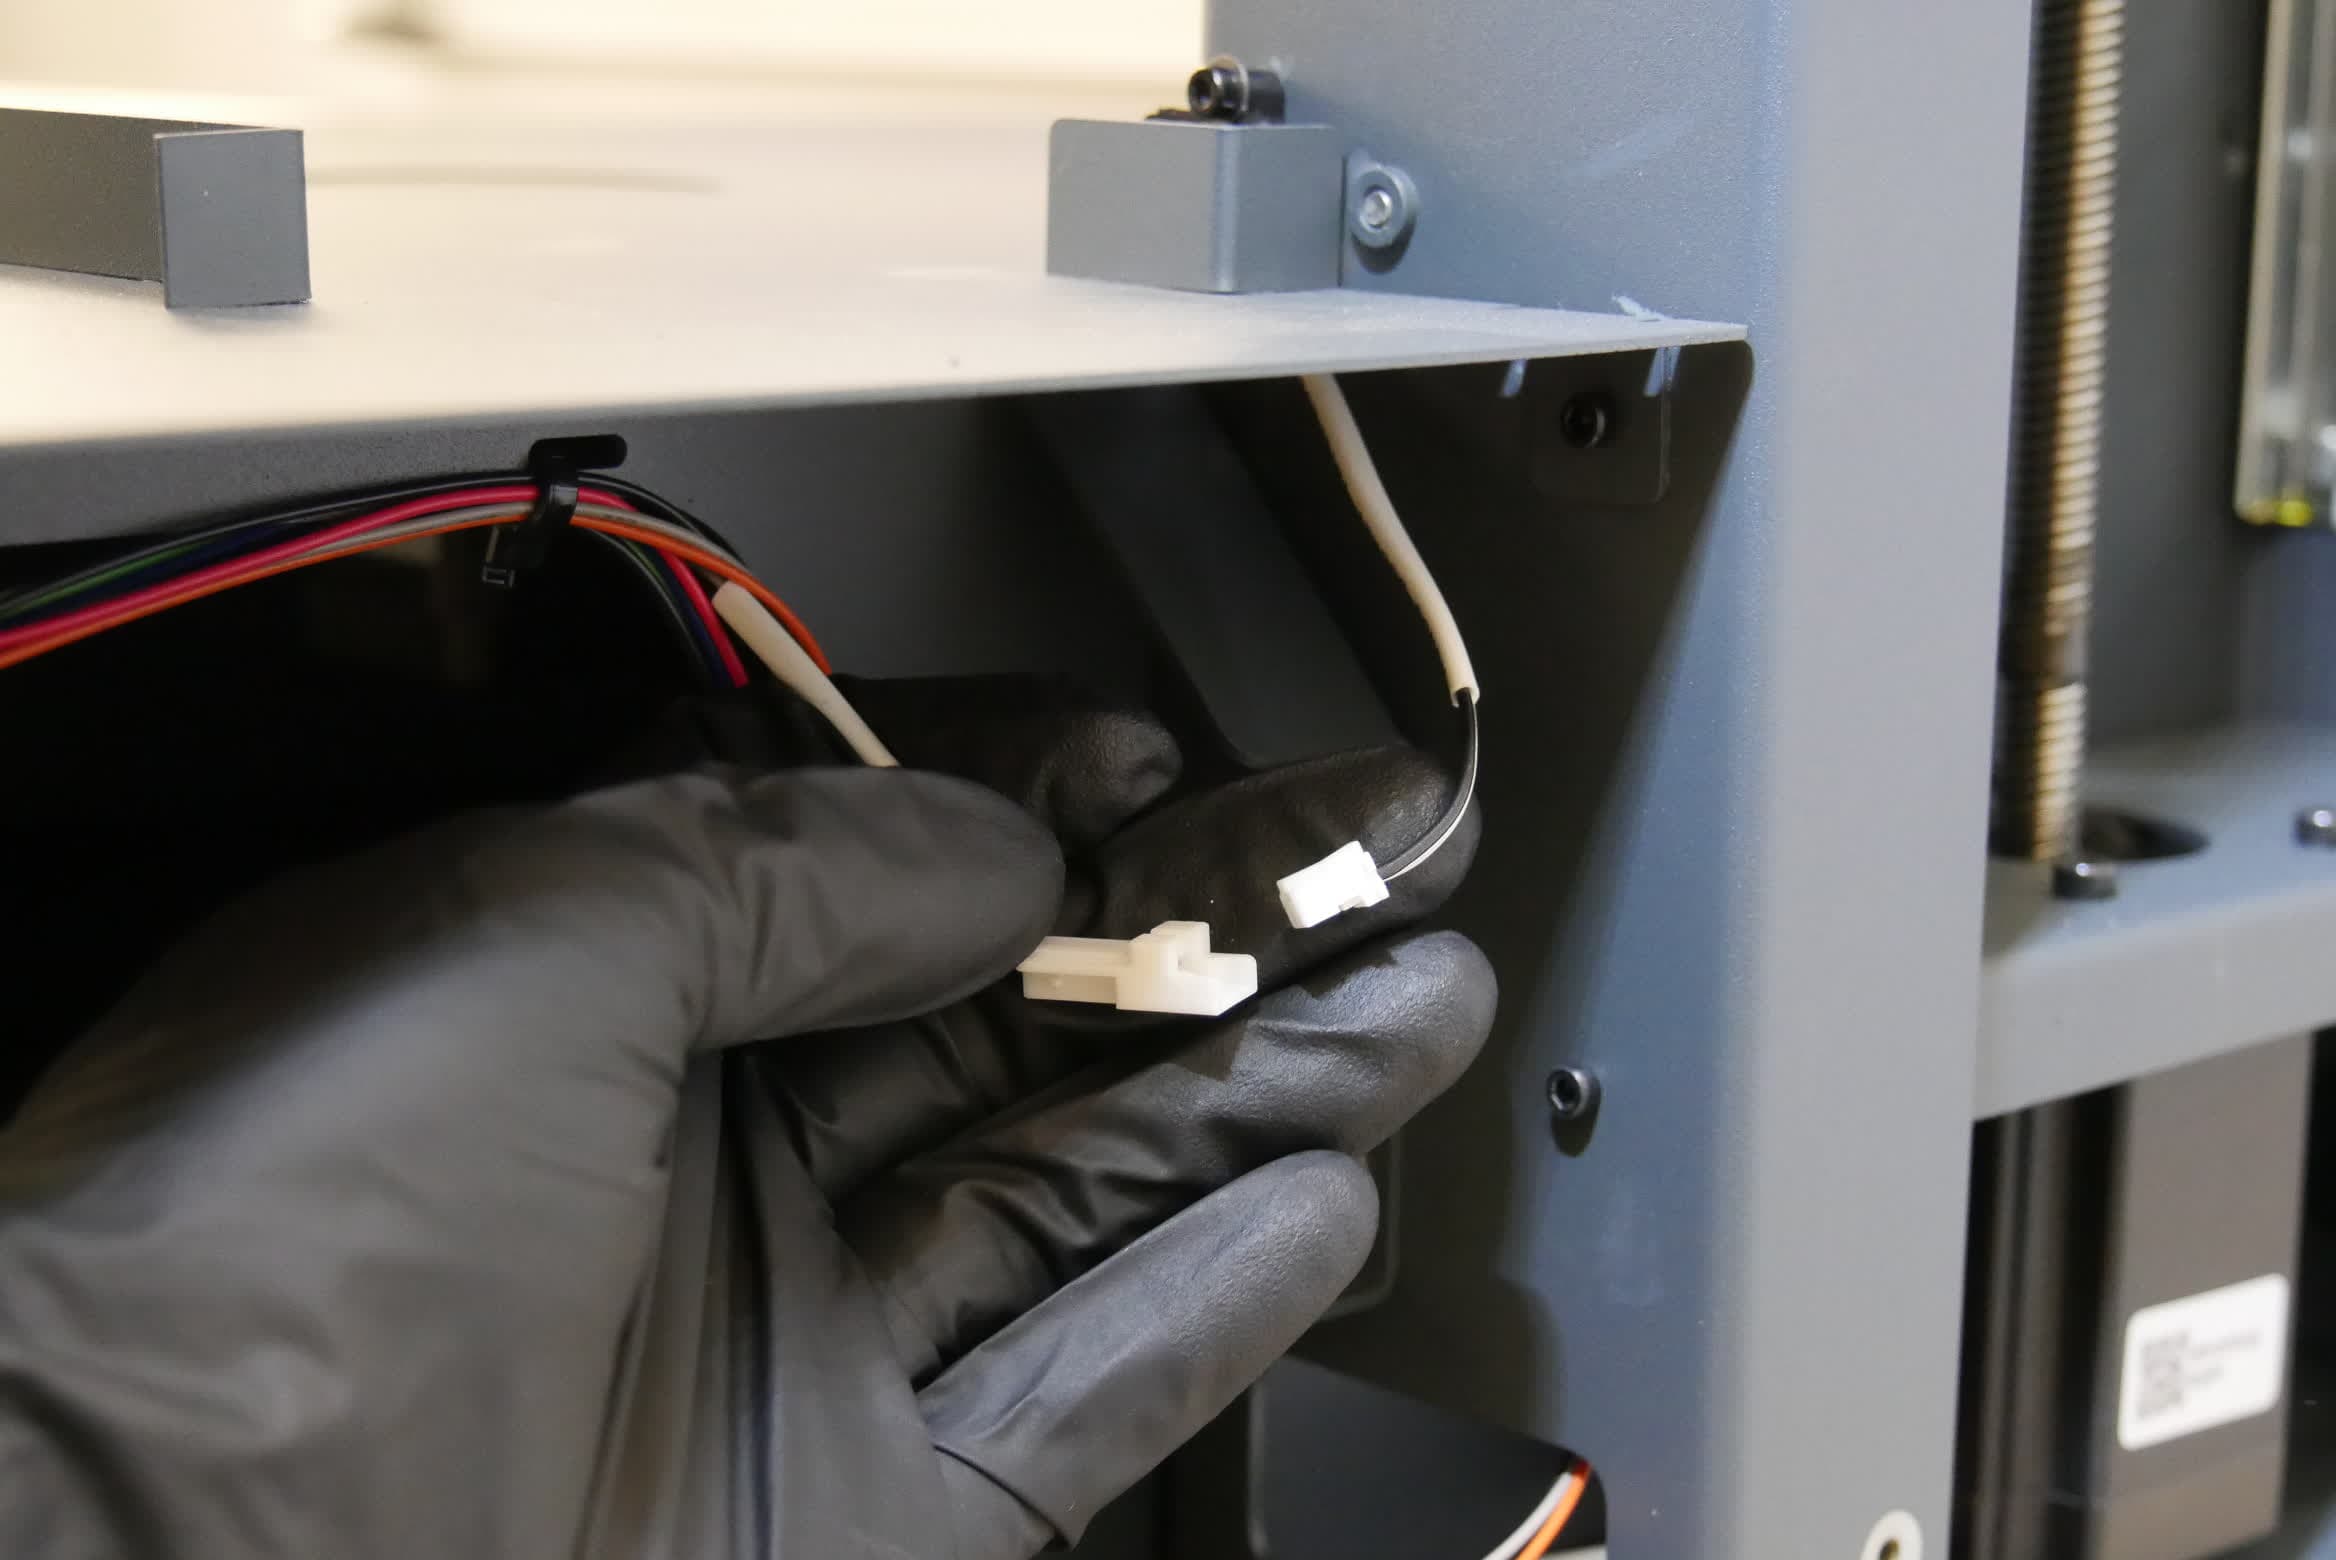
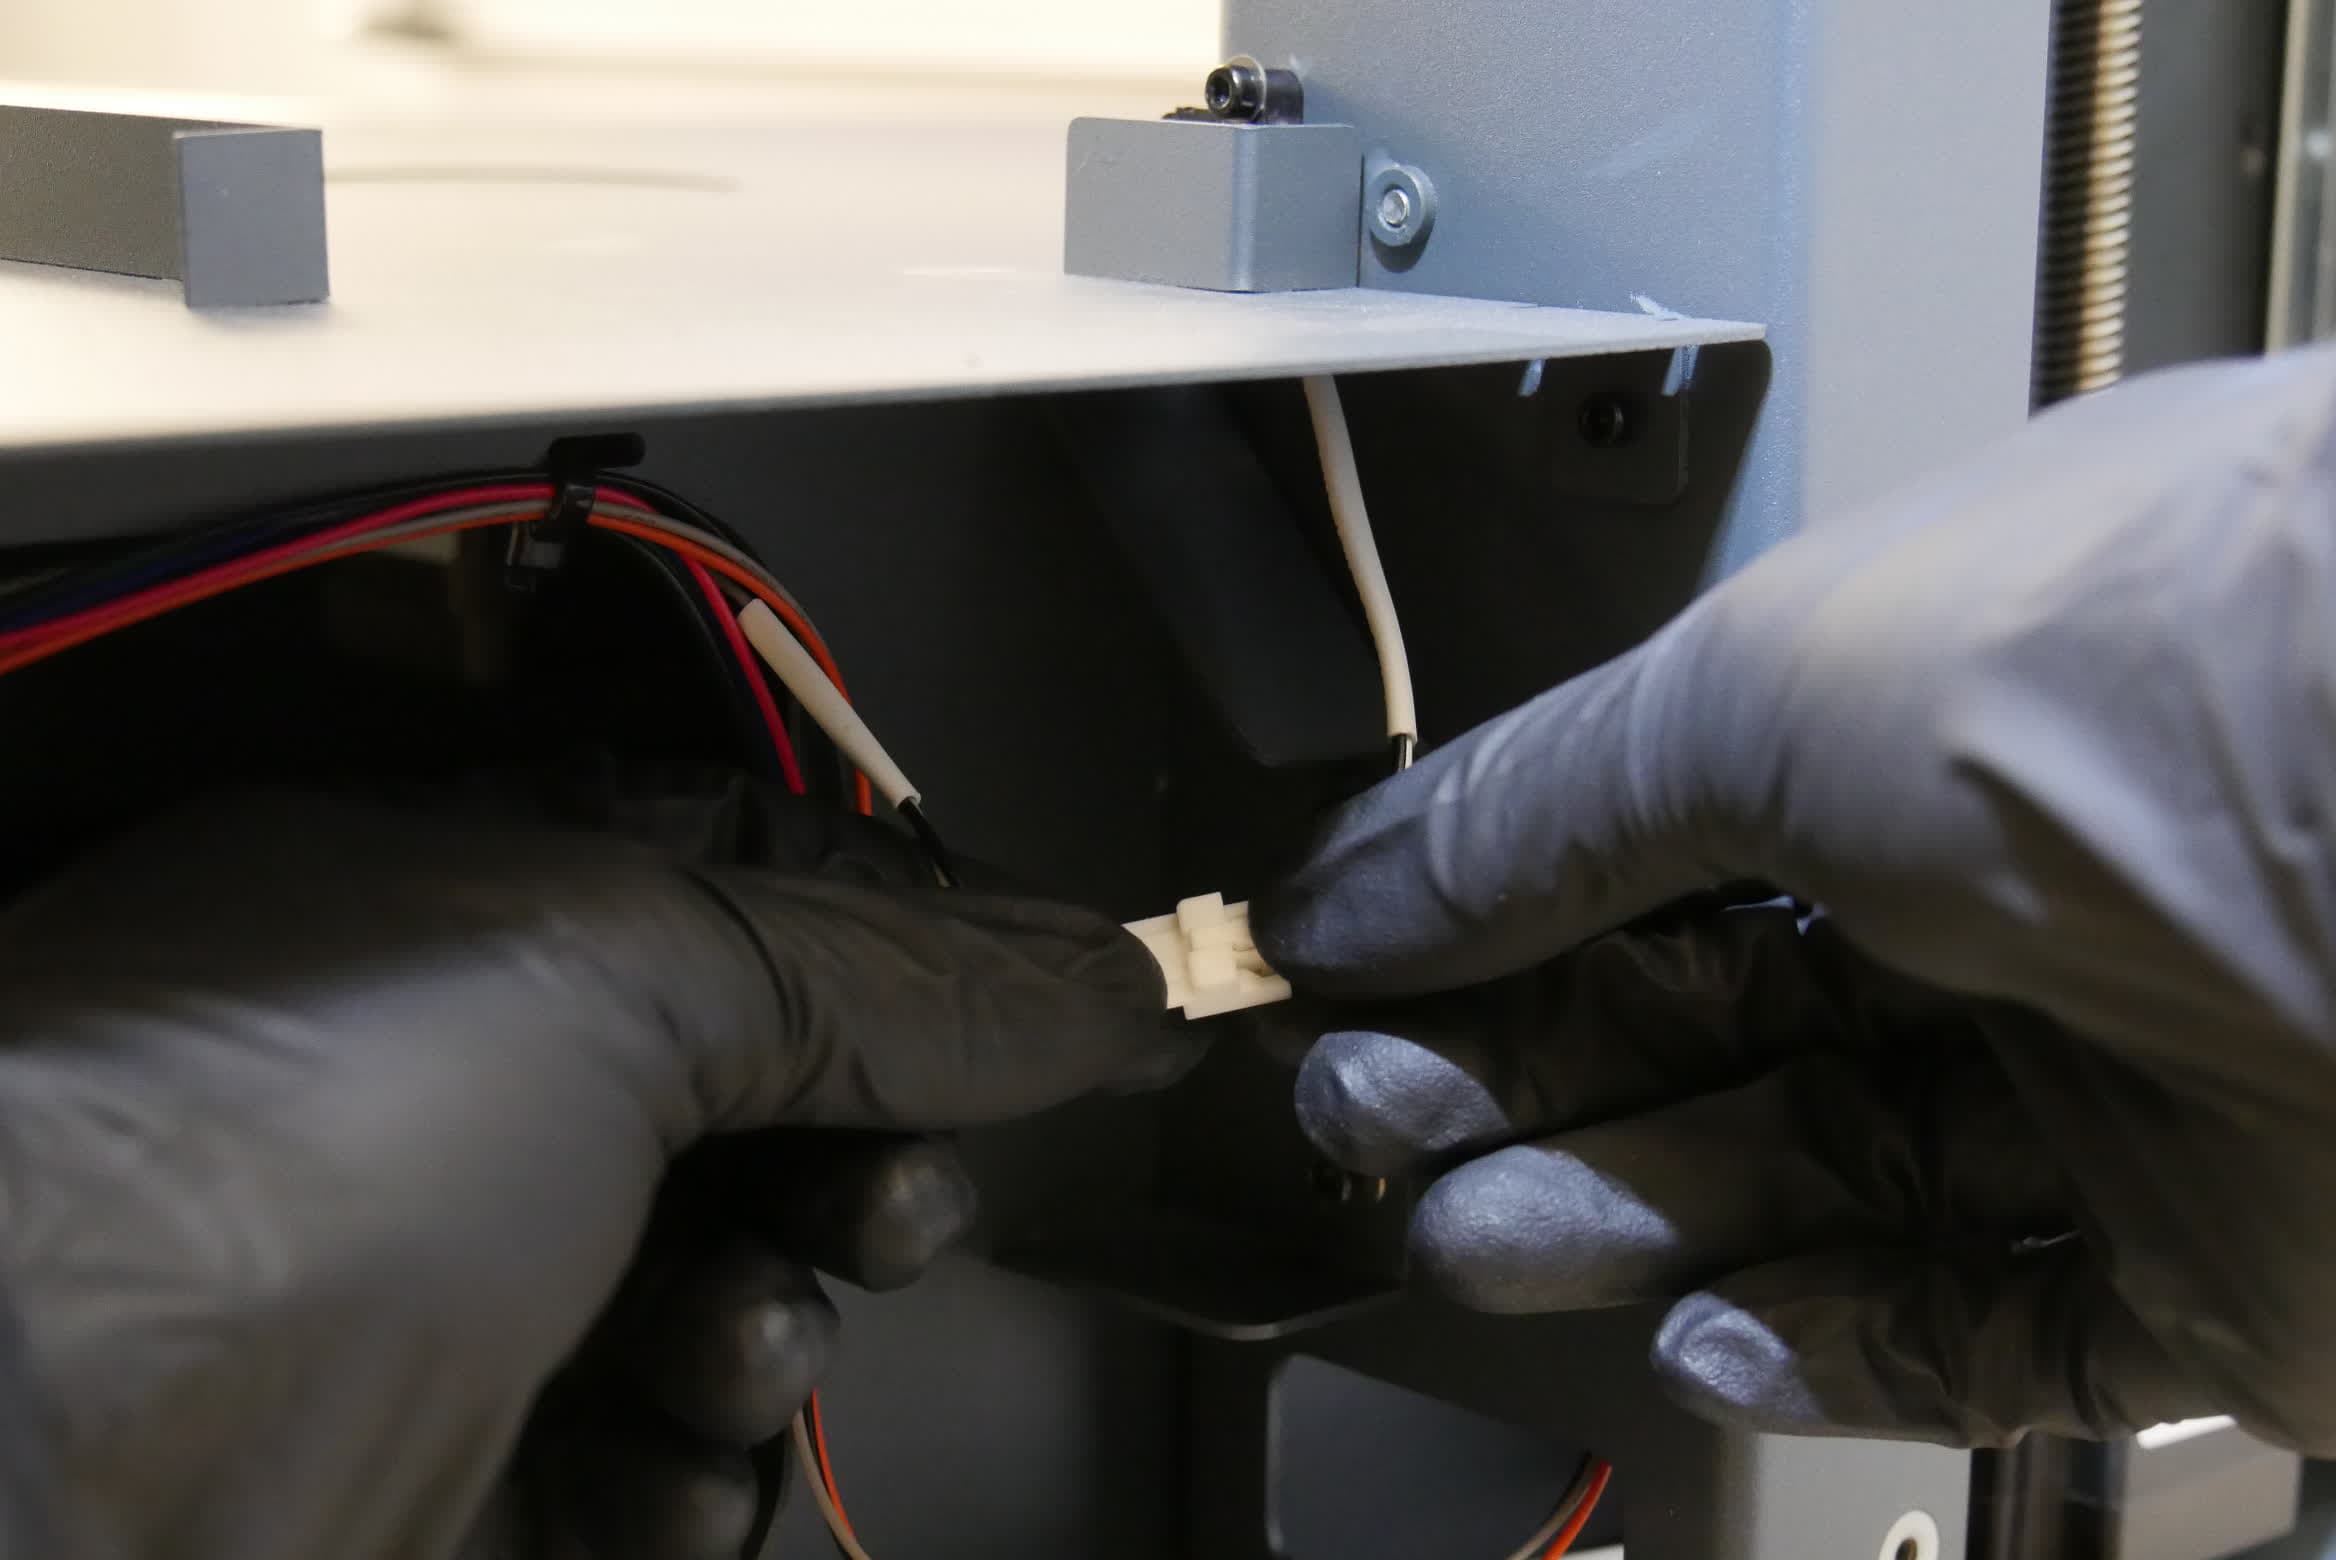
Connect the interlock switch cable to its extension cable. The connector is secure when you hear and feel a click. The connectors only fit together in one orientation.
Reinstalling the right shell
Overview: Reinstall and secure the right shell.
Step 1: Reinstall the right shell
Hold the right shell against the Form Wash L. Check that the screw holes in the right shell line up with the corresponding screw holes in the frame of the machine. Loosely thread the three countersunk 2.5 mm hex screws into the screw holes on the right side of the machine and the nine button head screws into the screw holes on the back of the machine.
Step 2: Secure the right shell
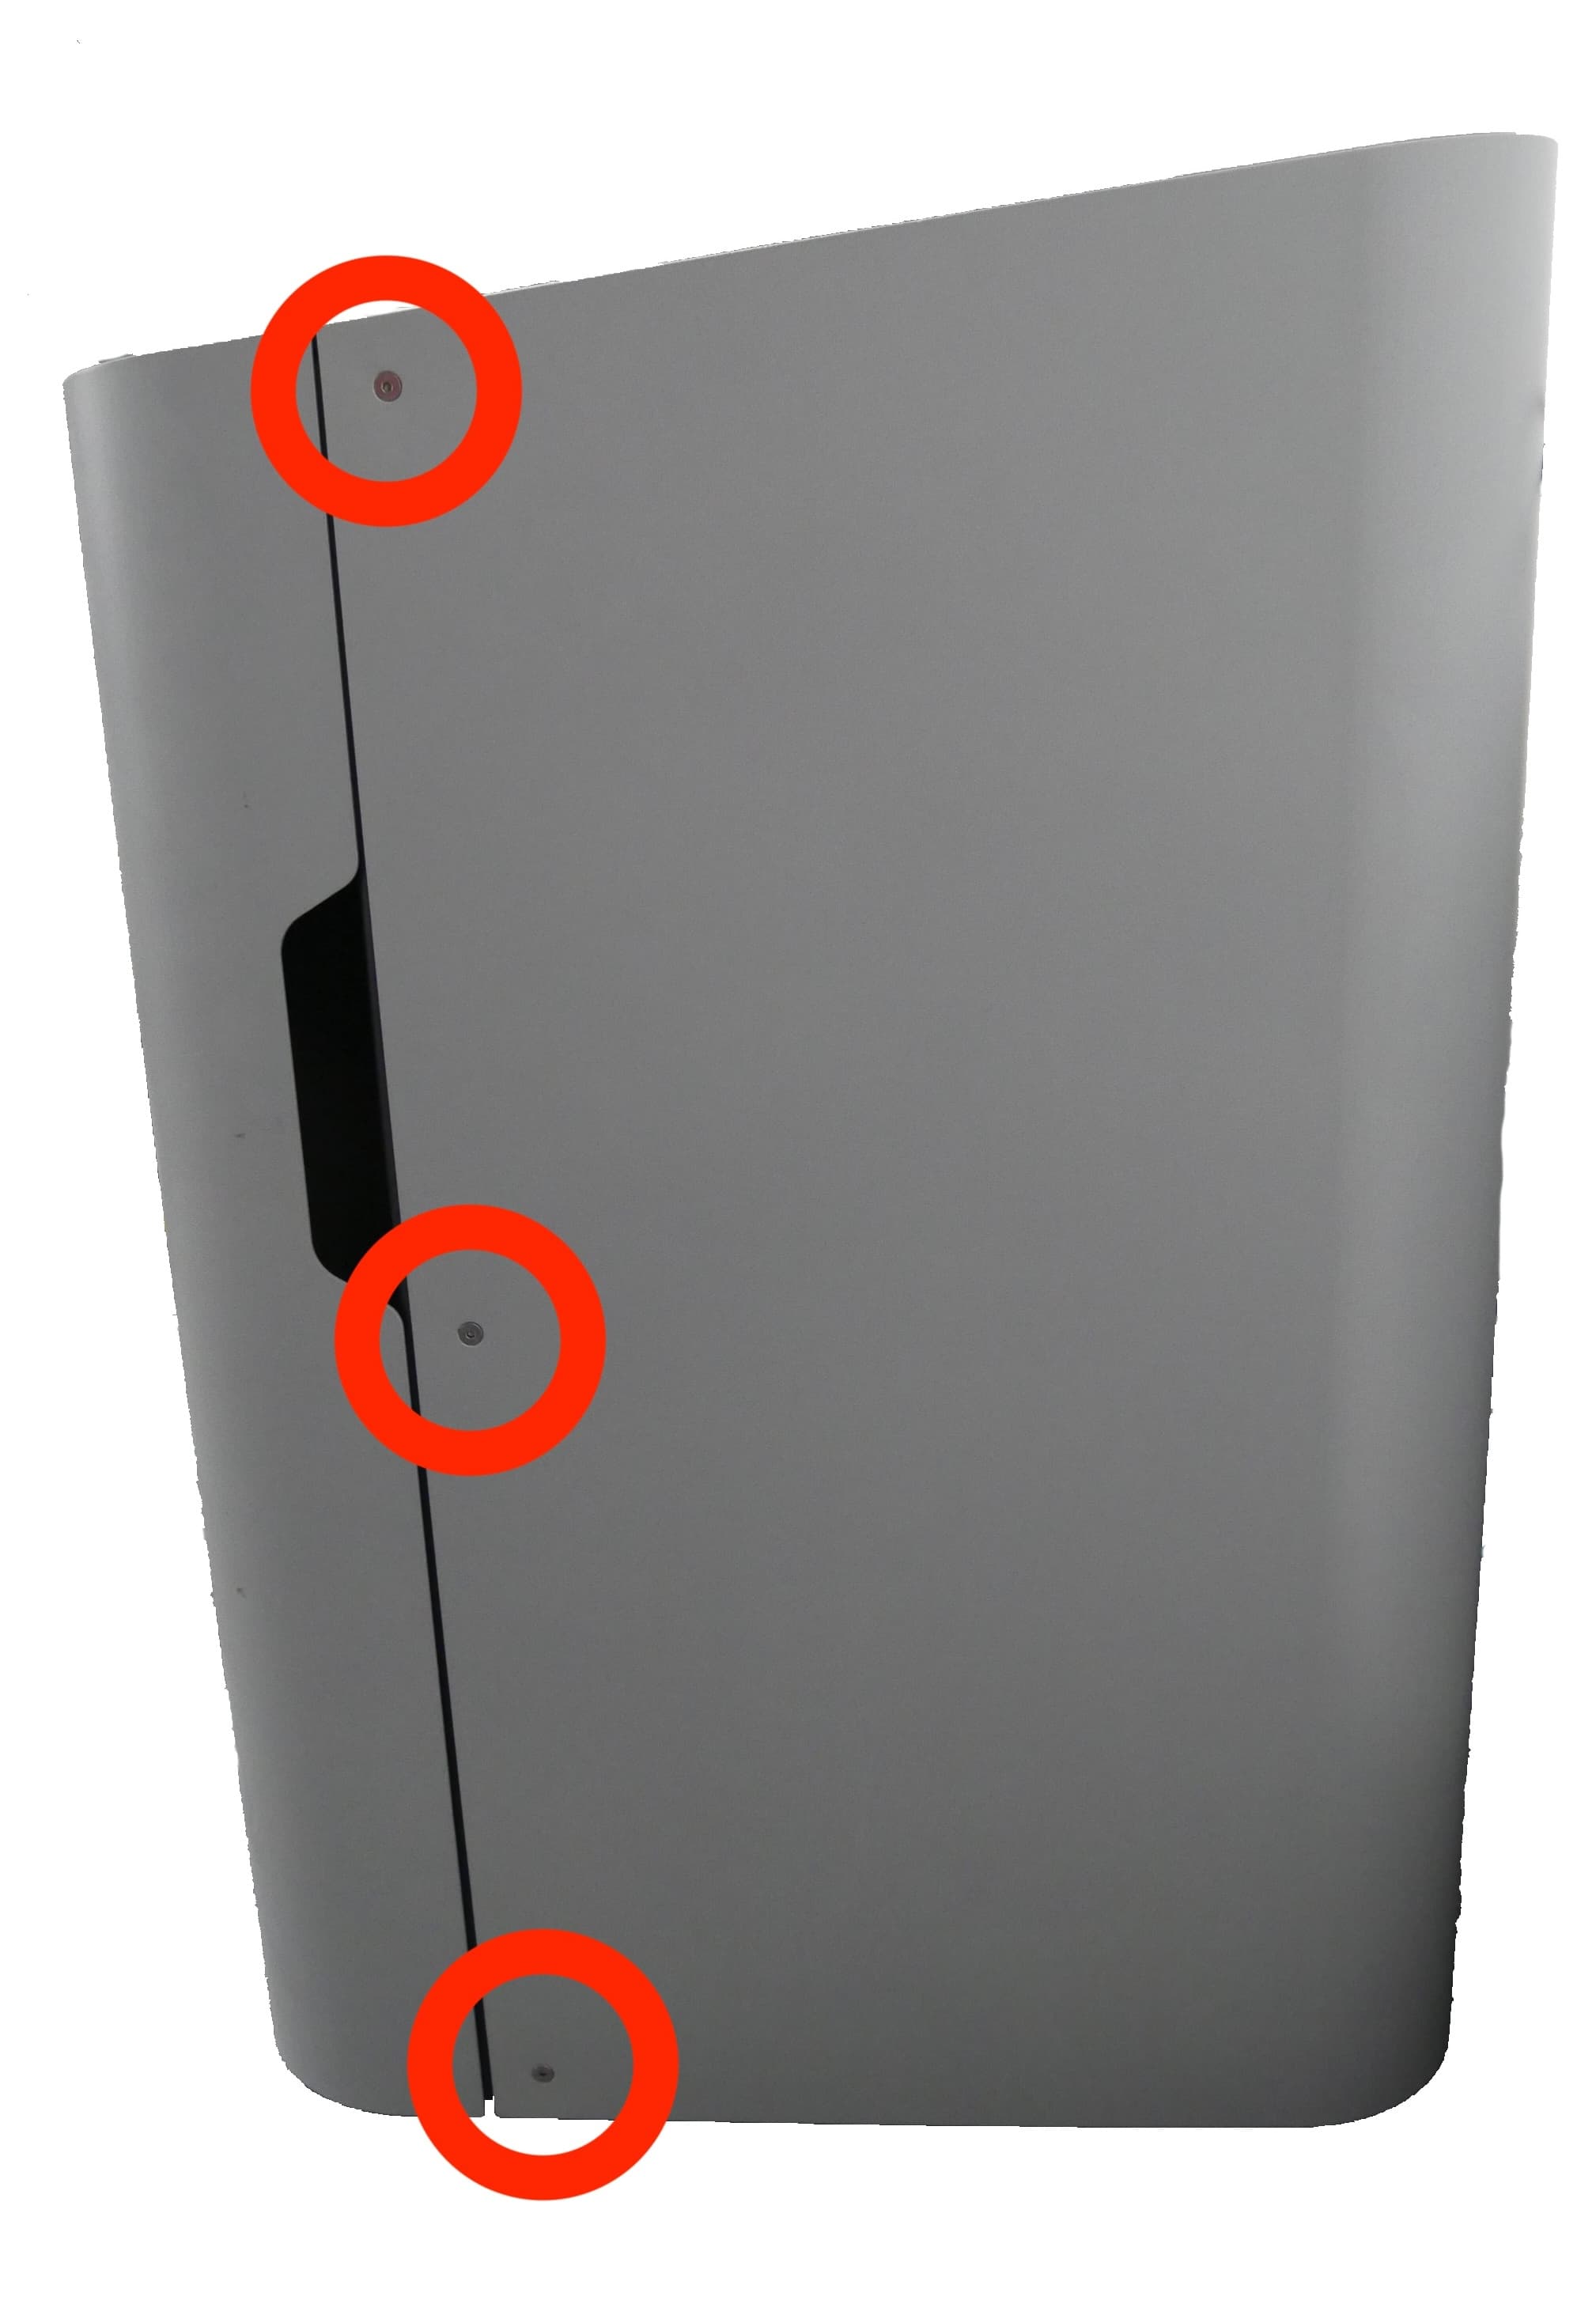
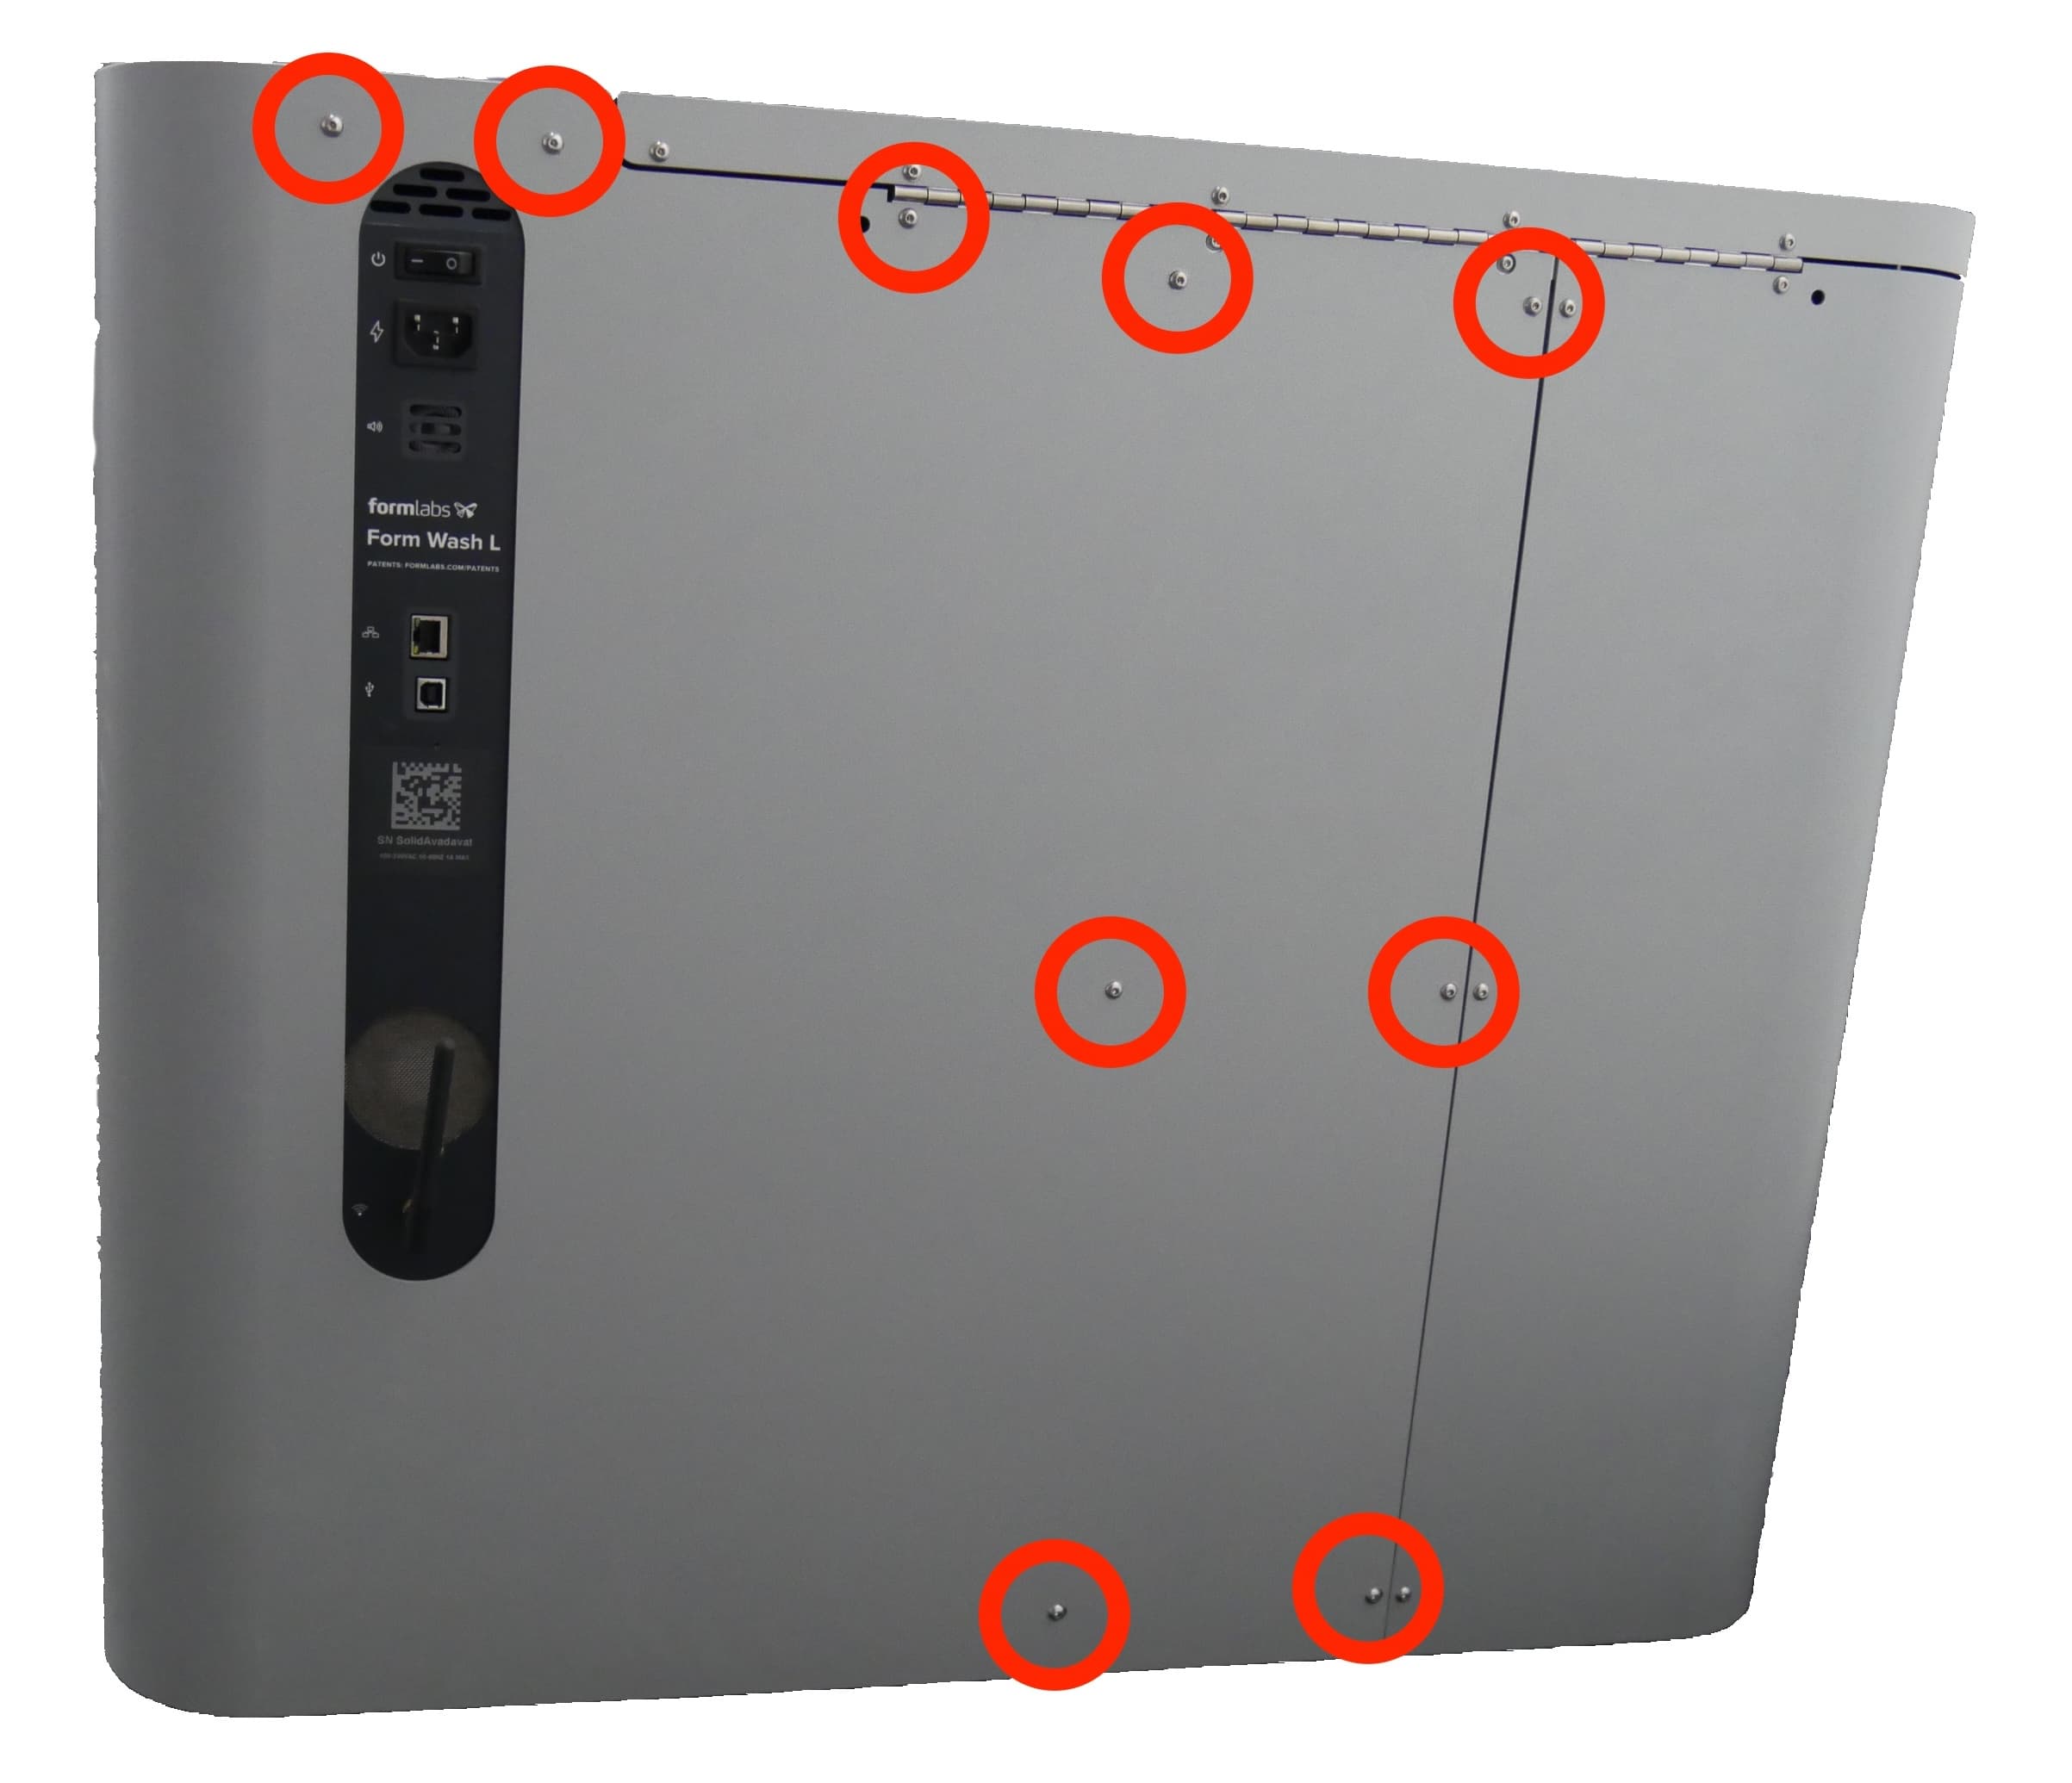
Starting with the screws on the right side of the machine, tighten the screws using a 2.5 mm hex driver until finger tight.
Finalizing the repair
Overview: After reinstalling the right shell, power on the machine and perform final checks.
Step 1: Power on the machine
Reconnect the power cable to the Form Wash L. Flip the breaker switch on the back of the unit to the ON position to turn on the machine.
Step 2: Test the repair
Slide the wash bucket into the Form Wash L until it reaches the back of the machine. Check that the machine recognizes that the wash bucket has been inserted. Refill the wash bucket, start a wash cycle, and ensure that the wash cycle runs normally. Contact Formlabs Support or your authorized reseller to share the results of the procedure.