
Required supplies:
Formlabs:
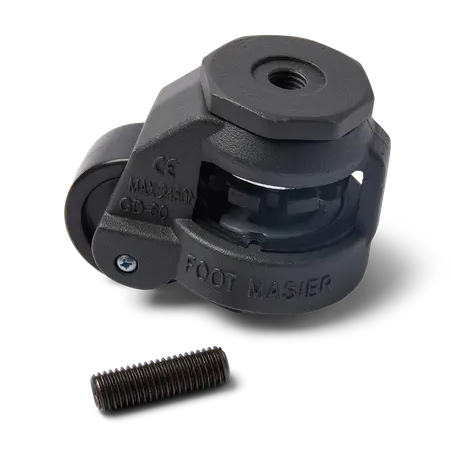
- Replacement caster, up to 4x (RP-FB-CAST-01)
Third-party:
- Pallet jack, forklift, or other device that can safely lift and hold the weight of the Fuse Blast
- 50 mm wrench, 7.5 mm thick or less
- Pliers (optional)

The Fuse Blast sits on four lockable casters, allowing you to easily move it within your workspace or keep it in place for safe operation. If one or more of those casters are damaged, such as during shipping, it may be difficult or impossible to move the machine or keep it steady during use.
Use this guide to replace one or more Fuse Blast casters.
Required supplies:
Formlabs:
Third-party:
Estimated time: 5–10 minutes
Preparing the workspace
Overview: Prepare the Fuse Blast and a clean workspace for replacing the casters.
Step 1: Prepare the workspace
Clear a workspace. Ensure that the workspace is well-ventilated, level, and clean.
Step 2: Unplug the machine
Disconnect the power cable from the machine before continuing with maintenance. To prevent any accidental activation of the machine while you are working, do not perform maintenance on the machine while it is connected to power.
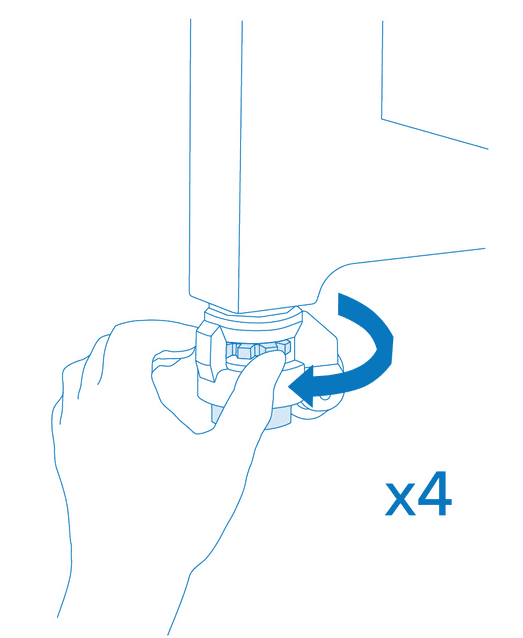
Depending on your workspace and how you plan to lift the Fuse Blast, you may need to move the machine to replace the casters. If you do, rotate each wheel nut clockwise to release the wheel. With two people, carefully roll the machine to the location where you will perform the repair. Once in position, lock the casters on the feet to prevent the Fuse Blast from moving.
Replacing a caster
Overview: Uninstall a caster from the Fuse Blast and install its replacement. Repeat as needed for all casters you are replacing.
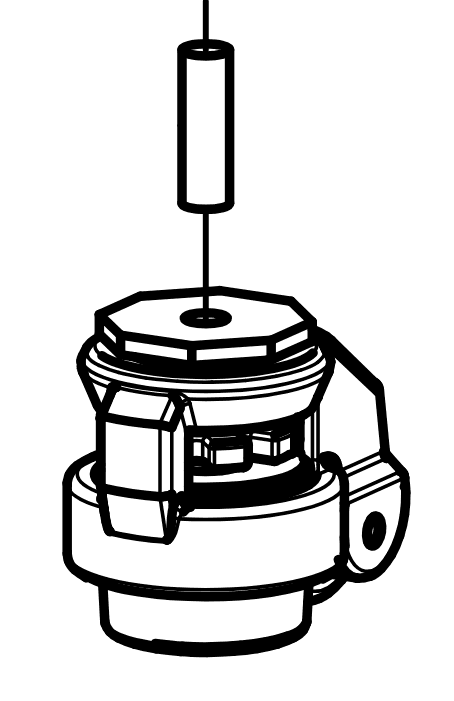
Remove the replacement caster and threaded stud from their packaging. Thread one end of the stud into the screw hole at the top of the caster until it bottoms out in the partial-depth threads in the caster.
Step 2: Lift the Fuse Blast
Identify the caster you will be replacing. Insert the forks of your pallet jack, forklift, or other similar device between the casters on the side of the machine you will be working. For example, if you are replacing the front-right caster, insert the forks under the right side of the machine, between the front-right and back-right casters. Lift the side of the machine by about 2 in (5 cm). If your lifting device has a lock, lock it in place before continuing.
Caution:
The Fuse Blast is a heavy device. Do not tilt the machine from the front or back to prevent it from tipping over. Do not attempt to lift the Fuse Blast by hand.
Step 3: Remove the caster
Use a 50 mm wrench (7.5 mm thick or less to fit between the caster and Fuse Blast) to loosen the nut at the top of the caster to be removed. If the caster separates from its threaded stud, use a pair of pliers or other similar tool to unscrew the stud from the Fuse Blast. Set the caster and stud aside for disposal.
Step 4: Install the replacement caster
Thread the free end of the stud in the replacement caster into the now-open nut. Use a 50 mm wrench (7.5 mm thick or less to fit between the caster and Fuse Blast) to tighten the nut at the top of the caster until it is flush against the Fuse Blast.
Step 5: Lower the Fuse Blast
Carefully lower the machine so it sits unsupported on the casters.
Step 6: Replace other casters (optional)
If you are replacing any of the other casters, repeat steps 1–5 for each.
Finalizing the repair
Overview: After replacing the casters, power on the machine and perform final checks.
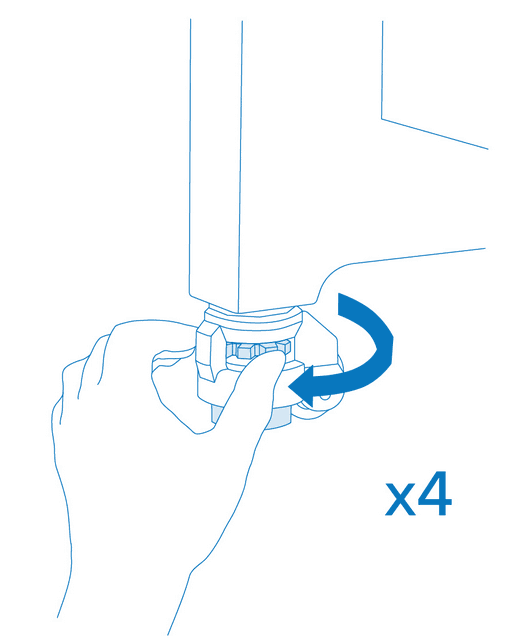
Rotate each wheel nut clockwise to release the wheel. With two people, carefully roll the machine back into position in its workspace.
Step 2: Lock the casters
Once in position, lock the casters on the feet to prevent the Fuse Blast from moving.
Step 3: Power on the machine
Connect the power cable to the machine and the power supply. Flip the power switch on the back of the machine to the ON position. The machine initializes.
Step 4: Test the machine
Start a blasting cycle and use the machine as you normally would to test that it remains stable and securely locked in place.