
Required supplies:
Formlabs:
- Fuse Blast basket liner kit (RP-FB-BLNE-01)
Third-party:
- Pliers
- Snips or flush cutters
- Additional personal protective equipment specified in the safety data sheet for the powder in use

The Fuse Blast tumbler basket has a liner that cushions your printed parts and assists in powder removal. This liner can wear down over time, reducing its effectiveness.
Use this guide to replace the Fuse Blast basket liner.
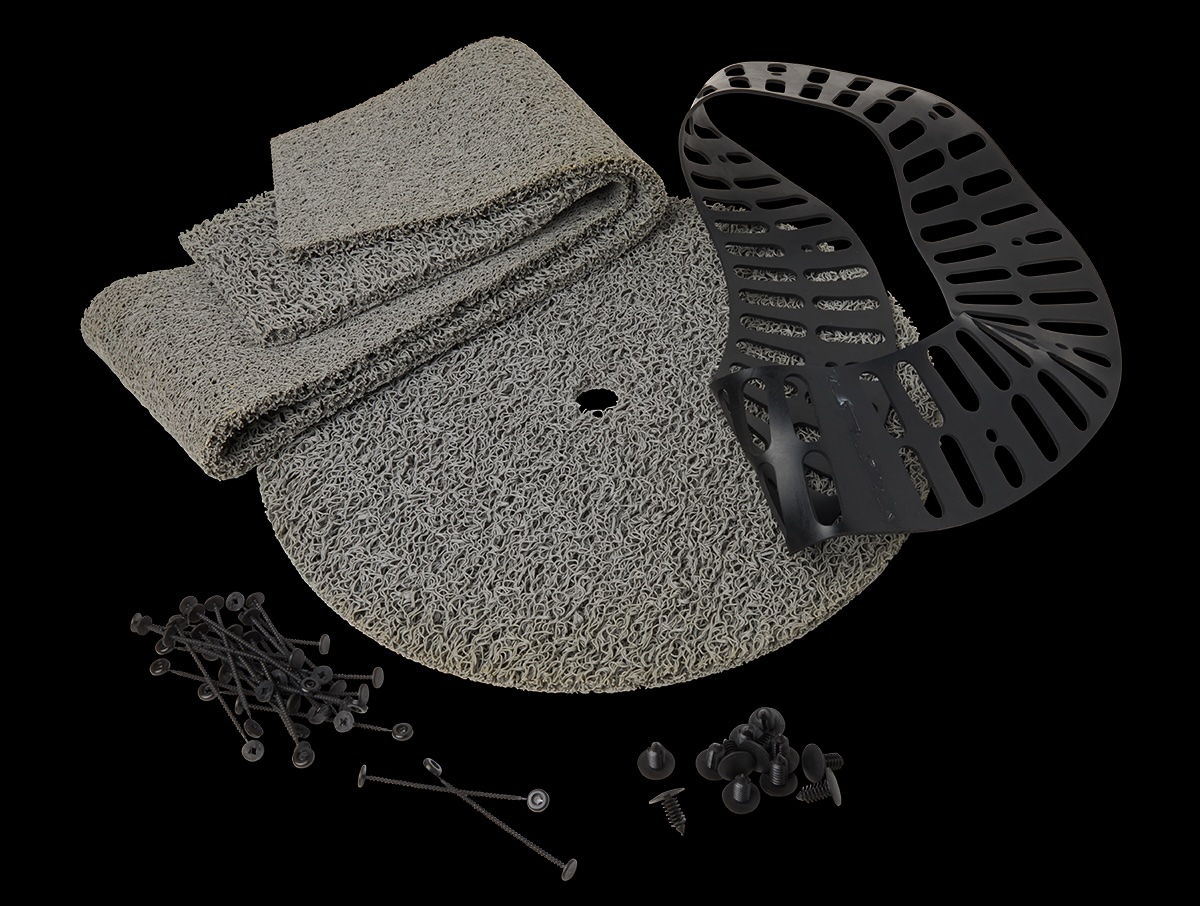
Required supplies:
Formlabs:
Third-party:
Estimated time: 15–30 minutes
Preparing the workspace
Overview: Prepare the Fuse Blast basket for replacing the liner.
Step 1: Prepare the workspace
Clear a workspace near your Fuse Blast large enough for the tumbler basket and the liner components. Ensure that the workspace is well-ventilated and free of dust.
Step 2: Remove the fuse blast tumbler basket
Empty the basket if needed. With two hands, carefully pull the basket off the tumbler basket shaft. Lift the tumbler basket out of the blast chamber and set it on your work surface.
Removing the basket liner
Overview: Remove the basket liner and liner cone from the tumbler basket.
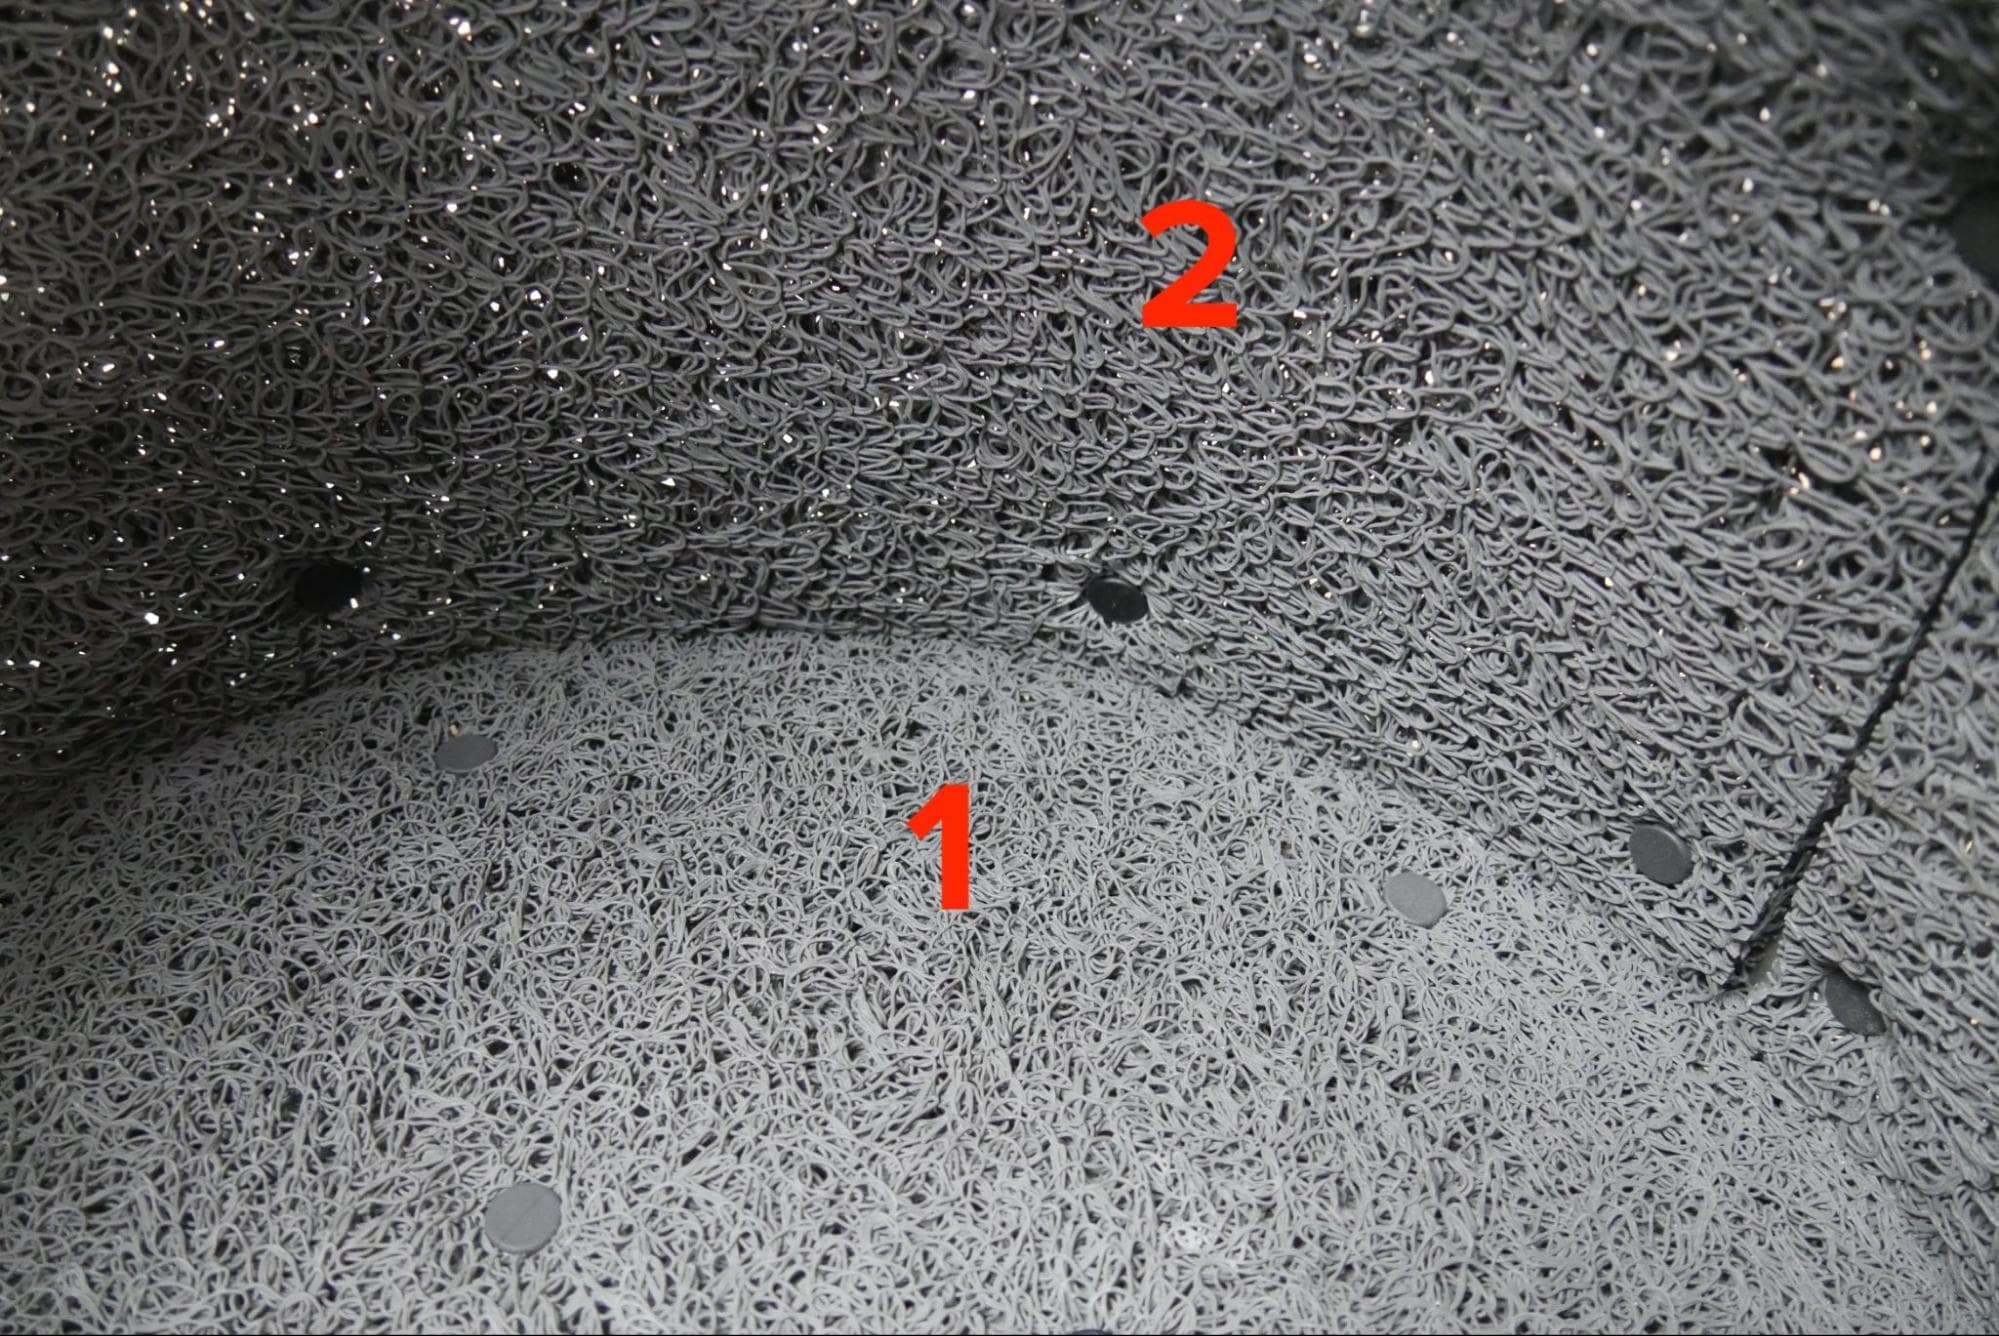
The tumbler basket is lined with a circular base liner at the back of the basket (labeled 1 in the image here) and a cylindrical liner around the wall (labeled 2). These two pieces are held in place by a total of 34 rivets. Use pliers or snips to release all of these rivets around the outside of the basket. Lift both parts out of the basket and set them aside for disposal.
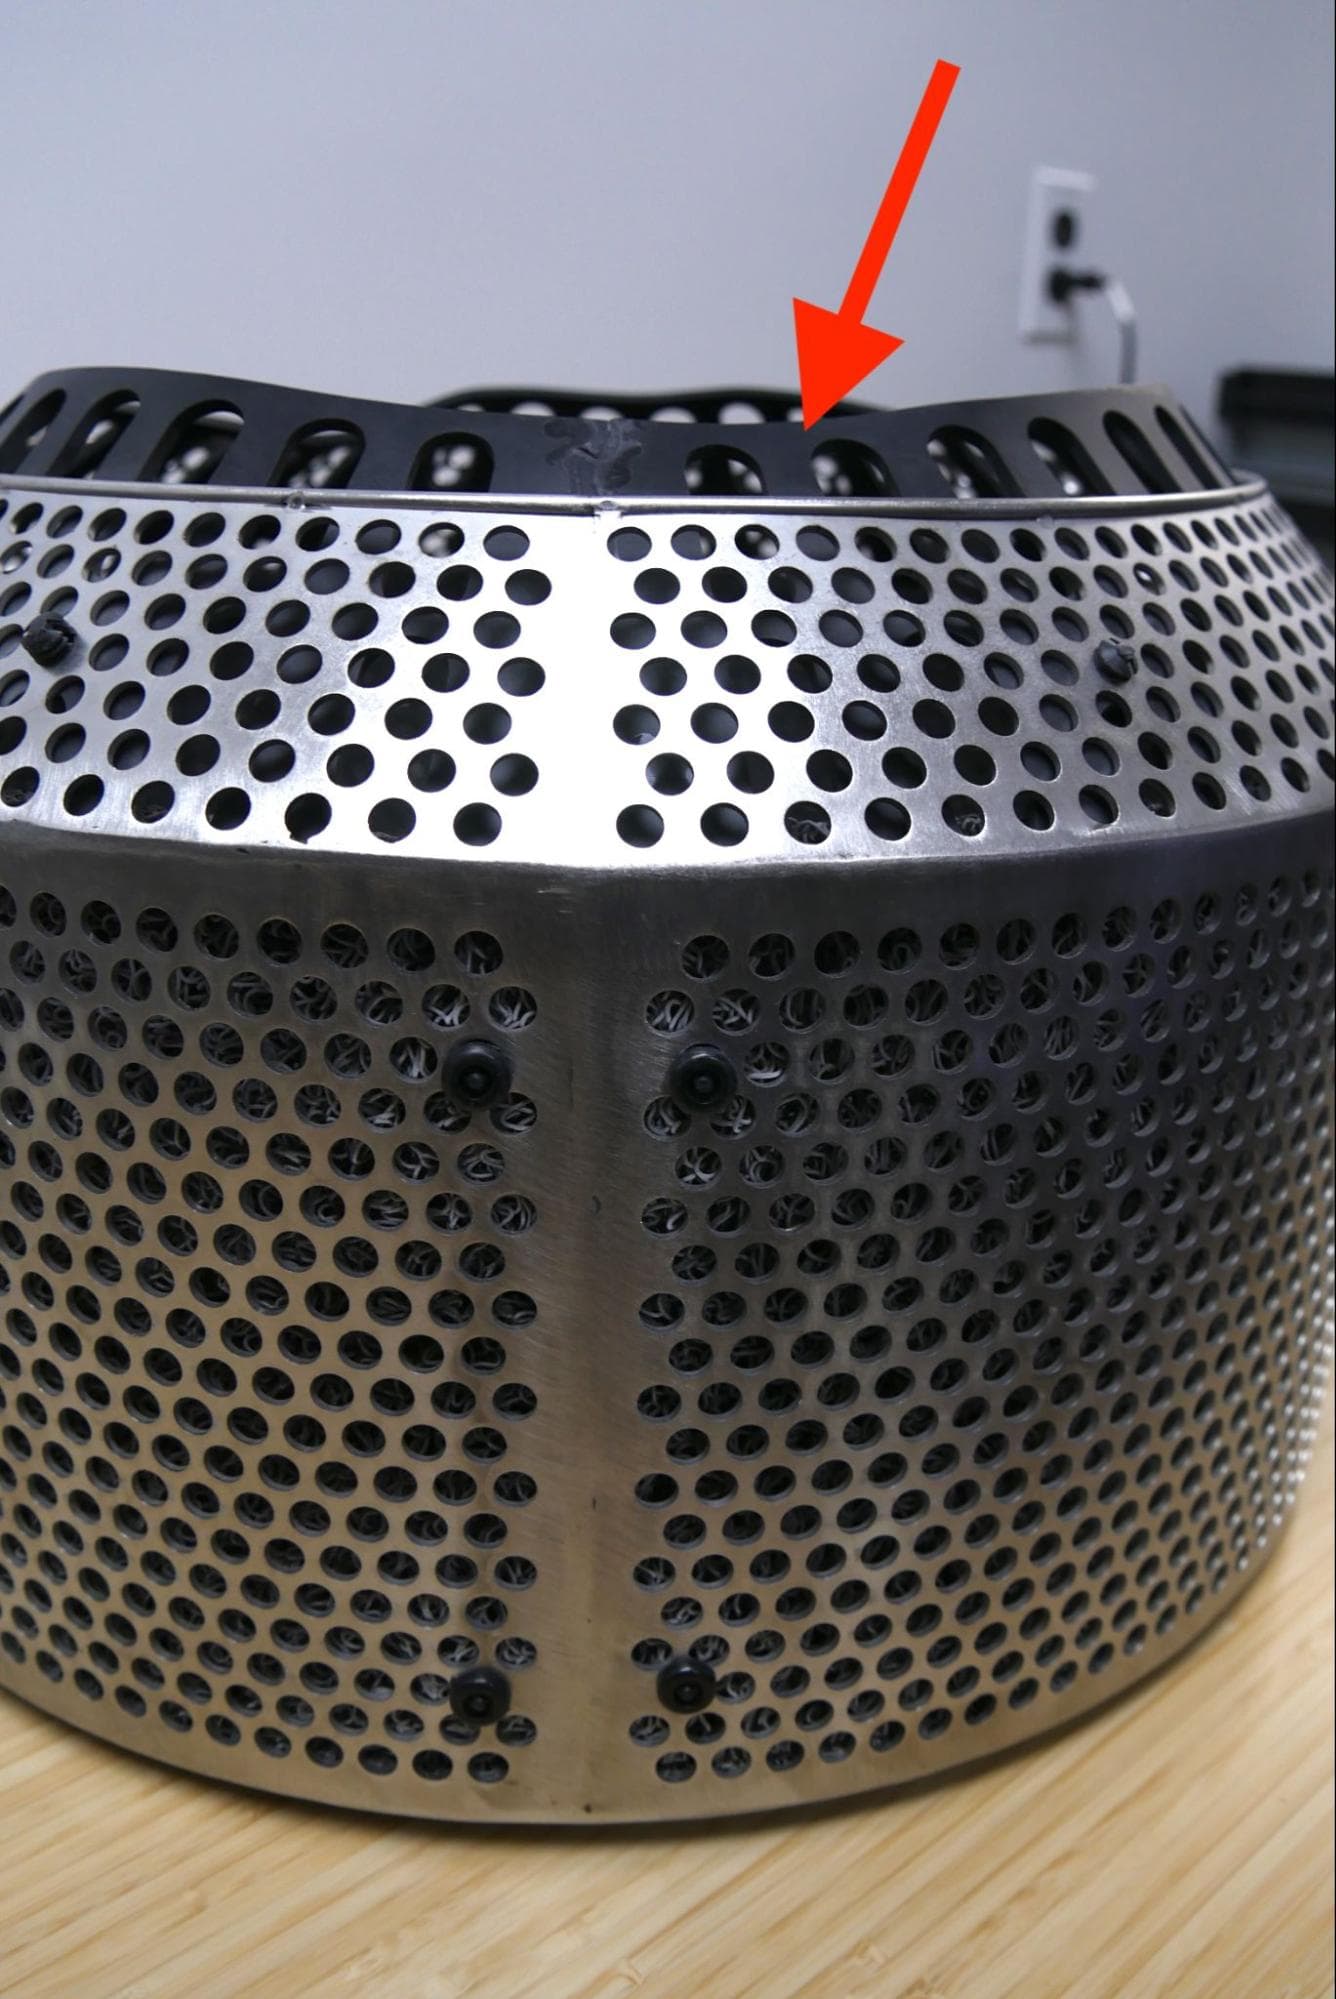
The dark rubber basket cone liner is held in place by eight or nine rivets, depending on its date of manufacture. If it is damaged or has come loose, remove and replace it. If the cone liner is undamaged, you can leave it in place and save the new cone liner from the basket liner kit for later use.
If you are replacing the basket cone line, use pliers or snips to release the rivets around the outside rim of the basket. Remove the cone liner from the basket and set it aside for disposal.
Installing the replacement basket liner
Overview: Mount and secure the replacement basket liner and liner cone.
Step 1: Mount the circular base liner
Place the circular base liner in the tumbler basket, flat against the back wall. Align the hole in the middle of the circular base liner with the center mounting hole in the tumbler basket. Tilt the tumbler basket up onto its side.
The circular base liner is held in place with 12 two-piece push-in rivets. To best secure the circular base liner to the tumbler basket, space the rivets evenly around the liner as shown here, with six rivets close to the outer edge and six close to the center mounting hole in the tumbler basket.
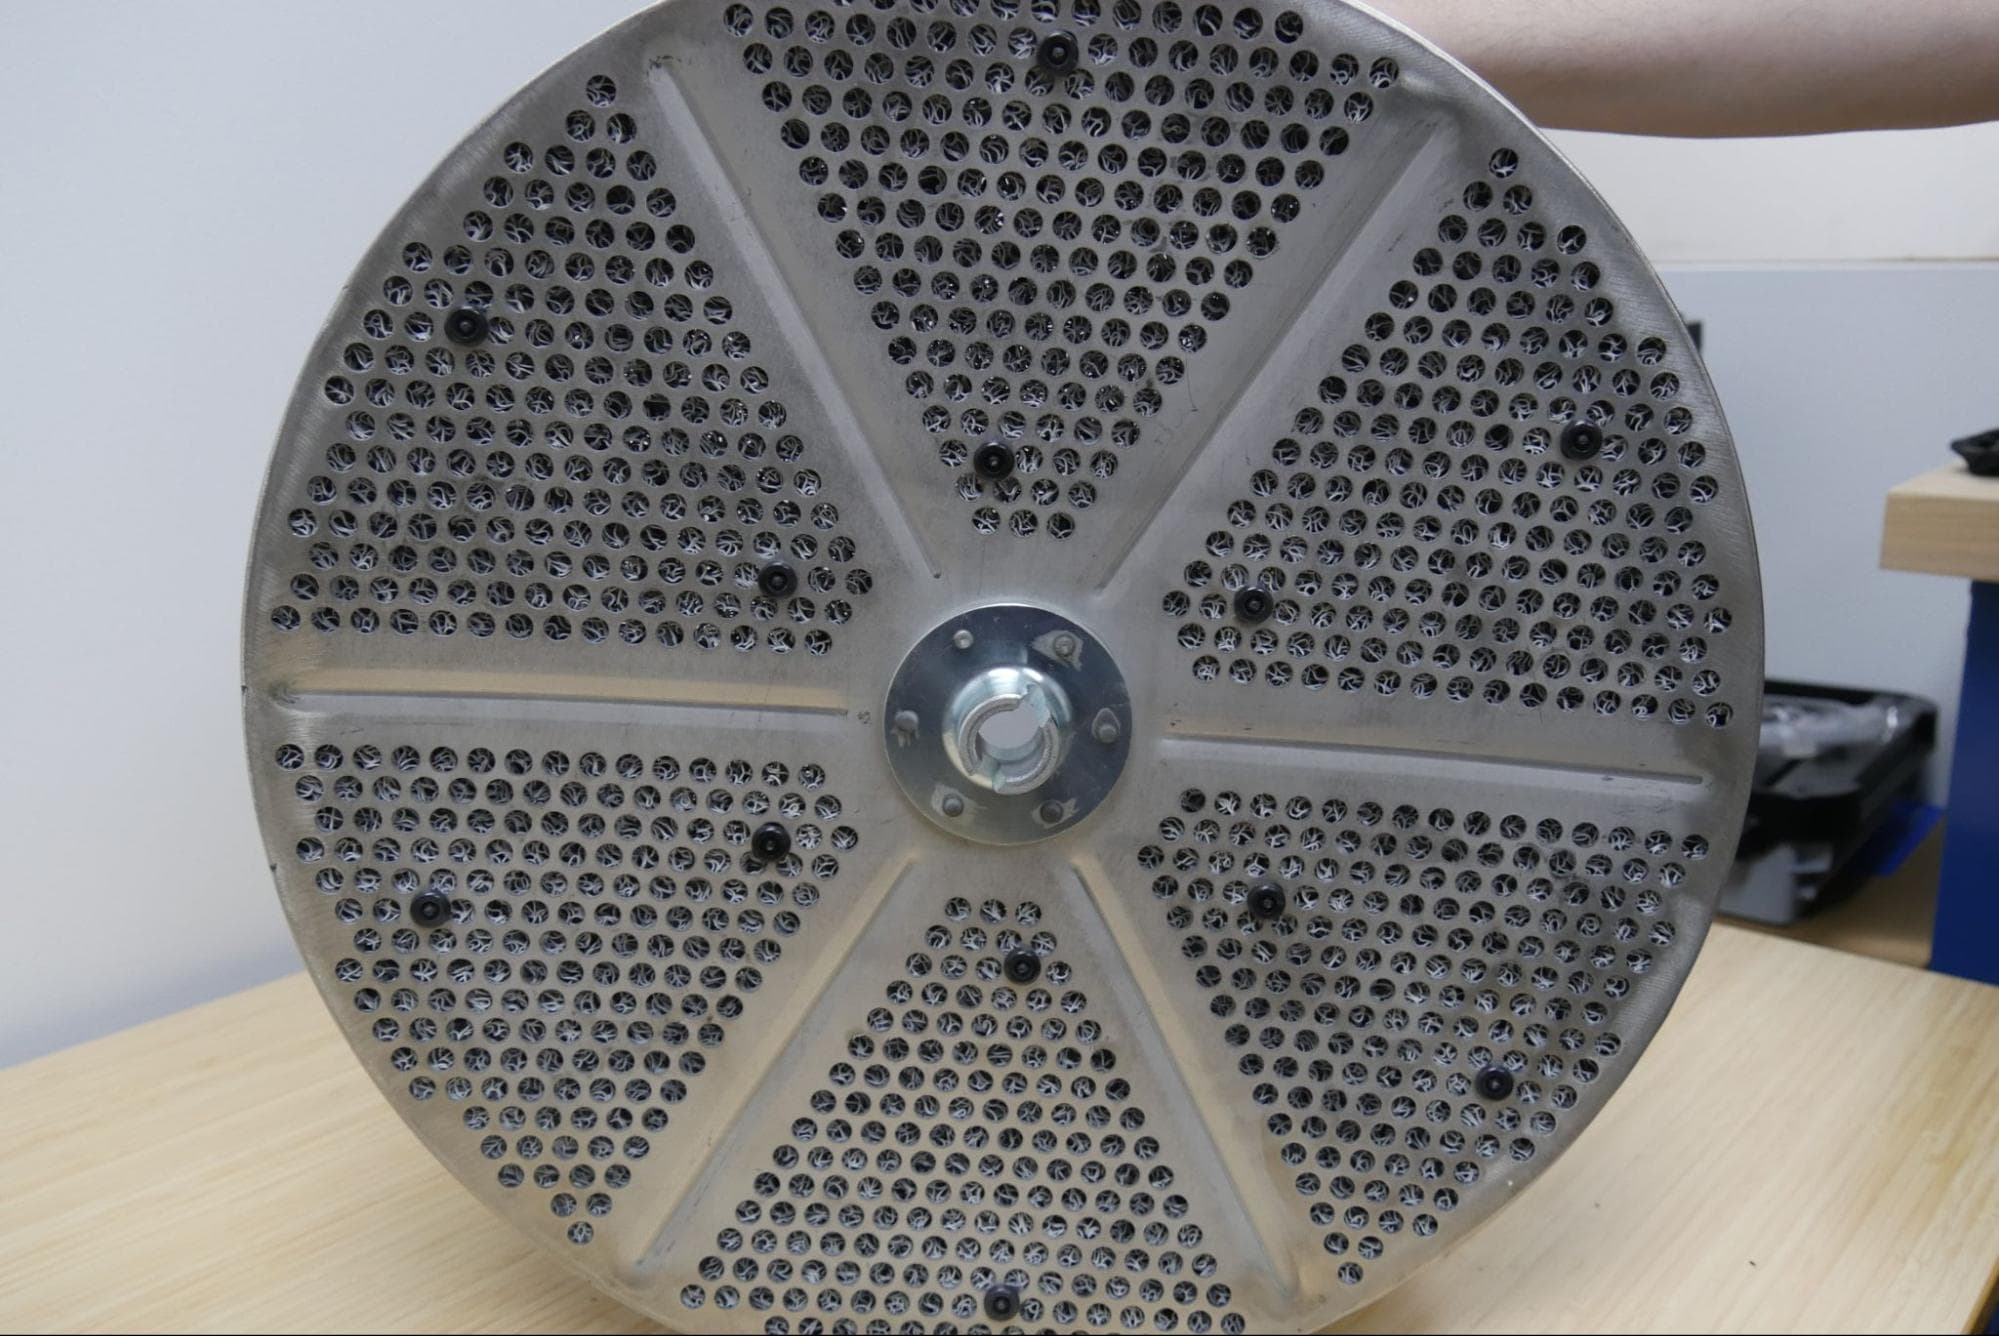
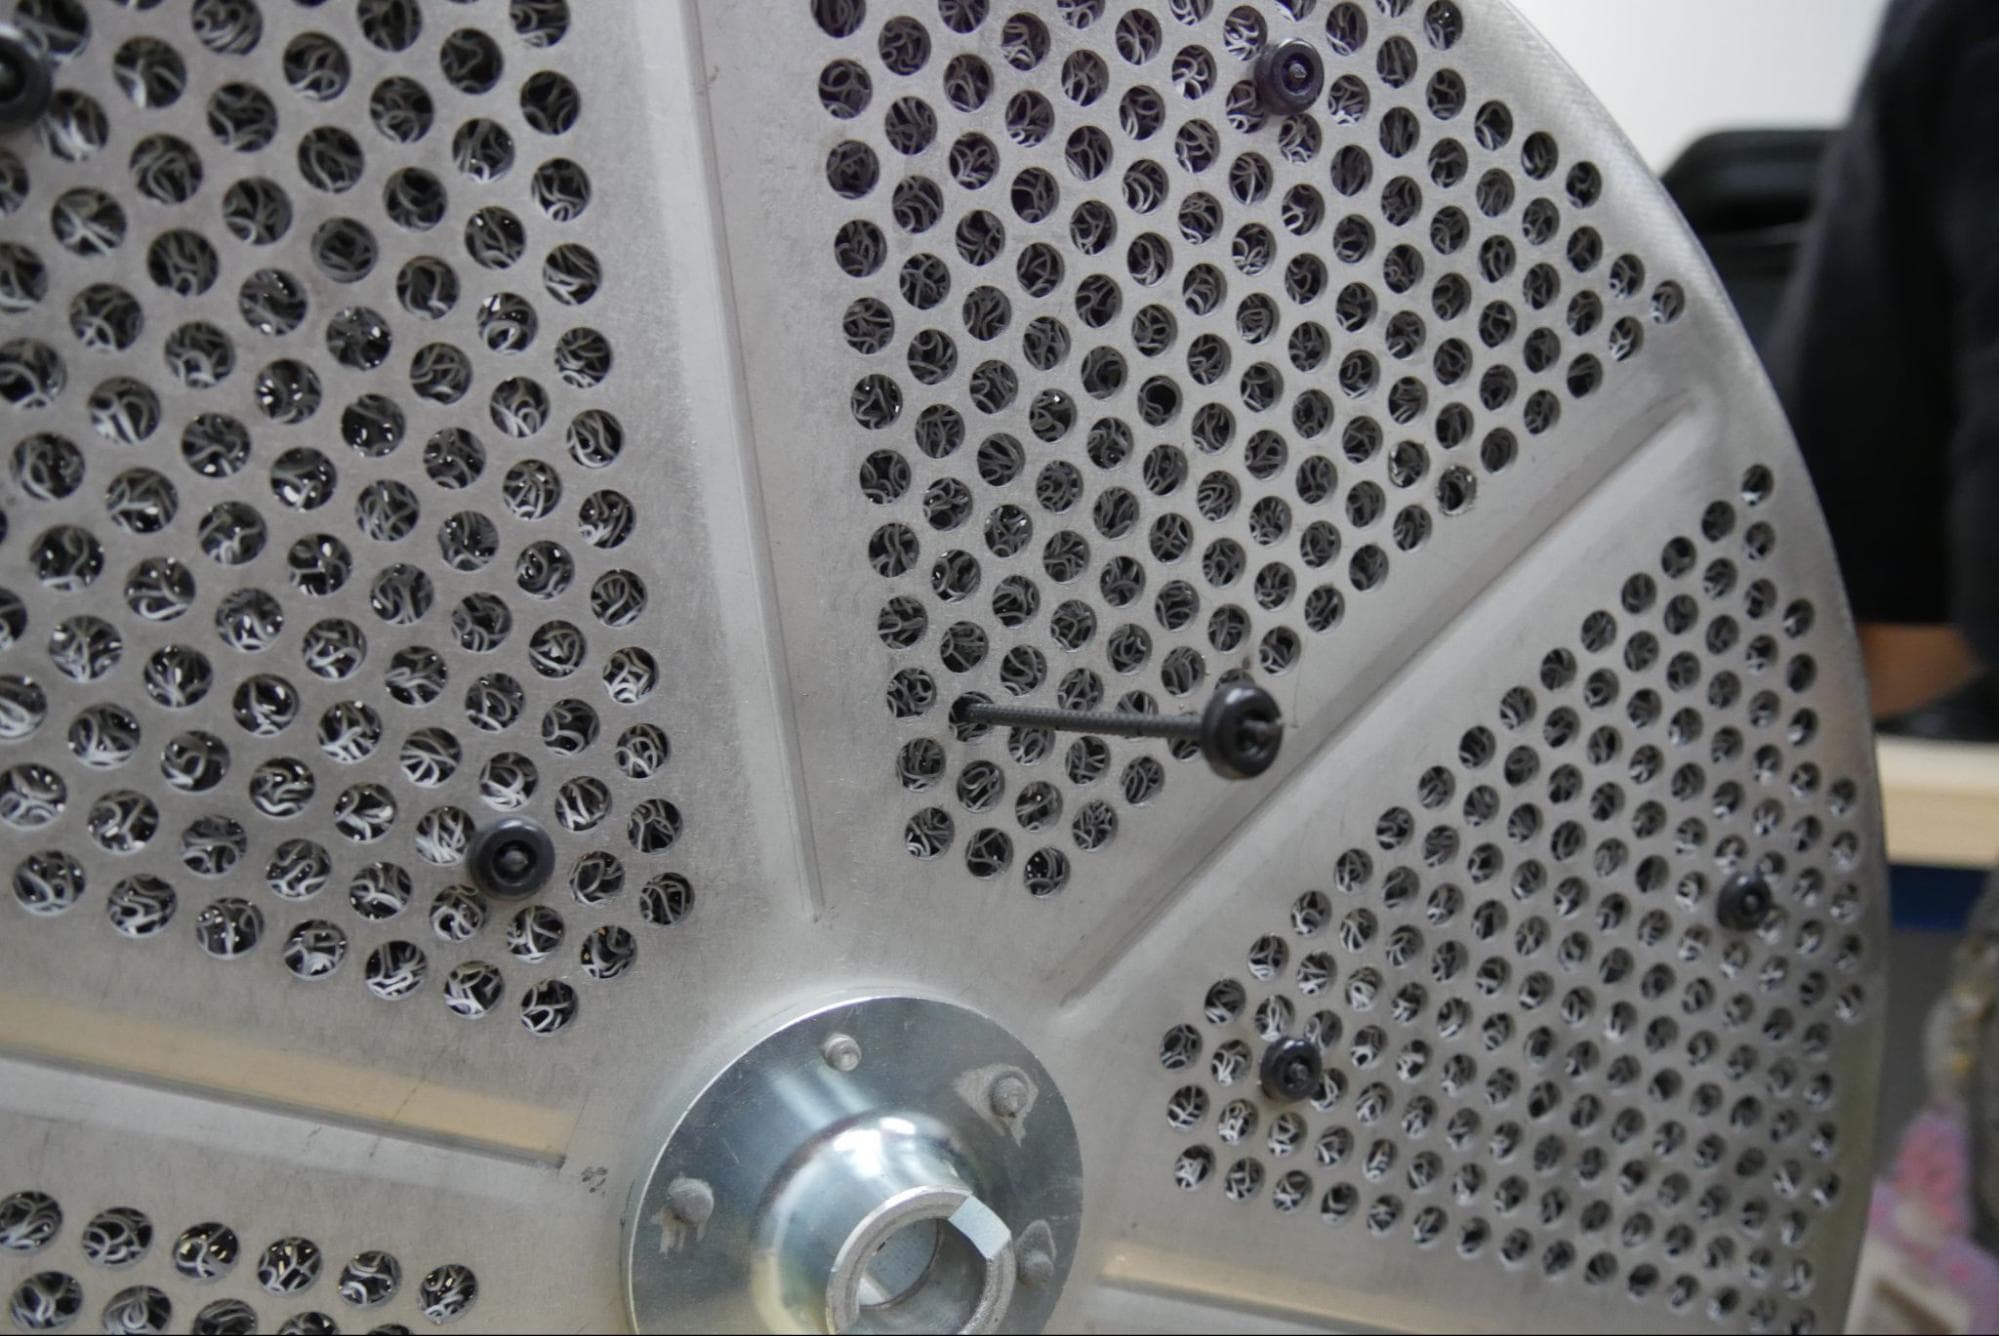
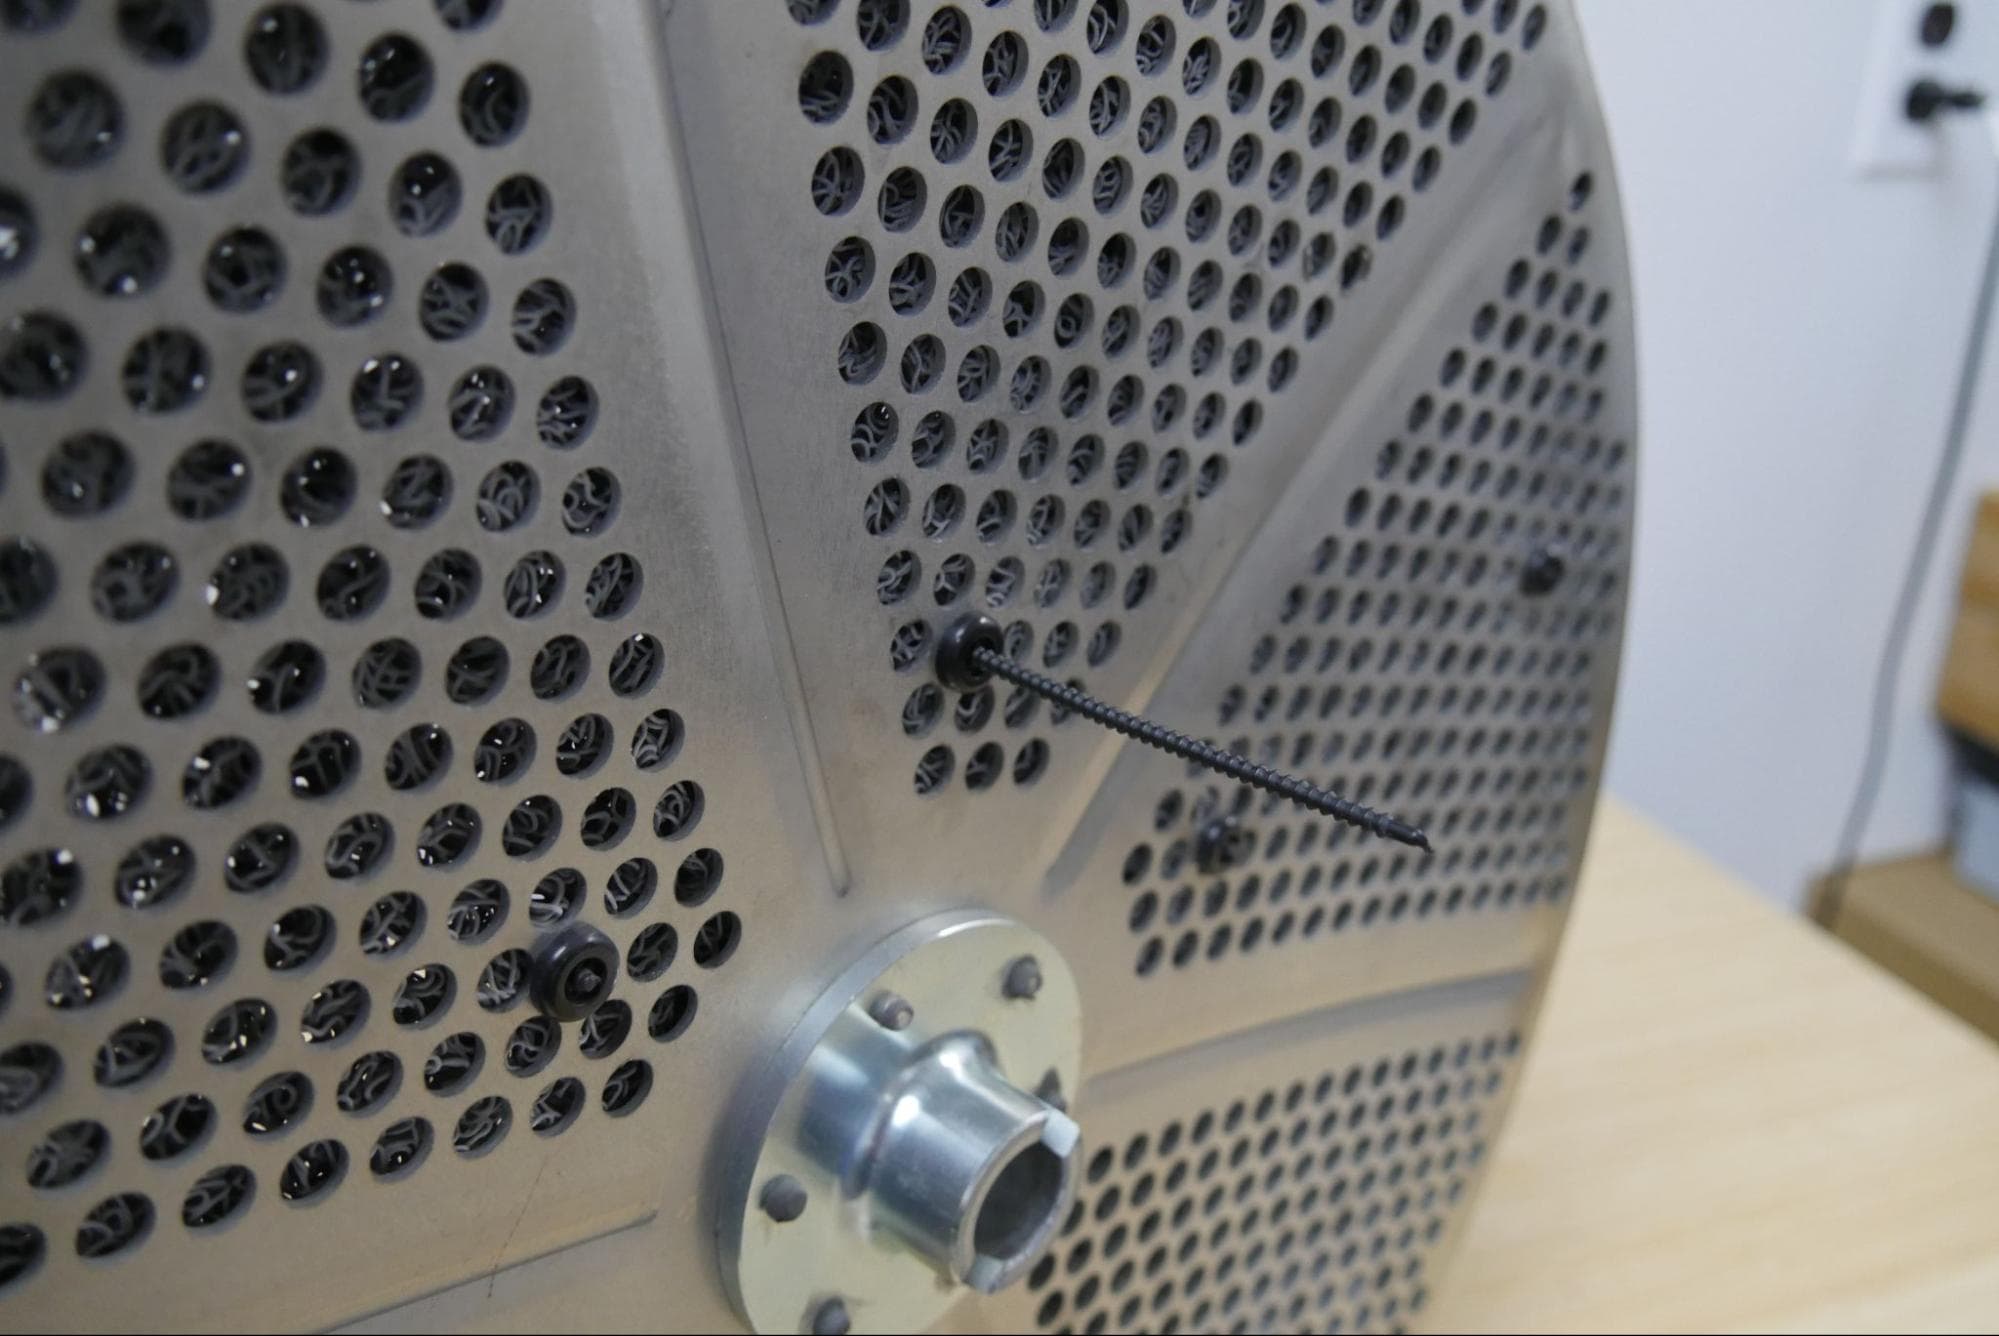
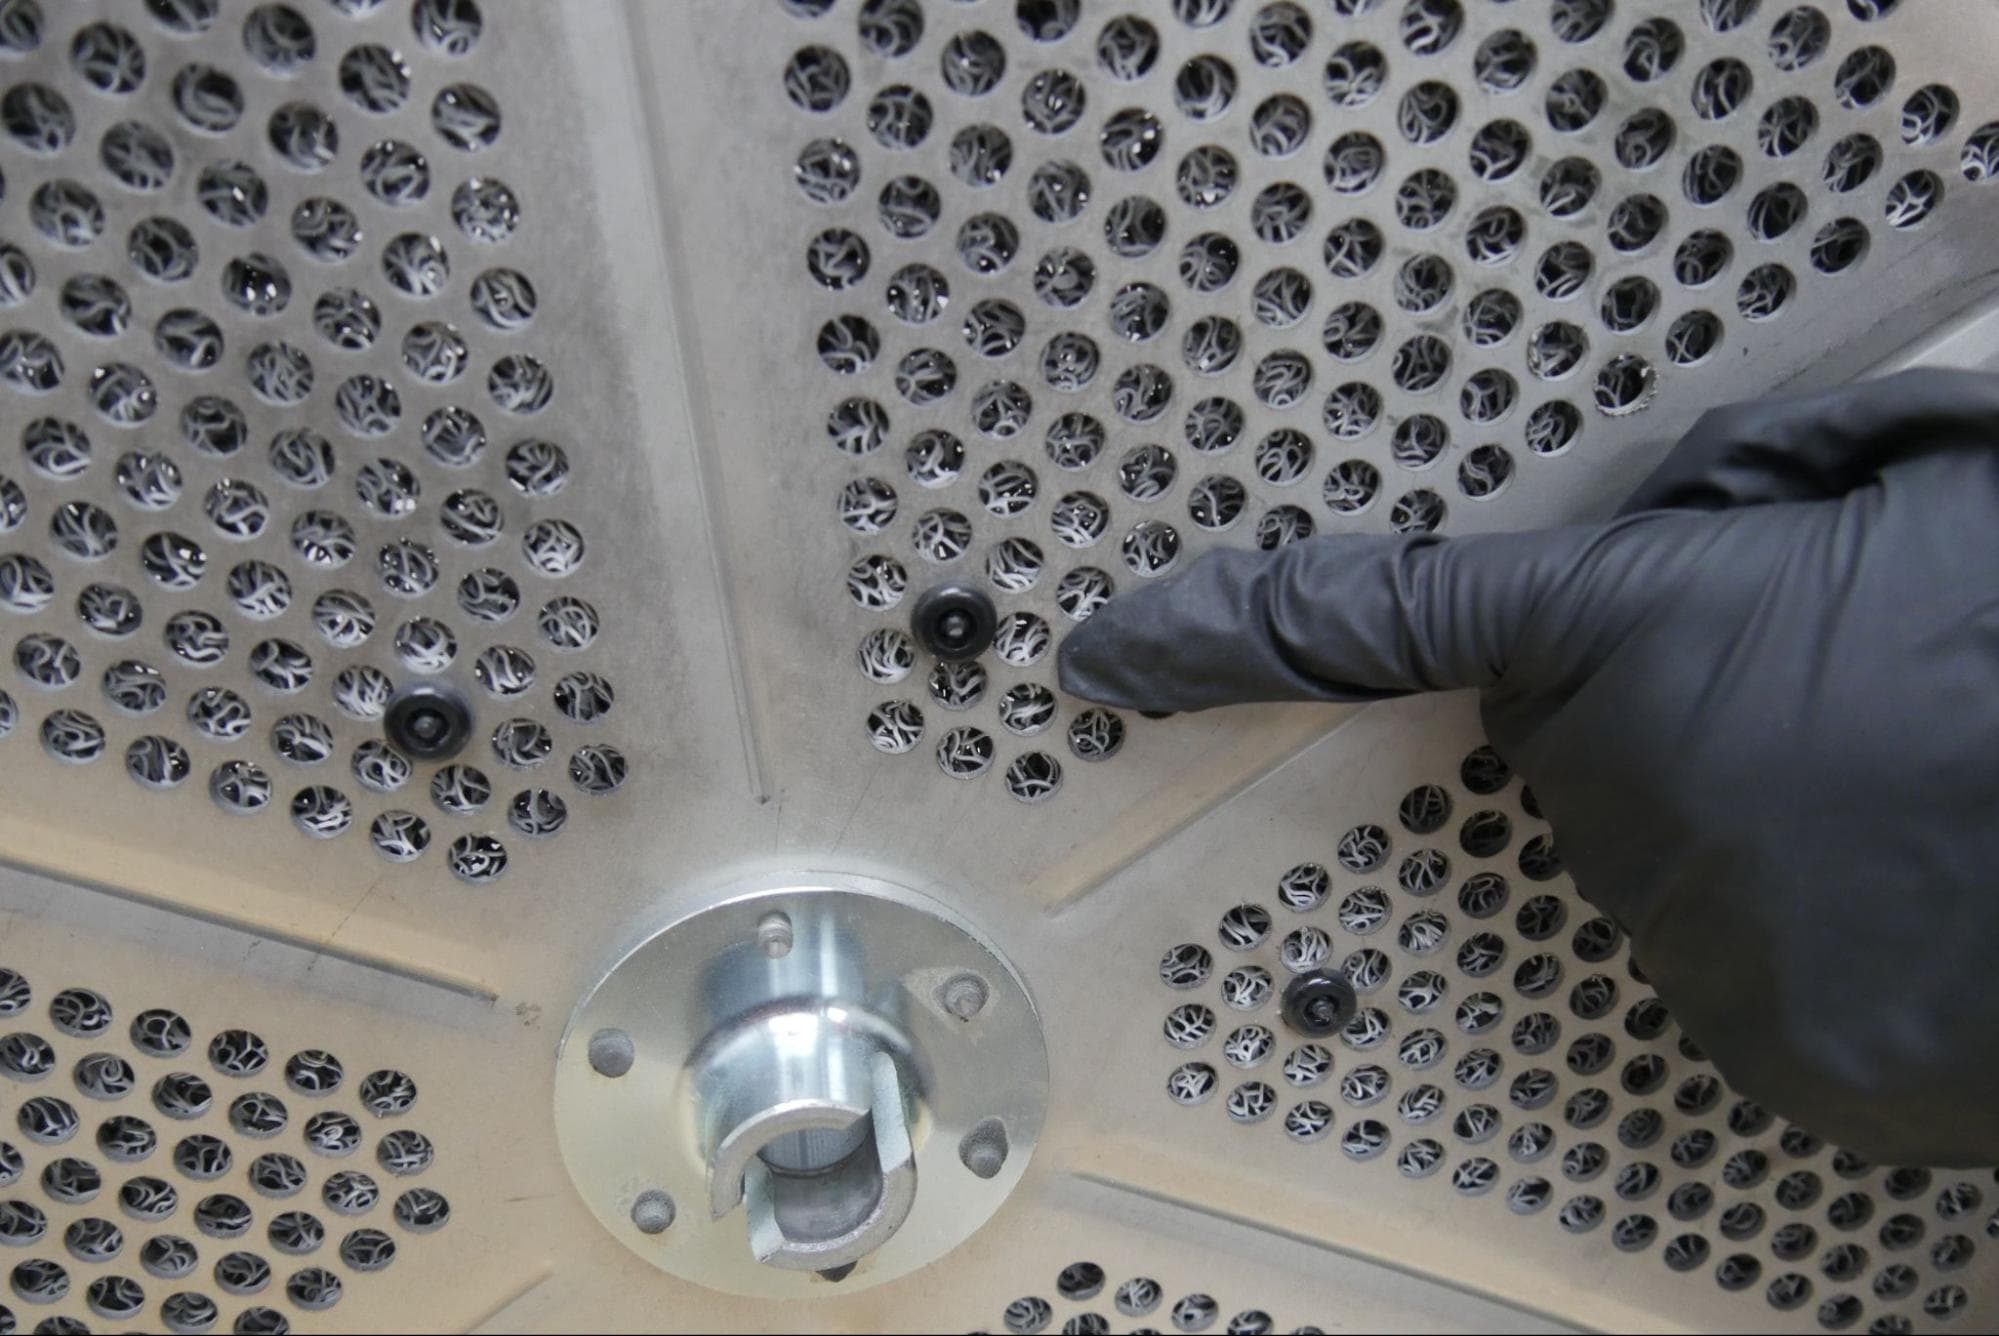
For each of the 12 rivets, separate the rivet shank from the attached washer. Push the long shank of the rivet through the liner and basket from the inside. Capture the rivet with the matching washer on the back outside the basket and pull tight with pliers. Trim the rivet shank flush with the washer.
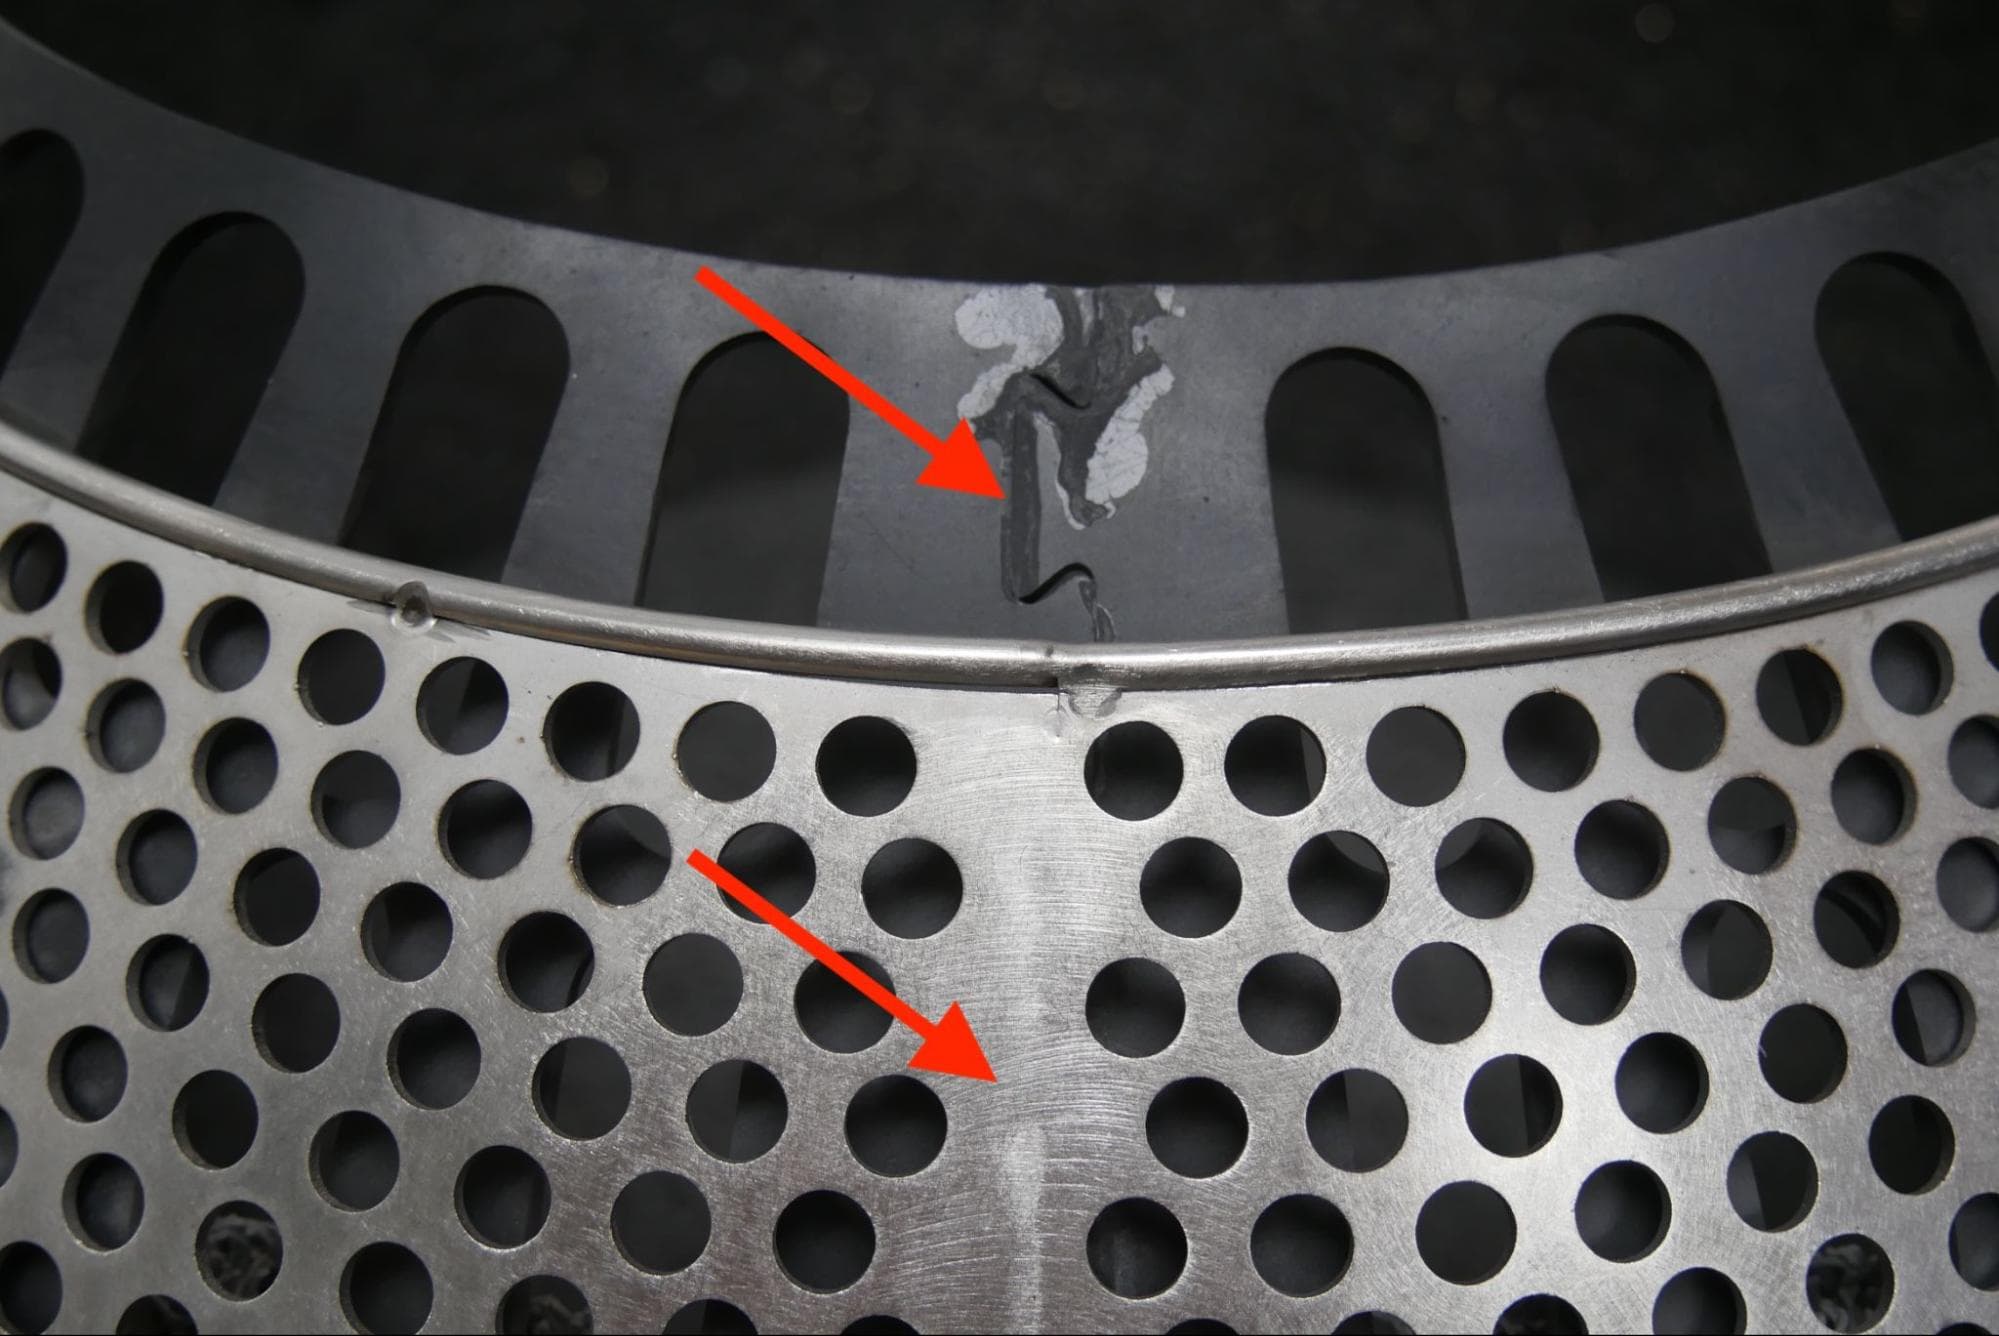
If you are replacing the liner cover, place it in the tumbler basket against the inner face of the conical lip. Align the seam in the liner cone with the welding seam at the bottom of the basket. Align the bottom of the liner with the transition from the conical basket lip to the cylindrical basket wall.
Step 4: Secure the liner cone (optional)
The liner cone is secured with eight or nine push-in rivets with ribbed shanks, depending on its date of manufacture. The liner cone has pre-cut holes for these rivets.
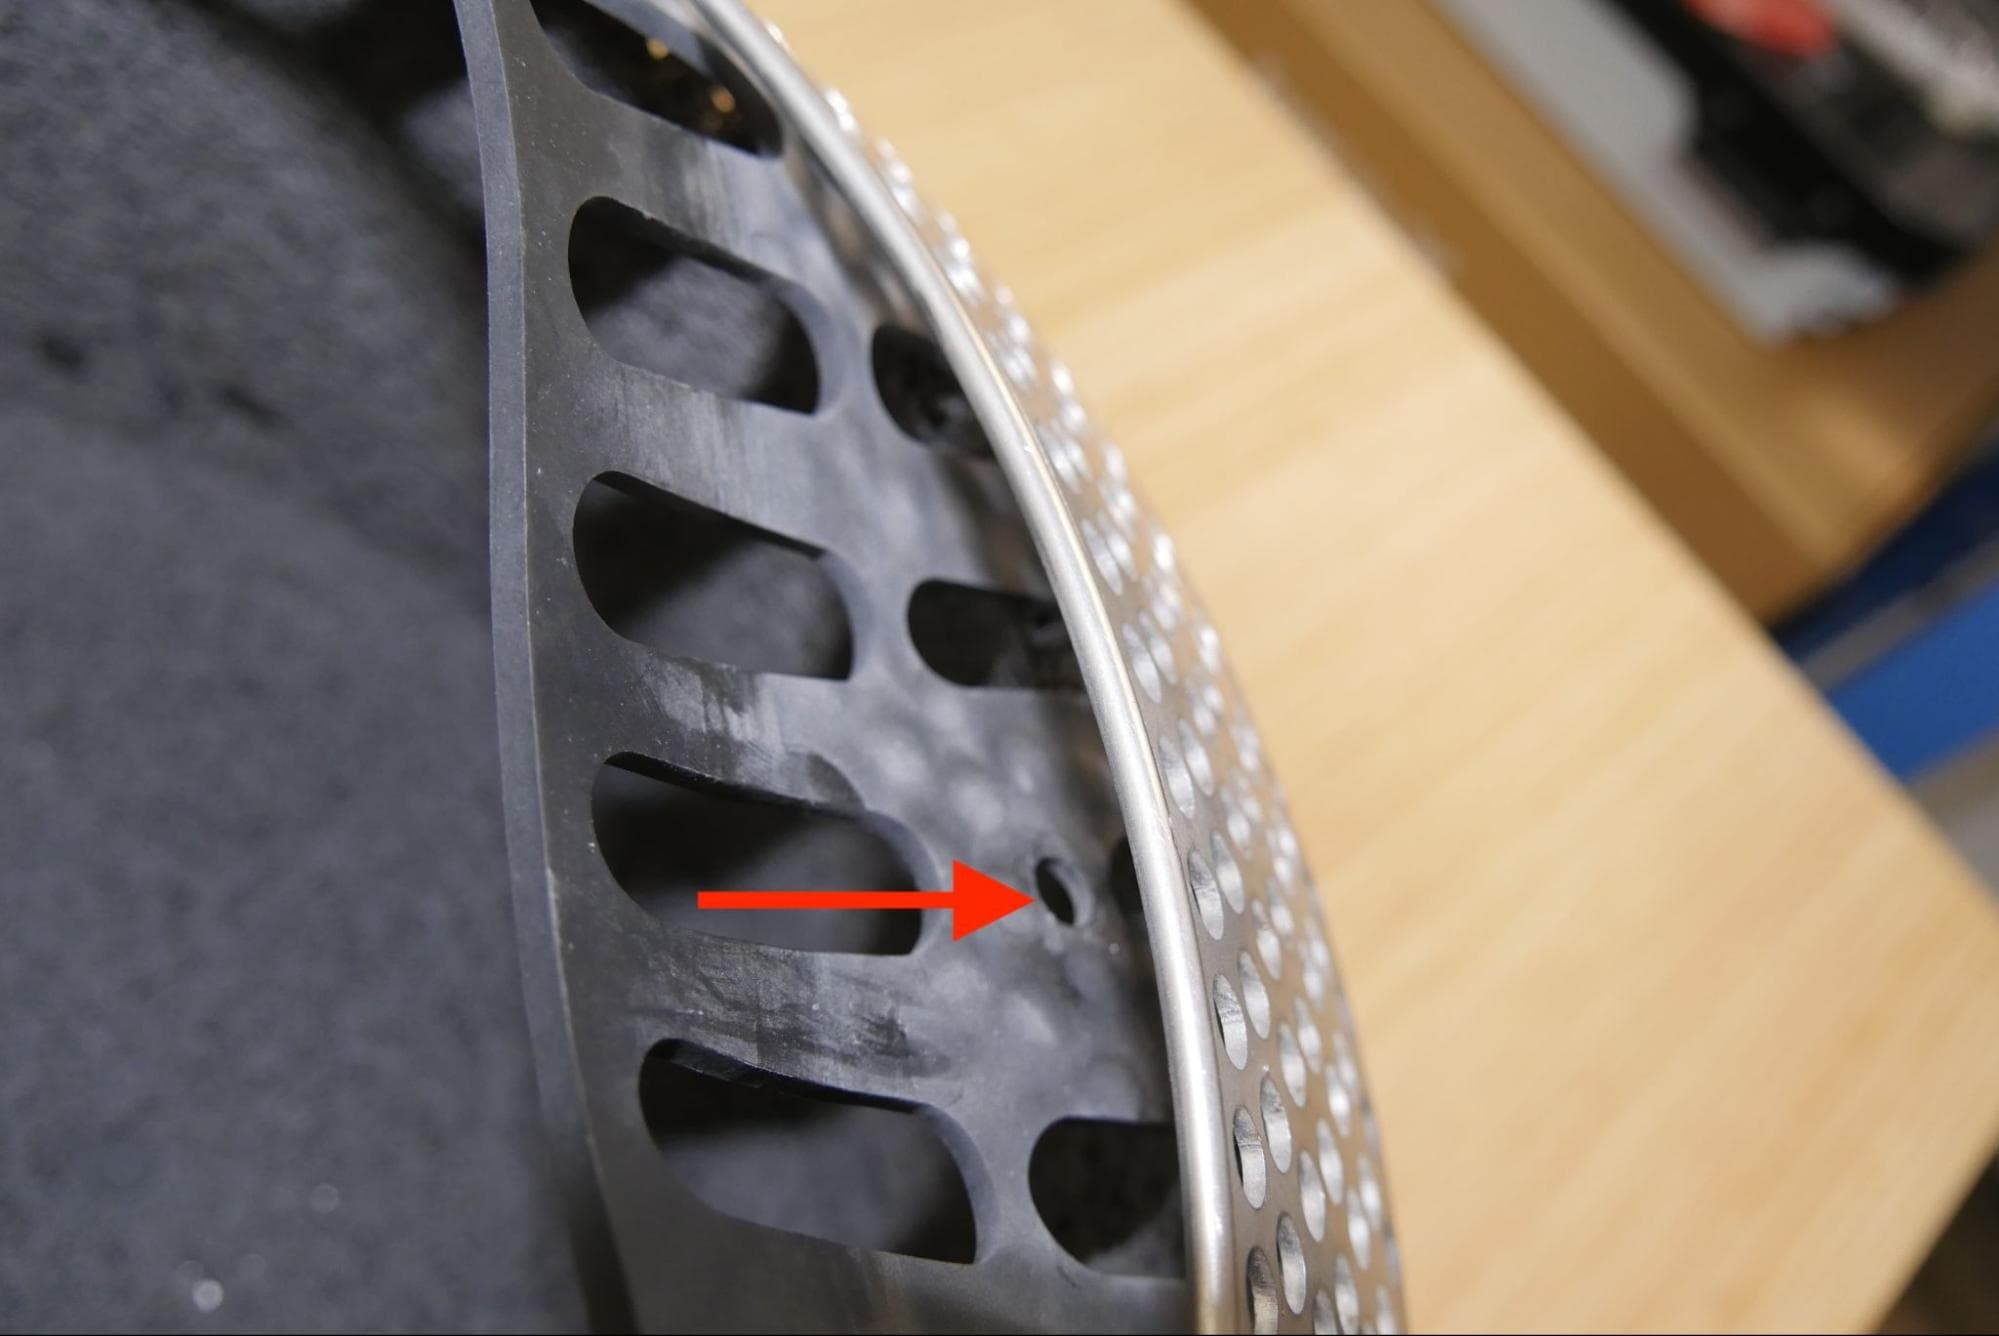
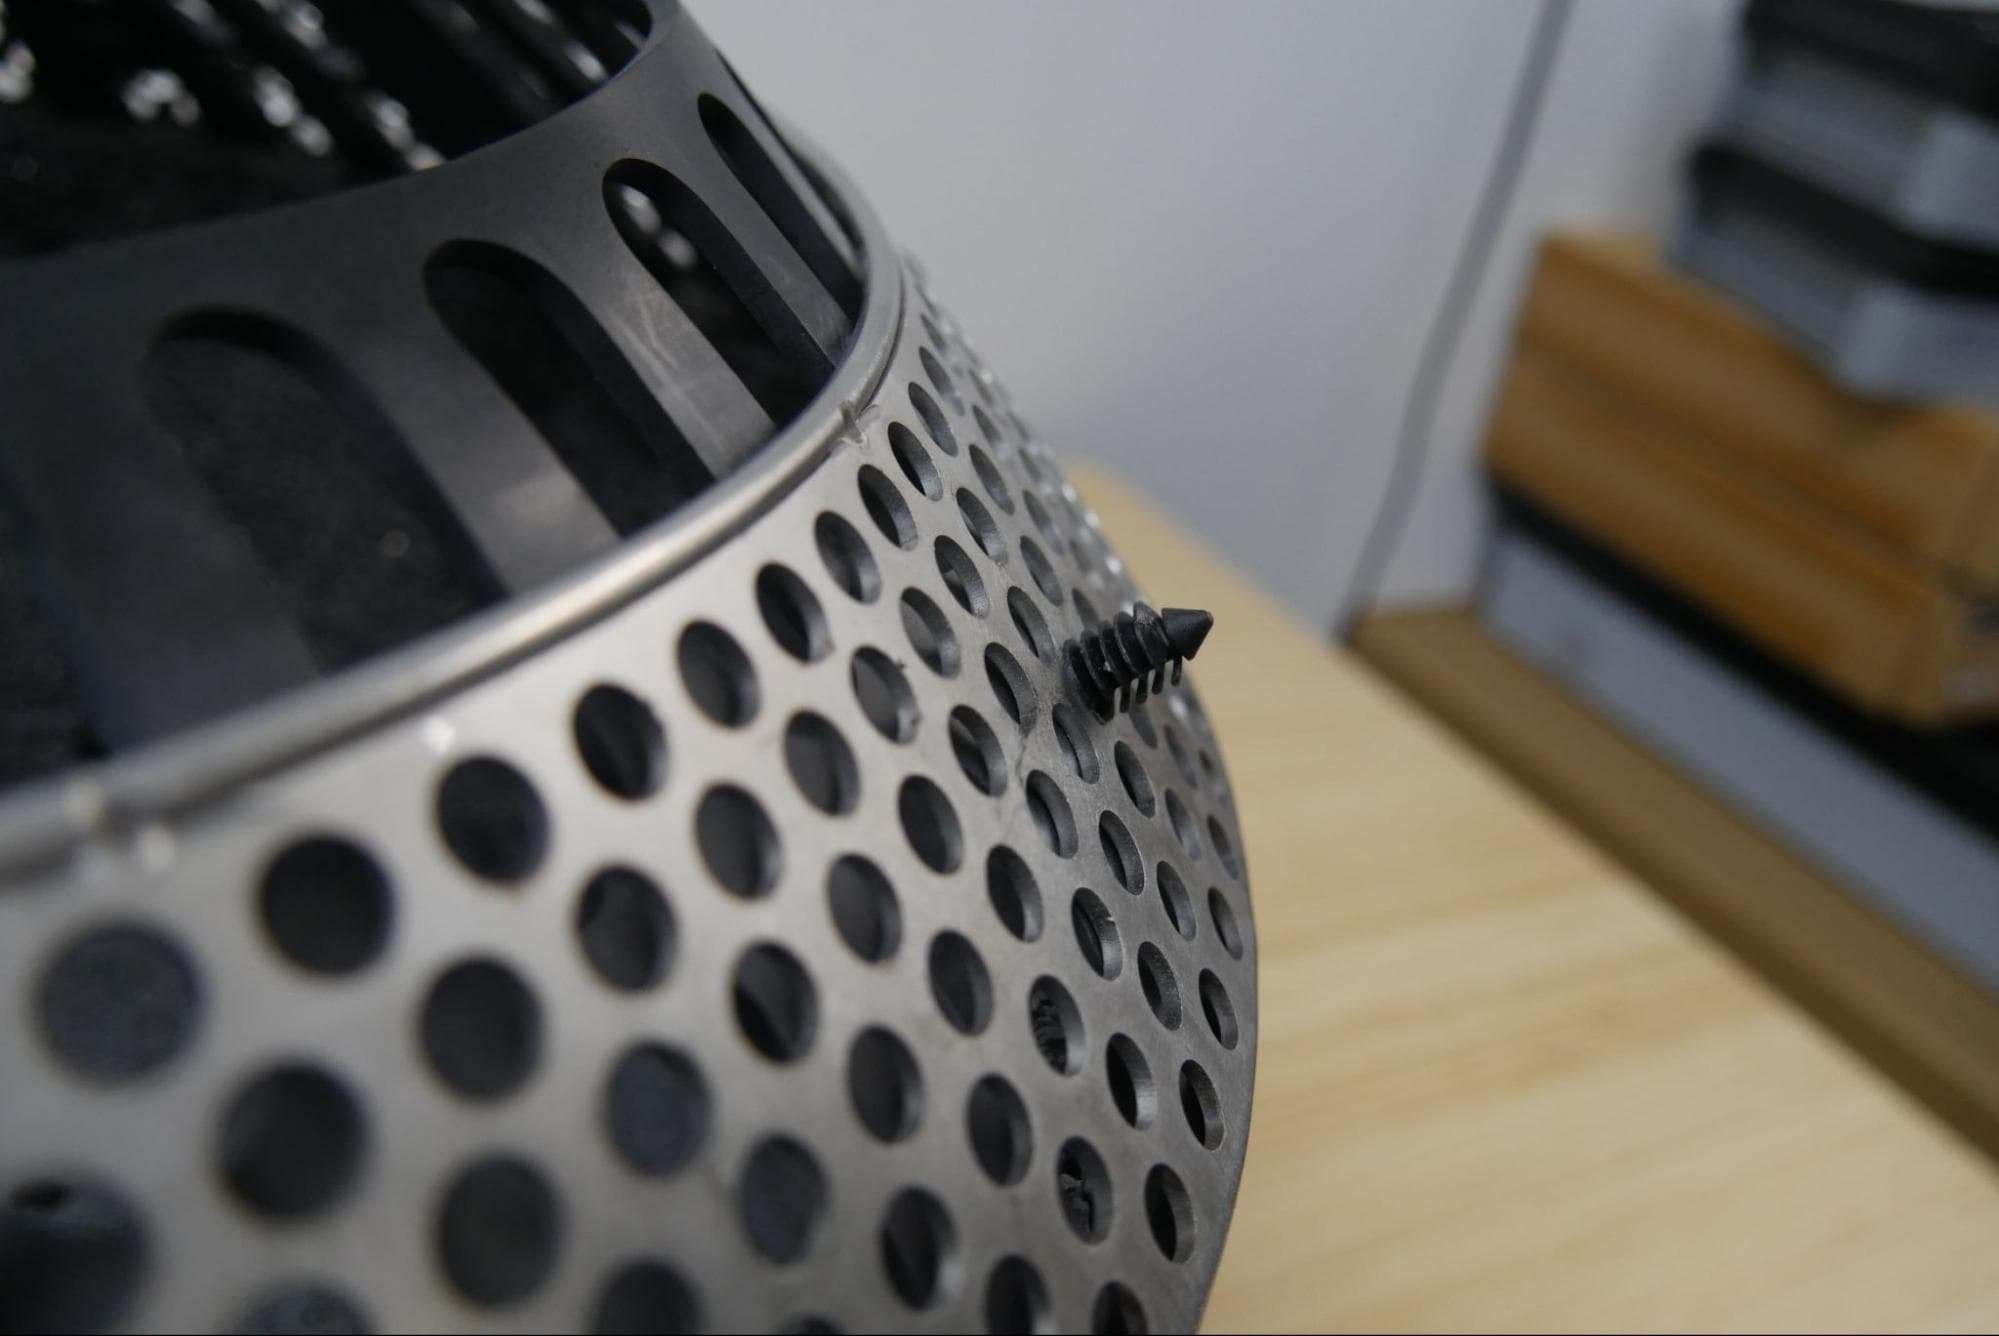
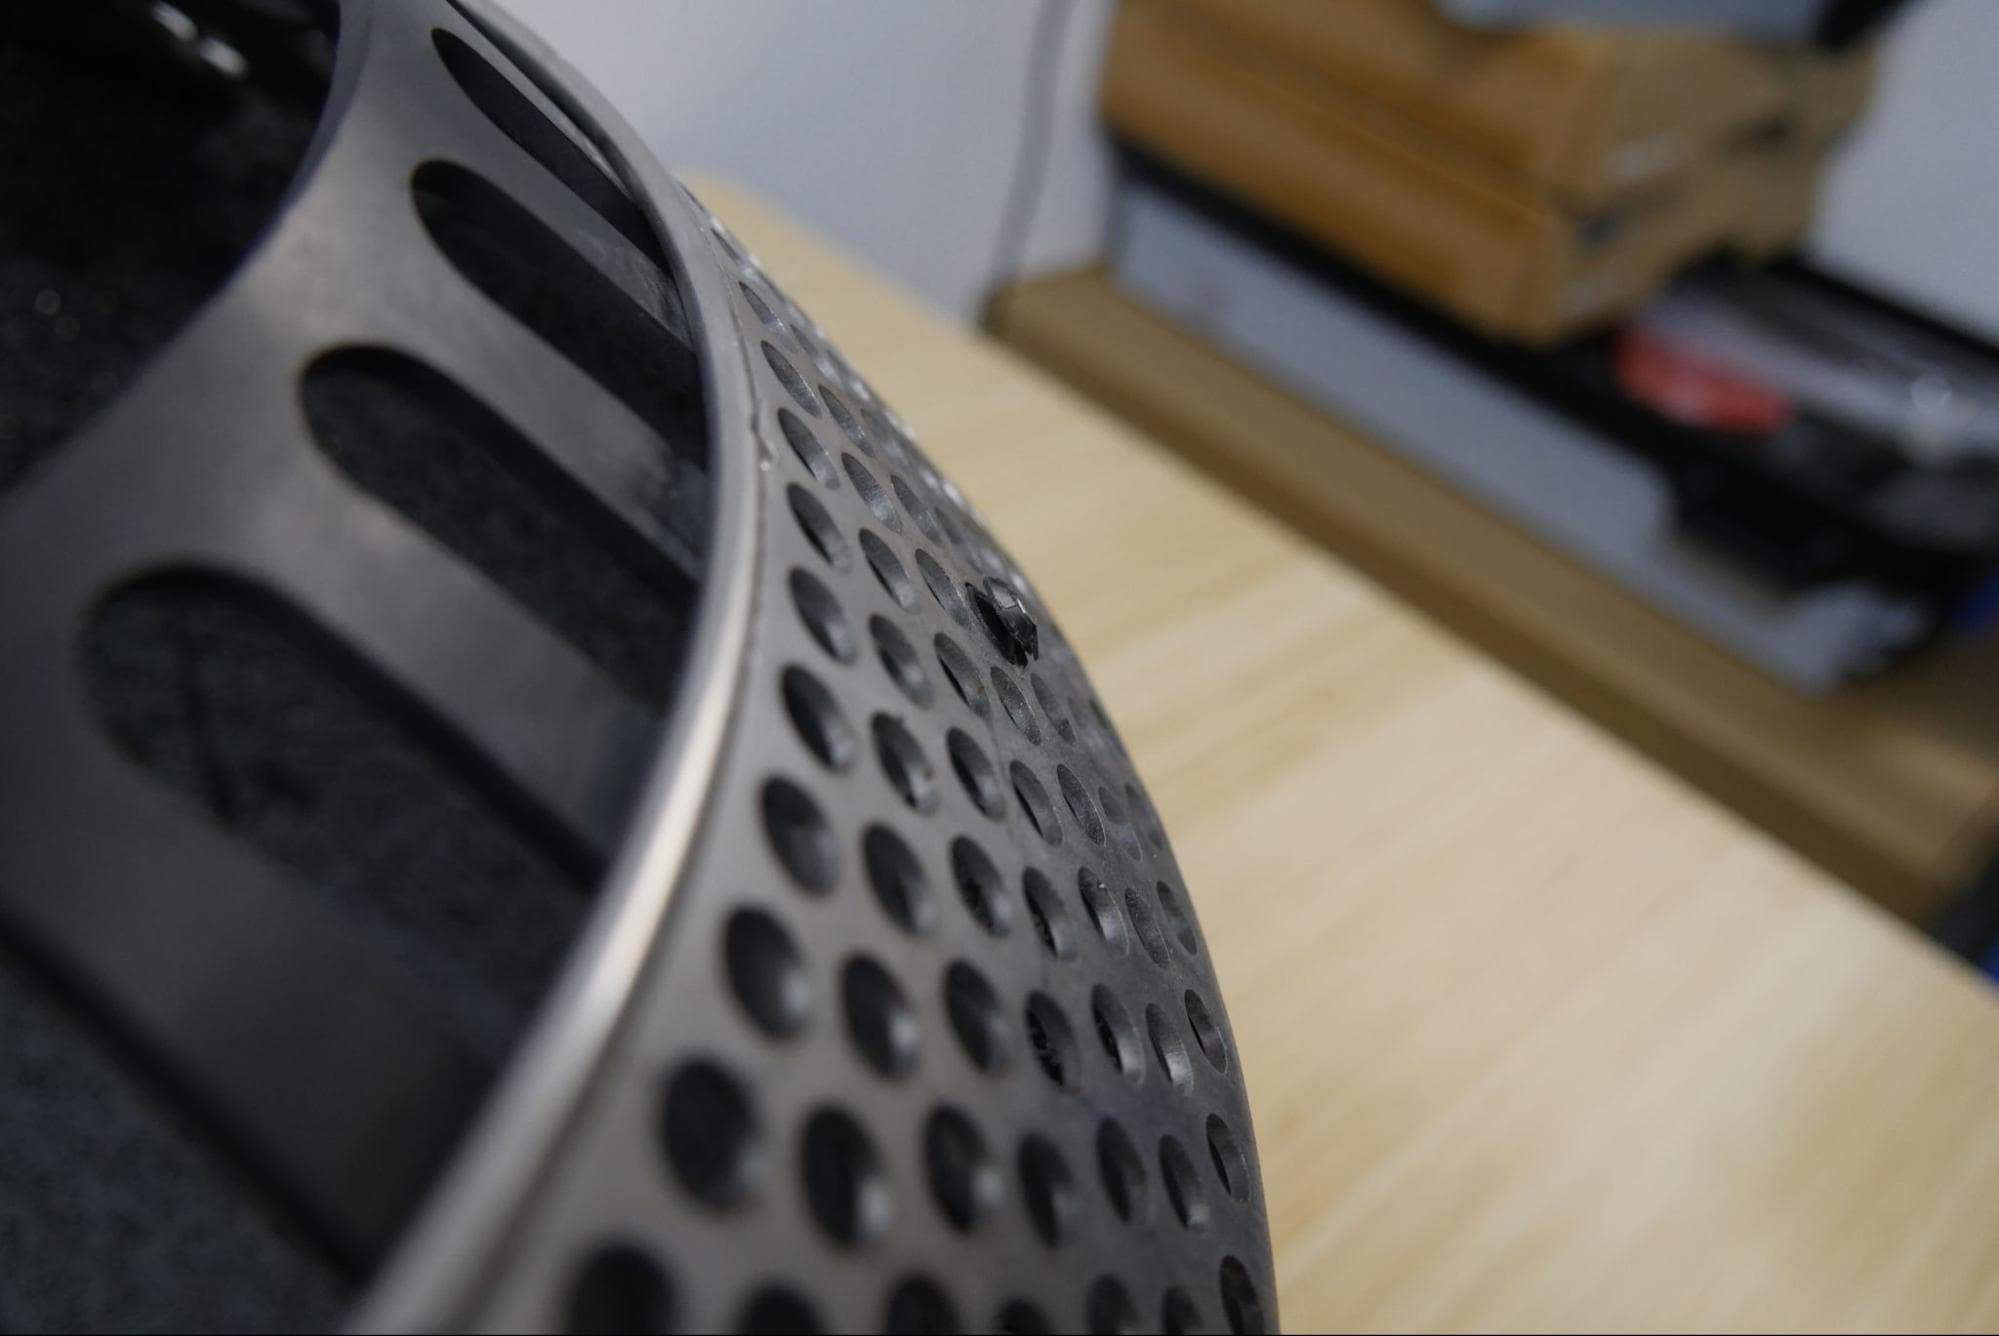
Locate one of these pre-cut holes. Push one of the larger ribbed rivets through the hole from the inside of the liner. Push the rivet out through one of the holes in the basket on the third or fourth row down from the basket lip. Trim excess of the shank, leaving two ribs exposed. Do not trim the rivet flush with the basket, as it will not be able to stay in place.
Continue counterclockwise around the cone, inserting a rivet into the remaining holes in the liner. If the rivets do not align perfectly with the holes in the basket, stretch the liner slightly.
Step 5: Mount the cylindrical liner
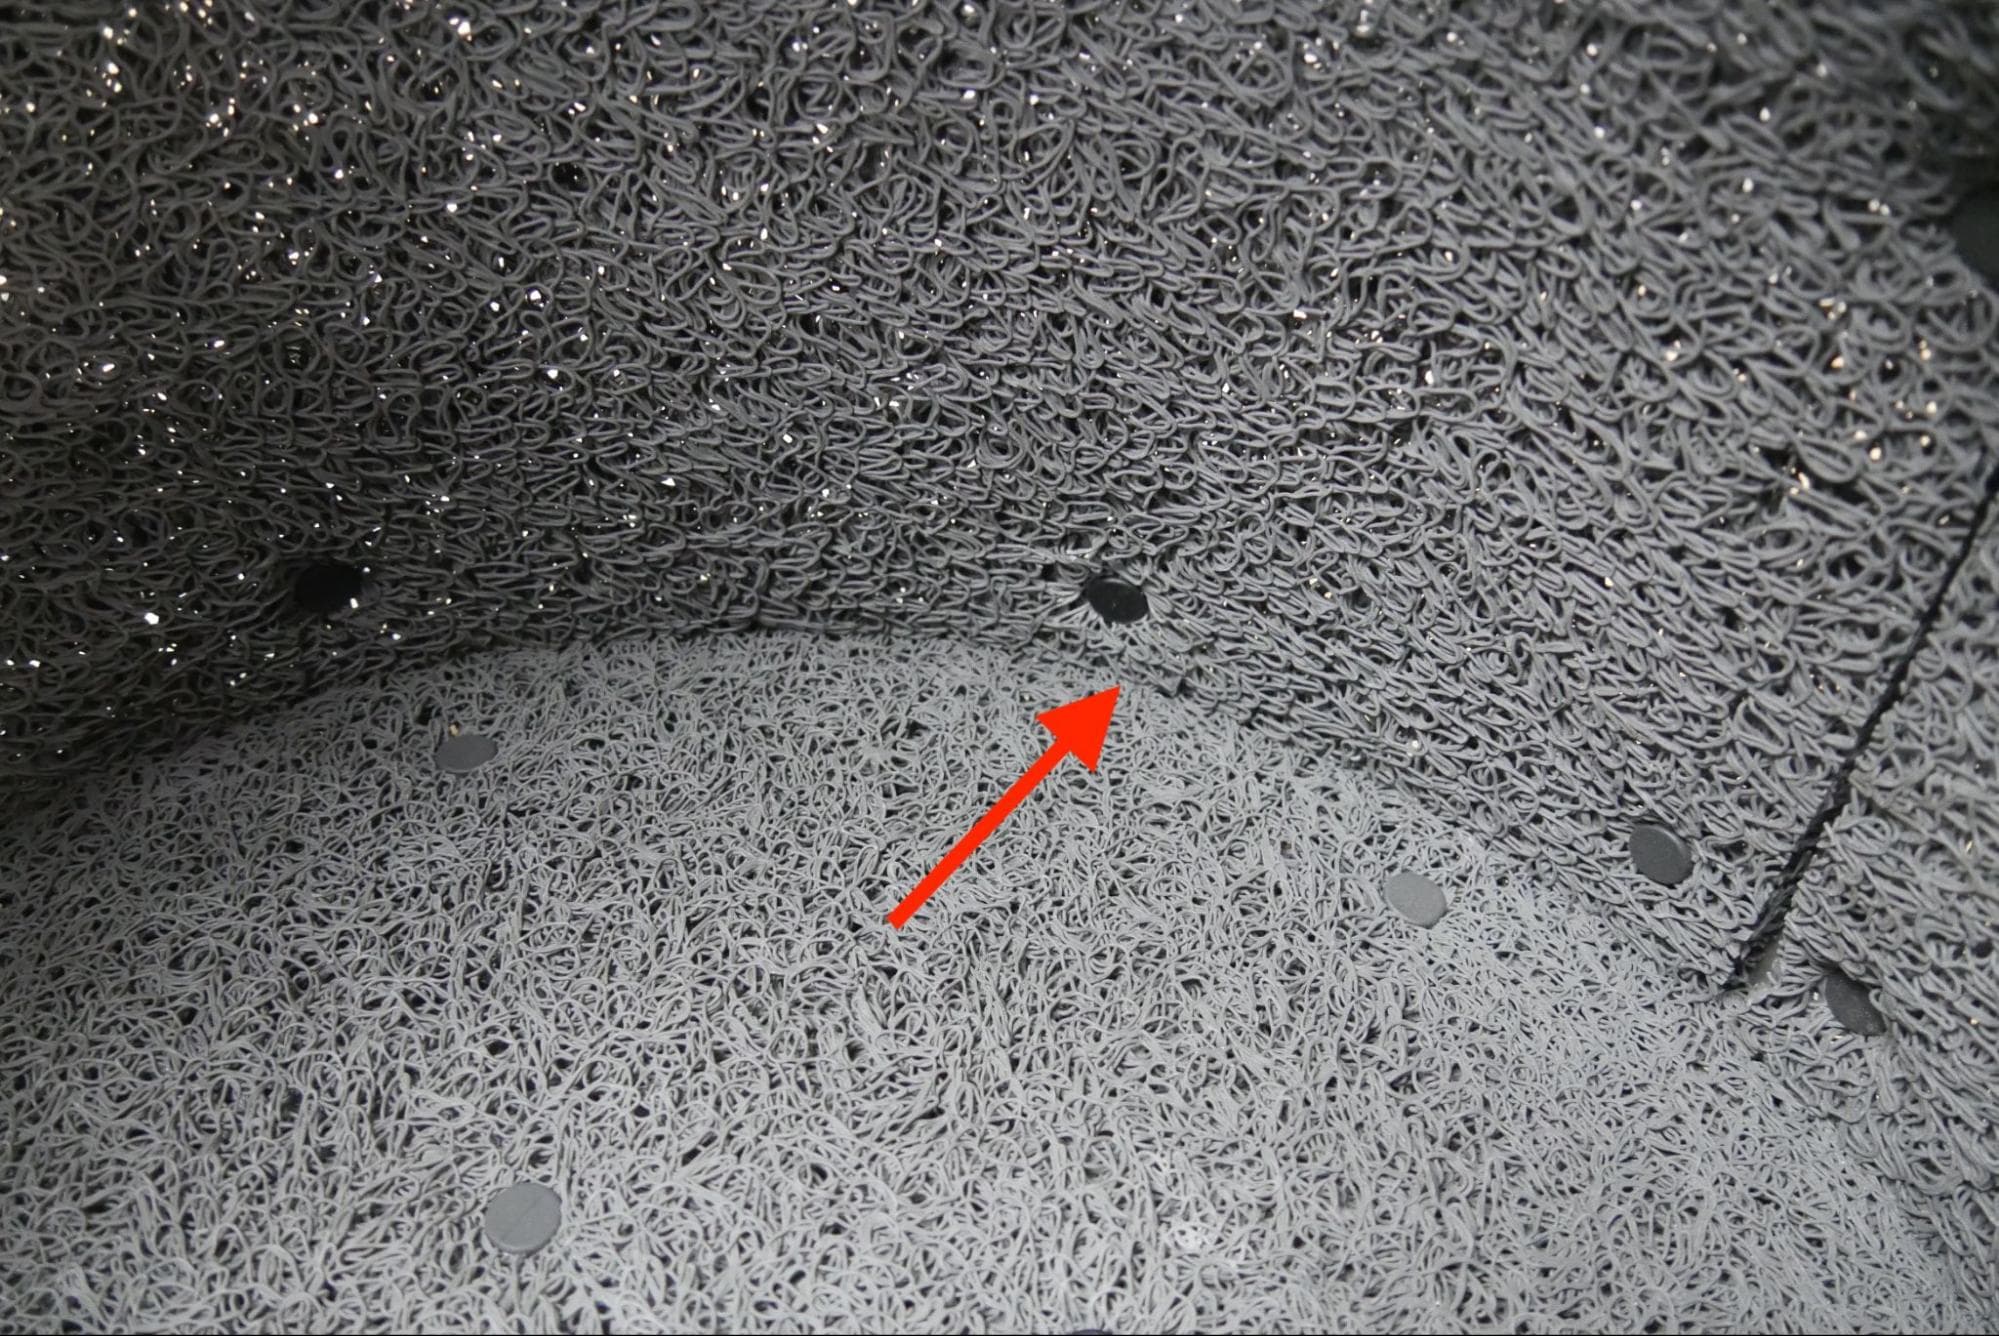
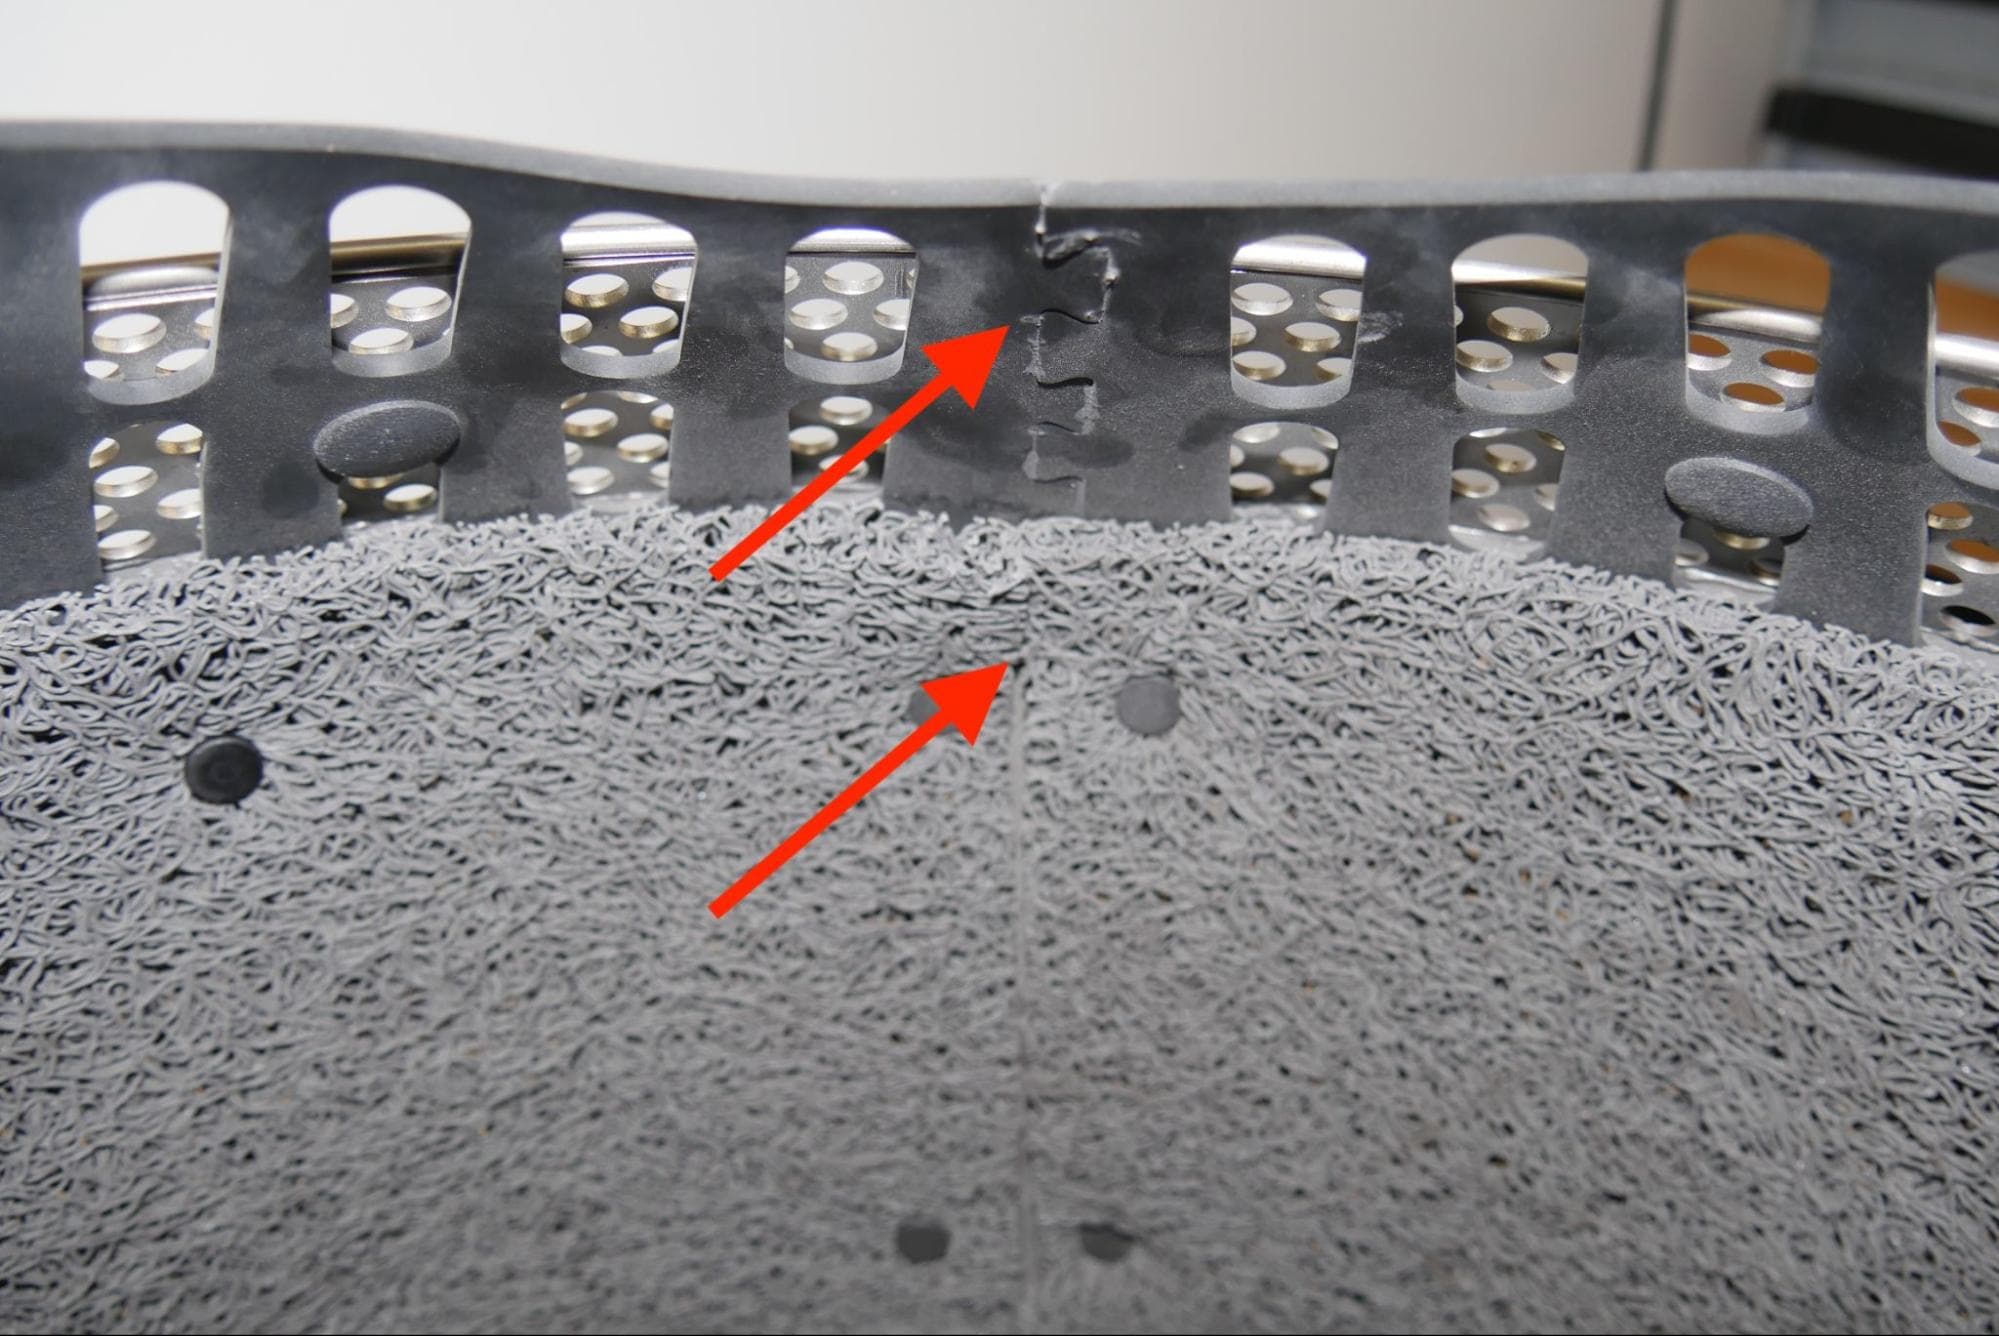
Place the cylindrical liner around the inner circumference of the basket. Align the seam in the cylindrical liner with the seam in the liner cone. Press the lower edge of the liner flush against the circular base liner.
Step 4: Secure the cylindrical liner
The cylindrical liner is held in place with 22 two-piece push-in rivets. To best secure the cylindrical liner to the tumbler basket, space the rivets evenly around the liner as shown here, with 11 rivets close to the circular base liner and 11 close to the liner cone.
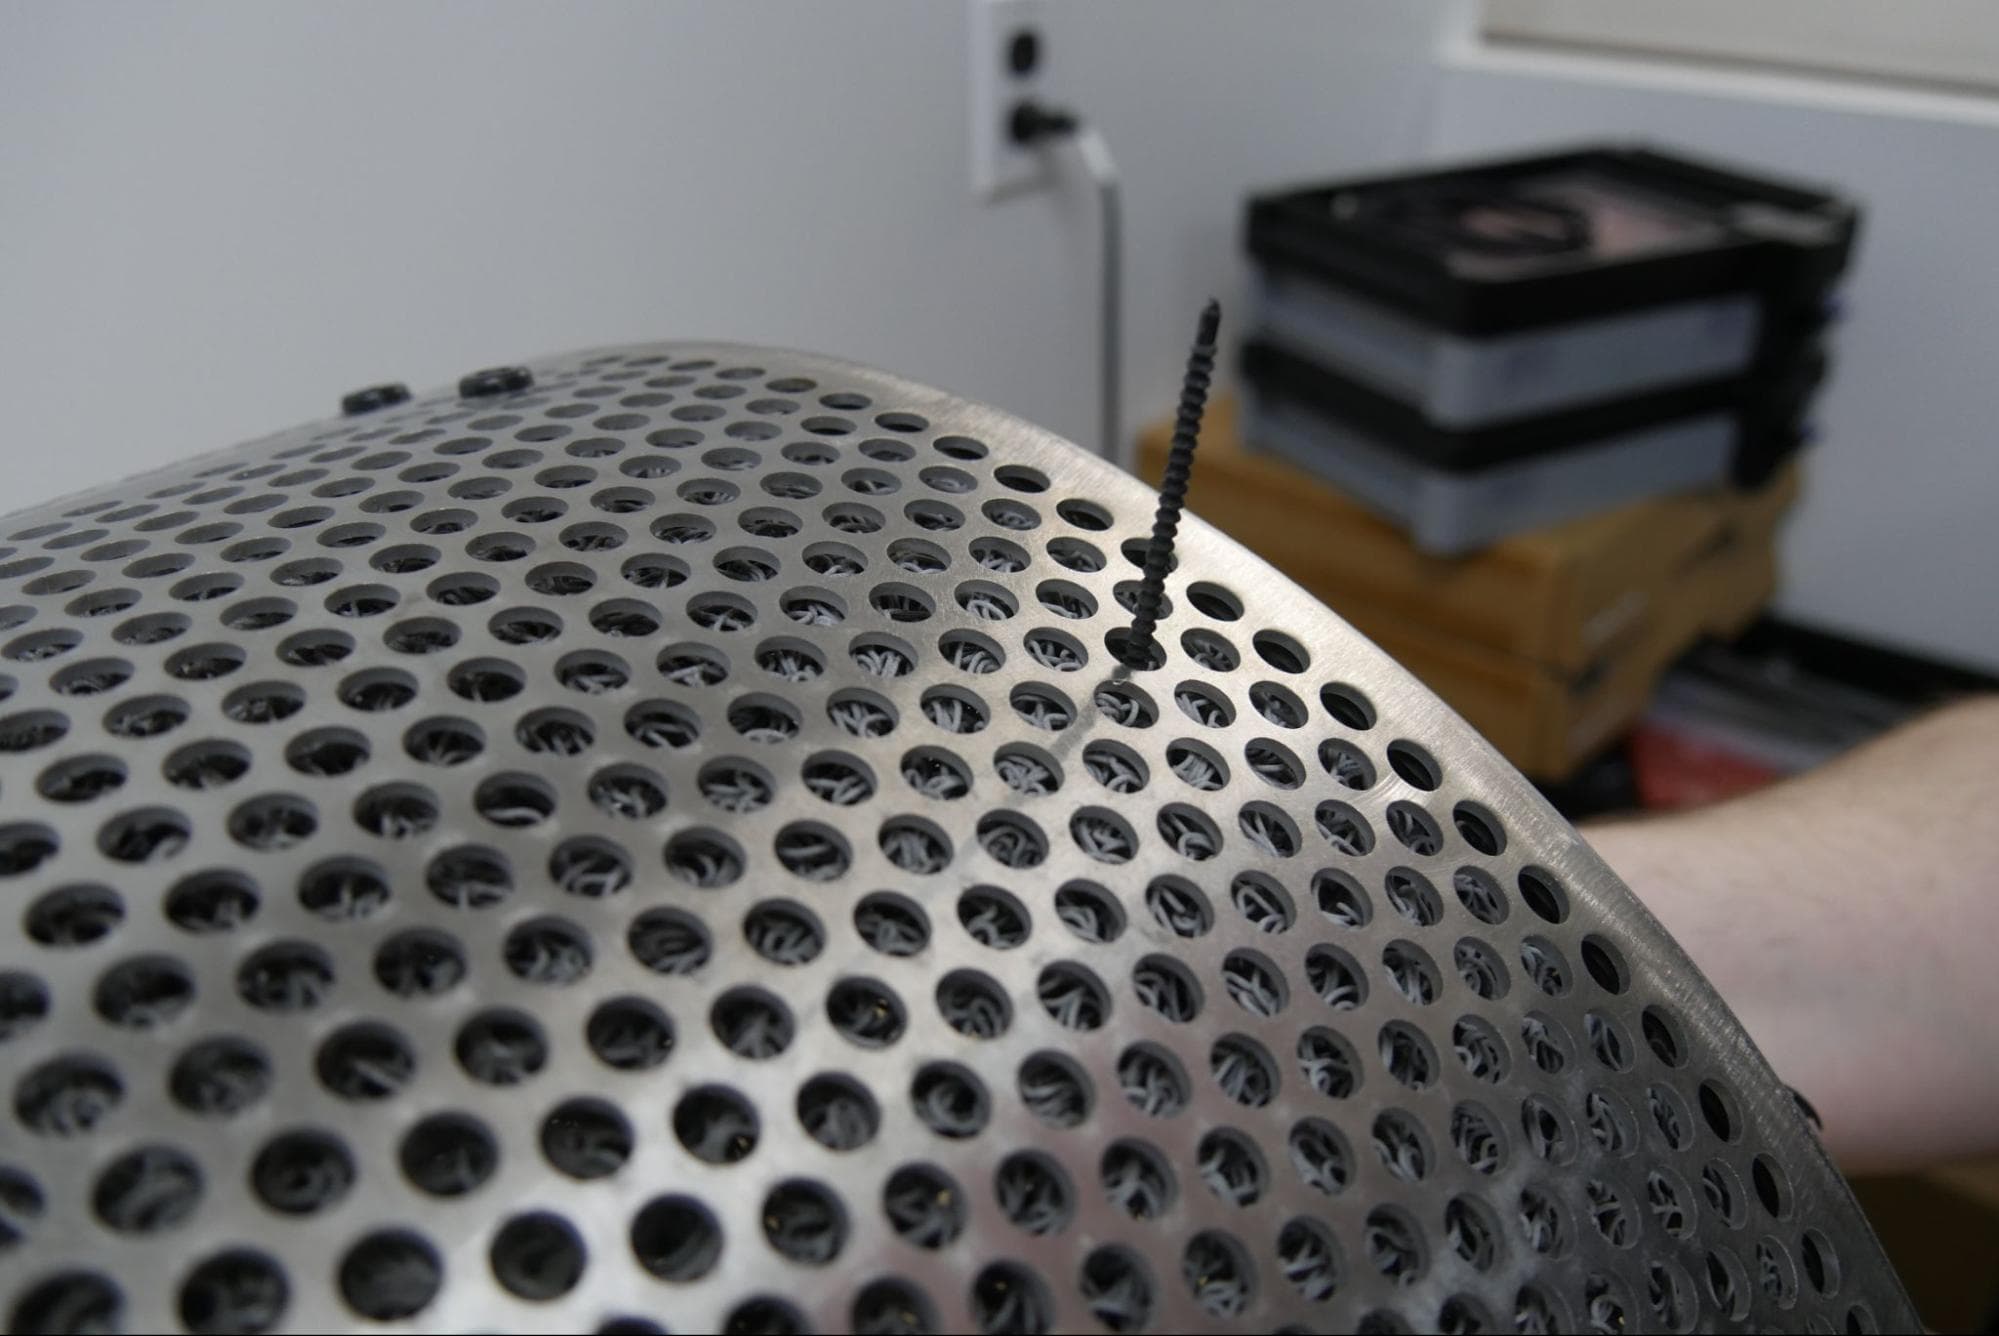
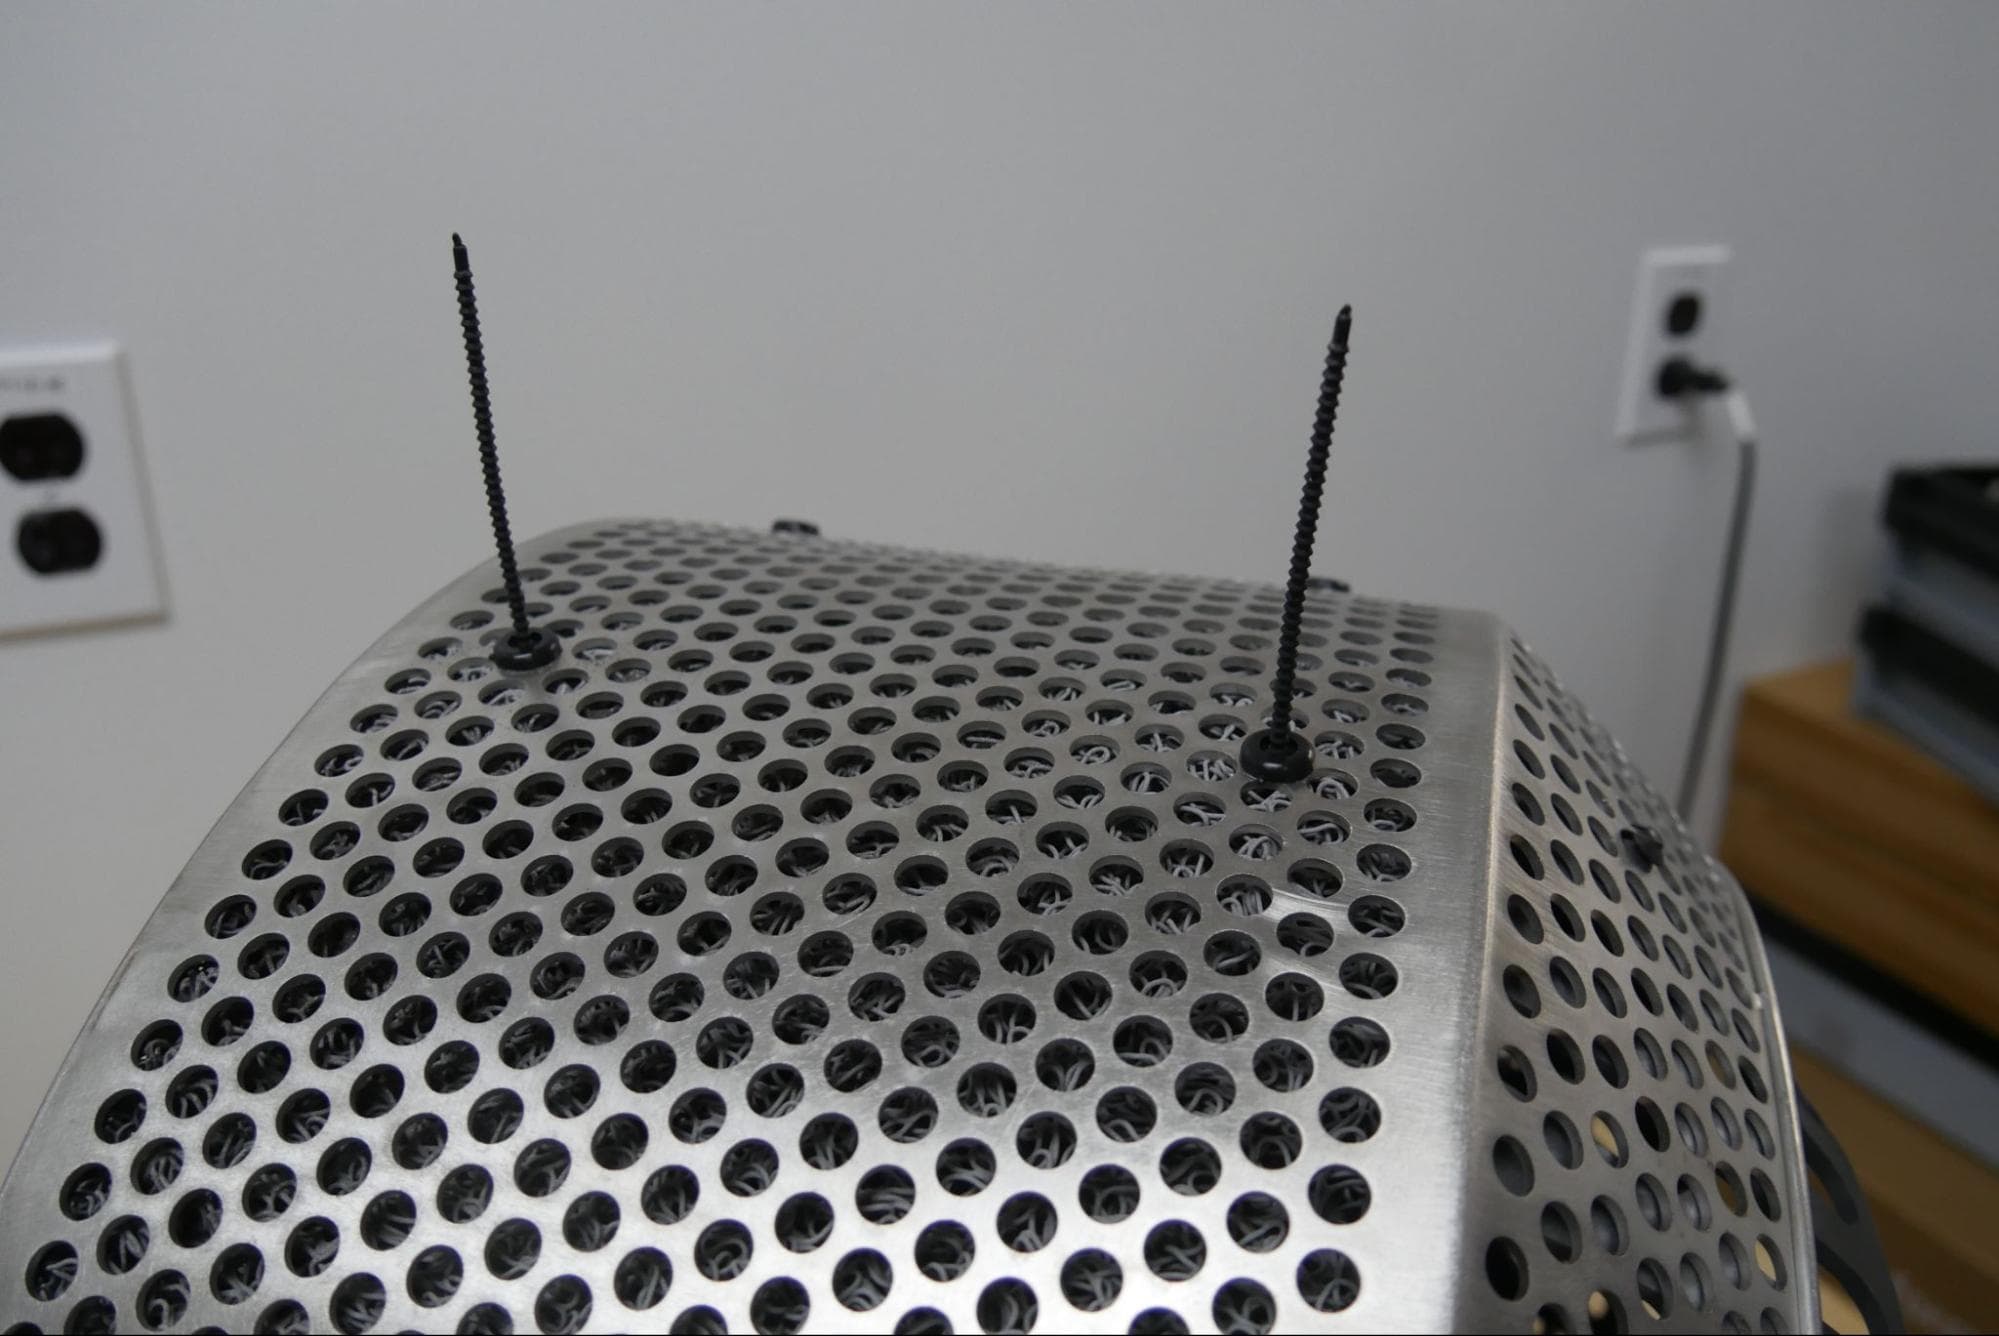
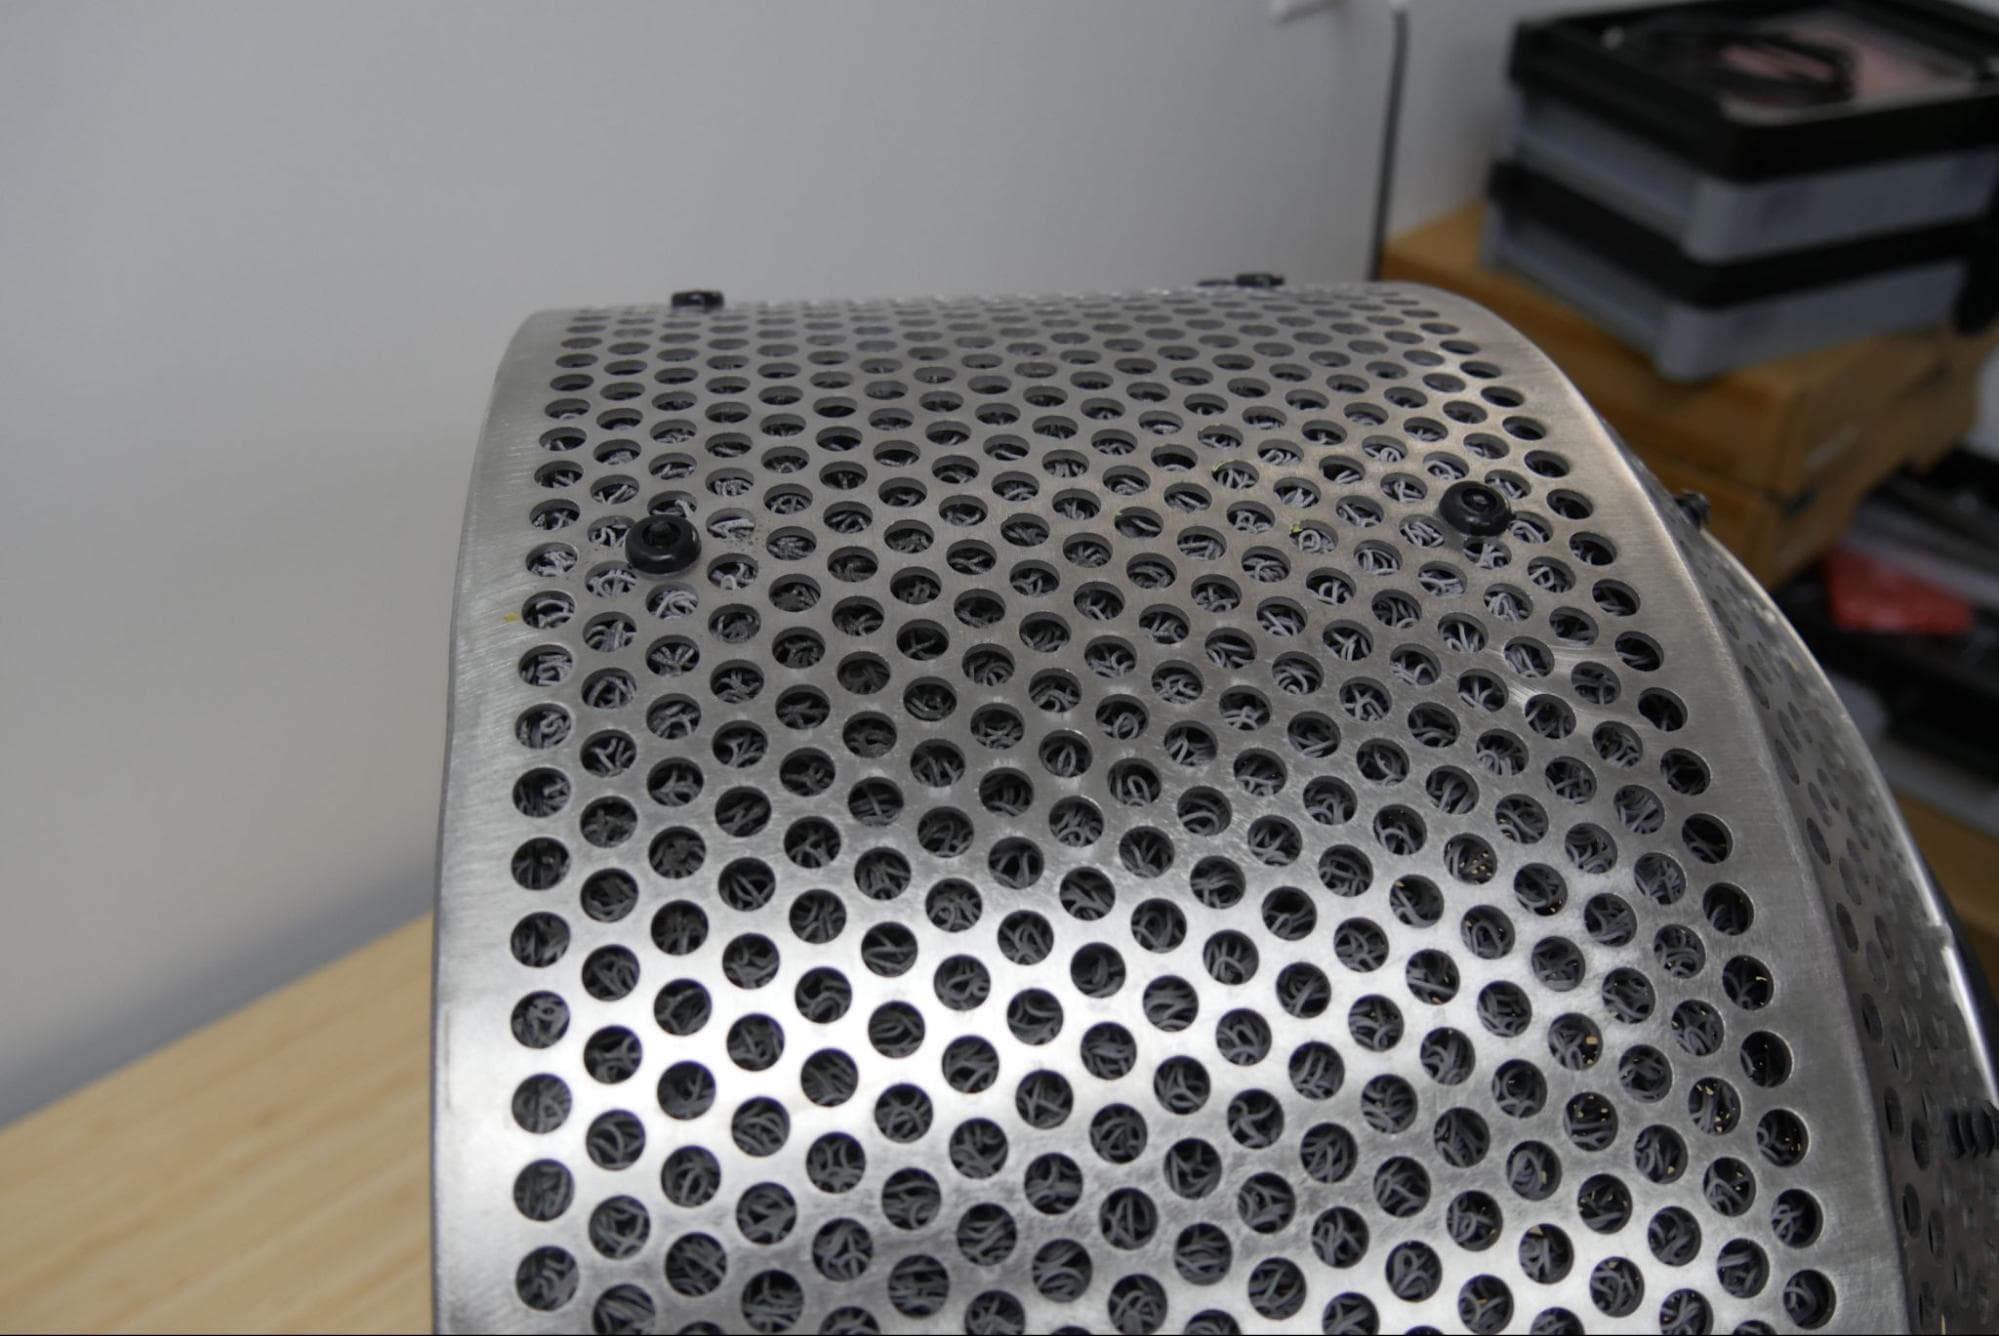
For each of the 22 rivets, separate the rivet shank from the attached washer. Starting close to the liner seam, push the long shank of a rivet through the liner and basket from the inside. Capture the rivet with the matching washer on the back outside the basket and pull tight with pliers. Trim the rivet shank flush with the washer. Continue around the liner until it is fully secure.
Tip:
The liner kit comes with extra rivets if you feel they are needed to fully secure the liner.
Finalizing the repair
Overview: After installing the basket liner, reinstall the tumbler basket in the Fuse Blast.
Step 1: Install the tumbler basket
Using two hands, carefully slide the tumbler basket onto the tumbler basket shaft. Check that the basket is securely seated in place.
Step 2: Test the basket liner
Insert printed parts into the tumbler basket. Close the blast chamber door and start a blast cycle. Check that the liner stays in place throughout the blast cycle.