
Note:
If your computer is running Windows 7 and cannot connect to a printer via USB, download the USB drivers for PreForm.

USB
The USB cable included with the printer is intended for a secure, wired connection. Plug the parallel cable end directly into the back of your printer and finish by inserting the other end into your computer’s USB port.
Note:
If your computer is running Windows 7 and cannot connect to a printer via USB, download the USB drivers for PreForm.

Rear ports on a Form 2. | |
 Rear ports on a Form 3. |  Rear ports on a Form 3L. |
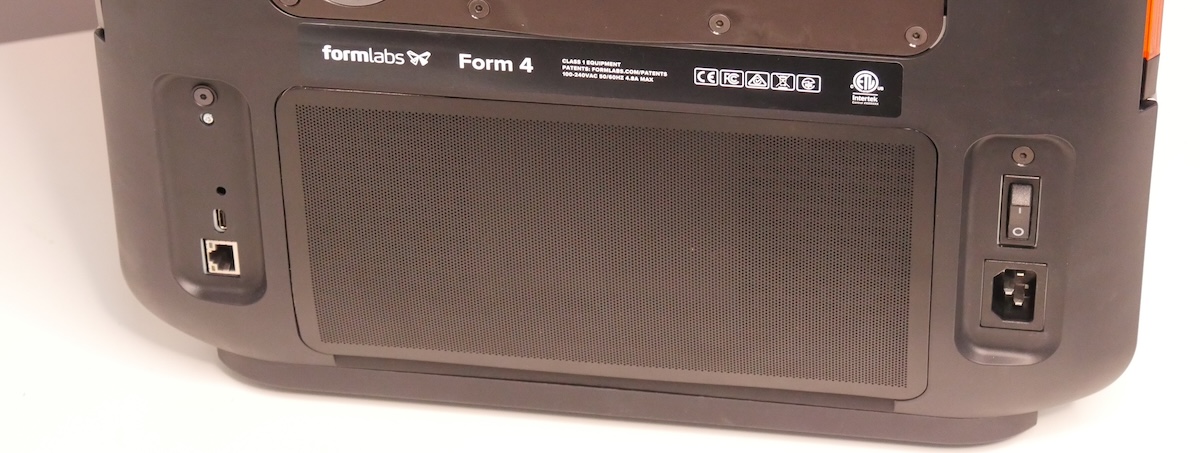 Rear ports on a Form 4. | 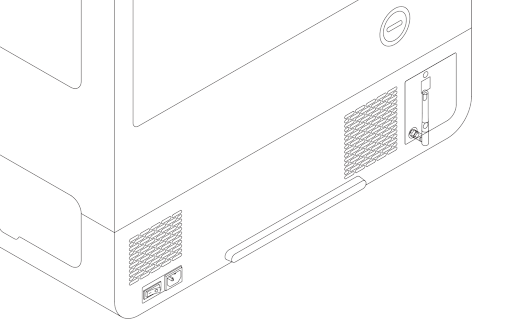 Rear ports on a Form 4L. |
Note:
Form 4 and Form 4L generation printers have a USB-C port in the rear of the unit. If you experience connection issues when using a USB-C to USB-C cable, try using a USB-C to USB-A cable.
Ethernet
The rear of the unit is equipped with a RJ-45 Ethernet LAN Port. Use a shielded CAT-5 Ethernet cable to connect the printer to a local network. Plug one end of the Ethernet cable into the back of the printer, and connect the other end to your LAN.
| Form 2 | Form 3 generation Form 3L generation Form 4 generation Form 4L generation | |
|---|---|---|
| Ethernet specifications | 10BASE-T/100BASE-TX Ethernet (100 Mbit) | 10BASE-T/100BASE-TX/1000BASE-T Ethernet (1000 Mbit) |
Wi-Fi
Formlabs SLA printers (Form 2 or later) have built-in Wi-Fi. Configure a wireless network connection using the printer’s touchscreen.
| Form 2 | Form 3 generation Form 3L generation | Form 4 generation Form 4L generation | |
|---|---|---|---|
| Connection type | IEEE 802.11 b/g/n Wi-Fi | IEEE 802.11 b/g/n Wi-Fi | IEEE 802.11 b/g/n/ac Wi-Fi |
| Frequency | 2.4 GHz | 2.4 GHz / 5 GHz | 2.4 GHz / 5 GHz |
| Security | WEP / WPA | WPA / WPA2 | WPA / WPA2 |
Configuring Wi-Fi on a Form 2
To configure Wi-Fi on a Form 2:
Note:
To upload a print using Wi-Fi on a Form 2, your computer must be on the same network as the printer.
Configuring Wi-Fi on all other Formlabs SLA printers (Form 3 or later)
To configure Wi-Fi on all other Formlabs SLA printers (Form 3 or later):
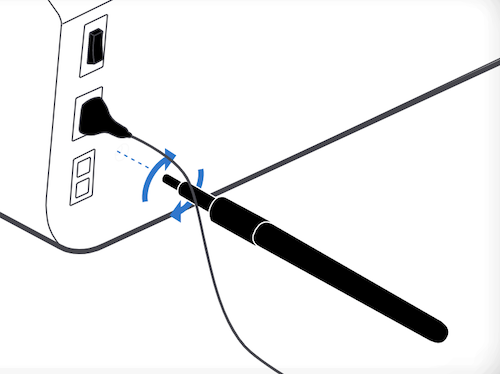
Note:
To connect a Form 3L/Form 3BL to a wireless network, install the Wi-Fi antenna by screwing it onto the jack on the back of the machine, next to the power, USB, and Ethernet ports.
To upload a print using Wi-Fi on a Formlabs SLA printers (Form 3 or later), your computer must be on the same network as the printer unless remote printing is enabled.
Manual IP configuration
When connected to an active Ethernet connection or available Wi-Fi network, the printer can be configured with a static IP address.
Configuring Wi-Fi or Ethernet using a manual IP on a Form 2
To connect with Wi-Fi or Ethernet using a manual IP configuration on a Form 2:
Configuring Wi-Fi or Ethernet using a manual IP on a Formlabs LFS printer (Form 3 or Form 3L generation)
To connect with Wi-Fi or Ethernet using a manual IP configuration on a Formlabs LFS printers (Form 3 or Form 3L generation):
Configuring Wi-Fi or Ethernet using a manual IP on a Formlabs LFD printer (Form 4 or Form 4L generation)
To connect with Wi-Fi or Ethernet using a manual IP configuration on a Formlabs LFD printers (Form 4 or Form 4L generation):