

Industrial investment casting
Industrial investment casting
Industrial investment casting, also known as lost-wax casting, is a versatile foundry process for producing metal parts with intricate shapes. This process spans nearly all industries and is relied upon for high-quality and high-integrity metal parts. Investment casting enables the production of geometries that cannot be manufactured in any other ways and with a high surface finish.
Investment casting typically involves three main steps:
- Creating an expendable pattern, often through wax injection molding using metal tooling.
- Making a non-permanent ceramic mold from this pattern.
- Casting or pouring liquid metal inside the ceramic mold.
Investment casting can be expensive, especially for low-volume production. 3D printing the sacrificial pattern has emerged as a cost and time-effective alternative to wax mold creation, enabling faster turnaround times and competitive prices. Because it eliminates tooling, SLA 3D printing allows patterns to be in hand the next day. It requires very limited equipment, freeing up CNC capacity and skilled operators’ time for other high-value tasks.
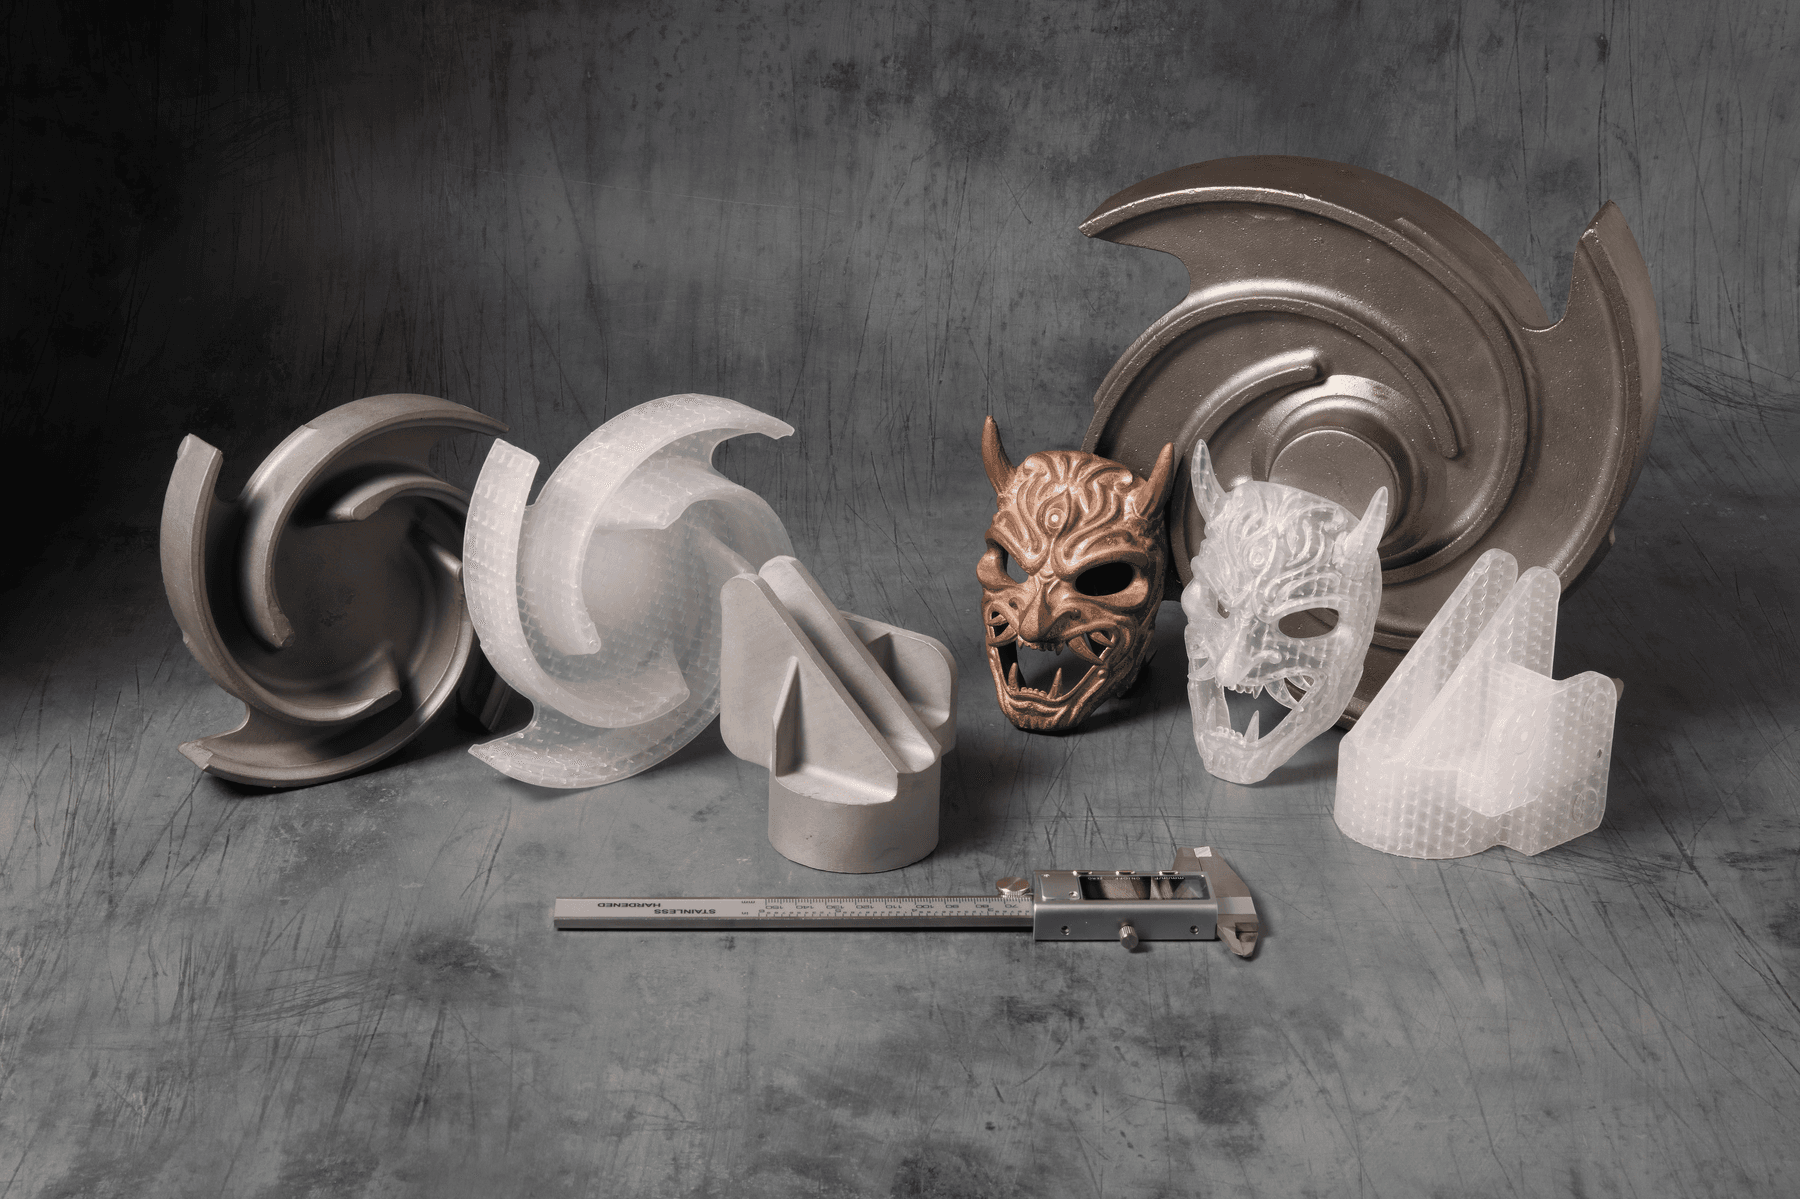
Formlabs recommended materials
Formlabs strongly recommends using Clear Cast Resin for industrial investment casting. Clear Cast Resin is an antimony-free material with low ash content (<0.02%) and has shown the ability to achieve dimensional accuracy, surface quality, and cost-per-part requirements for a wide range of applications.
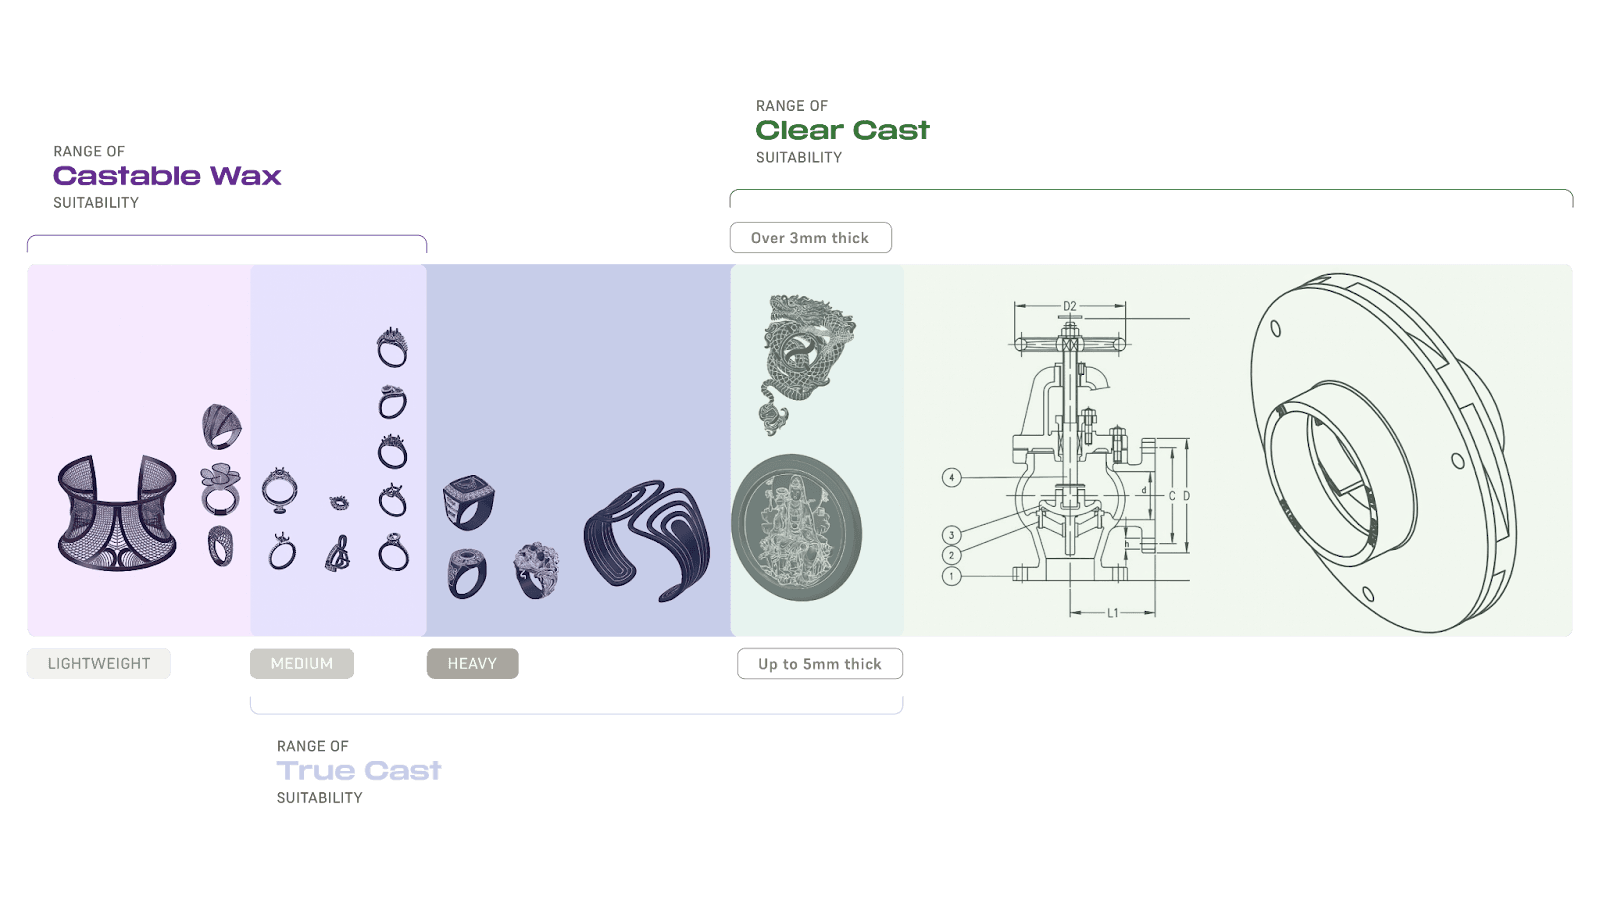
When choosing a casting resin, take the casting properties of each material into consideration. For smaller parts or wire filigree, use Castable Wax Resin. For medium to heavy jewelry or small engineering components, use True Cast Resin. For larger investment casting, use Clear Cast Resin.
Design considerations
Sacrificial patterns for industrial investment casting must be strong enough to withstand the pressure of being dipped in ceramic slurry while also being thin enough to burn away. Thin walls prevent cracking caused by thermal expansion during burnout. Software solutions are available that hollow the part and build inner lattice scaffolding to strengthen the part. The lattice supports the exterior of the part, prevents warping, and enables printing with thin walls. The sprue can also be 3D printed as part of the pattern. Since the lattice is required to create quality castings, it is recommended not to go below ⅛ inch or 3 mm for the majority of the part.
After designing the part with your CAD software, import the CAD file into the lattice module and determine the settings for the outer shell, the lattice structure, and drain holes. Thinner walls improve casting success, but they increase the risk of print failures and may weaken parts.
Print feature recommendations
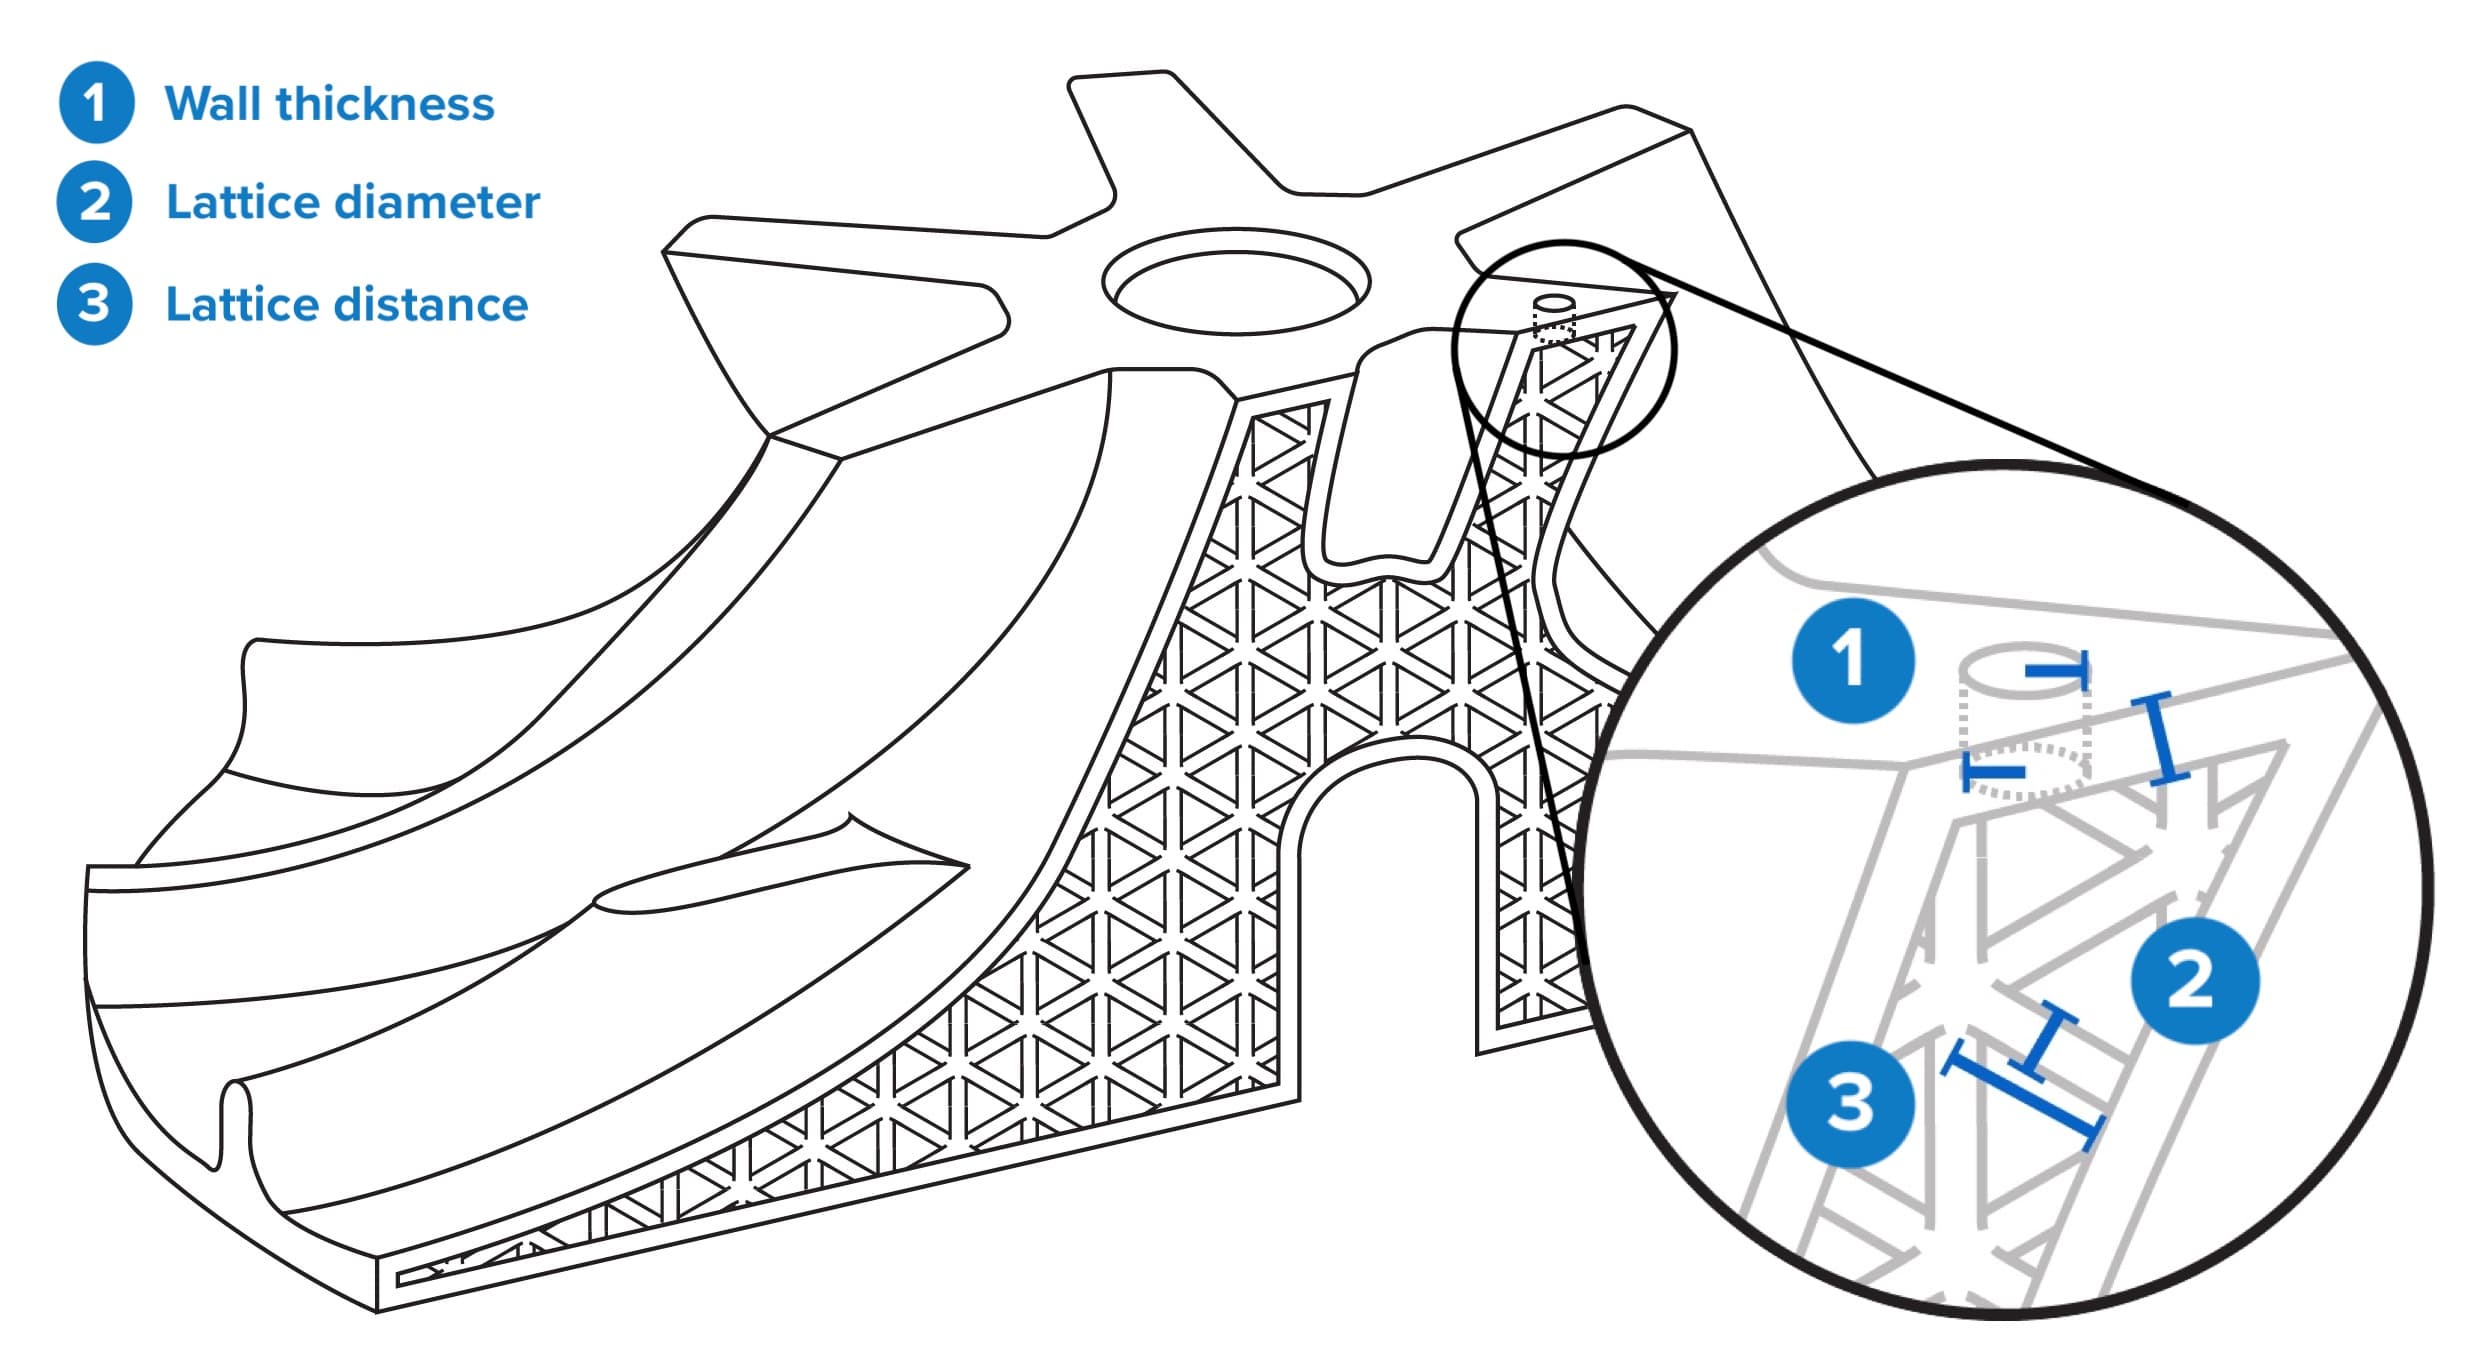
| Wall Thickness | Lattice Diameter | Lattice Distance | |
|---|---|---|---|
| Highly Conservative | 1 mm | 1 mm | 3 mm |
| Conservative | 1 mm | 0.5 mm | 3 mm |
| Common | 0.75 mm | 0.75 mm | 3 mm |
| Recommended | 0.5 mm | 1 mm | 3 mm |
| Detail Size | 0.5 mm (standard) | ||
| Hole Size | 2 mm (minimum, increase as needed) | ||
For more information, refer to the white paper Industrial Investment Casting with 3D Printed Patterns using Formlabs Clear Cast Resin.
Drain holes
Drain holes reduce the risk of print failures caused by cupping and allow liquid resin to drain out of the part.
- Keep the planned orientation of the part in mind when designing drain holes.
- Place holes near the extremes of parts, or along the edges to allow IPA and liquid resin to drain completely.
- Place holes at the top and bottom of the planned part orientation.
- Place holes on surfaces that will be machined or cut to simplify post-processing.
- Create straight holes (r1 = r2) or only slightly chamfered holes (r1 > r2).
- Place holes in the location where the sprue will be attached to allow for good airflow during burnout.
Latticed parts can result in large file sizes, which slow down the print preparation and support generation process. Convert your exported files to 3MF to reduce the file size.
Printing considerations
Follow Formlabs best practices for orienting parts. Orient the model 30–45 degrees relative to the build platform.
- Add a full raft, using 0.75 support density and 0.30 mm touchpoints or smaller. Avoid placing support touchpoints on critical surfaces.
- Formlabs recommends turning off internal supports on latticed parts, as they may interfere with the lattice structure.
- Due to their geometry, casting patterns frequently trigger PreForm warnings about being undersupported or having cups. Support minima on the skin of the part to minimize these warnings as much as possible.
- You may wish to generate supports for a non-latticed pattern and match the supports on the latticed version to that.
Print at 100 µm layer height.
Post-processing considerations
Follow Formlabs best practices for washing and post-curing prints. Refer to the individual material articles for specific wash and cure instructions.
After an initial wash, dry parts and clear the lattice structure using compressed air. Wash the part again and thoroughly clear it with compressed air, taking care to clear out as much IPA and resin as possible from the interior. Allowing IPA and resin to sit in the part may cause the shell to become floppy, making it unsuitable for casting. It is critical to remove all trapped IPA, as any remaining liquid can cause vapor in burnout and lead to shell cracking.
Clear Cast Resin requires post-curing to reach its optimal mechanical properties. Follow Formlabs best practices when deciding whether to remove supports before or after post-curing.
Refer to the support article for your device for post-curing recommendations.
Preparing the pattern
There are three main ways to patch drain holes:
- Wax: This is typically the easiest method but is sometimes prone to pinhole failures. This can also simply be done as attaching the drain holes to vents or gating that is otherwise necessary.
- Resin: Formlabs recommends placing a small amount of resin over the hole and using a UV pen to cure it. This typically creates solid coverings that are functionally the same as the rest of the part.
- Part design: You may wish to generate the hole patches as their own parts, print them, and then attach these to the parts, though this is typically unnecessary for parts without extremely large holes.
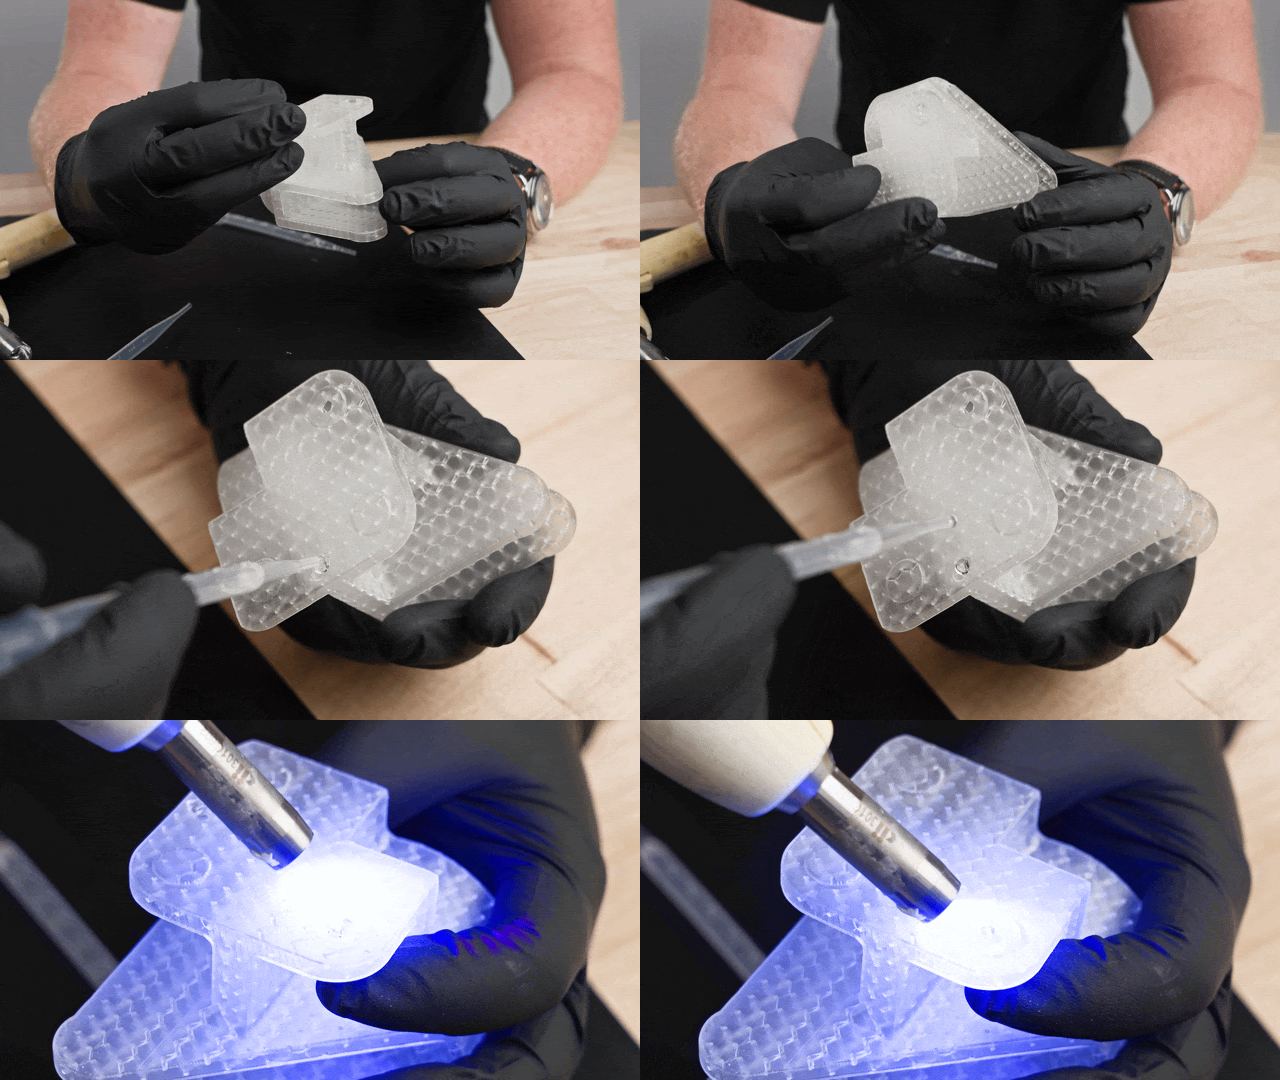
Patching a drain hole with Clear Cast Resin and using a UV pen to cure it.
Check the fit of the holes by forcing compressed air into the last hole and looking for leaks.
Follow your usual process for pattern assembly, shell creation, and burnout. For burnout, Formlabs recommends flash firing at a temperature of 1300–1650 °F (700–900 °C) for two hours. Do not use an autoclave to dewax parts as this can cause parts to expand, warp, and buckle, and will often crack shells. Check for any cracking or flashing in the shell after the burnout and blow out any remaining ash from the mold.
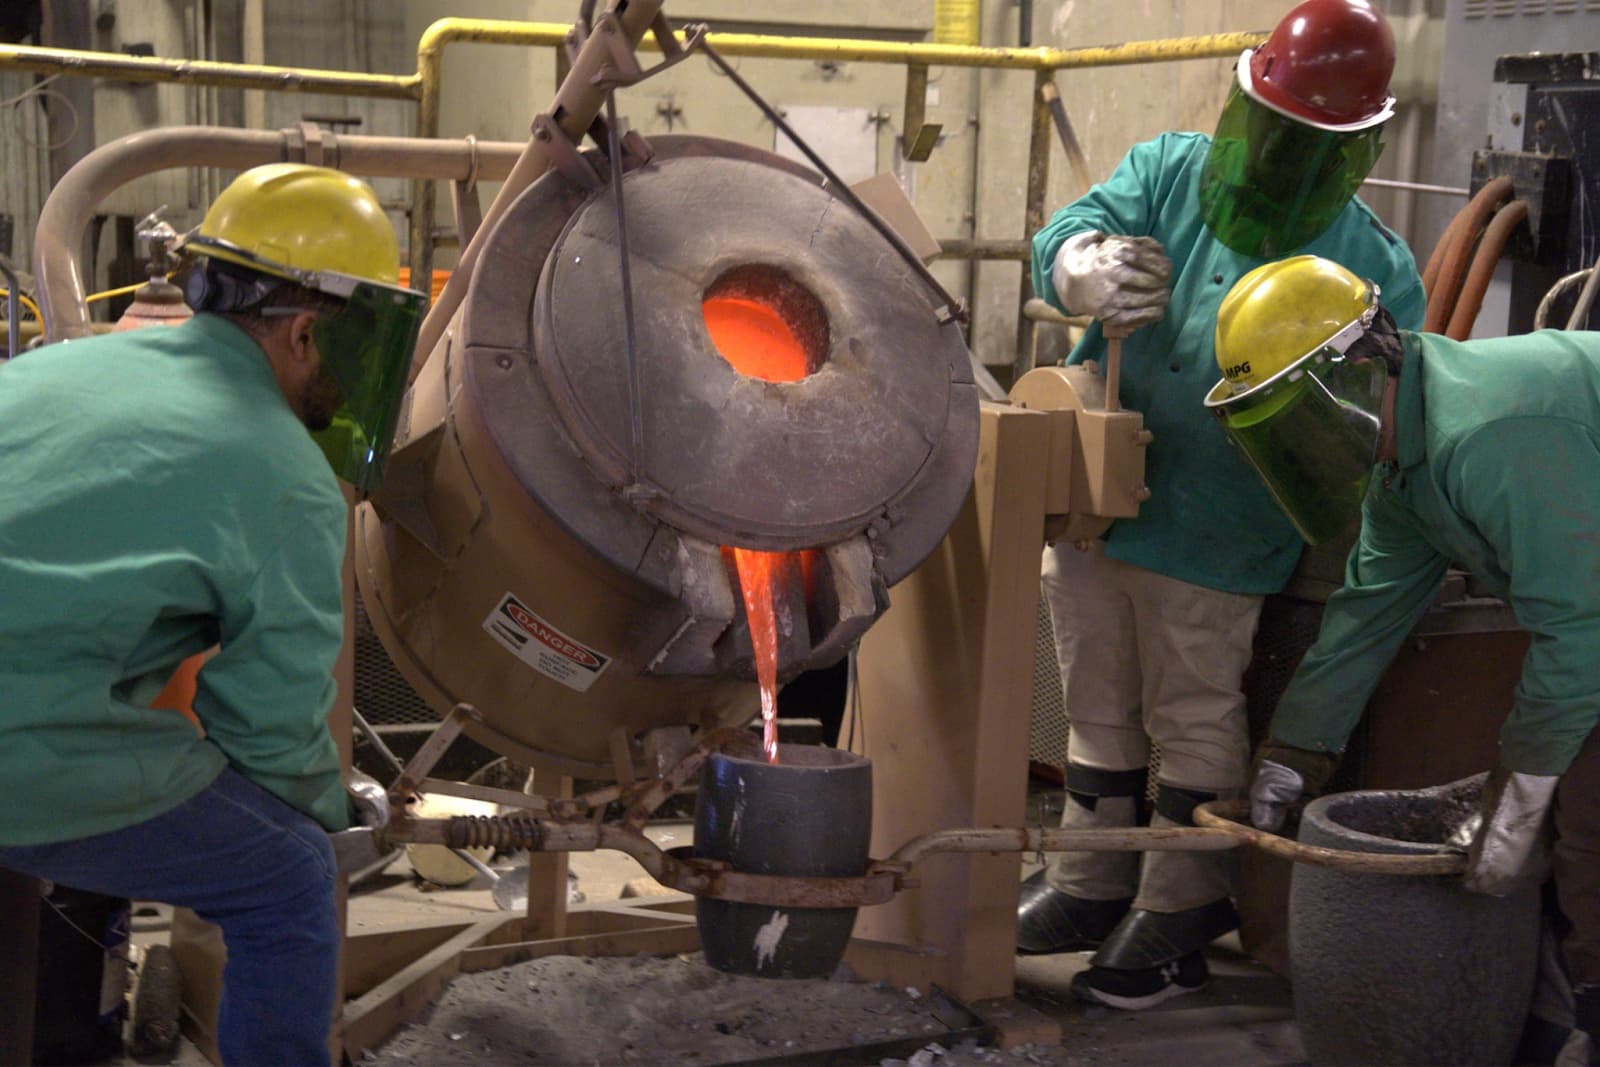
Follow your usual process for casting and finishing.
For detailed instructions about the workflow, refer to the white paper Industrial Investment Casting with 3D Printed Patterns using Formlabs Clear Cast Resin.
End-use recommendations and limitations
3D printing the sacrificial pattern has emerged as a cost and time-effective alternative to wax mold creation, enabling faster turnaround times and competitive prices. Patterns 3D printed with Formlabs Clear Cast Resin can produce investment cast parts with quality comparable to traditional wax patterns. It is particularly recommended for:
- Patterns with complex metal geometries with undercuts, tortuous channels, and thin walls
- Short-run or rapid-turnaround production
Some limitations include:
- 3D printed patterns may be more brittle than wax patterns and should be handled with care.
- Requires a flash fire burnout furnace reaching 700–900 °C.
- Do not use an autoclave to dewax parts as this can cause parts to expand, warp, and buckle, and will often crack shells.
Additional resources