
Required Supplies:
Formlabs:
- Replacement cover
- Replacement gas spring
Third-party:
- 2.5 mm hex driver
- T8 Torx driver
- T10 Torx driver
- Nitrile gloves
- Flashlight

The Form 3L cover is secured in the upright position with a gas spring to prevent the cover from closing suddenly. A damaged gas spring may obstruct the cover from opening and closing properly.
Use this guide to replace the Form 3L cover, the Form 3L gas spring, or both.
Required Supplies:
Formlabs:
Third-party:
Estimated time: 20–30 minutes
Danger:
Read and follow all safety instructions and warnings in the operator manual. Replacement with incorrect parts can lead to burns, shock, fire, or explosion. Dispose of all parts in accordance with local regulations.
Caution:
The Form 3L is a heavy object. Two people are required for this procedure to prevent injury and avoid damage to the machine.
Preparing the workspace
Overview: Prepare the Form 3L and a dust-free workspace for replacing the cover and gas spring.
Step 1: Remove the build platform
Remove the build platform first to avoid dripping resin into the printer cavity.
Step 2: Remove the resin cartridges
Remove the resin cartridges and close the vent caps to prevent resin from dripping off the bite valves and into the printer.
Step 3: Remove and store the resin tank
Remove the resin tank, place it in the resin tank case, and cover it with its lid. Set the case and tank aside on a clean, flat surface.
Notice:
Wear gloves and hold the resin tank by the tank grips on either side to avoid contamination or damage to the underside of the tank.
Step 4: Prepare the workspace
Clear a workspace around your printer. Ensure that the workspace is well-ventilated and free of dust. Prepare additional space for storing the rear panel of the printer during maintenance.
Step 5: Unplug the printer
Disconnect the power cable before continuing with maintenance. Do not perform maintenance on the printer while it is connected to power. Wait five minutes after disconnecting the printer from power before proceeding.
Danger:
Performing maintenance on the printer while it is plugged in increases the risk of electric shock. Never remove the back panel of the printer while the printer is plugged in. Never reconnect the printer to power while the back panel is uninstalled.
Step 6: Clean the printer cavity
Warning:
Resin may cause skin irritation or an allergic skin reaction. Wear gloves when handling liquid resin or resin-coated surfaces. Wash skin with plenty of soap and water.
Open the printer cover. Check inside the printer cavity to ensure that no resin has pooled on the printer floor. Clean any resin inside the printer cavity with paper towels. Dampen the paper towels with isopropyl alcohol if necessary to fully remove the resin.
Danger:
IPA is flammable and presents a fire hazard. Keep containers closed, and keep out of the reach of children.
Removing the rear shell
Overview: Unscrew and remove the rear shell of the printer.
Notice:
The Form 3L contains sensitive electronic components. Ground yourself before touching any electronics in the printer by using a grounding strap or touching a grounded piece of metal.
Step 1: Remove the Wi-Fi antenna nut
Unscrew and remove the nut from the base of the Wi-Fi connector. The Wi-Fi connector is attached to the printer’s motherboard and remains in place when the rear shell is removed.
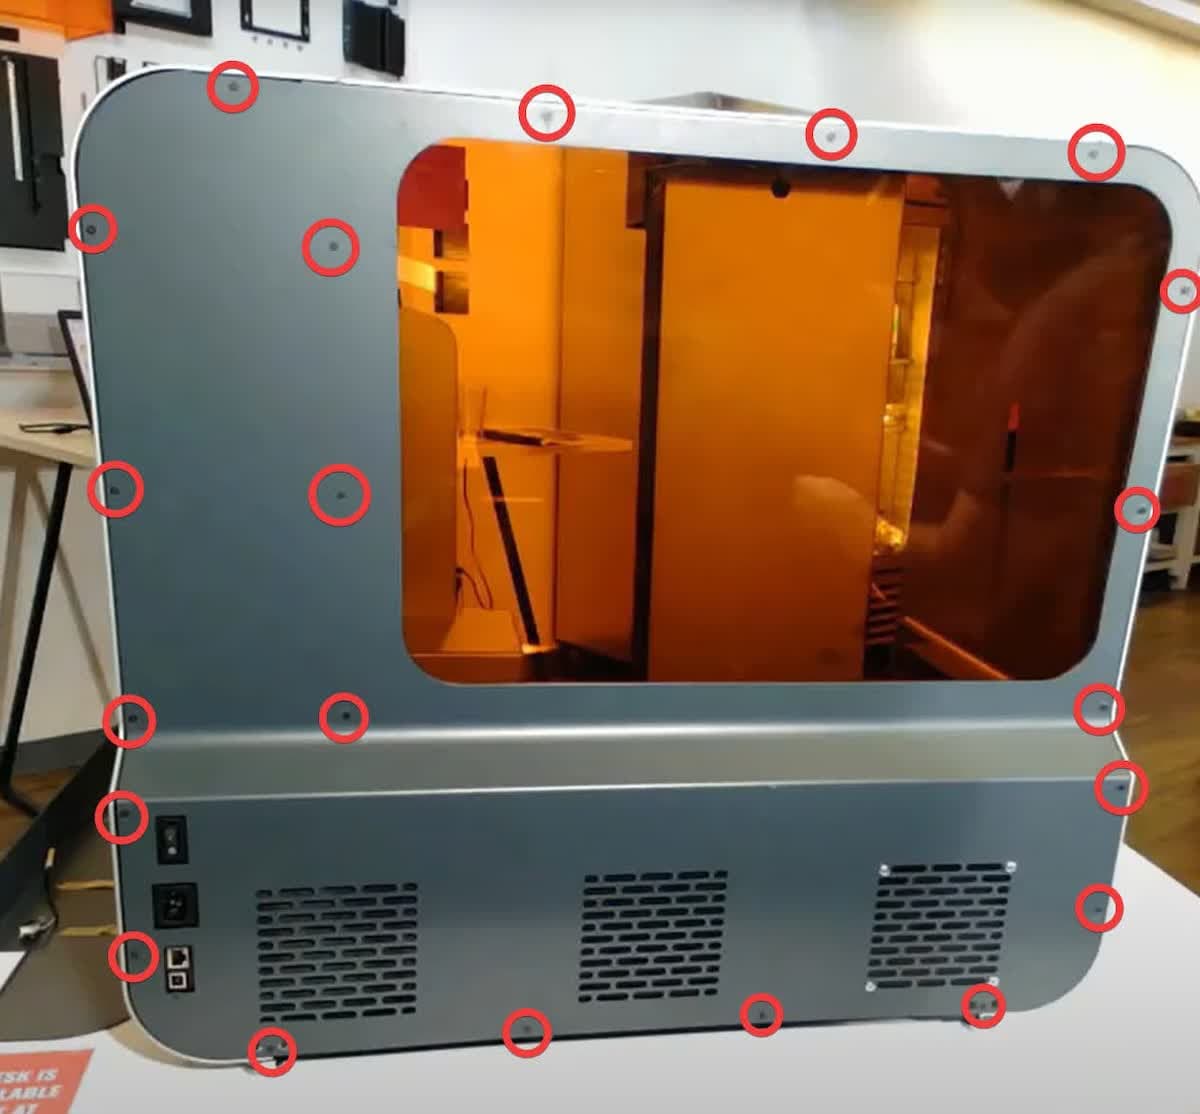
Use a T10 or T8 Torx driver to loosen and remove the 21 screws on the rear shell. Early models may use all T8 screws, while later models use all T10 screws. Start at the bottom of the panel and work your way up to the top.
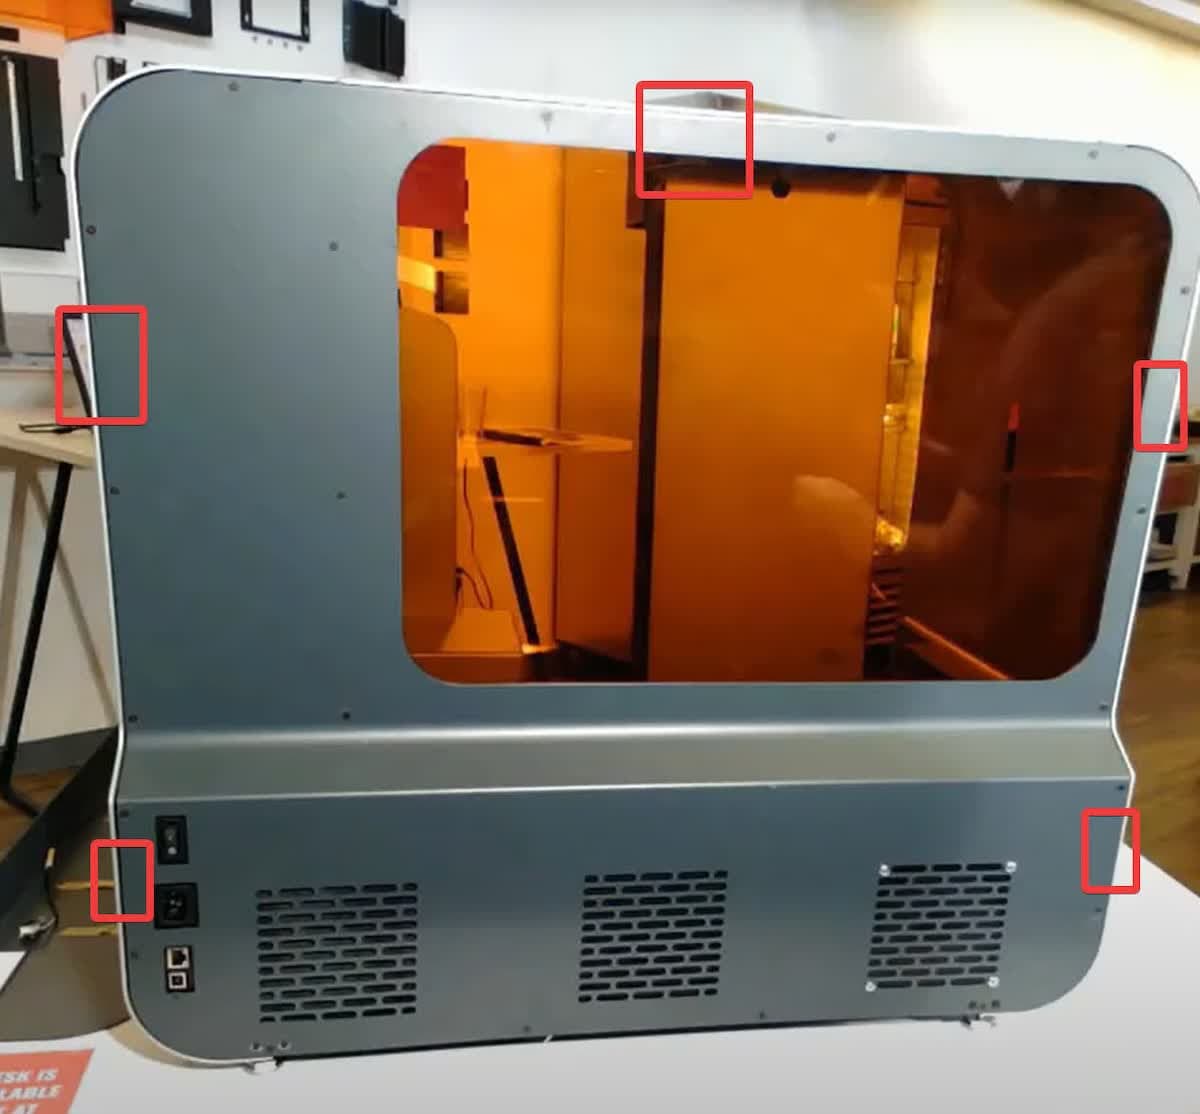
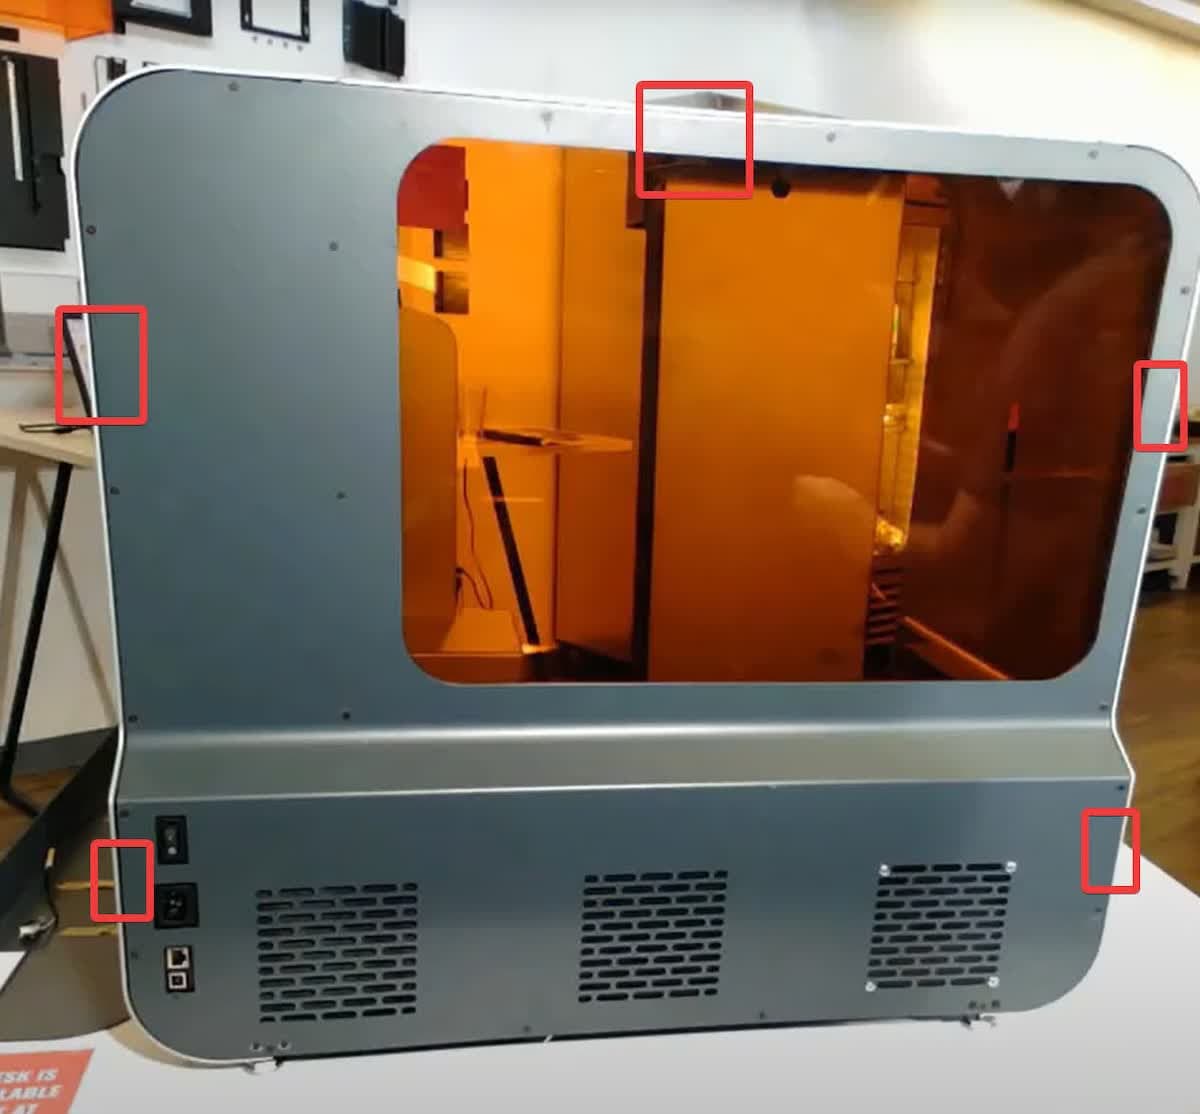
Remove the rear shell by pulling it away from the printer. There are five pins that hold the panel in place, so it may require moderate force to separate from the printer. Be careful not to damage the rear fan cable, which is still attached to the rear shell. Lay the rear shell down next to the printer.
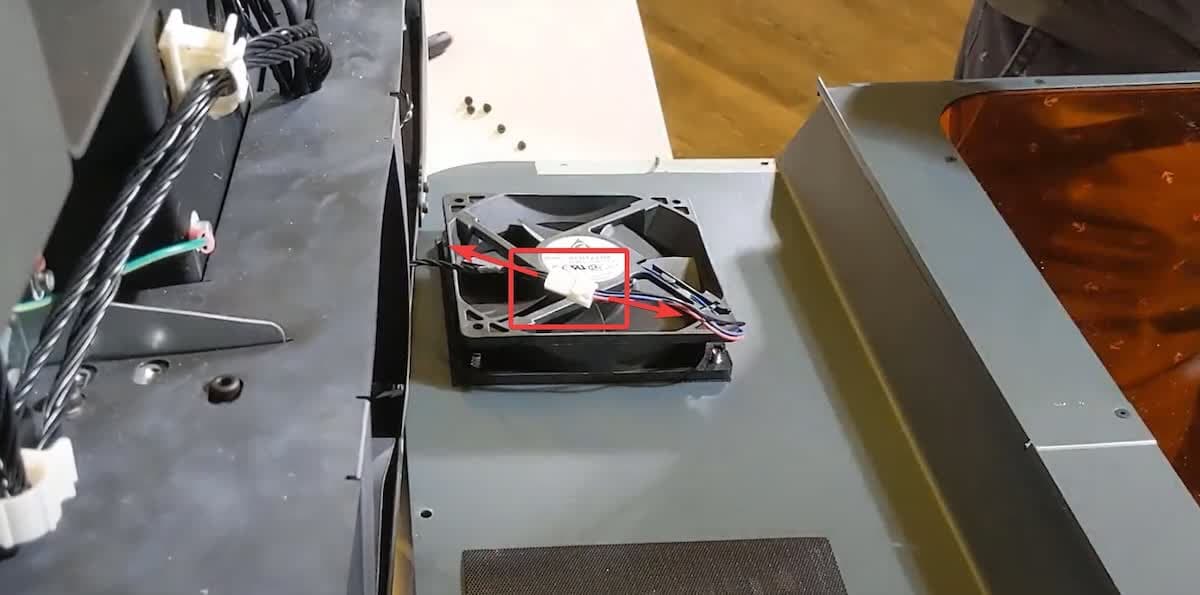
Disconnect the rear fan cable harness by gripping the plugs and gently pulling them away from each other. Do not pull on the wires themselves.
Removing the gas spring
Overview: Remove the gas spring retaining rings and disconnect the gas spring from the printer.
Step 1: Open the cover
Open the printer cover.
Caution:
Do not attempt to remove the gas spring with the cover closed.
Step 2: Locate the retaining rings
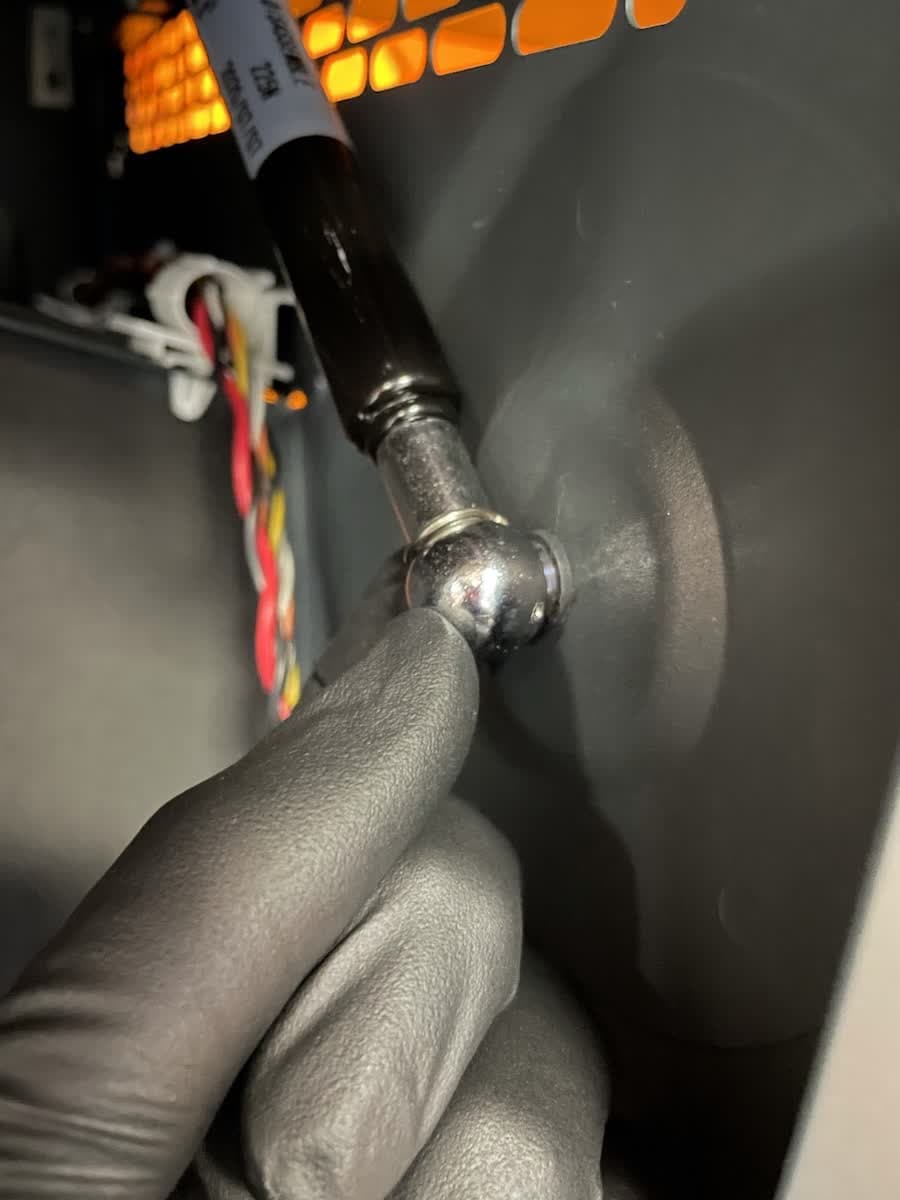
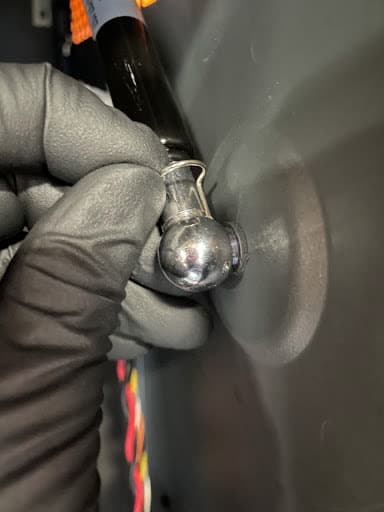
A retaining ring is located at each end of the gas spring. Note the orientation of the retaining rings for reinstallation. To unlock a retaining ring, rotate it until the curved section of the retaining ring unhooks from the shaft of the gas spring.
Step 3: Remove the retaining ring
Slide the retaining ring towards the center of the gas spring to remove it. Repeat for the second retaining ring.
Step 4: Remove the gas spring
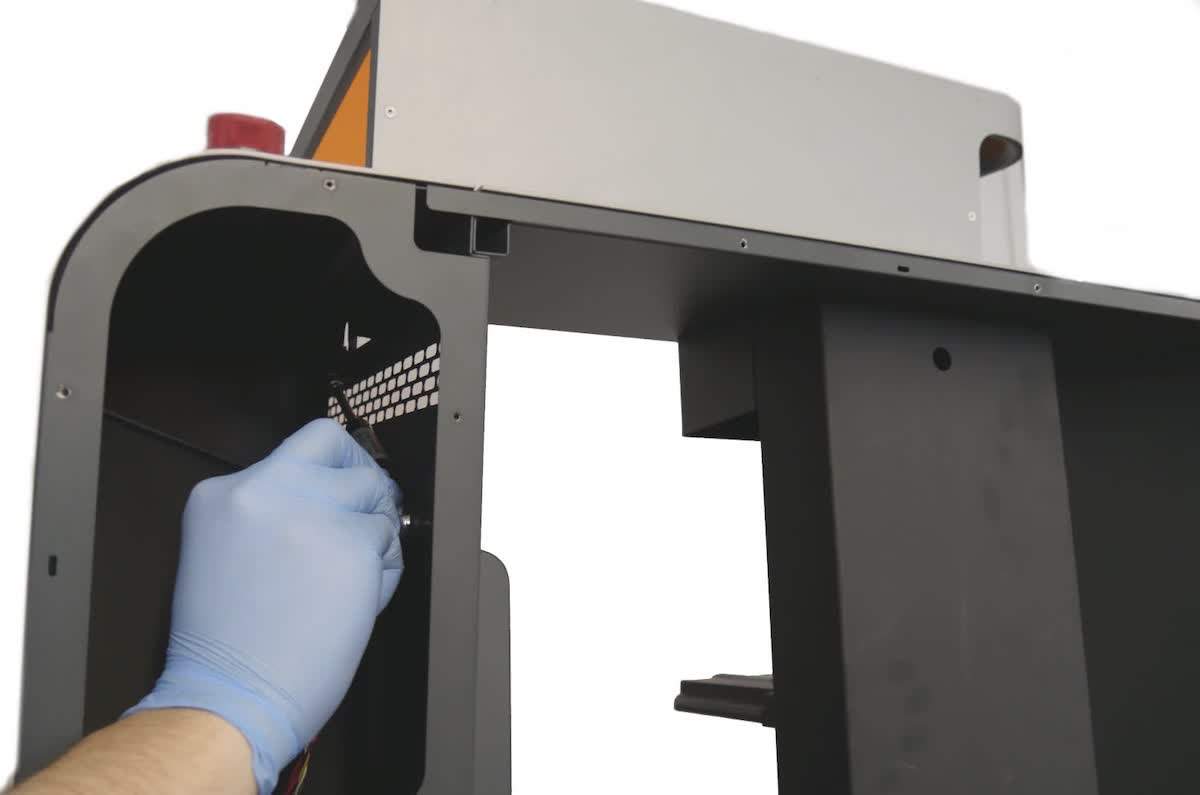
Two people are required for this step. Have one person lift the cover slightly past its open position. Have the second person grasp the rear end of the gas spring and pull it away from the wall to which it is attached. Once one end of the gas spring is detached, the person holding the cover must support the full weight of the cover.
Notice:
Do not pull on the center of the gas spring. Do not drop the cover. Pulling the center of the gas spring or dropping the cover damages the printer and requires further replacement.
Gently close the cover. Detach the other end of the gas spring. If you are only replacing the cover, set aside the gas spring for later reinstallation. If you are only replacing the gas spring, skip to Reinstalling the gas spring. Otherwise, continue.
Removing the cover
Overview: Unmount and uninstall the printer cover.
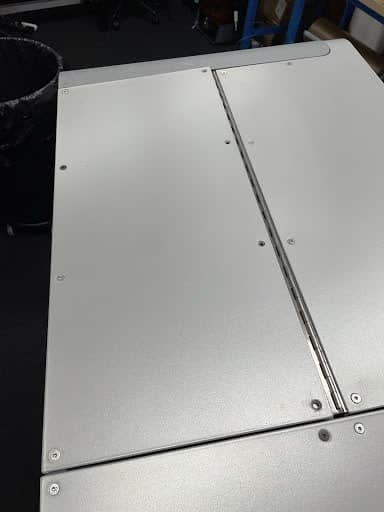
Remove the four hex screws from the top panel near the cover hinge using a 2.5 mm hex driver.
Step 2: Remove the cover
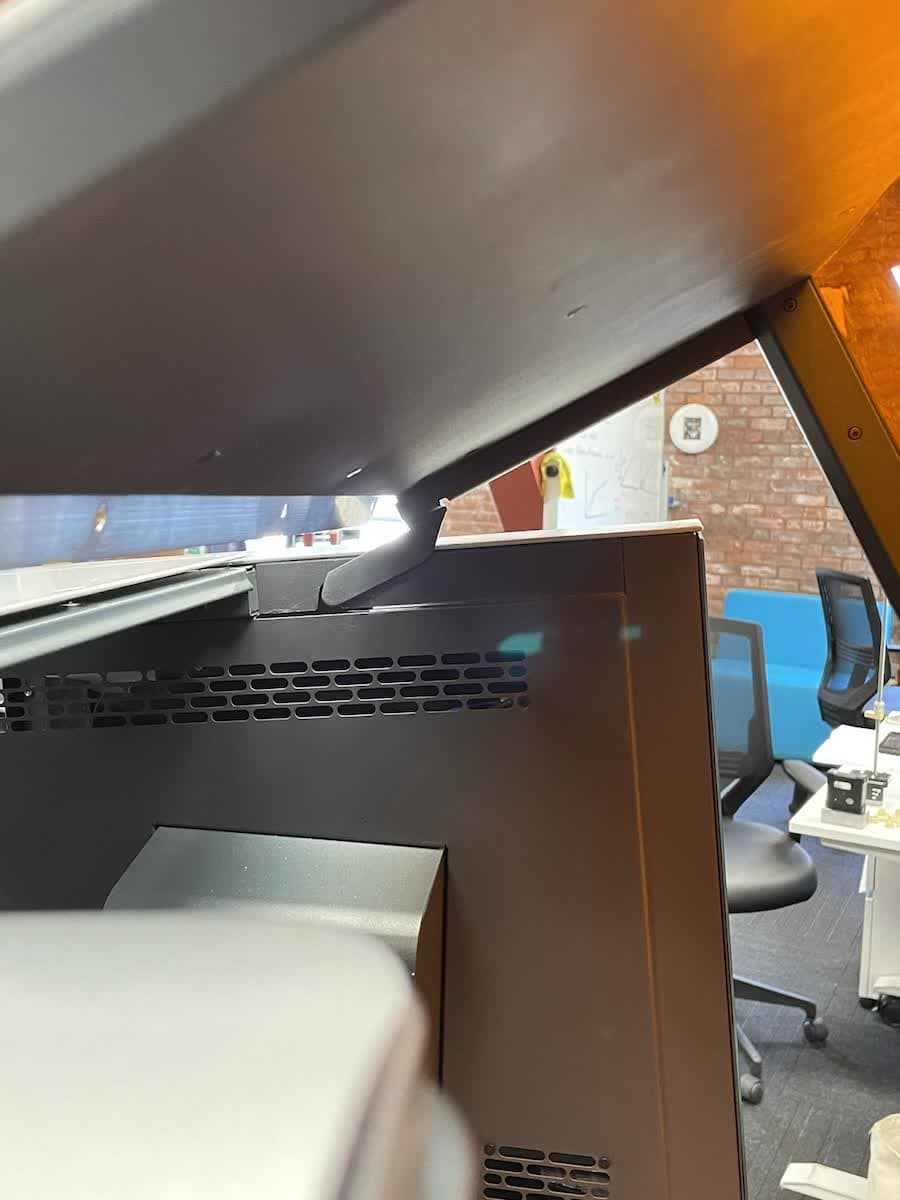
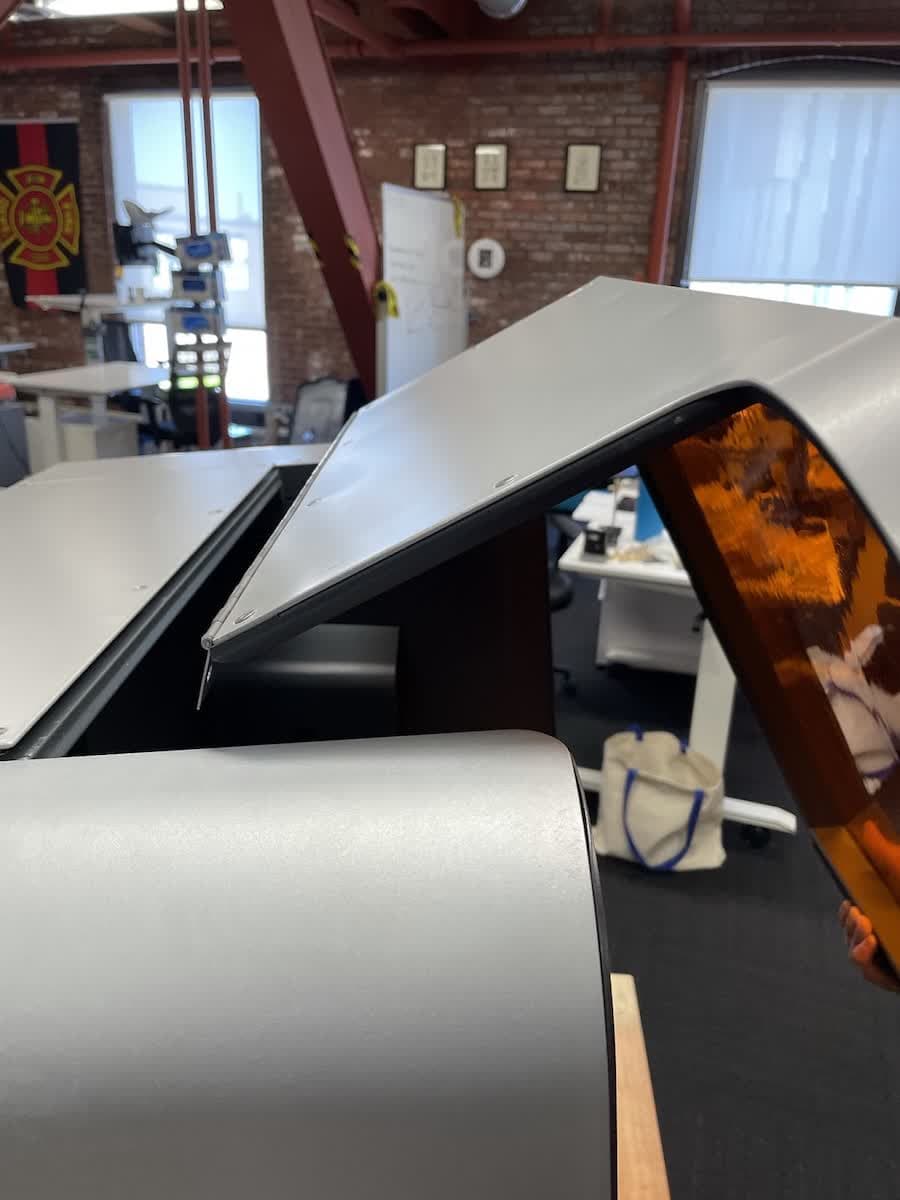
Two people are required for this step. Have both people lift the cover at an angle and pull outward, being mindful of the gas spring arm on the right side of the cover. If you are replacing the cover, set aside the cover for disposal.
Installing the replacement front cover
Overview: Install the new cover by manually moving the gas spring arm into position and slide the hinge under the top panel.
Step 1: Adjust the gas spring arm
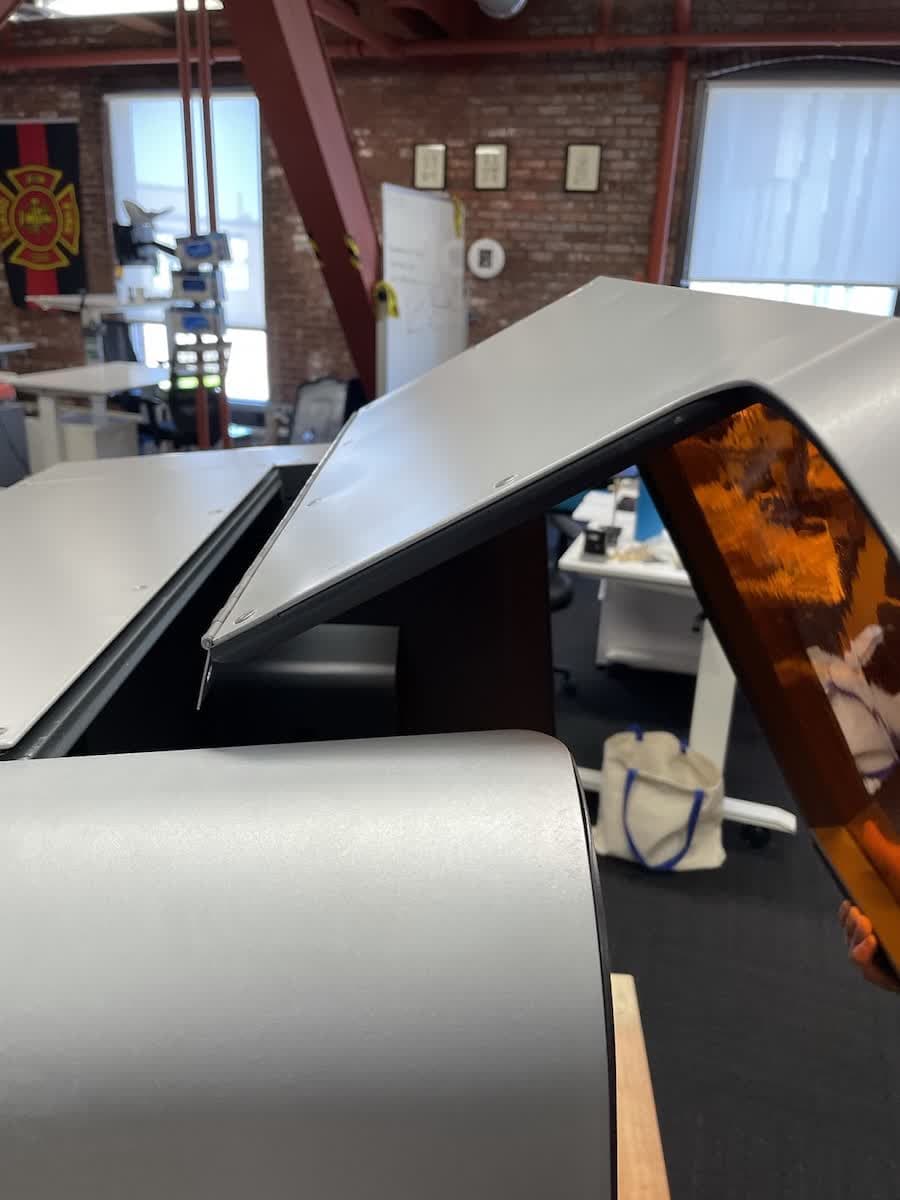
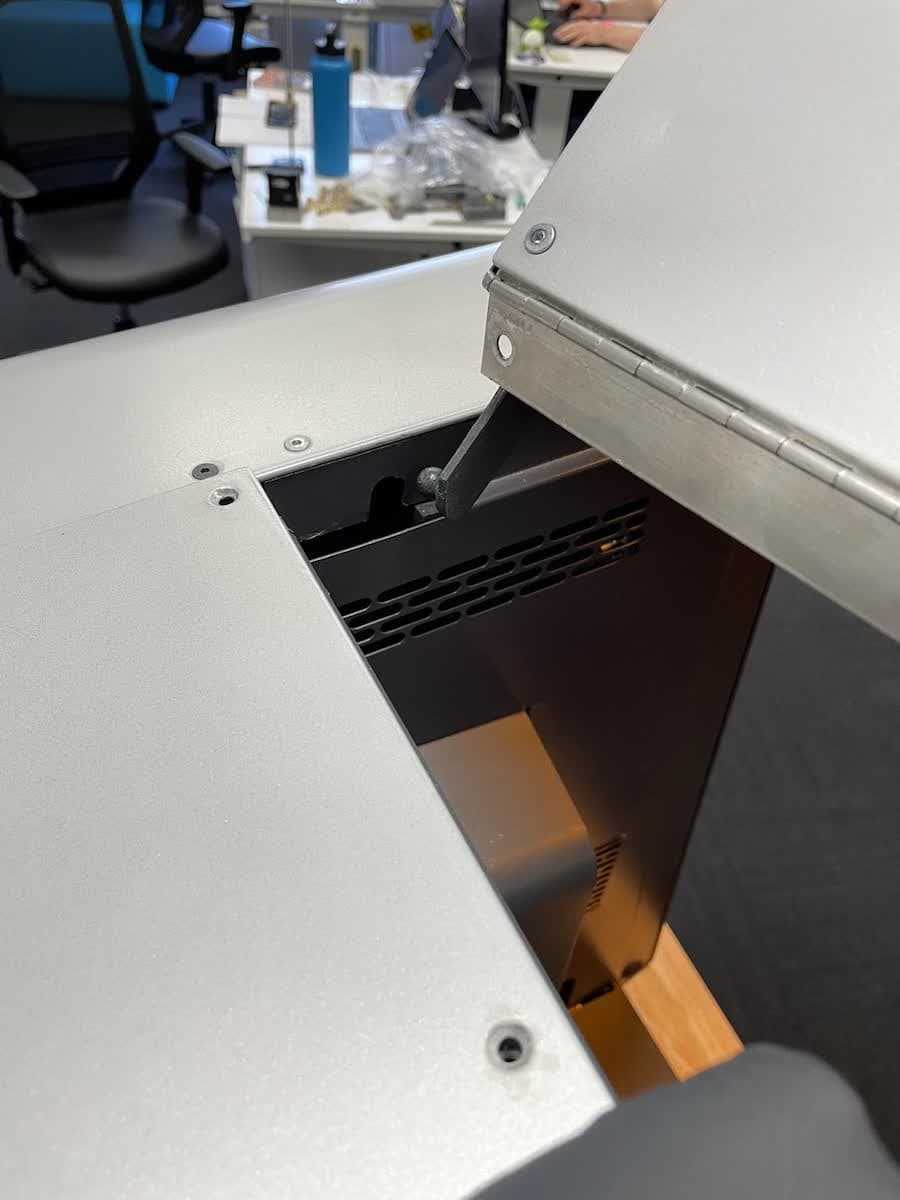
Two people are required for this step. While one person lifts the cover into position over the cavity, the second person manually maneuvers the gas spring arm into the hole on the printer chassis.
Step 2: Slide the cover hinge under the top panel
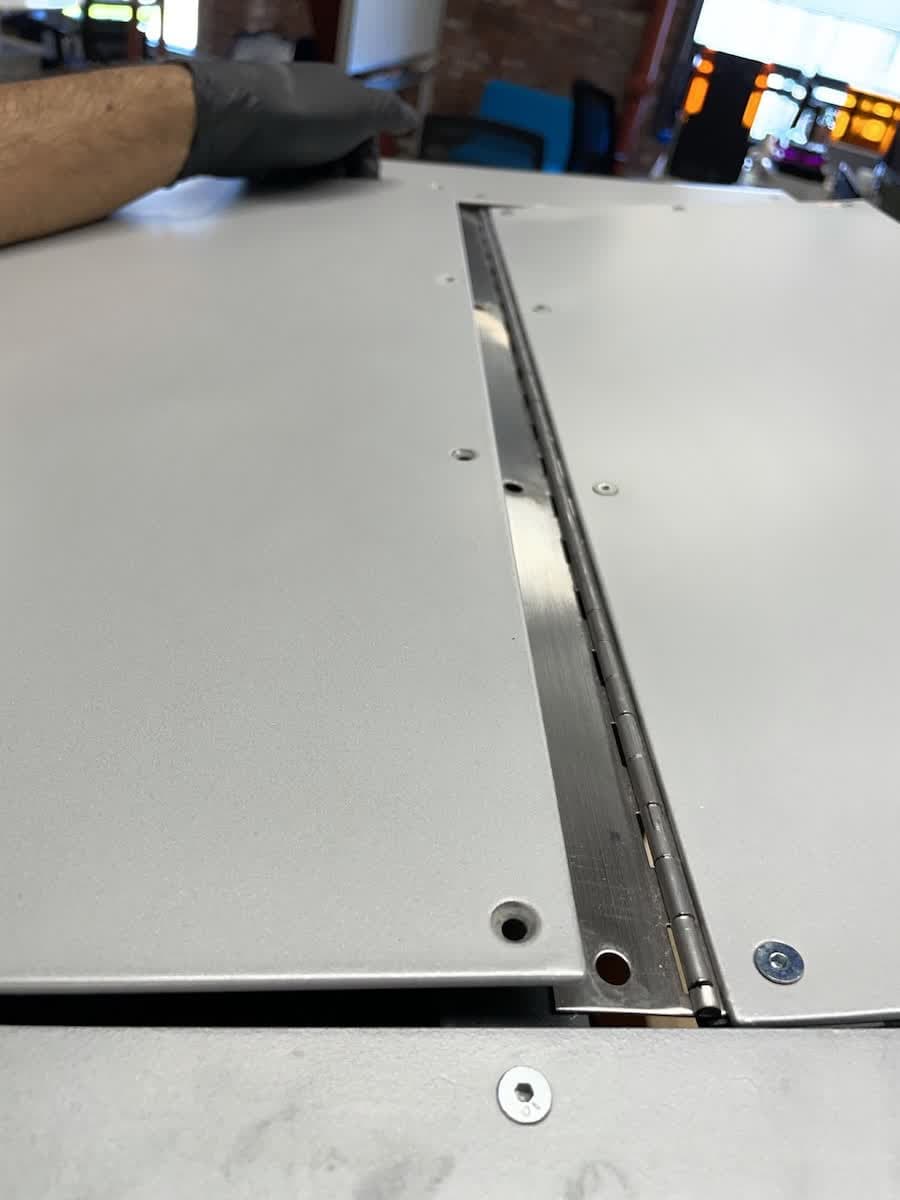
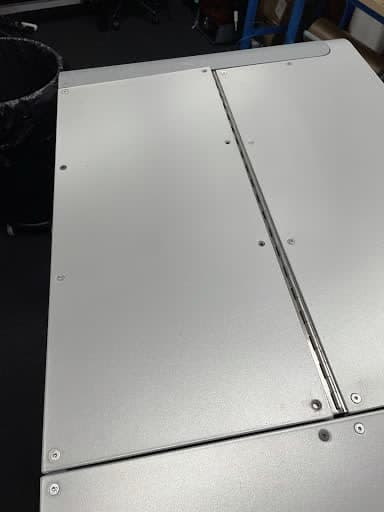
Lower the cover. Gently lift the top panel on the printer and slide the cover hinge underneath. Align the four screw holes on the cover hinge and the top panel.
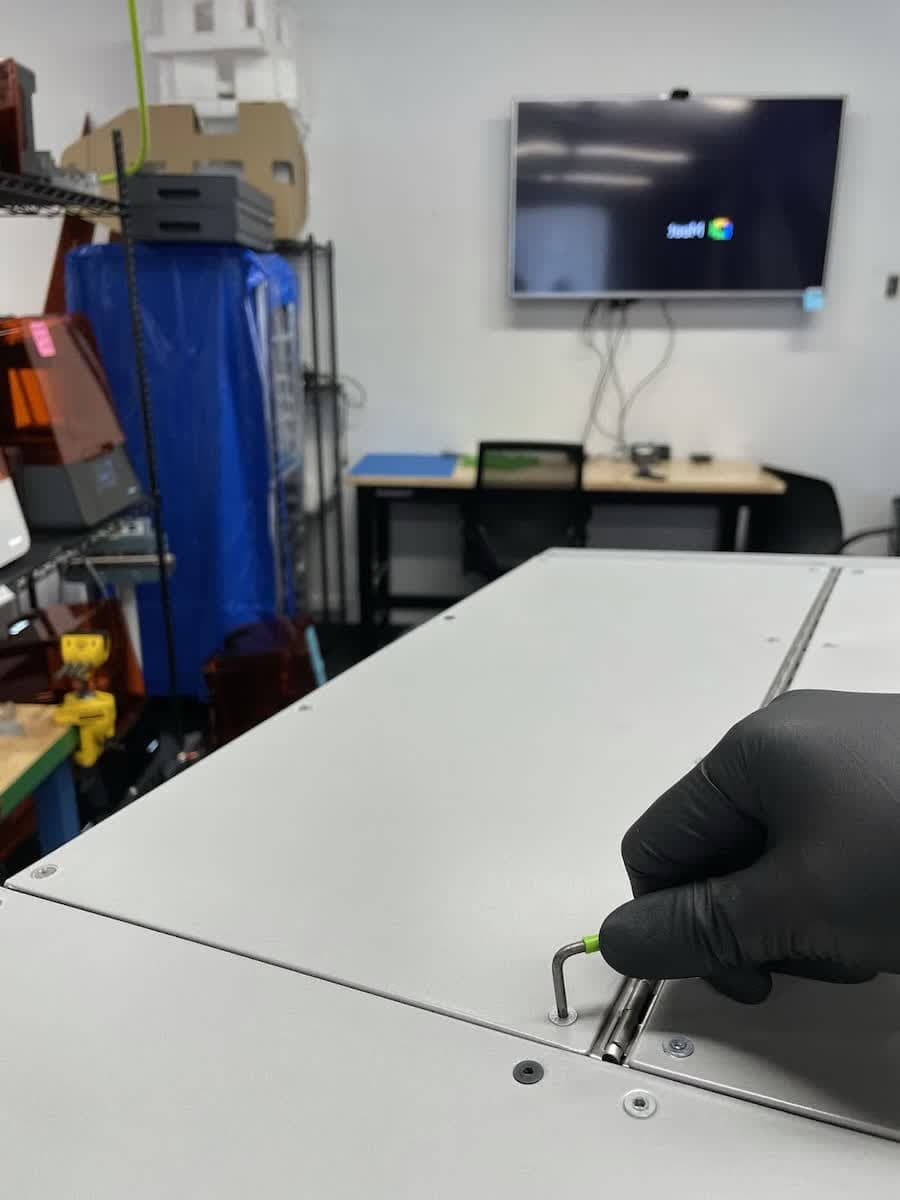
Using a 2.5 mm hex screwdriver, install the four hex screws on the top panel to secure the cover. Verify the cover can open and close unobstructed. Loosen screws and adjust the front panel if needed.
Reinstalling the gas spring
Overview: Install the gas spring after the cover is in position..
Step 1: Insert retaining ring into extended end of the gas spring
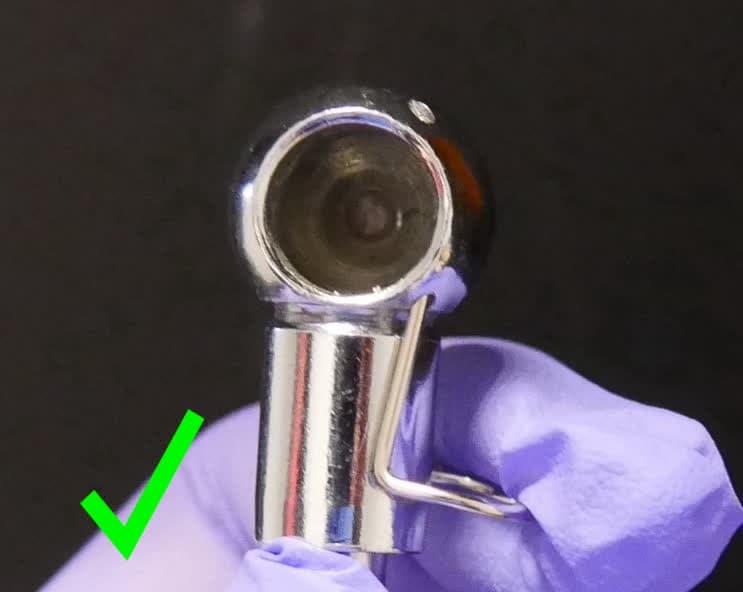
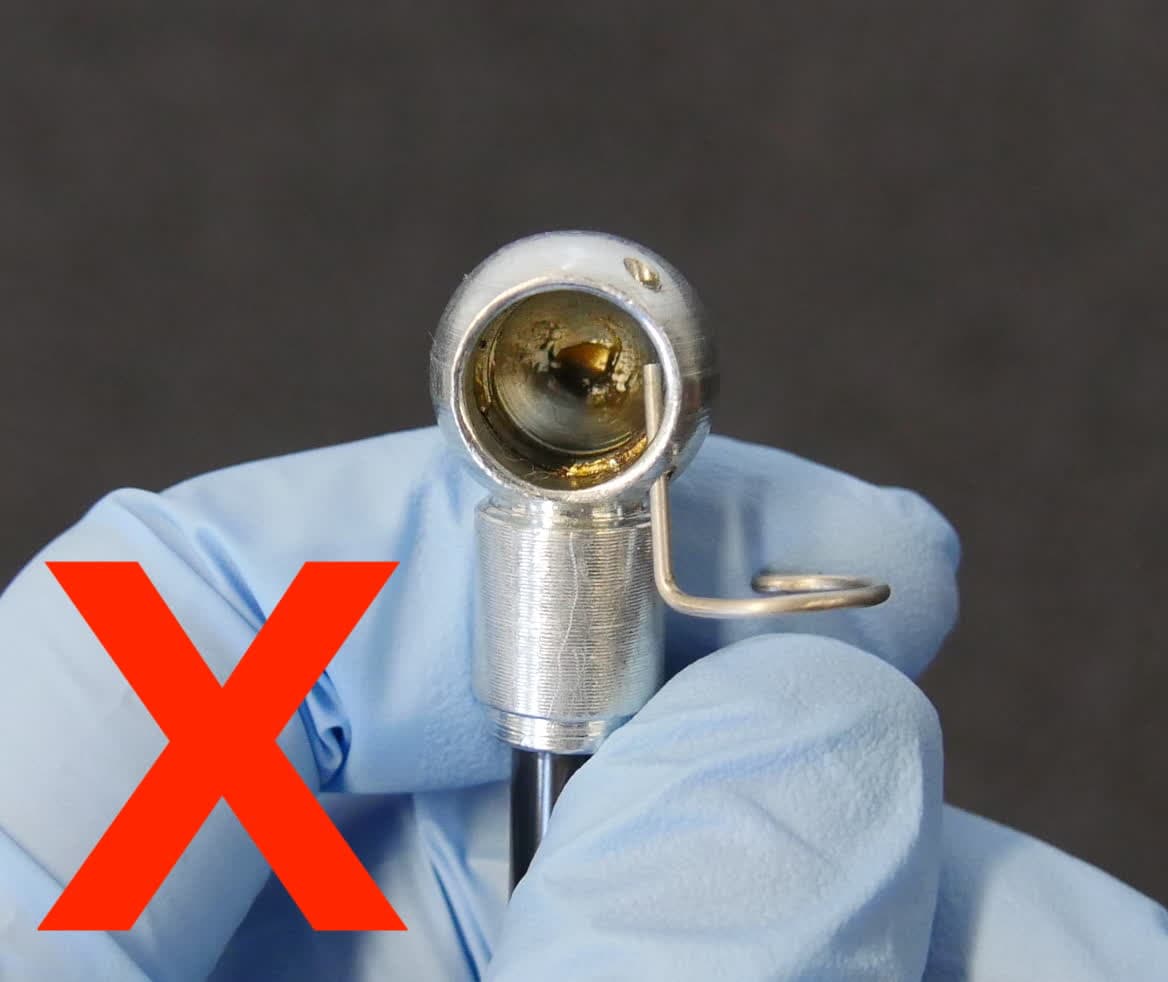
The retaining ring holes can be difficult to locate and access after the gas spring is installed. To ease installation, partially insert one retaining ring through the hole in the socket at the extended end of the gas spring. Only insert it through one hole; the ring should not be visible inside the gas spring socket. Hold the retaining ring in place inside the gas spring with your thumb and index finger. Keep the retaining ring in this position when inserting the extended end of the gas spring into the printer.
Step 2: Install and secure the extended end of the gas spring
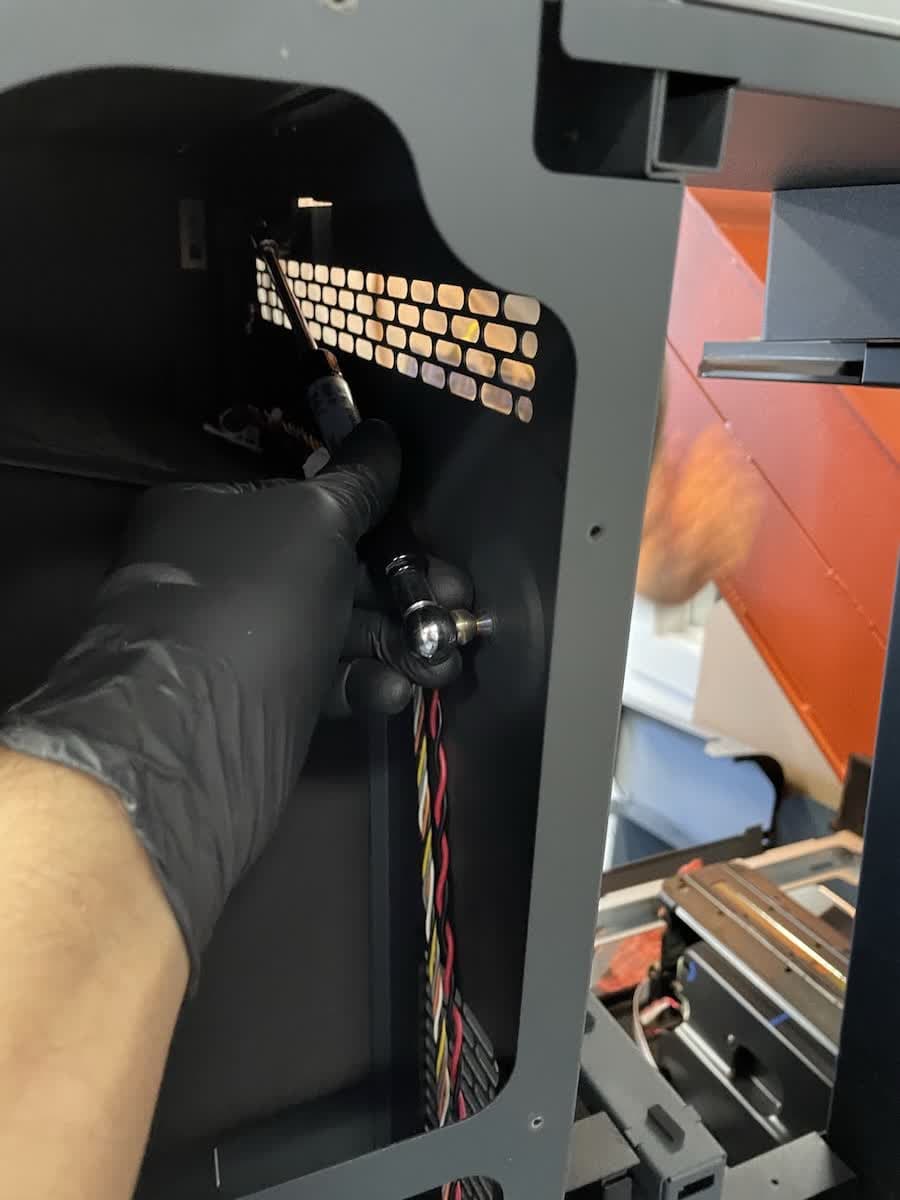
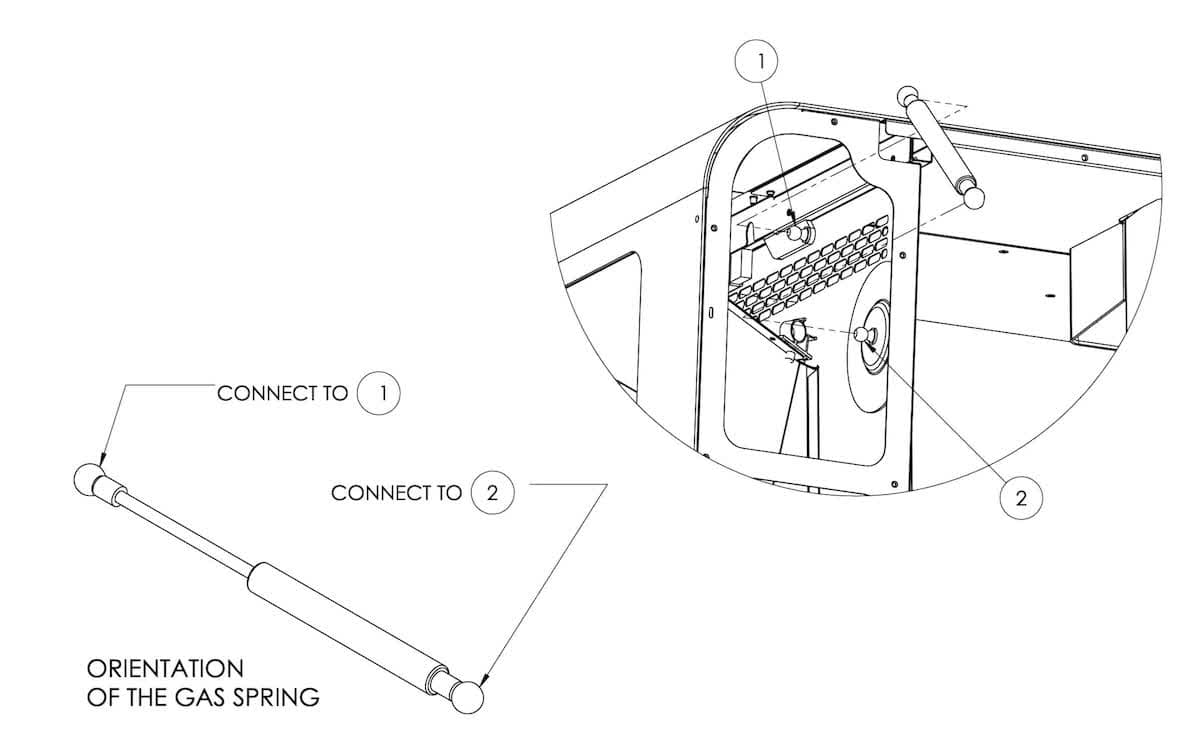
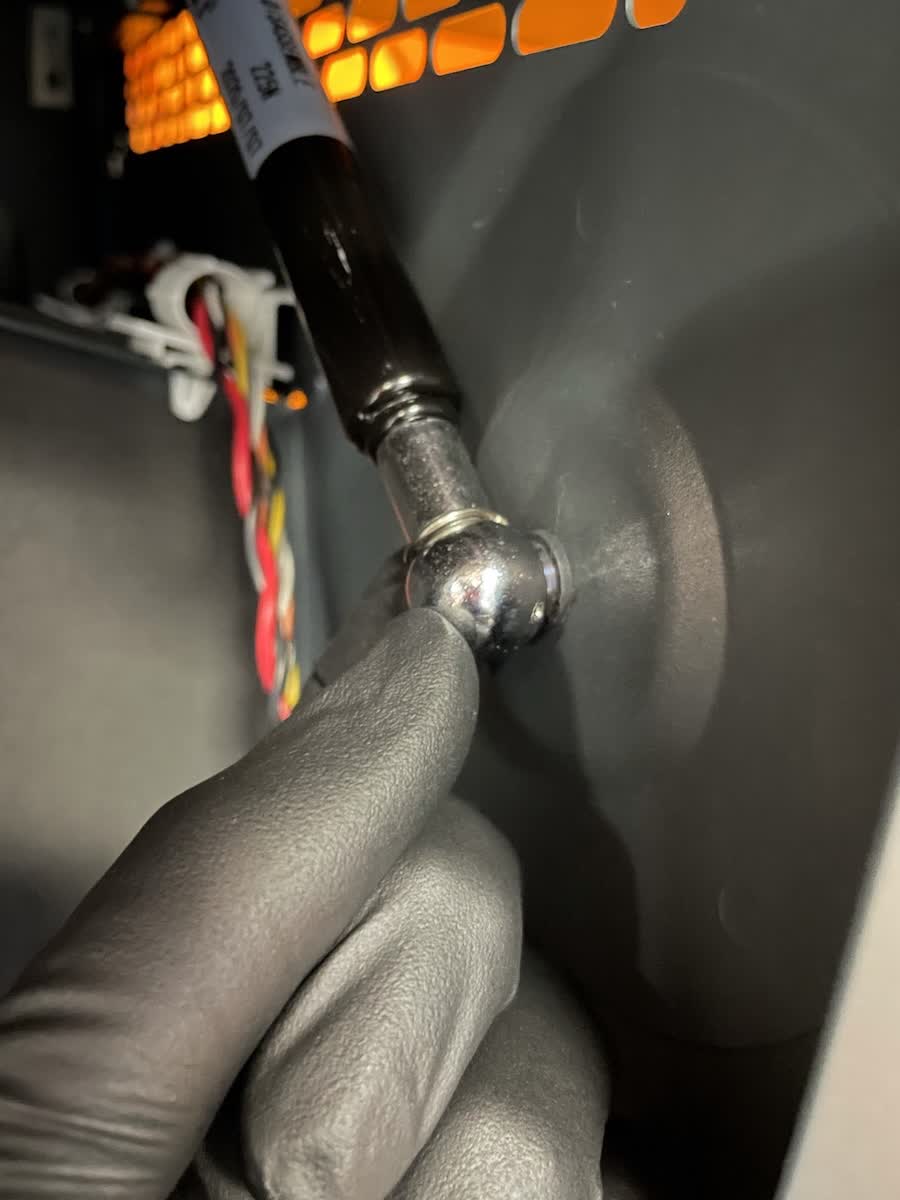
Leave the cover in the downward position. With the retaining ring kept in place with your thumb and forefinger, install the extended end of the gas spring onto the ball on the cover. Press the gas spring socket onto the ball until you hear an audible click. Note that installation of the retaining ring is not possible if the socket is not correctly attached to the ball.
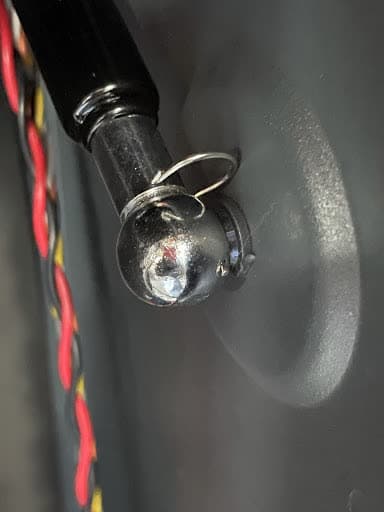
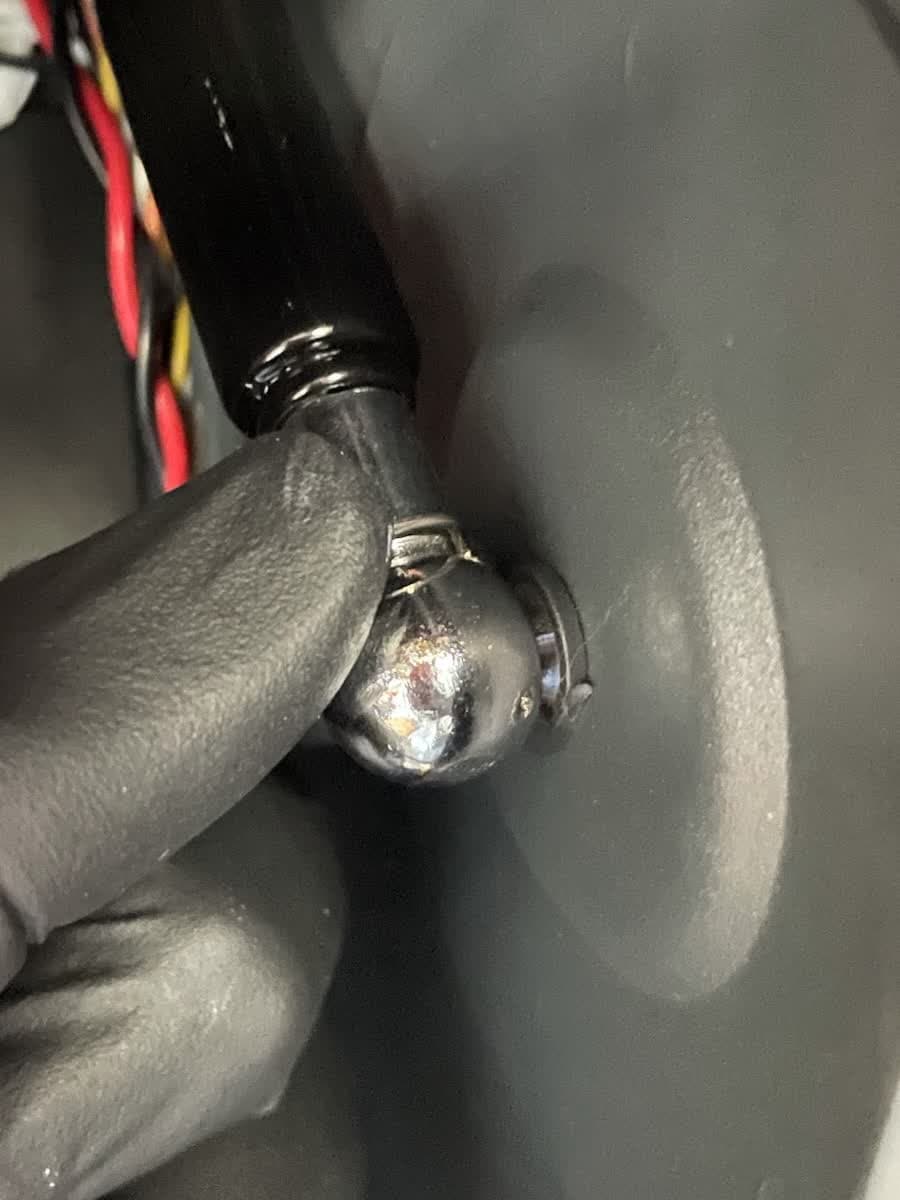
Use your thumb and index finger to fully insert the retaining ring into the socket, then rotate the retaining ring about the shaft and press firmly into place to lock the gas spring in place. The retaining ring should sit in the groove between the gas spring and shaft.
Raise and hyperextend the cover. One person keeps the cover in place while the other installs the rear end of the gas spring.
Press the gas spring socket onto the ball at the rear of the printer until you hear an audible click. Note that installation of the retaining ring is not possible if the socket is not correctly attached to the ball.
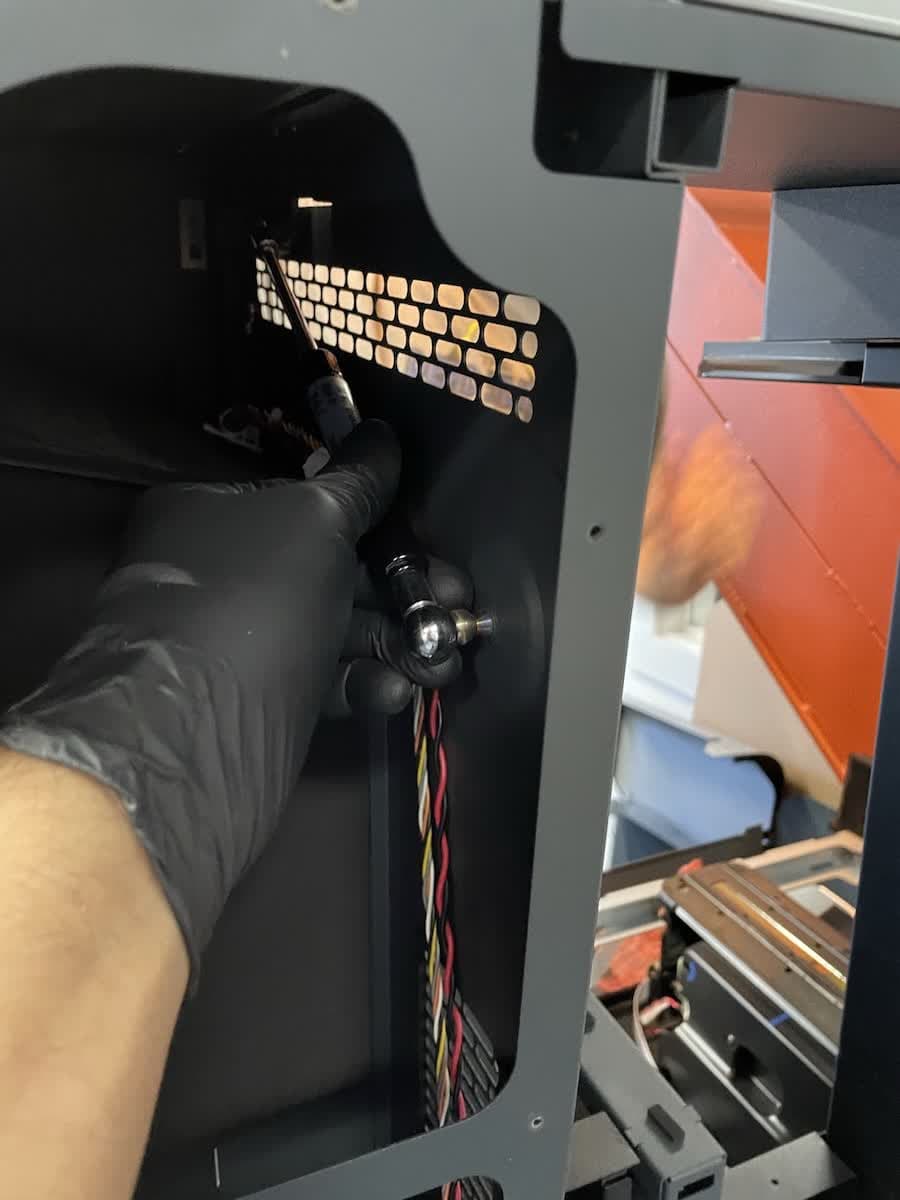
Step 4: Install the retaining ring
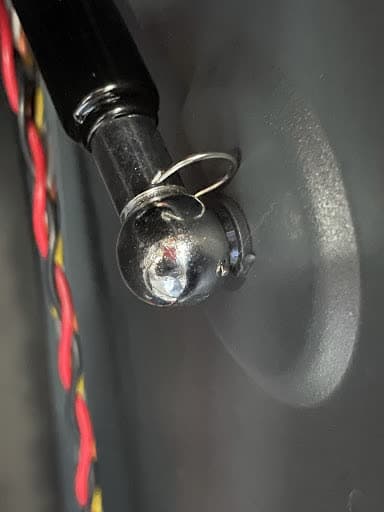
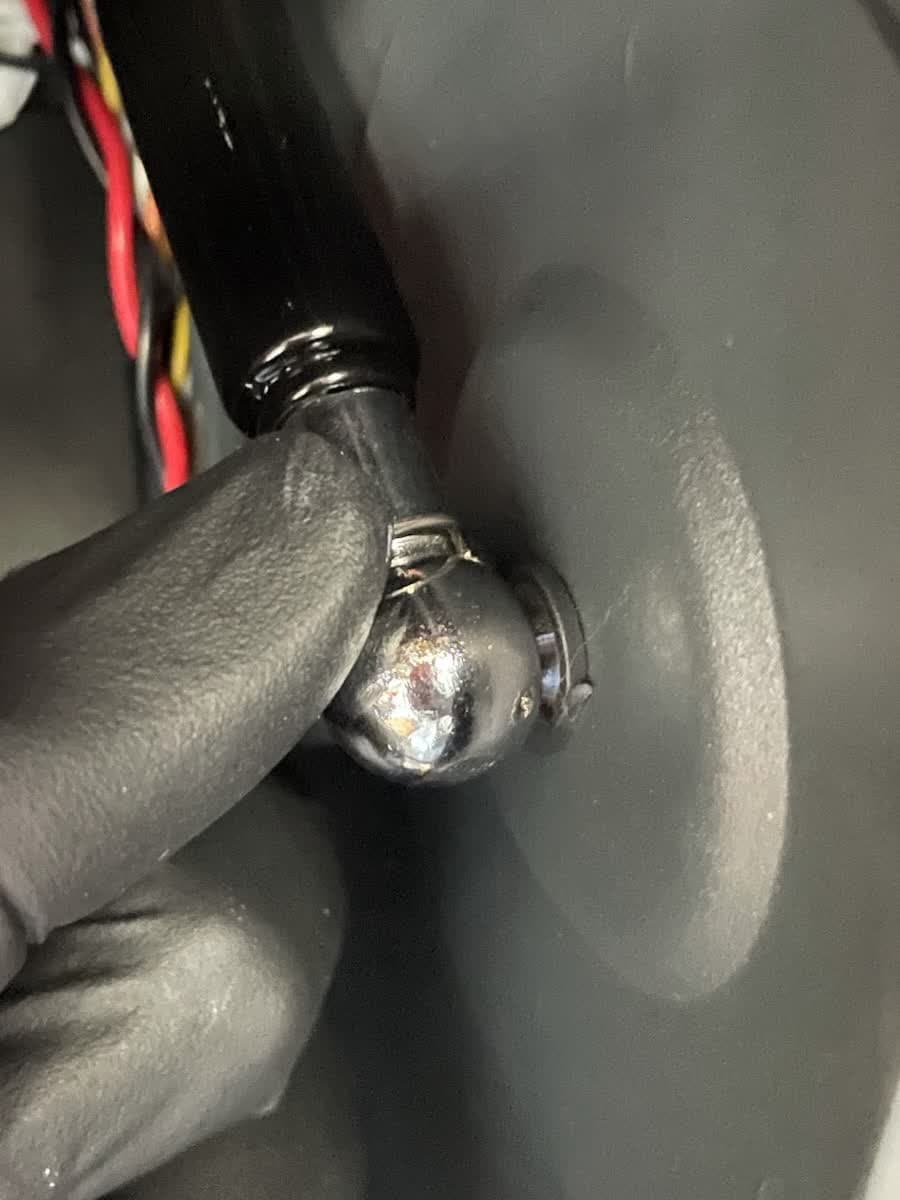
Install the retaining ring on the rear end of the gas spring. The long end of the retaining ring slides through the small holes in the gas spring socket.
Rotate the retaining ring about the shaft and press firmly into place to lock the gas spring in place.
Reinstalling the rear shell
Overview: After performing any other maintenance procedures, reinstall and secure the rear shell.
Step 1: Connect the rear fan
Lay the rear shell down behind the printer. Reconnect the two ends of the rear fan cable. Secure the fan cable to the rear shell with a strip of polyimide tape.
Step 2: Replace the rear shell
Place the rear shell back onto the printer, taking care to align the five pins on the shell with their respective holes. Press it towards the front of the printer to ensure that it fully seats in place. There should be no gaps between the rear shell and the side or bottom shells.
Step 3: Secure the rear shell
Using a T8 or T10 Torx driver, screw the 21 screws into the rear of the printer.
Finalizing the repair
Overview: After installing the new cover and gas spring, check if the cover stays open on its own and power on the printer.
Step 1: Test the cover
Ensure that the cover opens and closes smoothly and that the gas spring functions as intended. The cover should be able to remain open without assistance.
Step 2: Power on the printer
Plug in the printer to make sure that it can detect that the cover is closed. The printer should only display the Open Cover message when the cover is opened. Contact Formlabs Support or your authorized reseller to share the results of the procedure.