
Required supplies:
Formlabs:
- Replacement Z-axis limit switch
Third-party:
- 2.5 mm hex driver
- Nitrile gloves

The Form Wash L uses the Z-axis limit switch to detect that the wash basket is fully raised or lowered. If the Z-axis limit switch is damaged, the wash basket may not raise or lower properly.
Use this guide to replace the Form Wash L Z-axis limit switch.
Required supplies:
Formlabs:
Third-party:
Estimated time: 20–30 minutes
Preparing the workspace
Overview: Prepare the Form Wash L and a dust-free workspace for replacing the Z-axis limit switch.
Step 1: Prepare the workspace
Clear a workspace around your machine. Ensure that the workspace is well-ventilated and free of dust.
Step 2: Unplug the networking cables and Wi-Fi antenna
Disconnect the Ethernet and USB cables from the unit, if they are connected. Unscrew and remove the Wi-Fi antenna.
Step 3: Unplug the machine
DANGER:
Performing maintenance on the machine while it is plugged in increases the risk of electric shock. Never remove the panels of the machine while it is plugged in. Never reconnect the machine to power while the panels are uninstalled.
Disconnect the power cable from the machine before continuing with maintenance. Do not perform maintenance on the machine while it is connected to power. Wait five minutes after disconnecting the machine from power before proceeding.
Removing the right shell
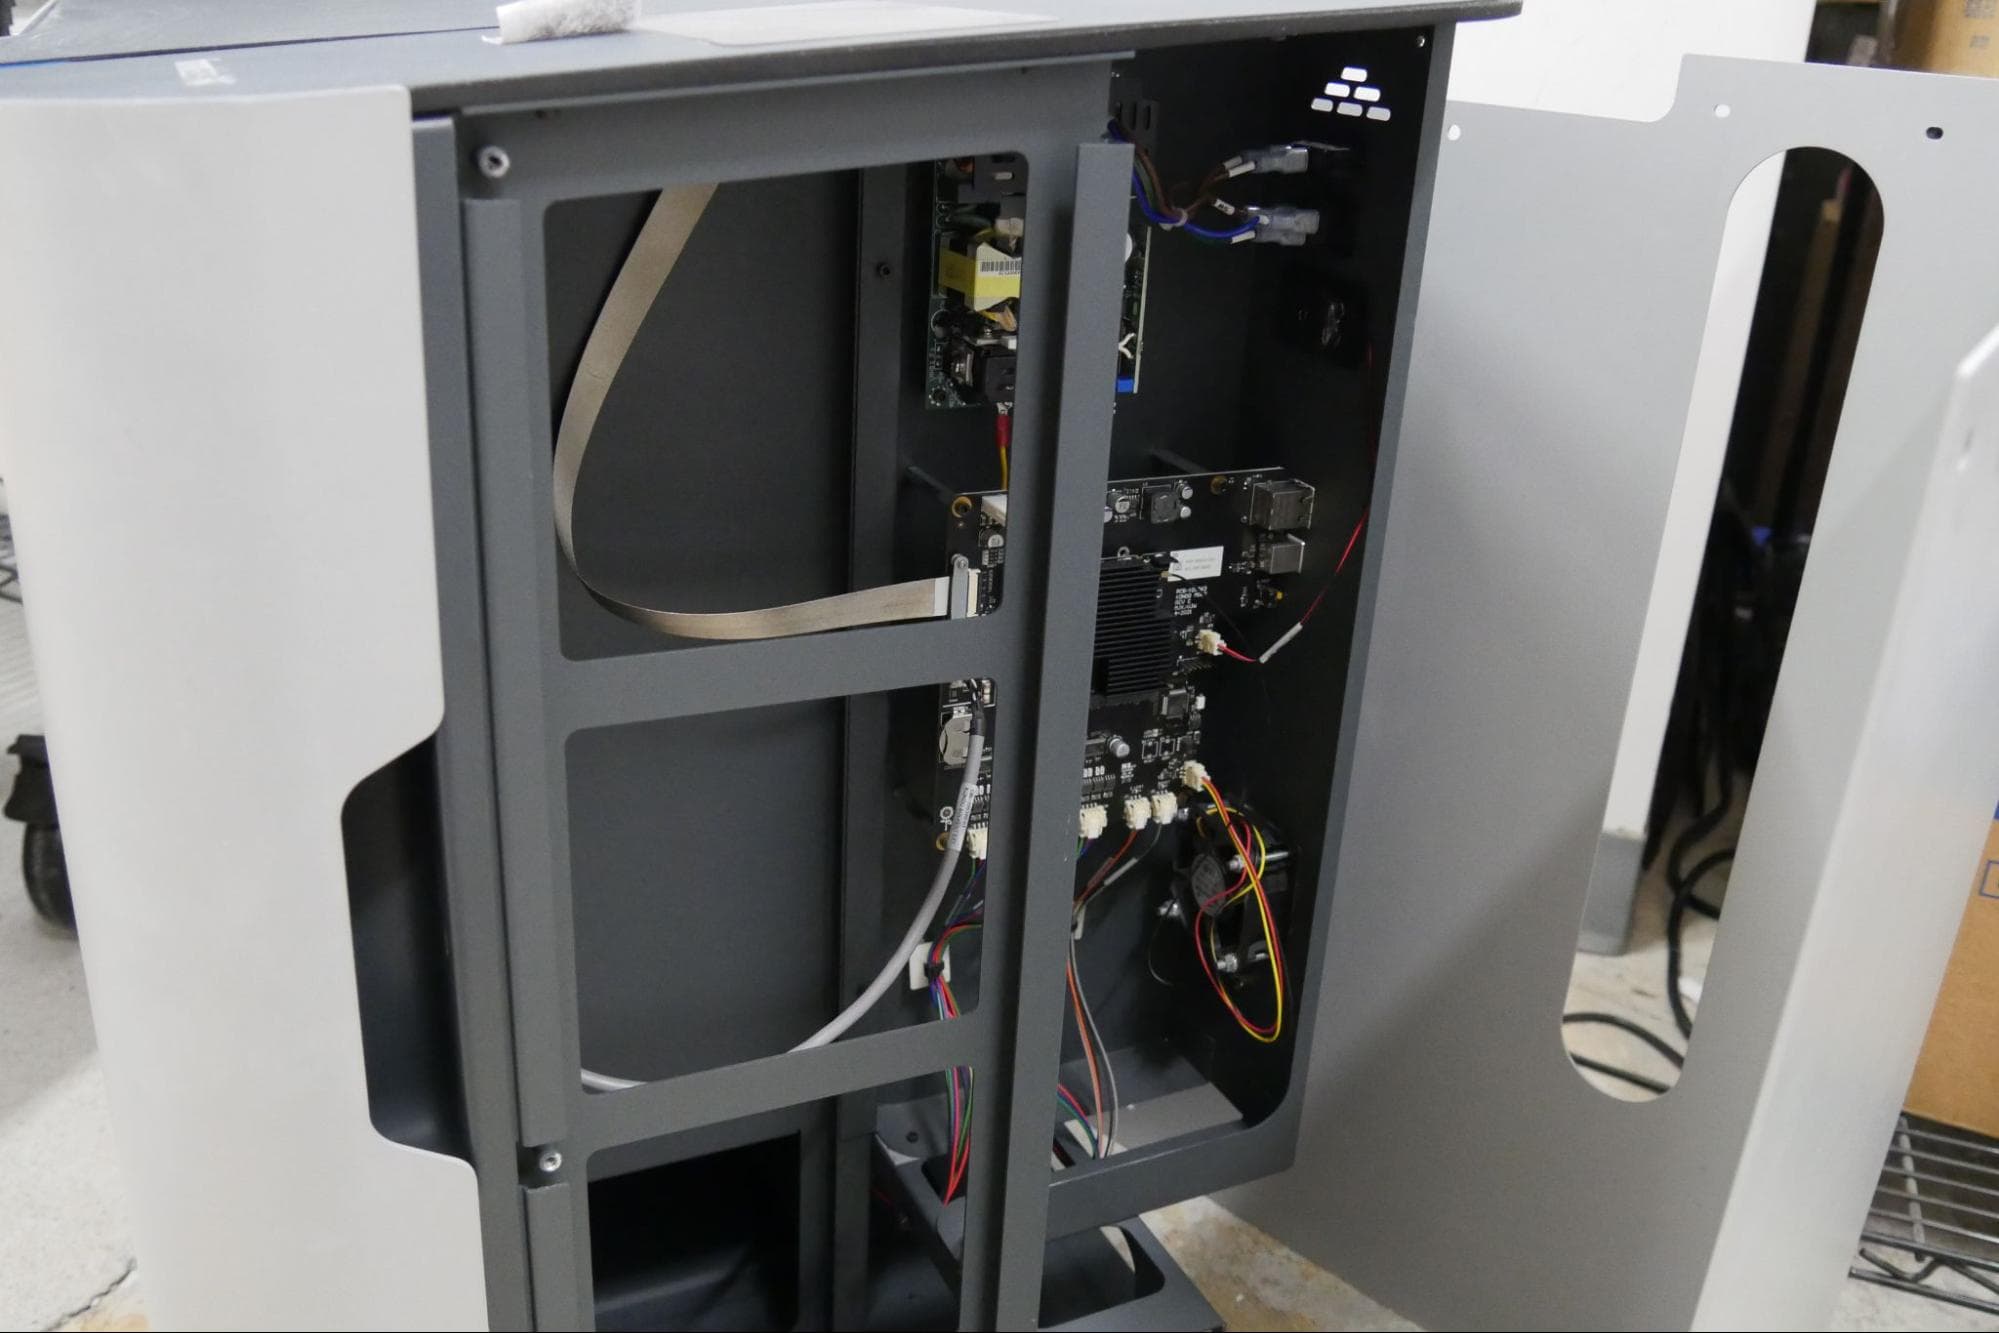
Overview: Remove the right shell of the machine to access the limit switch.
NOTICE:
The Form Wash L contains sensitive electronic components. Ground yourself before touching any electronics in the machine by using a grounding strap or touching a grounded piece of metal.
Step 1: Unscrew the right shell screws
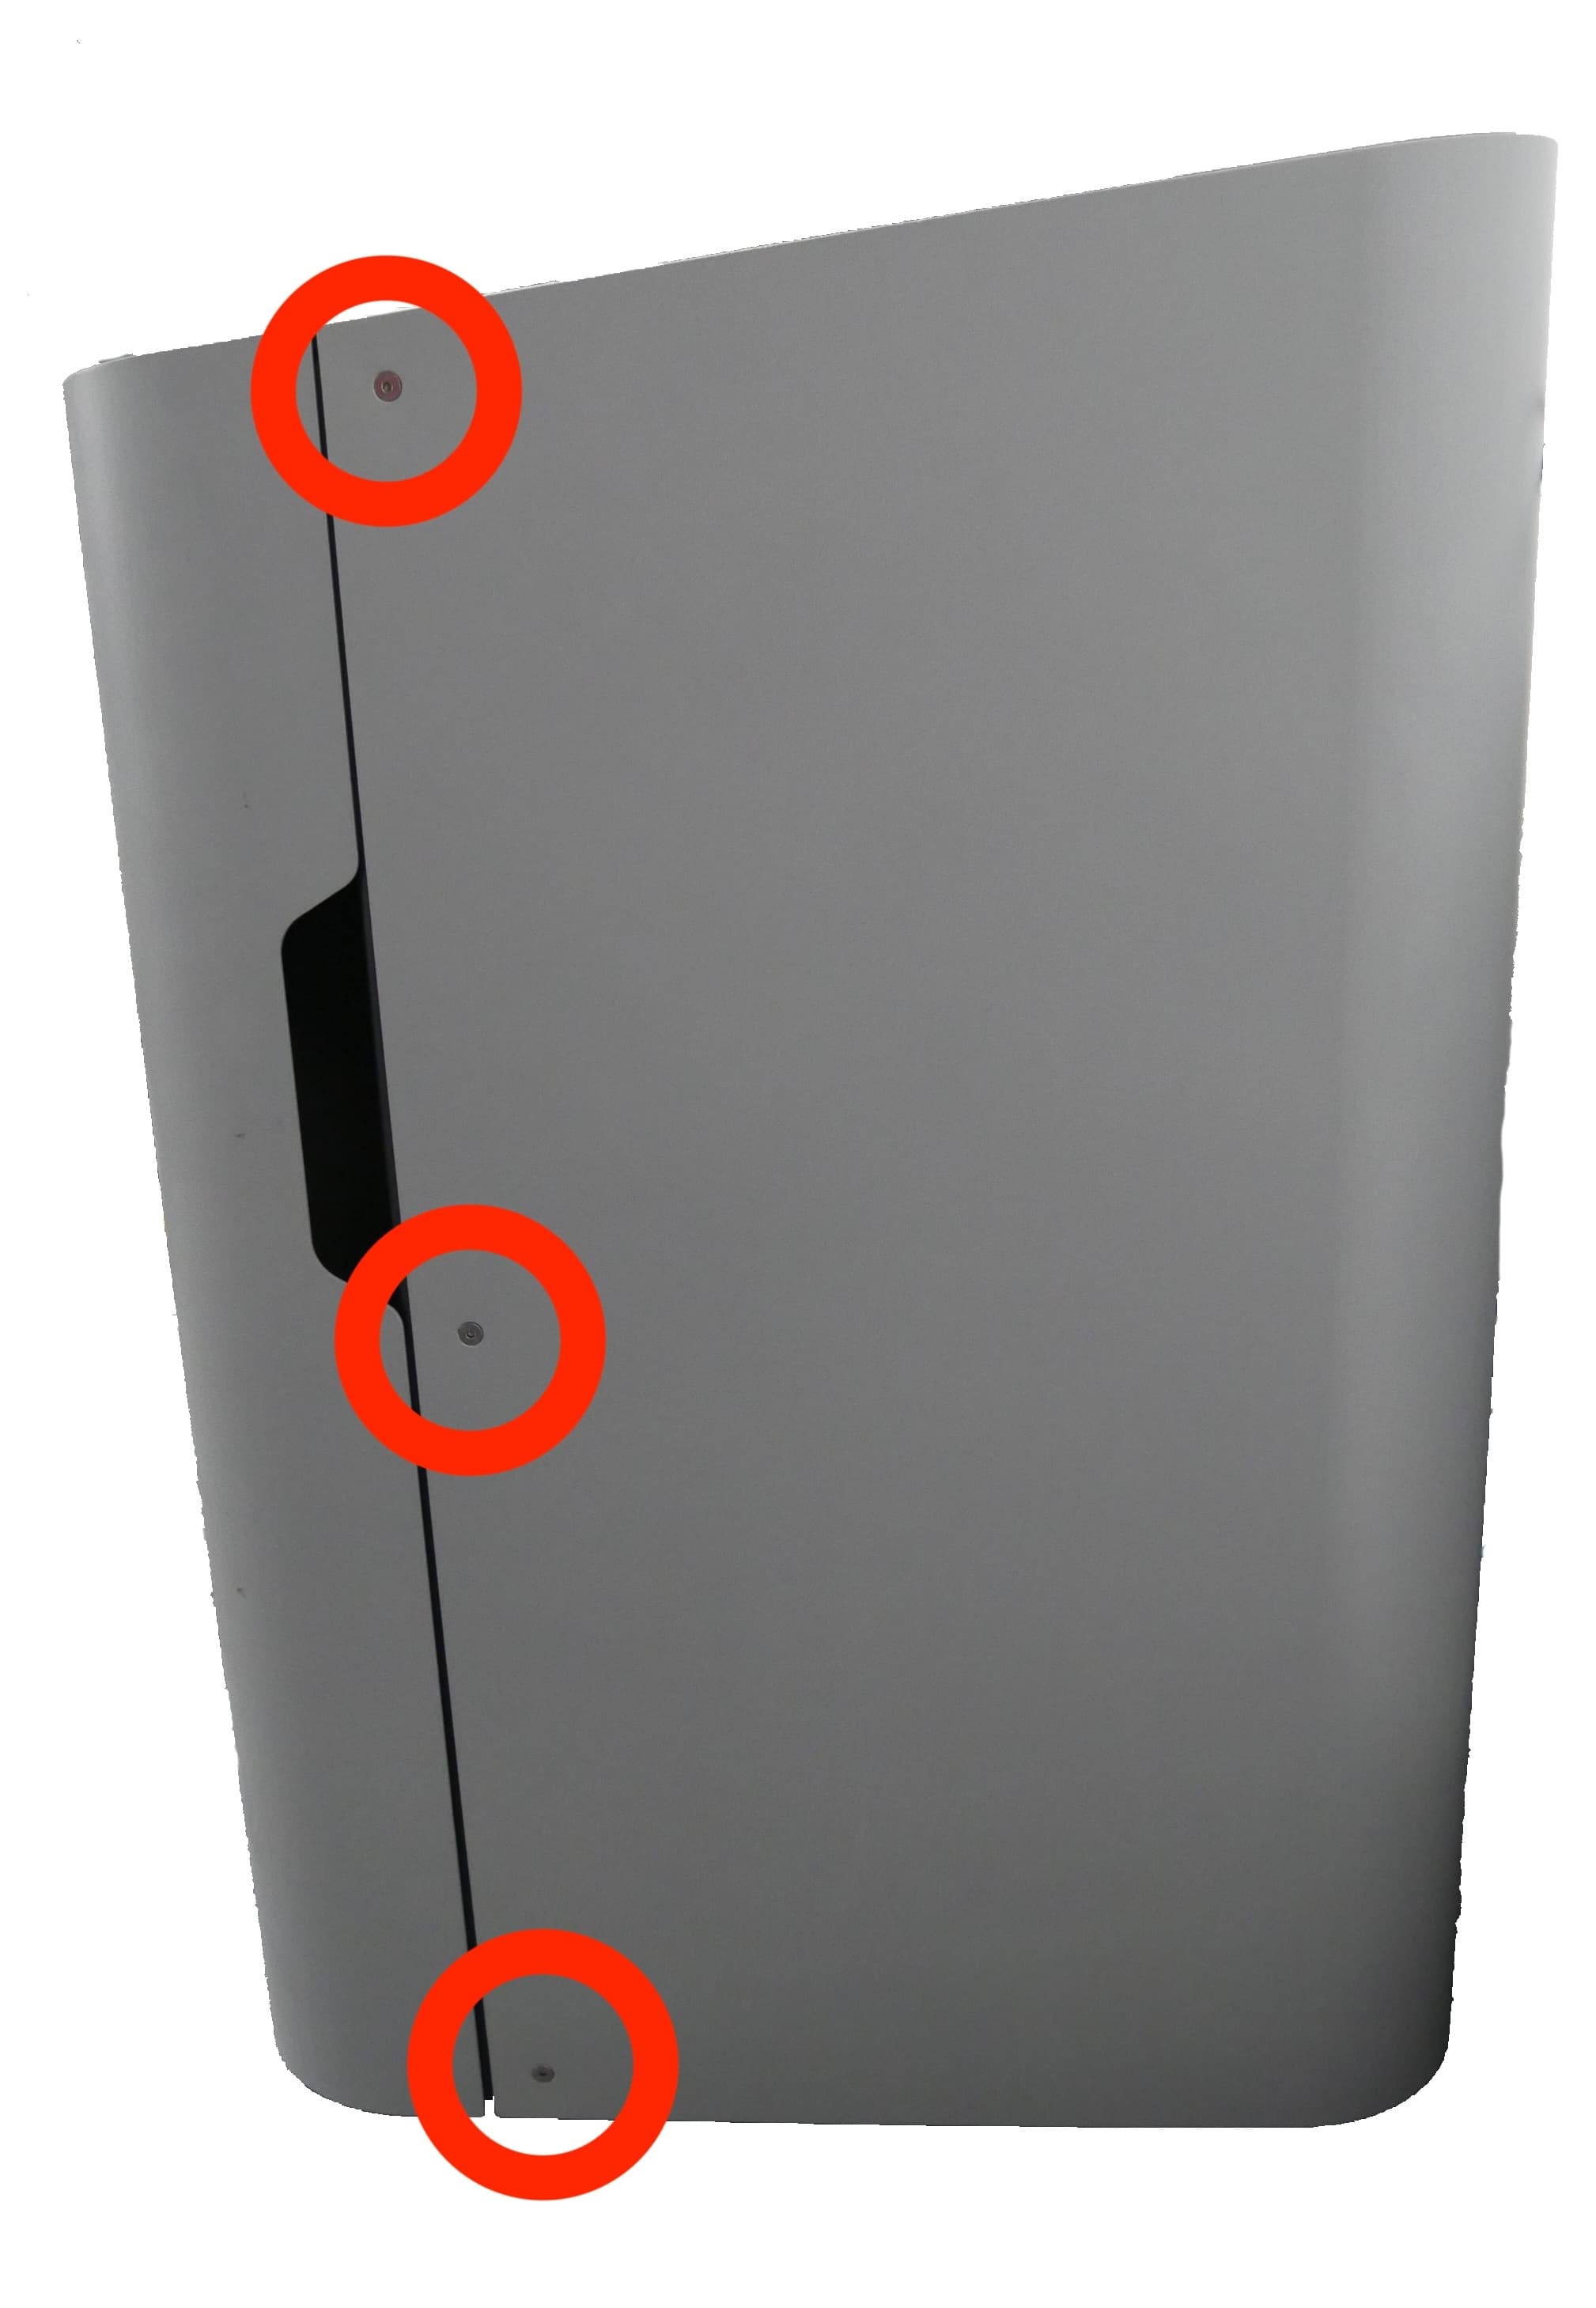
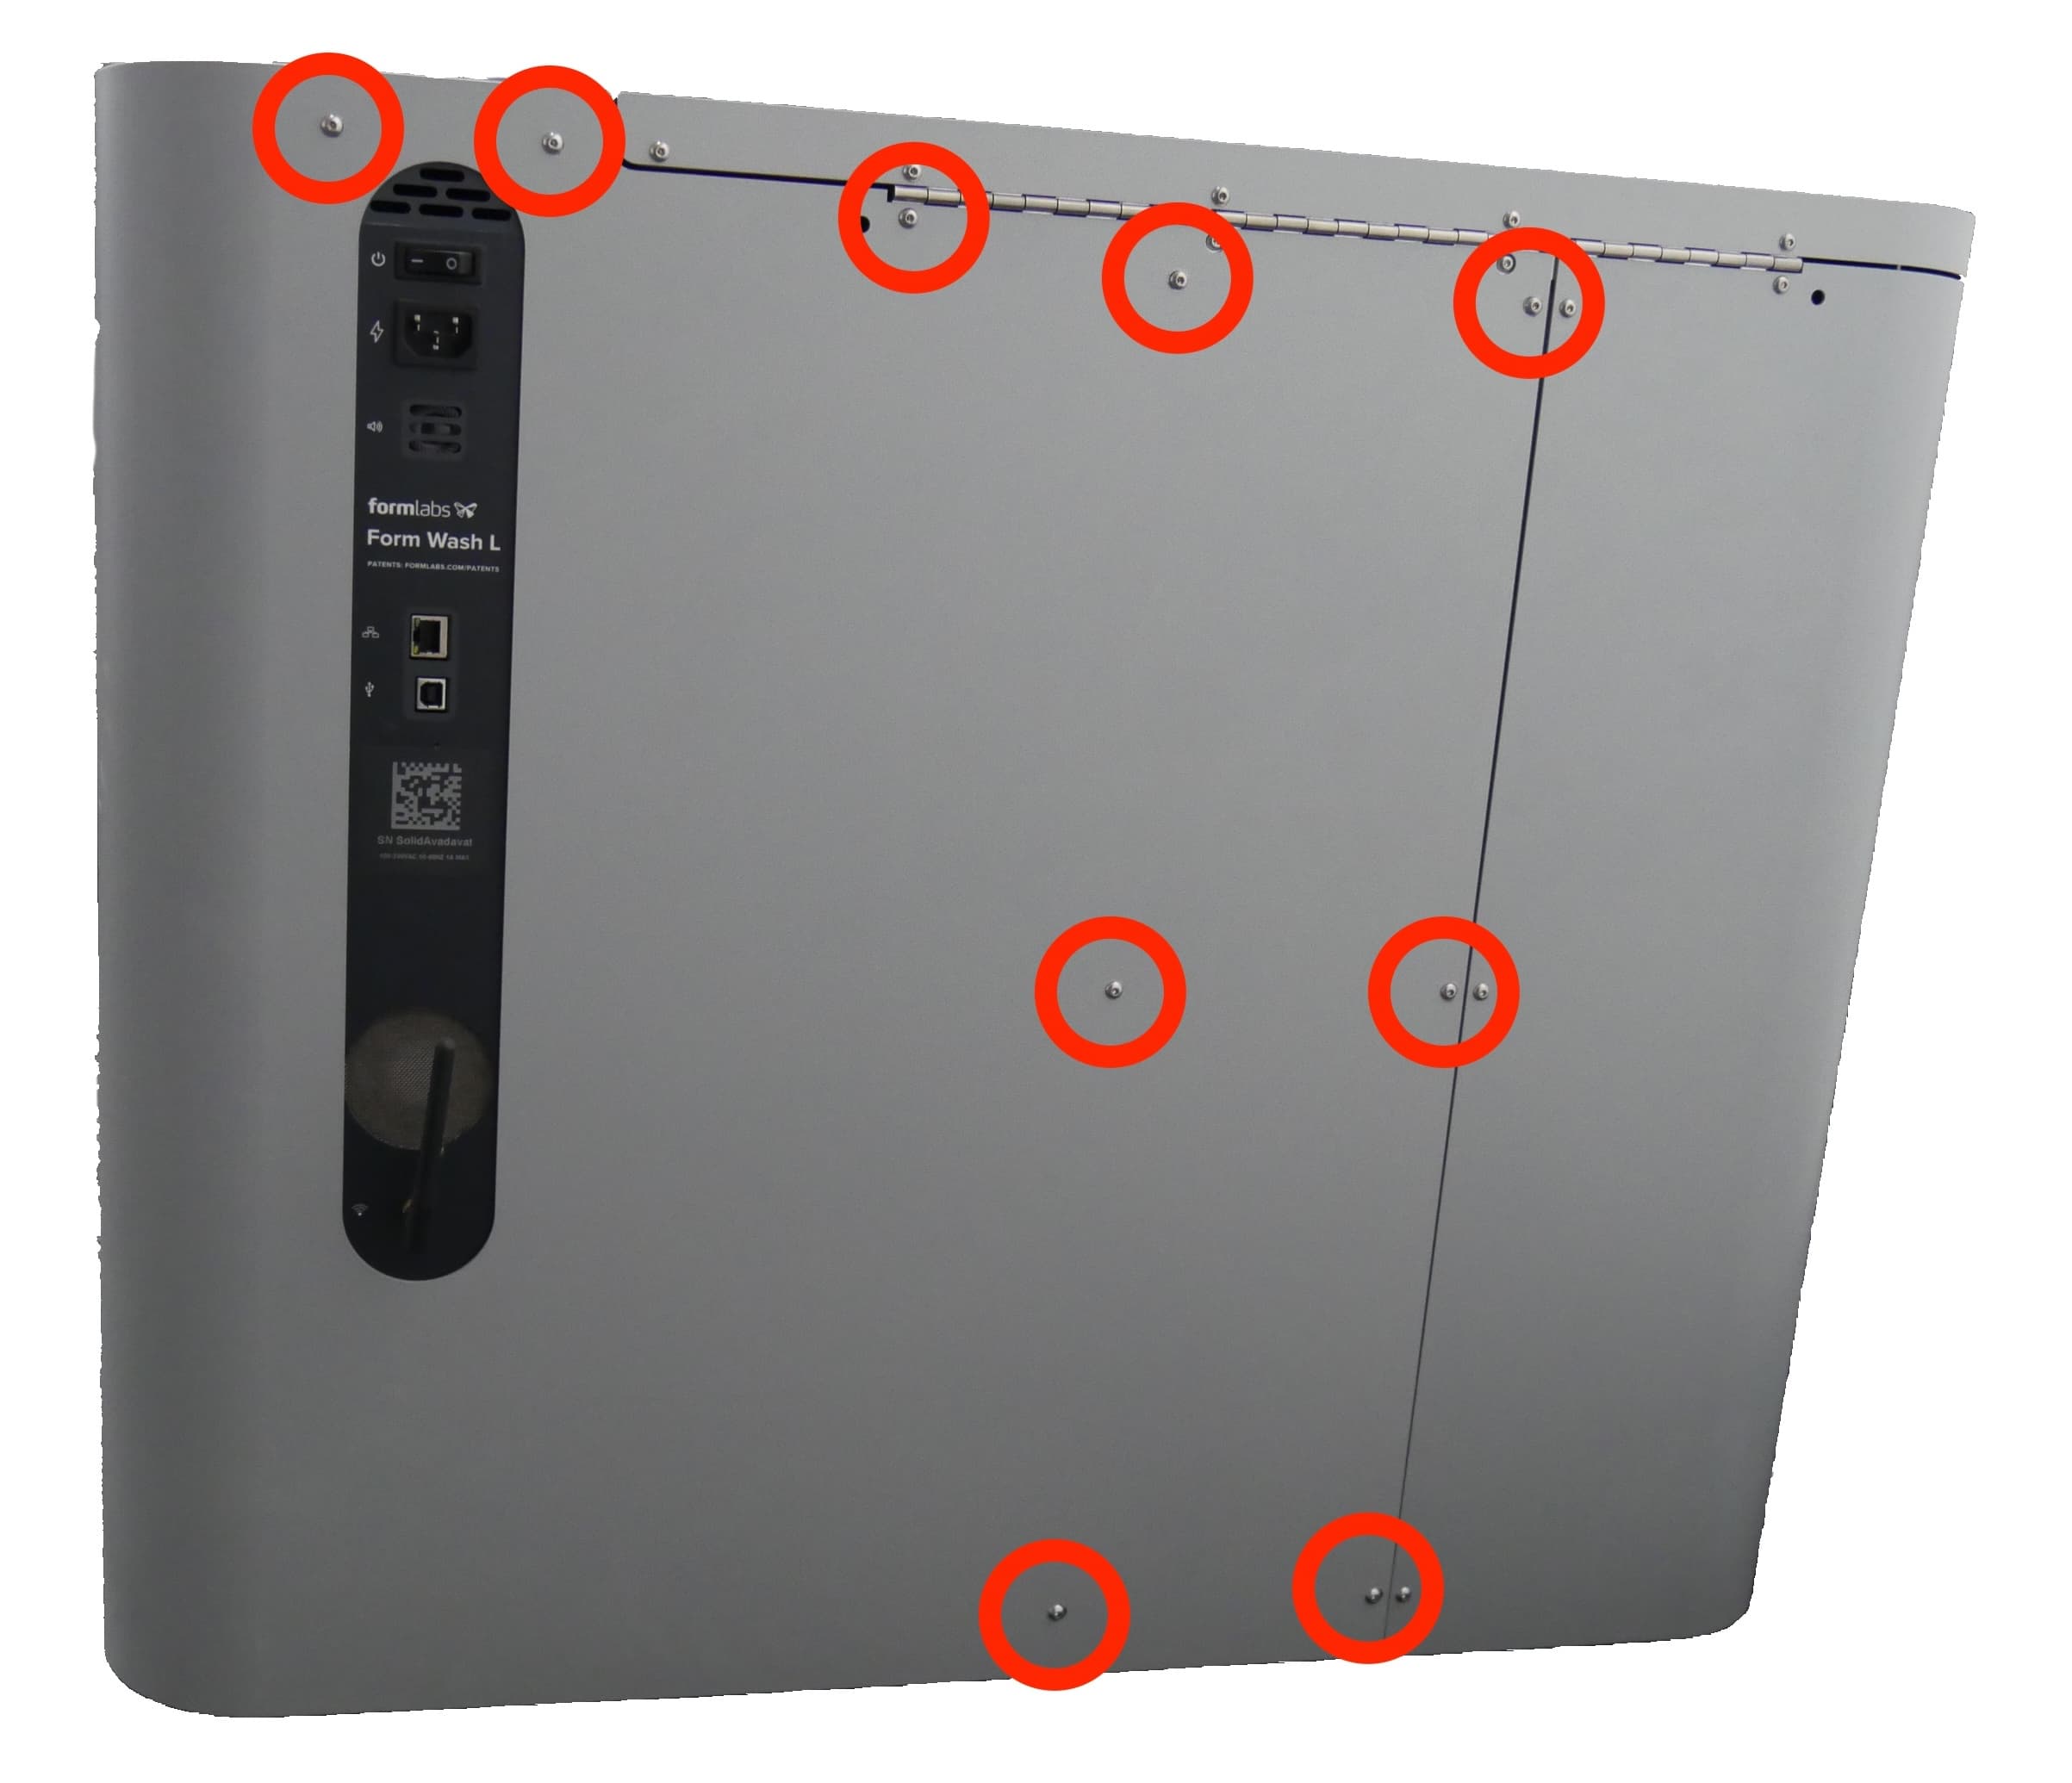
Use the 2.5 mm hex driver to loosen and remove the 12 screws holding the right shell to the frame of the Form Wash L. Three countersunk screws are located on the right side of the machine and nine button head screws are located on the rear. Set the screws aside.
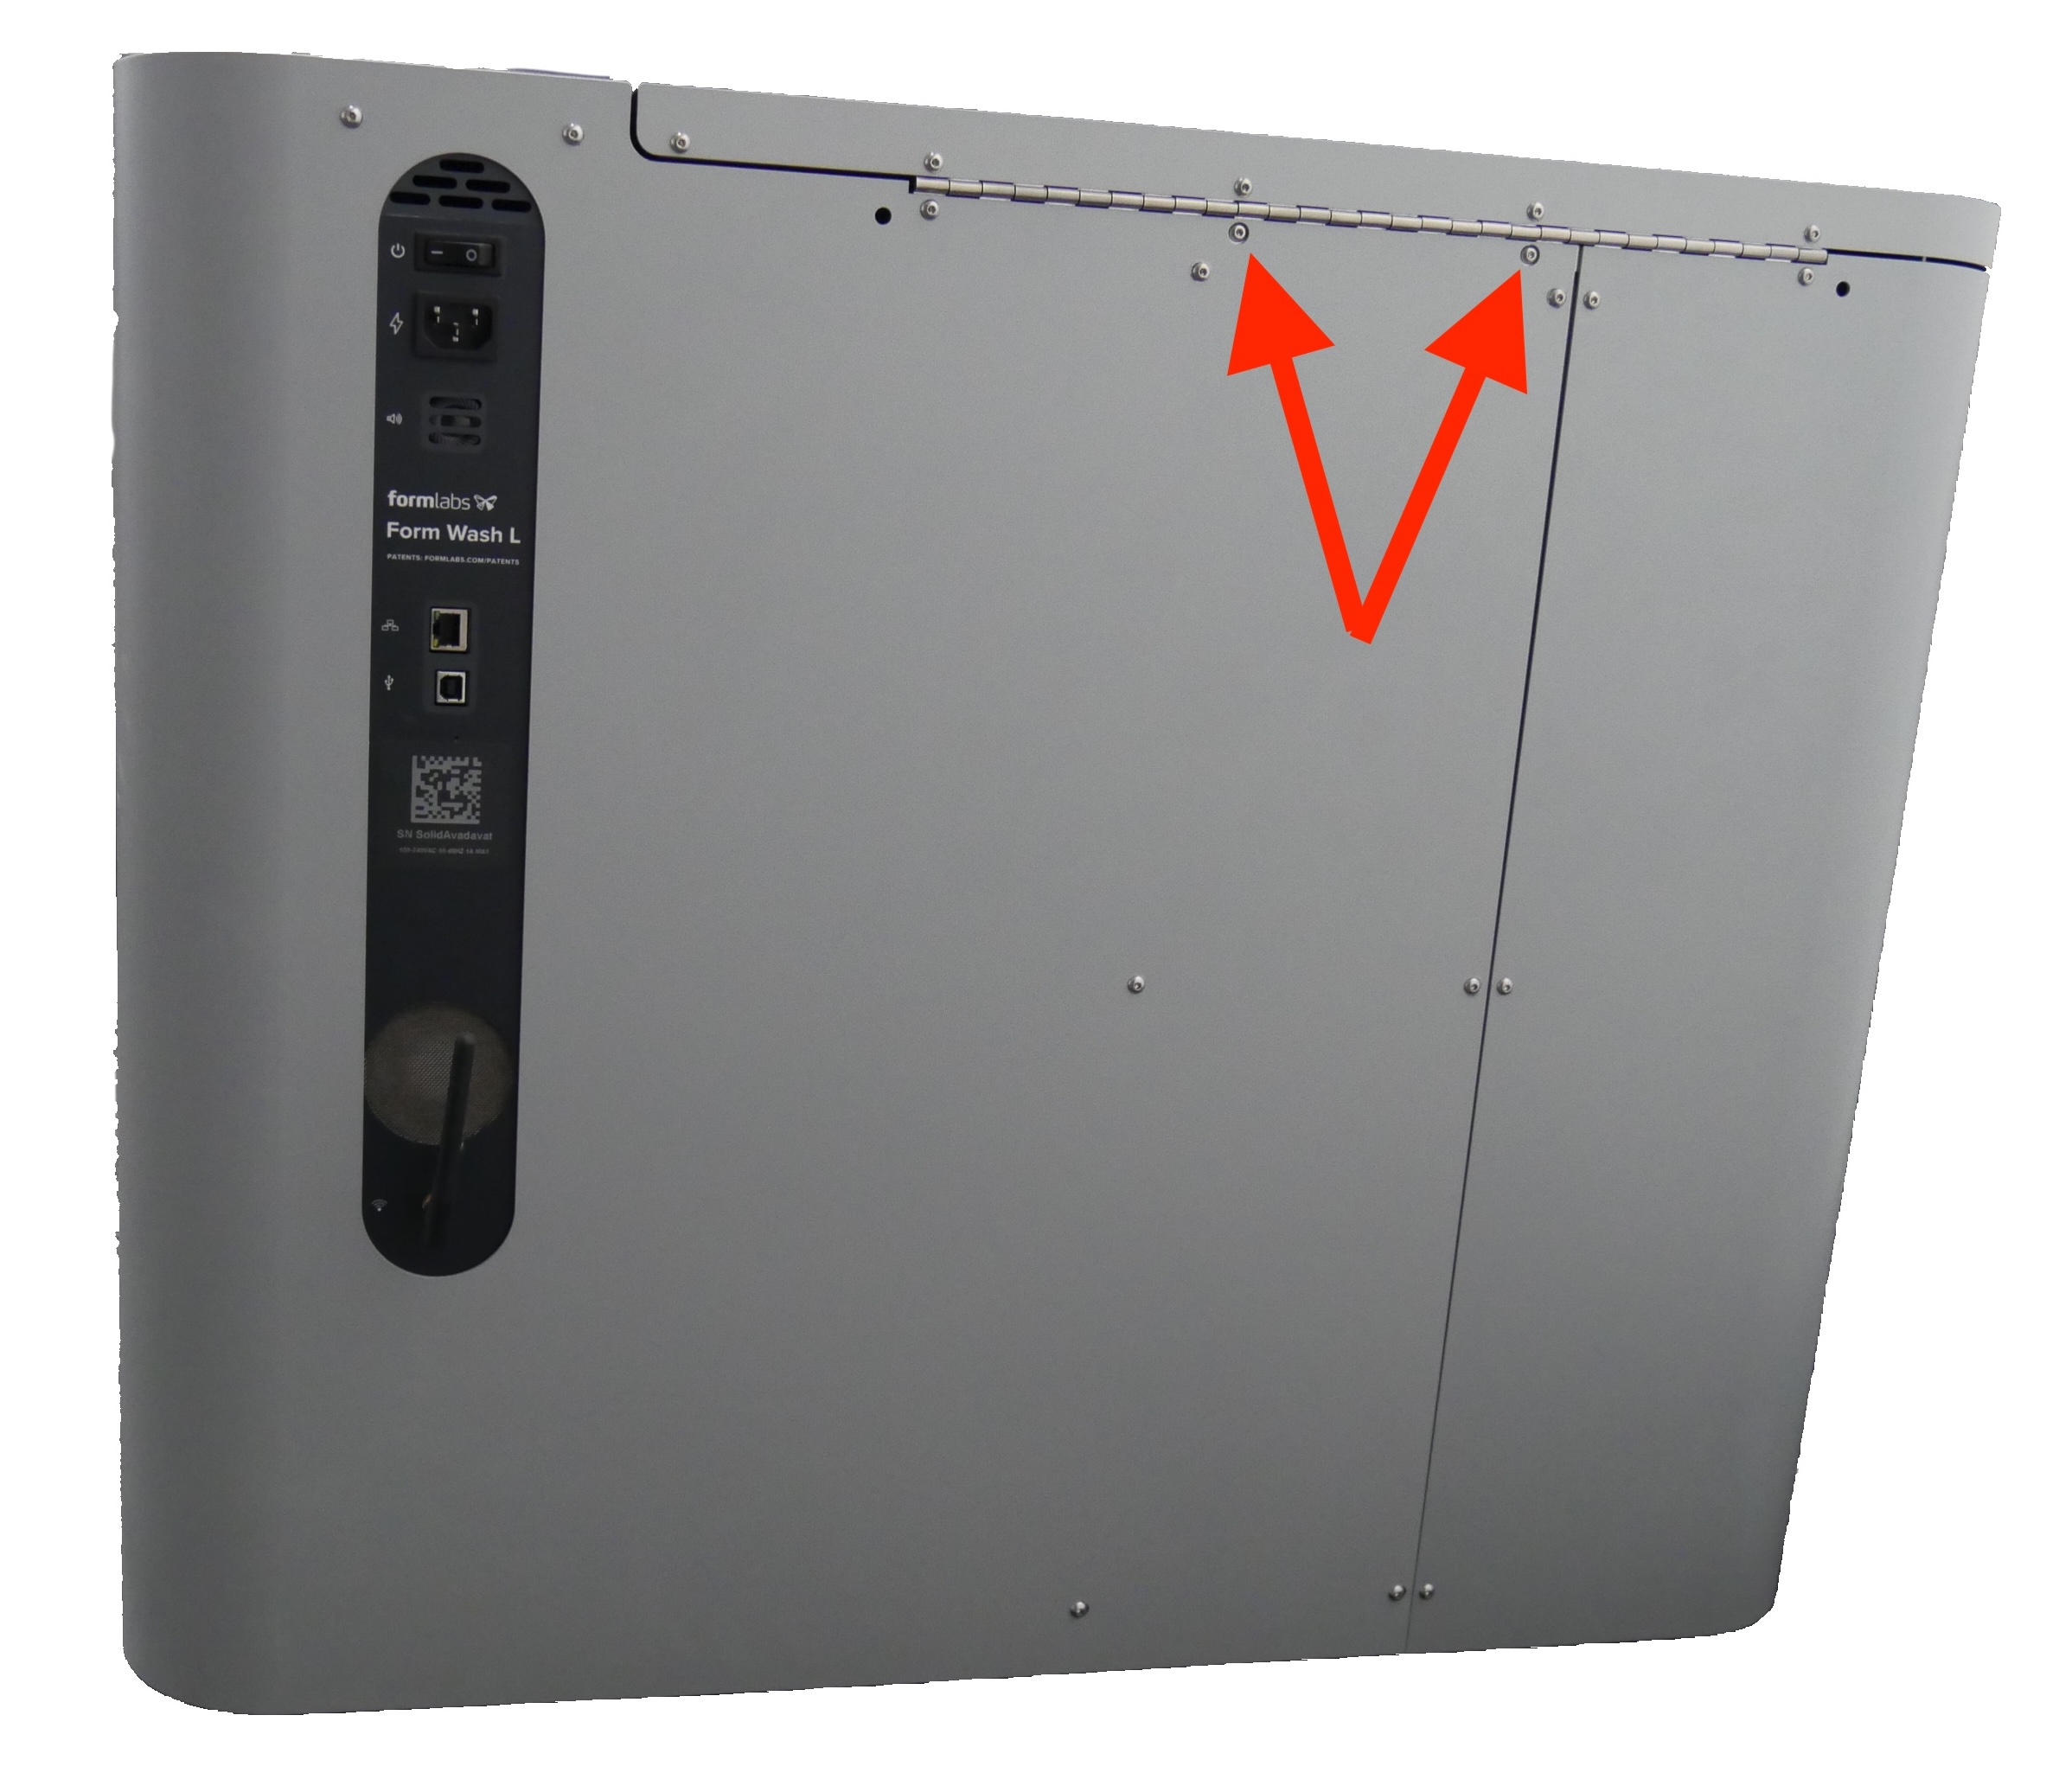
NOTICE:
There are two screws, accessible through cutouts in the right shell, that secure the lid to the frame of the machine. Do not remove these screws during this procedure.
Pull the right shell away from the Form Wash L to separate it from the machine’s frame. Set the right shell aside.
Removing the Z-axis limit switch
Overview: Unscrew and uninstall the limit switch.
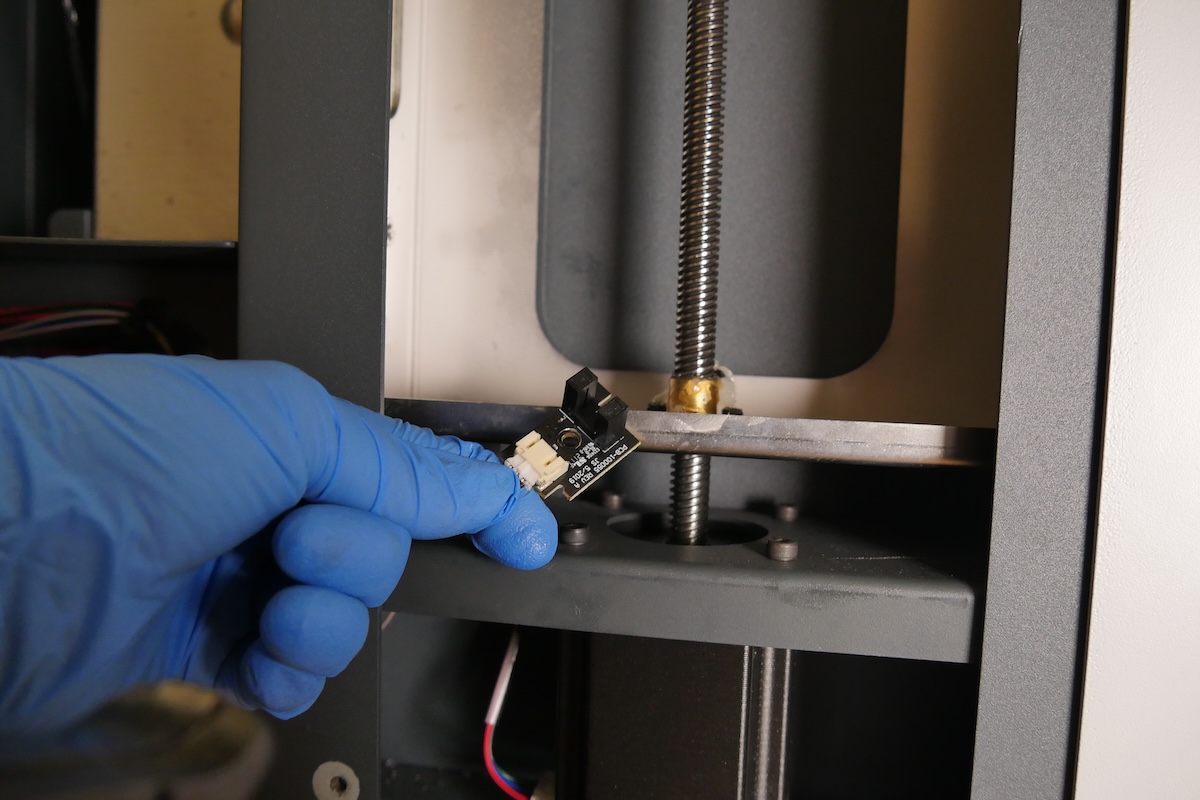
Locate the Z-axis limit switch, positioned to the left of the Z-axis lead screw (when facing the Form Wash L from the back).
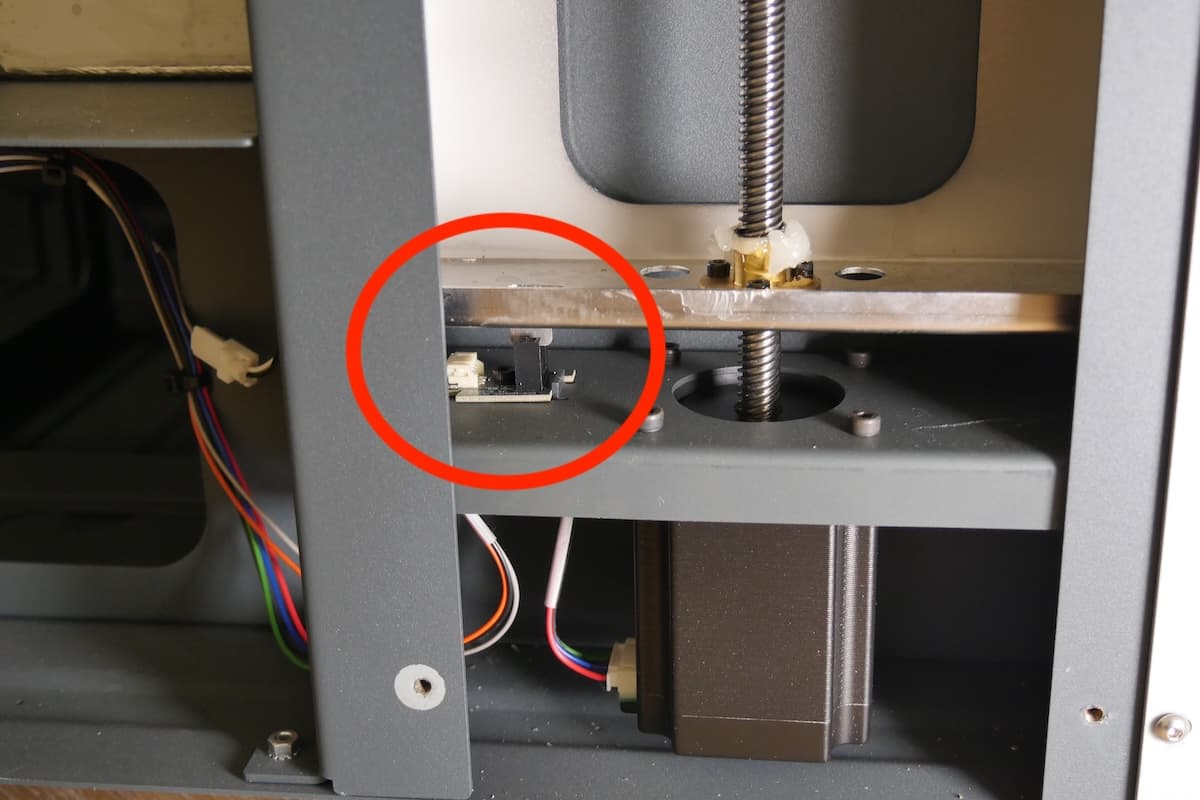
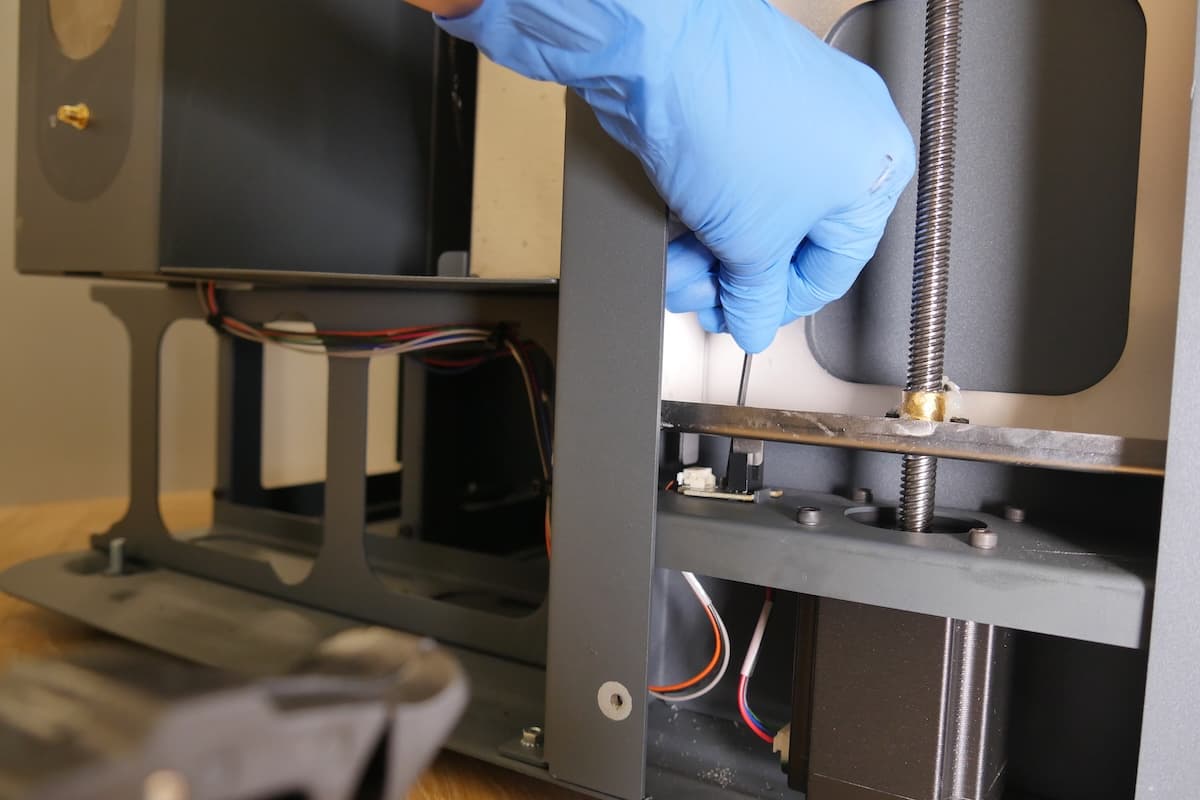
Using a 2.5 mm hex driver, loosen and remove the screw securing the limit switch to the Form Wash L. If you are unable to reach the limit switch screw with a normal hex driver, use a ball-end hex driver. Set the screw aside.
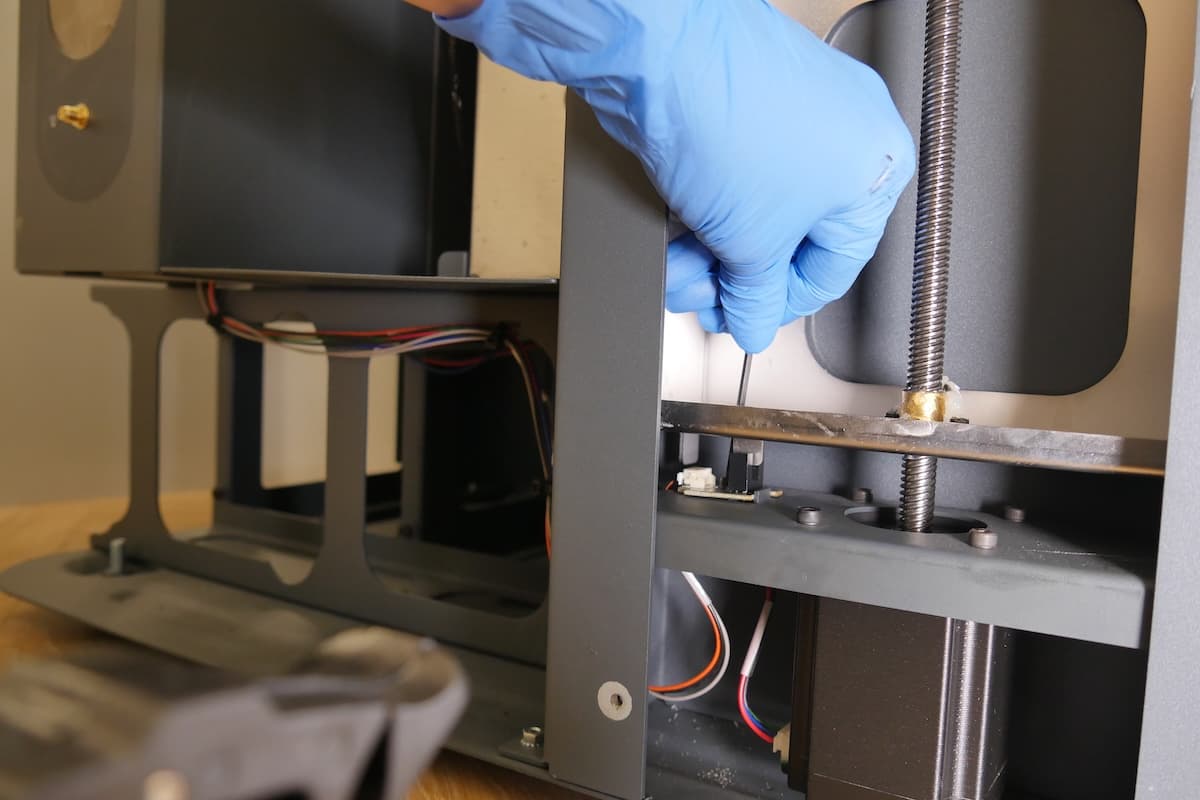
Disconnect the cable from the limit switch board. Pull on the plastic connector, not the wires themselves.
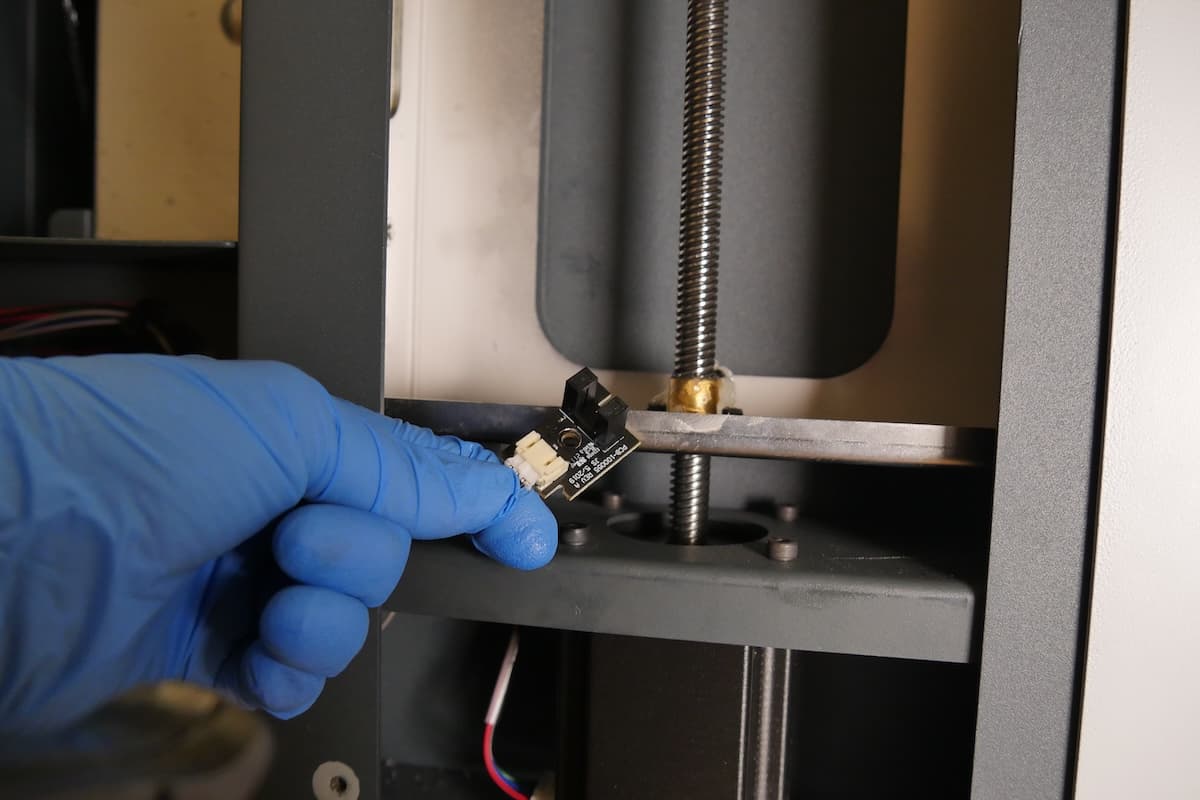
Remove the limit switch from the Form Wash L and set it aside for disposal.
Installing the new Z-axis limit switch
Overview: Mount and secure the new Z-axis limit switch.
Connect the limit switch cable to the replacement limit switch. The connectors only fits in the correct orientation.
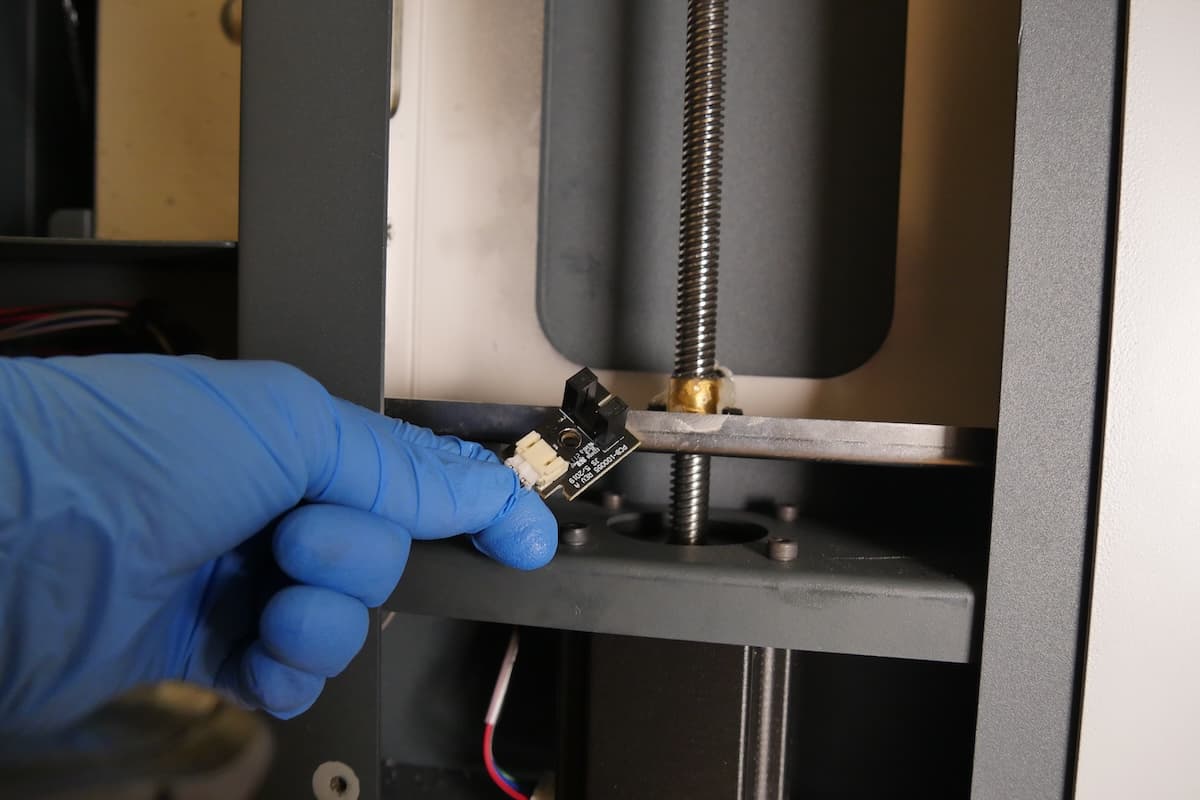
Orient the limit switch with the cable extending to the left. Align the screw hole in the limit switch with the corresponding screw hole next to the Z-axis lead screw.
Thread the limit switch retention screw into the screw hole in the switch. Use a 2.5 mm hex driver to tighten until snug.
Reinstalling the right shell
Overview: Reinstall and secure the right shell.
Step 1: Reinstall the right shell
Hold the right shell against the Form Wash L. Check that the screw holes in the right shell line up with the corresponding screw holes in the frame of the machine. Loosely thread the three countersunk 2.5 mm hex screws into the screw holes on the right side of the machine and the nine button head screws into the screw holes on the back of the machine.
Step 2: Secure the right shell
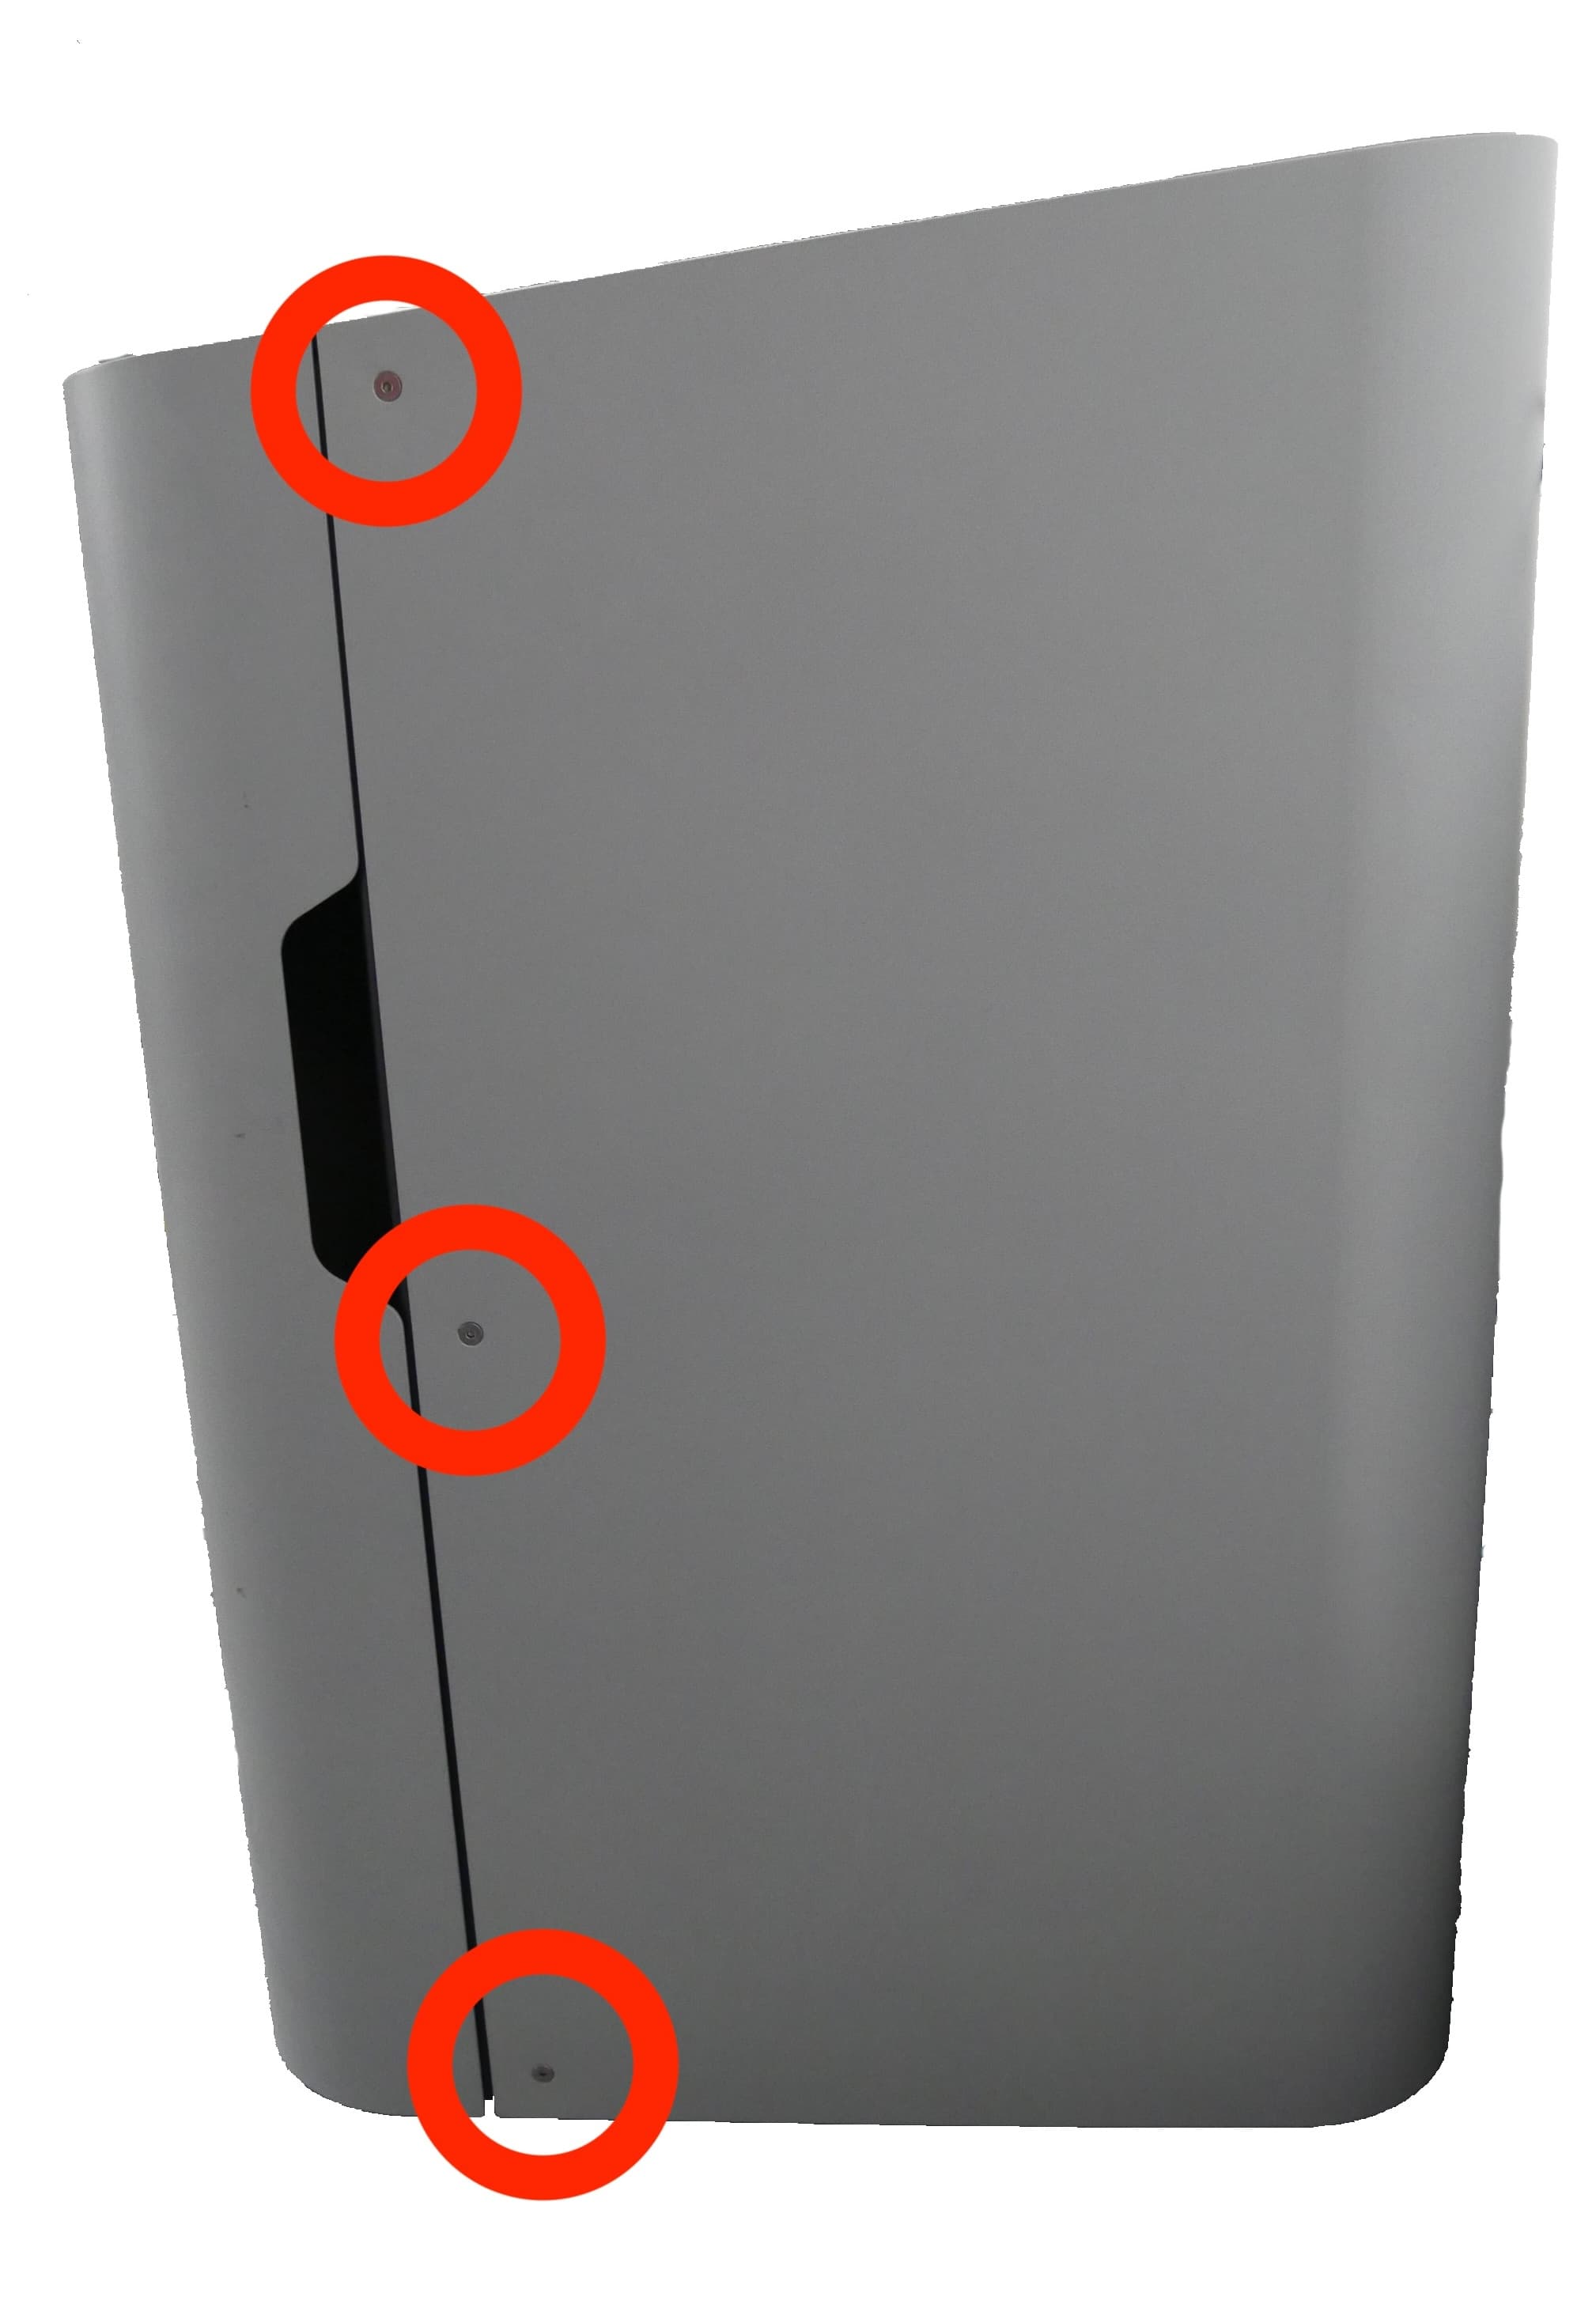
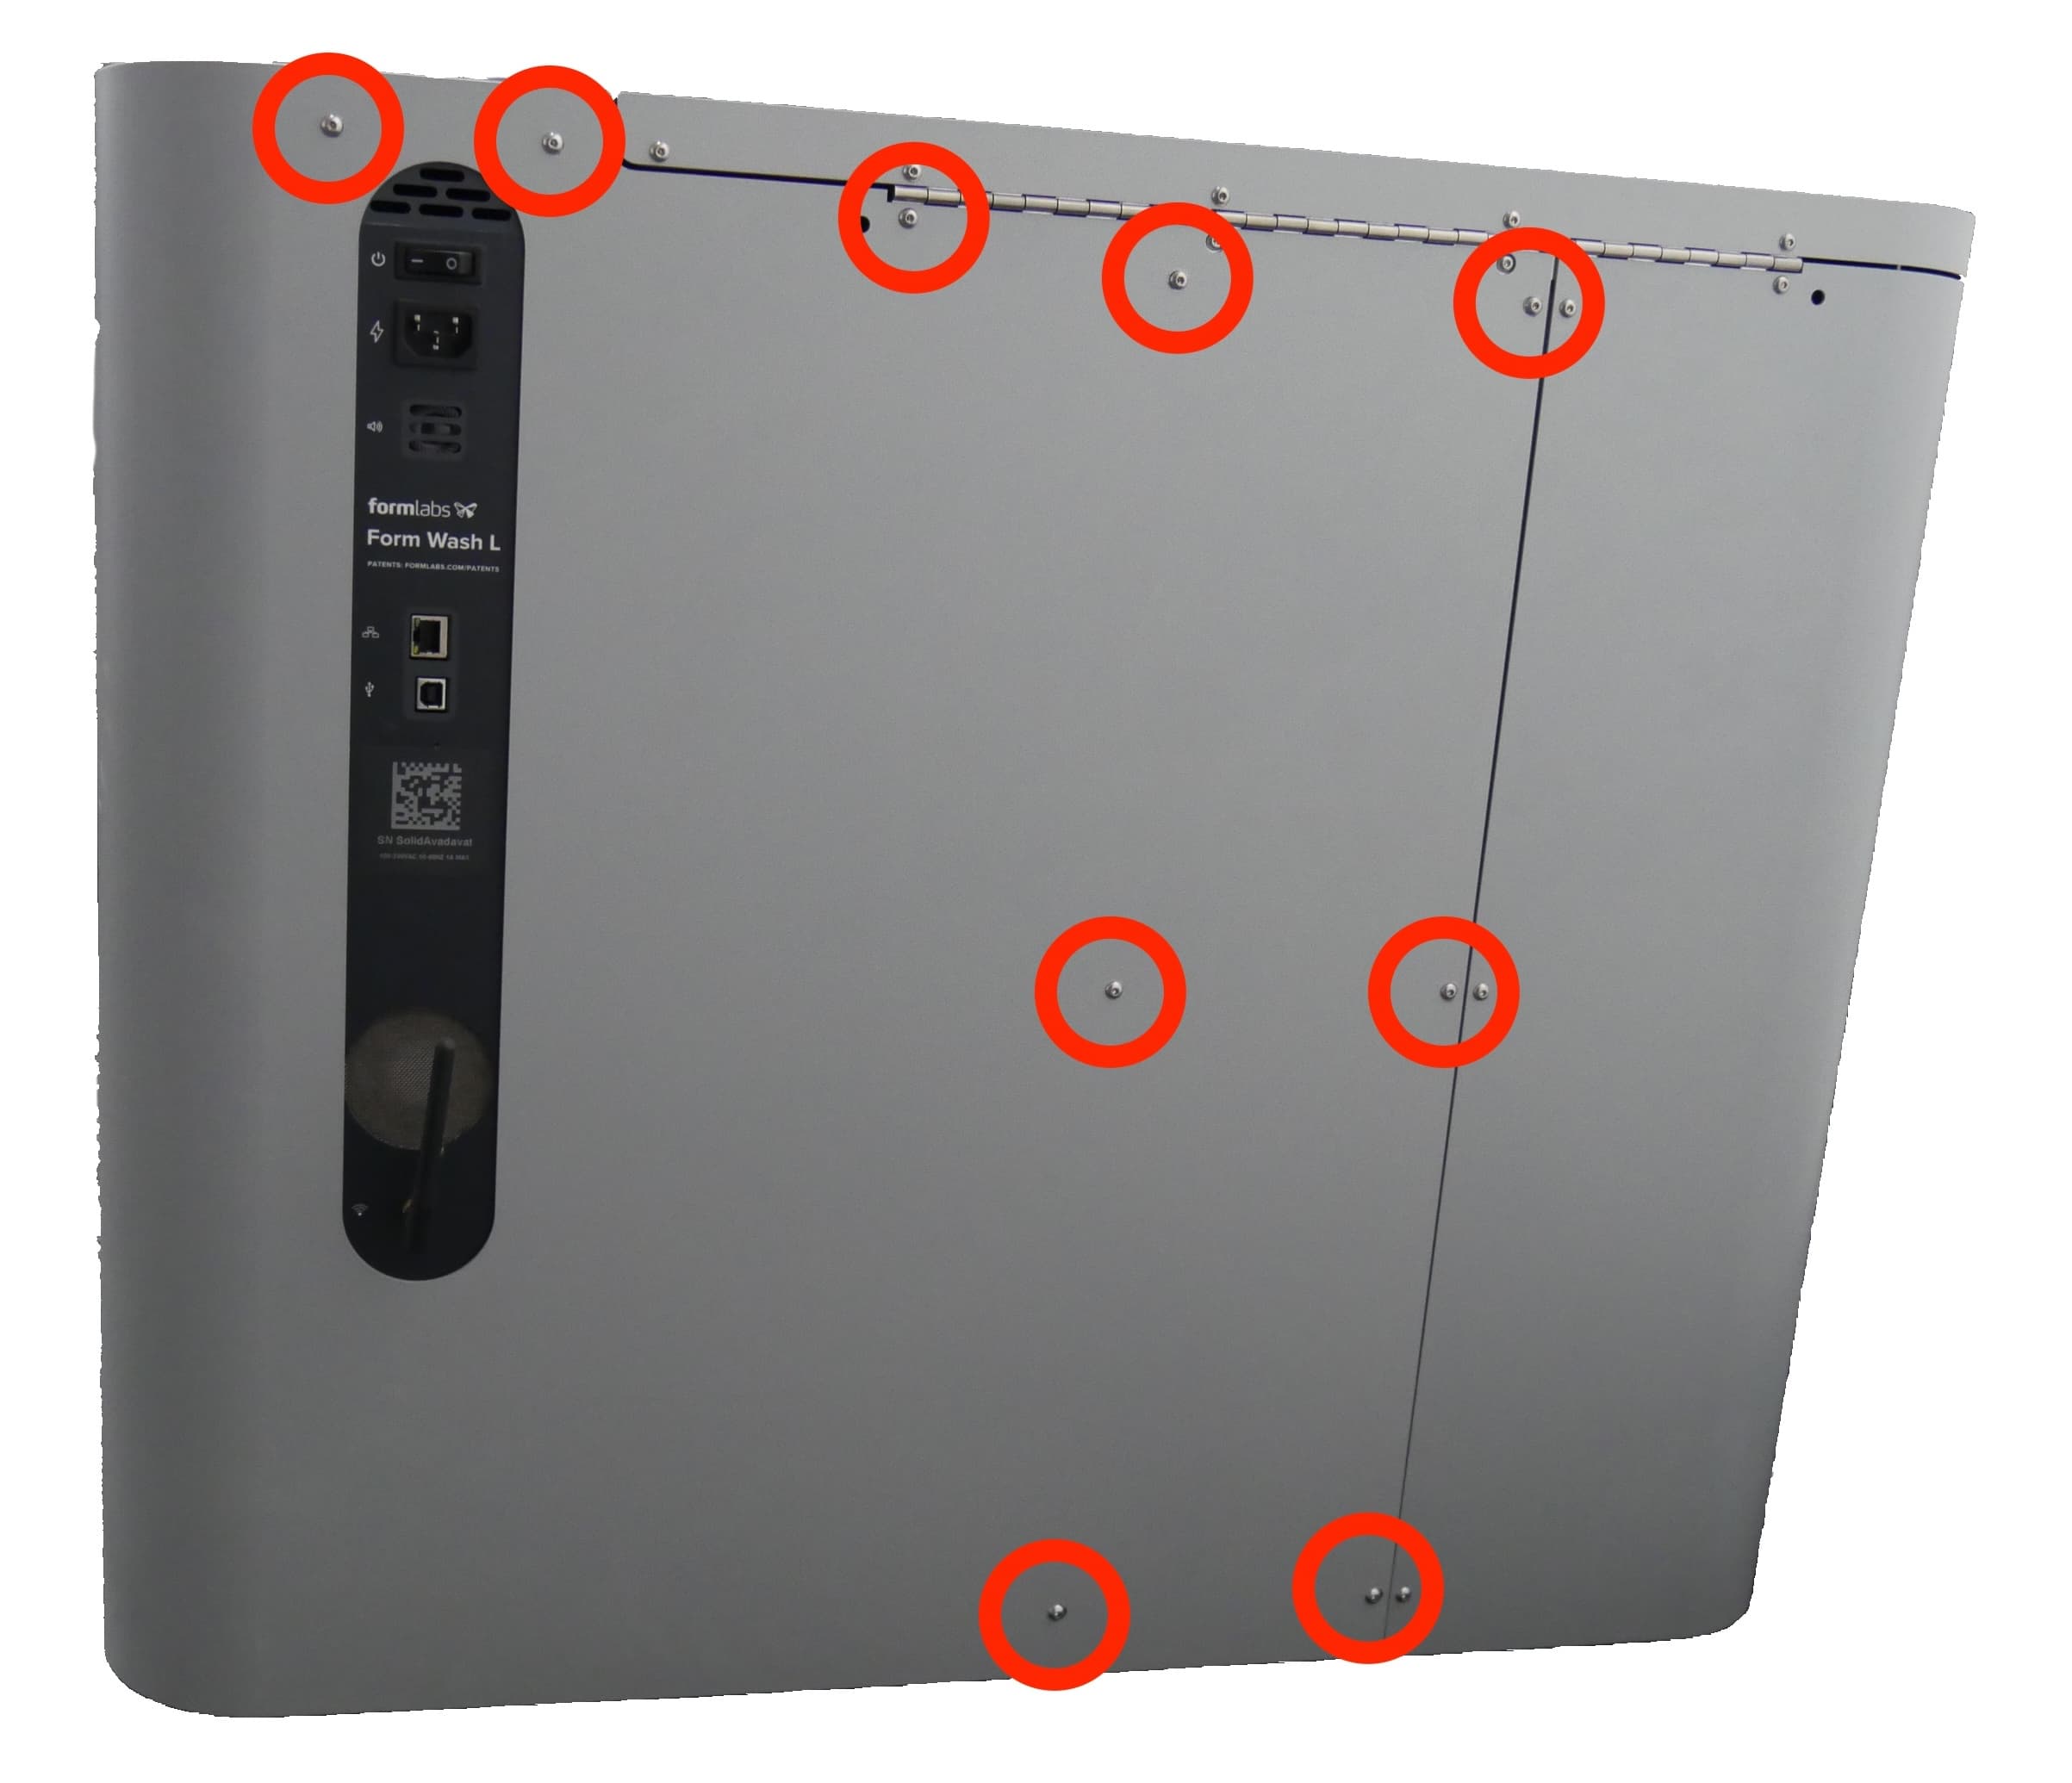
Starting with the screws on the right side of the machine, tighten the screws using a 2.5 mm hex driver until finger tight.
Finalizing the repair
Overview: After reinstalling the right shell, power on the machine and perform final checks.
Step 1: Power on the machine
Reconnect the power cable to the Form Wash L. Flip the breaker switch on the back of the unit to the ON position to turn on the machine.
Step 2: Test the repair
Use the touchscreen to raise and lower the wash basket and ensure that it moves normally. Contact Formlabs Support or your authorized reseller to share the results of the procedure.