WHITE PAPER
Formlabs Logo

Replacing the Form Wash L display assembly

Replacing the Form Wash L display assembly

The Form Wash L has a touchscreen in its top shell. The touchscreen is the primary means of interacting with and controlling the machine, so a broken or malfunctioning touchscreen can prevent the machine from being used normally.

Use this guide to replace the Form Wash L display assembly.

fwl-display-top-shell.jpg

Required supplies:

Formlabs:

  • Replacement display assembly
  • Replacement display ribbon cable
  • Electric siphon pump (packaged with Form Wash L)

Third-party:

  • 1.5 mm hex driver
  • 2.5 mm hex driver
  • 5.5 mm socket driver
  • Nitrile gloves
  • Empty solvent container at least 42 L in size
Estimated time: 45–60 minutes

DANGER:

Read and follow all safety instructions and warnings in the operator manual. Replacement with incorrect parts can lead to burns, shock, fire, or explosion. Dispose of all parts in accordance with local regulations.

Preparing the workspace

Overview: Prepare the Form Wash L and a dust-free workspace for replacing the display assembly.

Step 1: Prepare the workspace

Clear a workspace around your machine. Ensure that the workspace is well-ventilated and free of dust.

Step 2: Unplug the networking cables and Wi-Fi antenna

Disconnect the Ethernet and USB cables from the unit, if they are connected. Unscrew and remove the Wi-Fi antenna.

Step 3: Unplug the machine

DANGER:

Performing maintenance on the machine while it is plugged in increases the risk of electric shock. Never remove the panels of the machine while it is plugged in. Never reconnect the machine to power while the panels are uninstalled.

Disconnect the power cable from the machine before continuing with maintenance. Do not perform maintenance on the machine while it is connected to power. Wait five minutes after disconnecting the machine from power before proceeding.

Step 4: Empty the Form Wash L

DANGER:

Always consult the safety data sheet (SDS) from the IPA supplier as the primary source of information. IPA is flammable and should be used and stored away from ignition sources. Store small quantities of IPA in appropriately labeled and sealed containers.

Prepare the electric siphon pump that was packaged with the Form Wash L, as well as an empty solvent container at least 42 L in size suitable for the type of solvent in the machine. Lift the Form Wash L lid. Place the intake end of the electric siphon pump into the wash bucket. Securely place the flexible pump hose into the empty solvent container. Turn on the pump switch to transfer solvent from the wash bucket to the solvent container.
Removing the right shell

Overview: Remove the right shell of the machine to access the display assembly.

NOTICE:

The Form Wash L contains sensitive electronic components. Ground yourself before touching any electronics in the machine by using a grounding strap or touching a grounded piece of metal.

Step 1: Unscrew the right shell screws

fwl-right-no-bg.jpg
fwl-rear-no-bg-1.jpg

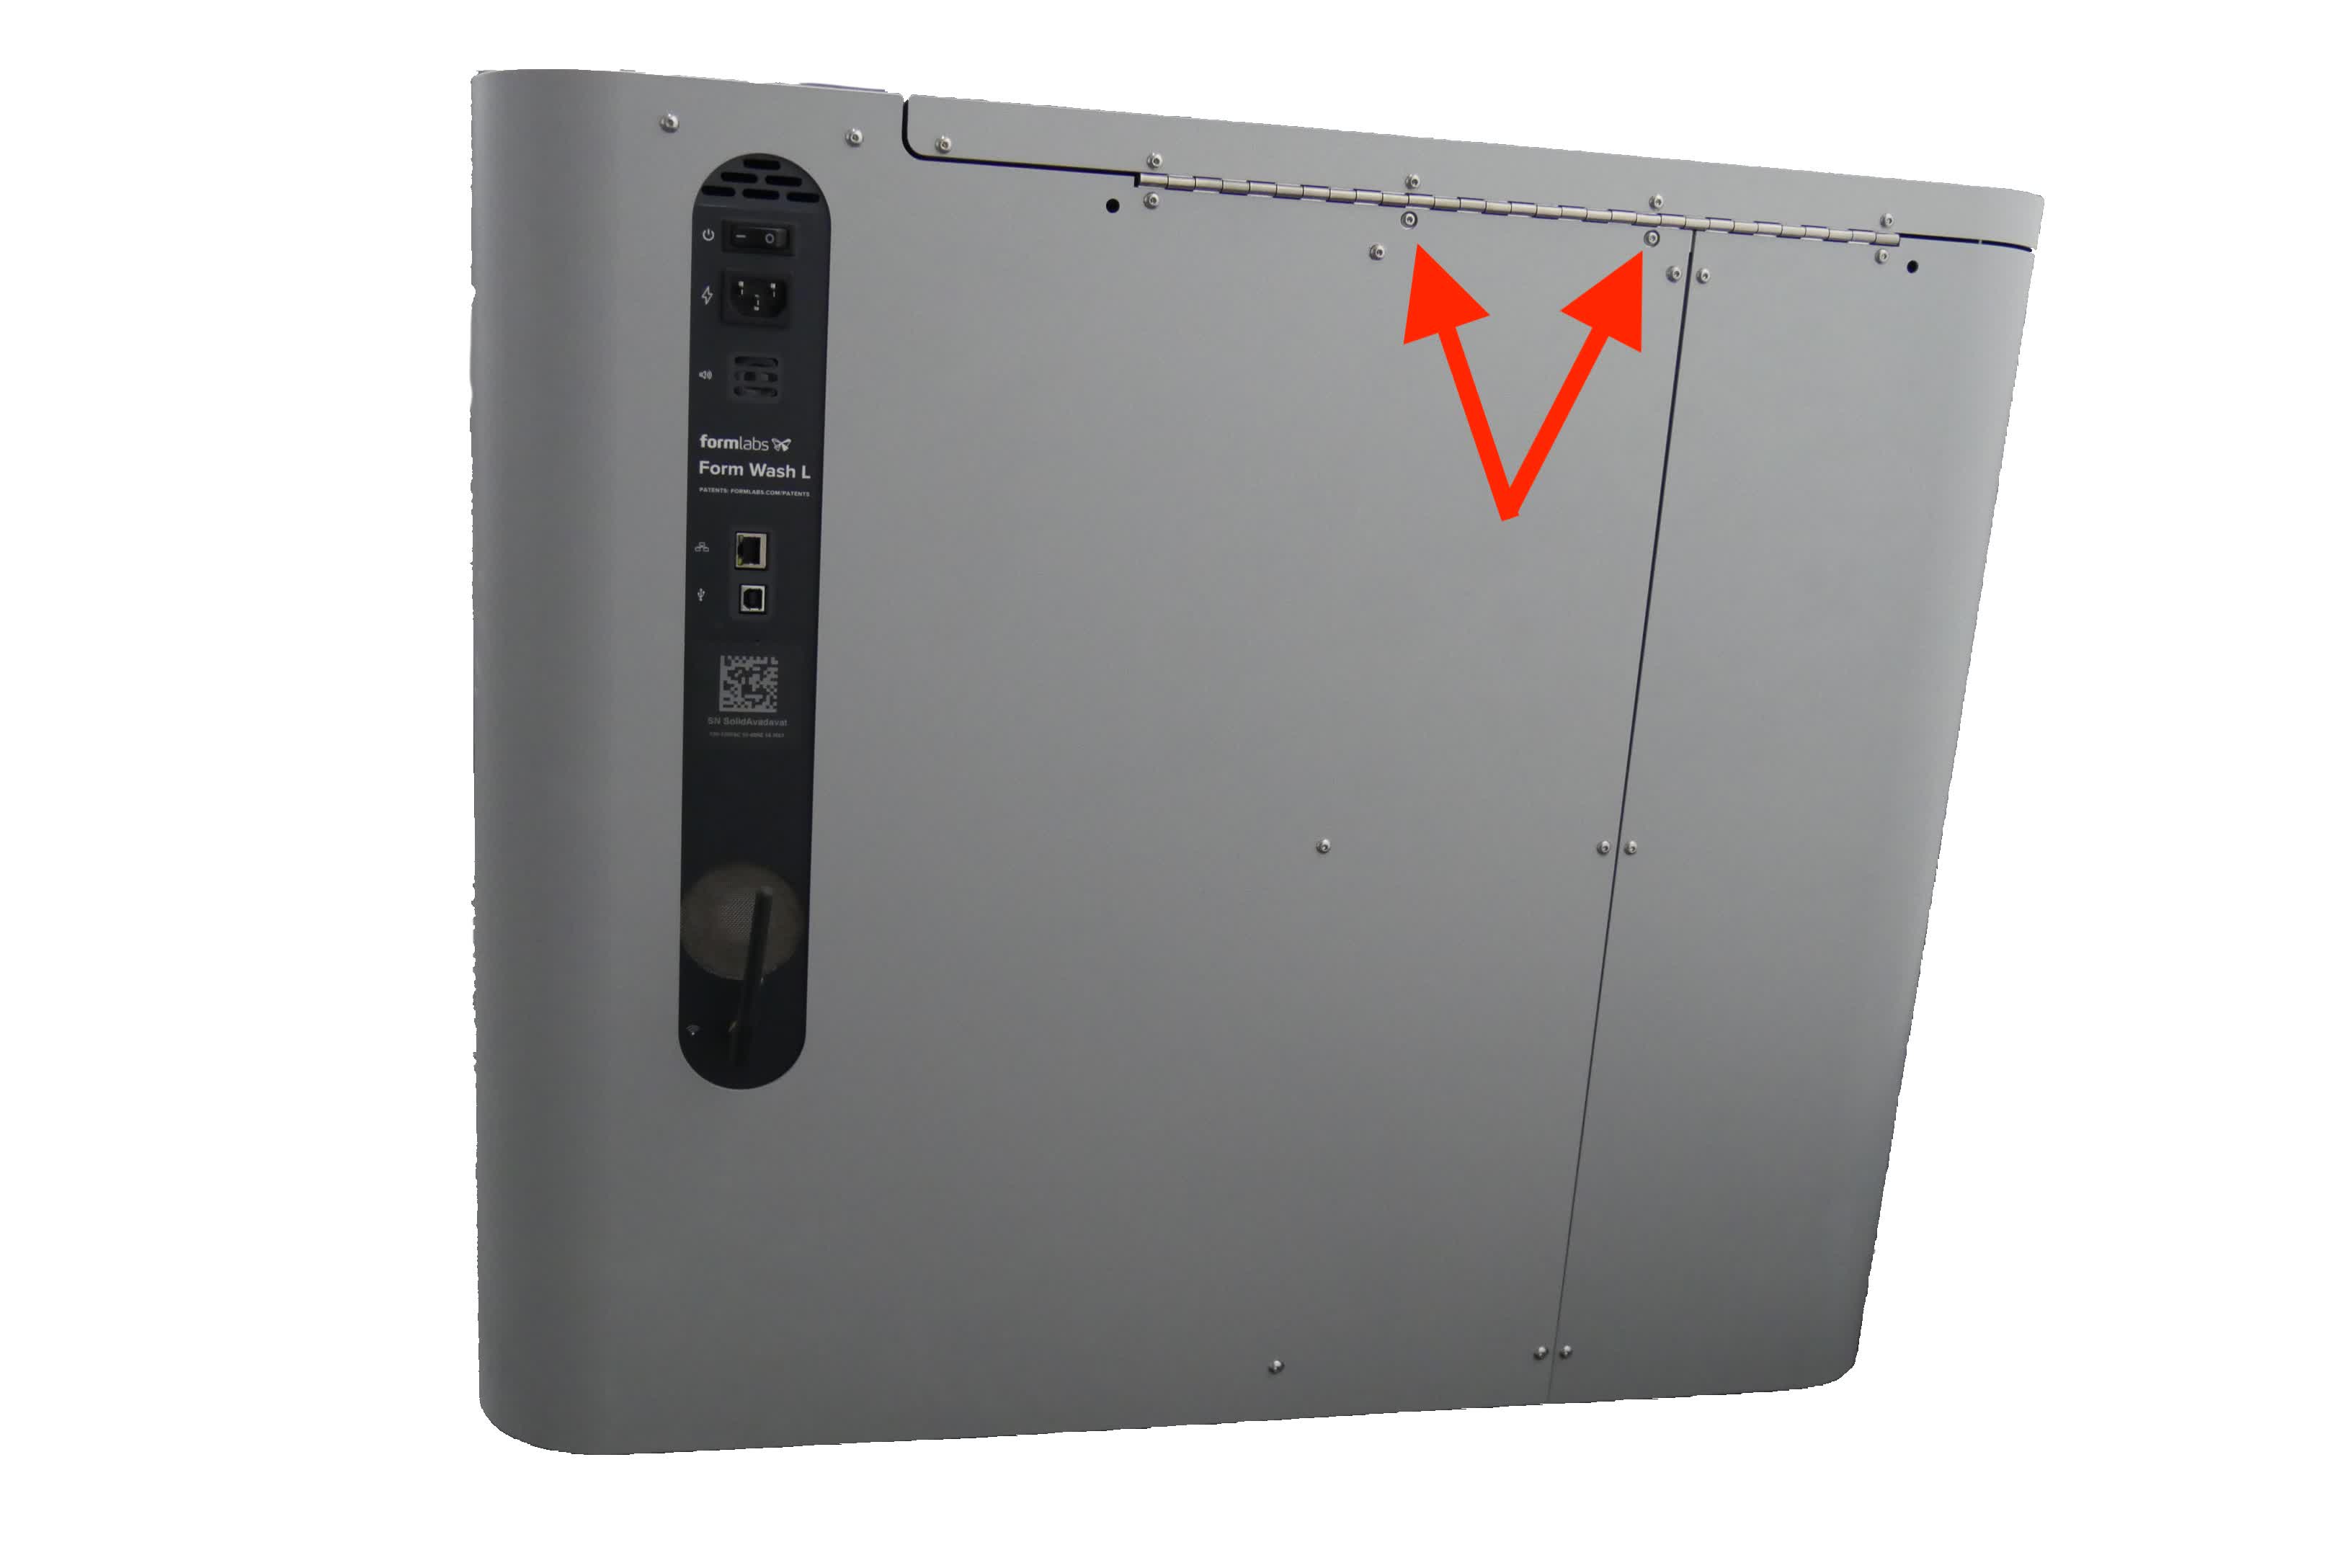
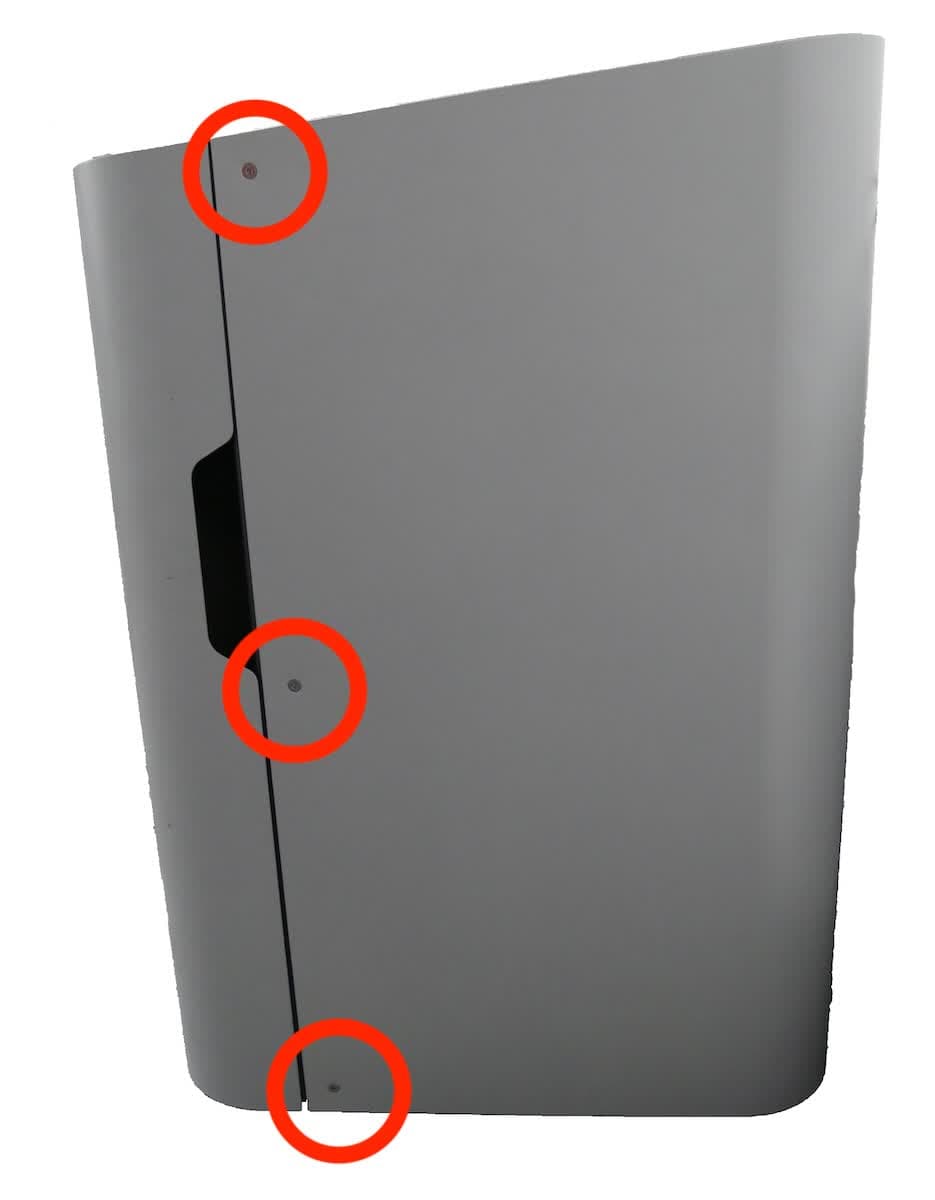
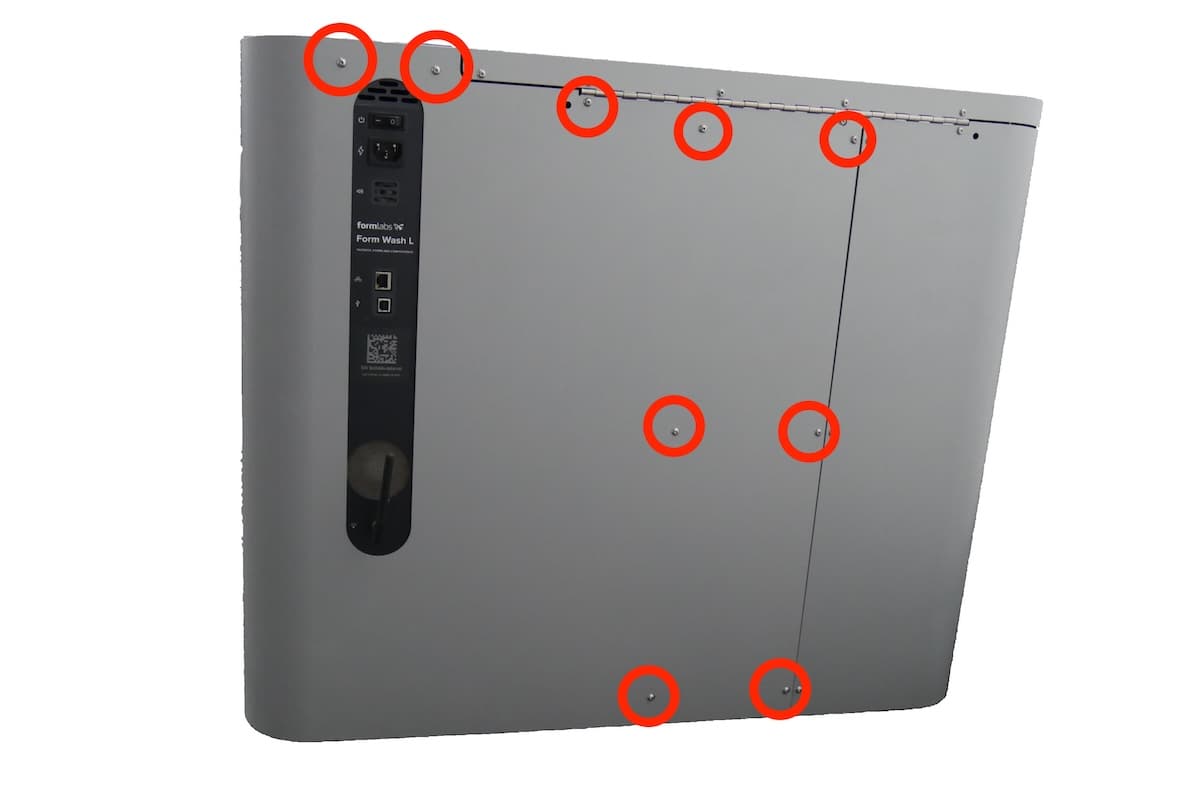
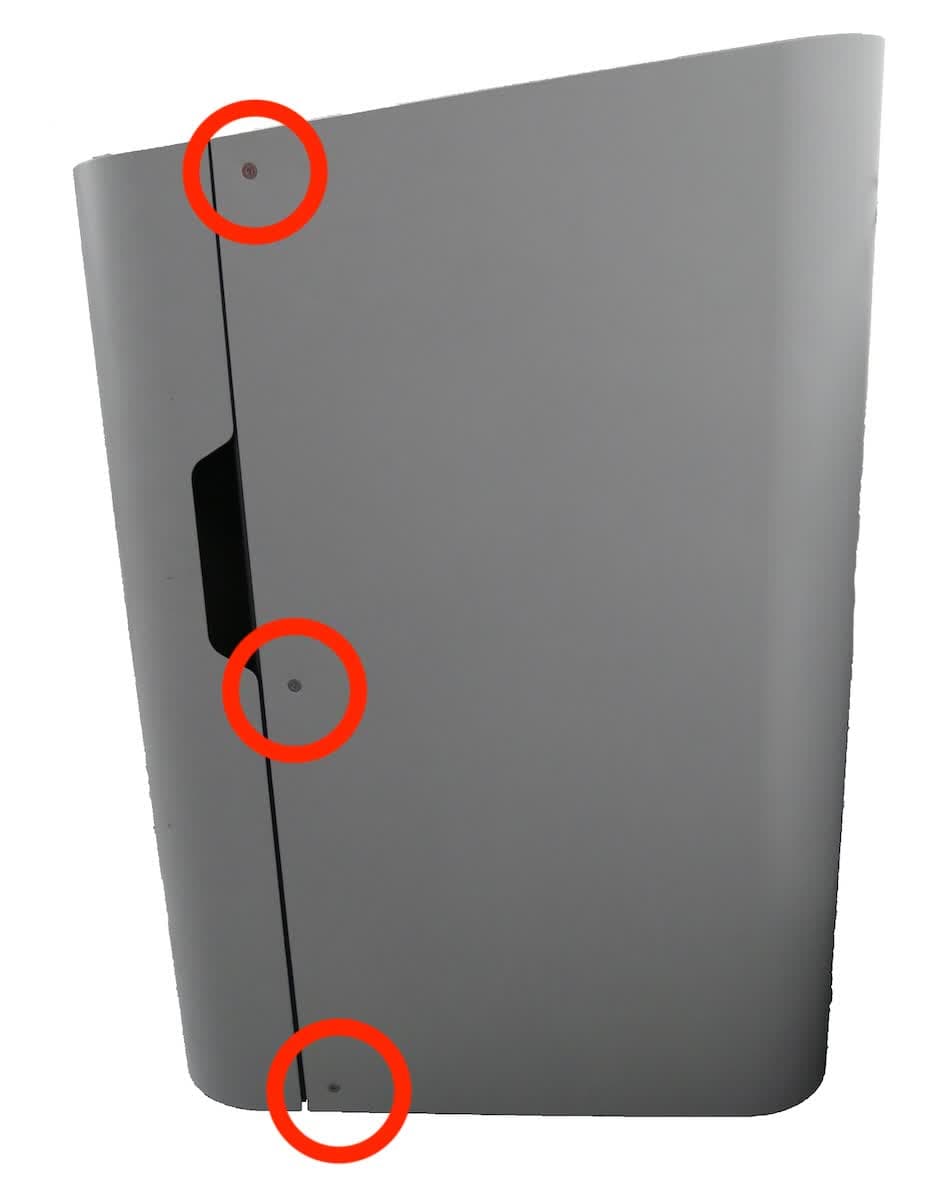
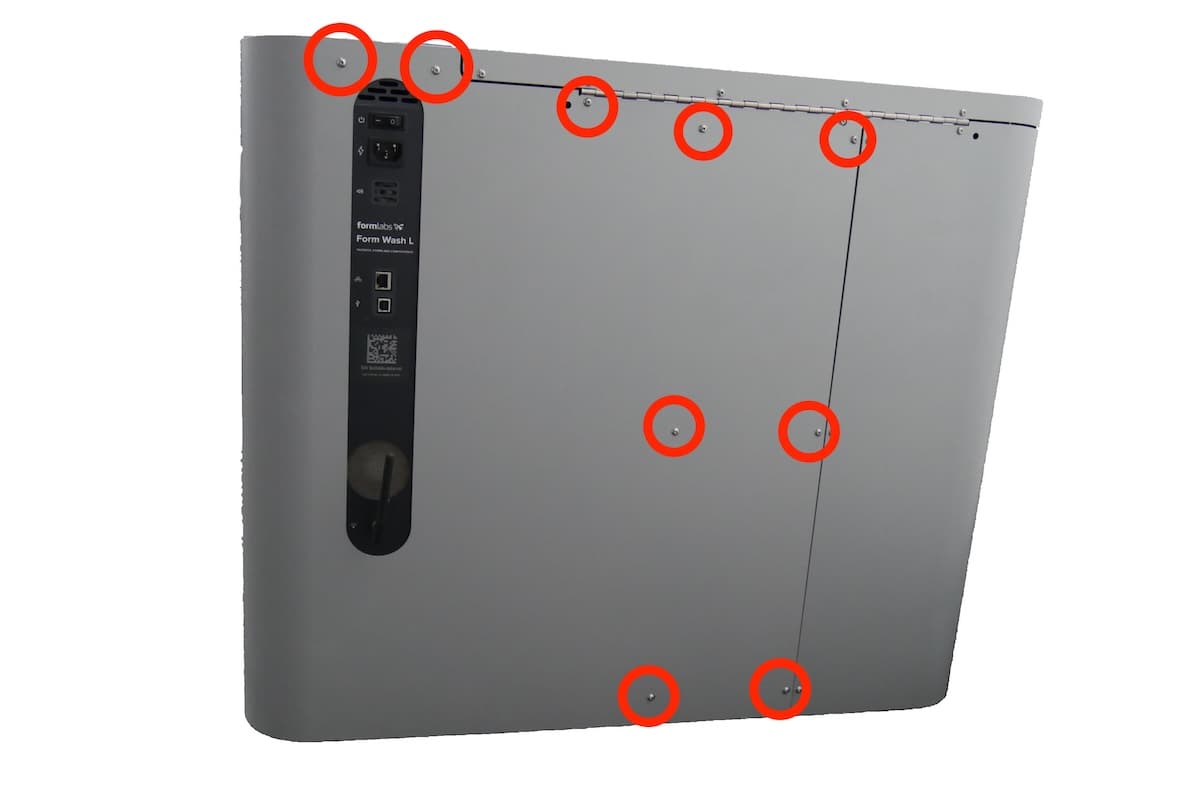
Use the 2.5 mm hex driver to loosen and remove the 12 screws holding the right shell to the frame of the Form Wash L. Three countersunk screws are located on the right side of the machine and nine button head screws are located on the rear. Set the screws aside.

fwl-rear-no-bg-2.jpg

NOTICE:

There are two screws, accessible through cutouts in the right shell, that secure the lid to the frame of the machine. Do not remove these screws during this procedure.

Step 2: Remove the right shell

Pull the right shell away from the Form Wash L to separate it from the machine’s frame. Set the right shell aside.

Removing the display assembly

Overview: Unscrew and uninstall the display assembly.

Step 1: Locate the display ribbon cable retention clip

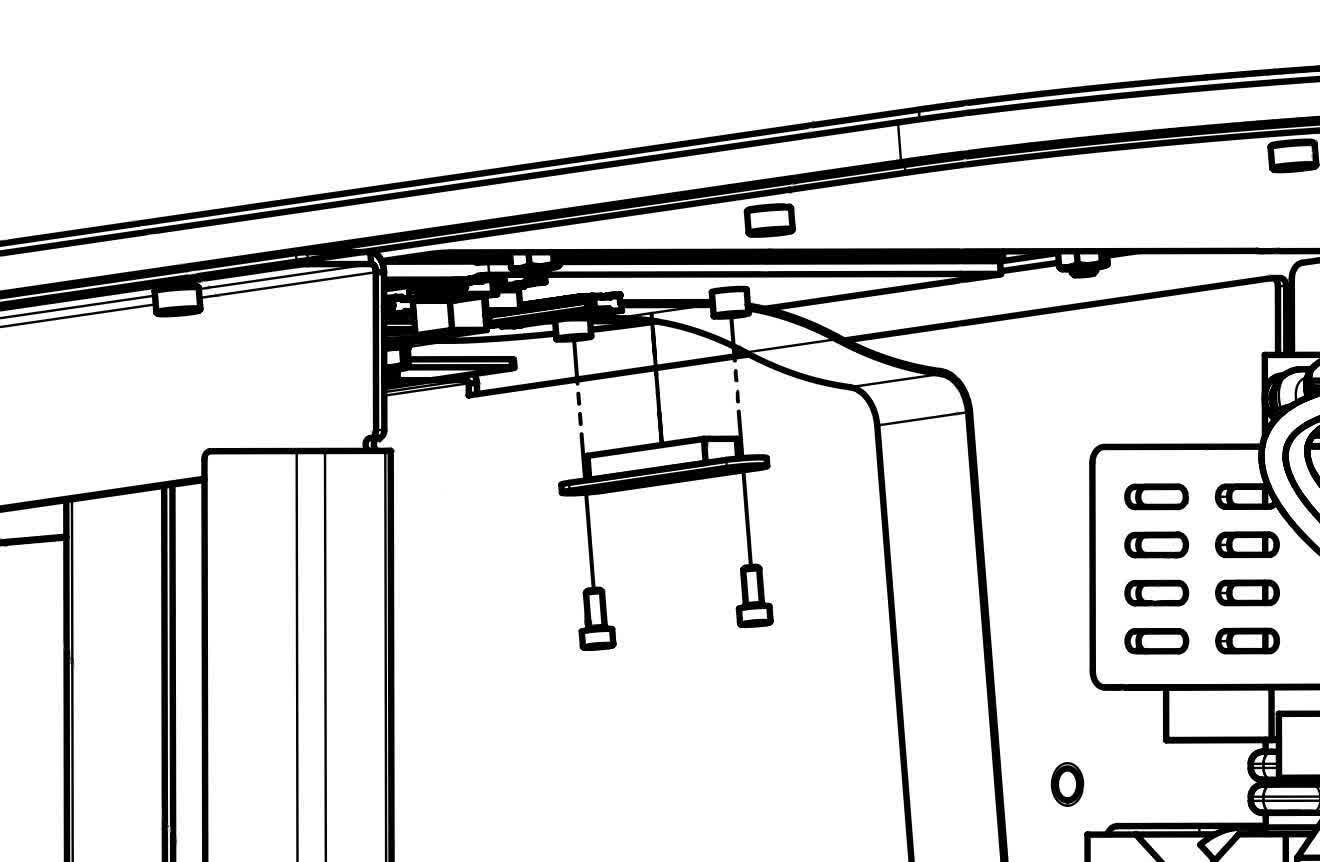
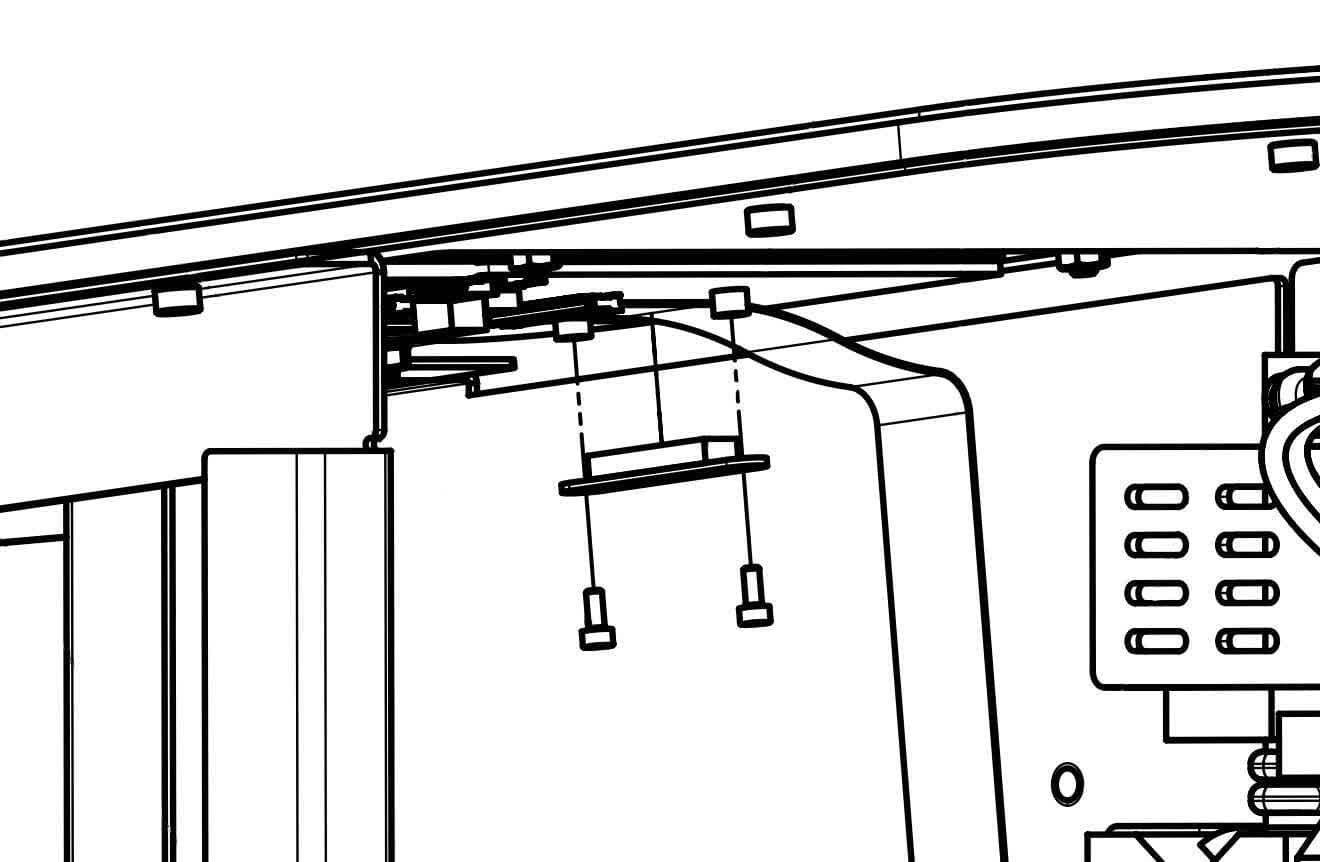
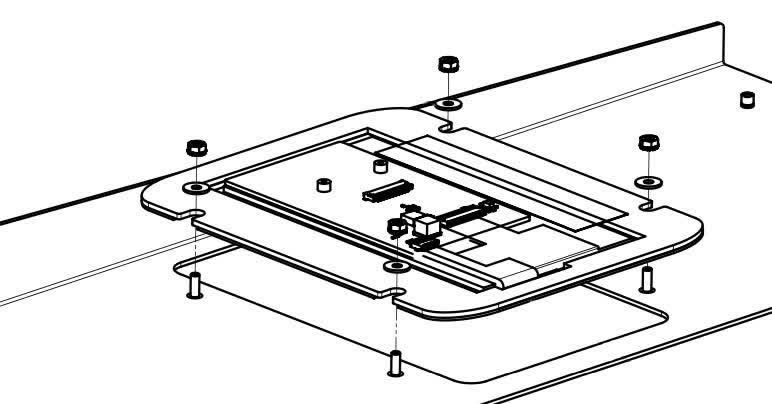
Locate the display assembly and the display ribbon cable on the underside of the top shell. The display ribbon cable is held flat against the back of the display assembly with a retention clip. The clip is secured to the assembly with two 1.5 mm hex screws.

fwl-display-cable-retention-clip-display.jpg

NOTICE:

Do not pull on the ribbon cable or pull the display assembly away from the machine. Doing so may damage the display ribbon cable.

Step 2: Remove the display ribbon cable retention clip

Using a 1.5 mm hex driver, unscrew the two screws. Separate the retention clip from the top shell, but do not pull on the display ribbon cable. Set the screws and the retention clip aside.

Step 3: Unlock the latch

fwl-display-cable-latch.jpg
fwl-display-cable-uninstall.jpg

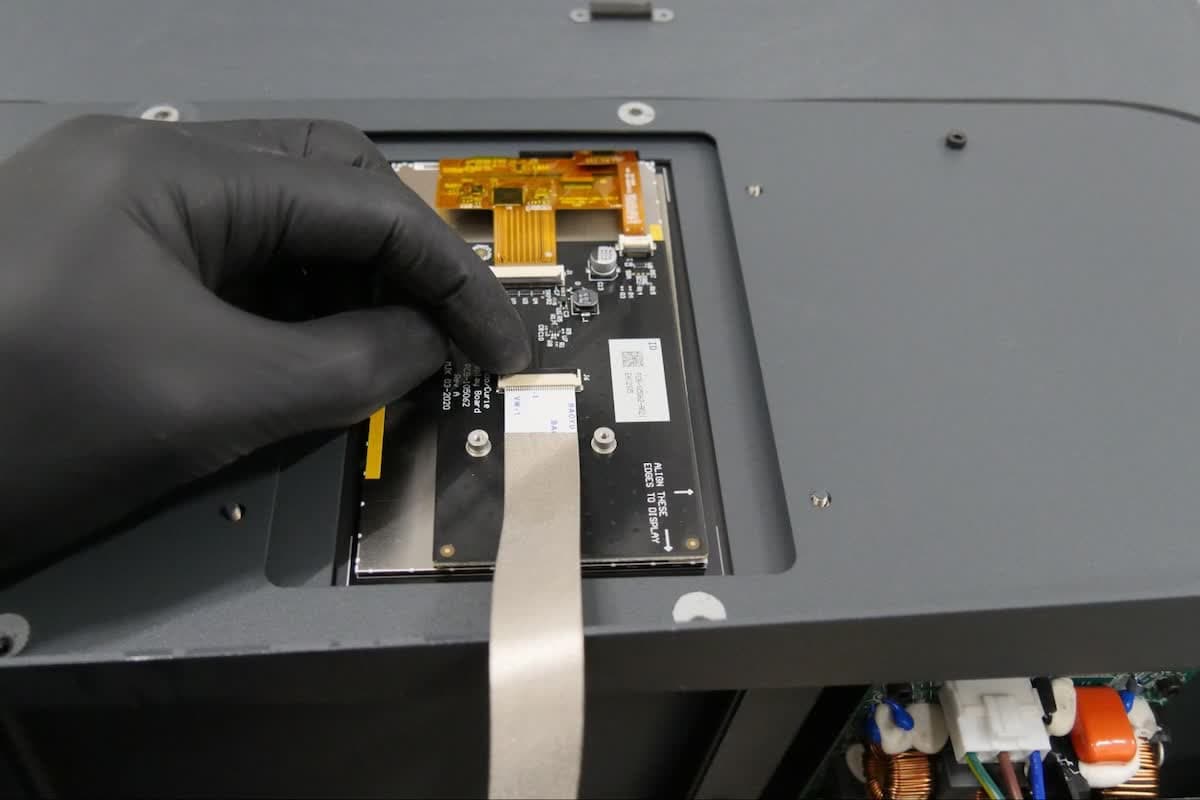
The display ribbon cable is secured to its connector with a latch. Lift the latch away from the display assembly to free the display ribbon cable. The latch is unlocked when it is perpendicular to the display assembly. Once the latch is in the vertical position, the latch is unlocked and the ribbon cable can be disconnected.

Step 4: Disconnect the display ribbon cable

Gently pull the ribbon cable to unplug it from the latch. Note the orientation of the exposed contacts on the ribbon cable for later reinstallation.

NOTE:

If you are reseating the display ribbon cable rather than replacing the display assembly, skip to Optional: Reseat the display ribbon cable.

Step 5: Remove the display assembly retention nuts

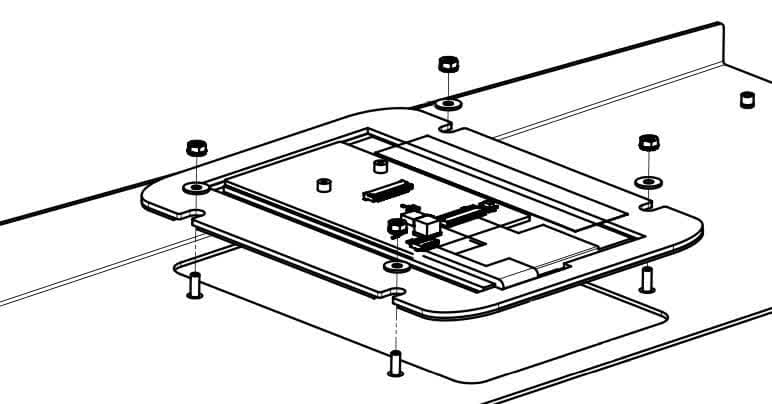
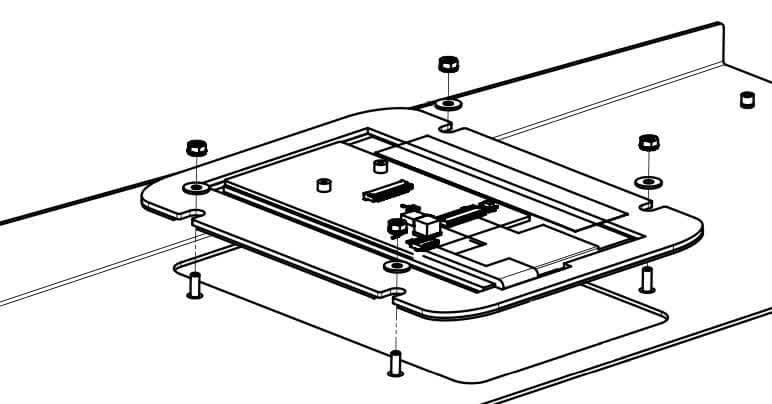
The display assembly is secured to the top shell with four nuts. Use a 5.5 mm socket driver to loosen and remove the nuts. Remove the washer from each of the threaded posts. Set the washers and the nuts aside.

Step 6: Remove the display assembly

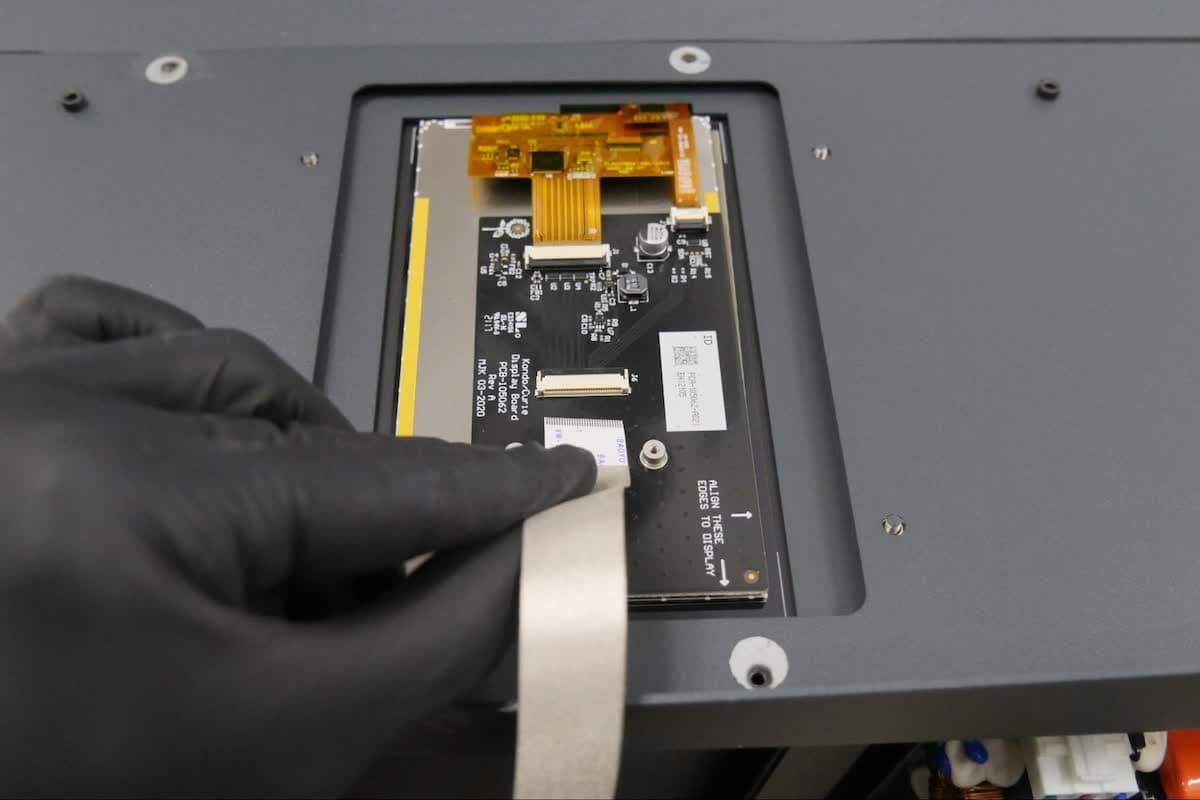
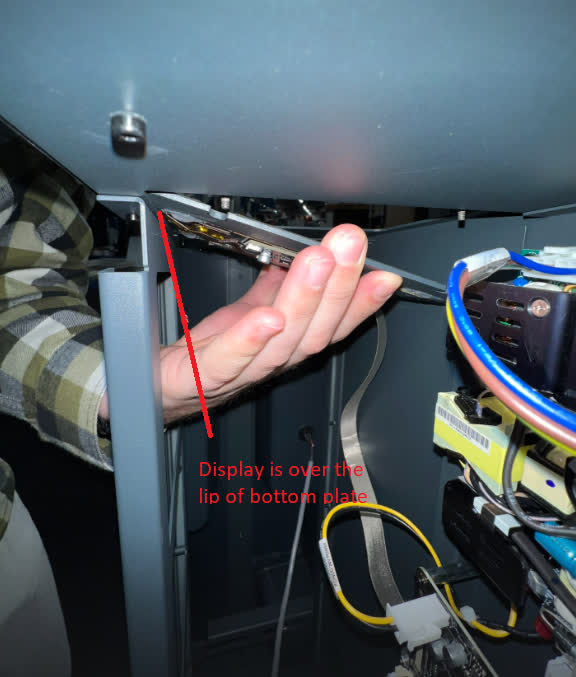
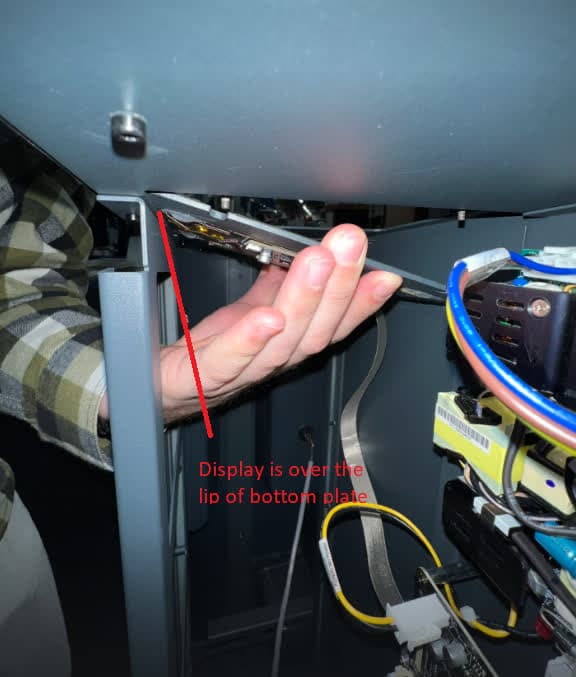
The right-hand lip of the display assembly is sandwiched between two plates in the top shell. Gently lower the left-hand side of the display assembly (closer to the inner wall of the machine) away from the top shell. Slide the display assembly out from between the two plates. Once the display assembly is free, set it aside.

fwl-display-top-shell.jpg
fwl-display-align.jpg

NOTE:

If you are replacing the display assembly, skip to Installing the new display assembly.

Optional: Reseat or replace the display ribbon cable

Overview: If you are reseating or replacing the display ribbon cable rather than replacing the display assembly, perform these additional steps.

Step 1: Remove the display ribbon cable retention clip

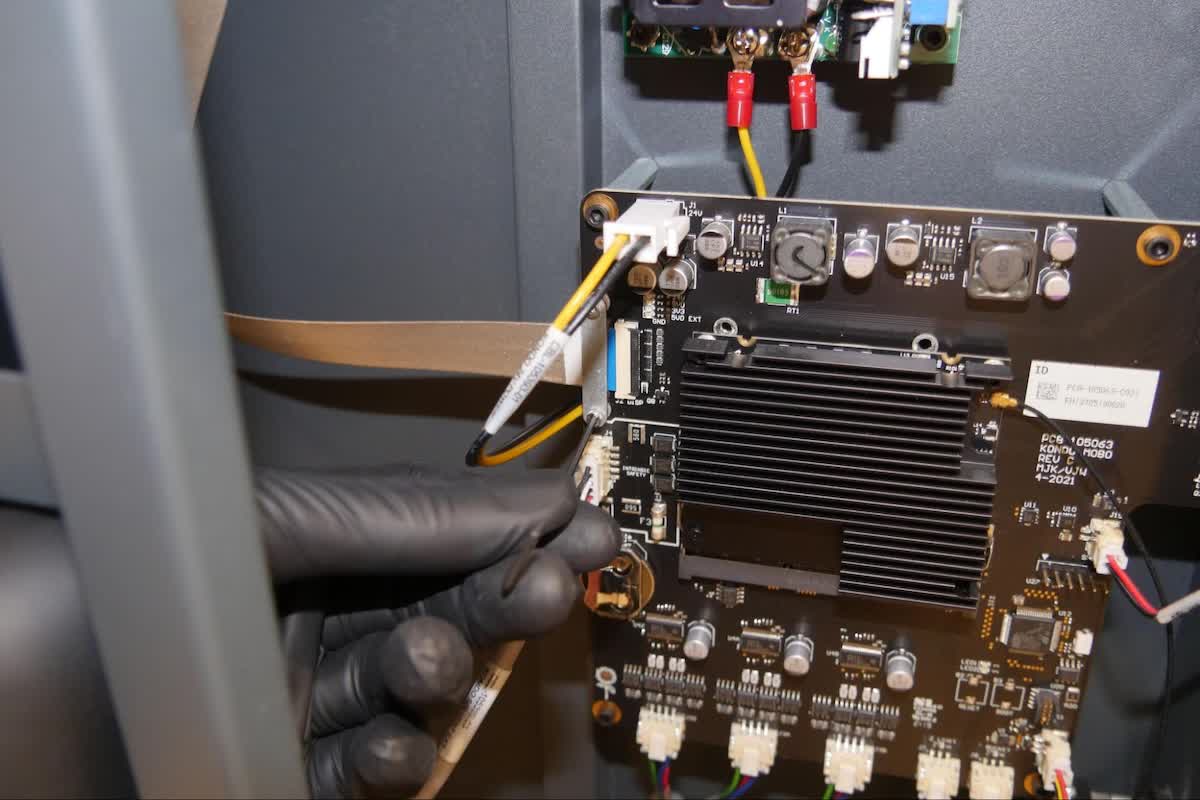
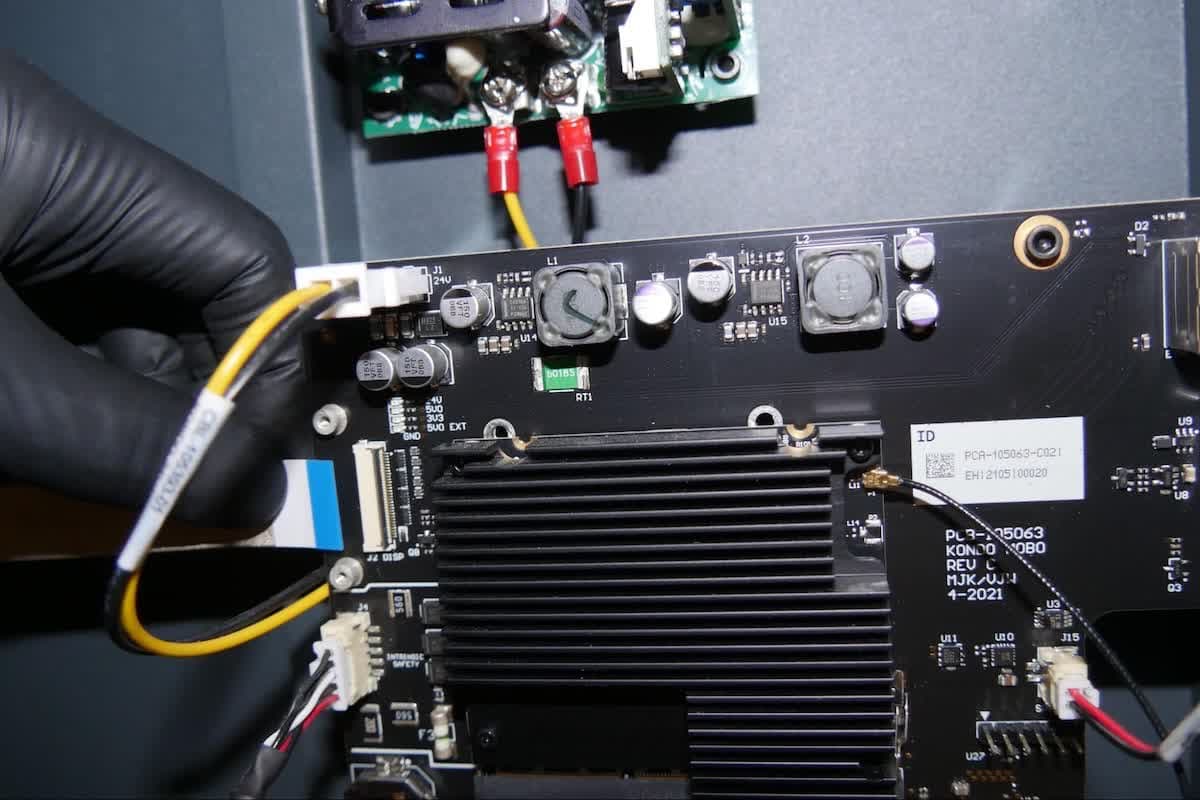
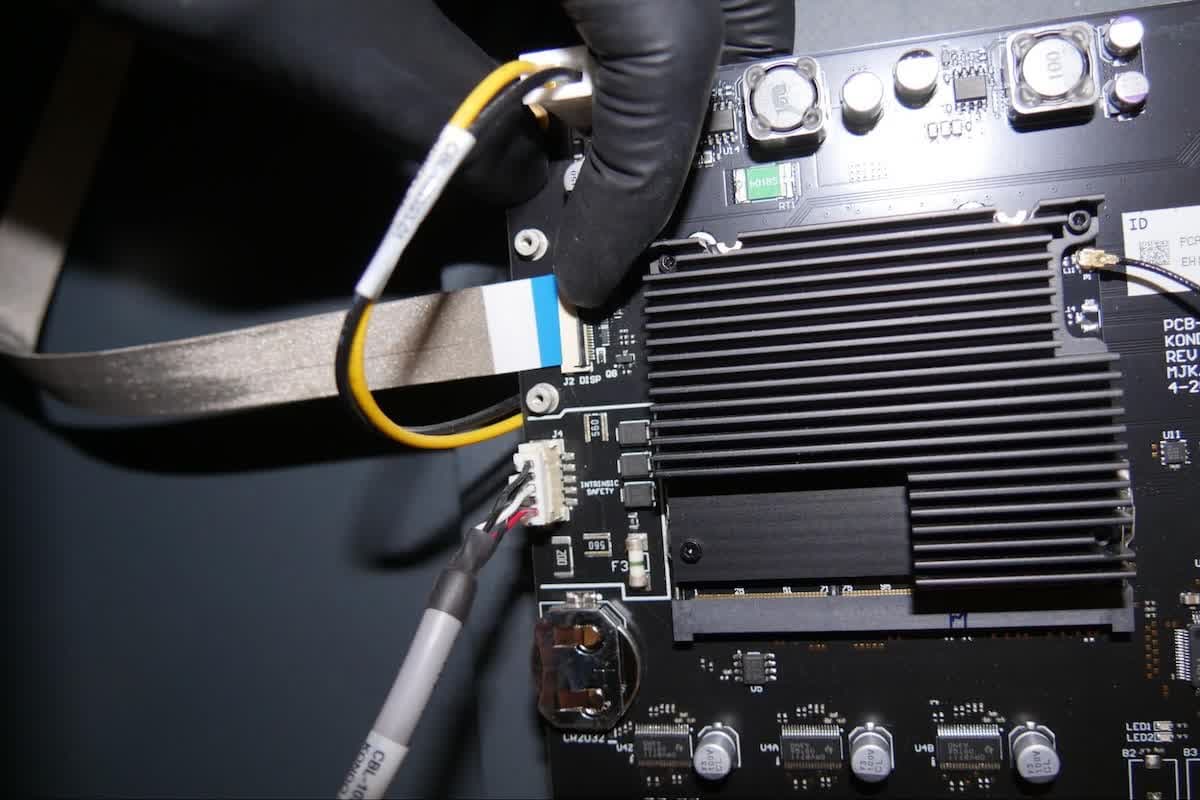
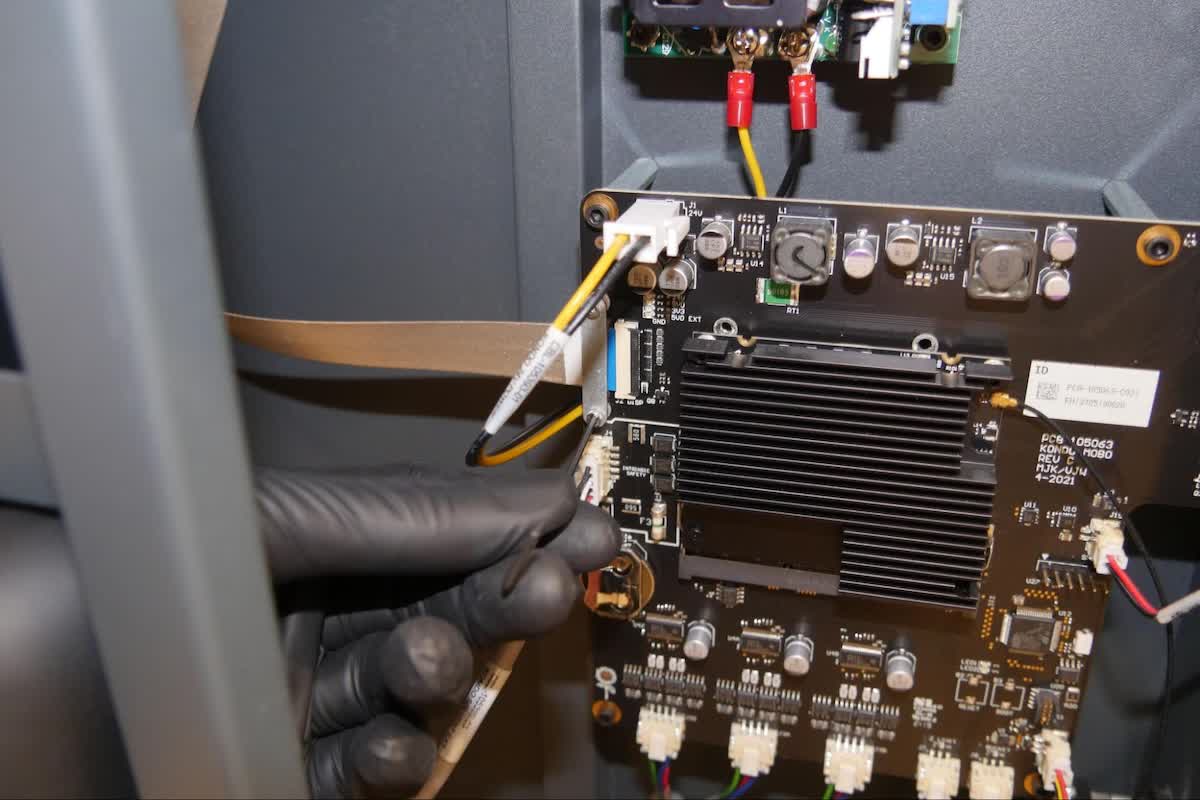
Follow the display ribbon cable to its connector on the motherboard.

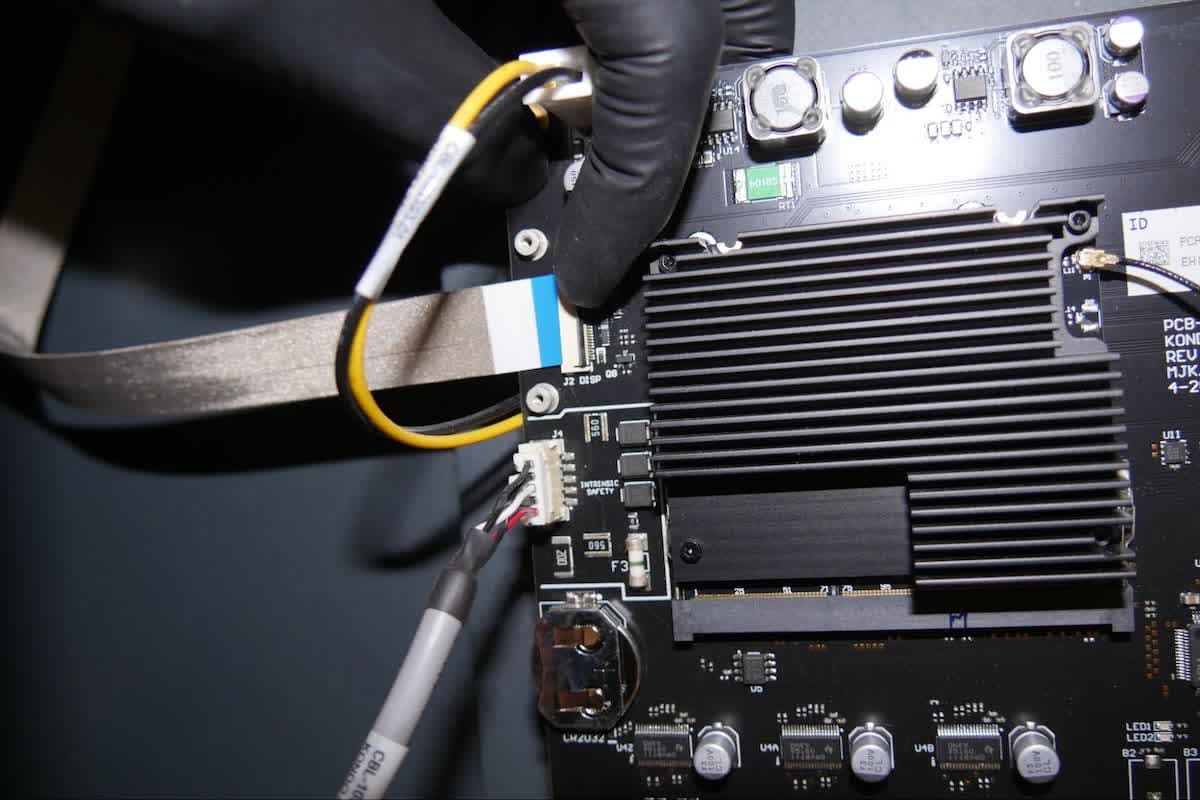
The display ribbon cable is held flat against the motherboard with a retention clip. The clip is secured to the motherboard with two 1.5 mm hex screws. Using a 1.5 mm hex driver, unscrew the two screws. Separate the retention clip from the motherboard, but do not pull on the display ribbon cable. Set the screws and the retention clip aside.

fwl-display-cable-motherboard-clip.jpg

NOTICE:

Do not pull on the ribbon cable. Doing so may damage the display ribbon cable.

Step 2: Disconnect the display ribbon cable from the motherboard

fwl-display-cable-motherboard-latch.jpg
fwl-display-cable-motherboard-uninstall.jpg

The display ribbon cable is secured in its connector with a latch. Lift the latch away from the display assembly to free the display ribbon cable. Once the latch is in the upright position, gently unplug the ribbon cable. Note the orientation of the exposed contacts on the ribbon cable for later reinstallation.

Step 3: Reconnect the display ribbon cable to the motherboard

Insert the display ribbon cable back into the connector on the motherboard, orienting the exposed contacts on the ribbon cable as they were previously. Ensure that the ribbon cable is not twisted or folded.

Step 4: Secure the display ribbon cable

Rotate the latch towards the display assembly to lock the display ribbon cable in place. The latch is locked when it is parallel to the motherboard.

fwl-display-cable-motherboard-latch.jpg

Step 5: Reinstall the display ribbon cable retention clip

Align the display ribbon cable retention clip with its mounting points on the motherboard, ensuring that it holds the ribbon cable flat against the motherboard. Insert one 1.5 mm hex screw into both of the two screw holes in the retention clip and, using a 1.5 mm hex driver, tighten until finger tight.

fwl-display-cable-motherboard-clip.jpg

NOTE:

If you are not replacing the display assembly, skip to step 3 under Installing the new display assembly and continue following the steps there to reconnect the display ribbon cable to the display assembly and reassemble the machine.

Installing the new display assembly

Overview: Mount and secure the new display assembly.

Step 1: Mount the replacement display assembly

Orient the display assembly so that the mounting points for the ribbon cable retention clip are closer to the inner wall of the machine. Insert the right-hand side of the display assembly between the two plates of the top shell. Raise the display assembly into place, ensuring that the four cutouts in the display assembly are aligned with the four threaded posts in the top shell.

fwl-display-align.jpg

Step 2: Secure the replacement display assembly

For each of the four threaded posts, place one washer on the post and loosely thread a retention nut into place. Tighten the nuts with the 5.5 mm socket driver until finger tight.

fwl-display-top-shell.jpg

Step 3: Reconnect the display ribbon cable

Insert the display ribbon cable into the connector on the new display assembly, orienting the exposed contacts on the ribbon cable as they were on the old display assembly. Ensure that the ribbon cable is not twisted or folded.

Step 4: Secure the display ribbon cable

Rotate the latch towards the display assembly to lock the display ribbon cable in place. The latch is locked when it is parallel to the display assembly.

Step 5: Reinstall the display ribbon cable retention clip

Align the display ribbon cable retention clip with its mounting points on the top shell, ensuring that it holds the ribbon cable flat against the display assembly. Insert one 1.5 mm hex screw into both of the two screw holes in the retention clip and, using a 1.5 mm hex driver, tighten until finger tight.

fwl-display-cable-retention-clip-display.jpg

Reinstalling the right shell

Overview: Reinstall and secure the right shell.

Step 1: Reinstall the right shell

Hold the right shell against the Form Wash L. Check that the screw holes in the right shell line up with the corresponding screw holes in the frame of the machine. Loosely thread the three countersunk 2.5 mm hex screws into the screw holes on the right side of the machine and the nine button head screws into the screw holes on the back of the machine.

Step 2: Secure the right shell

fwl-right-no-bg.jpg
fwl-right-no-bg.jpg

Starting with the screws on the right side of the machine, tighten the screws using a 2.5 mm hex driver until finger tight.

Finalizing the repair

Overview: After reinstalling the right shell, power on the machine and perform final checks.

Step 1: Power on the machine

Reconnect the power cable to the Form Wash L. Flip the breaker switch on the back of the unit to the ON position to turn on the machine.

Step 2: Test the repair

The touchscreen should respond to touch if the repair is successful. Test a variety of inputs, such as viewing the machine’s settings or starting a wash cycle. Contact Formlabs Support or your authorized reseller to share the results of the procedure.