WHITE PAPER
Formlabs Logo

Replacing the Fuse 1 generation recoater roller

Replacing the Fuse 1 generation recoater roller

The recoater distributes powder in an even layer as it moves across the print bed. A damaged recoater roller can cause print failures due to debris or uneven recoating.

Use this guide to replace the recoater roller in a Fuse 1 generation printer.

Fuse 1 generation recoater roller

Required supplies:

Formlabs:

Third-party:

  • 2.5 mm hex driver (flat-end)
  • 7 mm wrench
  • Mallet (optional)
  • Safety glasses
  • Nitrile gloves
  • N95 or better respirator
  • Ethanol (99%, anhydrous) or isopropyl alcohol
  • Nonabrasive wipes

Estimated time: 15–20 minutes

Danger:

Read and follow all safety instructions and warnings in the operator manual. Replacement with incorrect parts can lead to burns, shock, fire, or explosion. Dispose of all parts in accordance with local regulations.

Warning:

Do not perform this procedure if the printer was printing less than six hours prior. Failure to do so may result in serious burns. Allow the print enclosure to cool to room temperature before touching or inspecting any Fuse 1 components.

Removing the quartz tube heater spatial filters

Overview: Prepare the printer for the repair and remove the quartz tube heater spatial filters to better access the recoater roller.

Step 1: Prepare the workspace

Clear a workspace around your printer. Ensure that the workspace is well-ventilated and free of dust. Put on appropriate personal protective equipment for the powder in the printer, based on the safety data sheet for the powder.

Step 2: Open the print enclosure door

Open the print enclosure door using the touchscreen. If there is a build chamber inserted, unplug and remove it.


Step 3: Remove the spatial filter retention screw

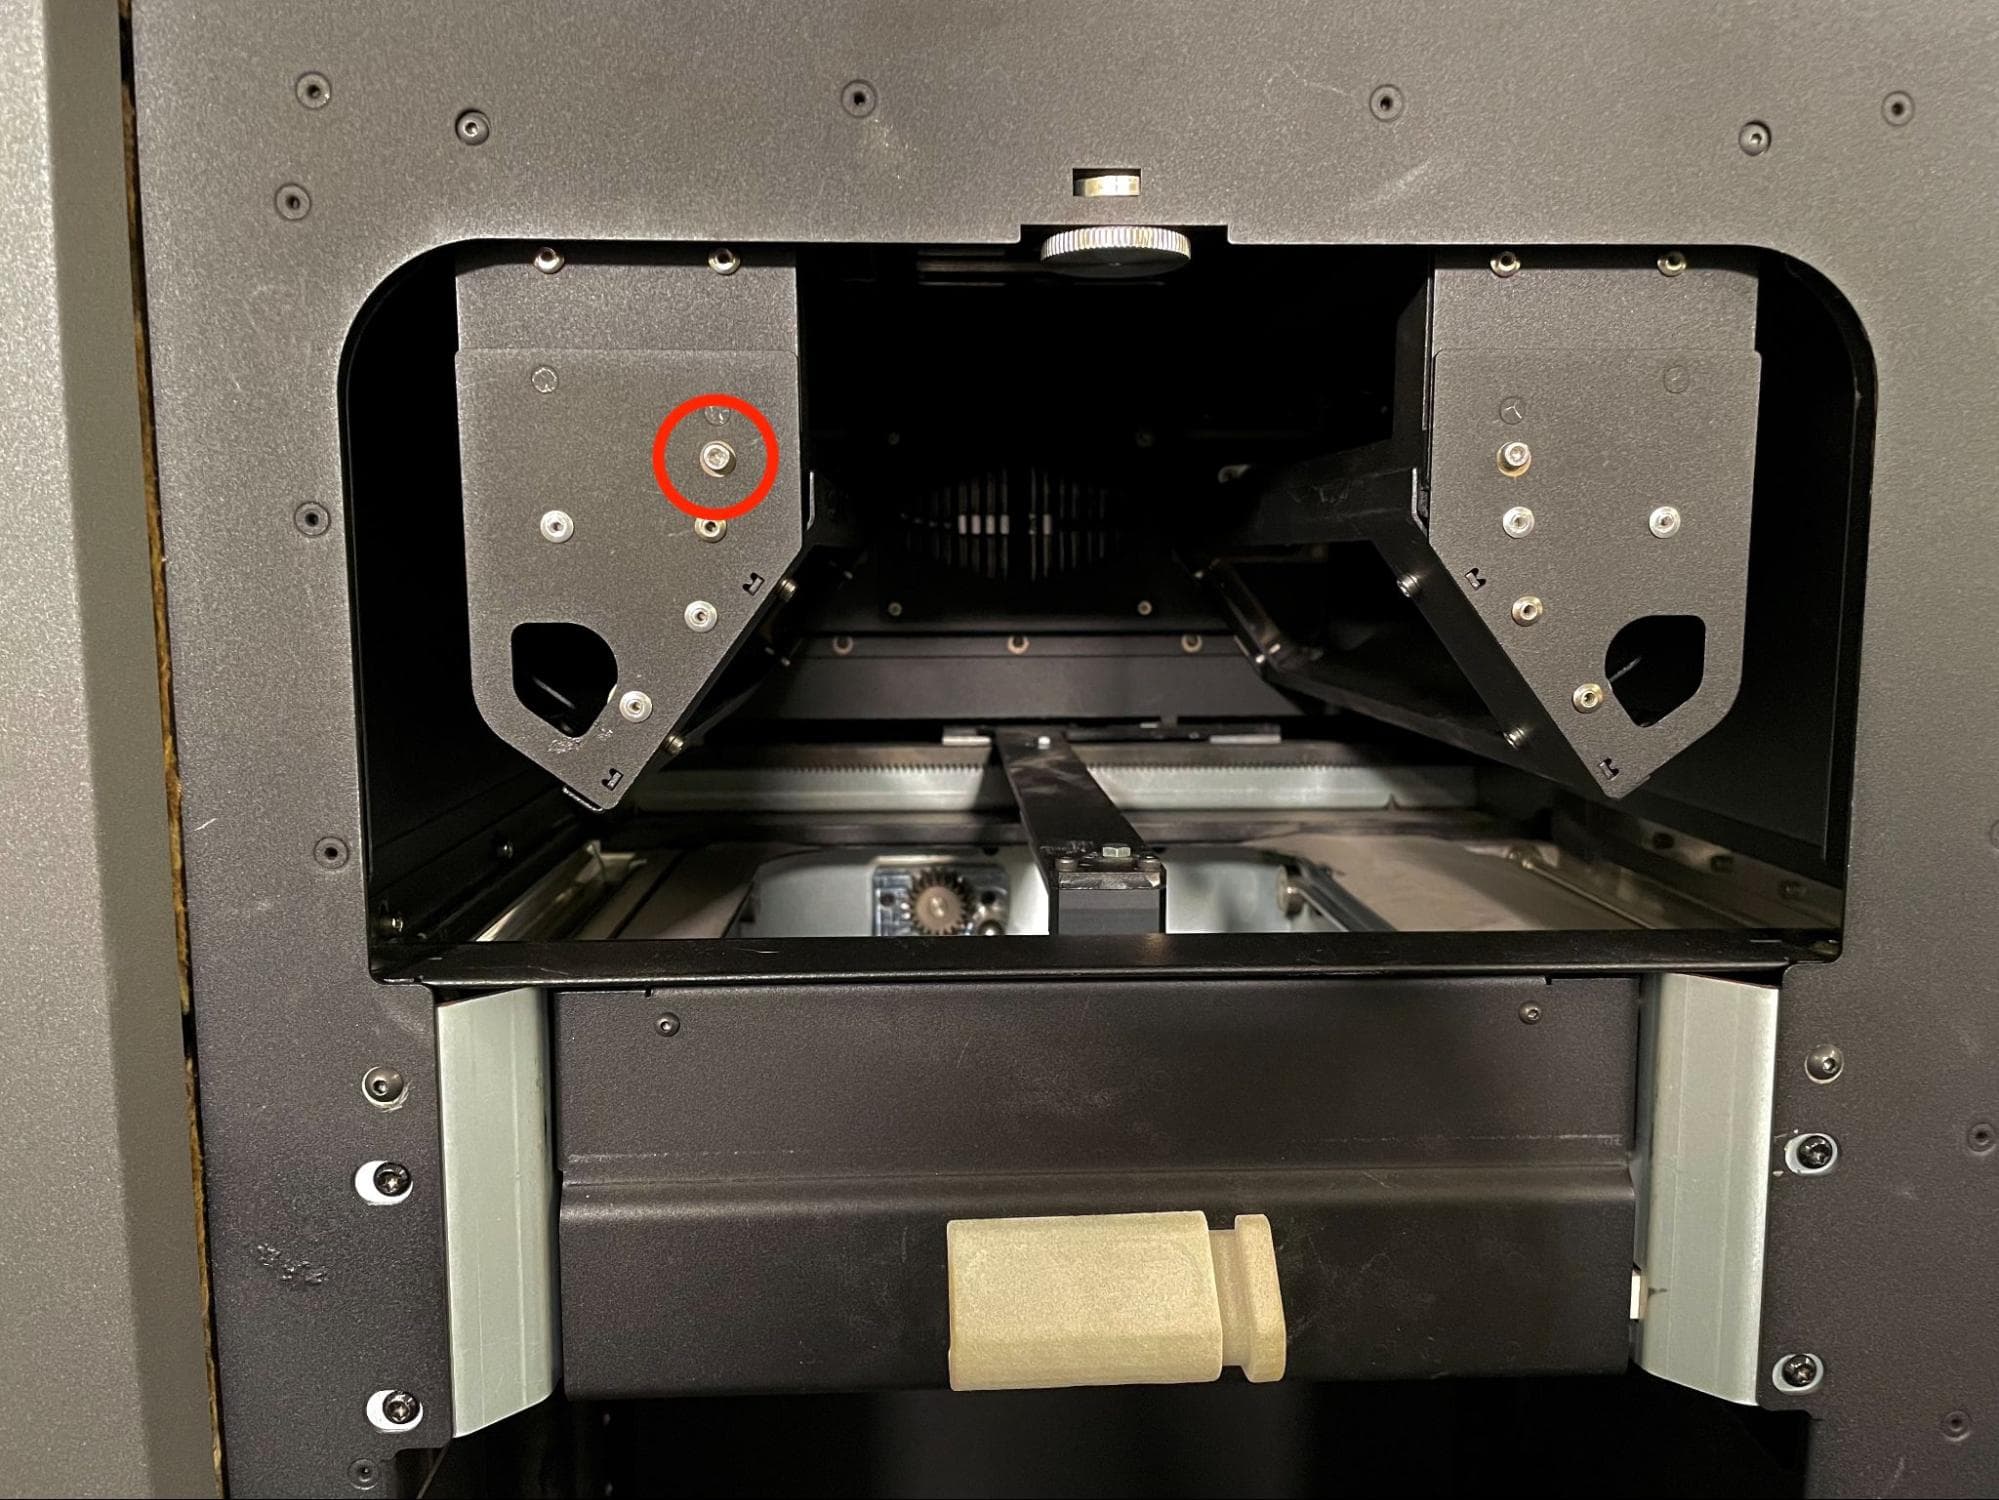
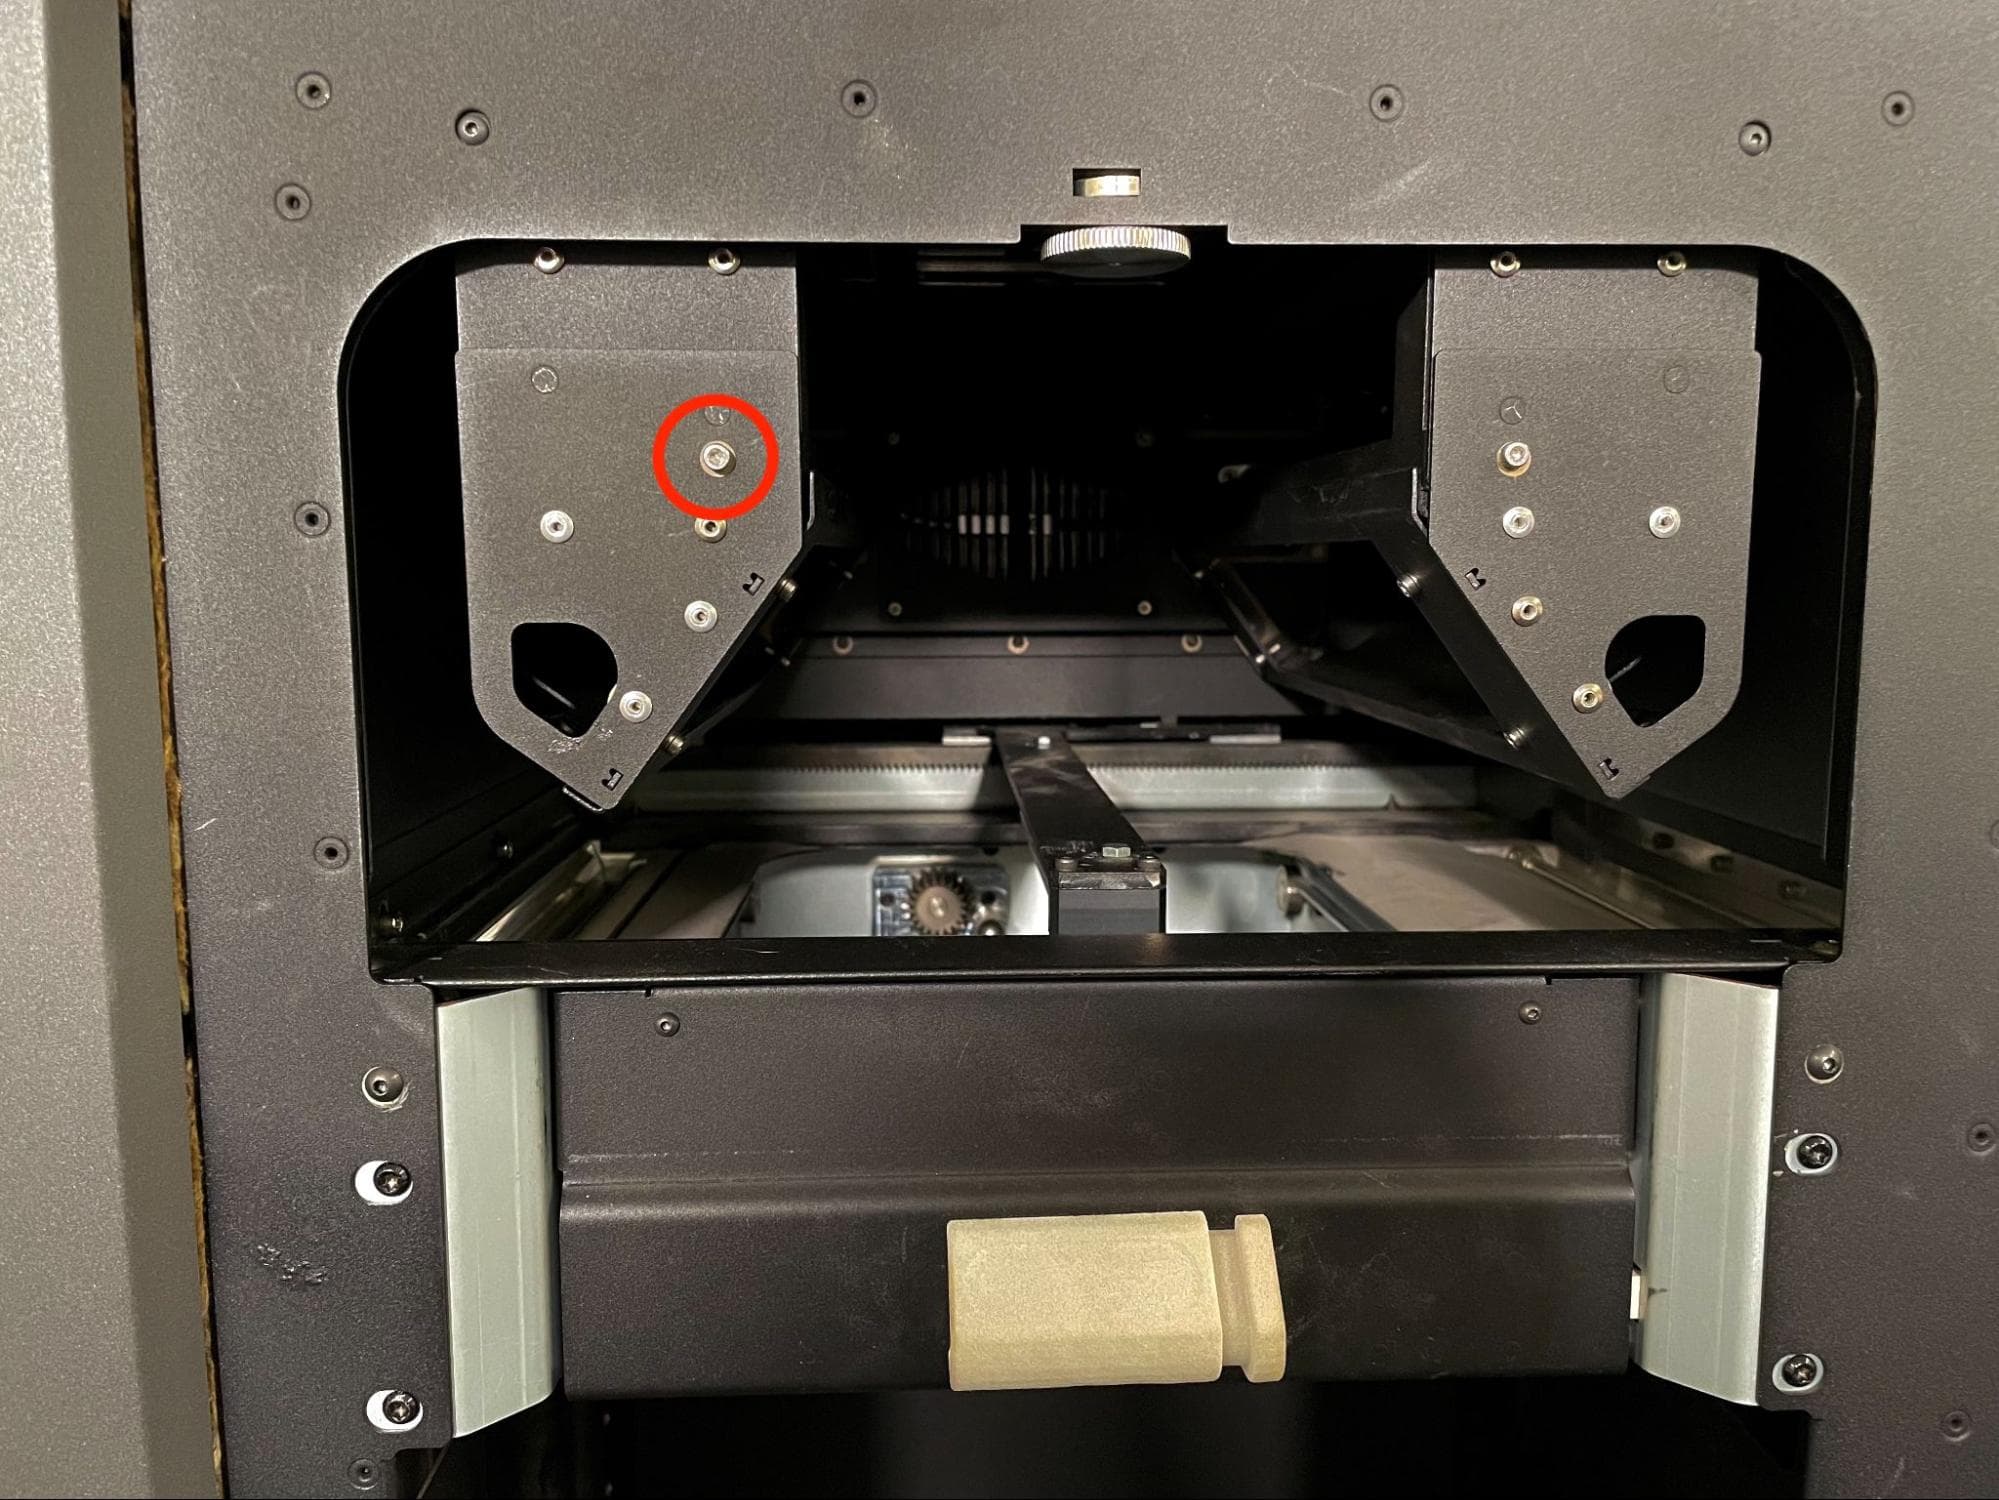
Use a 2.5 mm hex driver to remove the 8.0 mm M3 cap screw holding either quartz tube heater’s spatial filter to the frame.

Remove the heater filters

Step 4: Remove the spatial filter

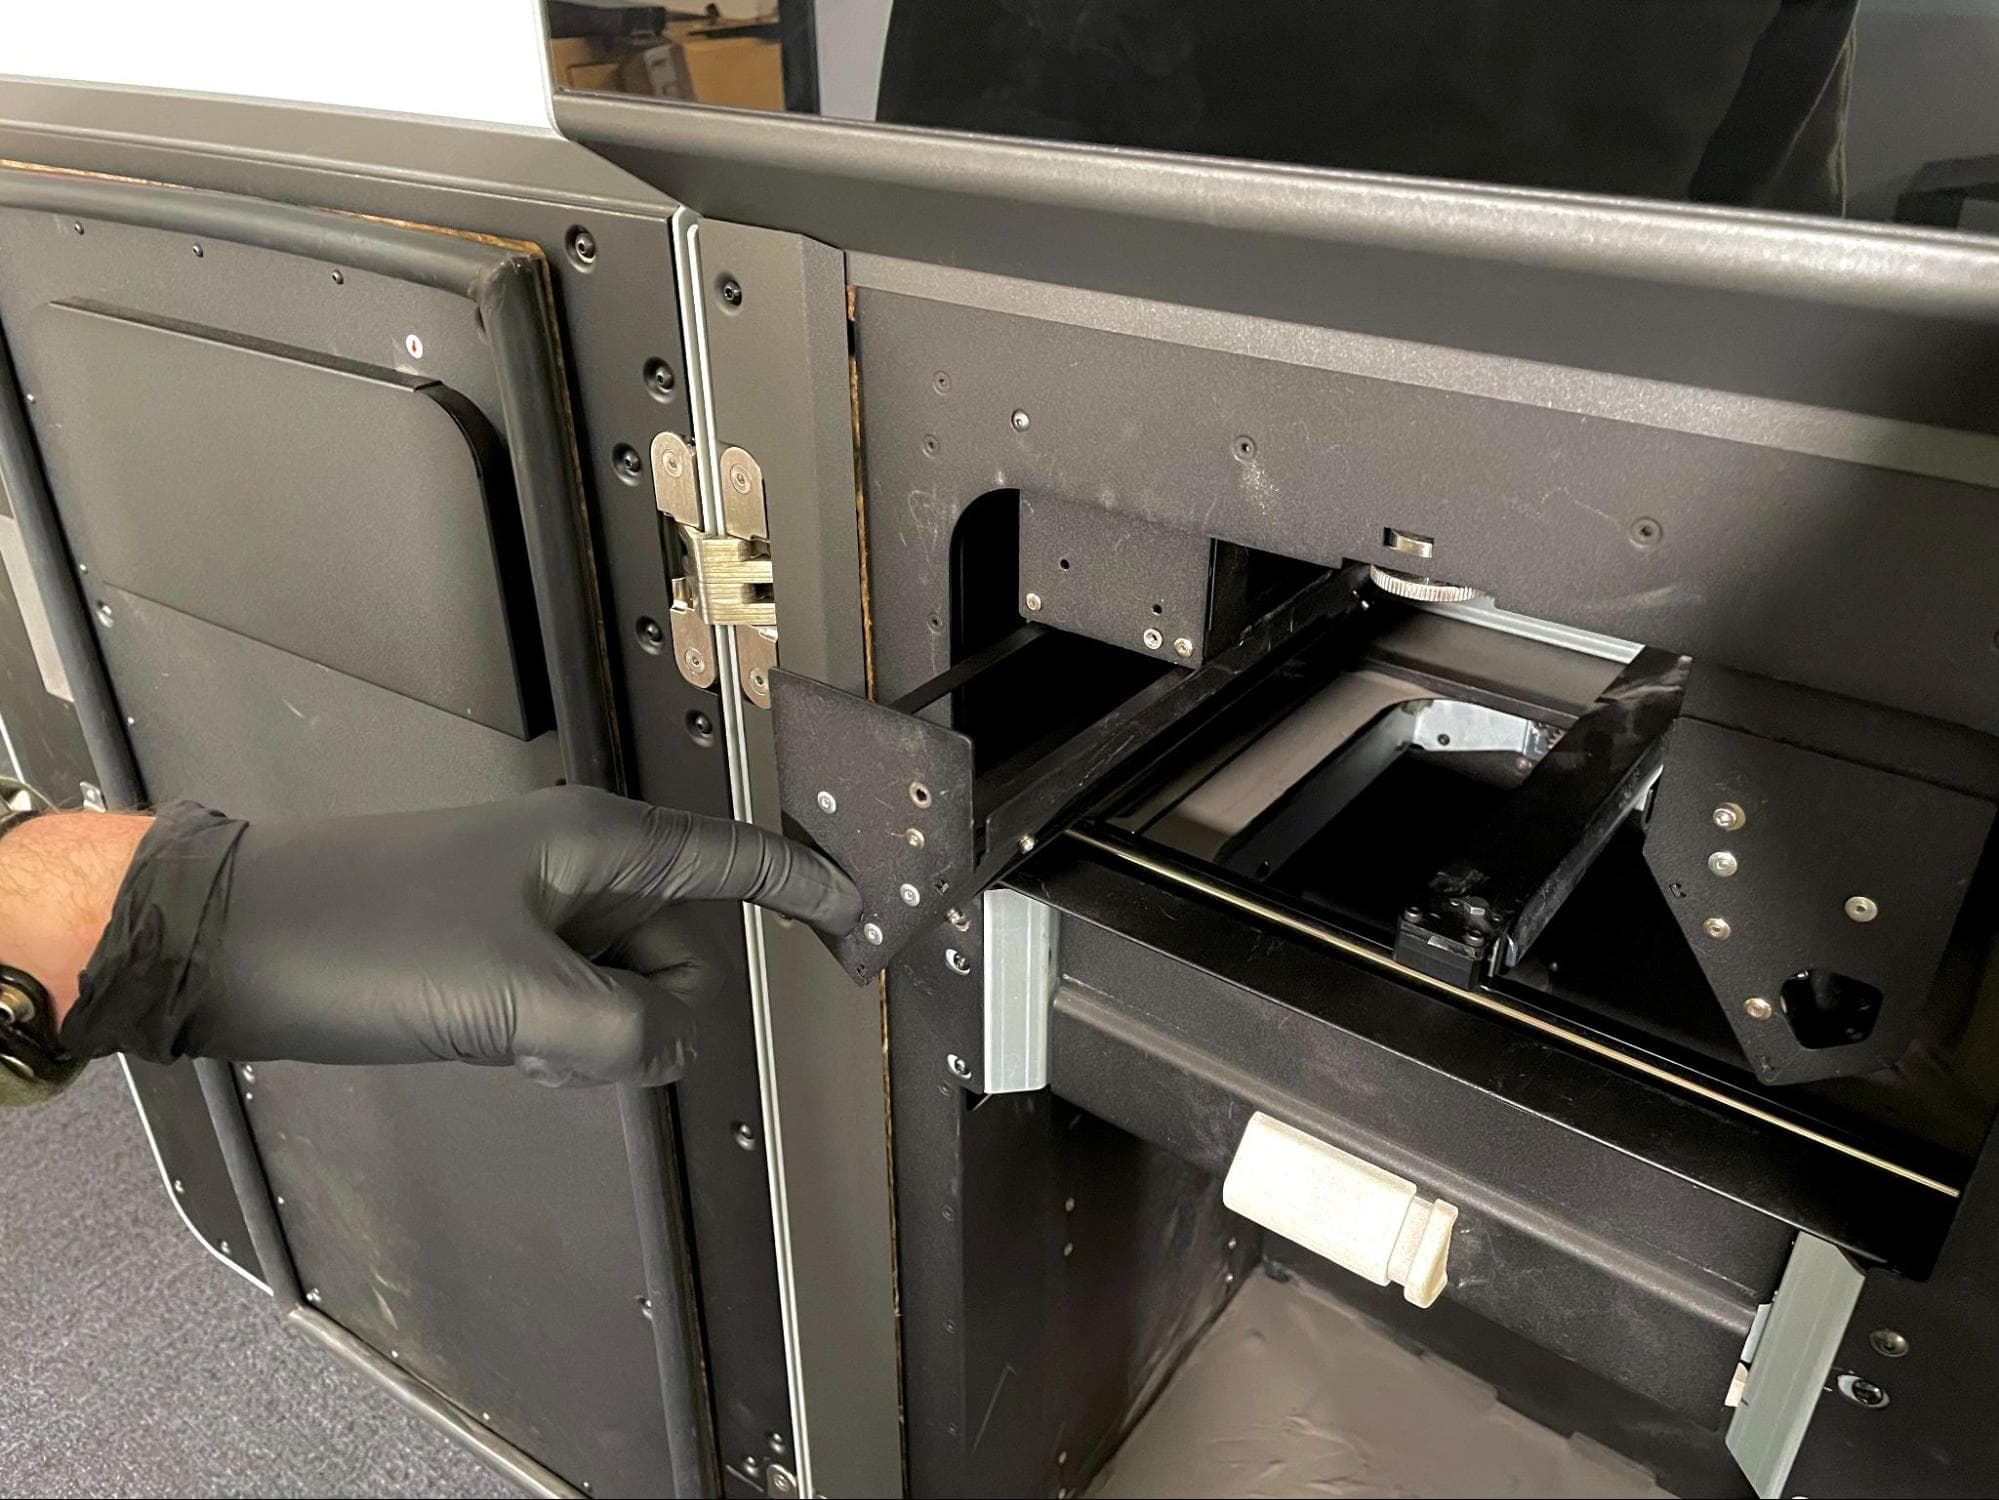
Insert your finger into the slot on the spatial filter and pull it away from the printer to remove it from the print enclosure. Set the spatial filter aside.

Remove the heater filters

Step 5: Unmount and remove the second spatial filter

Repeat steps 3–4 for the remaining filter.

Removing the original recoater roller

Overview: Unmount and remove the original recoater roller.

Step 1: Position the recoater roller for removal

On the touchscreen, navigate to Maintenance > Motor Moves. Touch and hold the appropriate directional toggle that will move the recoater out into the middle of the printer.

Remove the original recoater roller

Caution:

Crush hazard. Keep your hands, clothing, and tools clear of the path of the recoater roller while it is moving.

Step 2: Remove the recoater roller retention bolts

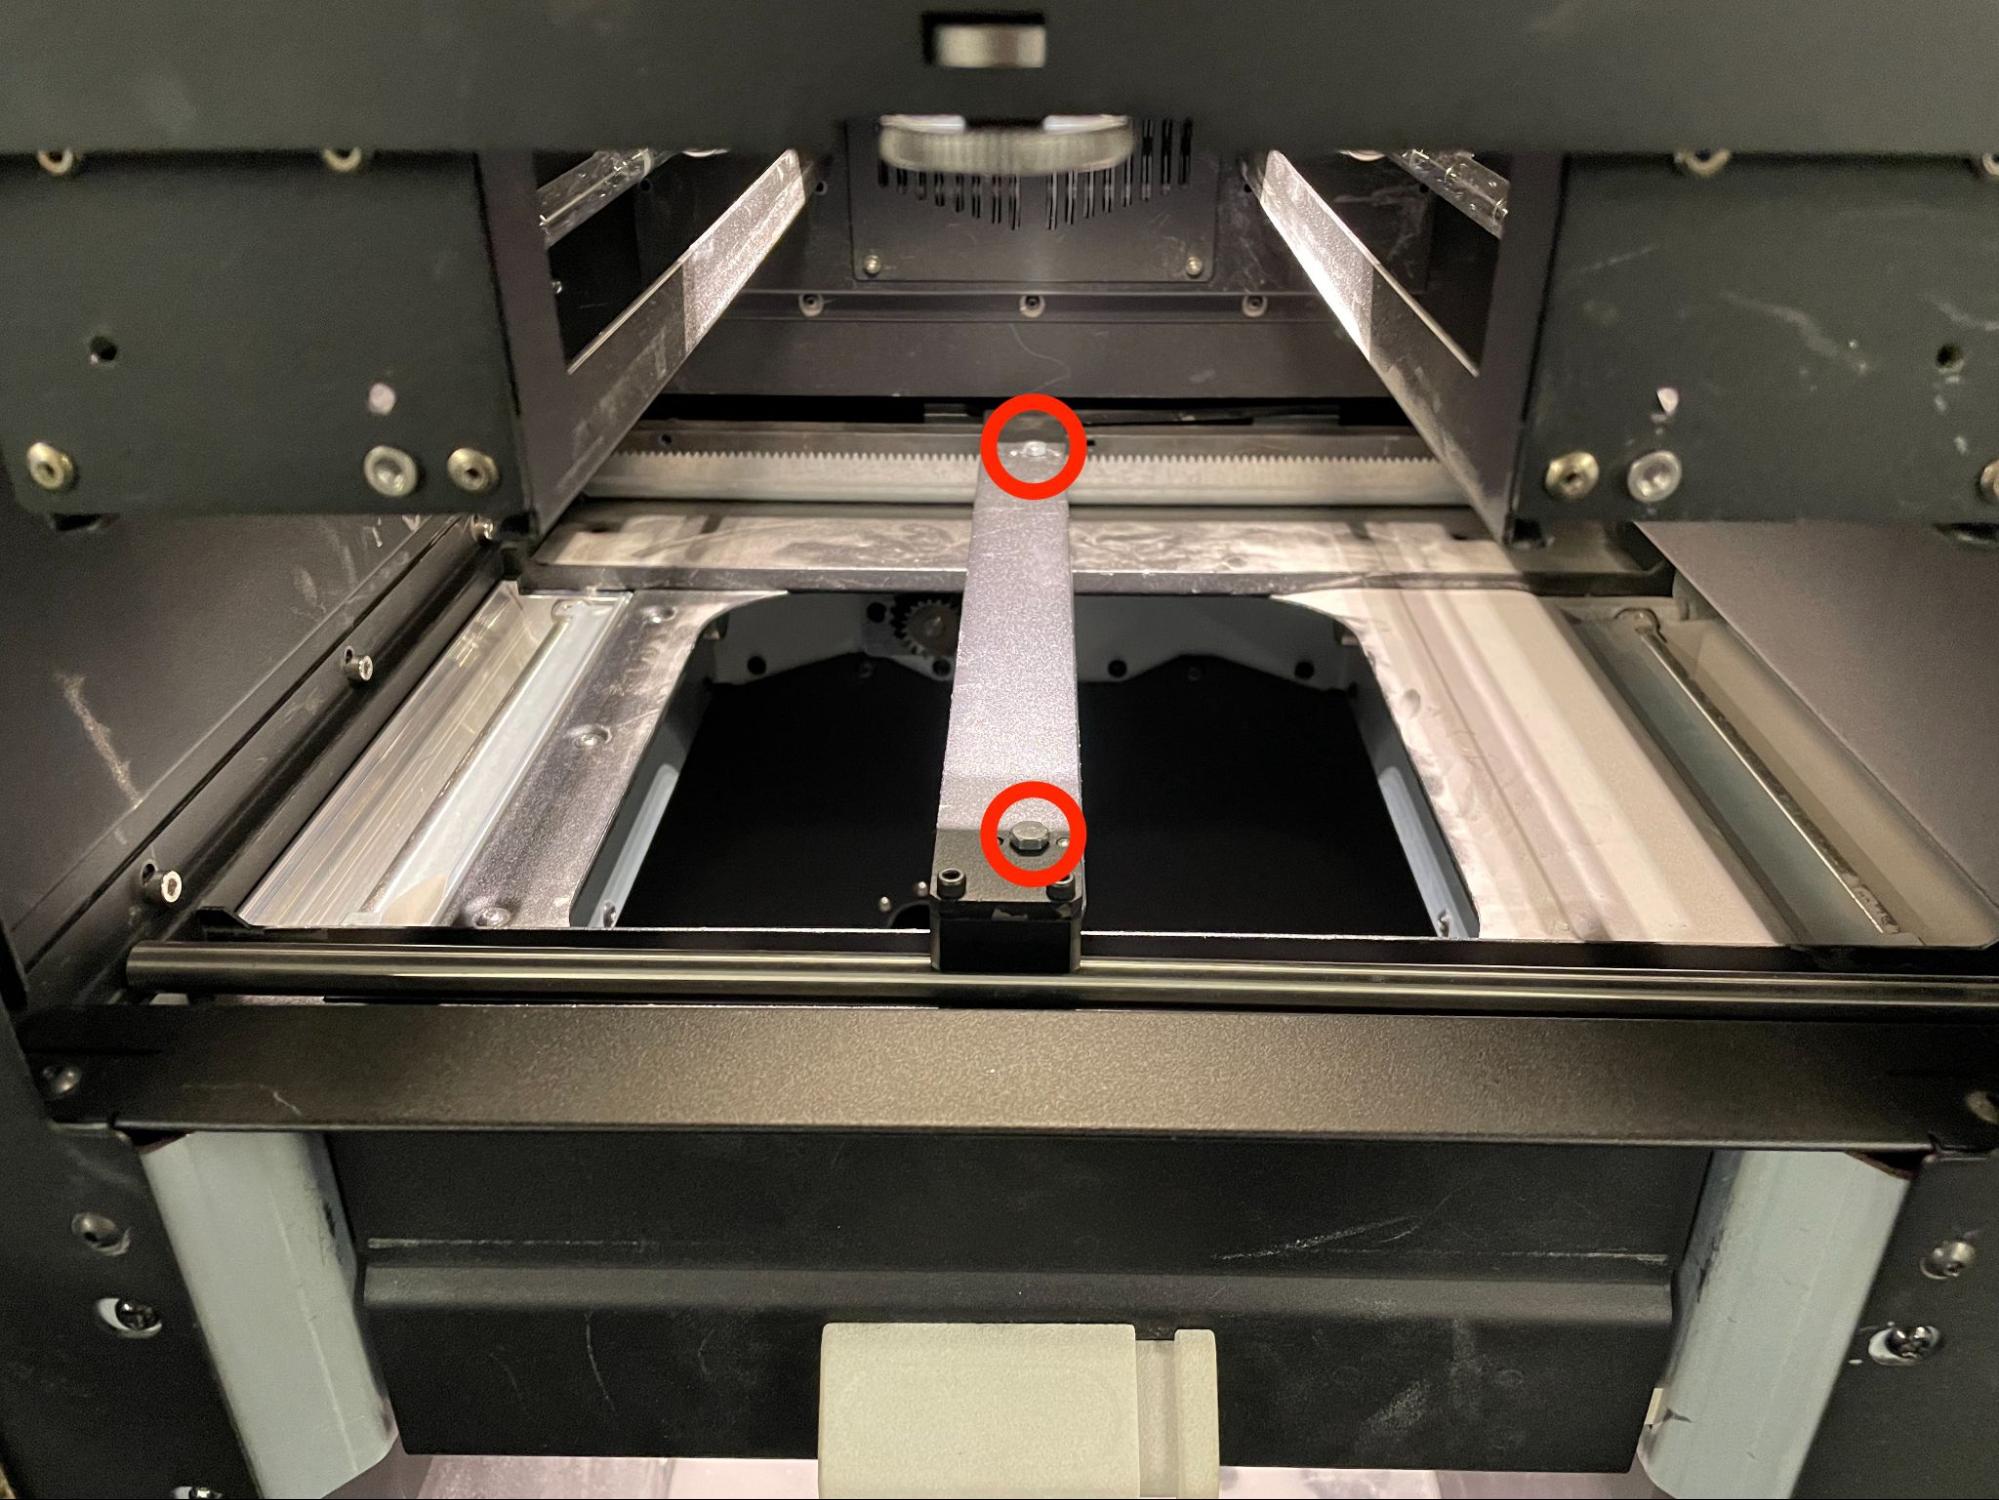
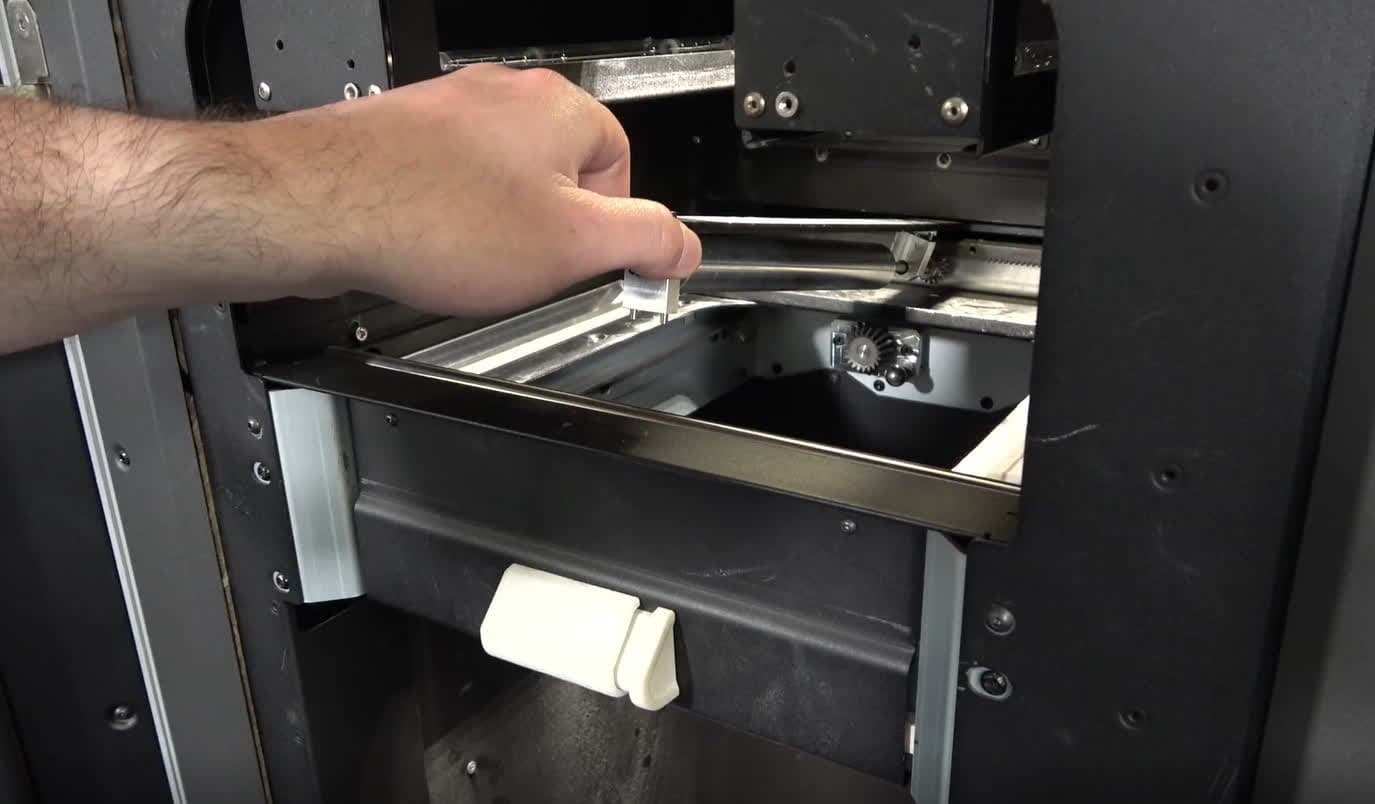
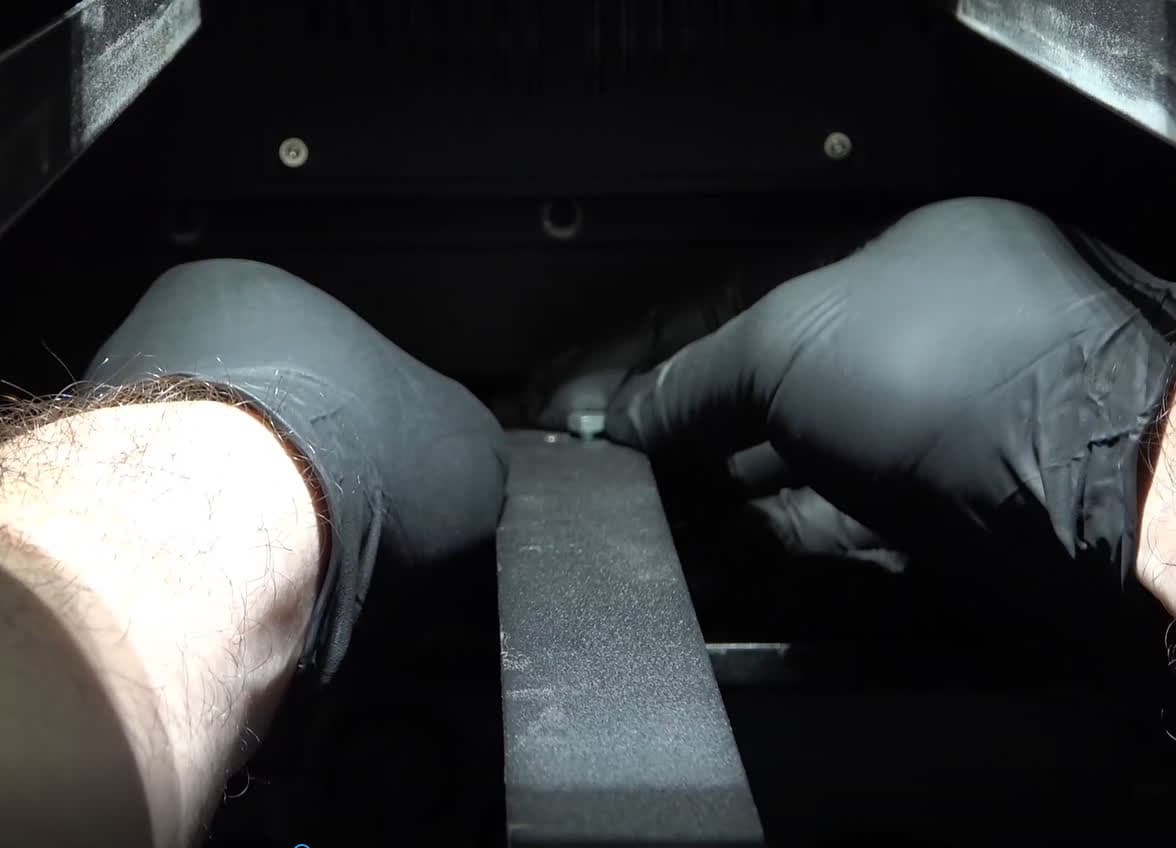
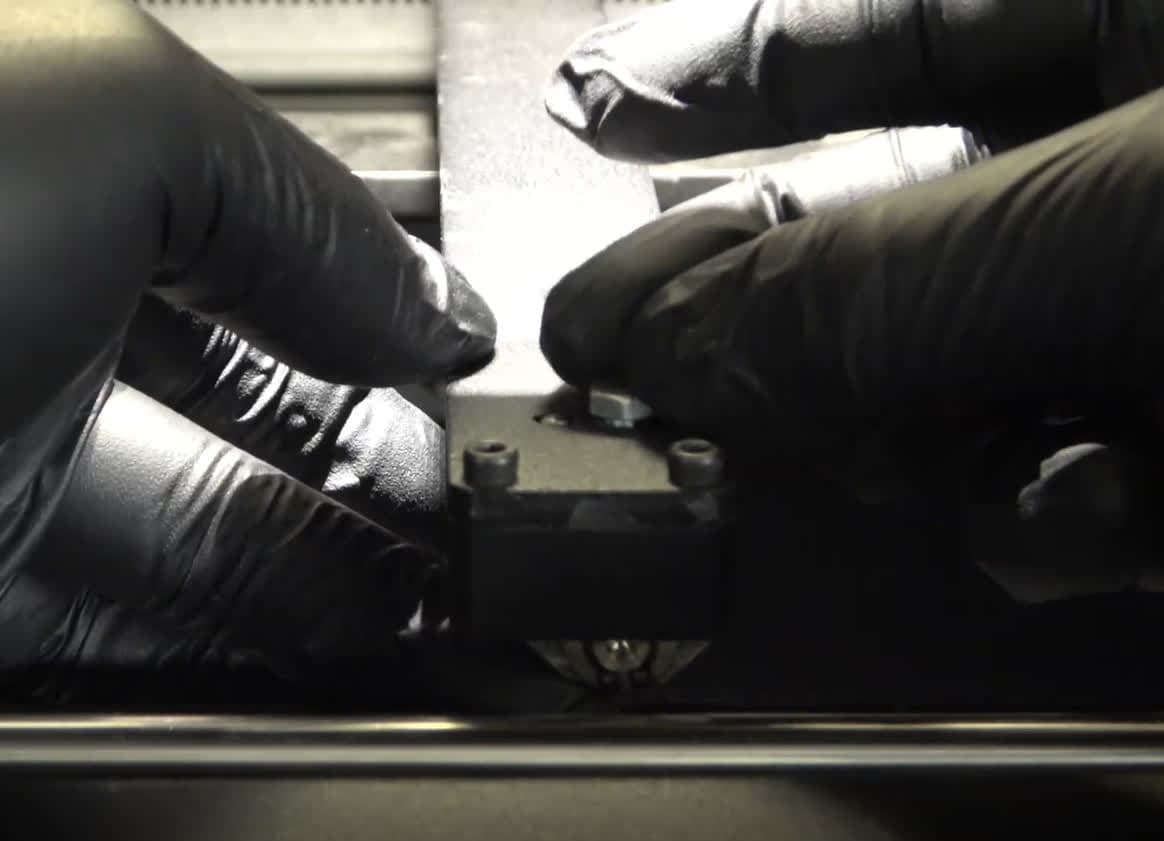
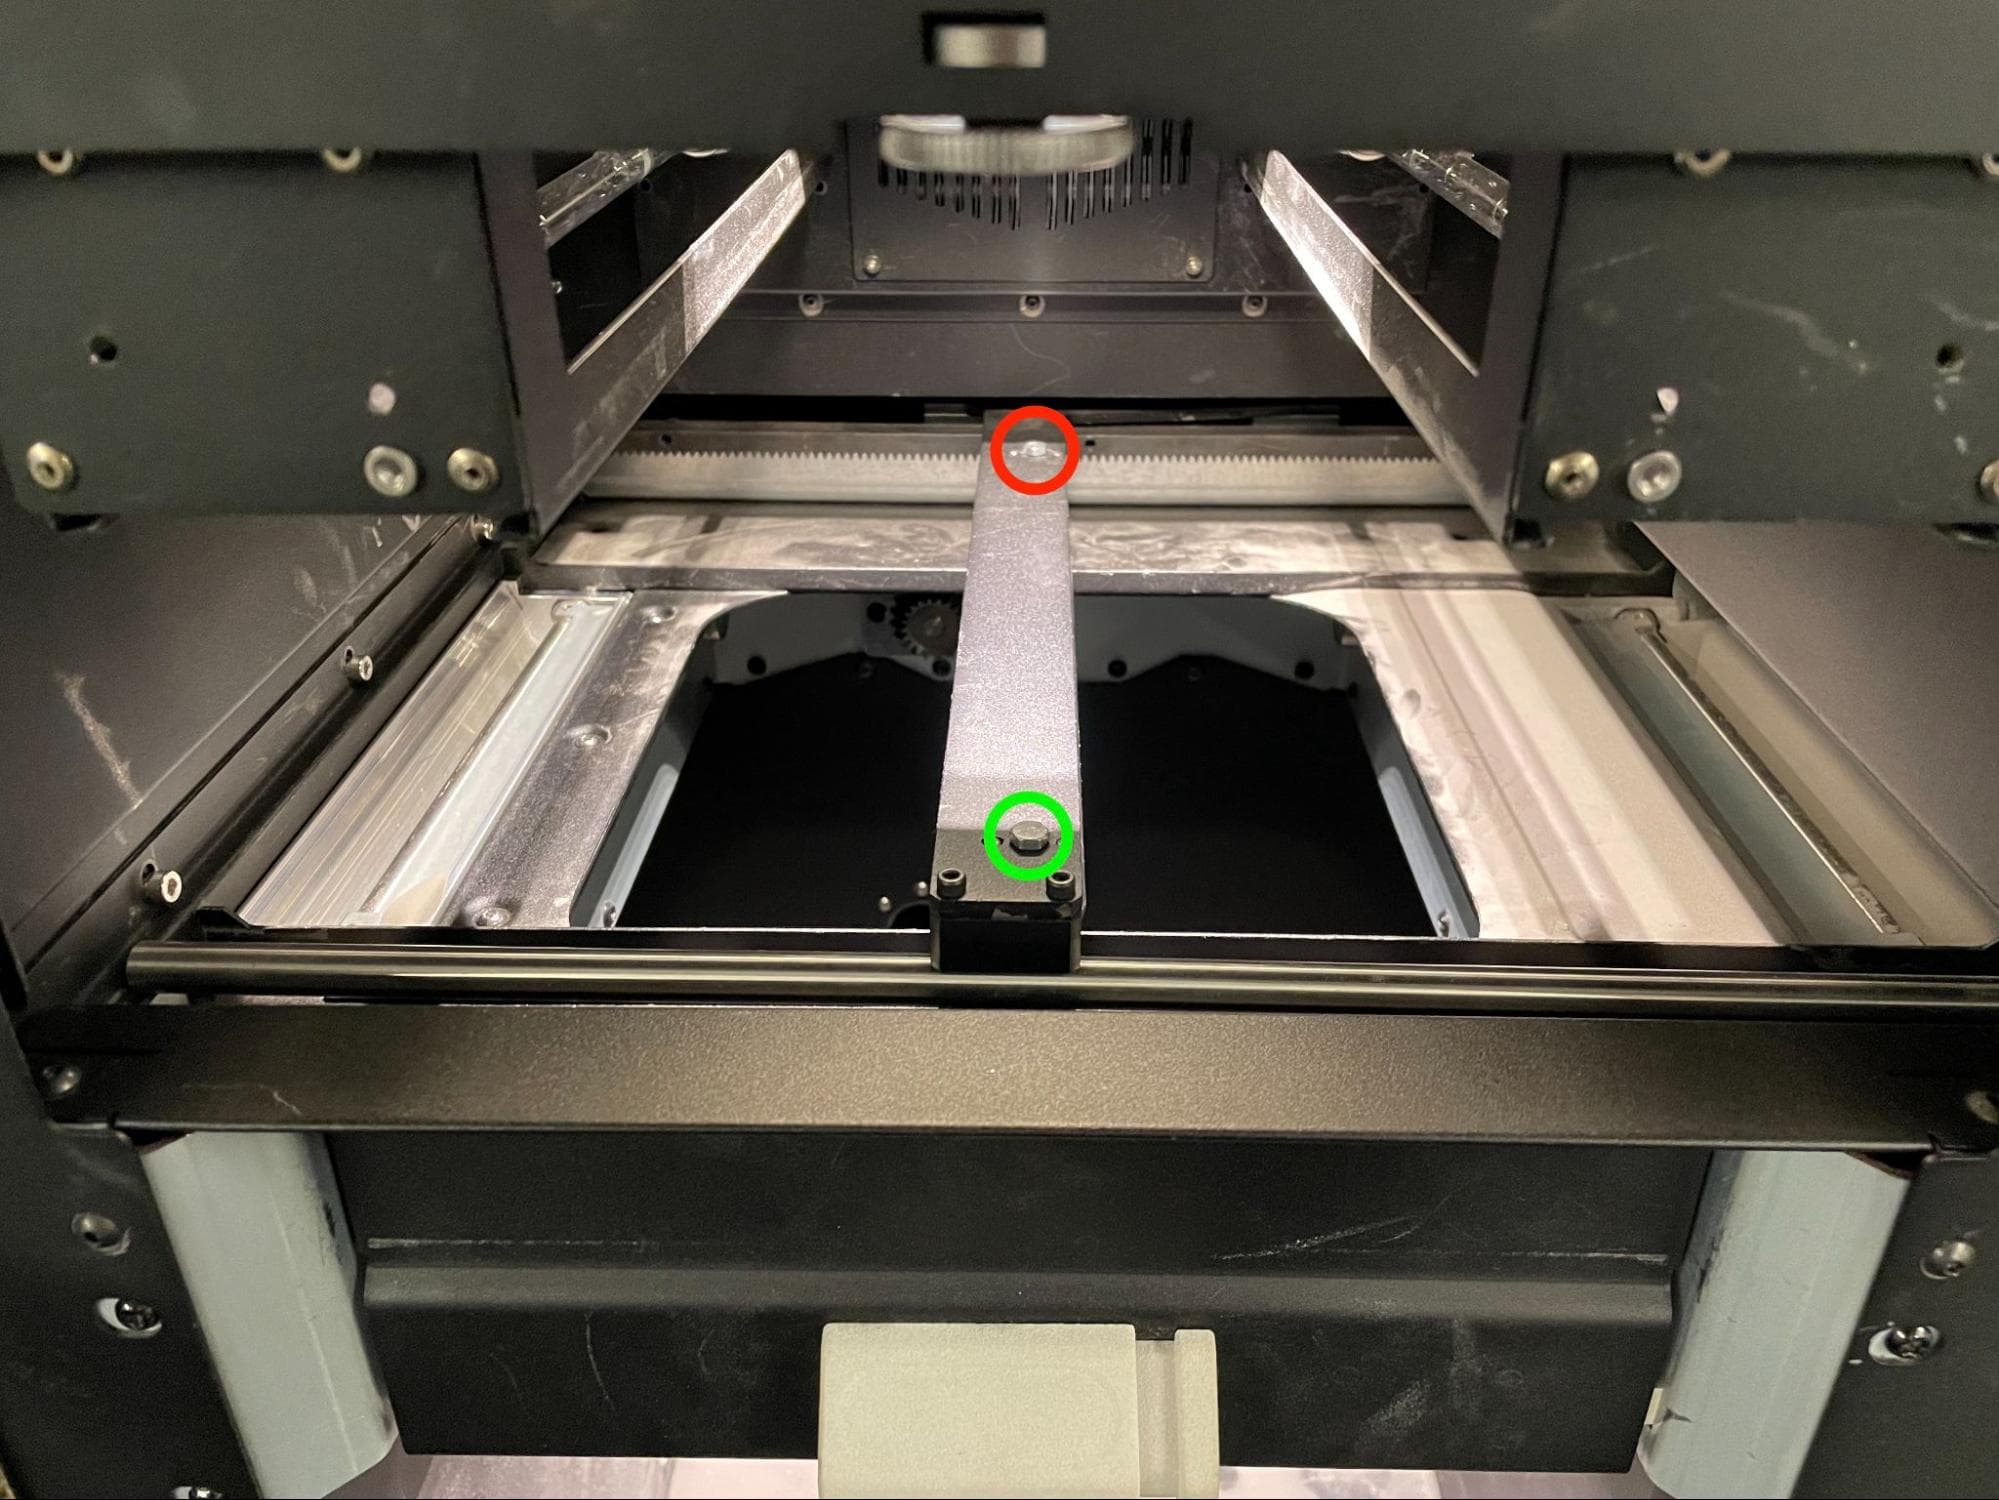
Use a 7 mm wrench to remove the two hex bolts holding the roller to the recoater arm.

Step 3: Uninstall the recoater roller

Remove the original recoater roller

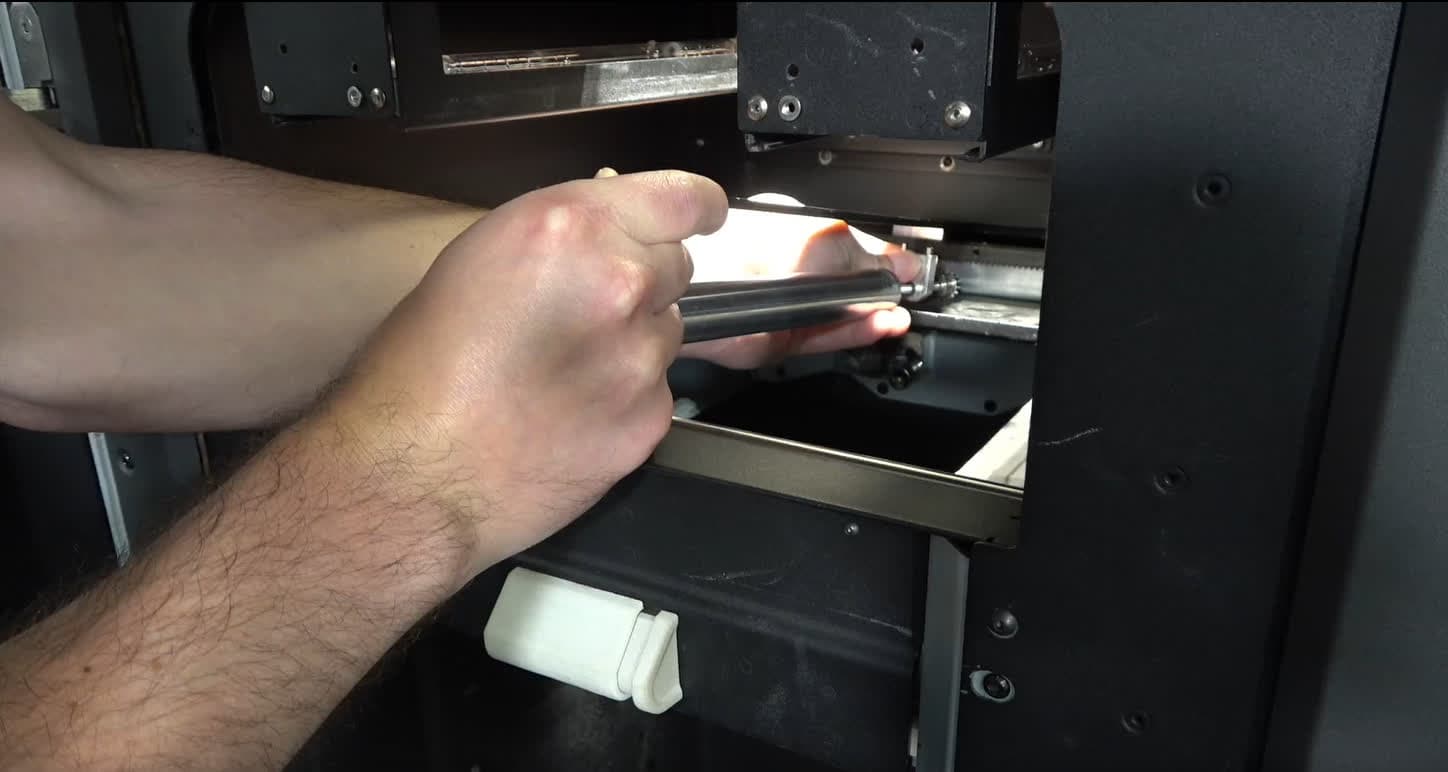
Gently pick up the front of the recoater arm and tip it towards the back of the printer. If the roller does not drop off the arm, gently pull it downward and away from the arm. Remove the recoater roller and set it aside for disposal.

Tip:

If the bearing blocks seem stuck to the recoater arm, rethread both bolts slightly, then tap the head of each bolt with a mallet.

Installing the replacement recoater roller

Overview: Clean and install the replacement recoater roller.

Step 1: Prepare the new recoater roller

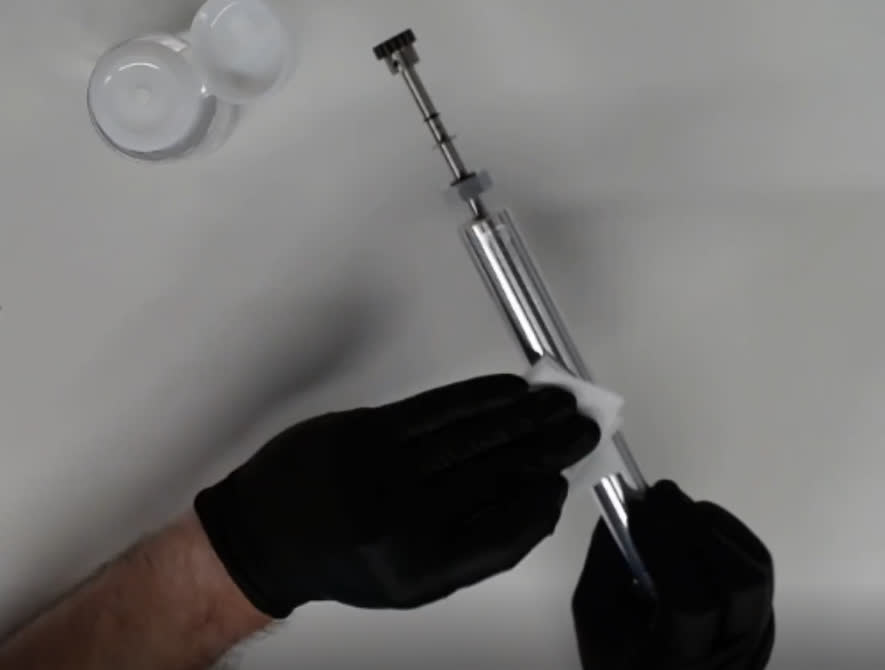
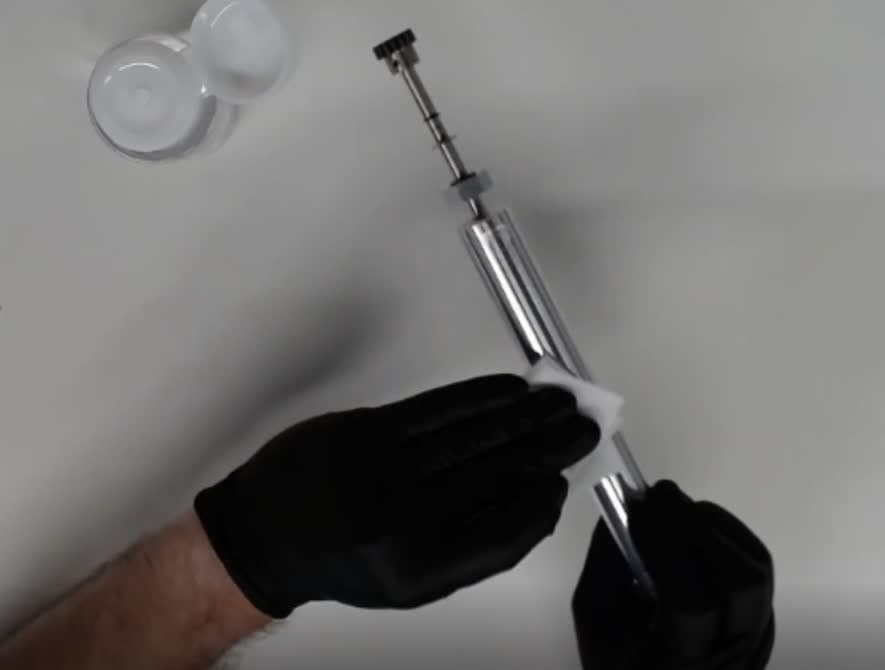
Put on a new pair of nitrile gloves. Wet a nonabrasive cleaning cloth with ethanol or isopropyl alcohol. Thoroughly wipe down the roller, ensuring there is no remaining dust or residue.

Install the new recoater roller

Step 2: Mount the recoater roller and rear bearing block

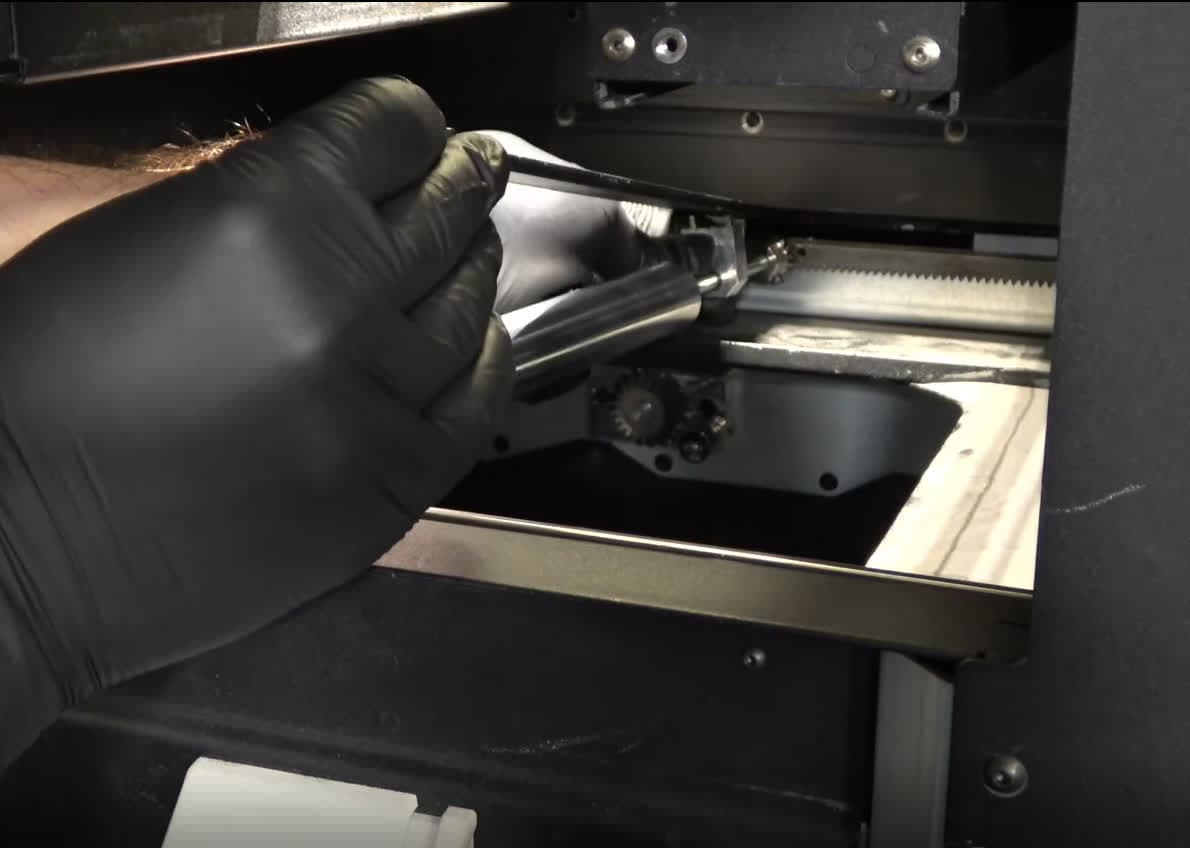
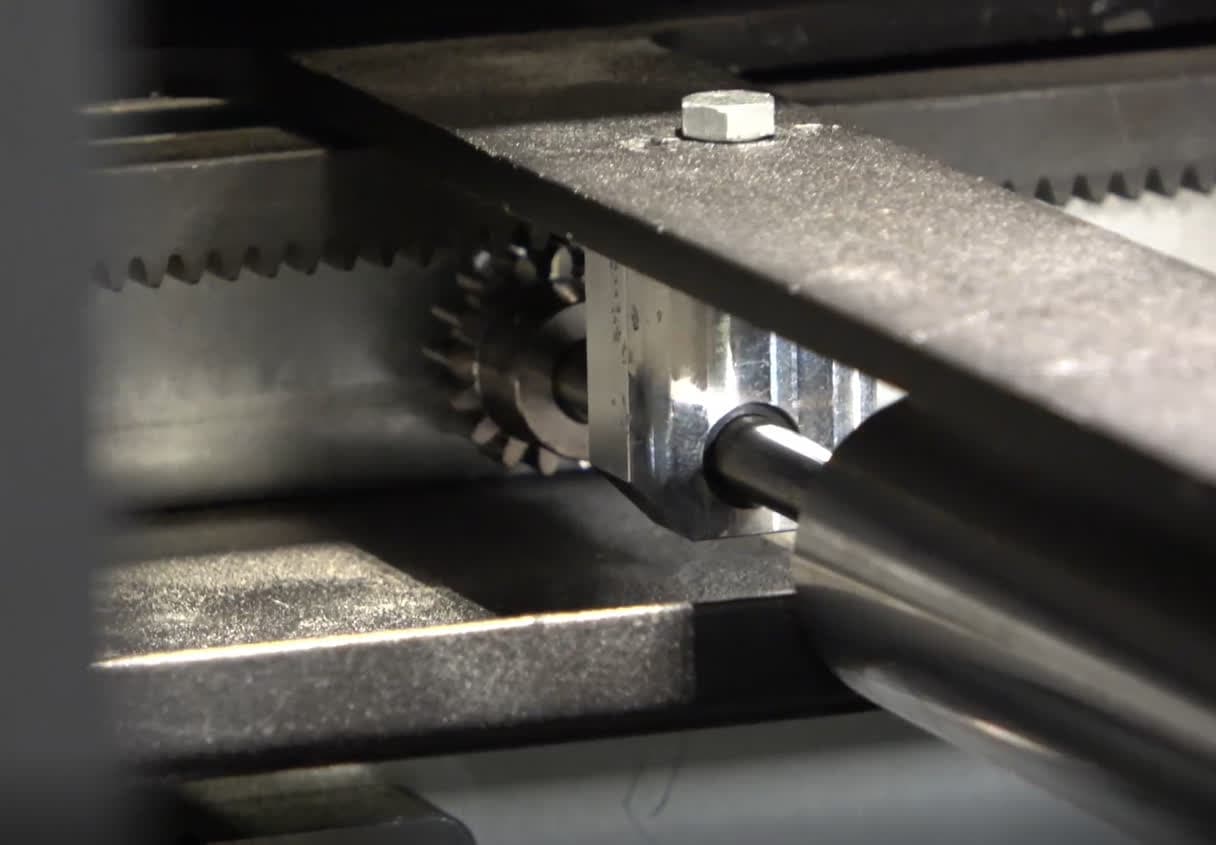
Maneuver the recoater roller’s pinion gear into the back of the printer so that it is loosely aligned with the corresponding rack gear. Position the rear bearing block so that its two pins align with the corresponding holes in the bottom of the recoater arm.

Install the new recoater roller

Step 3: Begin securing the recoater roller

While holding the rear roller mount in place, rethread the hex bolt by hand so it is still loose but does not allow the pins to drop out of the holes. Do not fully tighten the bolt.

Install the new recoater roller

Step 4: Mount the front recoater roller bearing block

Position the front bearing block so that its two pins align with the corresponding holes in the bottom of the recoater arm.

Step 5: Continue securing the recoater roller

While holding the front bearing block in place, rethread the hex bolt by hand so it is slightly loose. Do not fully tighten the bolt.

Install the new recoater roller

Step 6: Check the alignment of the recoater roller

Check that the rack and pinion gears are properly meshing. Move the loosely mounted recoater roller if needed.

Install the new recoater roller

Step 7: Fully secure the recoater roller

Using a 7 mm wrench, tighten the rear hex bolt first, followed by the front hex bolt. Do not over-torque the bolts, as they may strip and become stuck.

Install the new recoater roller

Reinstalling the quartz tube heater spatial filters

Overview: Align and reinstall the spatial filters.

Step 1: Align the spatial filter with the frame

Align the slots on the spatial filter with the rails on the lamp frame.

Step 2: Install the spatial filter

Replace the heater filters

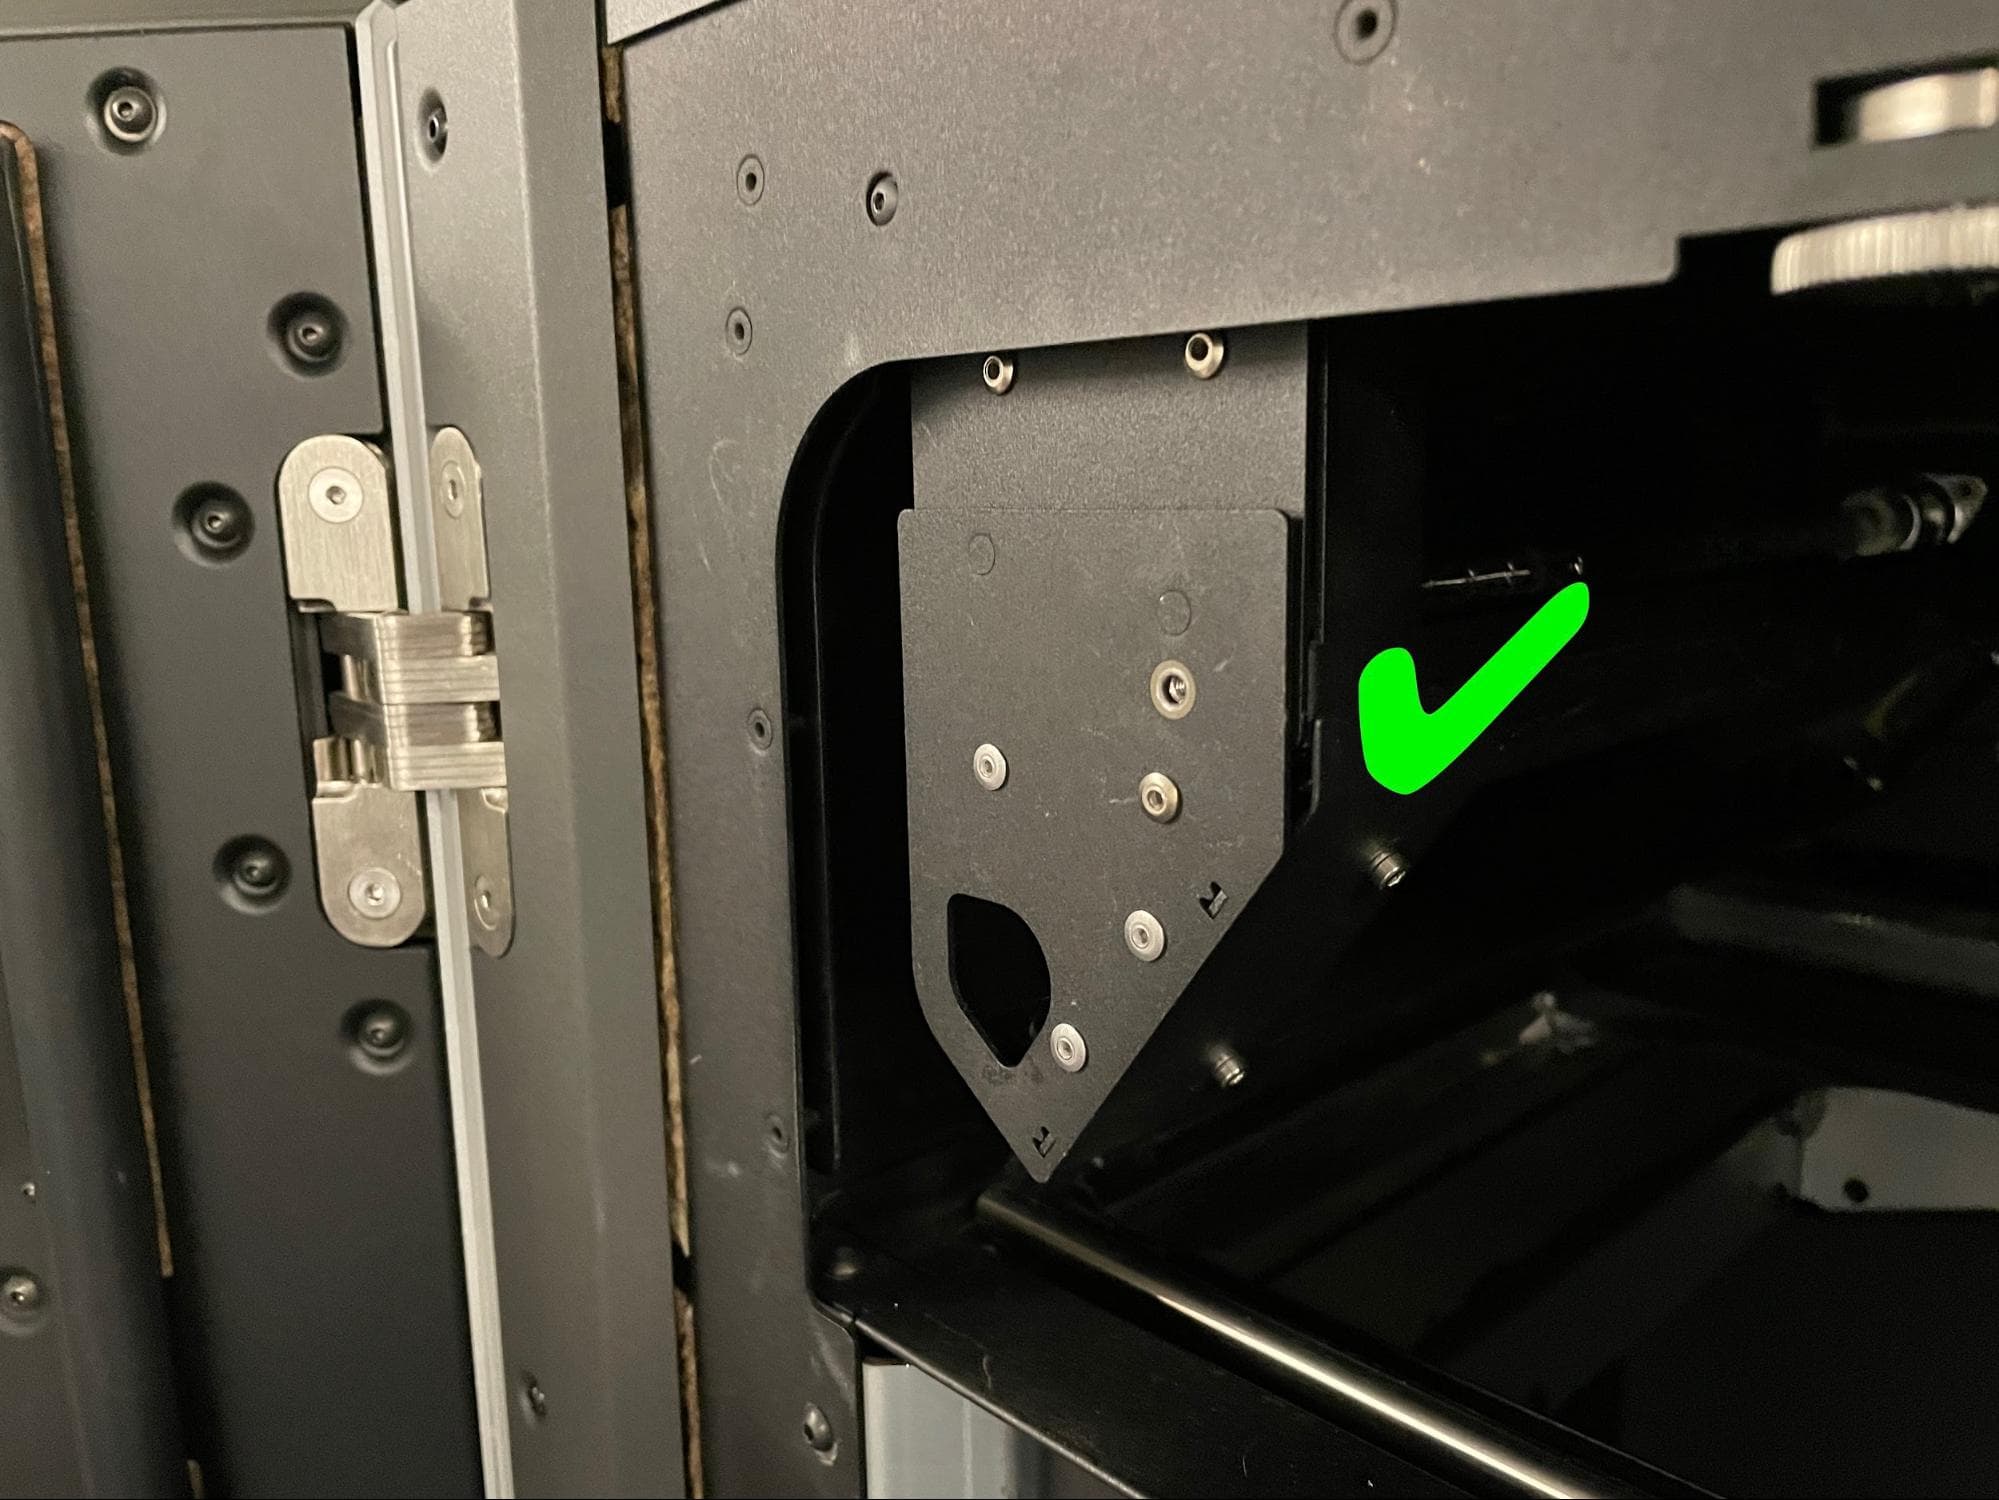
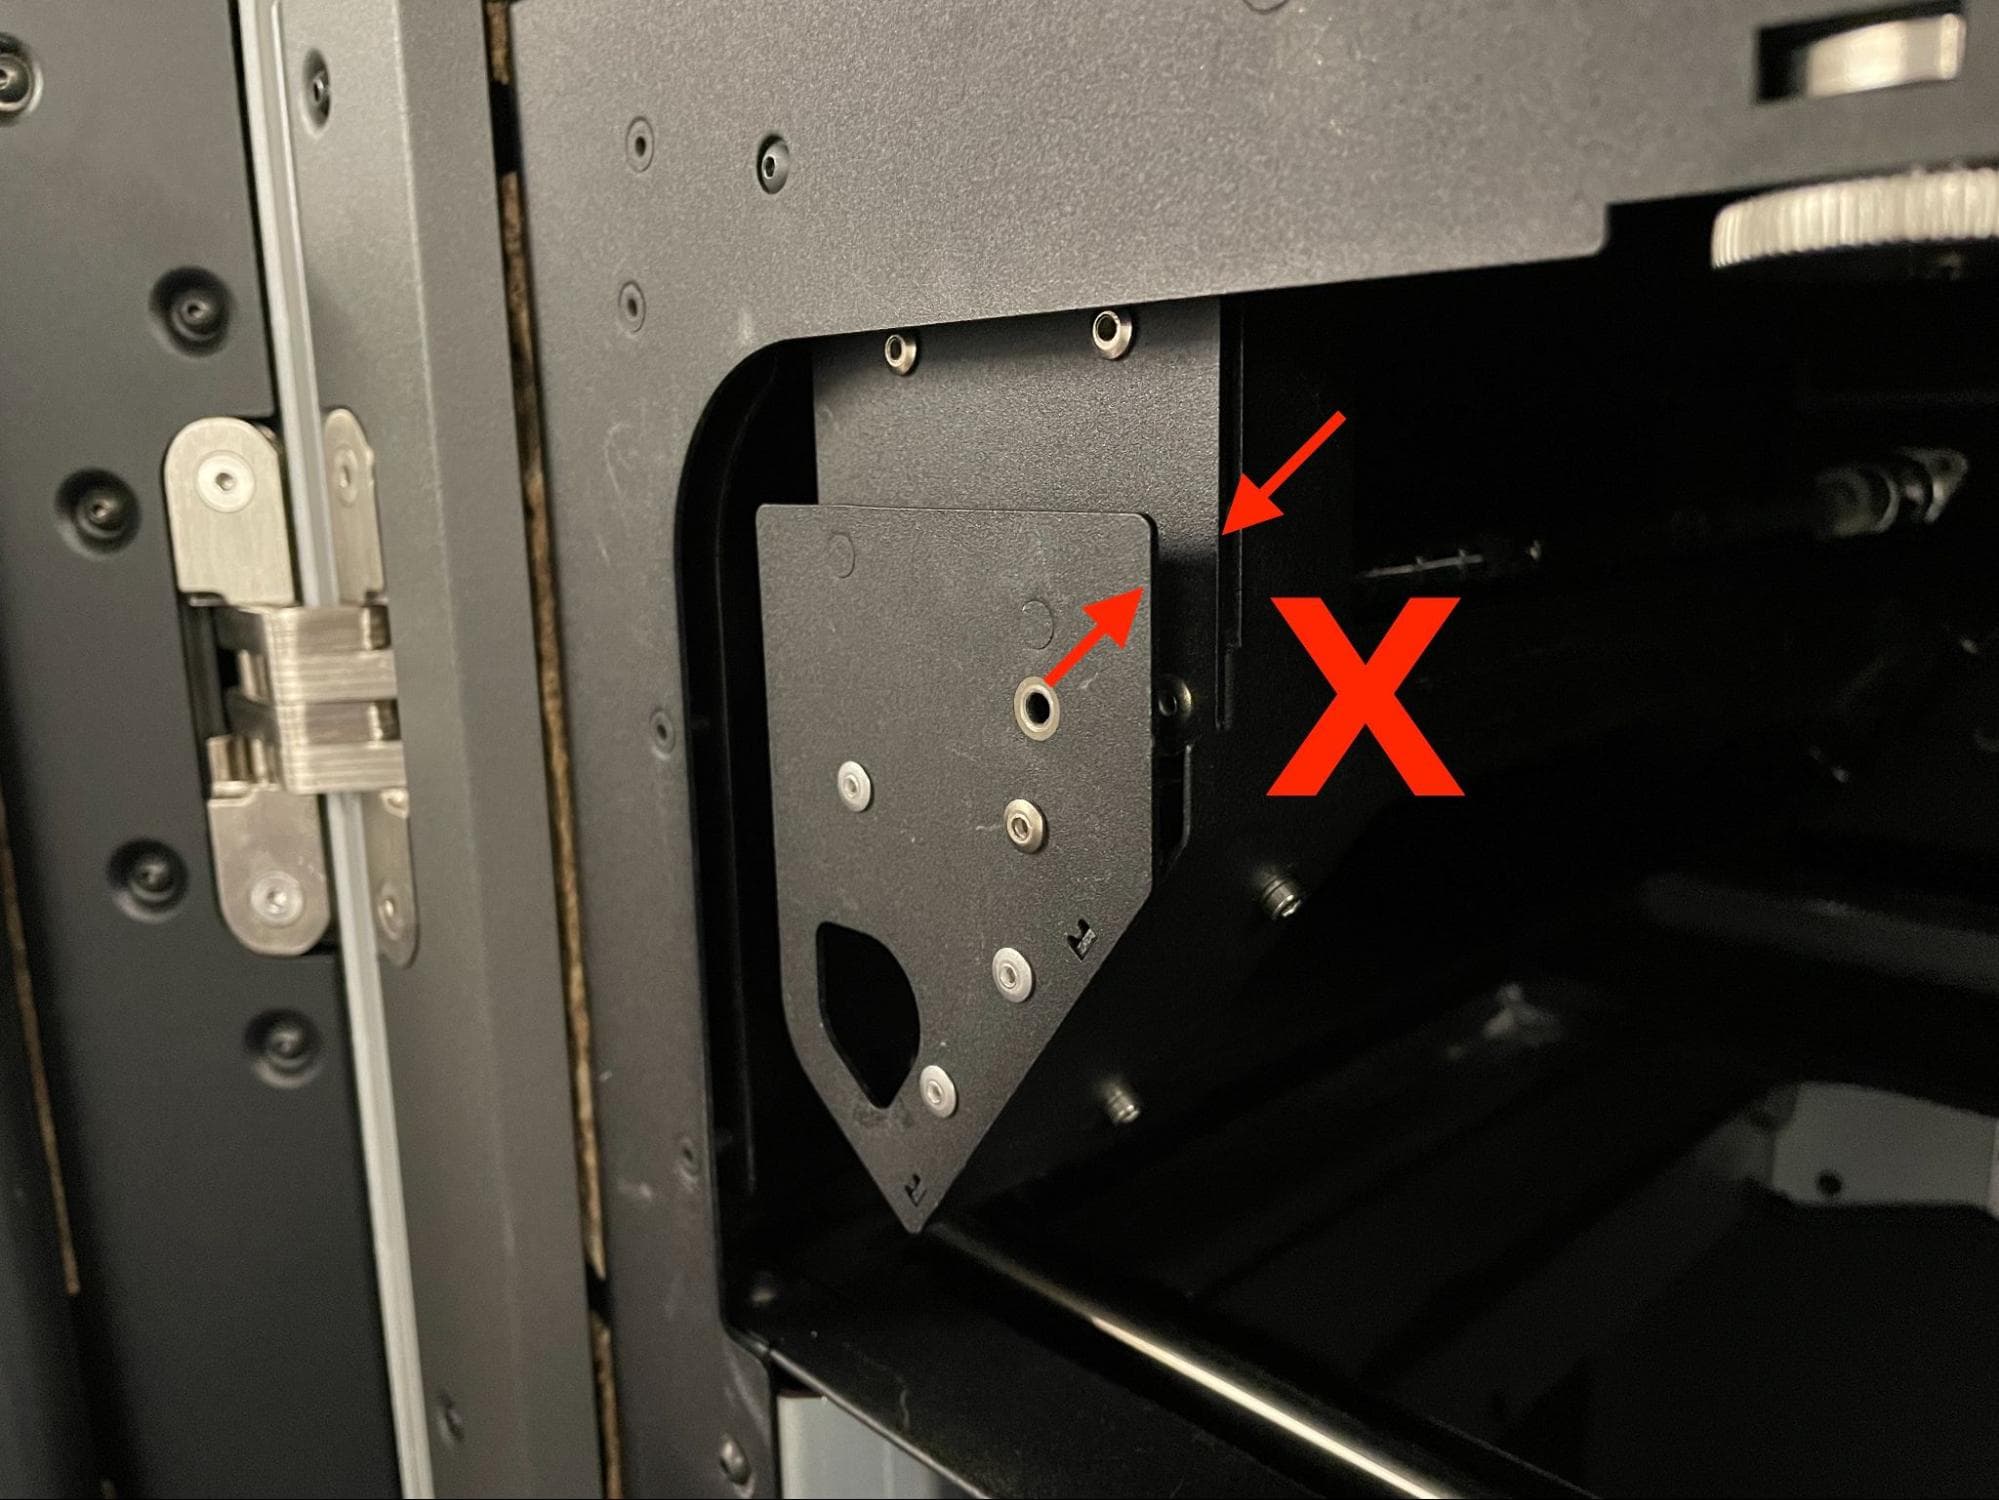
Push the spatial filter along the rails towards the back of the printer. Ensure that the alignment pins on the back of the front face of the spatial filter go into the corresponding holes in the lamp frame. The front of the spatial filter sits flush against the front of the lamp frame when it is properly installed.

Step 3: Secure the spatial filter

Thread the 8.0 mm M3 cap screw into the screw hole in the front of the spatial filter. Tighten the screw with a 2.5 mm hex driver until finger tight.

Replace the heater filters

Step 4: Install and secure the other spatial filter

Repeat steps 1–3 for the other filter.

Finalizing the repair

Overview: After installing the replacement recoater roller, start a print and perform final checks.

Step 1: Test the repair

Insert and connect a build chamber, close the print enclosure door, and start a print. Monitor the printer to ensure that the recoater roller moves smoothly and the print proceeds normally. Contact Formlabs Support or your certified service provider to share the results of the procedure.