
Required Supplies:
Formlabs:
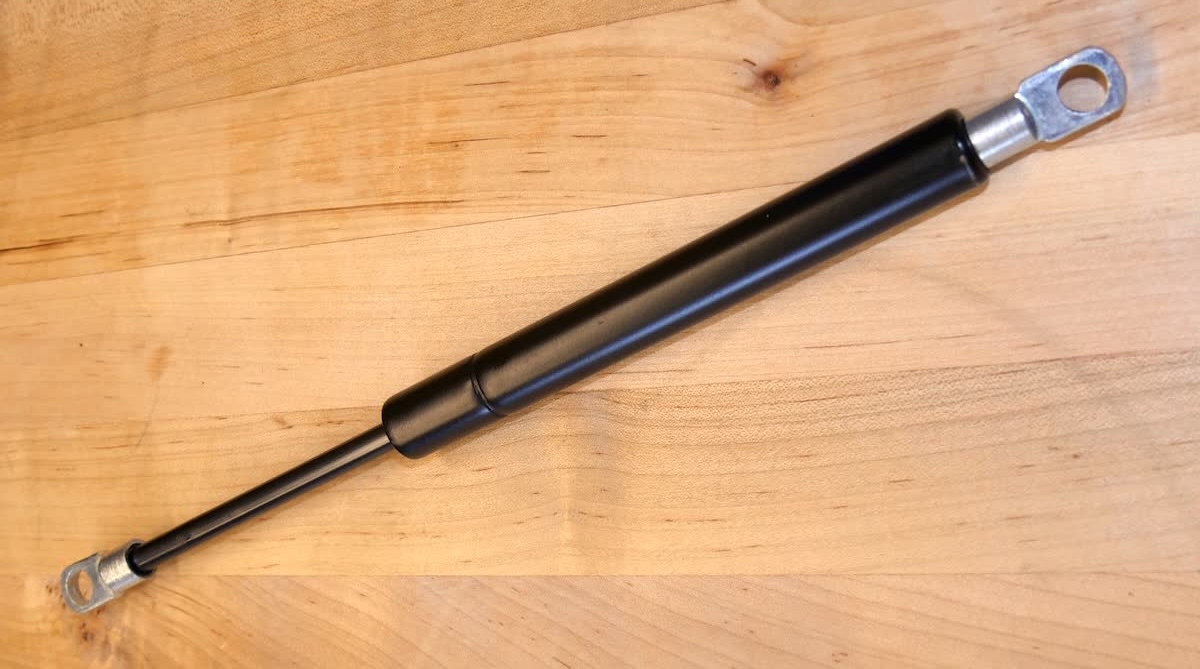
- Replacement gas spring kit
Third-party:
- T20 Torx driver

The Fuse Blast door is secured in the upright position with two gas springs to prevent it from closing suddenly. A damaged gas spring may prevent the cover from opening and closing properly.
Use this guide to replace the Fuse Blast door gas springs.
Required Supplies:
Formlabs:
Third-party:
Estimated time: 20–30 minutes
Caution:
The Fuse Blast is a heavy object. Two people are required for this procedure to prevent injury and avoid damage to the machine.
Preparing the workspace
Overview: Prepare the Fuse Blast and your workspace for replacing the gas springs.
Step 1: Remove and store printed parts
The Fuse Blast door will be open during portions of this procedure. Remove any printed parts from the Fuse Blast workspace to prevent them from being damaged inadvertently.
Step 2: Clean the workspace
Clean the area around your Fuse Blast so you can access the left and right sides of the machine. Use appropriate personal protective equipment when handling loose or unsintered powder. Refer to the support article Safety with Formlabs SLS products or your powder’s safety data sheet (SDS) for more information.
Step 3: Unplug the machine
Disconnect the power cable before continuing with maintenance. Do not perform maintenance on the machine while it is connected to power. Wait five minutes after disconnecting the machine from power before proceeding.
Danger:
Performing maintenance on the machine while it is plugged in increases the risk of electric shock. Never remove the panels of the machine while it is plugged in. Never reconnect the machine to power while the panels are uninstalled.
Removing the gas spring
Overview: Unmount and remove the gas spring.
Step 1: Access the gas spring
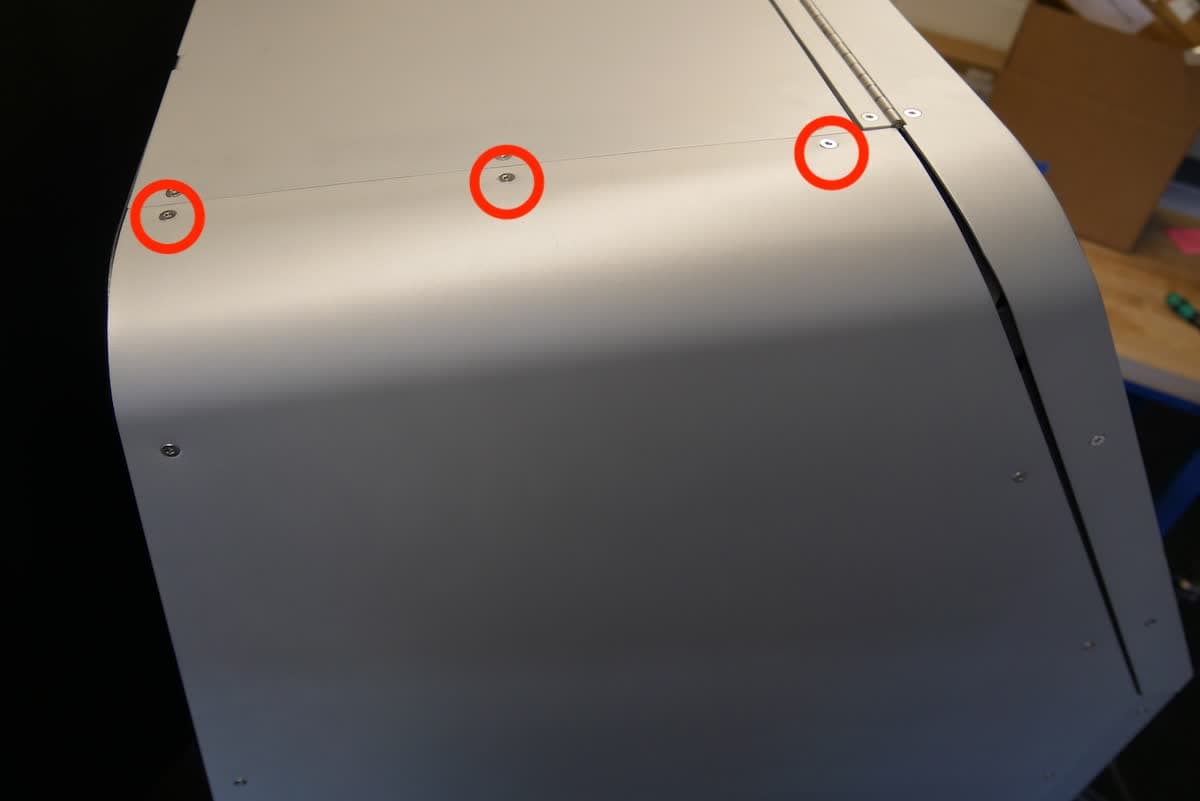
The Fuse Blast gas springs are located towards the top of the machine on the left and right sides. Remove the panel covering the gas spring you are replacing.
For the left gas spring, this is the left shell. Use a T20 Torx driver to loosen and remove the 11 screws securing the panel to the frame of the machine. Slide the panel diagonally up and towards the back of the Fuse Blast to free a mounting pin from its slot, then separate the panel from the machine and set it aside.

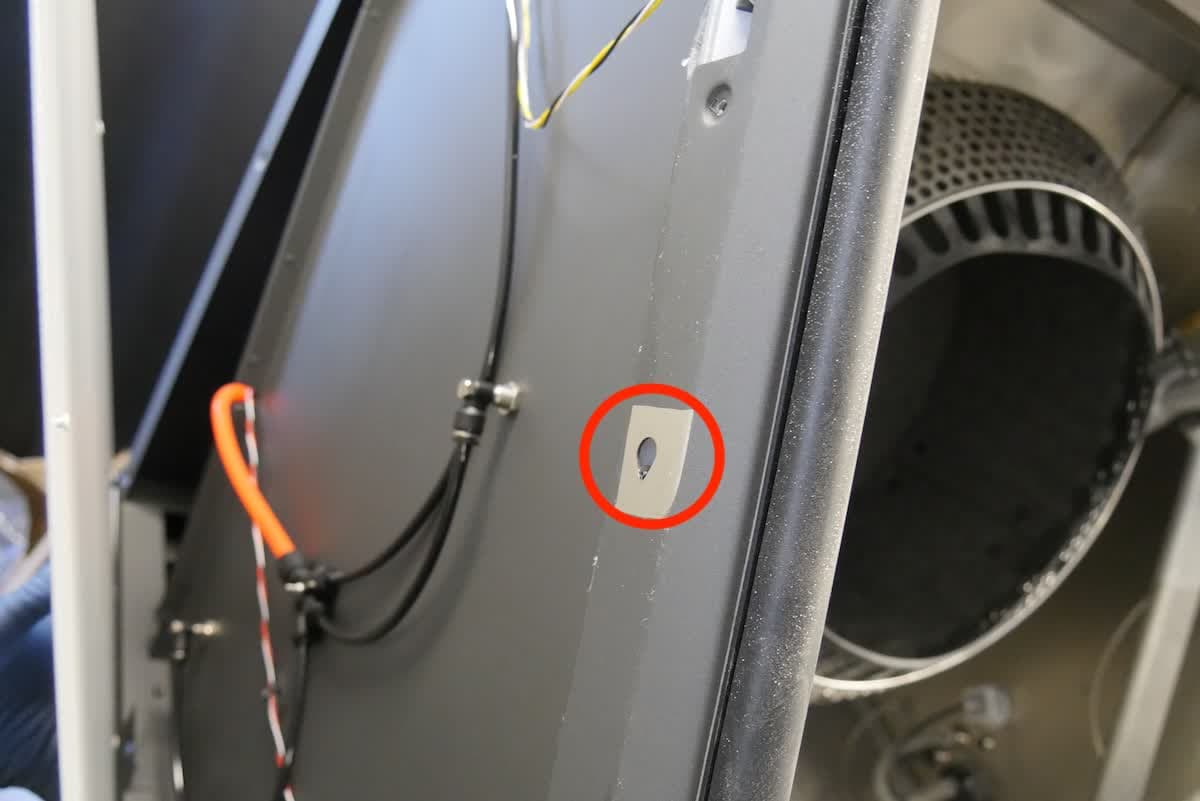
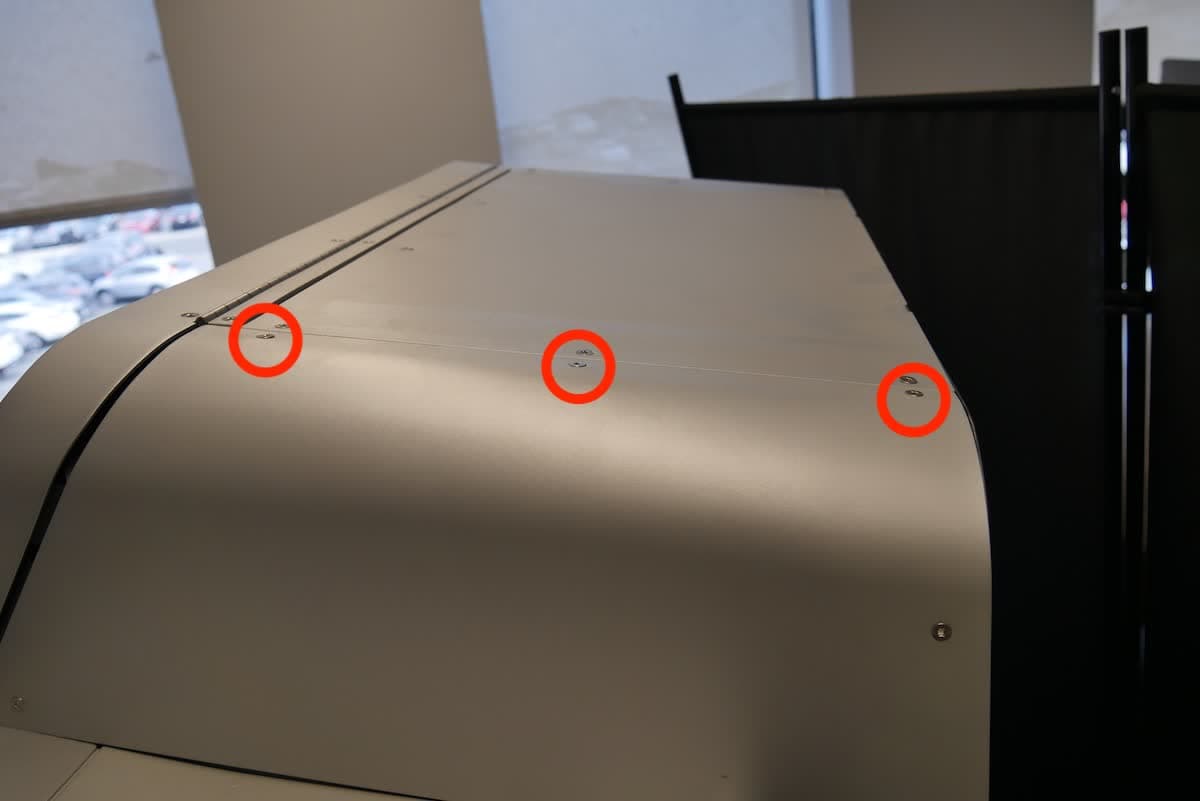
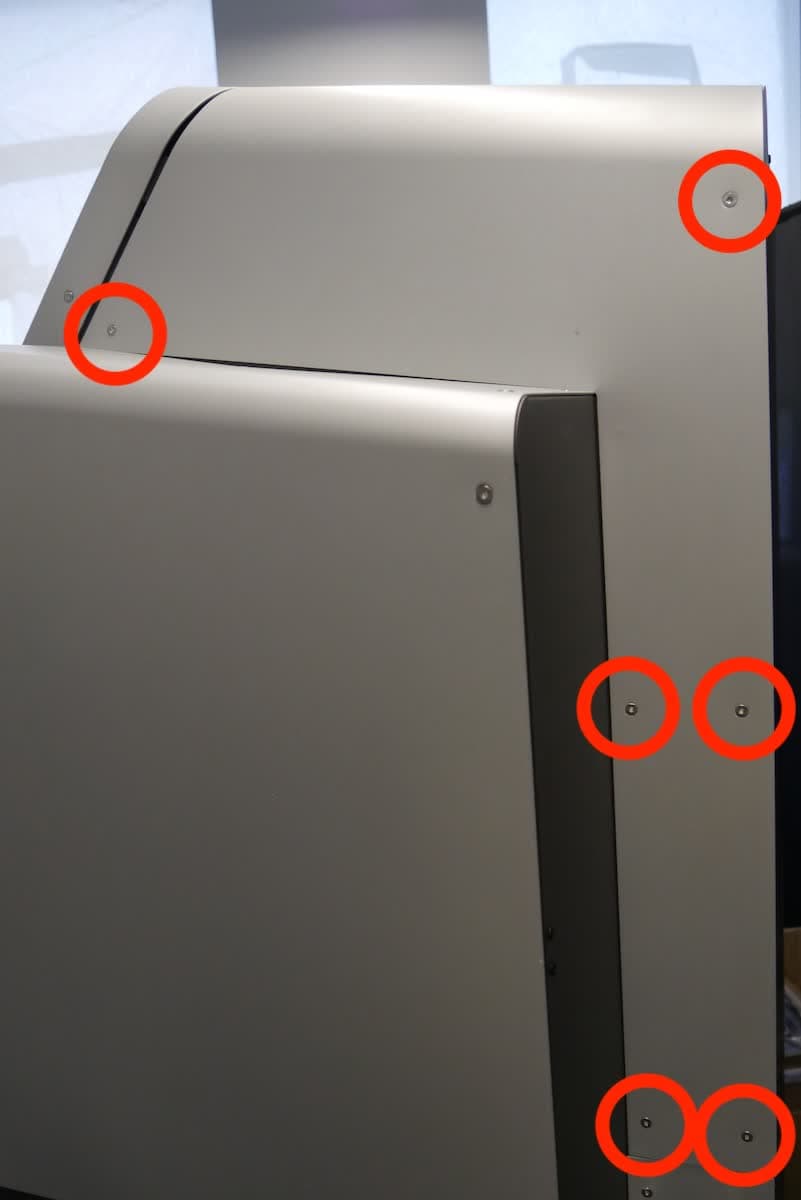
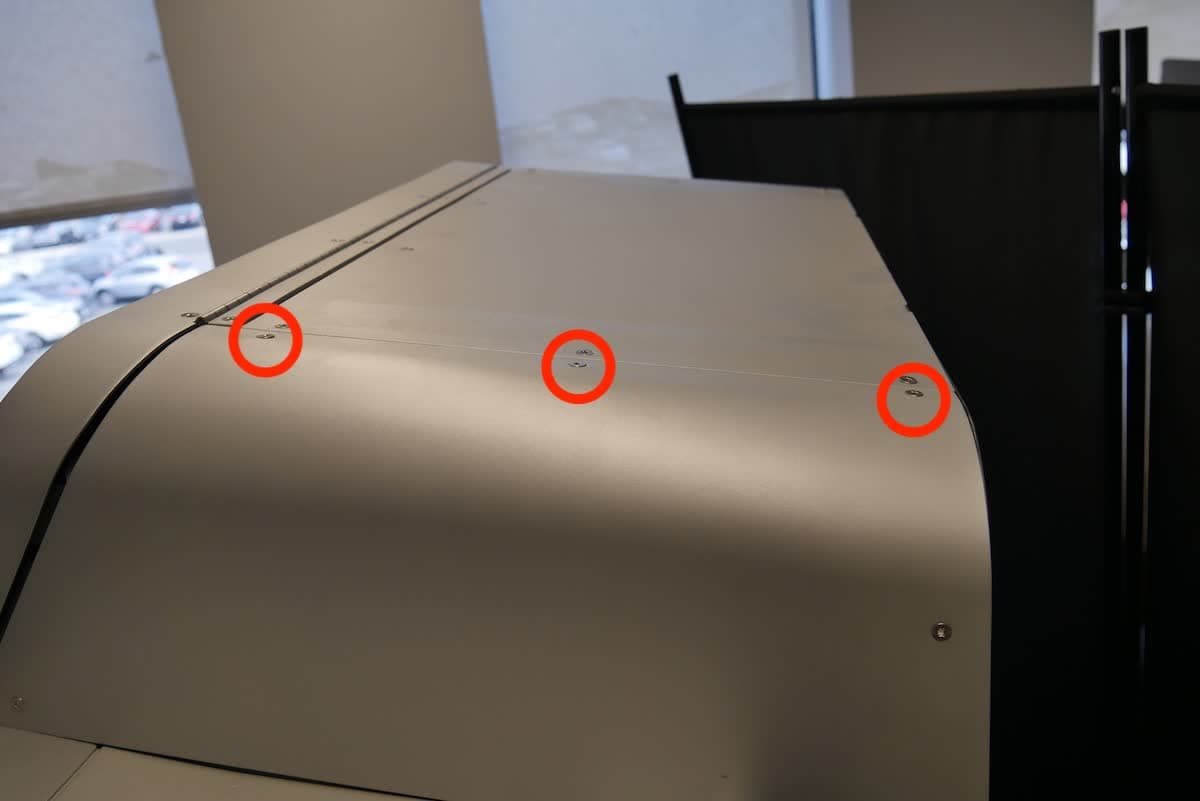
For the right gas spring, this is the right back shell. Use a T20 Torx driver to loosen and remove the nine screws securing the panel to the frame of the machine. Slide the panel diagonally up and towards the back of the Fuse Blast to free a mounting pin from its slot, then separate the panel from the machine and set it aside.

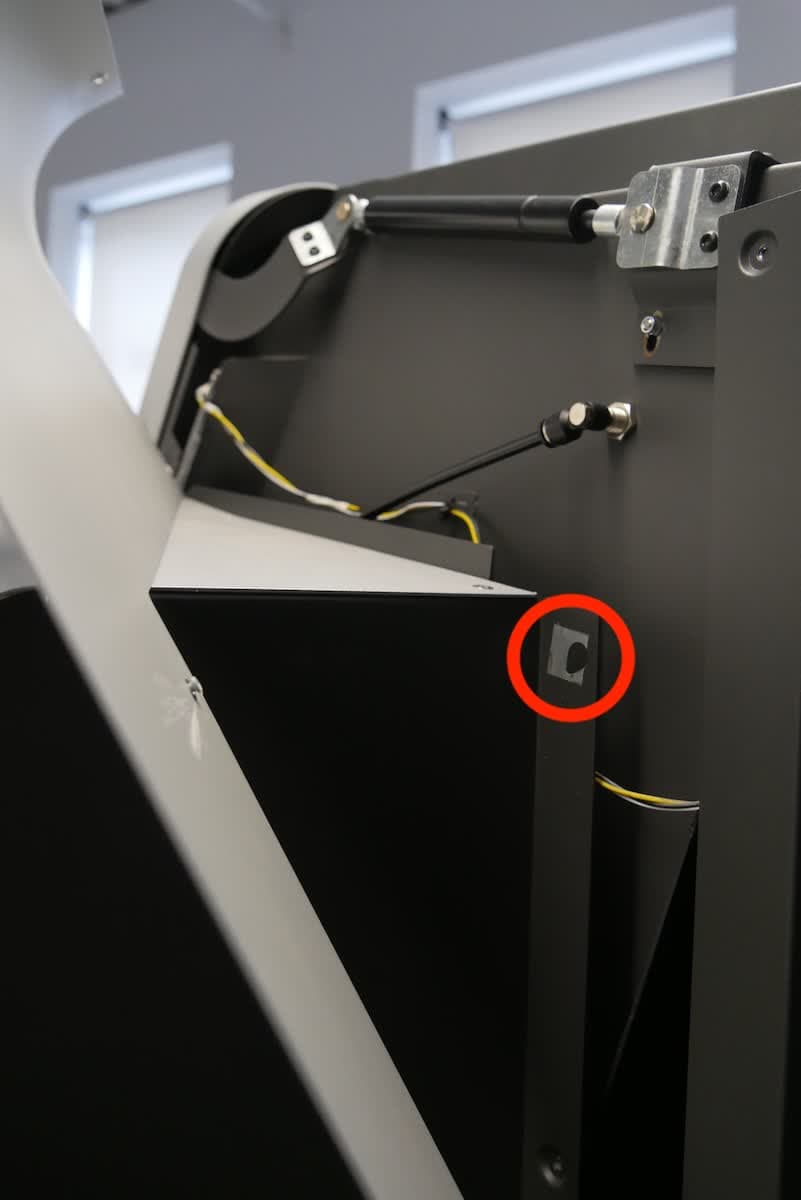
Step 2: Uninstall the gas spring brackets
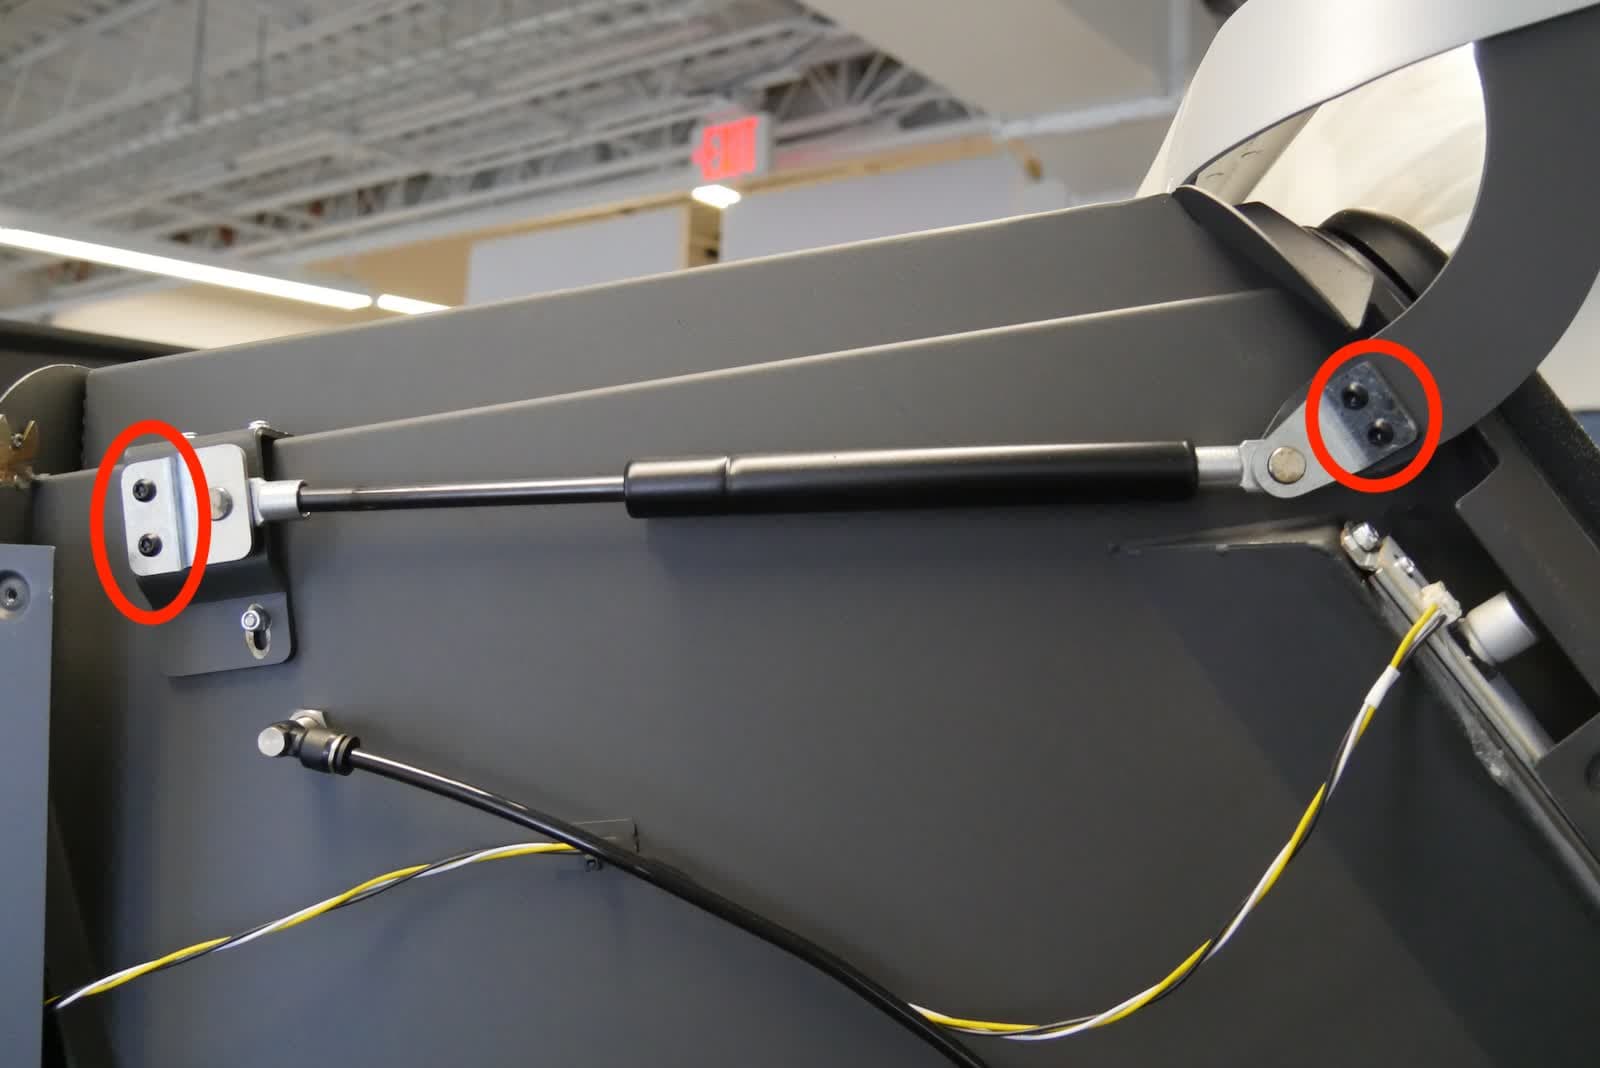
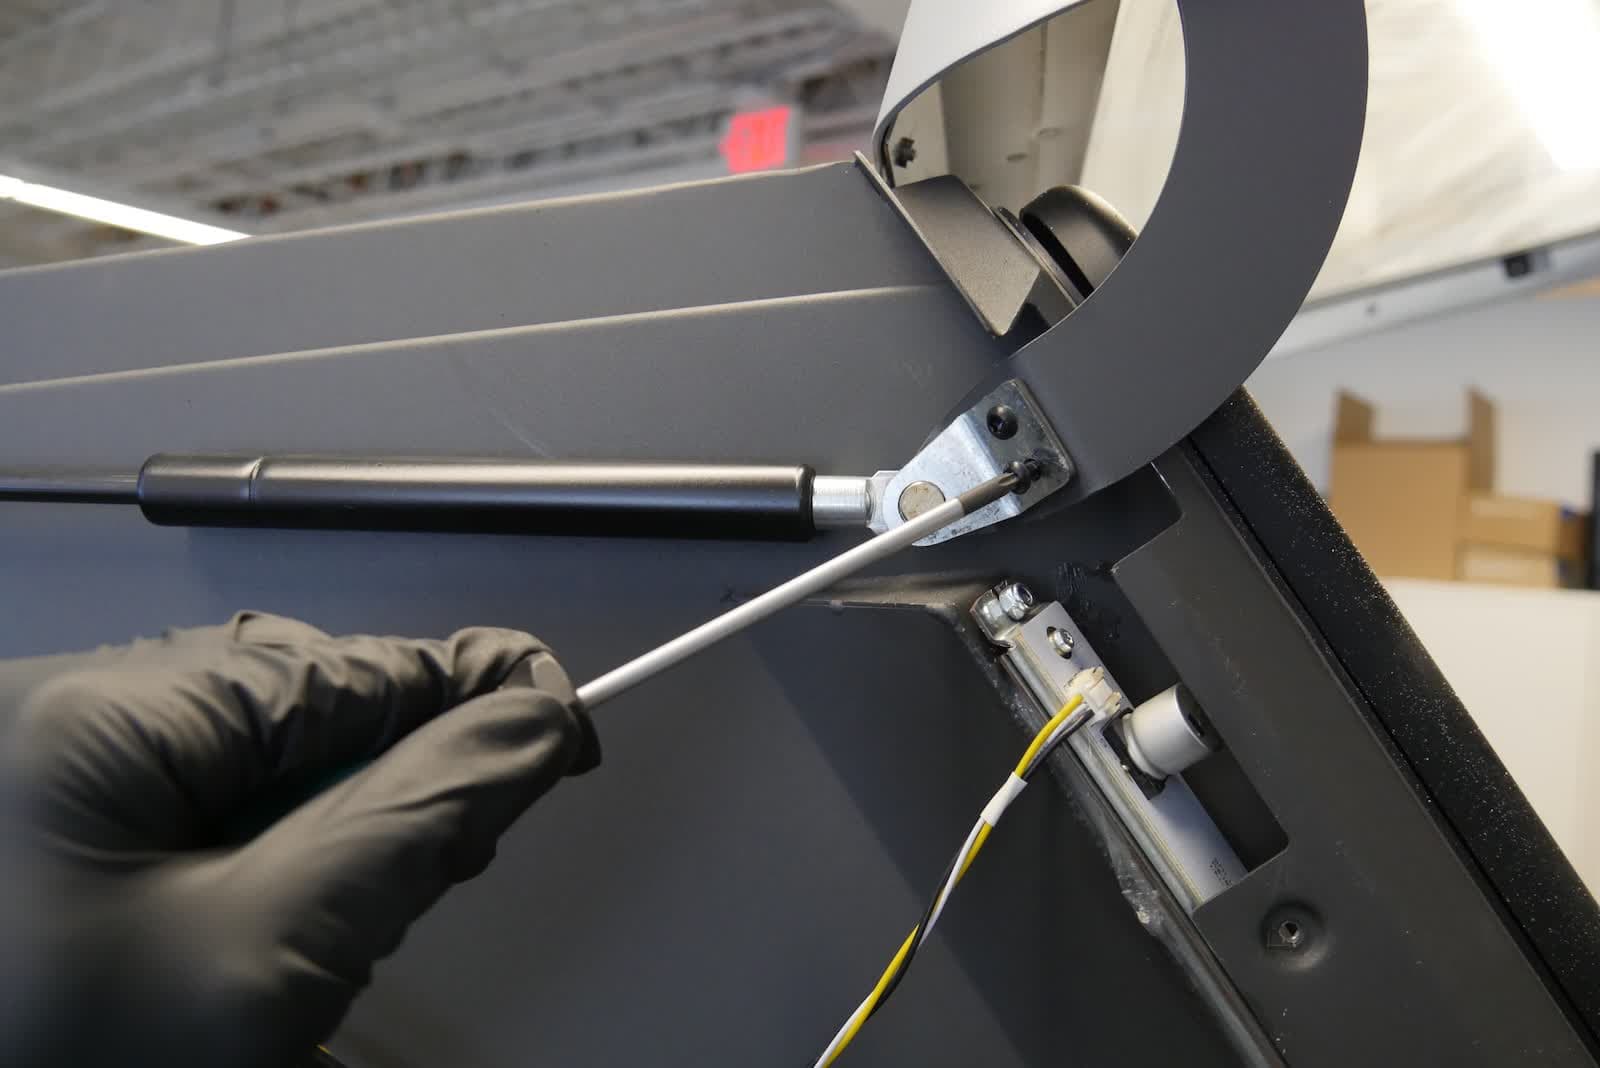
The Fuse Blast gas springs are held in place by two brackets, both of which are secured by two screws. Open the Fuse Blast door and have a second person support it. Using a T20 Torx driver, loosen and remove the four screws securing the brackets to the machine. If you are replacing both gas springs, repeat on the other side.
Step 3: Uninstall the gas spring
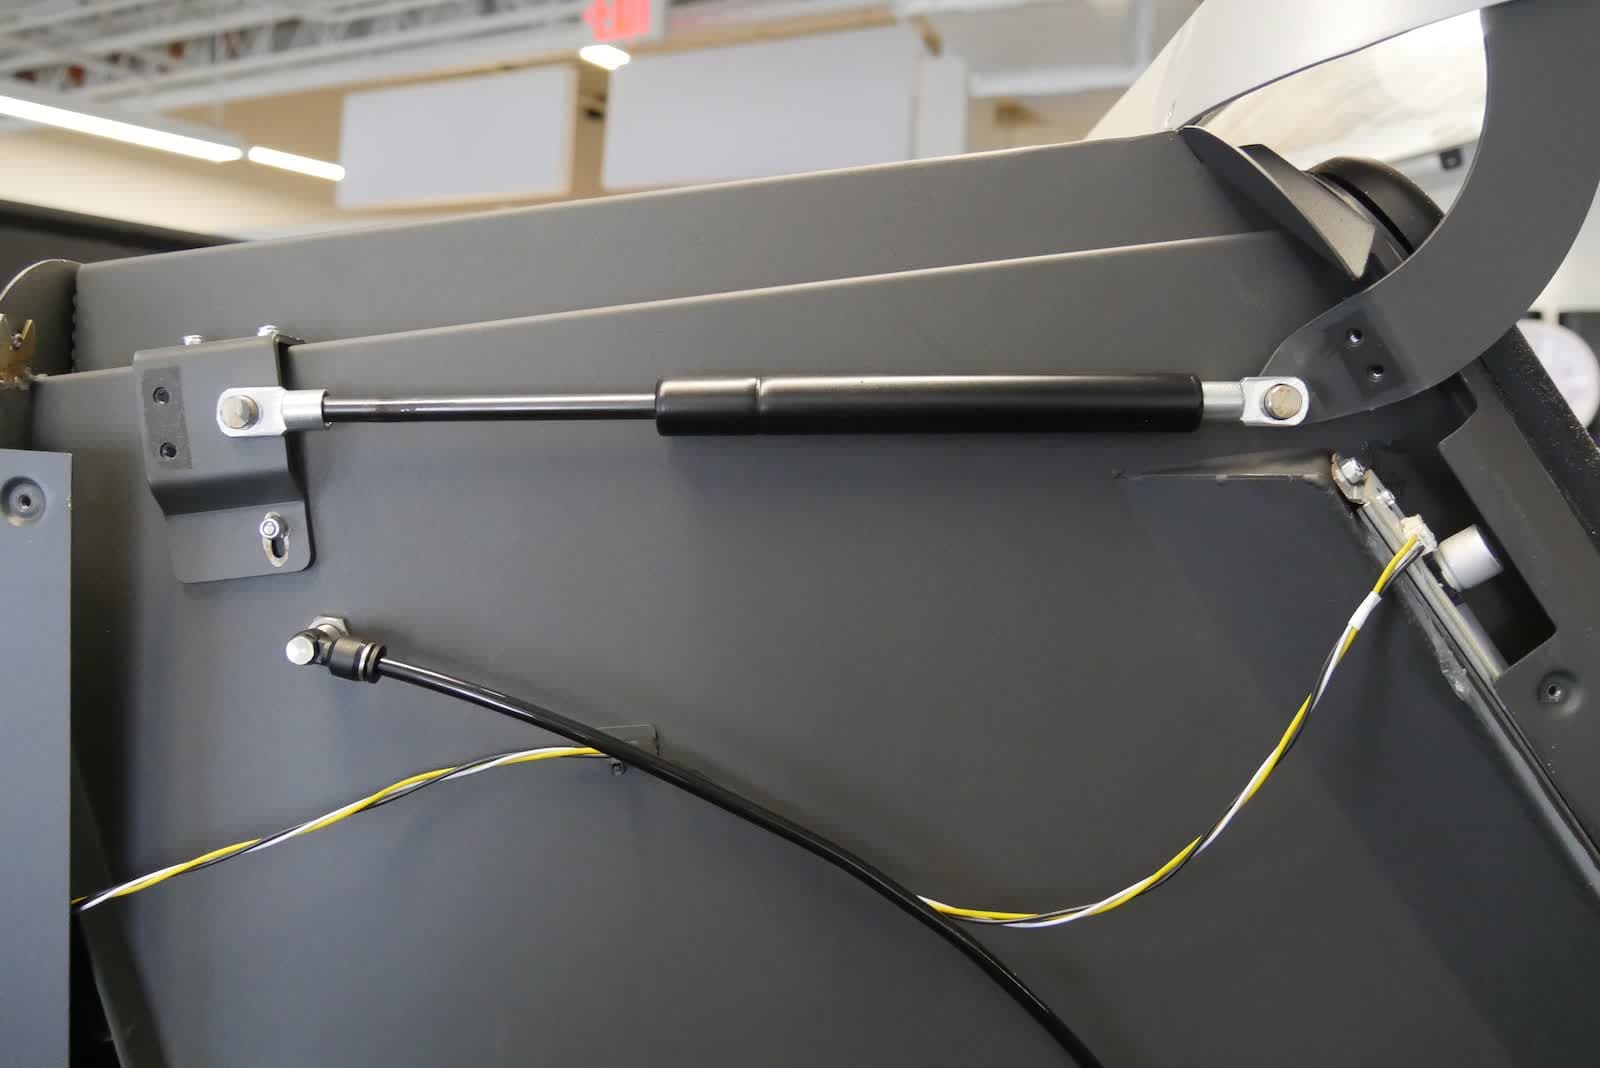

With the door being held open, pull both ends of the gas spring off of the pins it sits on. If you are replacing both gas springs, repeat on the other side.
Notice:
The Fuse Blast door is too heavy to be supported by a single gas spring. Close the door carefully to prevent injury or damage to the machine.
Installing the replacement gas spring
Overview: Mount the replacement gas spring onto the machine and secure them.
Step 1: Mount the gas spring
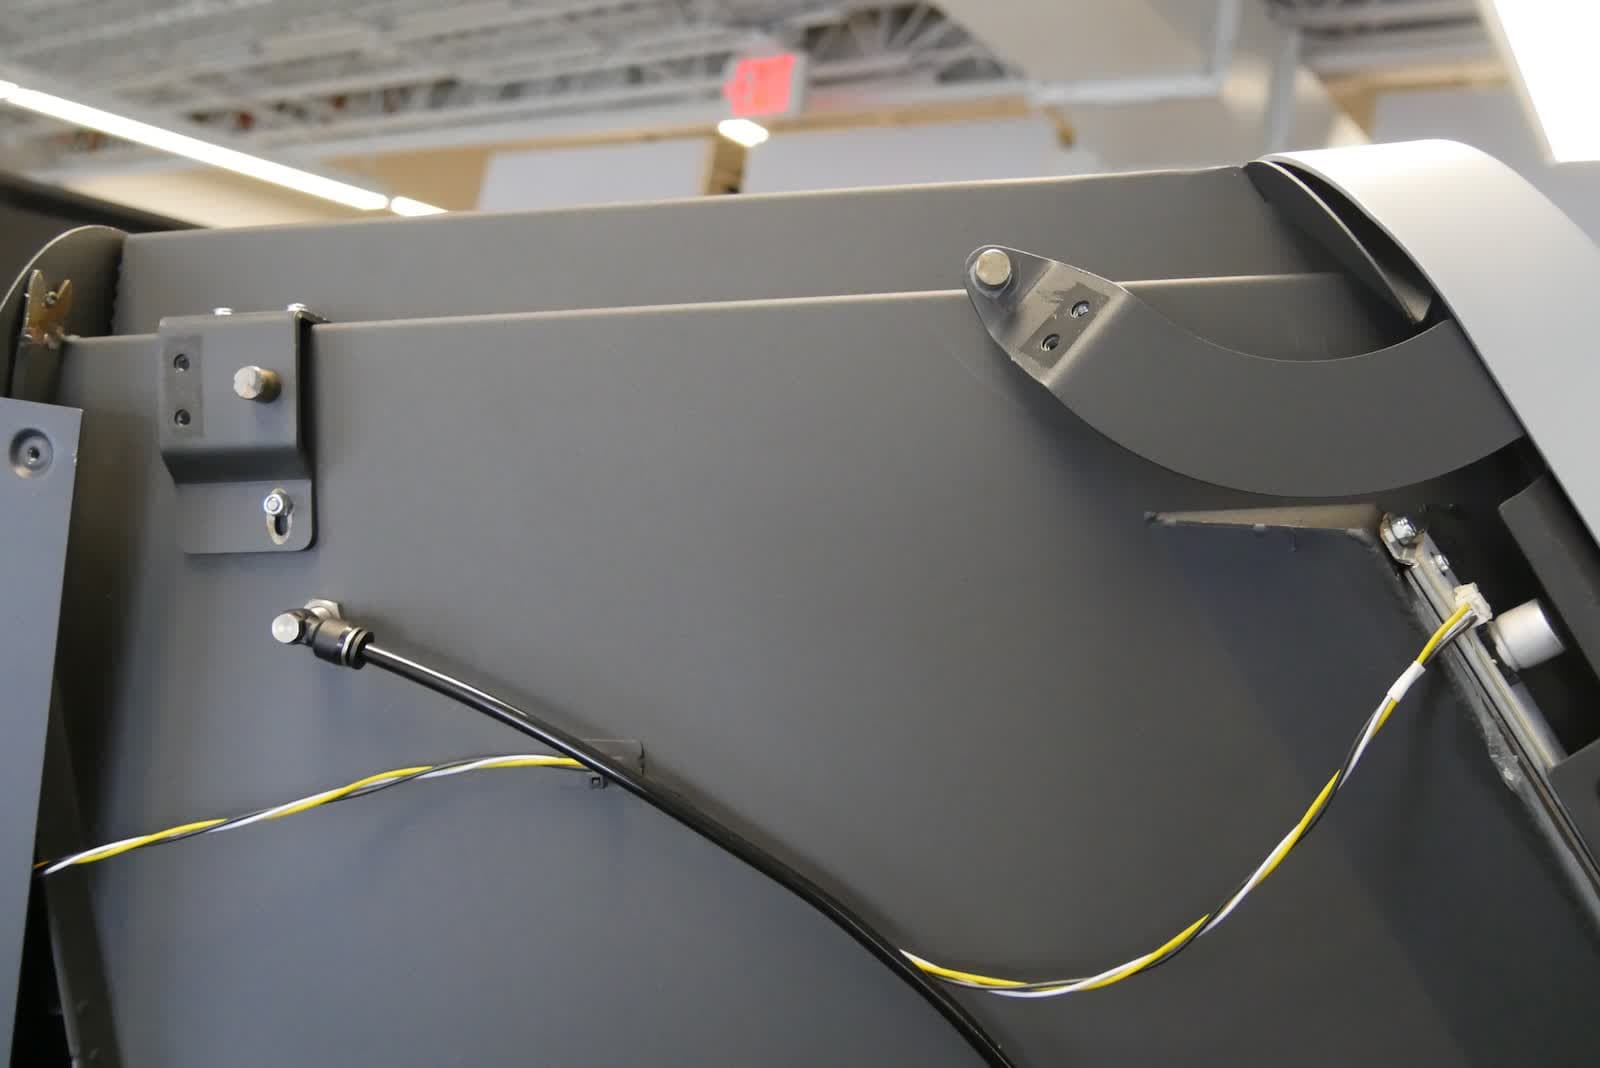
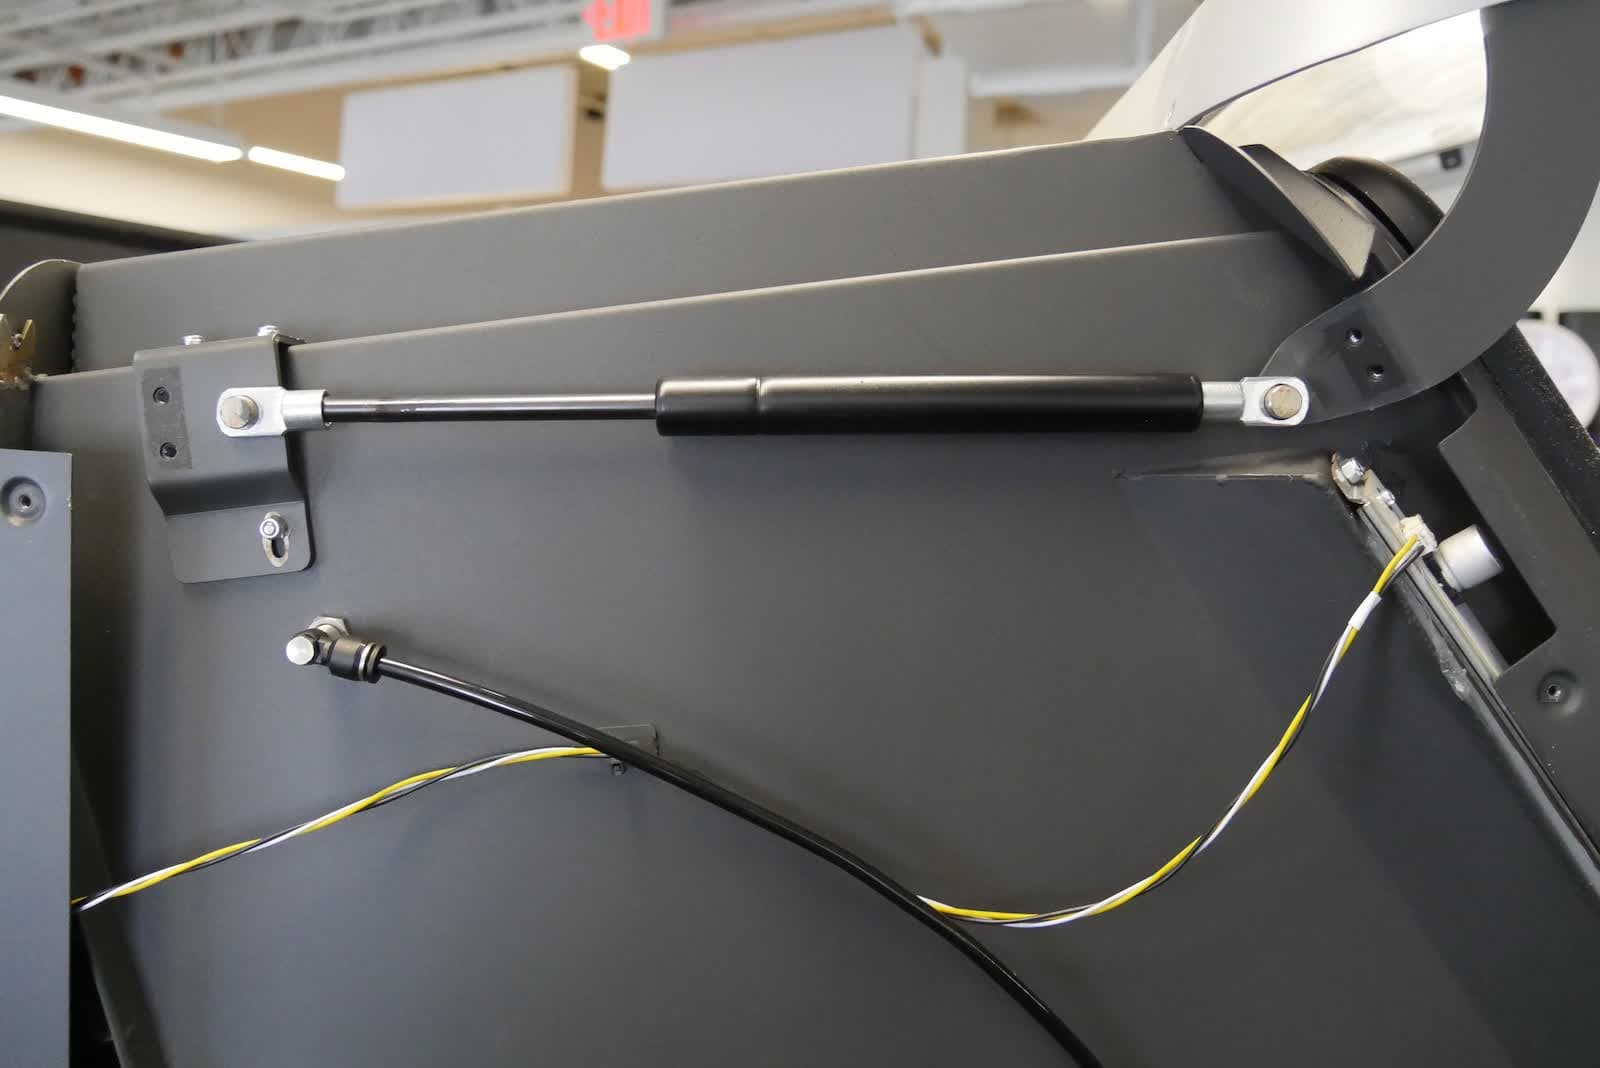
Orient the gas spring with the narrow end facing the back of the machine. With the Fuse Blast door being held open, mount the gas spring eyelets onto the pins on the frame and door. If you are replacing both gas springs, repeat on the other side.
Step 2: Secure the gas spring
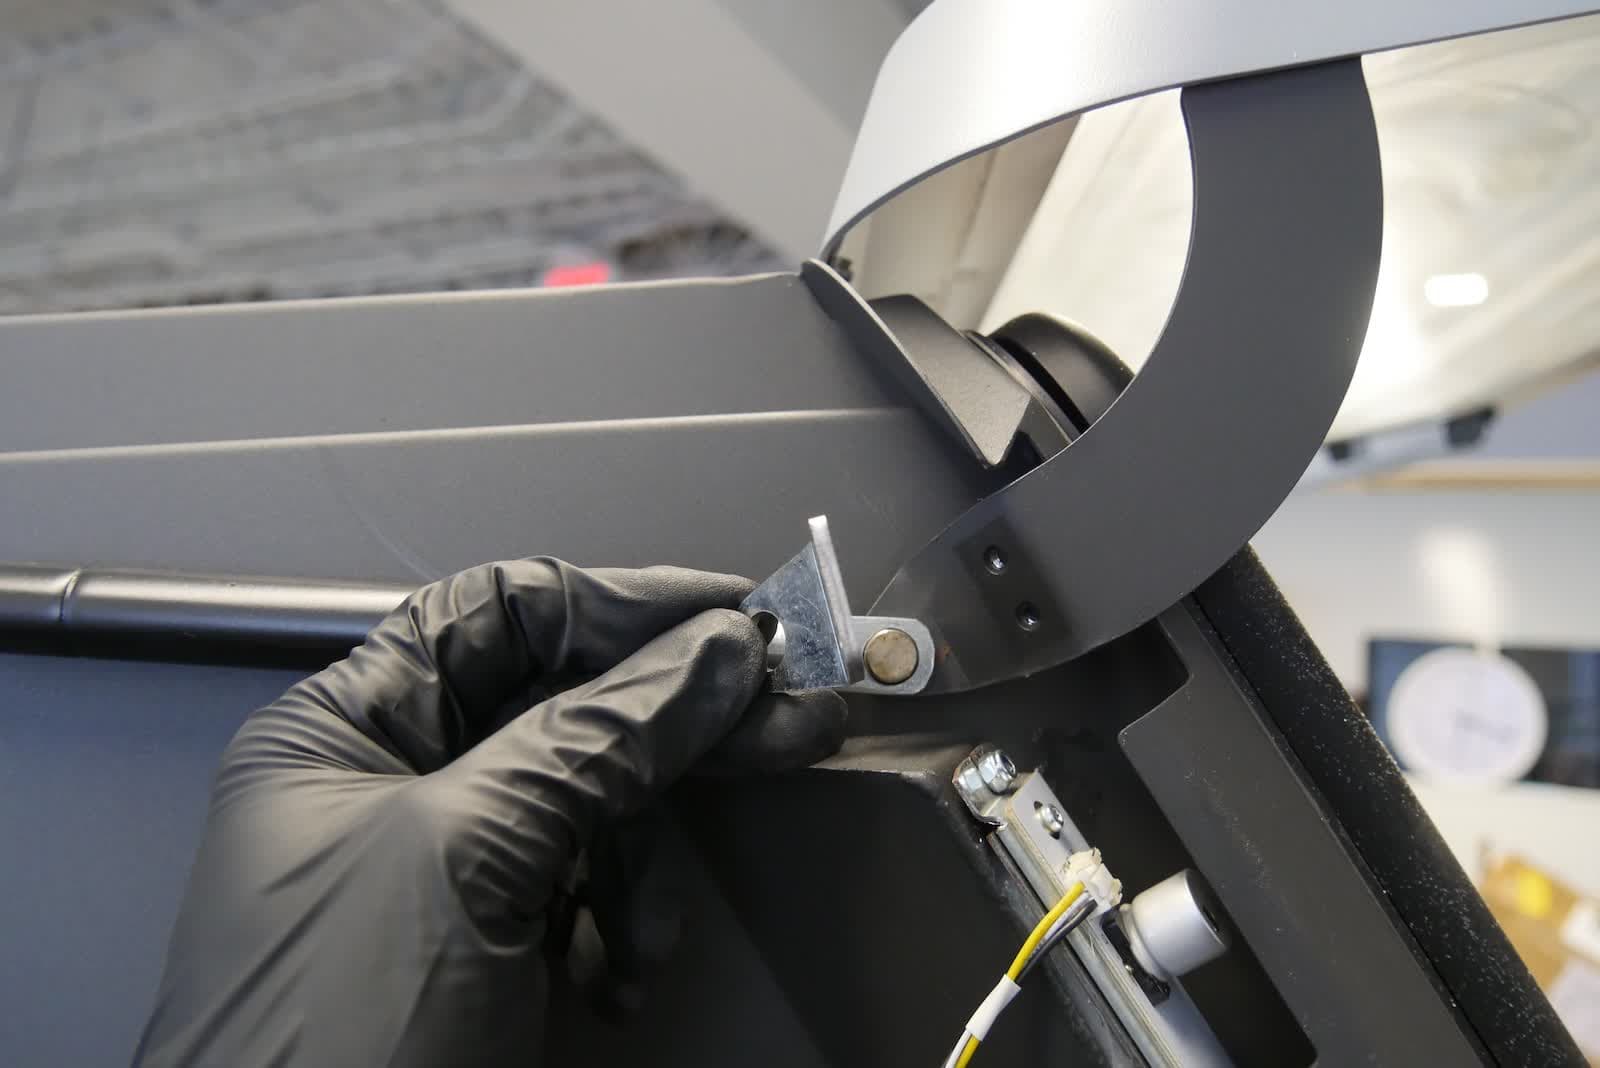

Mount the brackets over the ends of the gas spring, aligning the screw holes in the brackets with those on the machine. Thread one bracket retention screw into each of the four screw holes. Using a T20 Torx driver, tighten the screws until snug. If you are replacing both gas springs, repeat on the other side.
Step 3: Mount and secure the side panel
Mount and secure the side panel covering the gas spring you replaced.
For the left gas spring, this is the left shell. Mount the shell onto the machine, aligning the 11 screw holes in the panel with the corresponding screw holes in the frame. Thread one T20 torx screw into each of the screw holes, then use a T20 Torx driver to tighten until snug.
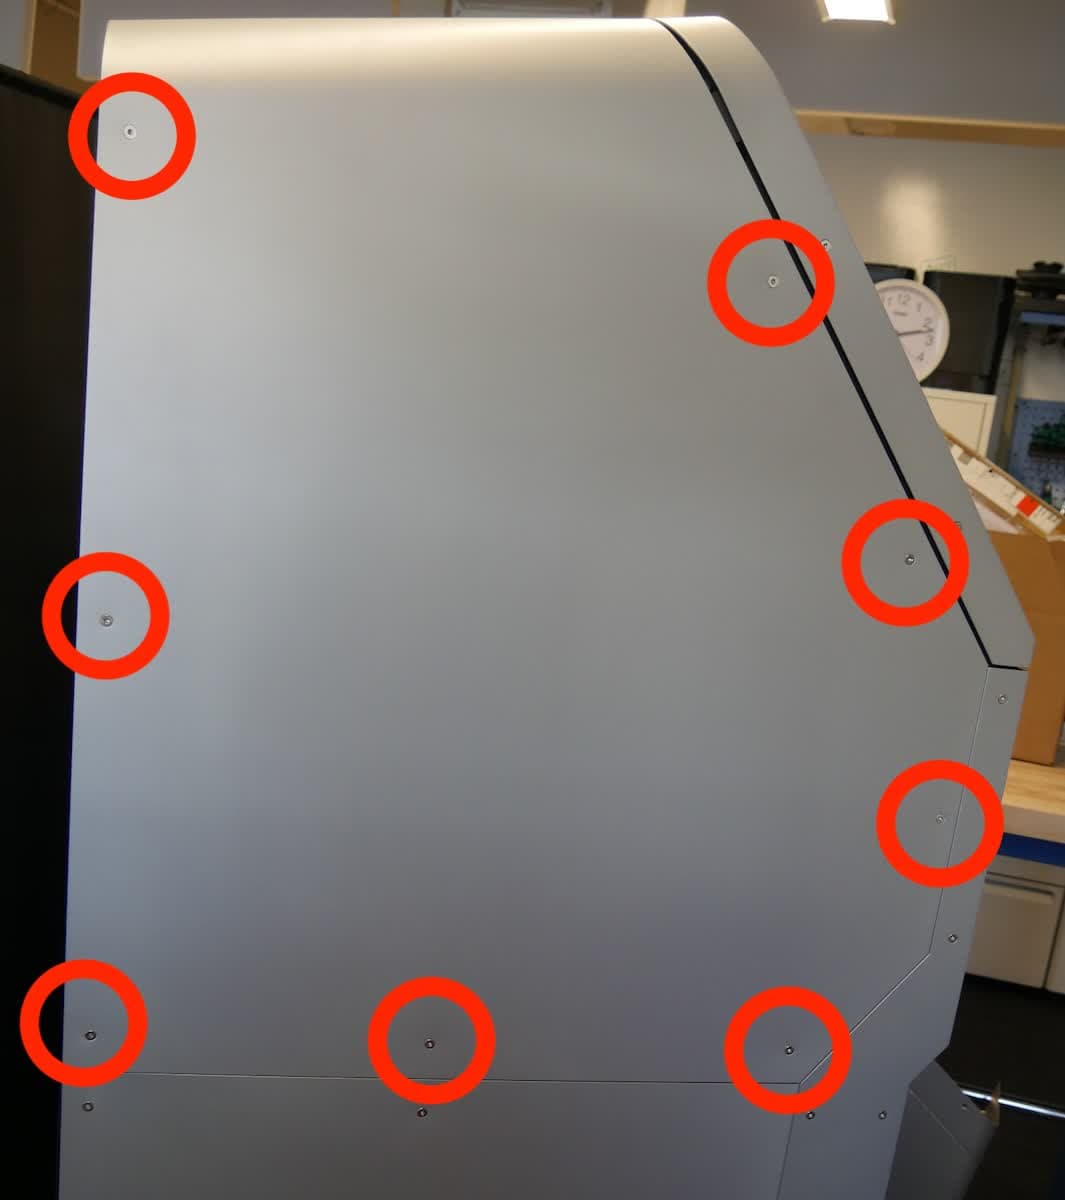
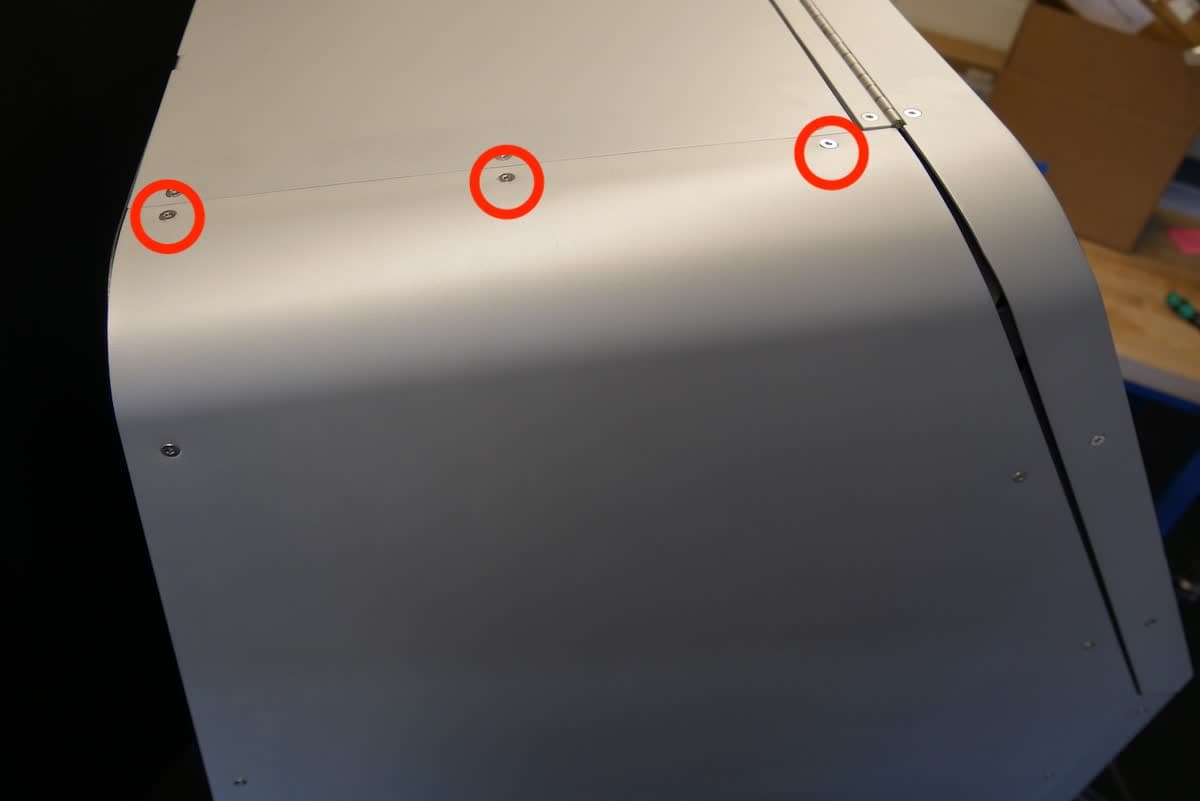
For the right gas spring, this is the right back shell. Mount the shell onto the machine, aligning the nine screw holes in the panel with the corresponding screw holes in the frame. Thread one T20 torx screw into each of the screw holes, then use a T20 Torx driver to tighten until snug.
Finalizing the repair
Overview: After installing the new gas spring, check if the door stays open on its own.
Step 1: Test the door
Ensure that the door opens and closes smoothly and that the gas springs function as intended. The hood should be able to remain open without assistance.