
Required supplies:
- Replacement Fuse Blast pneumatic cassette (RP-FB-PNCS-01)
- T20 Torx driver (provided with Fuse Blast)
- 7 mm nut driver (provided with Fuse Blast)

The Fuse Blast pneumatic cassette contains the machine's pressure regulator and helps control airflow throughout the machine. If it is faulty or malfunctioning, the Fuse Blast will be unable to clean your printed parts.
Use this guide to replace the Fuse Blast pneumatic cassette.
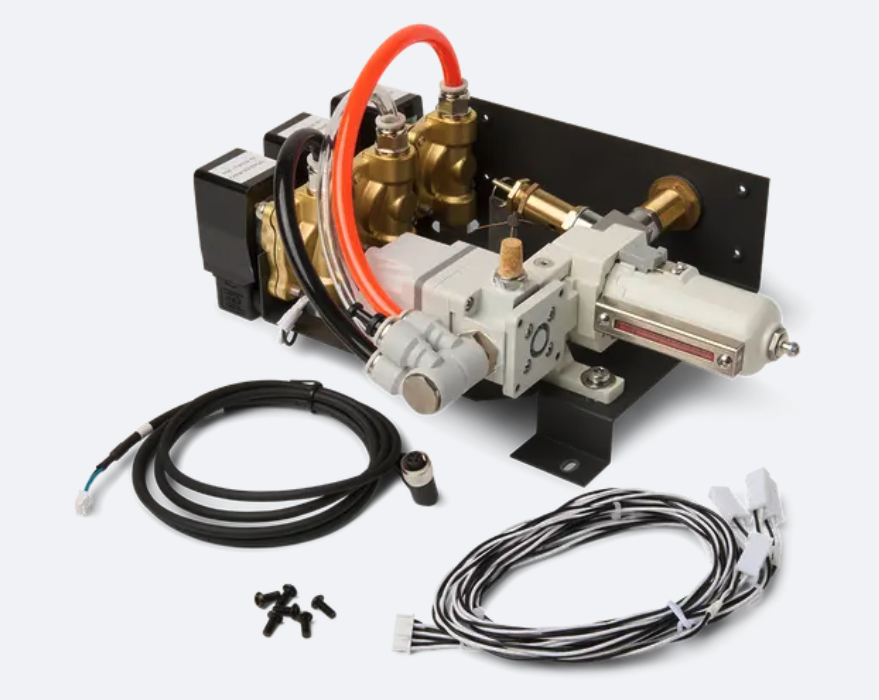
Required supplies:
Estimated time: 30 minutes
Warning:
The Fuse Blast is designed to contain fine particulate matter from media blasting and SLS 3D printing. Always wear an N95 respiratory mask when performing maintenance on a Fuse Blast unit.
Preparing the workspace
Overview: Prepare the Fuse Blast and a clean workspace for replacing the pneumatic cassette.
Step 1: Prepare the workspace
Clear a workspace. Ensure that the workspace is well-ventilated, level, and clean.
Step 2: Unplug the machine
Disconnect the power cable from the machine before continuing with maintenance. Do not perform maintenance on the machine while it is connected to power. Wait five minutes after disconnecting the printer from power before proceeding.
Danger:
Performing this procedure on the Fuse Blast while it is plugged in increases the risk of electric shock. Never remove any external paneling while the Fuse Blast is plugged in. Never reconnect the Fuse Blast to power while the external paneling is uninstalled.
Removing the lower sidecar panel
Overview: Remove the lower sidecar panel to access the pneumatic cassette.
Using a T20 Torx driver, loosen and remove the seven T20 Torx screws that secure the lower sidecar panel to the machine. Set the screws aside.
Slide the panel down around the waste hopper knife valve and the pneumatic filter. Remove the pneumatic filter if necessary to free the panel. Set the panel aside.

Removing the original pneumatic cassette
Overview: Disconnect the three solenoids that are part of the pneumatic cassette, then remove the pneumatic cassette from the machine.
Step 1: Disconnect the solenoids
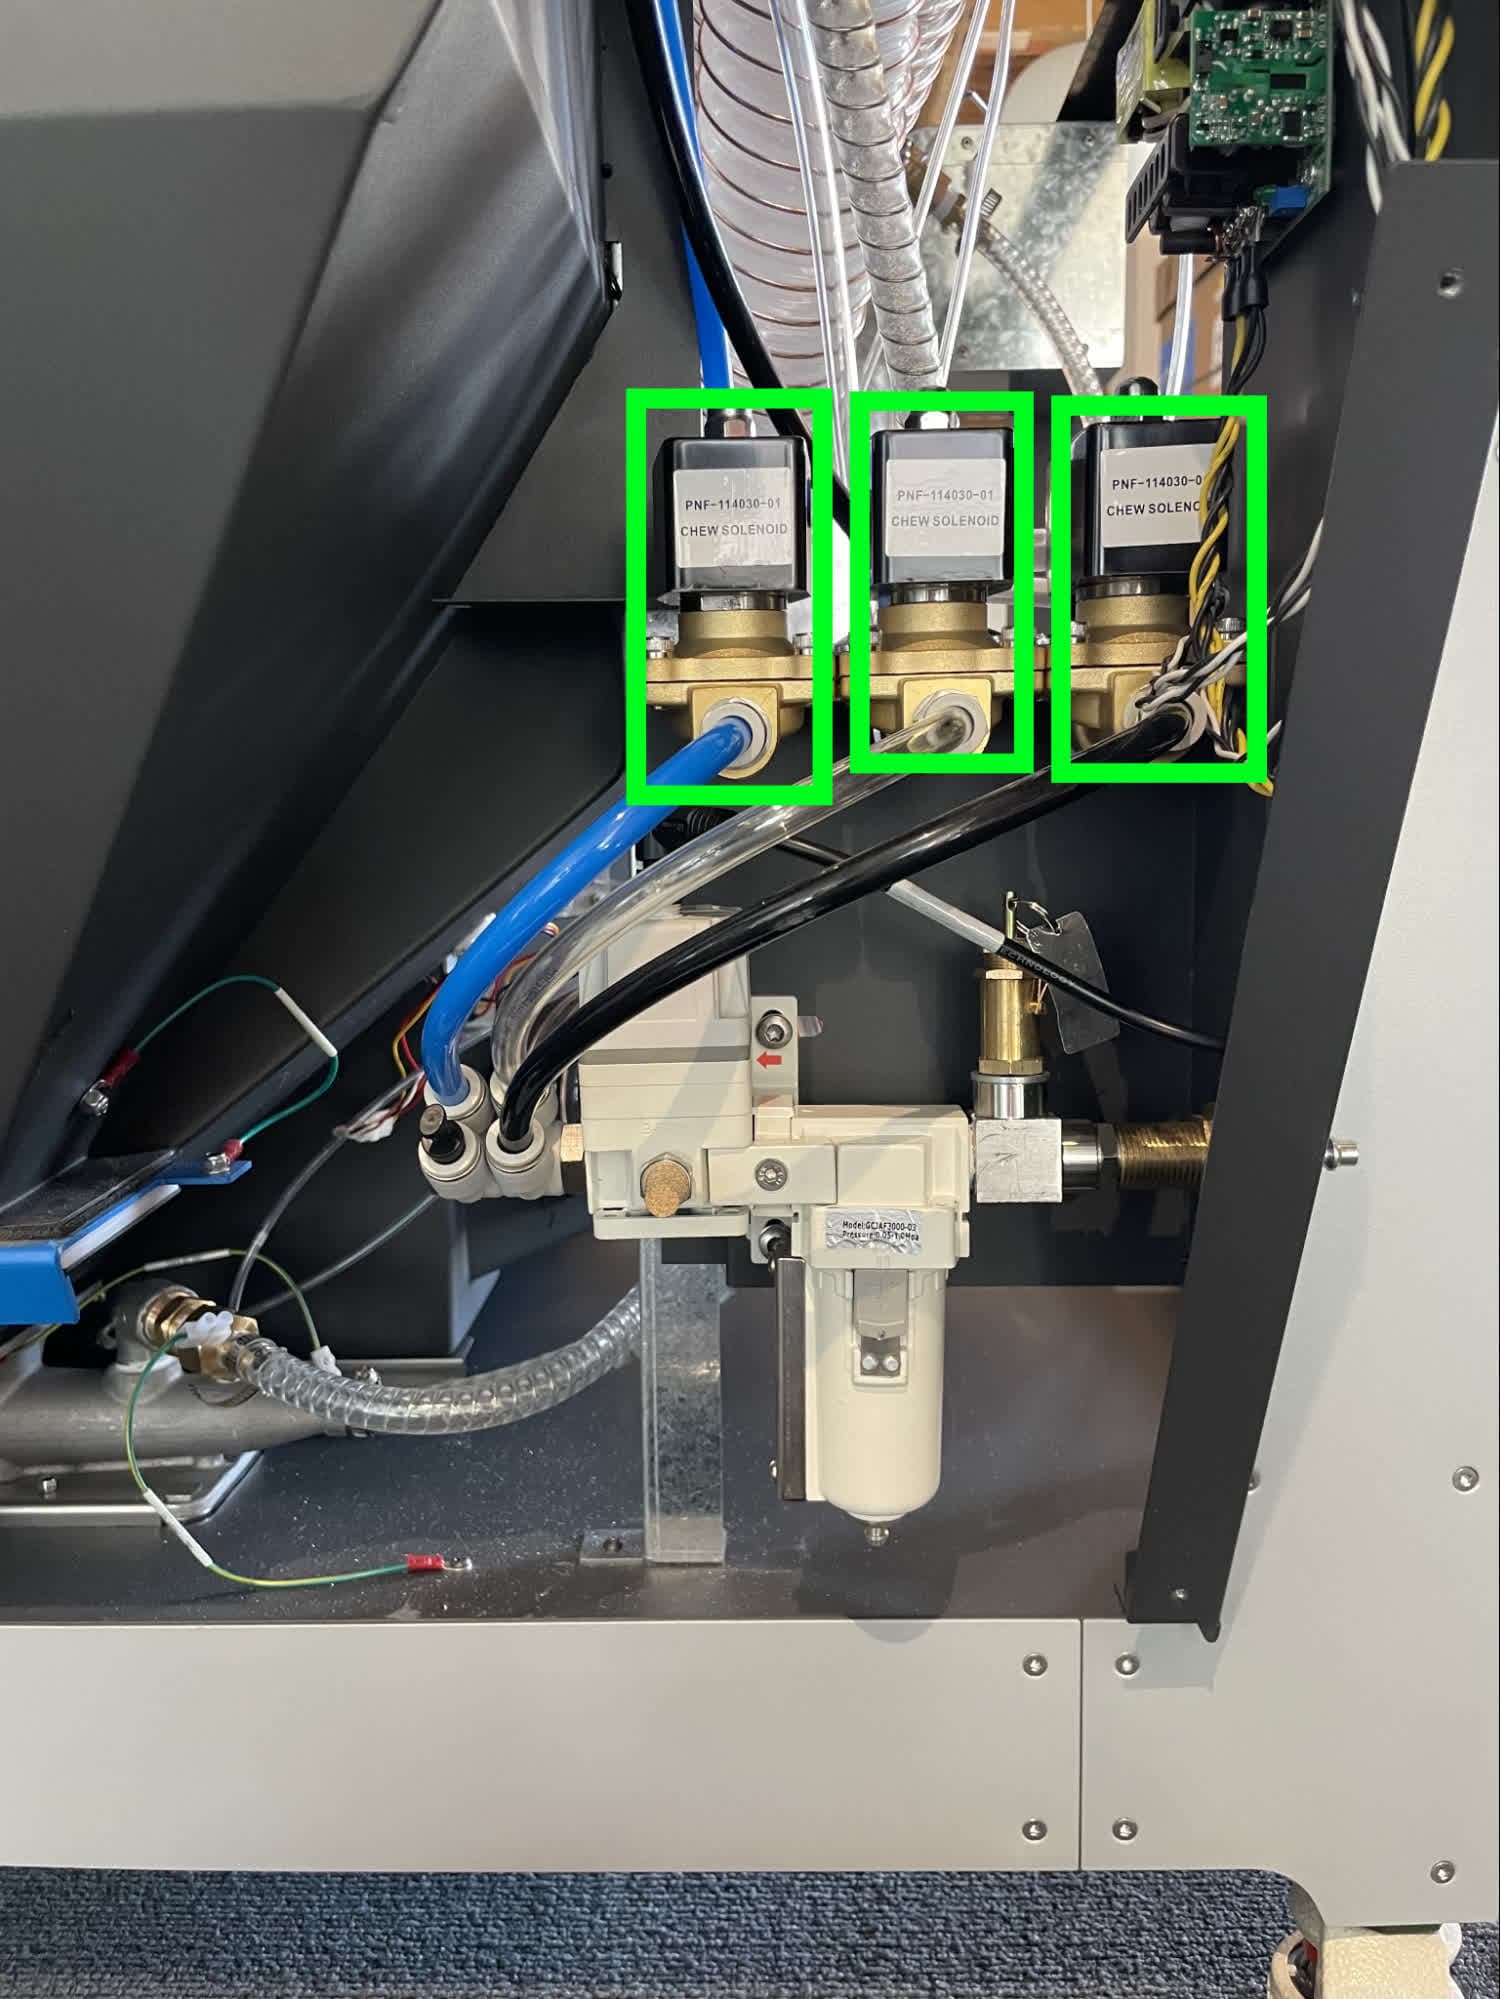
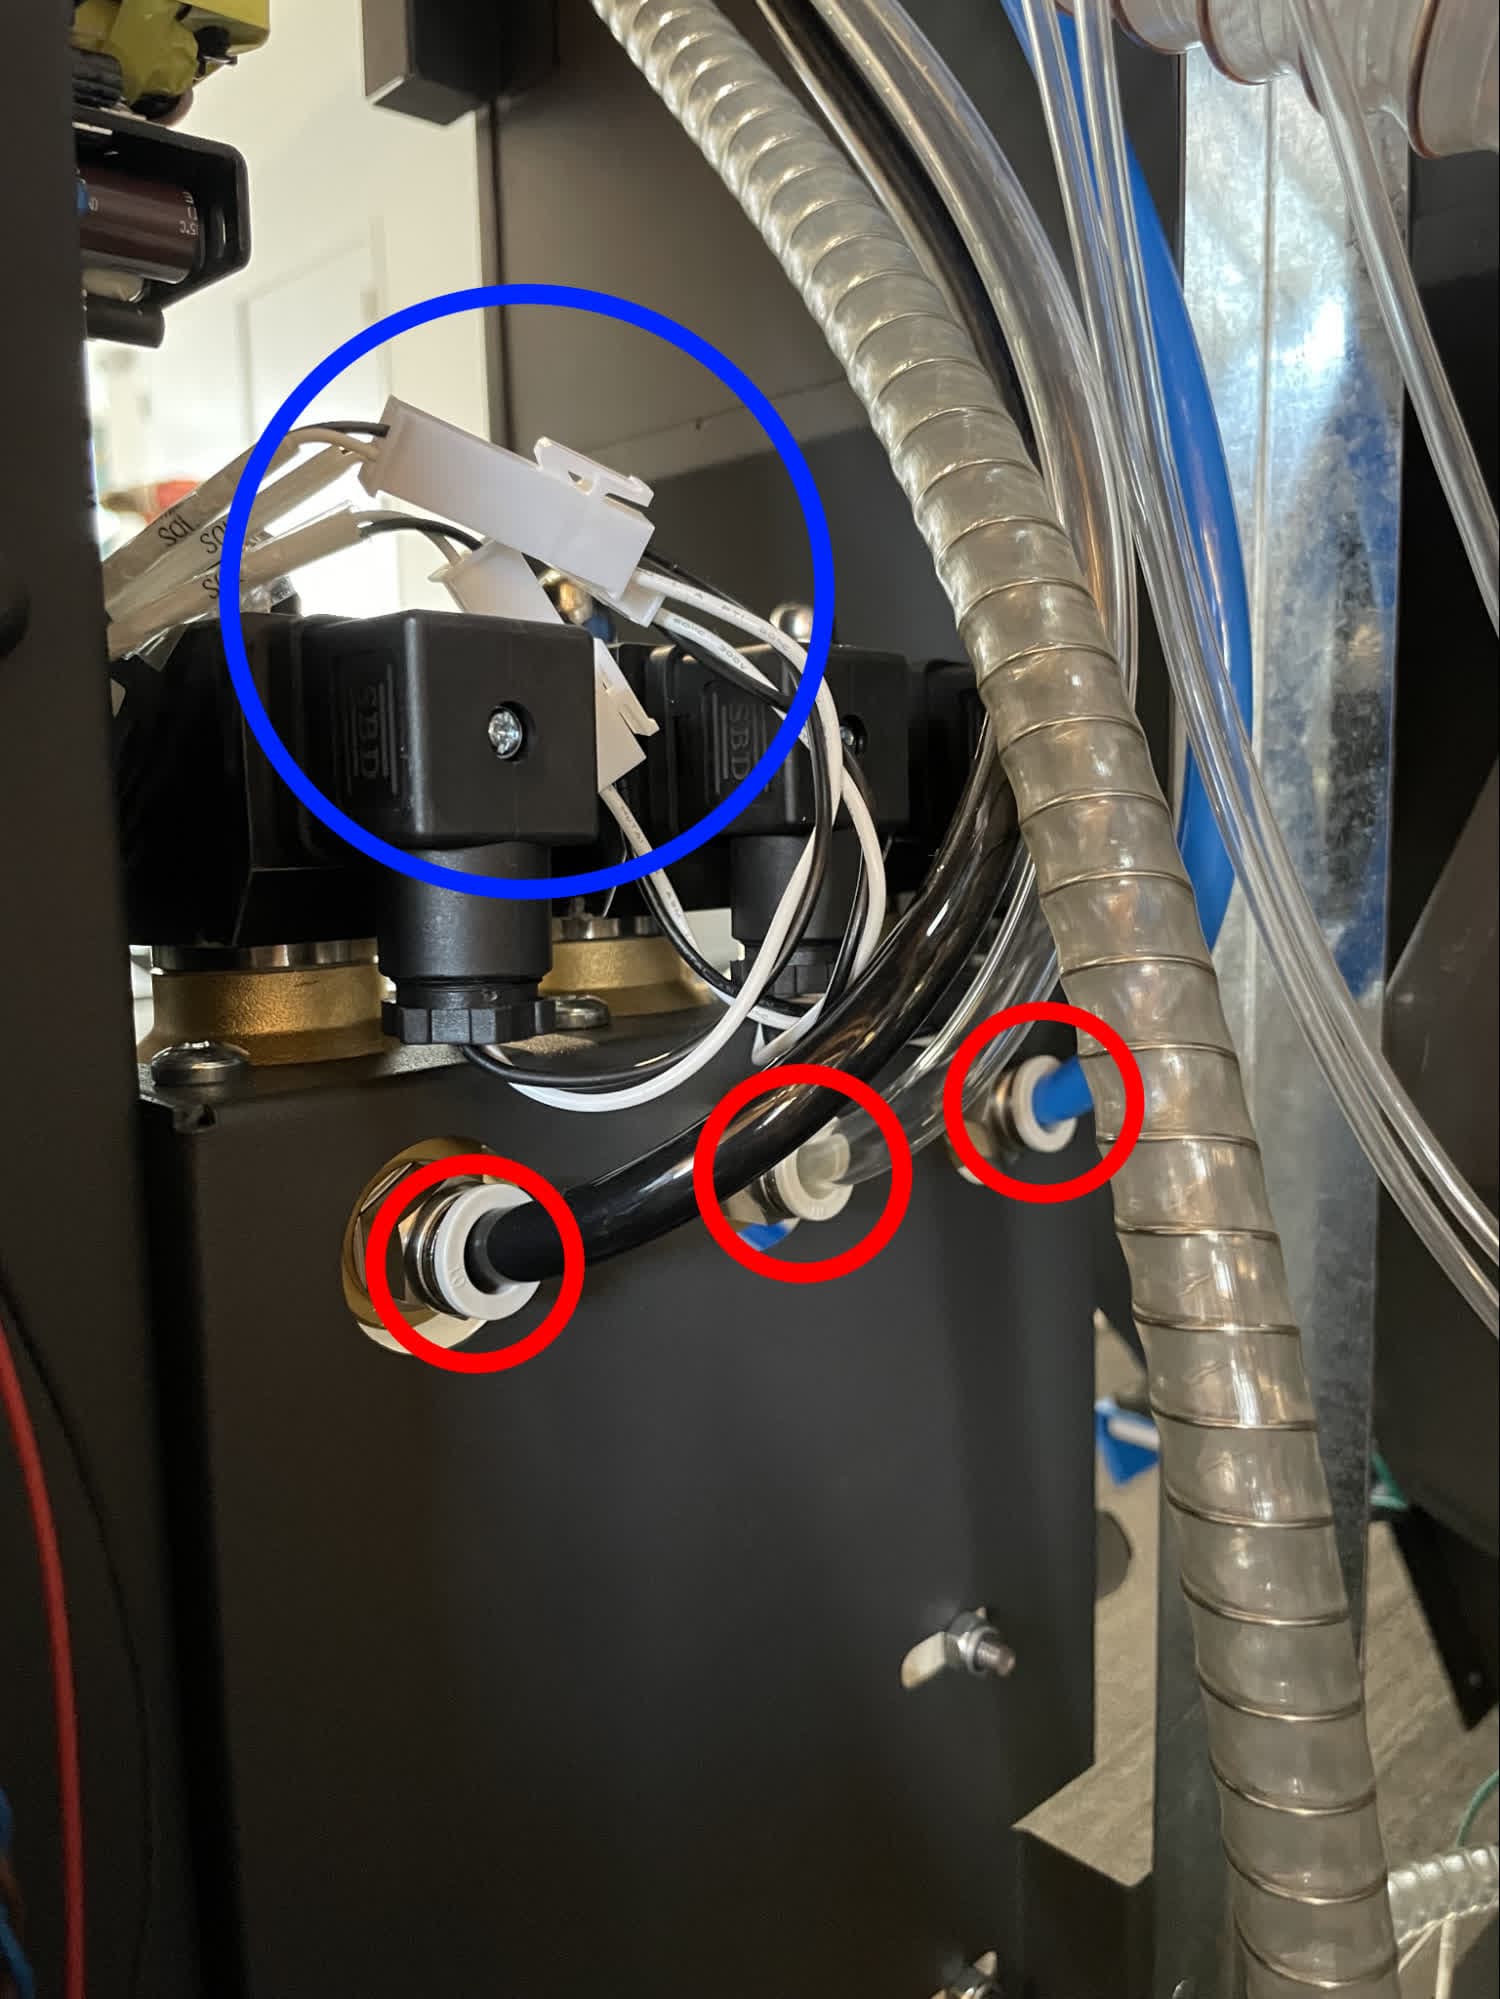
Locate the three solenoids, positioned at the lower-right corner of the machine behind the lower sidecar panel. For each of the three solenoids, reach behind the solenoid and disconnect the power cable and pneumatic tubing. Take note of which tube was connected to which solenoid—the tubing color depends on the age of your unit, so the pictures here may not match what you see.
For each power cable, squeeze the latch and pull the plastic connectors apart. Do not pull on the wires themselves.
For each of the pneumatic tubes, press on the push-to-connect fitting, then pull the tube out.
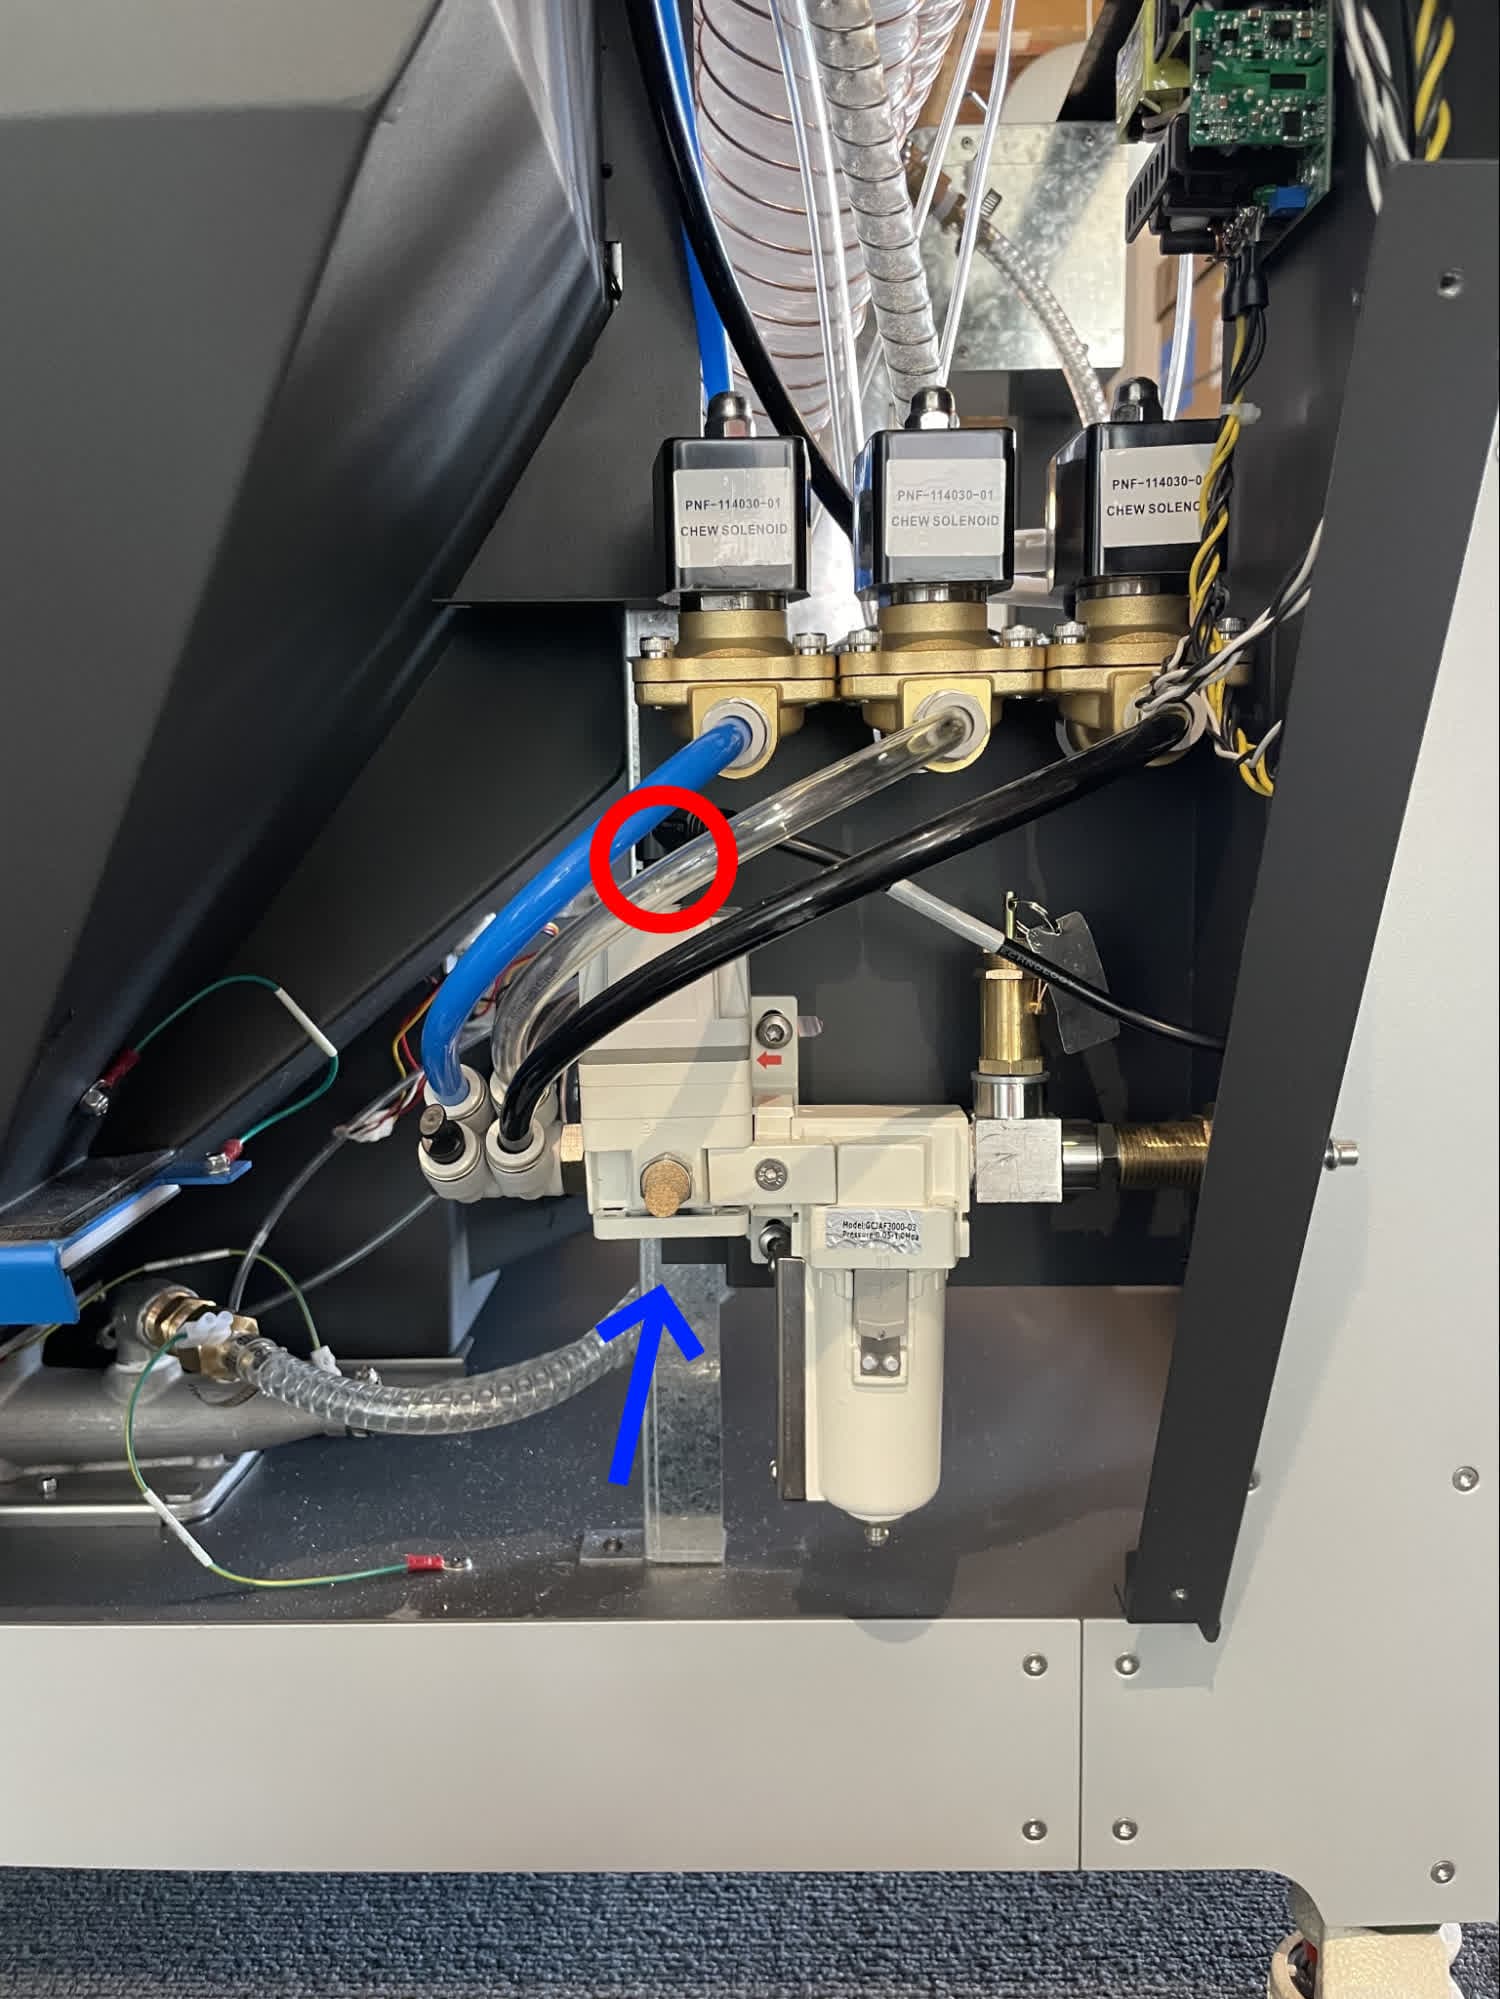
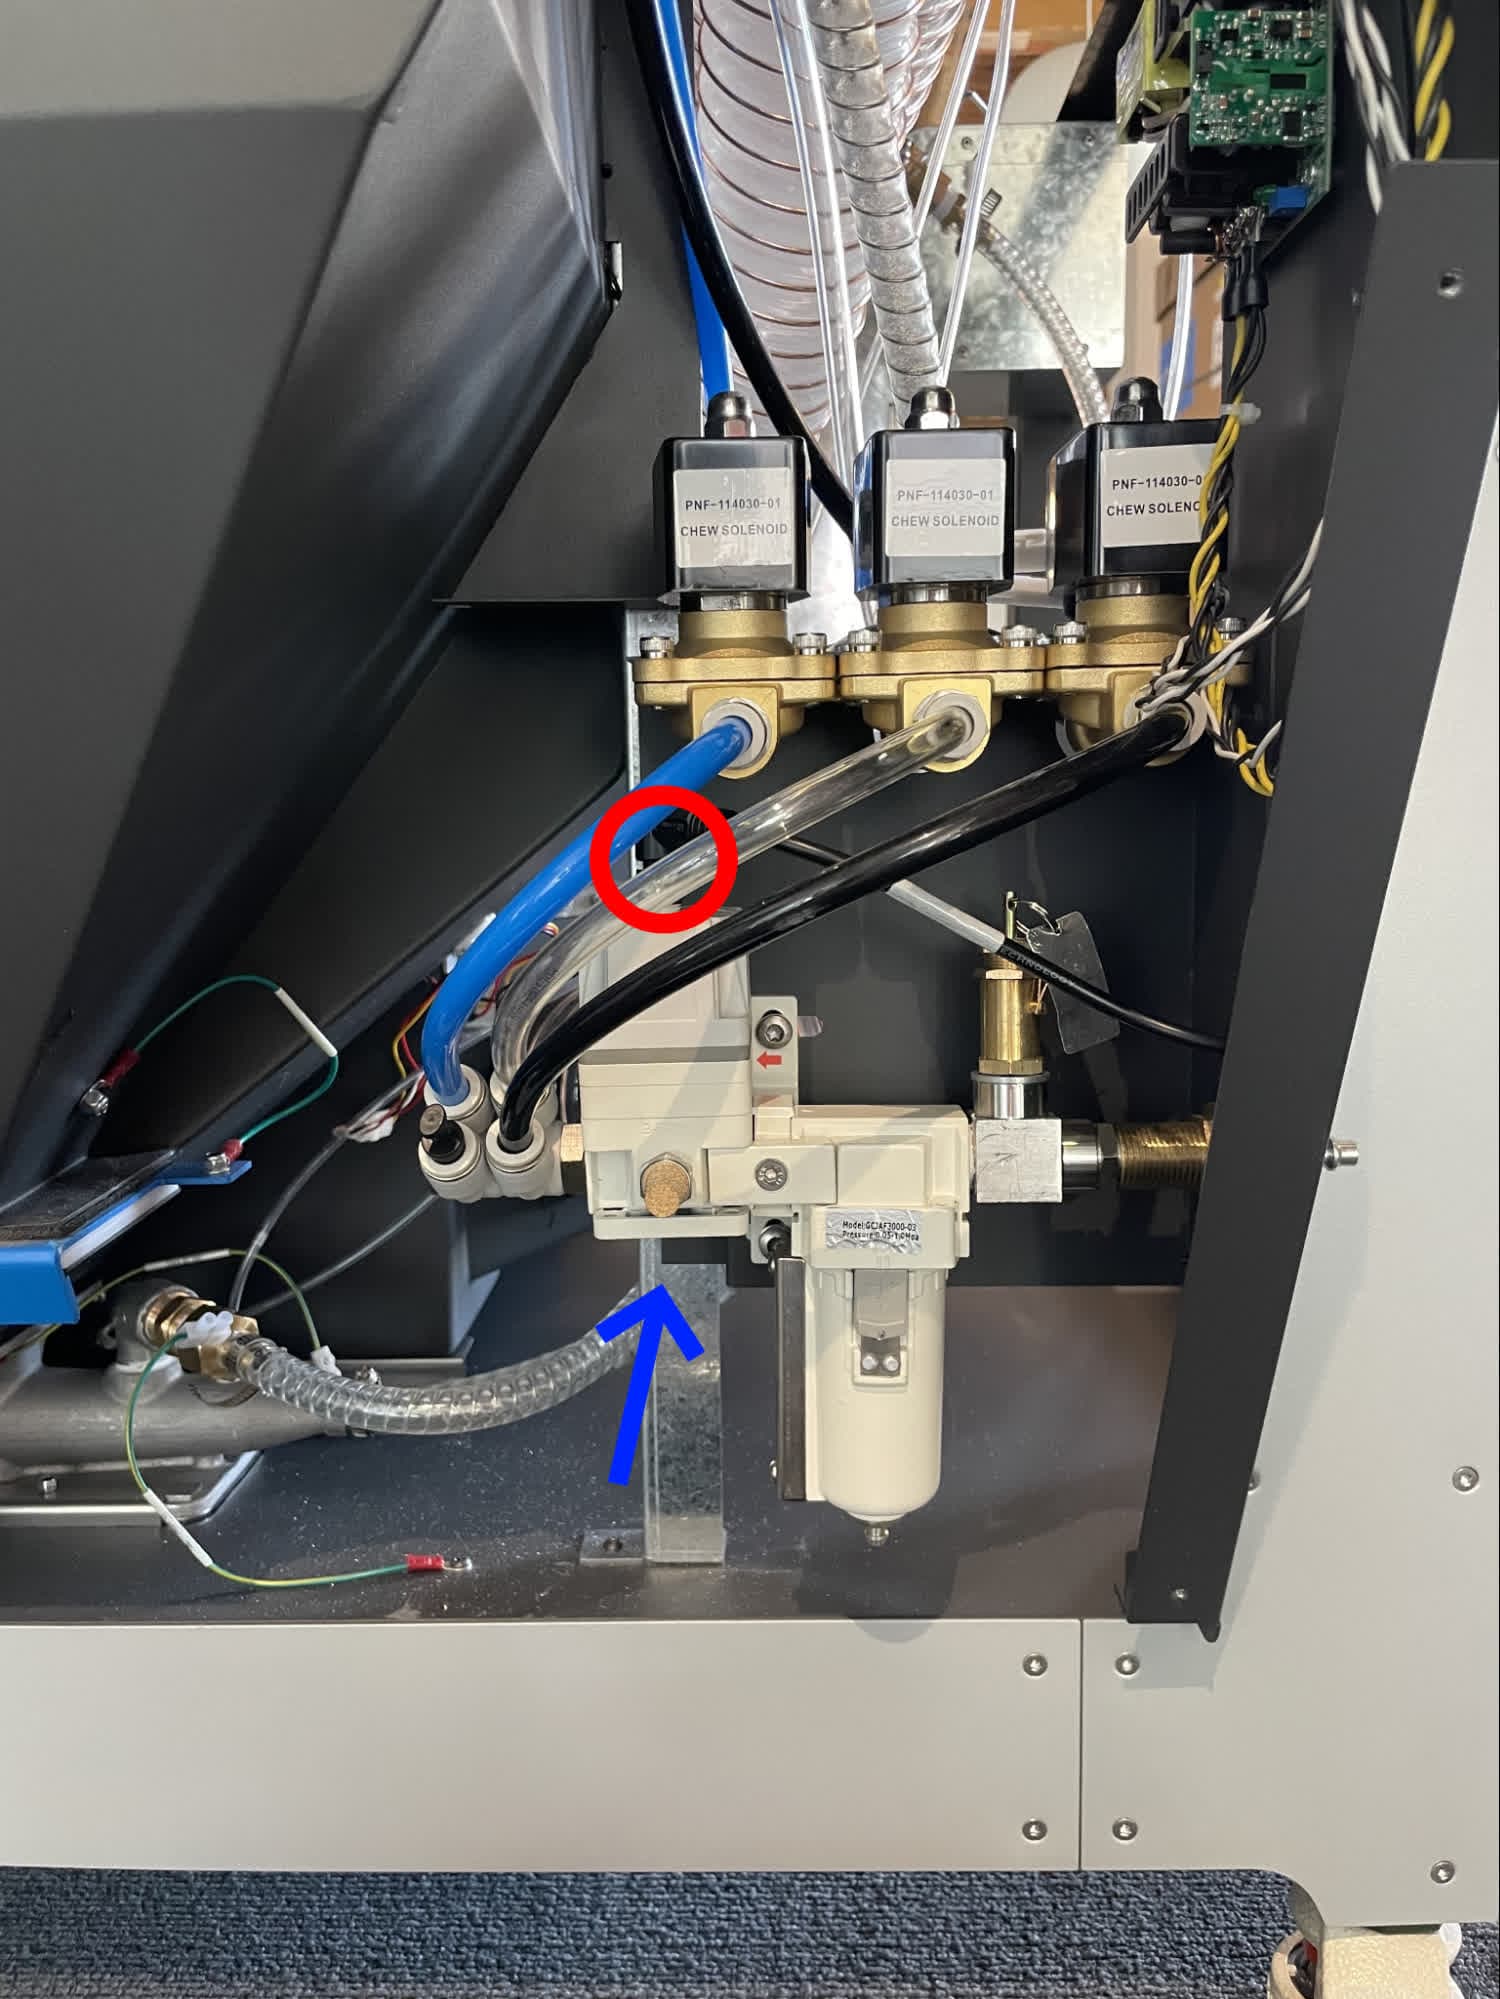
Unscrew and disconnect the pressure regulator’s power cable, circled in red here. It is located at the top of the pressure regulator.
Using a 7 mm nut driver or box wrench, remove the 7 mm nut from the bottom of the pneumatic cassette, shown here with an arrow. Set the nut aside.
Using a T20 Torx driver, loosen and remove the four T20 Torx screws from the rear of the sidecar. Set the screws aside.
Remove the pneumatic cassette from the Fuse Blast and set it aside for disposal with electronic waste. Take care not to pull on or damage the cables and tubing still attached to the machine.

Installing the replacement pneumatic cassette
Overview: Mount, secure, and connect the new pneumatic cassette
Step 1: Mount the replacement pneumatic cassette
Insert the replacement pneumatic cassette into the bottom of the sidecar. Align the screw holes in the side of the cassette with the corresponding screw holes in the back of the machine.
Step 2: Secure the pneumatic cassette

Thread one T20 Torx screw into each of the four screw holes in the back of the machine. Using a T20 Torx driver, tighten until snug.
Thread the 7 mm nut onto the bottom of the pneumatic cassette and use a 7 mm nut driver or box wrench to tighten until snug.
Step 3: Reconnect the pressure regulator power cable
Reconnect the pressure regulator’s power cable and screw it into place.
Step 4: Reconnect the solenoids
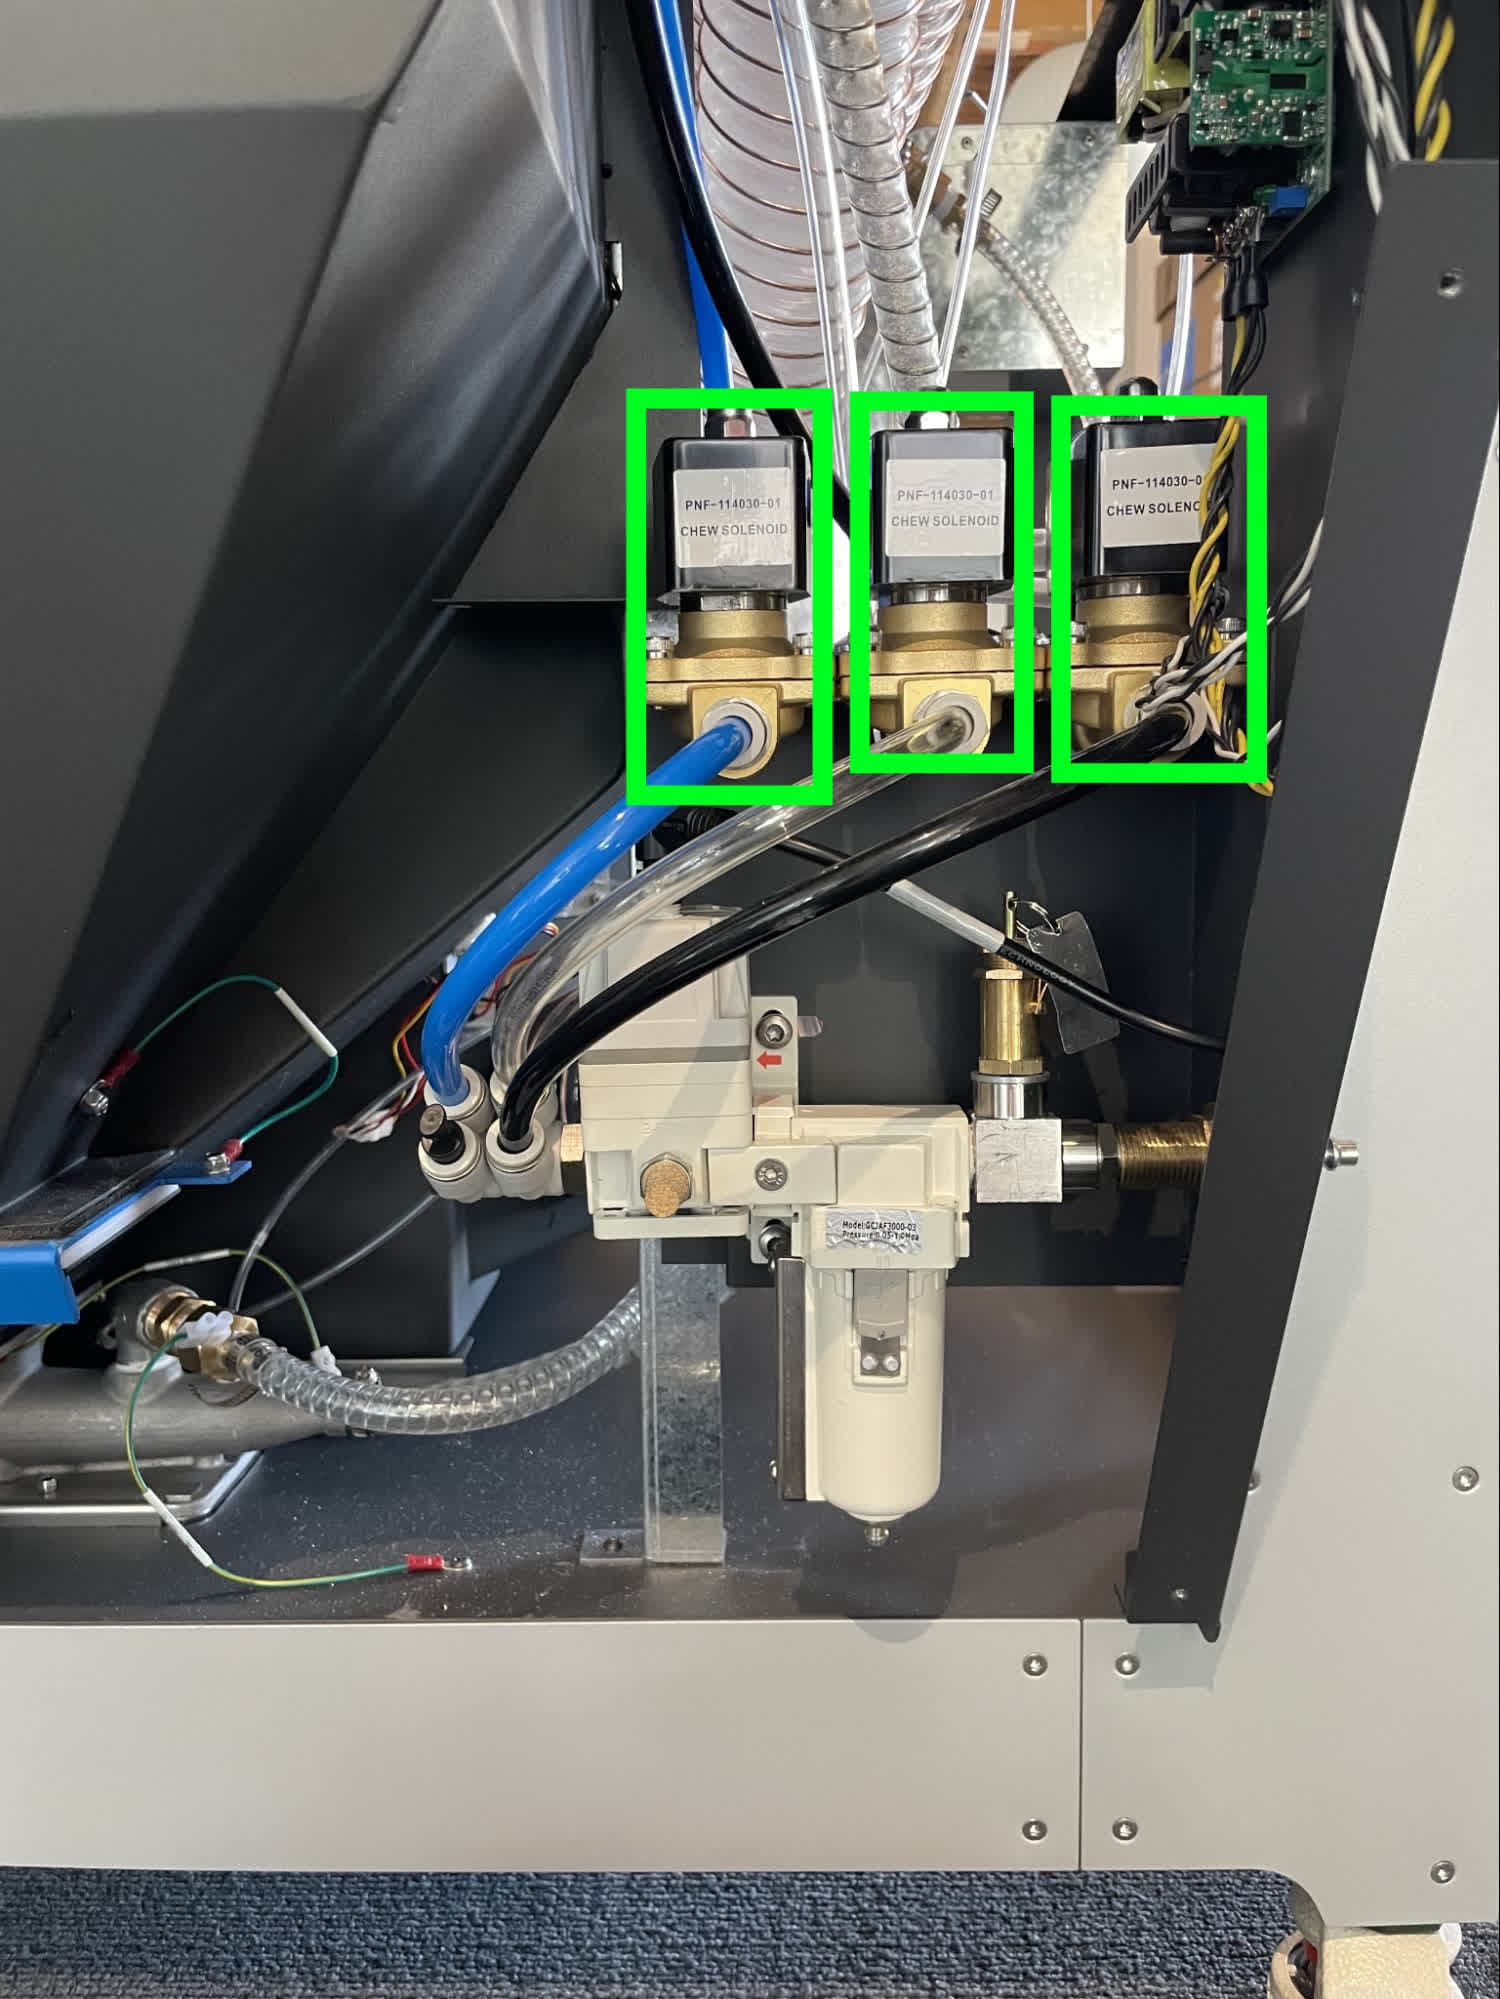
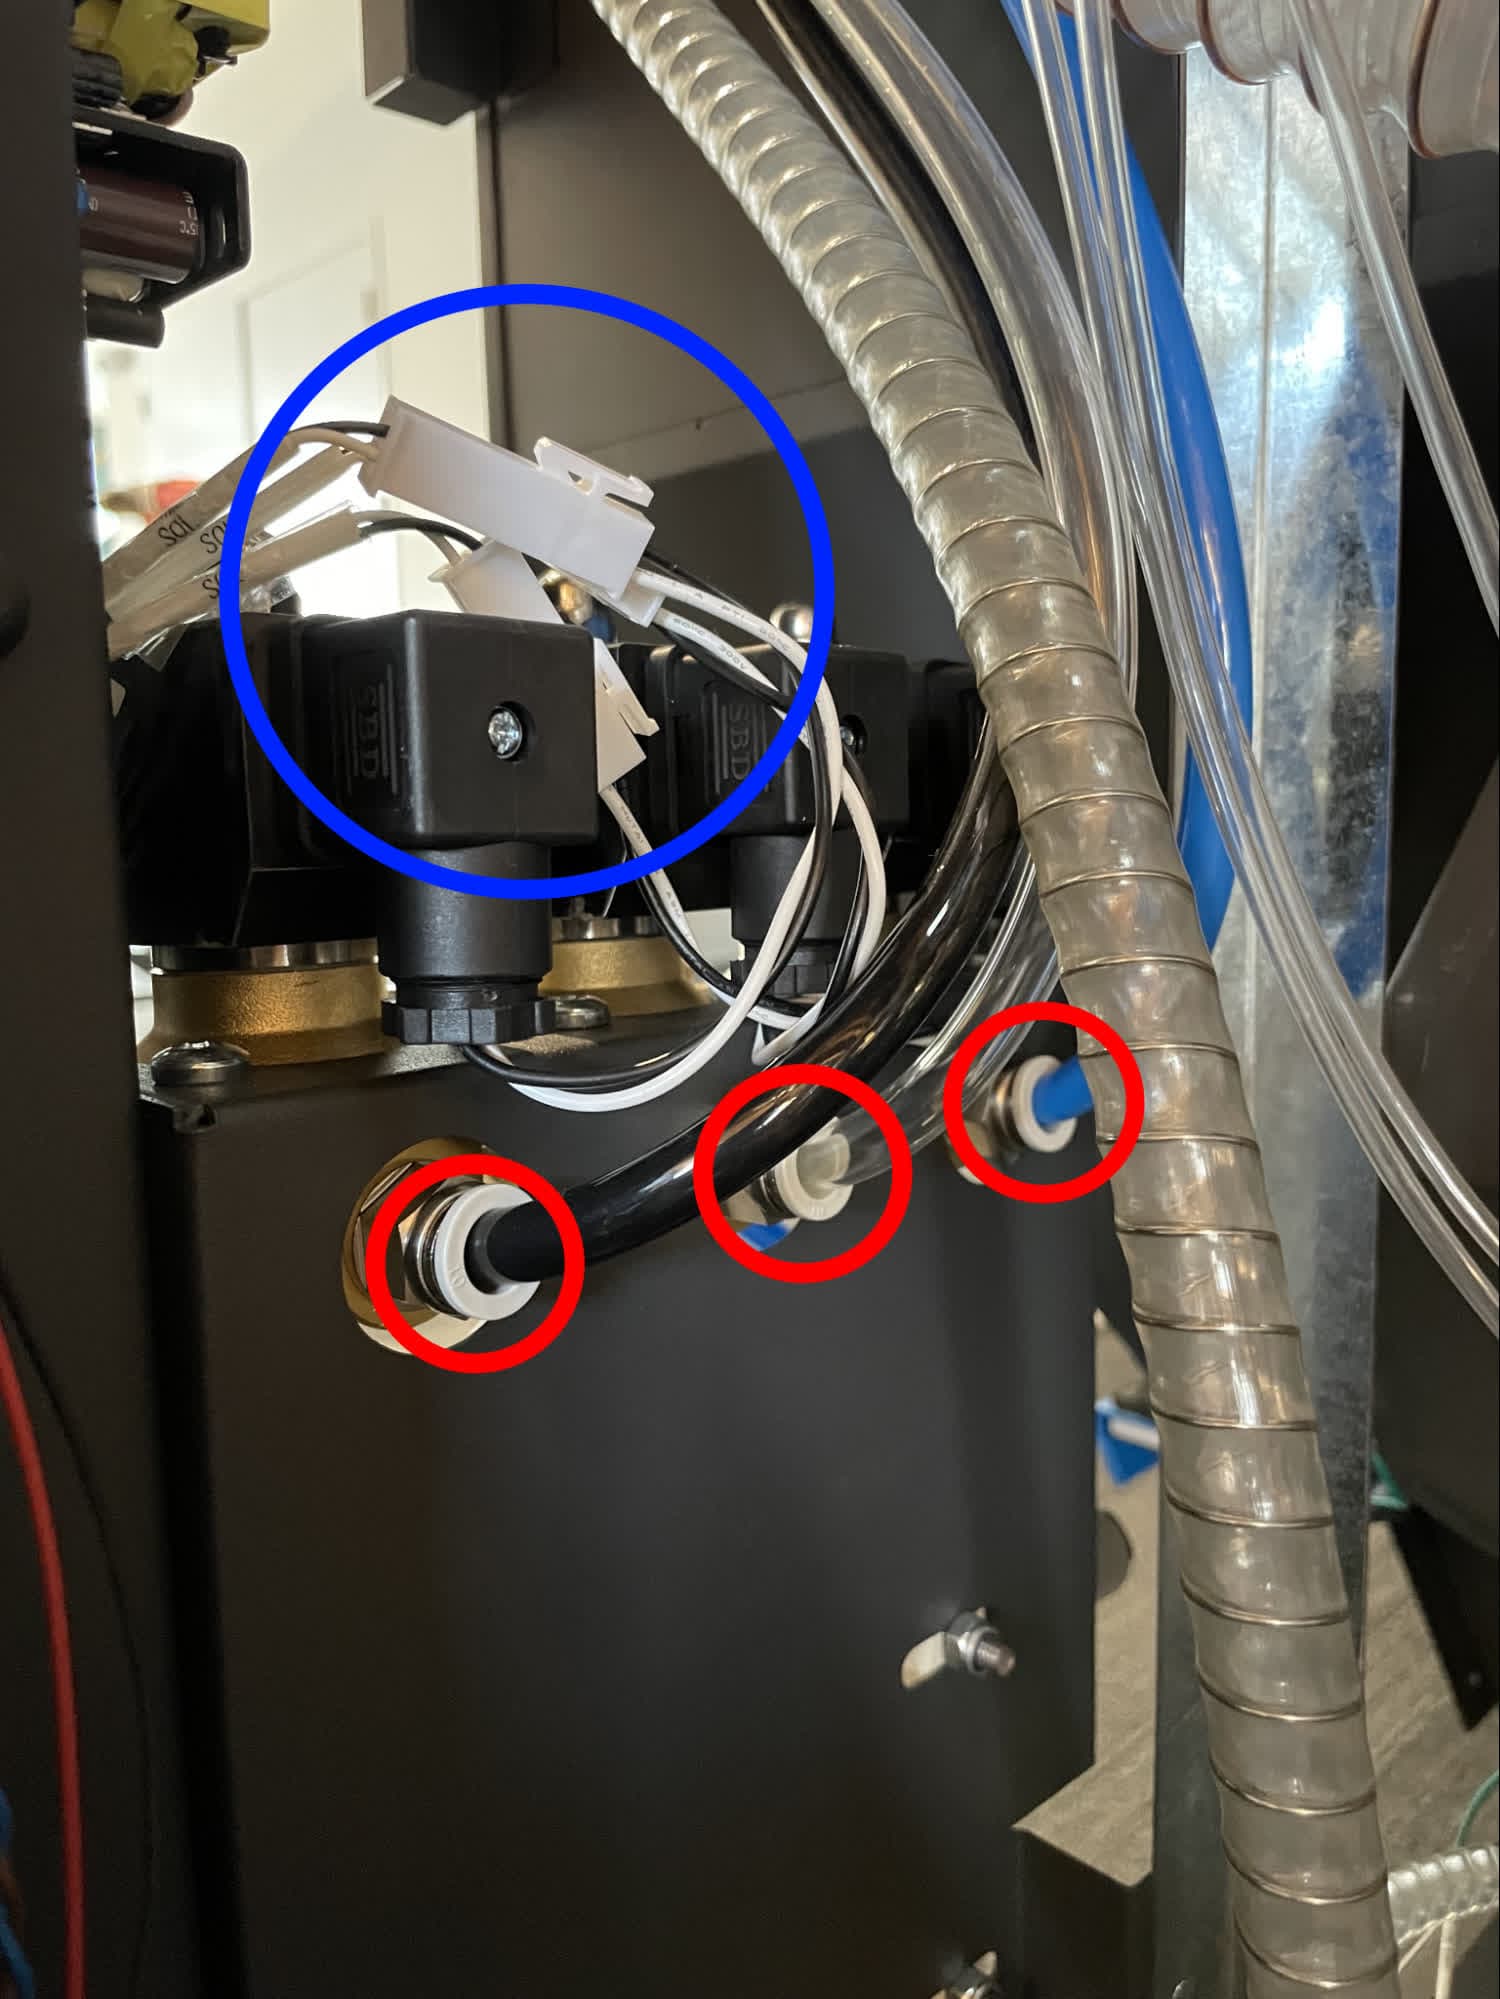
Reaching behind the solenoids, reconnect the power cables and pneumatic tubing to each of the three solenoids.
Ensure the correct power cable and pneumatic tubing is connected to the correct solenoid.
| Solenoid | Cable | Tubing Color | Location |
|---|---|---|---|
| Chamber Rinse | CHM SOL | Depends on your unit | Right |
| Part Rinse | PRT SOL | Depends on your unit | Center |
| Blast | BST SOL | Depends on your unit | Left |
Reinstall the lower sidecar panel
Overview: After installing the replacement pneumatic cassette, mount and secure the lower sidecar panel.
Slide the panel up around the waste hopper knife valve and the pneumatic filter. Remove the pneumatic filter if necessary, then reinstall it once the panel is in place.
Thread one T20 Torx screw into each of the seven screw holes in the lower sidecar panel. Using a T20 Torx driver, tighten until snug.

Finalizing the repair
Overview: After replacing the pneumatic cassette, power on the machine and perform final checks.
Step 1: Power on the machine
Connect the power cable to the machine and the power supply. Flip the power switch on the back of the machine to the ON position. The machine initializes.
Step 2: Test the repair
Test the machine to ensure that it operates normally. Activate the blast gun, either manually or by starting an automatic blasting cycle. Check that blasting media flows from the blast gun normally and the air whips move as expected.