
Required Supplies:
- Replacement fuse
- 120 V units: 20 A, 250 VAC, 5 × 20 mm
- 230 V units: 10 A, 250 VAC, 5 × 20 mm
- #2 Phillips screwdriver
- 2.5 mm hex driver (flat-end)
- Loctite 243 or equivalent threadlocker

The Fuse Sift can control power to a vacuum that is plugged into it. There is a fuse on the motherboard dedicated to this circuit. If that fuse blows or is otherwise damaged, you will not be able to control your vacuum through the Fuse Sift control panel or touchscreen.
Use this guide to replace the Fuse Sift vacuum fuse.
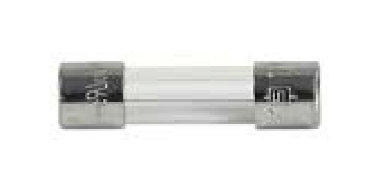
Required Supplies:
Estimated time: 15–20 minutes
Removing the rear enclosure panel
Overview: Remove the rear enclosure panel to better access the cartridge drawer components.
Step 1: Unplug the Fuse Sift
Power off the Fuse Sift, then unplug the power cable from the rear panel.
Danger:
Performing this procedure on the Fuse Sift while it is plugged in increases the risk of electric shock. After disconnecting the power from the Fuse Sift, wait at least five minutes before servicing.
Step 2: Unscrew the Wi-Fi antenna
Remove the Wi-Fi antenna, if present.
Step 3: Remove the rear enclosure panel
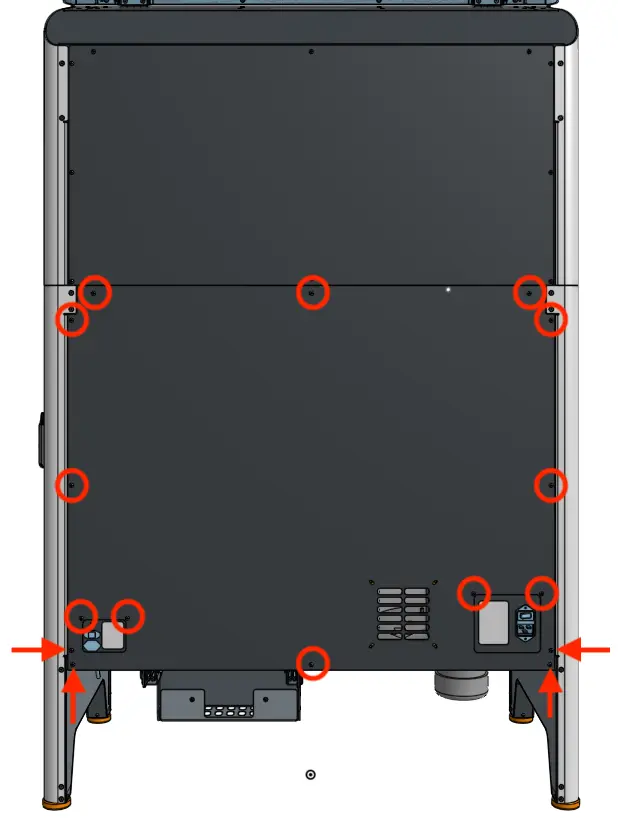
Use a 2.5 mm hex driver to remove the 16 black 8.0 mm M4 screws securing the rear panel to the Fuse Sift. Set the rear enclosure panel aside.
Tip
Remove the top three screws last to prevent the panel from falling off.
Notice:
The Fuse Sift contains sensitive electronic components. Ground yourself before touching any electronics in the device by using an antistatic wrist band.
Replacing the vacuum fuse
Overview: Access the Fuse Sift motherboard and replace the vacuum fuse.
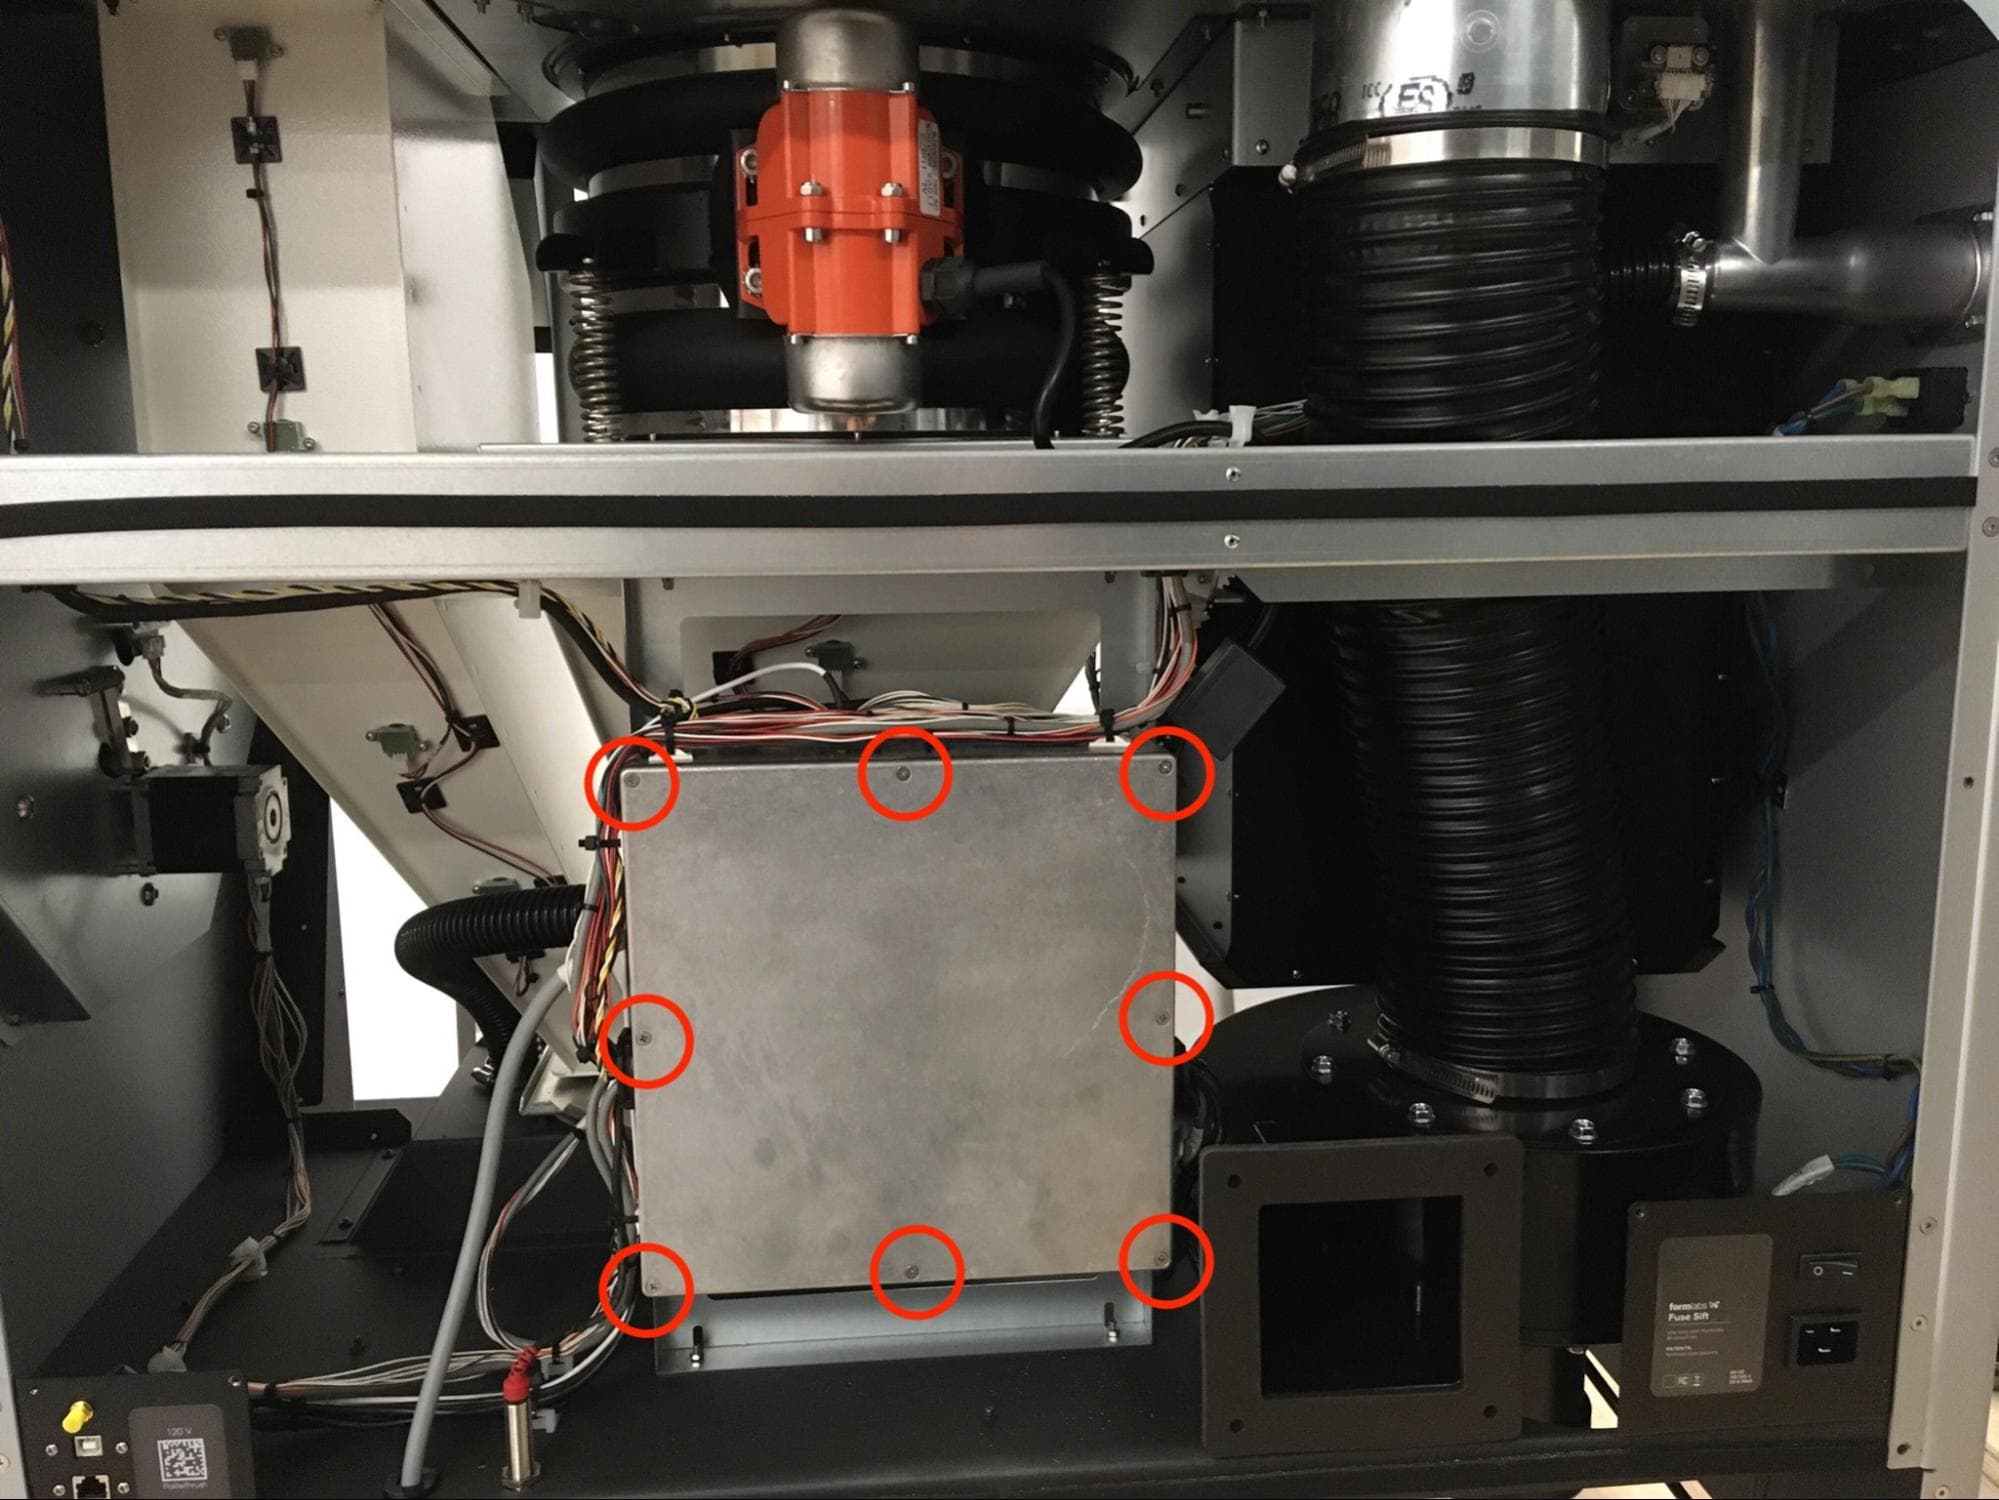
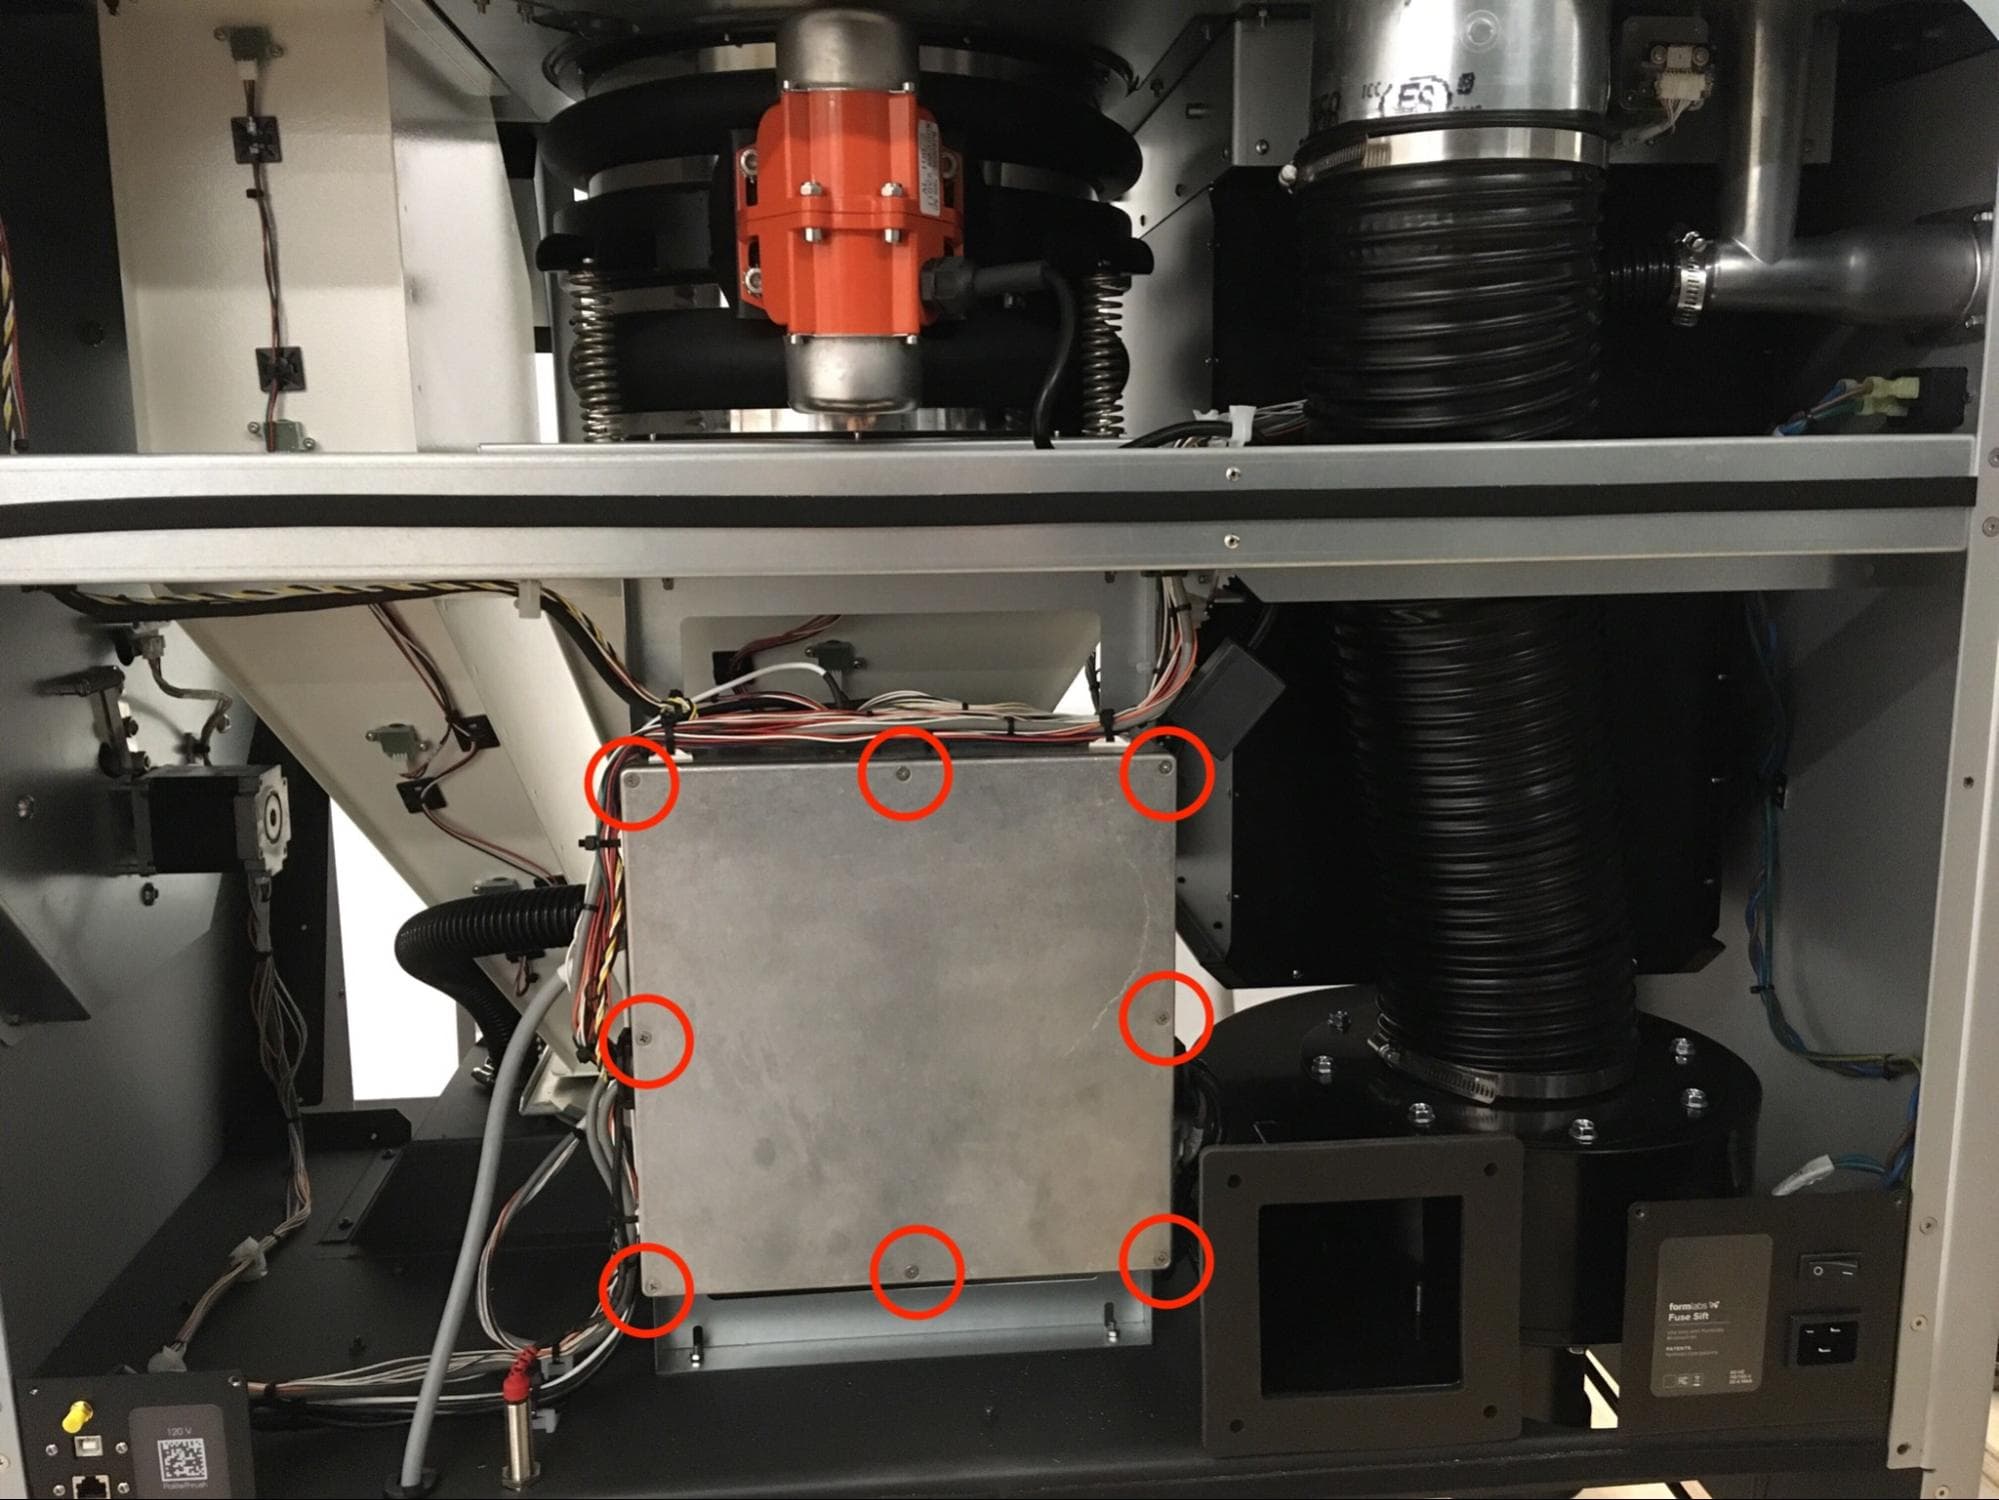
Using a #2 Phillips screwdriver, loosen and remove the eight 12.0 mm countersunk M3.5 screws securing the faceplate on the motherboard enclosure. Set the screws and faceplate aside.
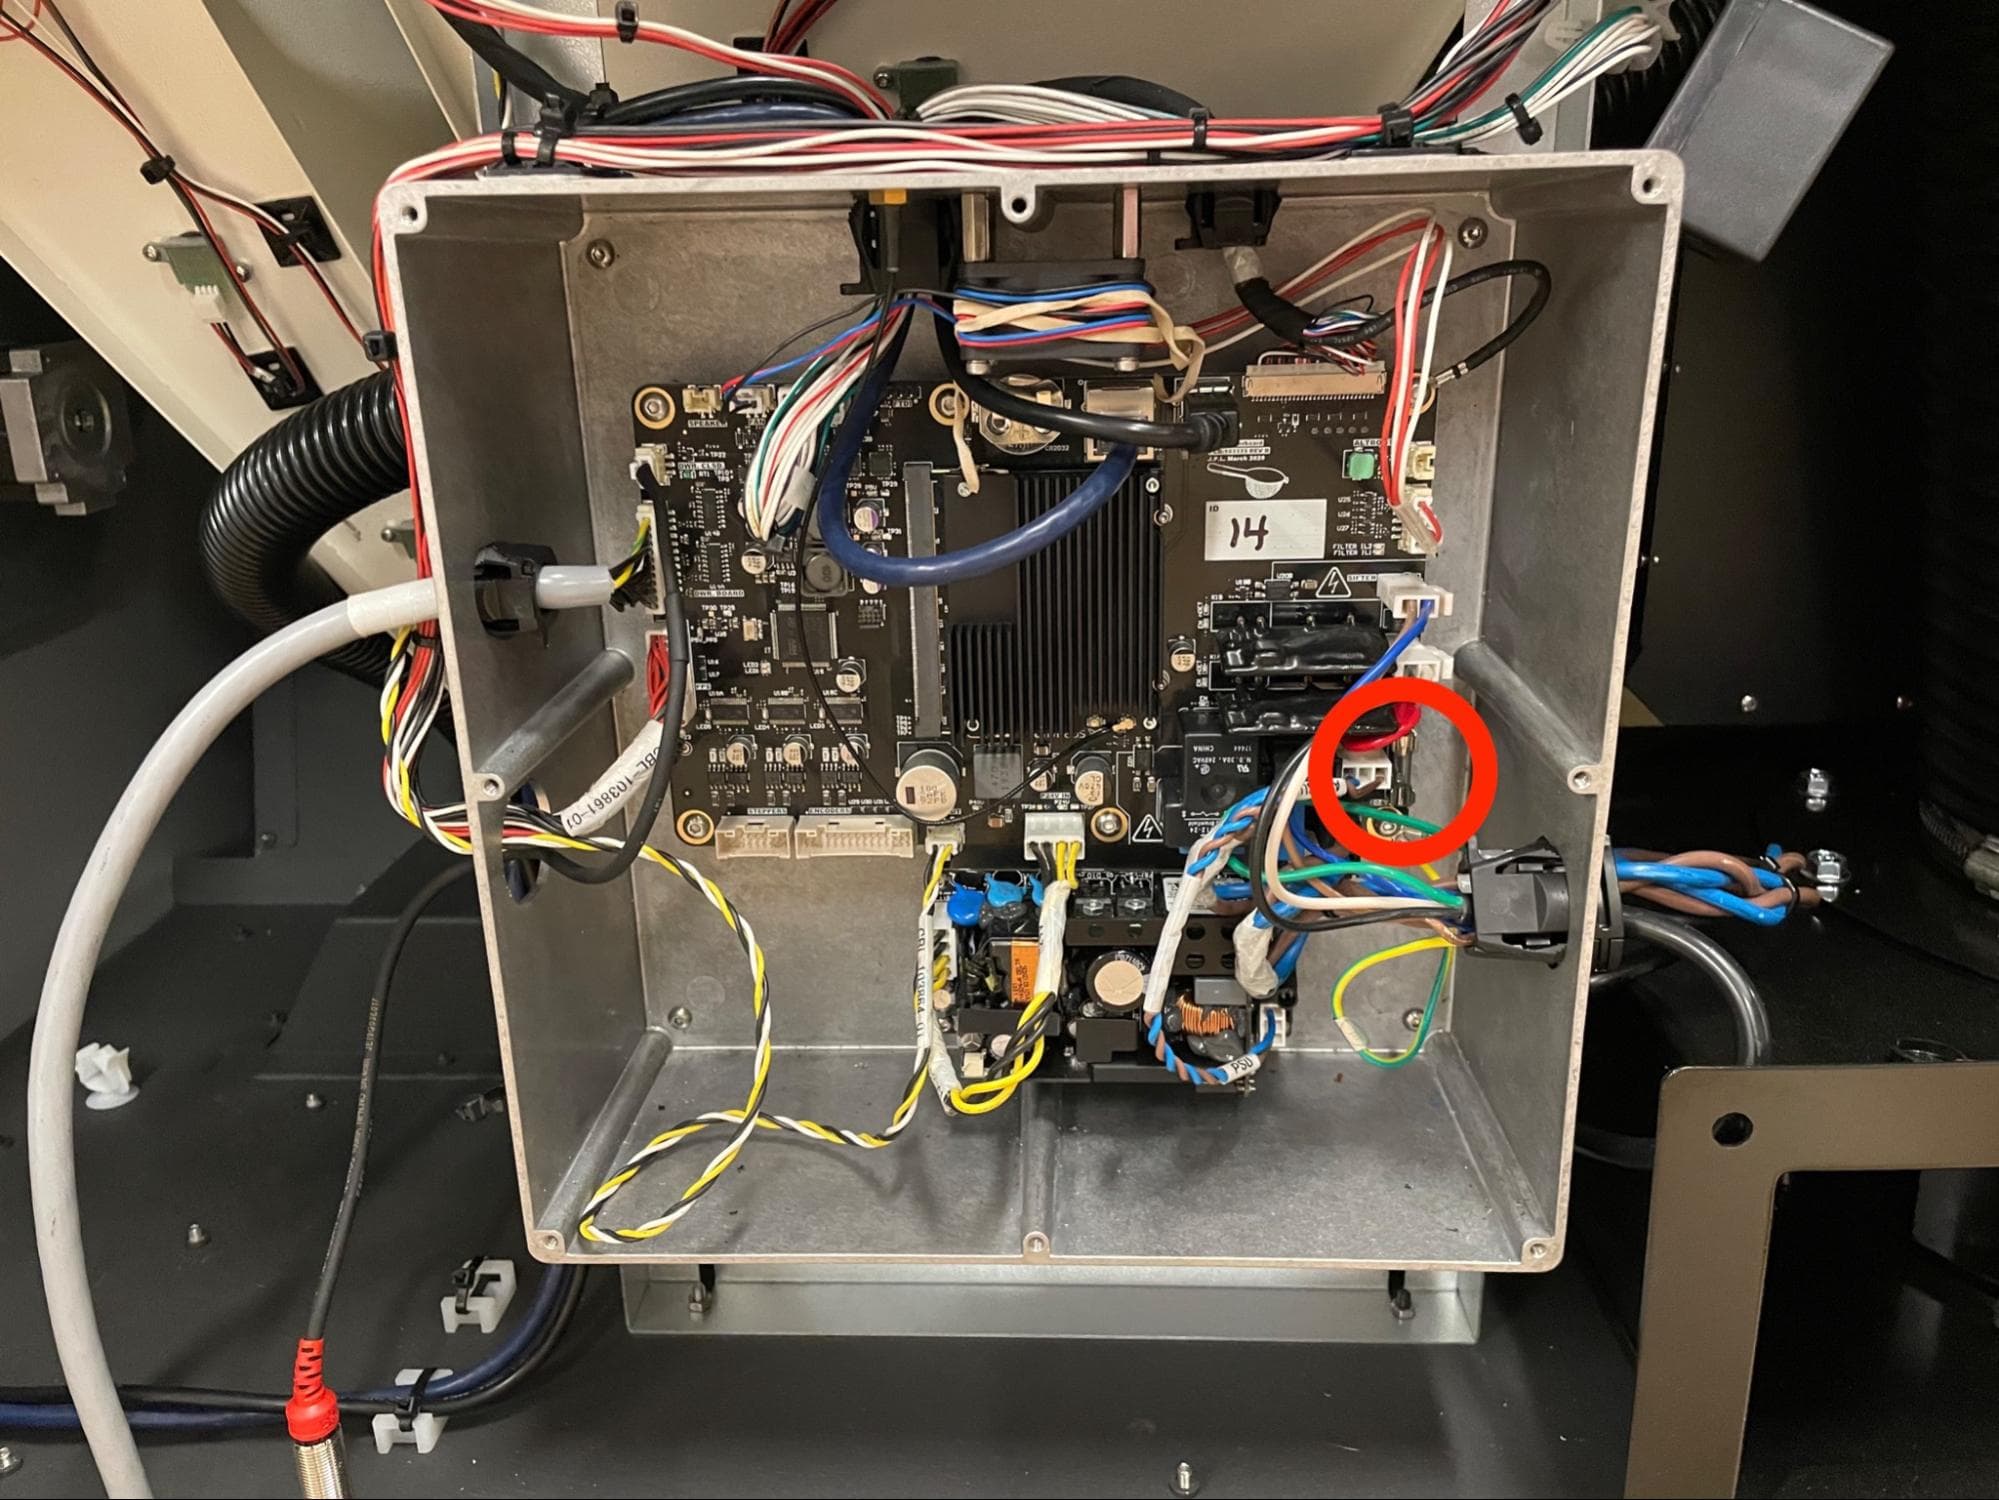
Locate the fuse receptacle on the bottom-right corner of the motherboard. Remove the original fuse from the receptacle and inspect for signs of damage. If the fuse is blackened, cracked, or completely blown, replace it with a new fuse.
Mount the faceplate onto the motherboard enclosure, aligning the screw holes in the faceplate with the corresponding screw holes in the enclosure. Apply a small dab of Loctite 243 or equivalent threadlocker to each of the eight 12.0 M3.5 countersunk faceplate mounting screws. Thread one screw into each of the screw holes in the faceplate. Using a #2 Phillips screwdriver, tighten until snug.
Reinstalling the rear enclosure panel
Overview: Mount and secure the rear enclosure panel after installing the new display assembly and cable.
Step 1: Prepare the rear panel retention screws
Apply a small amount of Loctite 243 or other similar threadlocker to each of the 16 black 8.0 mm M4 button screws that secure the rear panel to the Fuse Sift.
Step 2: Mount the rear panel
Mount the rear panel onto the Fuse Sift.
Step 3: Secure the rear panel
Thread one 8.0 mm M4 button screw into each of the 16 screw holes in the rear panel. Use a 2.5 mm hex driver to tighten until snug.

Tip:
Start with the top three screws to hold the panel in place while you thread and tighten the remaining screws.
Finalizing the repair
Overview: After installing the new vacuum fuse, test thre repair.
Step 1: Power on the Fuse Sift
Reconnect the Fuse Sift to its power source. Flip the power switch to the ON position.
Step 2: Check the vacuum
Check that the vacuum is still plugged into the power port on the side of the Fuse Sift, then turn it on using the Fuse Sift control panel or touchscreen. Contact Formlabs Support or your certified service provider if the vacuum still does not turn on.