
Note:
If you are in a building with palletized deliveries, ensure you have access to the loading dock.

Prior to unboxing and installing the Fuse Blast, prepare a suitable workspace for the Fuse 1, Fuse Sift, and Fuse Blast, ensure you have sufficient space to store consumables, and purchase additional supplies so you are ready to process printed parts when your Fuse Blast arrives. Unlike standard media blasting cabinets, Fuse Blast can share a space with the Fuse 1 generation printer or Fuse Sift without risk of media contamination.
Follow Formlabs instructions to unbox, connect cables, and turn on your Fuse Blast.
Receiving
The standard Fuse Blast package ships on a pallet and contains the Fuse Blast, tumbler basket, parts basket, power cable box, and accessories box.
Note:
If you are in a building with palletized deliveries, ensure you have access to the loading dock.
| Fuse Blast | Pallet including product and boxes | |
|---|---|---|
| Shipping dimensions | 100 × 75 × 175 cm 39.4 × 29.8 × 69 in | 120 × 114 × 194 cm 47.2 × 44.9 × 76.4 in |
| Shipping weight | 194 kg 427.7 lb | 243 kg 535.7 lb |
| Product weight | 180 kg 396.8 lb | N/A |
Unboxing
The custom packaging the unit arrives in is specially designed to protect the machine during shipping. During unboxing, inspect the product for any damage or missing items. In the case of damage or missing items, contact Formlabs Support or a certified service provider.
Caution:
Removing the machine from its packaging requires at least two people that are comfortable moving large and heavy objects.
Step 1: Position the packaging
Position the Fuse Blast’s packaging near the machine’s designated area, leaving enough room for two people to comfortably maneuver throughout the area. Stand the packaging upright and ensure it is level. Ensure there is 2 m (6.6 ft) of clearance in front of the packaging for unloading the Fuse Blast.
Step 2: Open the box
Cut and remove the outer strapping securing the packaging. Remove the eight clips securing the exterior cardboard shell. Retain all fastening hardware and packaging for future use.
Open the unit’s box from the top by removing the lid, then remove the two C-shaped shells from the left and right sides. Remove the two protective foam core supports from the unit. Locate and remove the accessory box from the front of the unit.
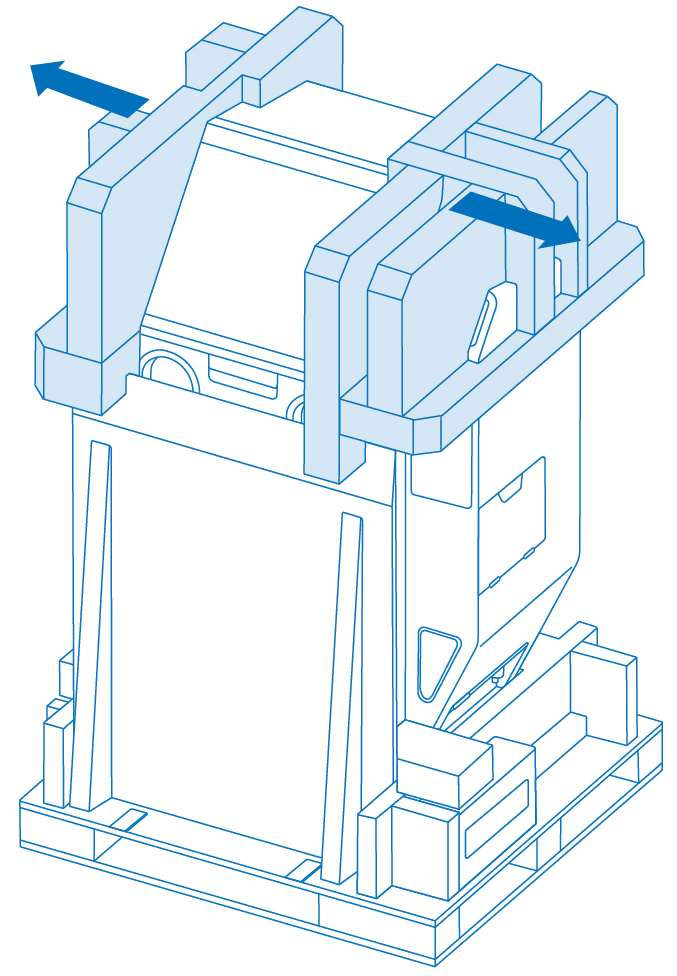
Step 3: Remove and attach the ramp to the pallet
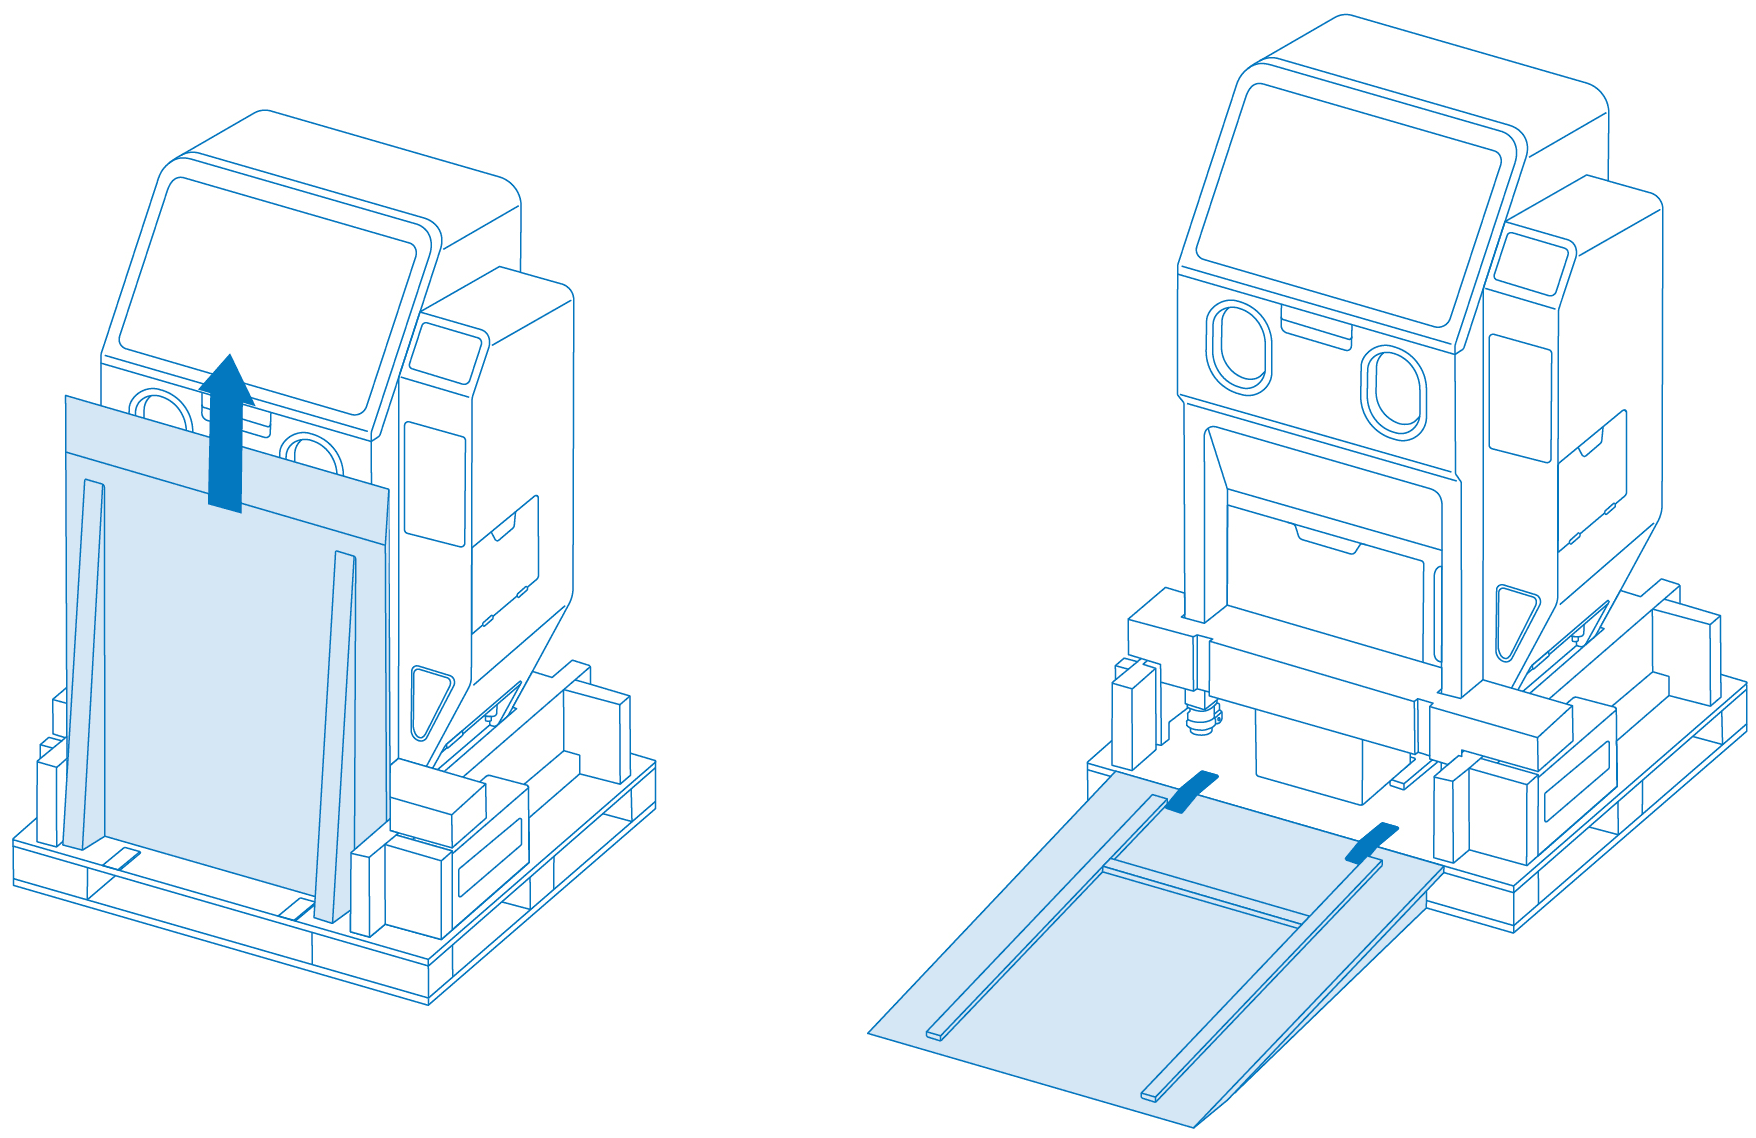
Locate and remove the ramp from the package. Align the top edge of the ramp to the front edge of the pallet. Using the velcro attached to the ramp, secure the ramp to the pallet in front of the Fuse Blast. The ramp surface should not be above the pallet platform.
Step 4: Roll the machine off the pallet and into the workspace
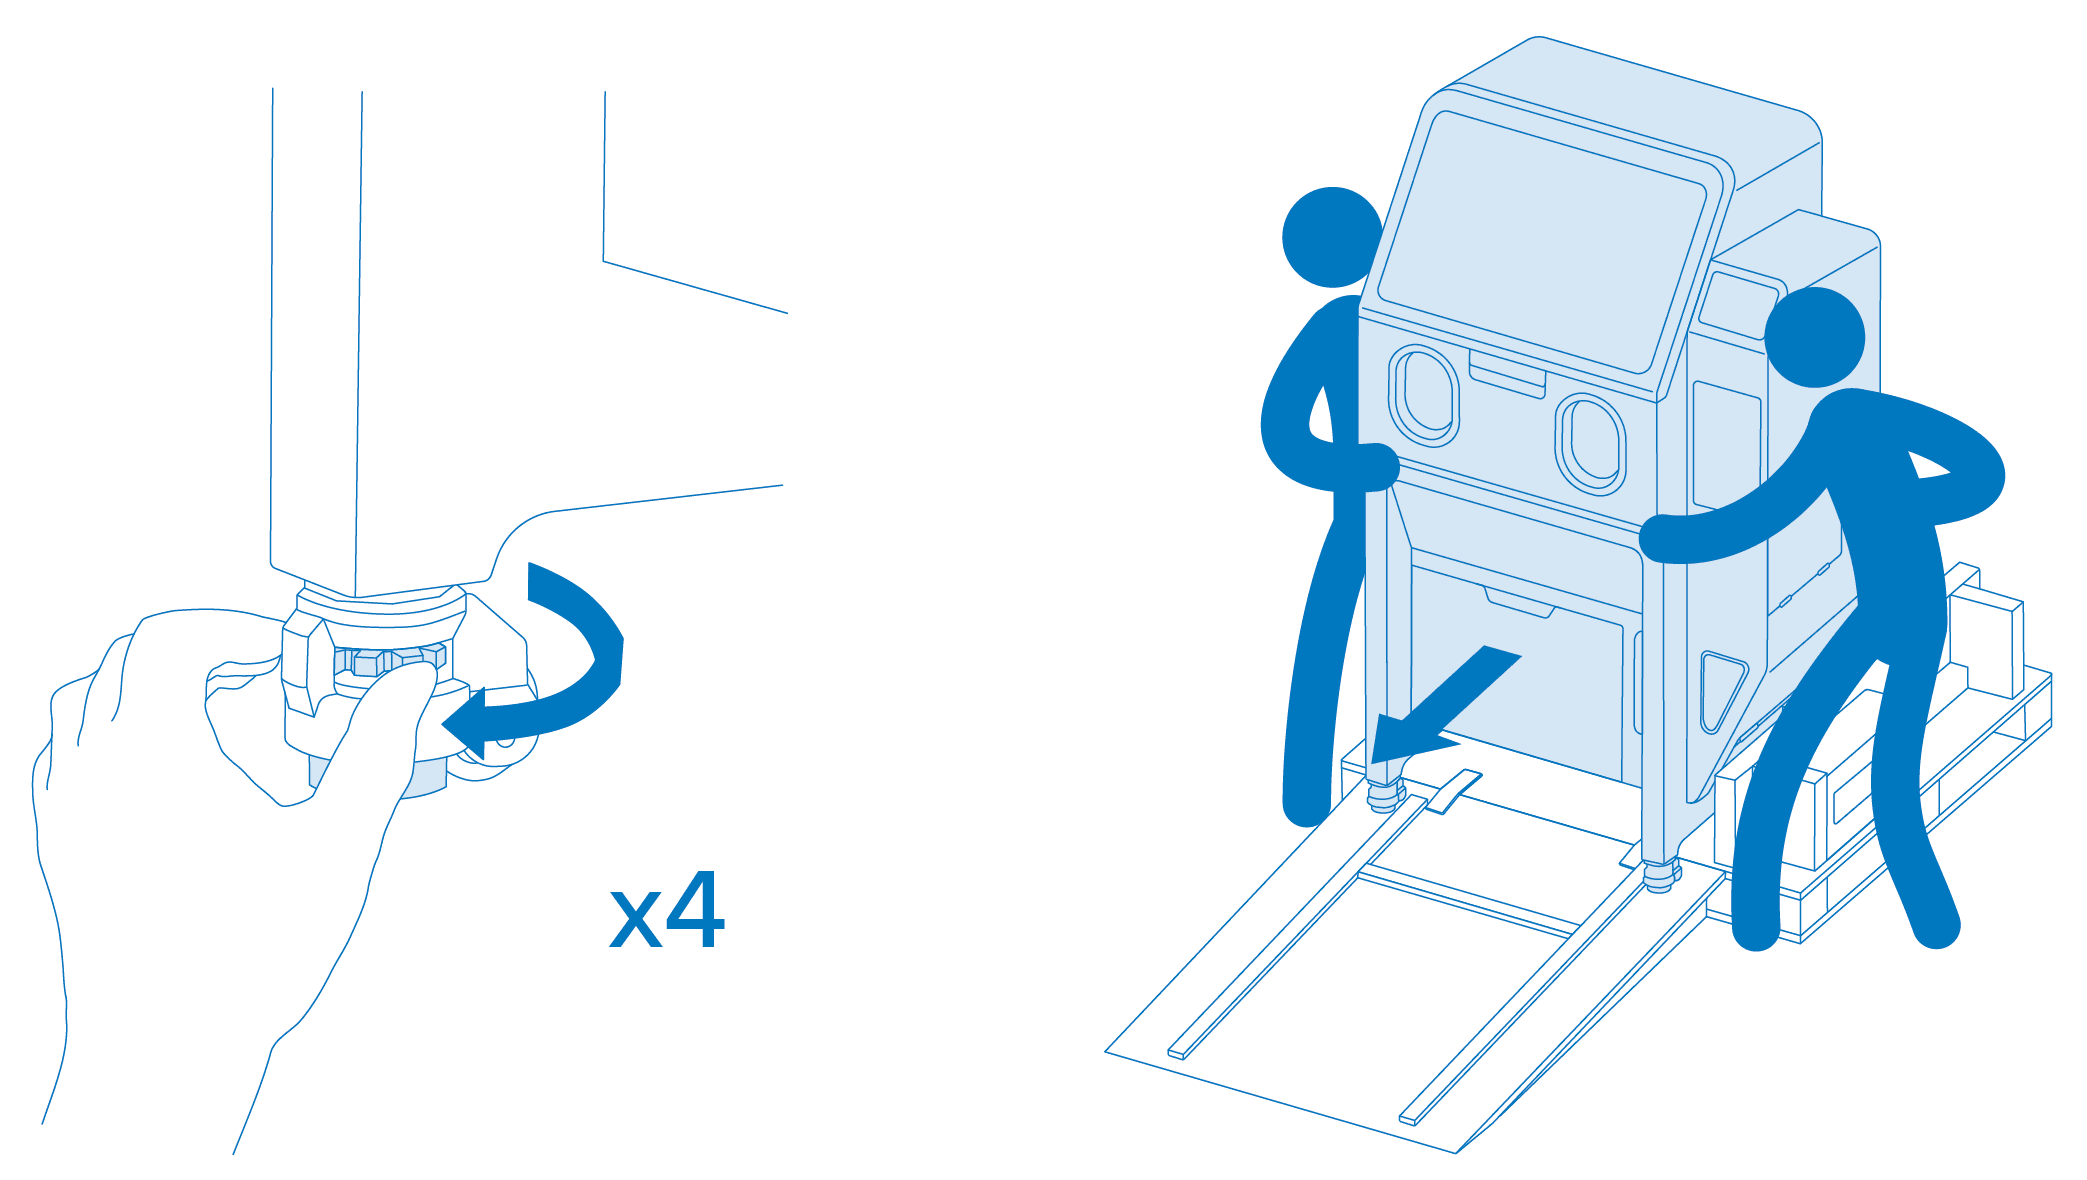
Remove the bottom protective foam core support. Rotate each wheel nut clockwise to release the wheel. With two people, carefully roll the machine off the pallet and into its workspace. Once in position, lock the casters on the feet to prevent the Fuse Blast from moving.
Step 5: Remove additional packaging material
Remove any additional wrapping and packaging from outside of the machine.
Note:
The original packaging is designed to be kept and reused for transporting or shipping the machine for service. Save the complete packaging including any inserts for your convenience.
Step 6: Mount the tumbler basket
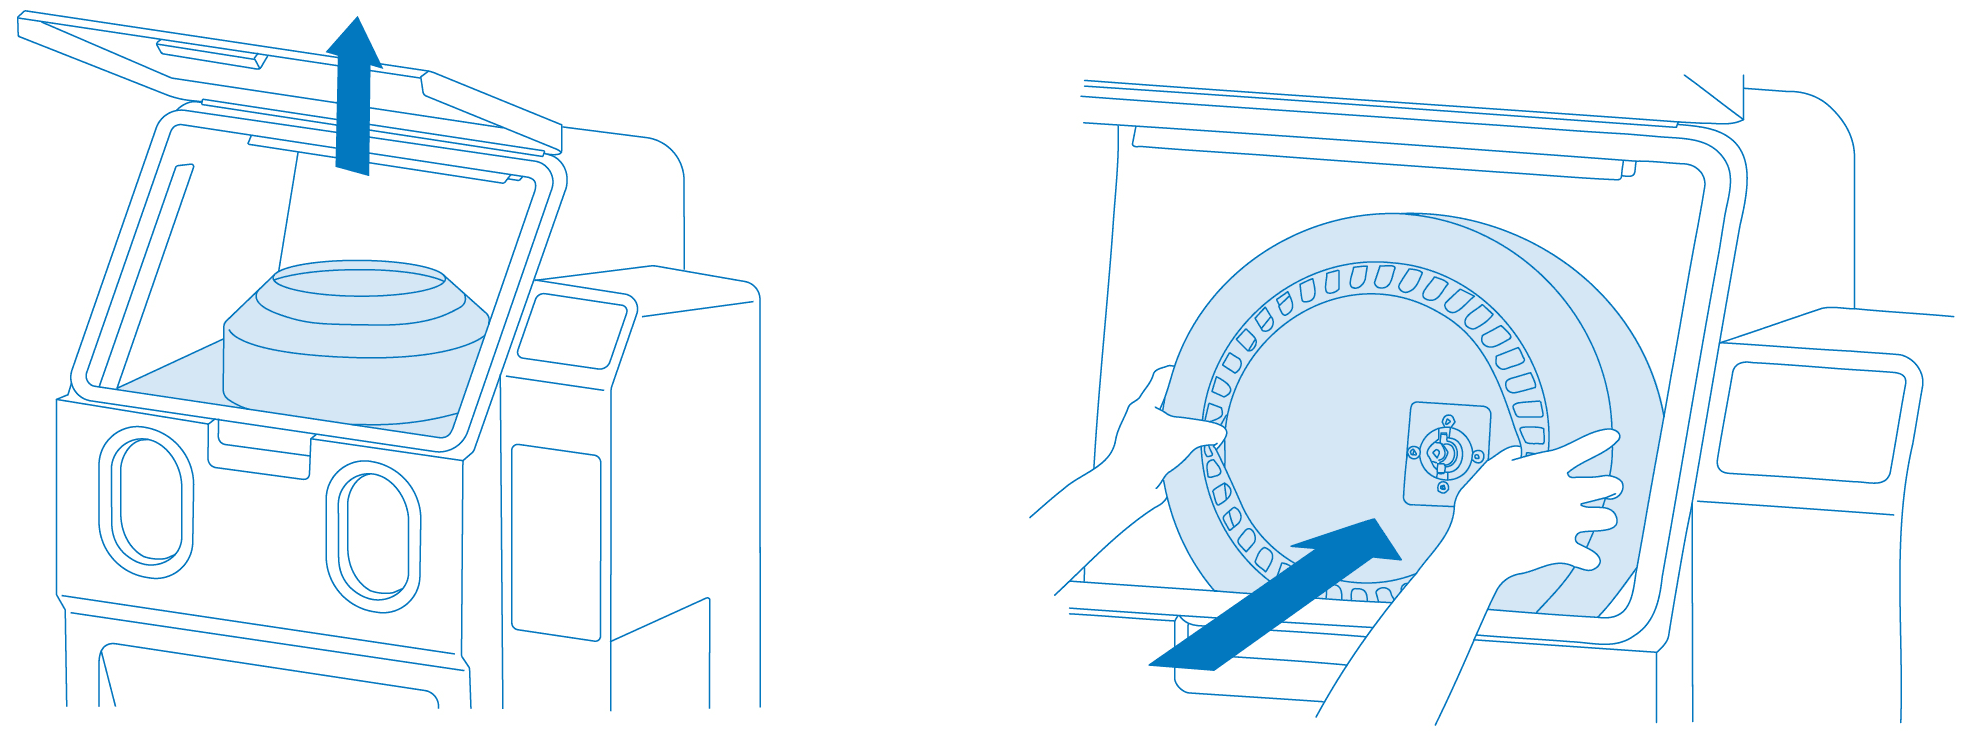
Open the blasting chamber door and remove the Fuse Blast tumbler basket from the packaging. Using two hands, carefully slide the tumbler basket onto the tumbler basket shaft.
Step 7: Install the media blast gun
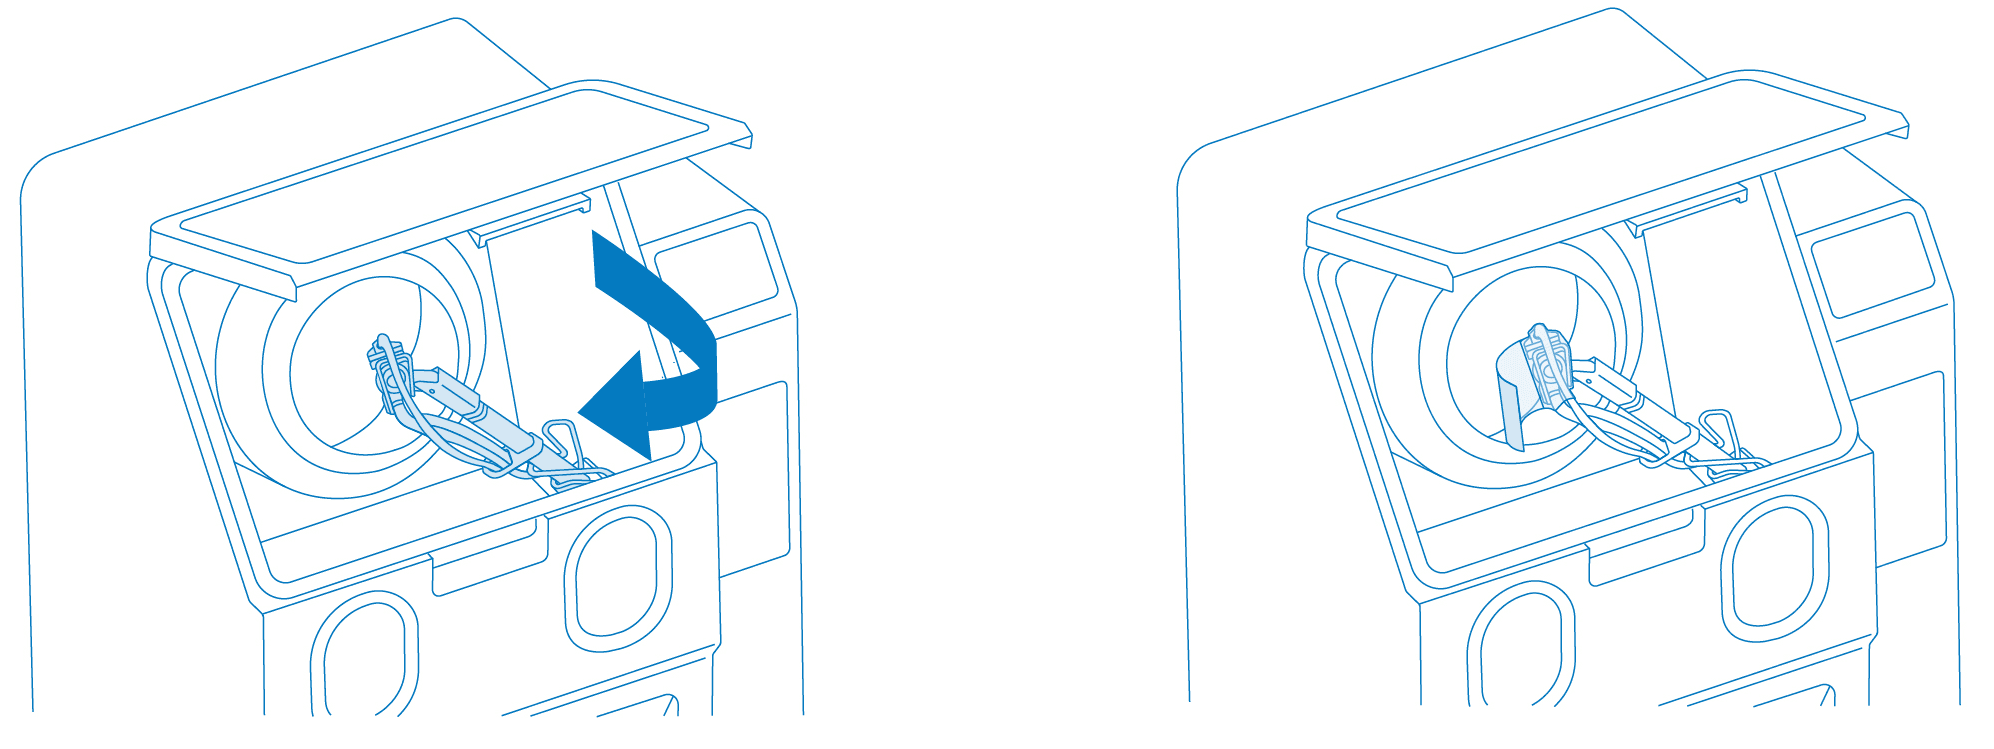
Install the media blast gun onto the blast arm. Ensure that the blast gun fits snugly on the blast arm.
Step 8: Install the foot pedals and the grounding strap
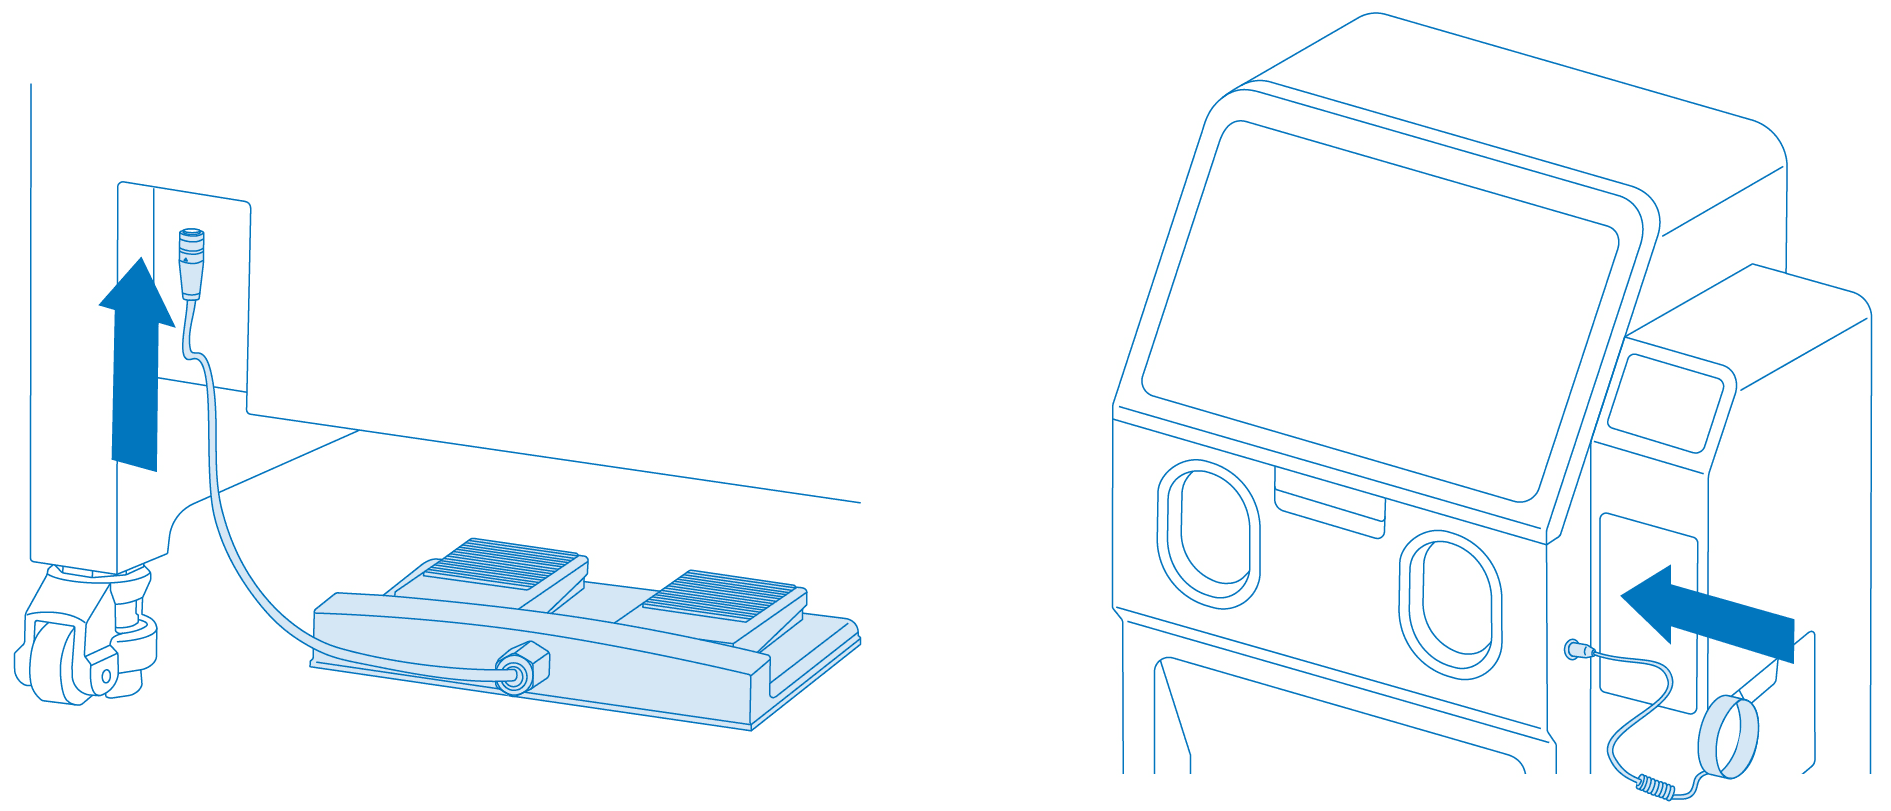
Place the foot pedals underneath the Fuse Blast and plug them into the connector on the back of the unit. Remove the grounding strap from the accessories box and attach it to the grounding strap plug on the front of Fuse Blast.
Step 9: Attach the air compressor
Attach your air compressor to the Fuse Blast using the compressed air inlet (1/4" quick disconnect coupling) at the back of the unit. Regulate your compressed air supply to at most 120 PSI.
Notice:
The Fuse Blast contains a pressure relief valve to protect the hardware from air pressures higher than 120 PSI. If the compressed air supply is above 120 PSI, the pressure relief valve pops off and makes a loud hissing noise, even if the machine is turned off.
Connecting the Fuse Blast
Connect the cables and install the Wi-Fi antenna, then turn on the machine. Last, connect the Fuse Blast to a network via Wi-Fi or Ethernet.
Step 1: Connect the cables
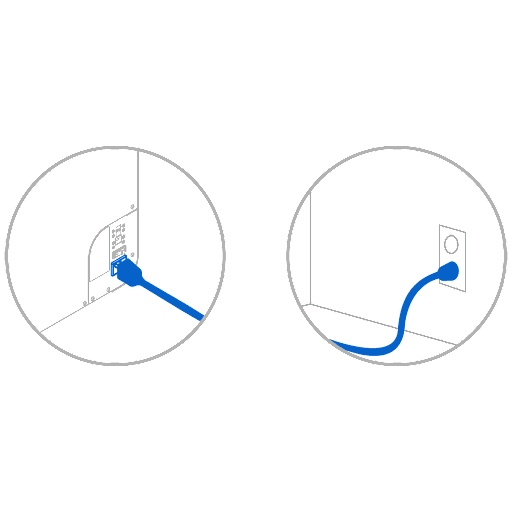
Plug the included power cable into the power port on the back of the unit and connect the power cable to a dedicated circuit.
Notice:
The Fuse Blast requires an AC circuit that can provide at least 3 A at 230 VAC (EU) or 6 A at 120 VAC (US), as well as reliable grounding. Power surges may disrupt operation and/or permanently damage sensitive components, jeopardizing the reliability of the product. Formlabs suggests the use of line conditioners or UPS in regions with voltage fluctuations.
Step 2: Install the Wi-Fi antenna
Screw the Wi-Fi antenna onto the jack on the back of the unit, next to the power, USB, and Ethernet ports.
Step 3: Turn on
To turn on the machine:

Step 4: Connect to a secure network
Connect the Fuse Blast to a secure network via Wi-Fi or Ethernet, providing it internet access for remote troubleshooting, sending diagnostic logs, and receiving firmware updates. The Fuse Blast can connect directly to a computer with a USB cable.