
Note:
Parts printed on a Fuse 1+ 30 W printer tend to exhibit more dimpling than those printed on a Fuse 1.

The SLS print process used in Fuse 1 generation printers requires the temperature of the material being sintered to be at a precise set point, which is measured by the printer’s IR sensor. While most printers should maintain this temperature properly without the need for adjustment, some common print defects and issues can be addressed by fine-tuning the print bed temperature.
Formlabs recommends only using this tool if other standard troubleshooting and maintenance steps have not addressed your print issue. For more guidance on your particular case, contact Formlabs Support or your certified service provider.
Troubleshooting prior to adjusting the Bed Temperature Target
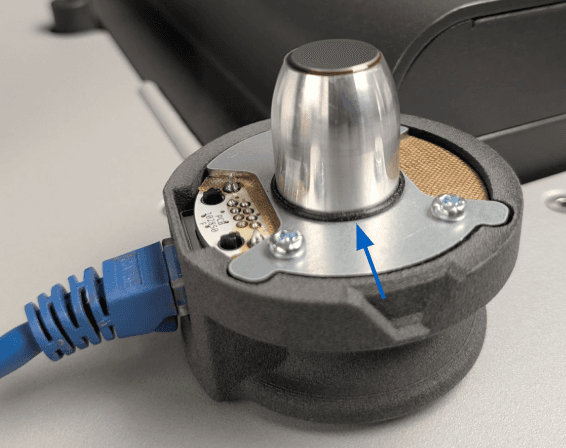
The primary cause of temperature-related issues is contamination on the IR sensor or IR sensor cone. Before adjusting the bed temperature, inspect and clean the IR sensor and its housing:
Adjusting the Bed Temperature Target
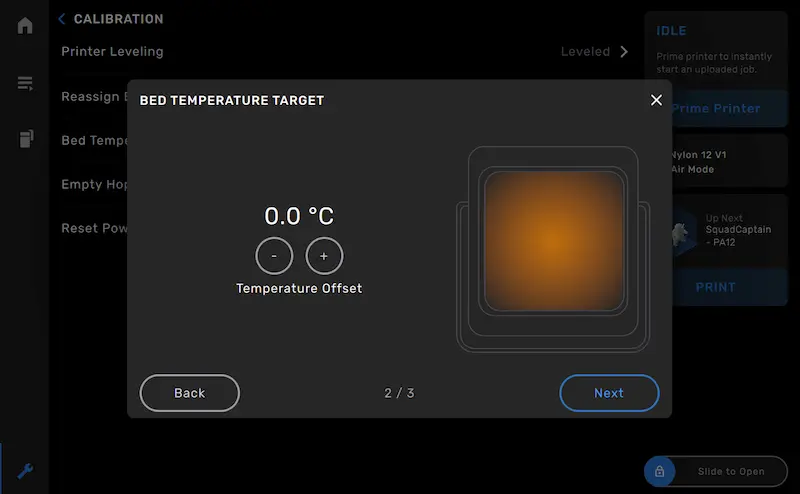
The Bed Temperature Target can be adjusted by up to ± 5 °C in 0.25 °C increments. When troubleshooting bed temperature issues, Formlabs recommends fine-tuning in 0.5 °C increments until optimal results are achieved. To adjust the Bed Temperature Target:
Common print issues related to bed temperature
Hard caking or Surface Armor that is difficult to remove
Hard caking or especially difficult-to-remove Surface Armor generally indicates that the bed temperature is too high. Lower the Bed Temperature Target by 0.5 °C and run another print job. Continue to adjust the bed temperature in 0.5 °C increments if needed.
Layer curling
Layer curling can indicate that the temperature is either too high or too low, depending on the context.
Curling on the Surface Armor of a printed part may indicate that the bed temperature is too high. Surface Armor layer curling usually occurs very early in the print process, on the first few lased layers. Lower the Bed Temperature Target by 0.5 °C and run another print job. Continue to adjust the bed temperature in 0.5 °C increments if needed.
Curling within fully-sintered layers may indicate that the bed temperature is too low. Raise the Bed Temperature Target by 0.5 °C and run another print job. Continue to adjust the bed temperature in 0.5 °C increments if needed.
Dimpling or pitting
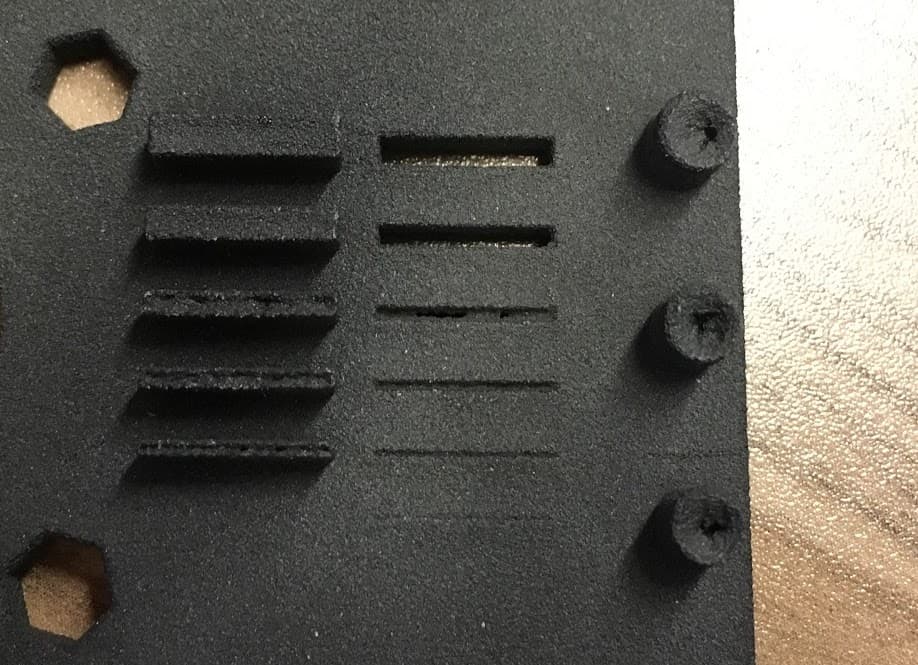
Some amount of dimpling on the top surface of parts is typical of parts printed on Fuse 1 generation printers and can generally be addressed with orientation and layout changes within the FORM file. Severe dimpling or deeper pitting may indicate that the bed temperature is too high. Lower the Bed Temperature Target by 0.5 °C and run another print job. Continue to adjust the bed temperature in 0.5 °C increments if needed.
Note:
Parts printed on a Fuse 1+ 30 W printer tend to exhibit more dimpling than those printed on a Fuse 1.
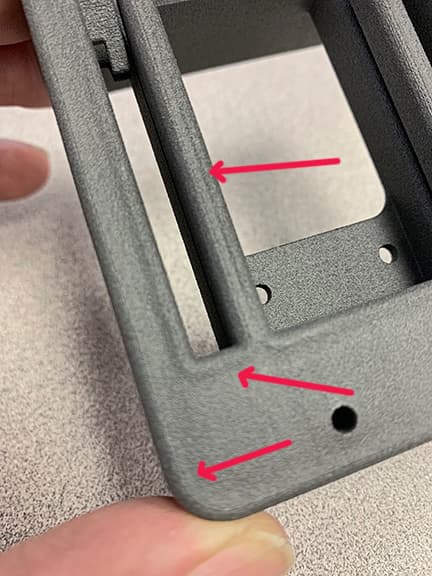
Dimpling.
Pitting.
Material-specific considerations
Formlabs does not recommend adjusting the Bed Temperature Target when printing with TPU 90A Powder, as it has not been shown to improve print outcomes.