

Nitrogen leaks (Fuse 1+ 30W)
Nitrogen leaks (Fuse 1+ 30W)
Some Formlabs SLS materials should be printed in a nitrogen atmosphere for best results. For example, printing with Nylon 11 Powder requires a lower refresh rate and results in better material properties than printing in air. To enable this, Fuse 1+ 30W printers include plumbing, sensors, and controls to work with an external nitrogen source.
Nitrogen leaks, either within or outside of the printer, can lead to error messages, increased nitrogen consumption, or can otherwise impact your ability to print.
For more information about setting up and printing with nitrogen on a Fuse 1+ 30W printer, see Using inert atmospheric control (Fuse 1+ 30W). For more information about which materials should be used with nitrogen, see Choosing the right powder.
Symptoms
- Nitrogen generator cycles on more frequently than expected
- Stored nitrogen (e.g., in a cylinder or dewar) runs out faster than expected
- Inlet Pressure Too Low or Nitrogen Pressure Out Of Range error message when printing with nitrogen
Causes
- Faulty or malfunctioning nitrogen source
- Nitrogen leak external to the printer
- Nitrogen leak within the printer
Troubleshooting steps
Inspect and adjust the nitrogen source
- If the printer displayed an Inlet Pressure Too Low or Nitrogen Pressure Out Of Range error message when printing with nitrogen, follow the troubleshooting steps for the error message to ensure that the nitrogen source and printer are adjusted properly.
- Inspect your nitrogen source for any leaks or issues. Follow troubleshooting guidance from the manufacturer or supplier, as needed.
- Inspect the lines and fittings between the nitrogen source and the printer. Apply a light coating of soapy water to all joints and connections and look for bubbling to check for signs of leaks. Tighten or replace any leaky fittings or tubing as needed.
Inspect the upper nitrogen lines
If the nitrogen source and printer are adjusted properly and there is no leak external to the printer, there may be a leak within the printer. Most minor internal leaks can be traced to the lines and fittings underneath the printer’s top panel.
- Turn off the printer and disconnect the power cable. Wait five minutes after disconnecting the printer from power before proceeding.
- Using a 2.5 mm hex driver, remove the 26 6 mm M4 countersunk screws securing the top panel to the printer. Set the screws aside.
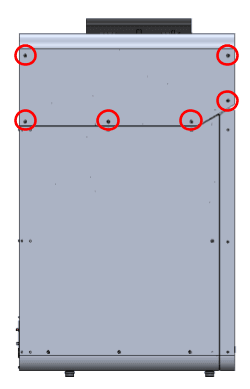
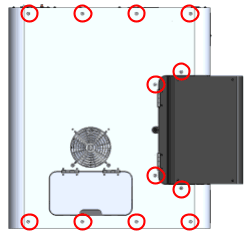
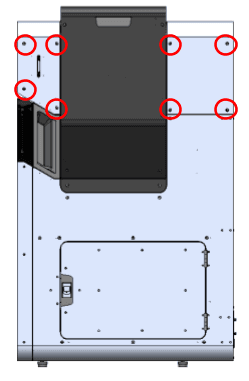
- Lift the top panel off of the printer by grabbing the IR sensor door and the rear-most edge. Set the top panel aside.
- Apply a light coating of soapy water to all tubing joints and connections visible above the upper cooling shroud. Do the same with the two push-to-connect fittings below the shroud.
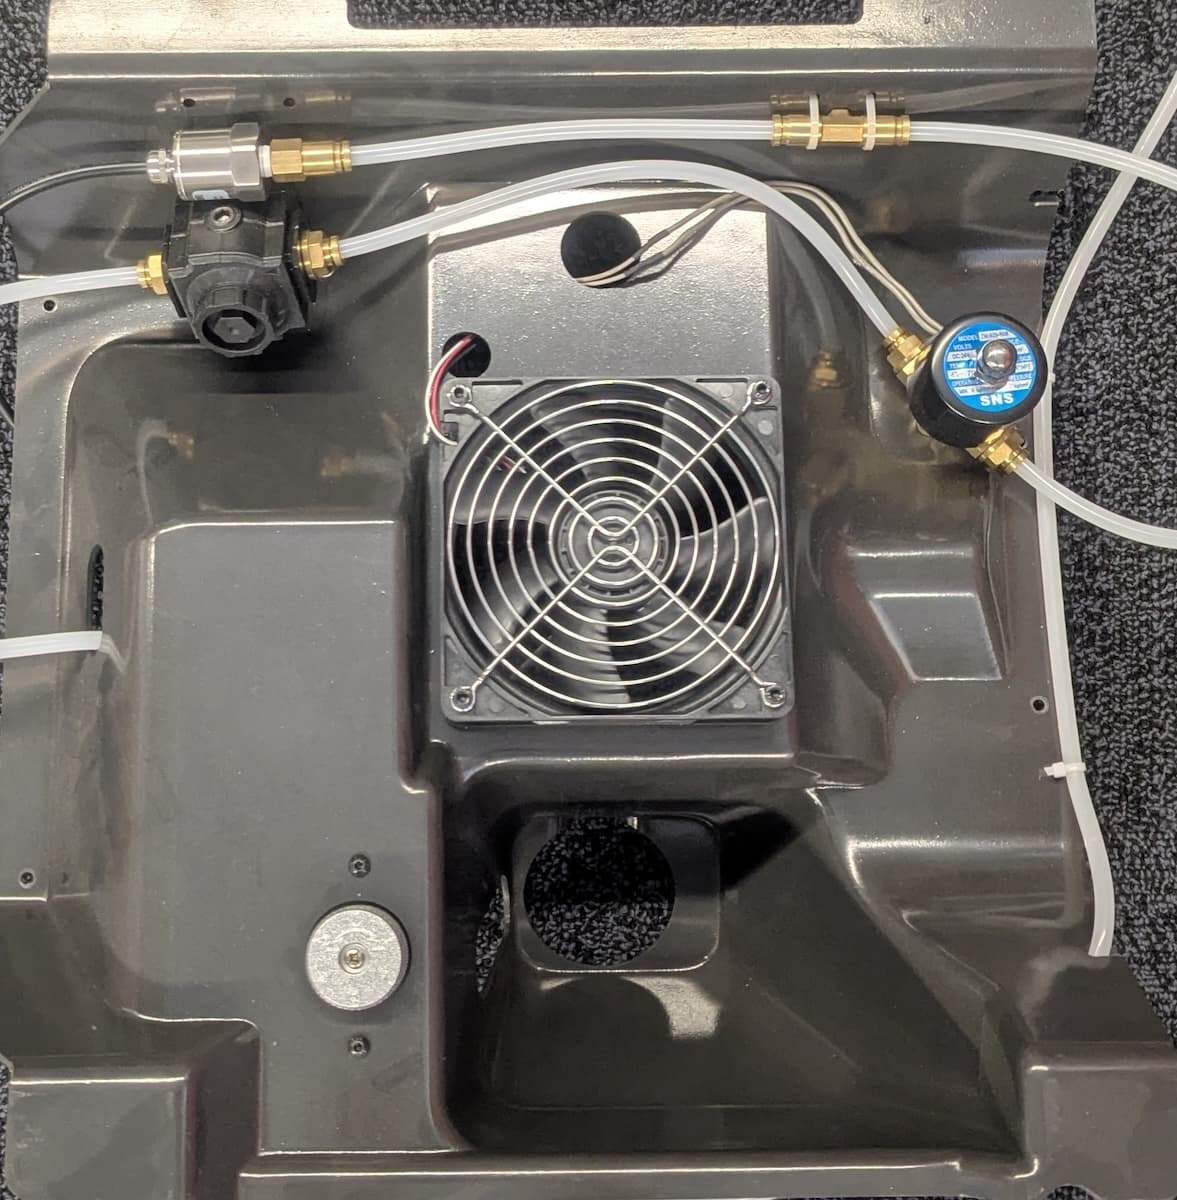
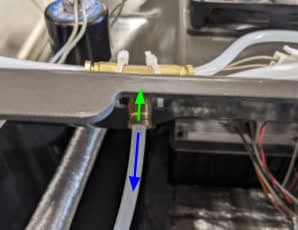
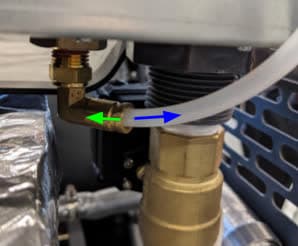
- Reconnect the printer to power and turn it on. When the printers are turned on and idle (not currently running a print) the nitrogen valves will remain open. If the printer is turned off, the valves will close. Do not touch any components within the printer while it is powered on and the top panel is removed.
- Look for bubbling to check for signs of leaks. Tighten any leaky fittings and reseat any leaking tubing.
- Turn the printer off and disconnect it from power.
- Reinstall the top panel.
- Reconnect the printer to power and turn it on.
- Run a test print with nitrogen to ensure the leak has been resolved.
Inspect the nitrogen ball valve and associated lines
If the leak is more significant and cannot be found under the printer’s top panel, inspect the nitrogen ball valve and associated lines.
- Follow the instructions in the guide for replacing the Fuse 1+ 30W nitrogen ball valve to access the nitrogen ball valve at the back of the machine.
- Apply a light coating of soapy water to all tubing joints and connections visible around the nitrogen ball valve.
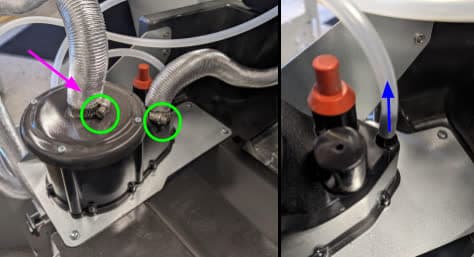
- Reconnect the printer to power and turn it on. When the printers are turned on and idle (not currently running a print) the nitrogen valves will remain open. If the printer is turned off, the valves will close. Do not touch any components within the printer while it is powered on and the panels are removed.
- Look for bubbling to check for signs of leaks. Tighten any leaky fittings and reseat any leaking tubing.
- Turn the printer off and disconnect it from power.
- Reinstall the printer’s panels.
- Reconnect the printer to power and turn it on.
- Run a test print with nitrogen to ensure the leak has been resolved.
If you cannot locate or fix the leak, contact Formlabs Support or your certified service provider.