Notice:
Remove all packaging material before connecting power. Lift the cover to remove the protective shipping material from the resin tank carrier.

Follow this guide to set up your Form 2. Learn about the printer’s components, how to prepare the printer for use, and initial setup steps.
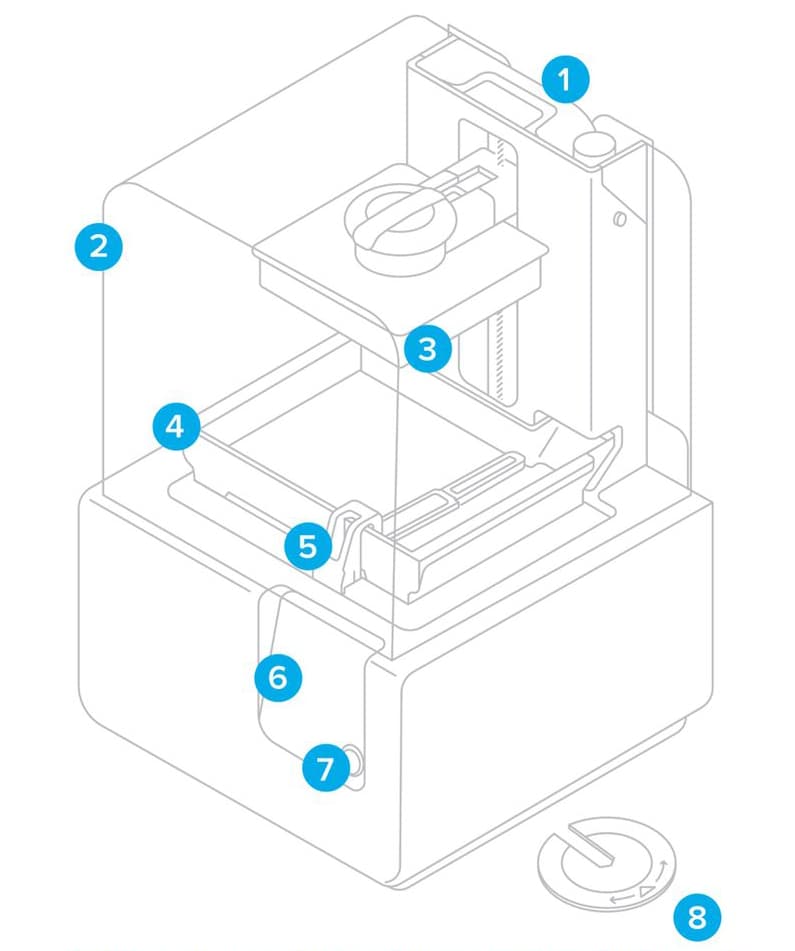
Printer components
Preparing
Step 1: Connect cables
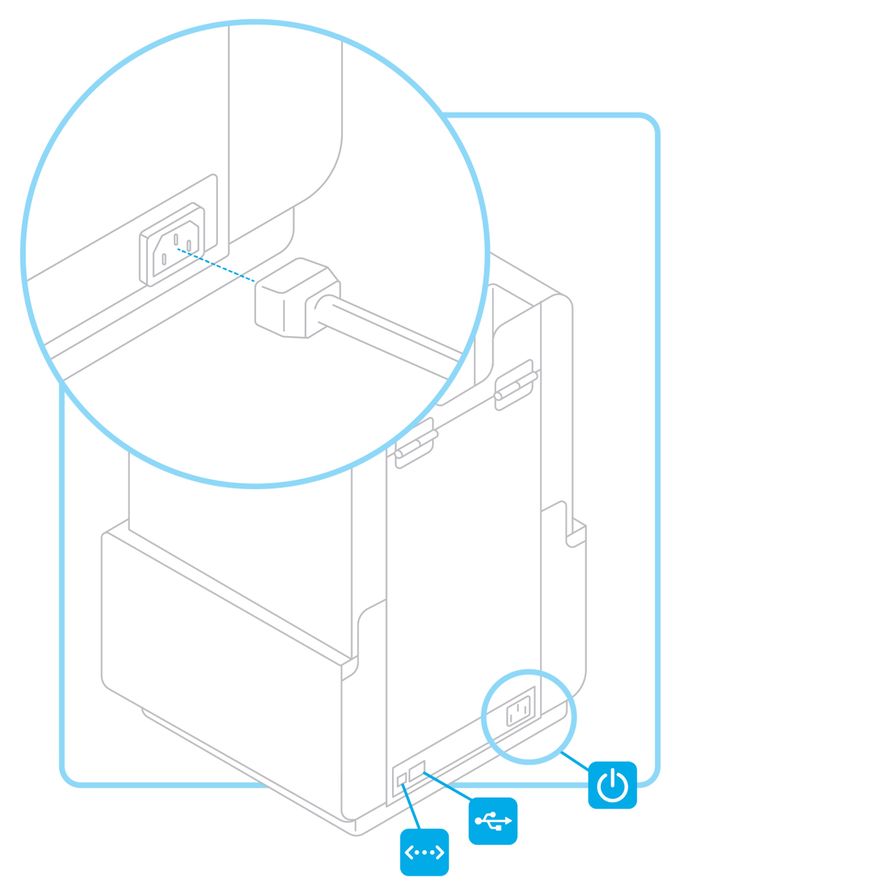
Connect power cable to printer and power supply.
Files can be uploaded via USB, Wi-Fi, or ethernet. For USB, connect the printer to a nearby computer. For ethernet, connect the printer to an ethernet port.
Notice:
Remove all packaging material before connecting power. Lift the cover to remove the protective shipping material from the resin tank carrier.
Step 2: Connect to Wi-Fi (optional)
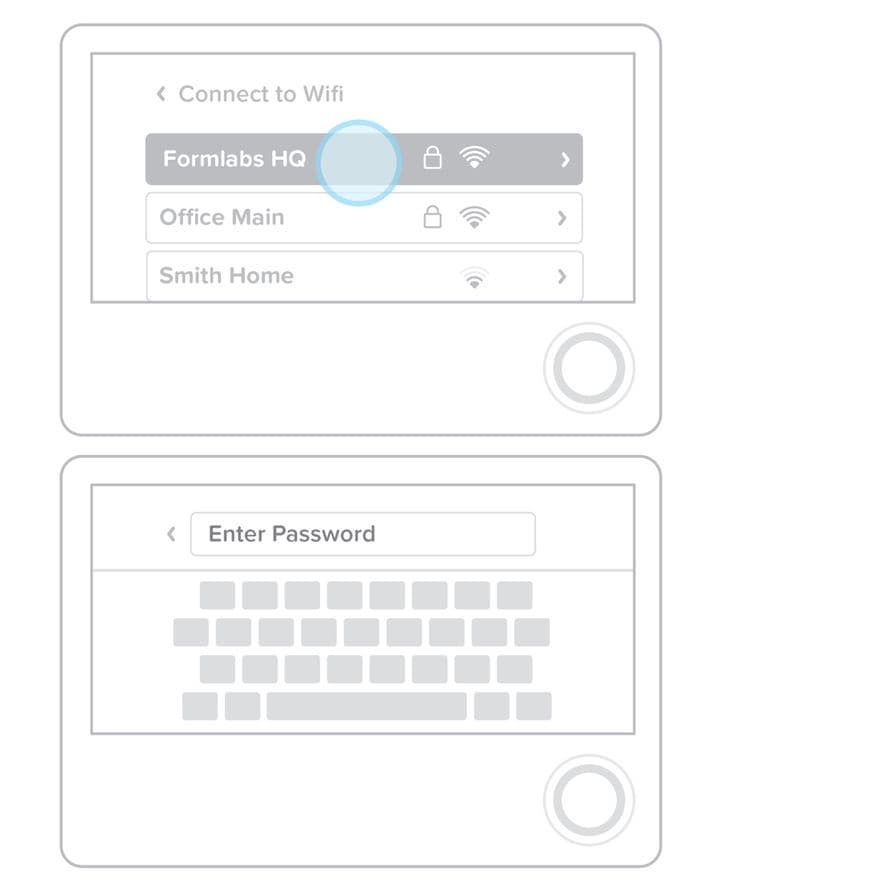
To connect to Wi-Fi, touch Wi-Fi on the settings tab on the touchscreen, then select the name of the network you would like to connect to.
Enter the password for that Wi-Fi network using the onscreen keyboard.
Step 3: Level printer
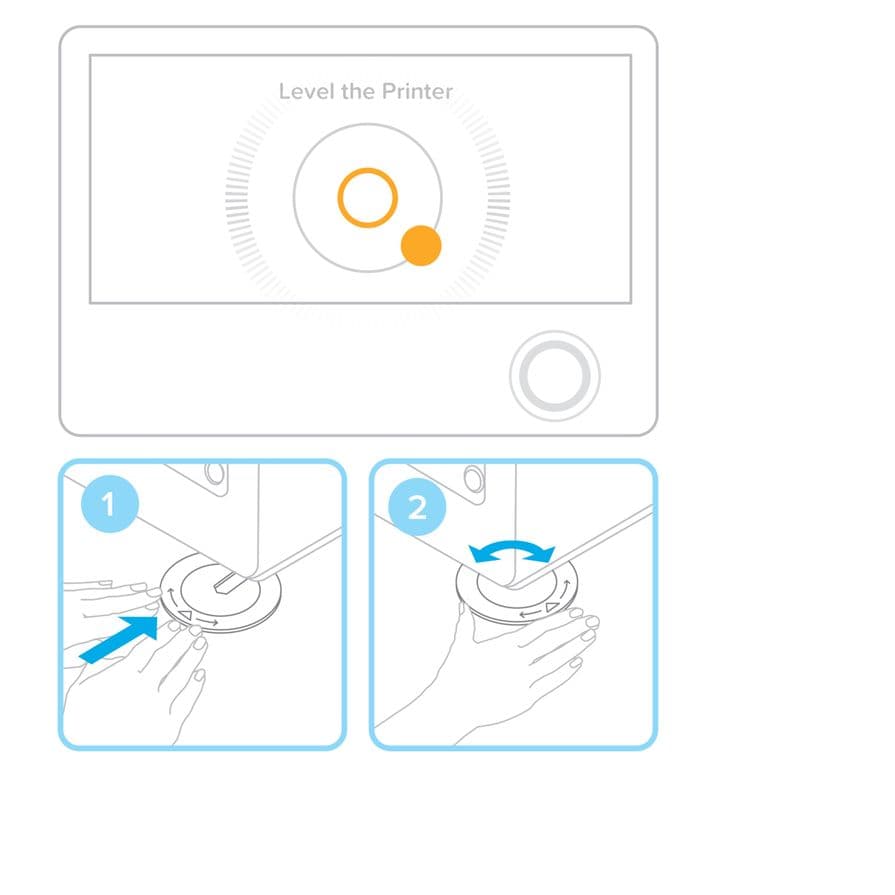
If prompted, rotate the leveling disc to raise or lower each foot of your printer. Adjust each foot until the circle is aligned on the screen.
It is important that the printer sits level so resin does not overflow from the tank during printing.
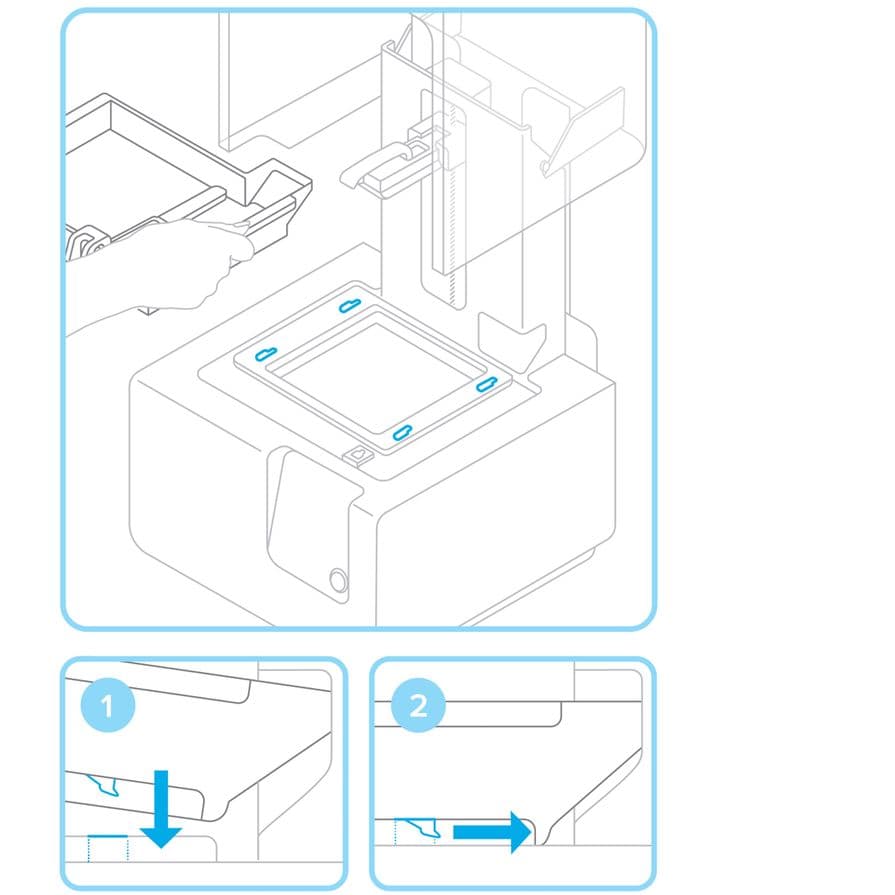
Step 4: Insert resin tank with wiper
Remove the tank lid and align the four small feet of the resin tank with the corresponding holes in the tank carrier. Push forward into place with force.
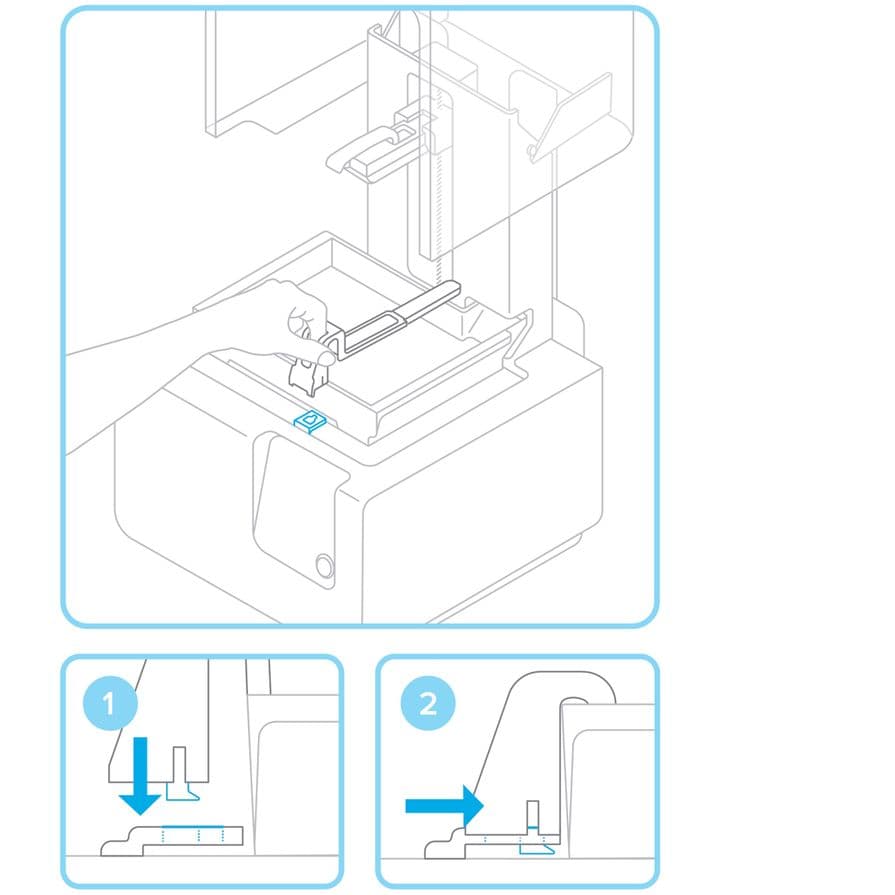
Step 5: Lock wiper
Ensuring the wiper is straight, align the foot of the wiper with the corresponding hole and push forward, snapping it into place.
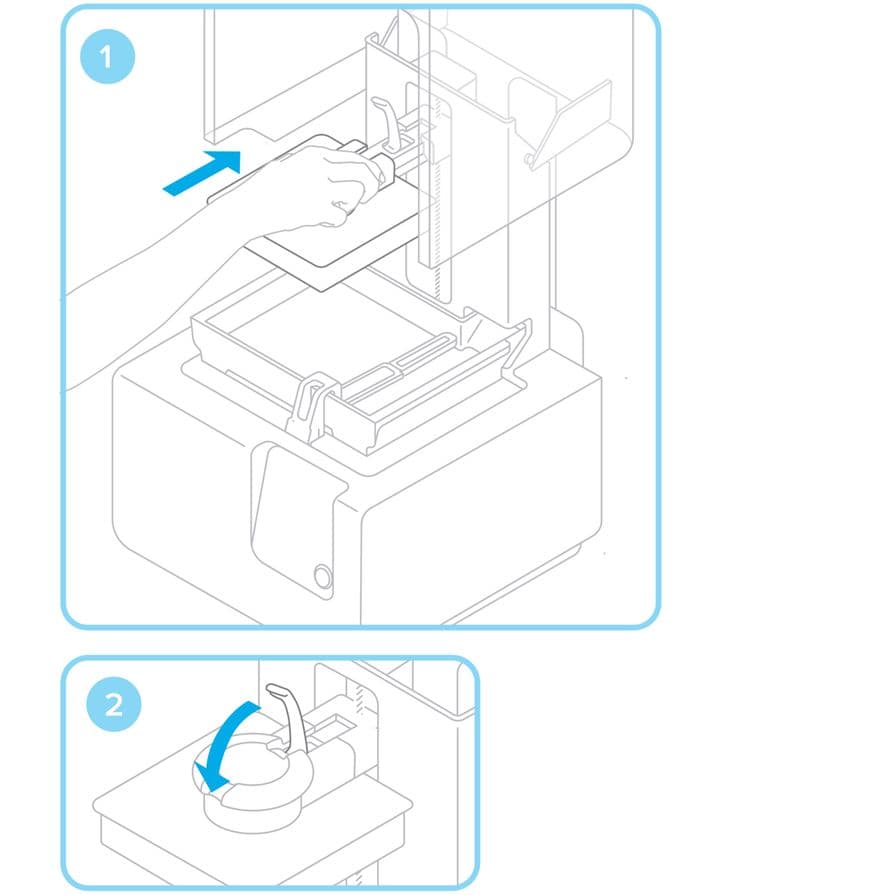
Step 6: Insert build platform
Align the build platform with the platform carrier and push it into place, locking the handle down to secure.
Step 7: Insert resin cartridge
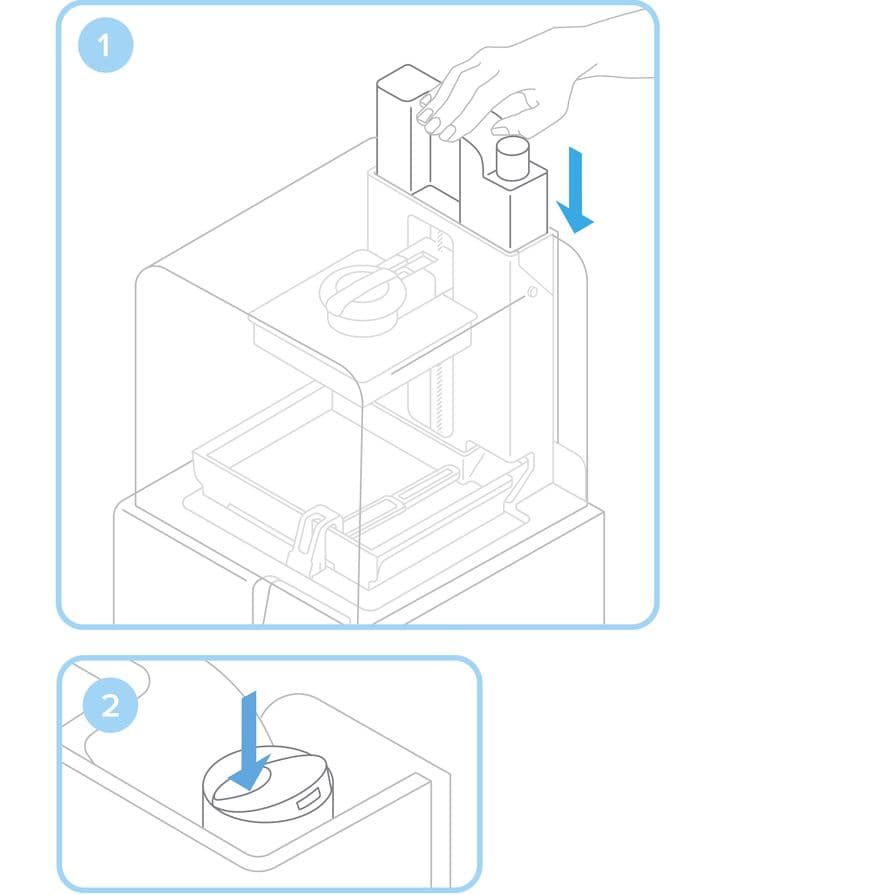
Remove the orange plastic valve cover from the bottom of the cartridge. Leave the rubber valve in place. Align the cartridge with the opening in the back of the printer. Push down until it sits securely. Press open the vent cap so that your resin tank fills correctly.
Printing
Step 1: Install PreForm and register to Dashboard
Download the latest version of PreForm.
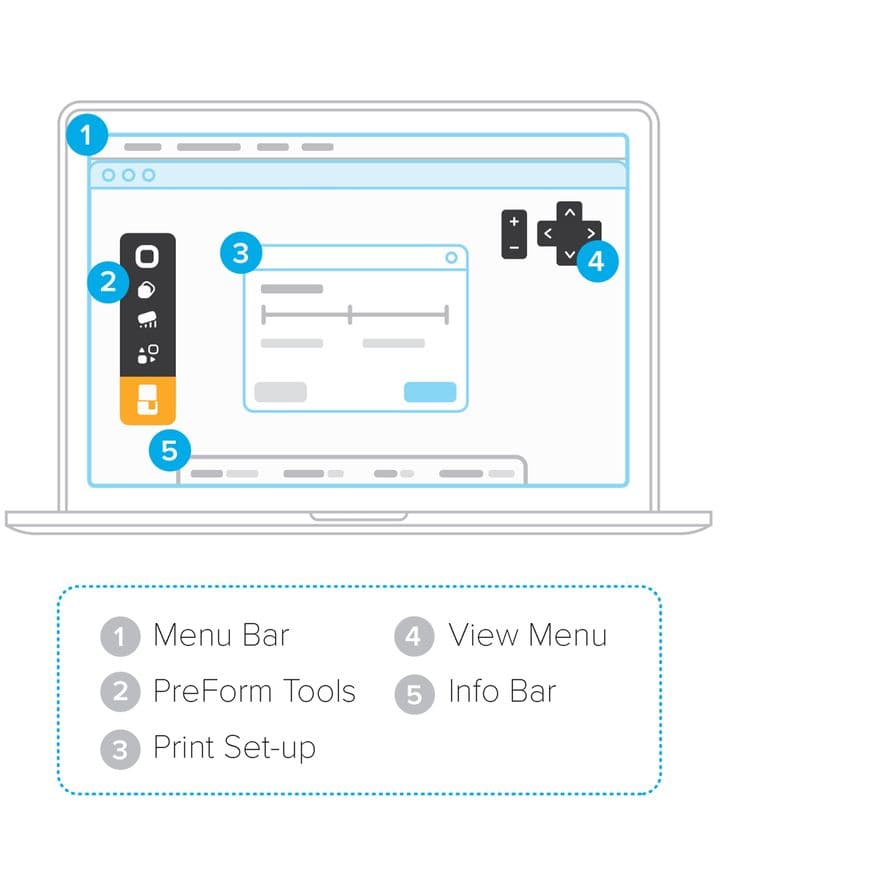
Open PreForm to see the build volume, which is inverted from the print orientation. Click through PreForm tools to explore basic functions for setting up your print.
Register each Form 2 to Dashboard to track prints online, monitor materials, and learn about printing: formlabs.com/dashboard.
Step 2: Prepare file for print
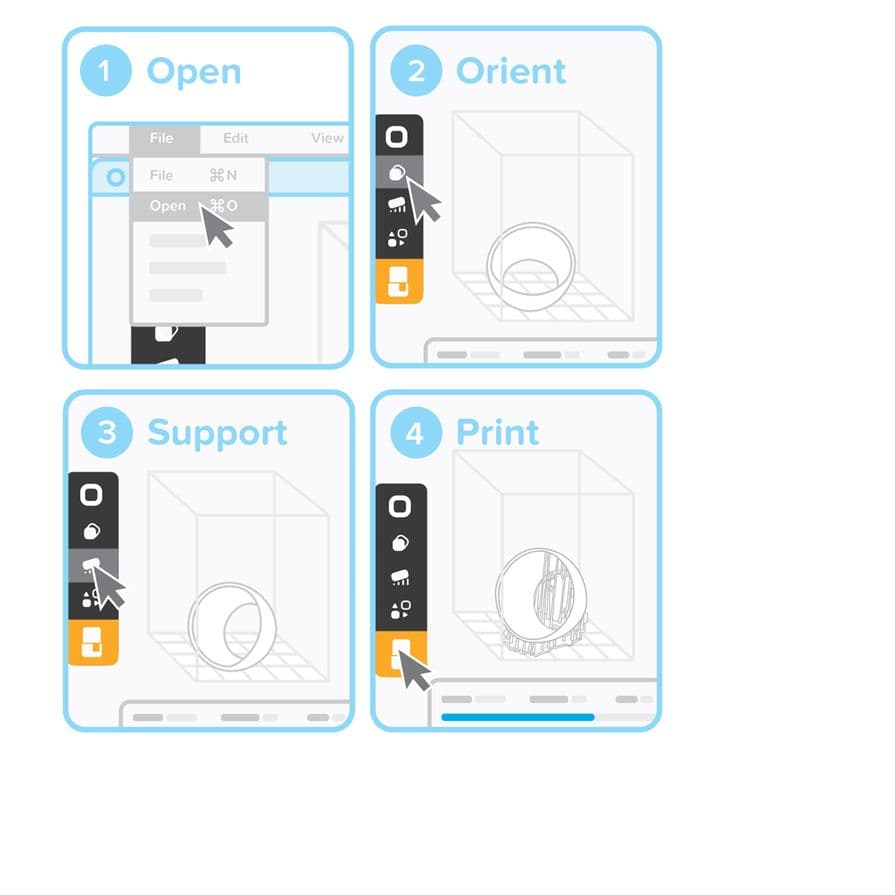
Open your STL/OBJ/3MF files. Most parts print better when supported at an angle. For automatic set-up, use PreForm tools to Orient All, Generate All, and Layout All. PreForm will do these steps in sequence if you select One-Click Print.
Confirm your print's material and layer height, then click the orange print icon. Select which printer to upload the file to from the printer dialogue.
Step 3: Confirm print
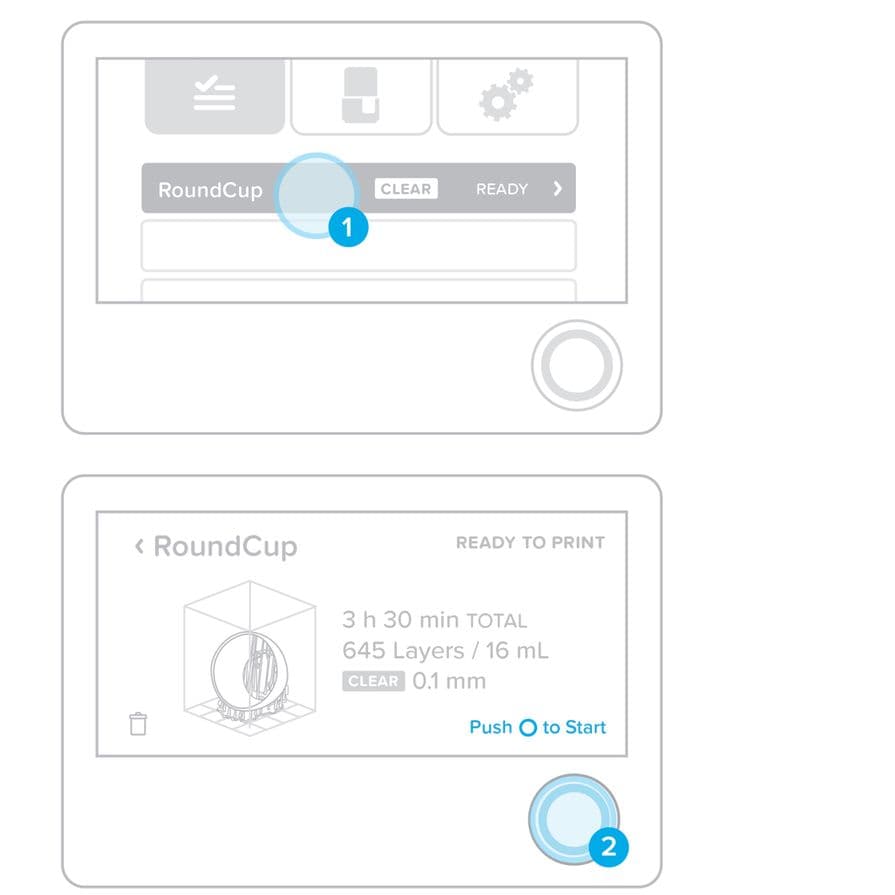
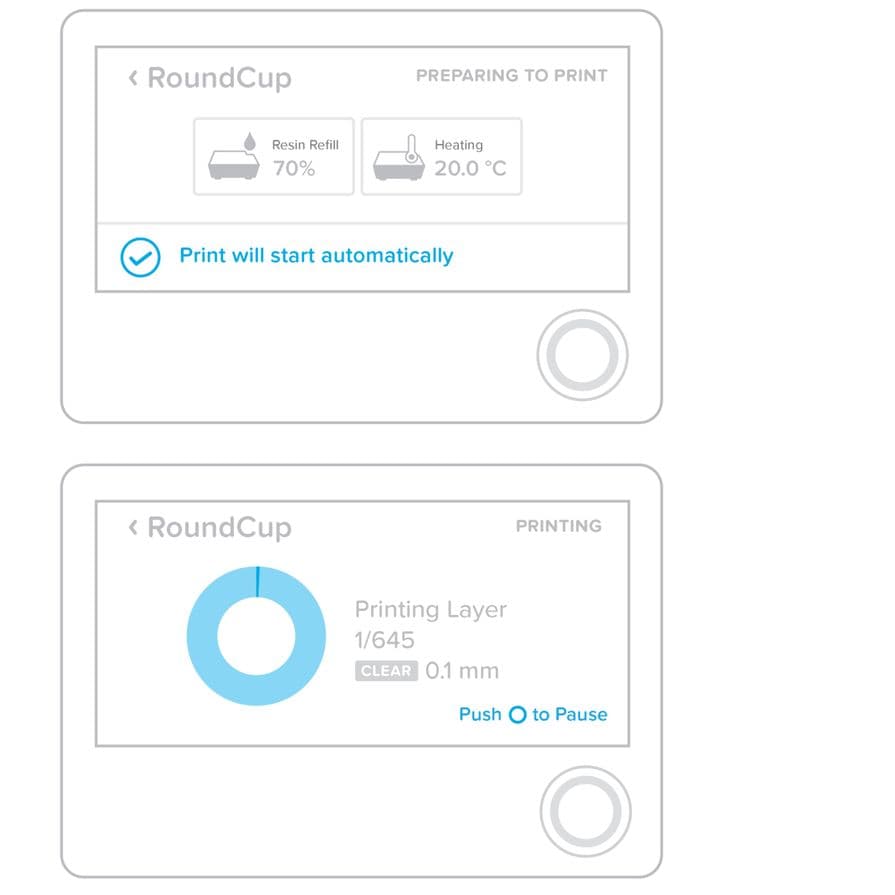
You will see your file uploading to the print queue on your printer's touchscreen. Select the file name and confirm the print by pushing the button on your printer.
Step 4: Pre-print checks
Before printing, the resin tank will fill and heat up to around 35°C. Once the tank is full, your print will automatically start.
Proceed to setting up your finish kit while your model is printing.
Store leftover resin in the resin tank for up to one month between prints.
Finishing
Step 1: Remove build platform
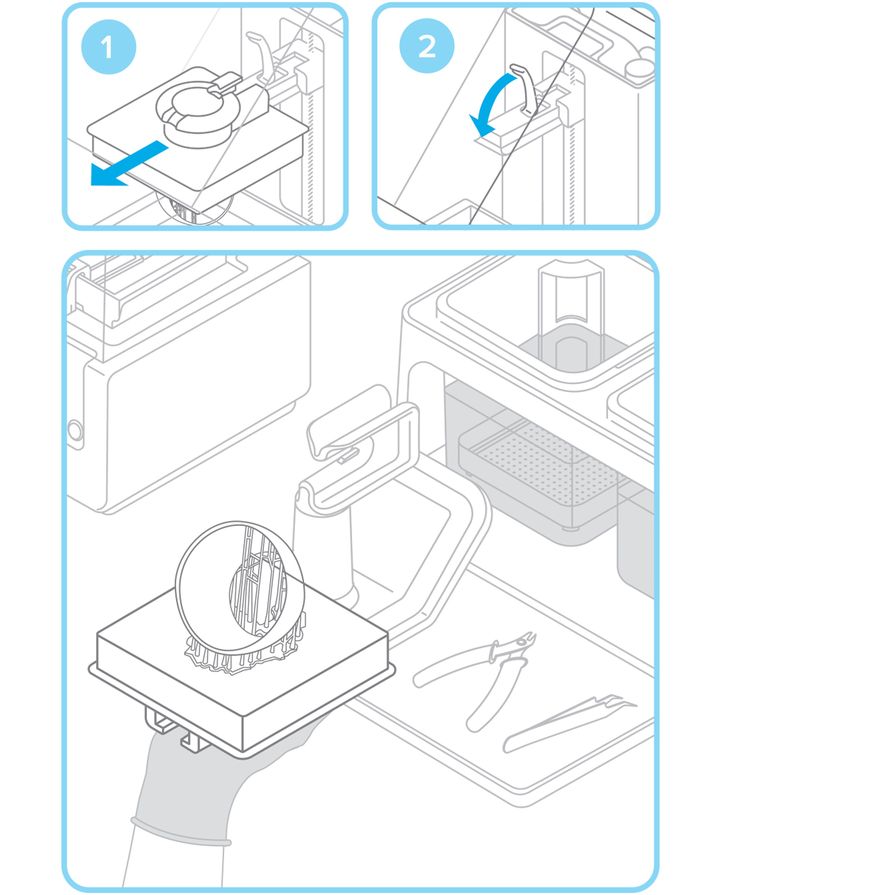
When your print is finished, wear gloves to remove the build platform. Turn the platform over to prevent dripping while transferring to the finish kit. Make sure to close the printer cover.
Warning:
Wear gloves when handling parts and surfaces covered in solvent or uncured resin.
Step 2: Remove your print
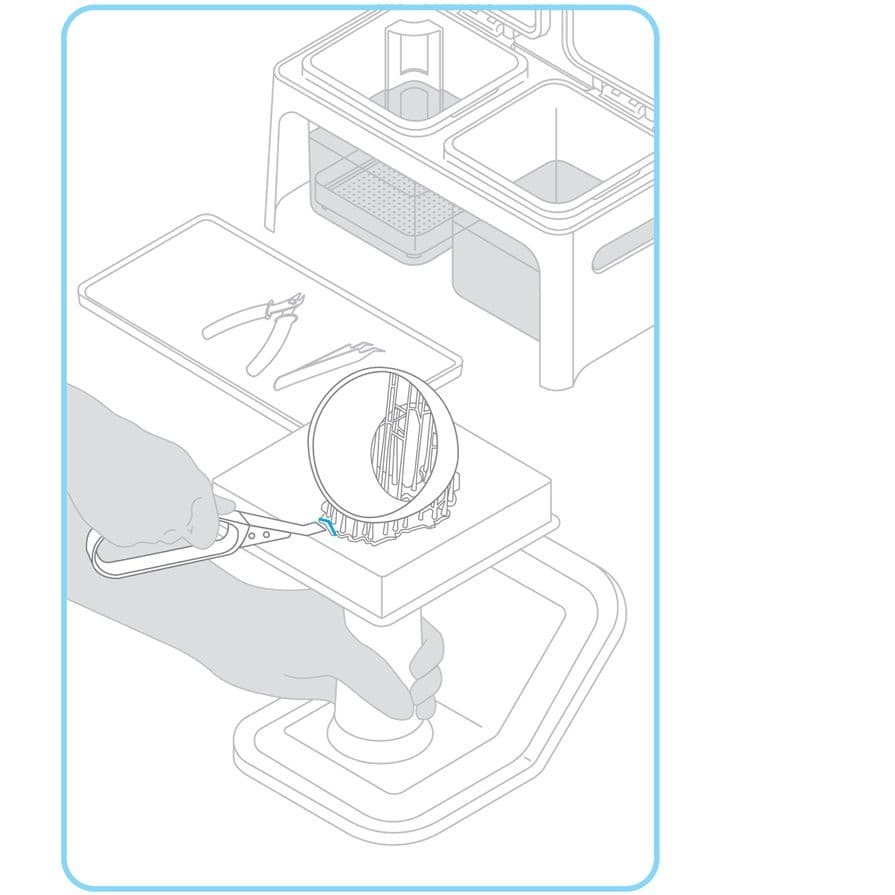
Attach the build platform to the jig and slide the removal tool under the base of your prints to release the part. Use the removal tabs for easy entry points.
Clean the build platform to prepare for the next print. Store the resin and resin tank according to guidelines.
Step 3: Wash your print
To automate the washing process, the Form Wash agitates the solvent bath and removes parts from the bath after a set time.
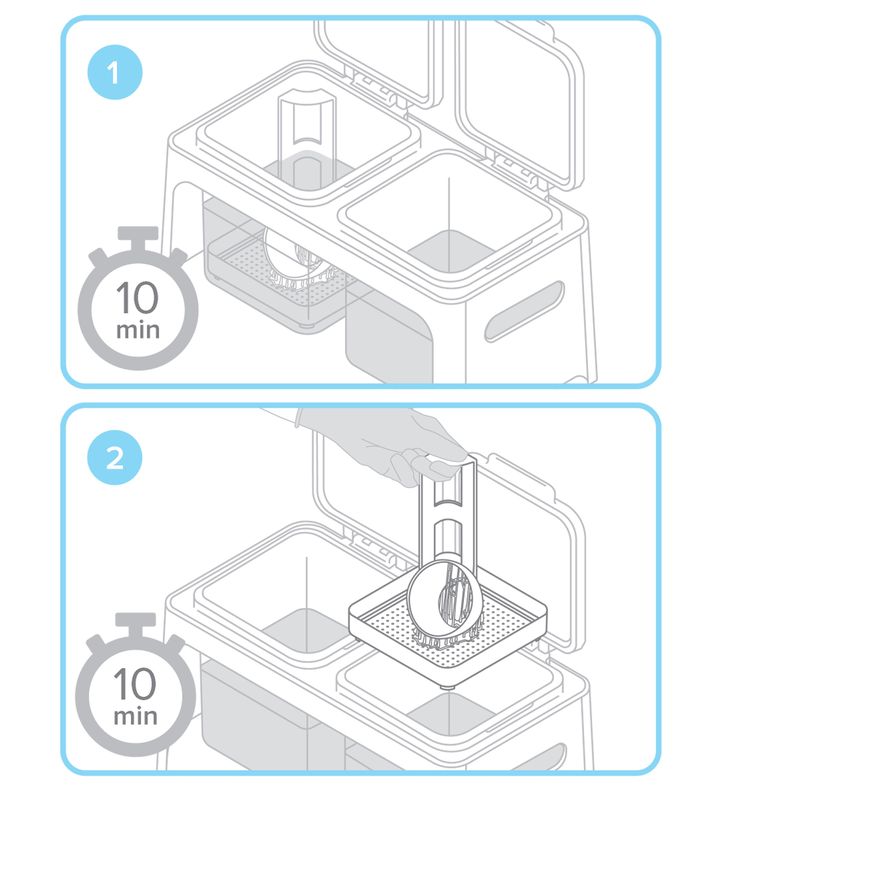
When using the Finish Kit, fill two rinse buckets with isopropyl alcohol (IPA) or tripropylene glycol monomethyl ether (TPM). Keep the lids closed and keep out of the reach of children.
Drop your print in the rinse bucket and leave for ten minutes. Agitate your part and repeat with the second rinse bucket. This two step process will help the solvent last longer.
Danger:
IPA is flammable. Review the SDS.
Step 4: Finish your print
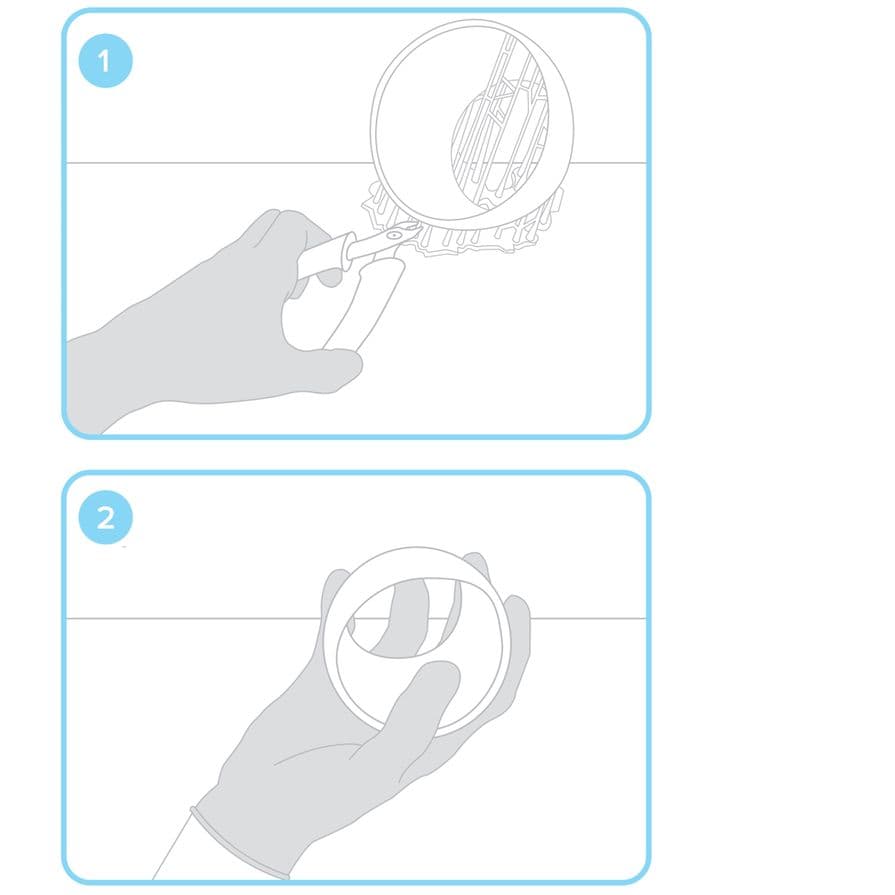
Once dry, use the flush cutters to remove supports from your print. You can sand support marks and polish your parts for a clean finish. Review post-curing requirements and times for each resin type.