

Setting up and using the Finish Kit (Form 4L generation)
Setting up and using the Finish Kit (Form 4L generation)
After printing, use the tools included in the Finish Kit to remove the printed part from the build platform, rinse it, and remove supports.
Finish Kit components
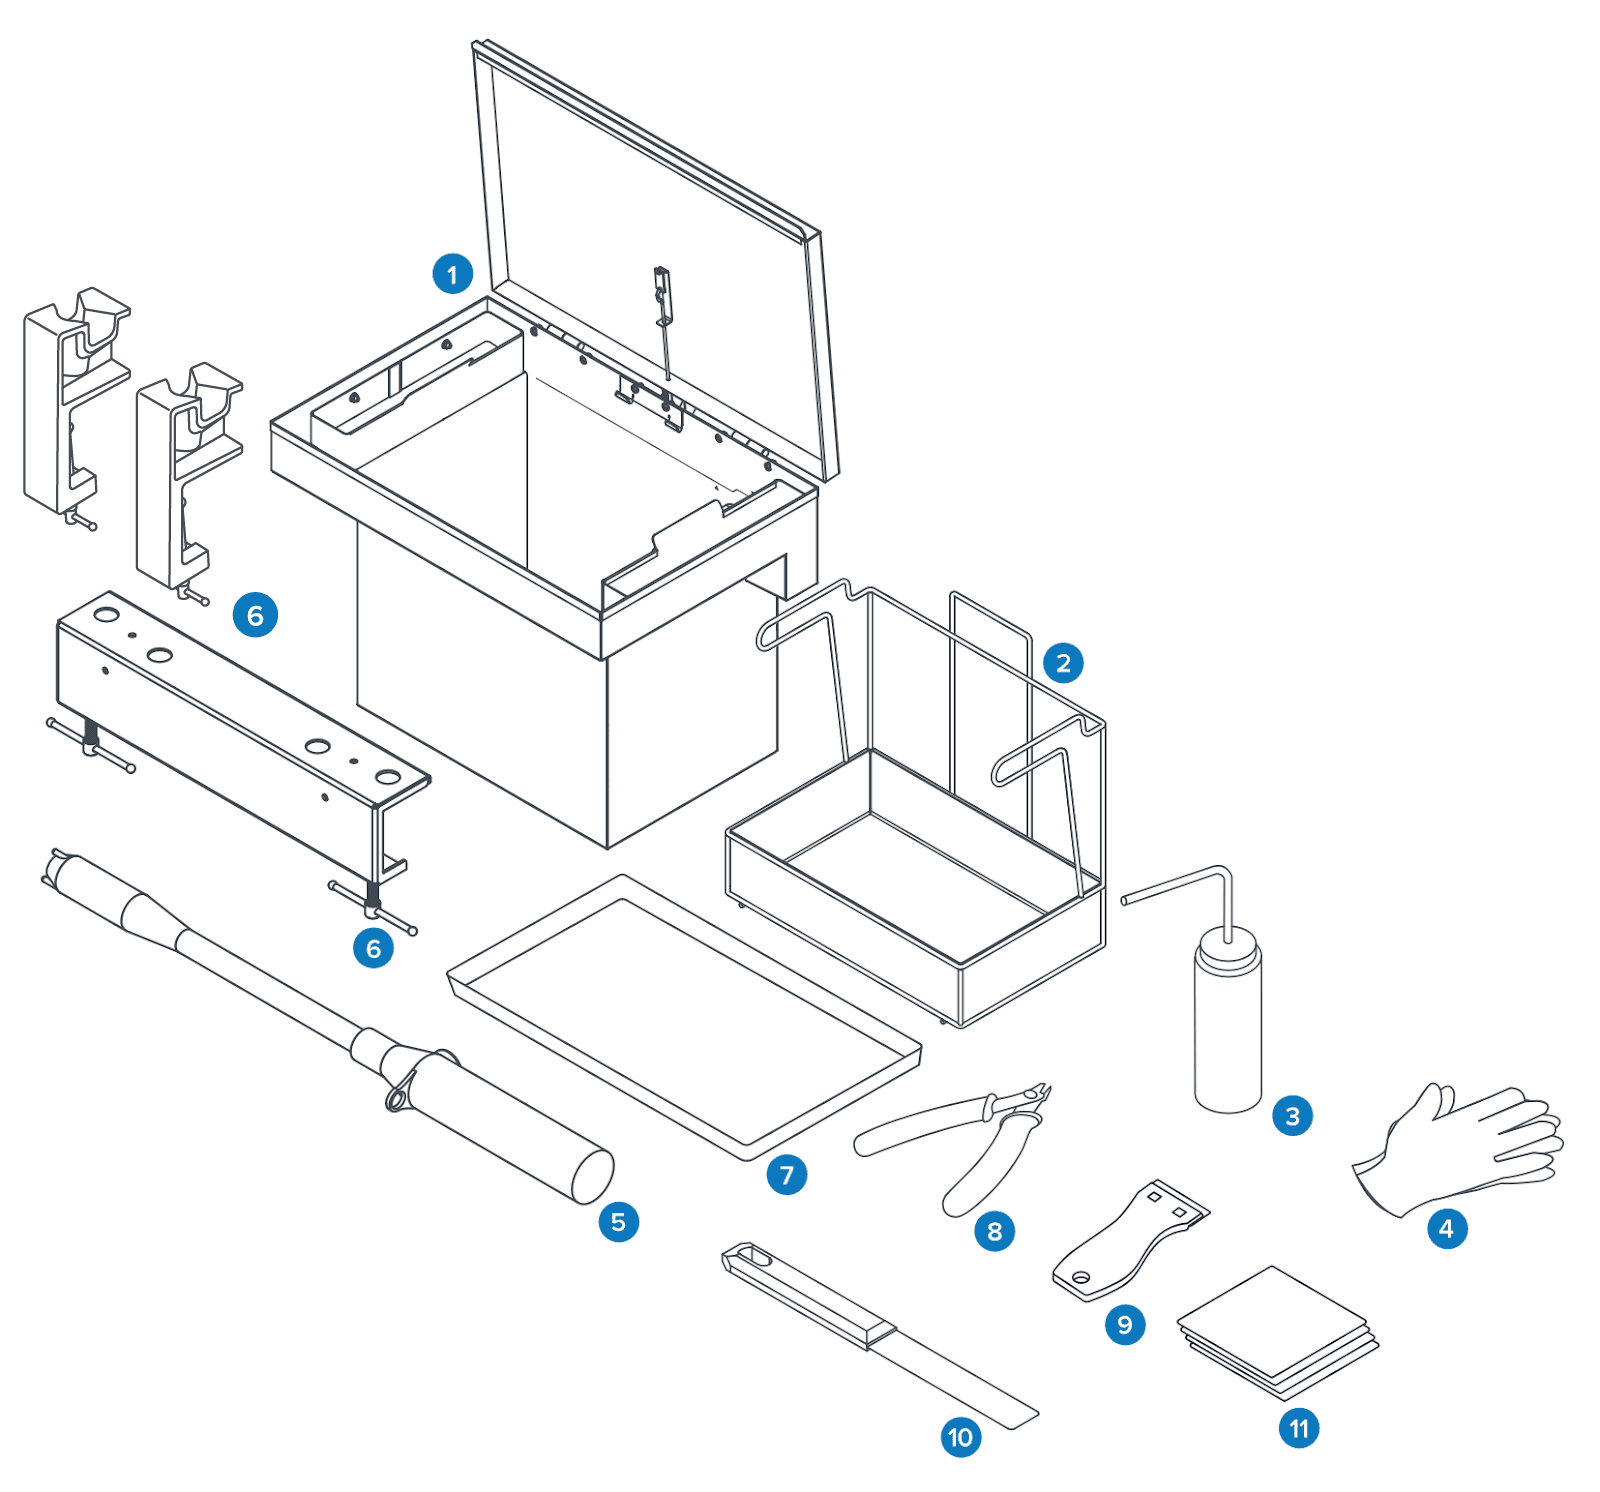
- Rinse bucket: Fill the rinse bucket with solvent to the FILL TO HERE marking before washing prints. The rinse bucket includes a ground wire to prevent static discharge. Formlabs recommends isopropyl alcohol or tripropylene glycol monomethyl ether. The bucket holds up to 37.1 L (9.8 gal) of solvent.
- Rinse basket: Place prints in the rinse basket, place the rinse basket into the rinse bucket, and agitate to clean.
- Rinse bottle: Remove resin trapped in cavities and internal channels of prints. Use clean solvent. Formlabs recommends isopropyl alcohol.
- Disposable nitrile gloves: Wear gloves when handling liquid resin, resin-coated surfaces, or solvent. Wash skin with plenty of soap and water.
- Battery operated solvent pump: Fill and empty the rinse bucket.
- Build platform jig: Stabilize the build platform for the secure removal of prints. Depending on the date of manufacture of your Finish Kit, this may be a one-piece or two-piece jig. See Using the jig for more information.
- Drying tray: Place washed prints on the drying tray to drip dry.
- Flush cutters: Snip to separate prints from their supports. Cut with the flat side on the prints’ surface for minimal support marks.
- Plastic tank scraper: Use to inspect and clean the Form 4L resin tank.
- Metal scraper: Use to remove parts from the build platform. Do not use this tool to inspect the Form 4L resin tank.
- Cleaning cloths: Disposable lint-free, non-woven microfiber cloths for cleaning the printer’s optical components.
Setting up the rinse bucket
Install the fusible link
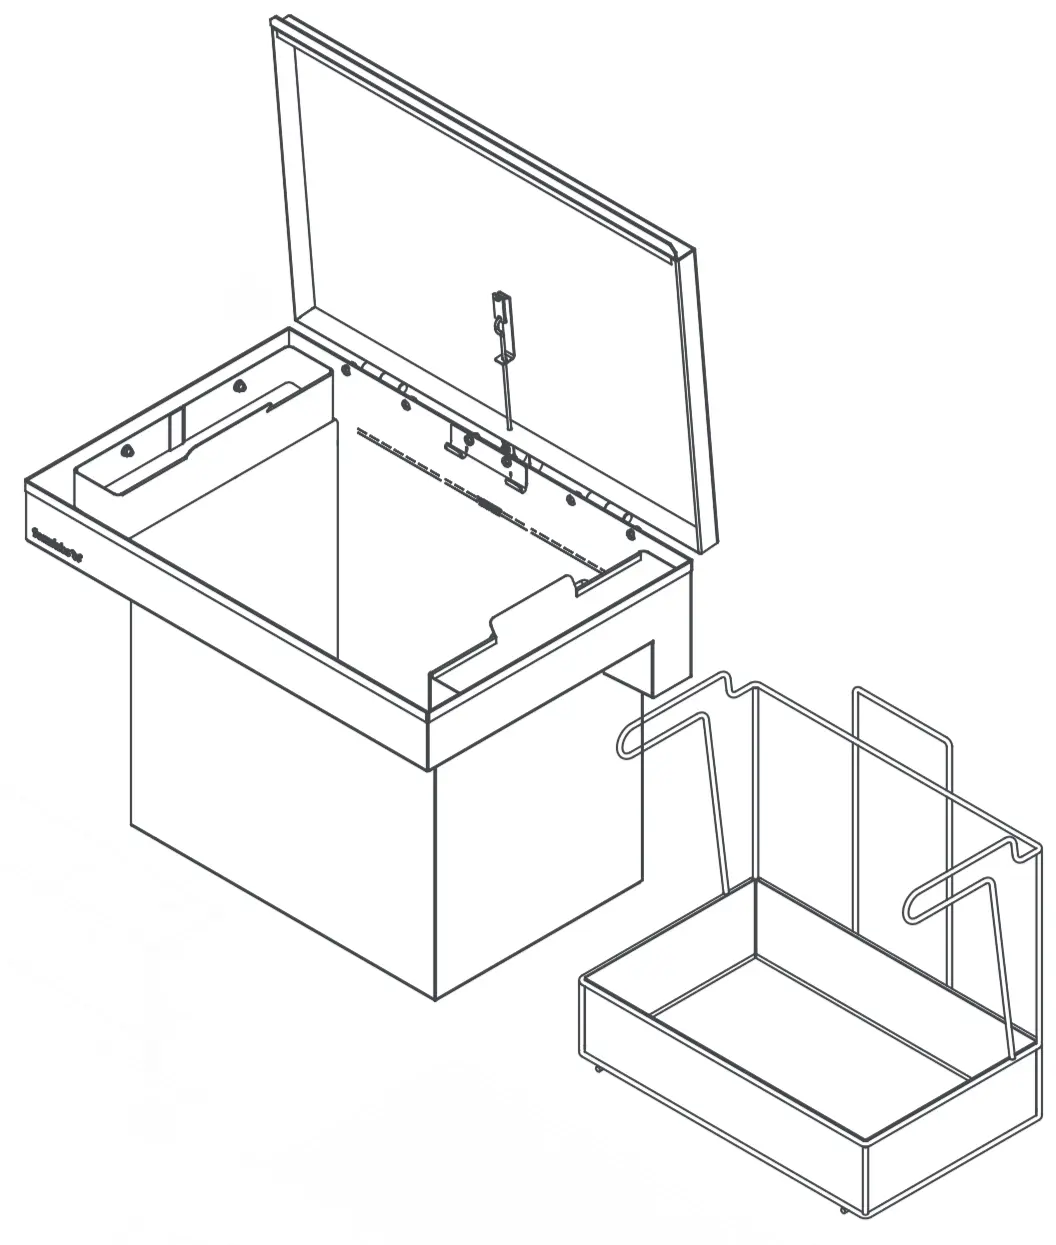
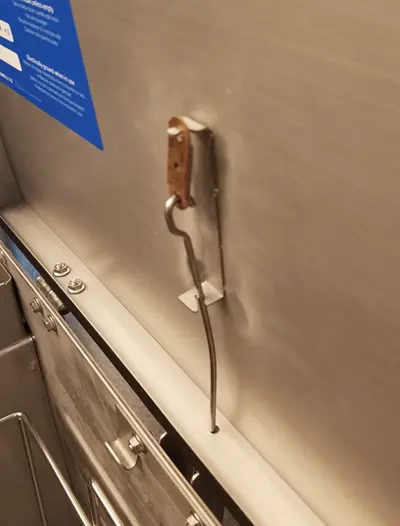
Inside the lid of the rinse bucket is a hook and fusible link. Install the fusible link as pictured below. This ensures that if there is a solvent fire inside the rinse bucket, the link will burn and cause the lid to close, suffocating the fire and putting it out.
If the fusible link needs to be replaced, either after being used or due to other damage, it can be purchased from McMaster-Carr.
Connect the ground wire
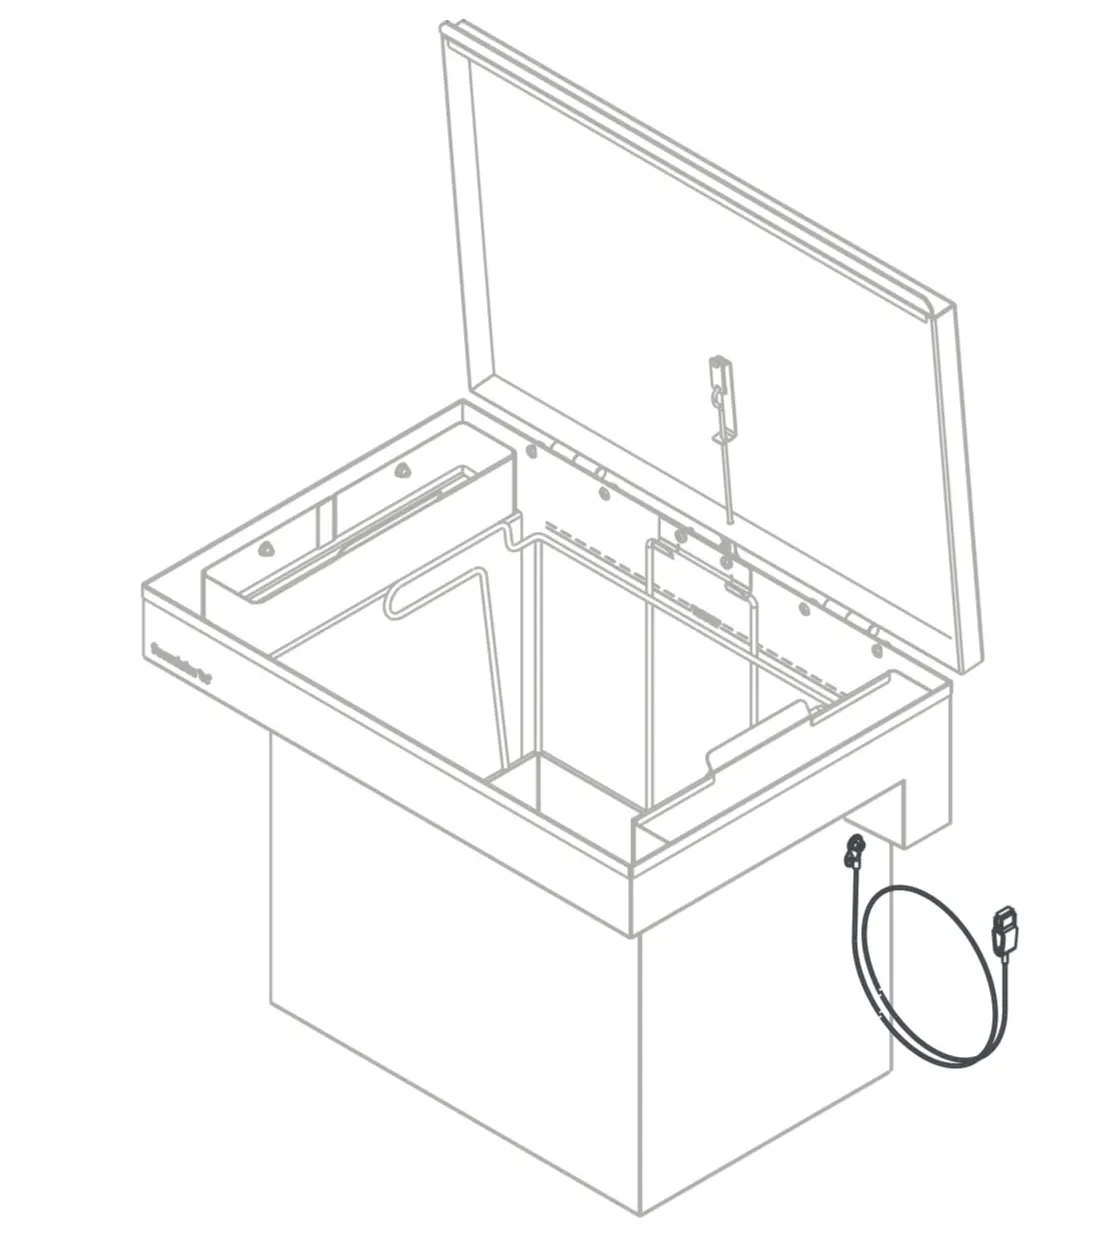
Connect the rinse bucket ground wire to a grounded piece of metal. If your solvent is stored in a metal container, electrically connect it to the grounded rinse bucket.
Fill with solvent
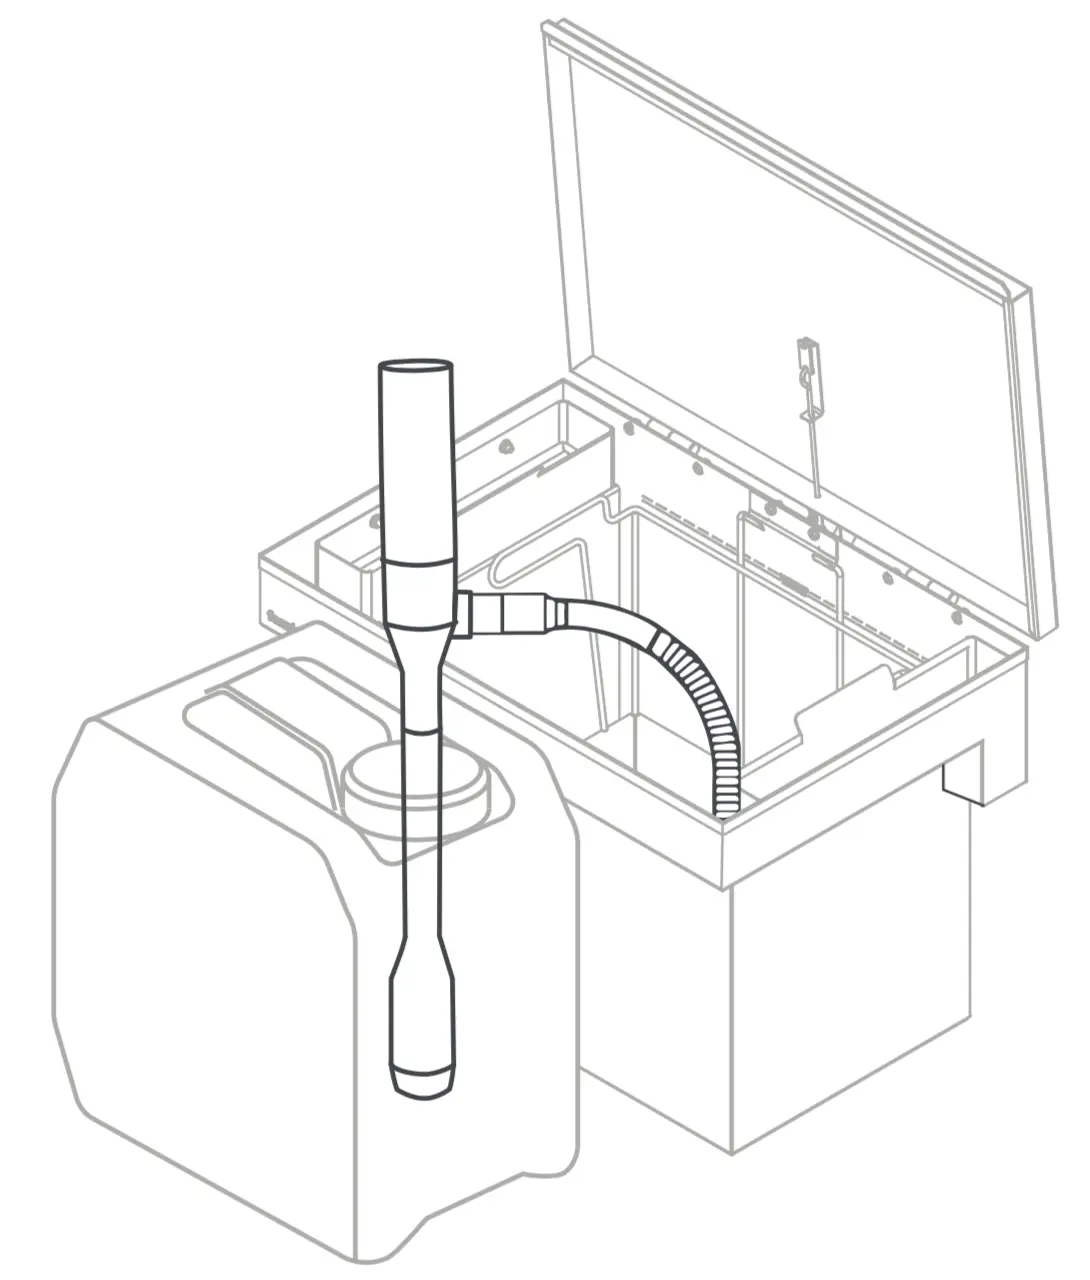
To fill the rinse bucket with solvent:
- Place the pump intake into the solvent container.
- Securely place the flexible pump hose into the rinse bucket.
- Press and hold the pump switch to pump solvent into the rinse bucket.
Using the jig
Installing the build platform jig
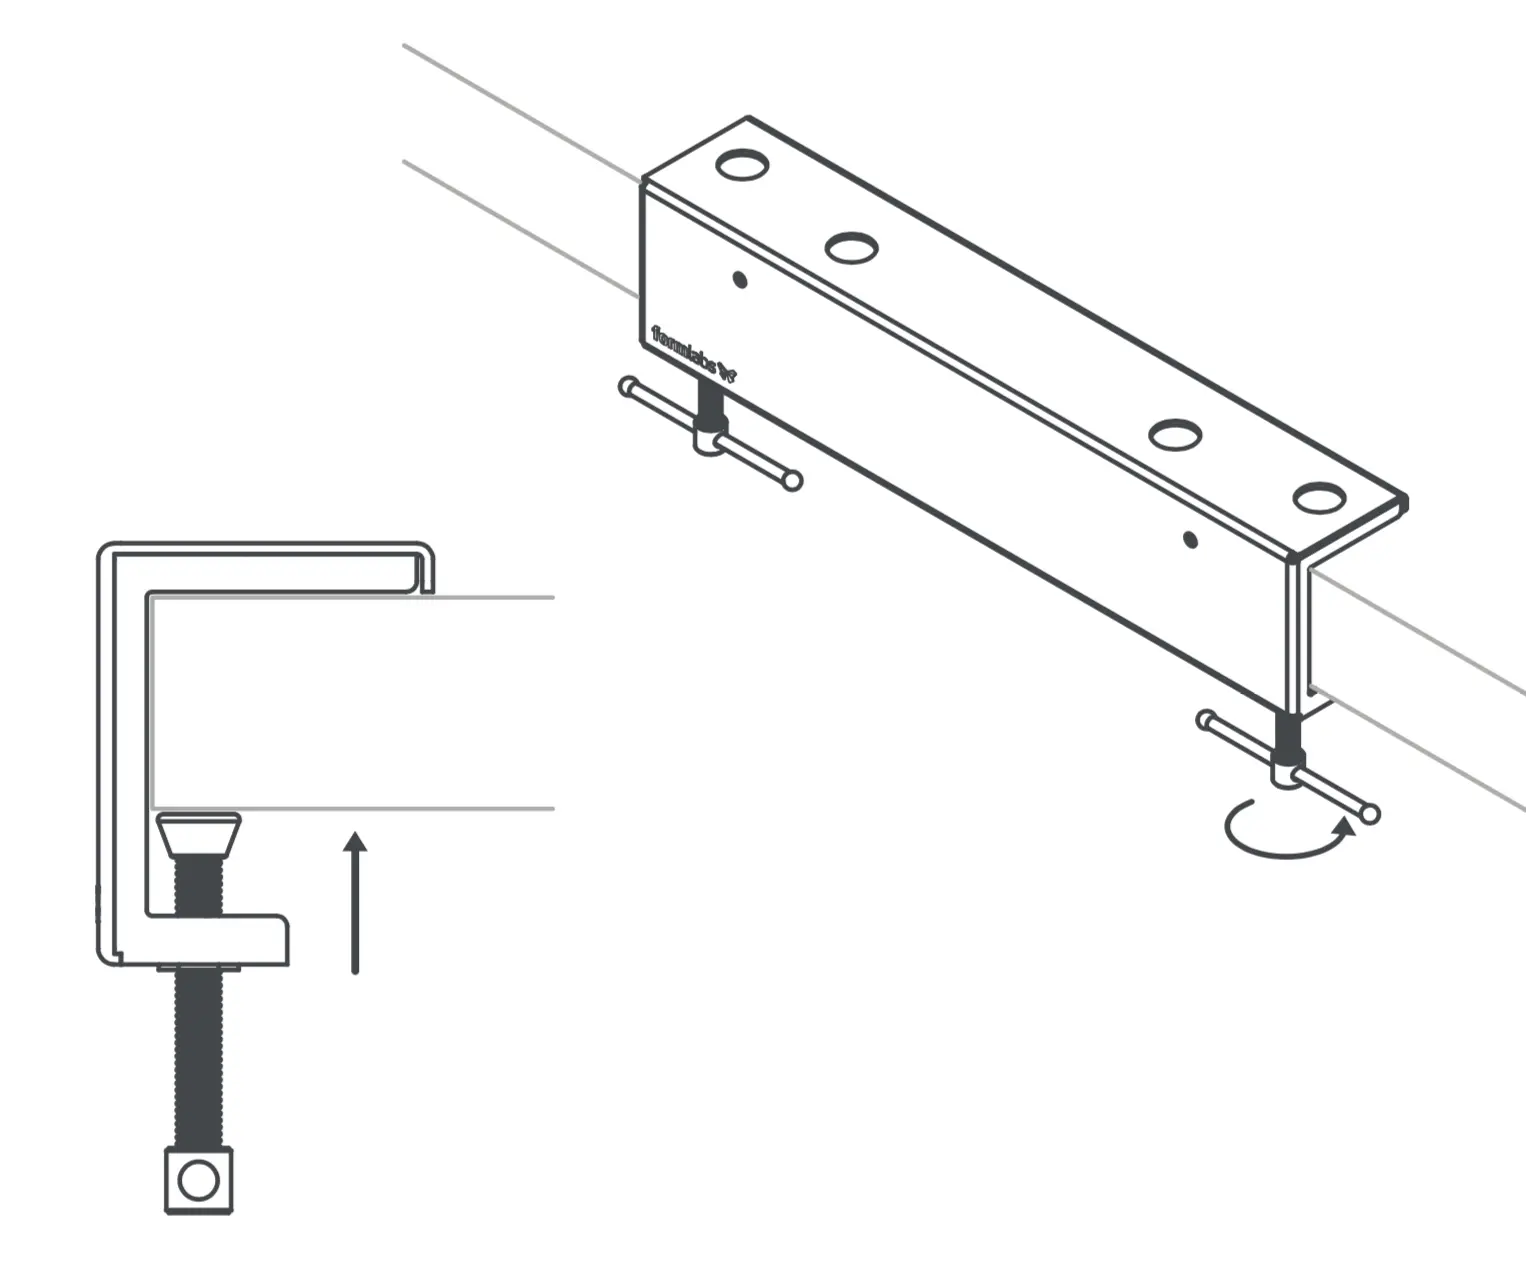
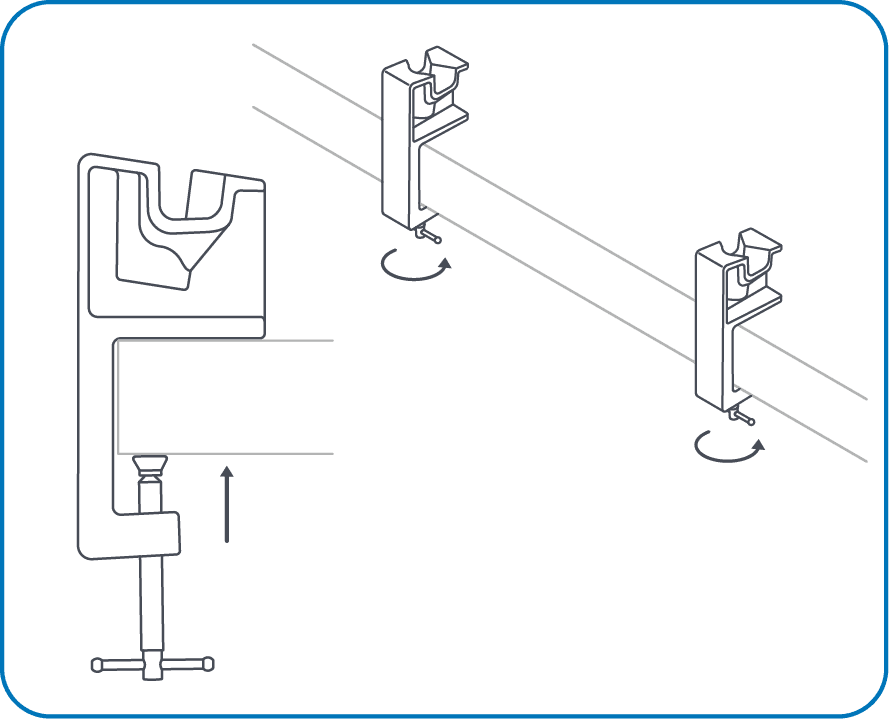
Secure the build platform jig to the edge of your work surface by tightening the jig screw clamps underneath the work surface. Ensure that there is enough space in front of the jig for the build platform.
- V1 jig: The build platform jig can also be secured to the work surface using the two screw holes on the front of the jig.
Attaching the build platform to the jig
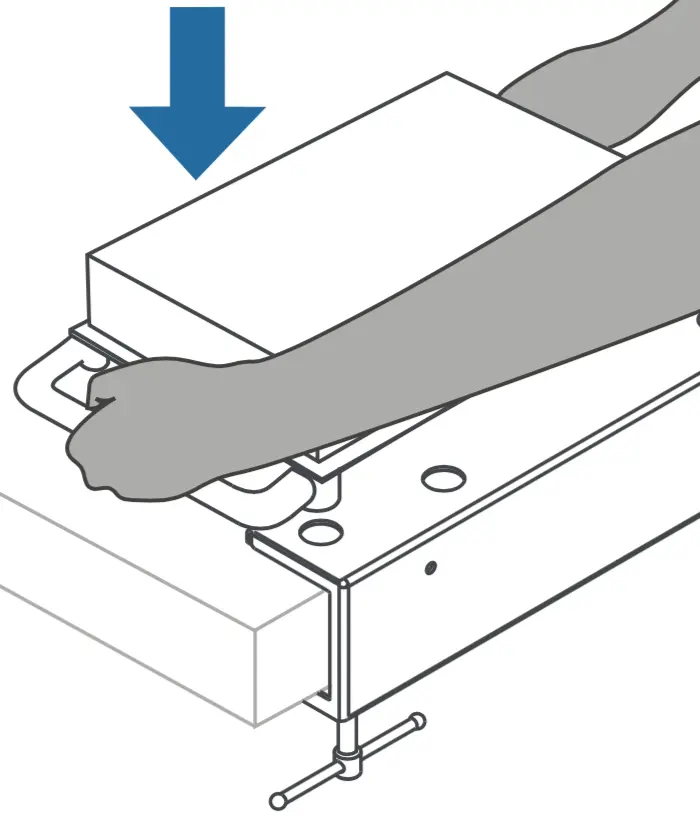
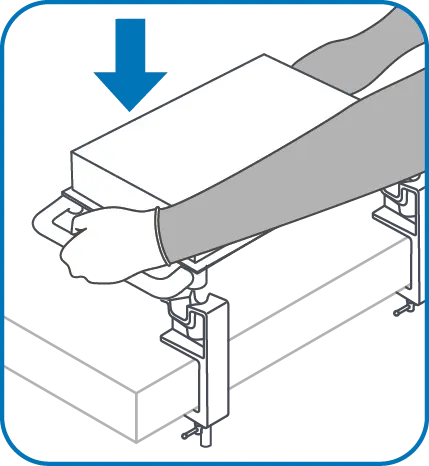
With your print facing upwards, place two of the build platform’s feet into the corresponding holes in the top of the jig.
Orientations of the build platform
The build platform can be seated with its long side either parallel or perpendicular to the jig. Depending on the size and placement of your printed parts, you may need to rotate the build platform to remove them more easily.
Next steps
If you haven’t already, partially fill the rinse bucket with solvent. Wash your printed parts to remove any remaining liquid solvent.
Once your printed parts are fully dry, you can post-cure them. Some Formlabs resins require post-curing to reach their optimal mechanical properties or as part of a workflow to produce a biocompatible part.
After post-curing, continue to post-process your parts. Remove support marks, polish your parts, or paint them depending on their end use.