

Formlabs Logo

Inspecting and cleaning resin tanks (Form Studio 1)

Inspecting and cleaning resin tanks (Form Studio 1)

Maintain and clean each resin tank using Formlabs instructions to maximize tank performance and to ensure consistent, high-quality prints over a tank’s lifetime. Only use approved materials and processes to clean the resin tank and film.

Warning:

Resin may cause skin irritation or an allergic skin reaction. Wear gloves when handling liquid resin or resin-coated surfaces. Wash skin with plenty of soap and water. Do not wash skin with products containing alcohol, like hand sanitizer, or any other solvents.
Tip:

Inspect the resin tank for damage and wear between prints and before storing the resin tank.

Cleaning after a failed print

A failed print may leave small, partially-cured pieces of resin floating in the tank or hard cured resin stuck to the film in the base of the tank. Remove debris from the tank film by hand or by printing a cleaning sheet. The cleaning sheet prints as a thin layer across the resin tank, binding cured and partially cured resin into a single piece. The cleaning sheet can then be removed from the tank along with the failed print.

Printing a cleaning sheet

The cleaning sheet is a thin part that prints directly on the resin tank film and is perfect for removing several print failures from a resin tank at the same time. It should take approximately 2–15 seconds to complete, depending on the material. 

For best results, Formlabs recommends using the included cleaning sheet removal tool when printing a cleaning sheet.

To begin printing the cleaning sheet:

  1. Check that no job is currently active and your printer is in the Idle status. 
  2. Open the printer cover.
  3. Insert the tank that experienced the print failure into the printer.
  4. Press down on the sides of the resin tank with your thumbs and close the latches to secure the tank.
  5. Place the flat base of the cleaning sheet removal tool in a corner of the resin tank.
  6. Close the printer cover.
  7. Remove the build platform and resin cartridge, if present.
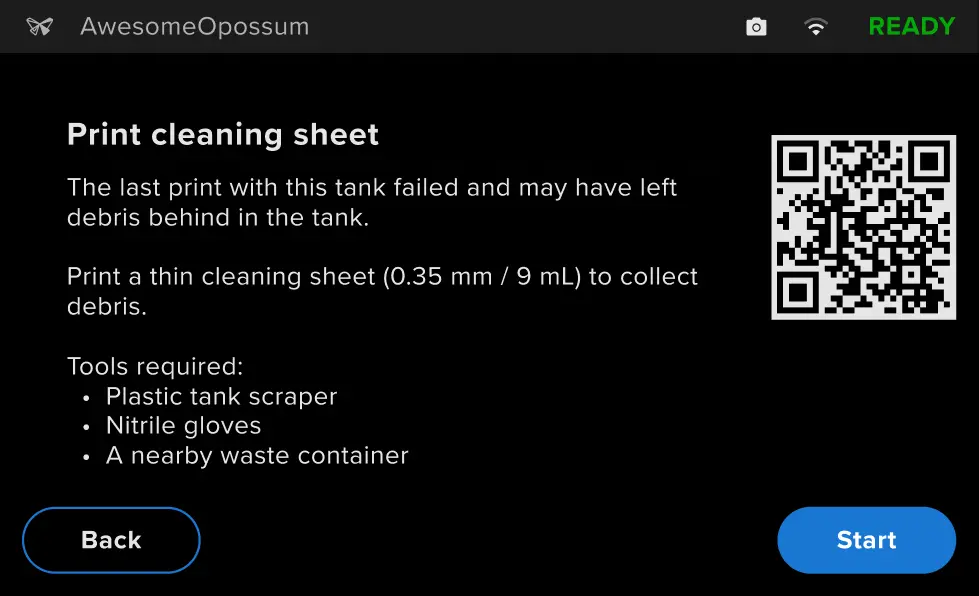
  8. Tap Maintenance > Print cleaning sheet. The Print cleaning sheet screen appears. 
  9. Tap Start. The cleaning sheet begins printing.
Printing a cleaning sheet on the Form Studio 1

Removing a completed cleaning sheet

The cleaning sheet causes other bits of cured resin to adhere and become caught in a single part. After the cleaning sheet has finished printing, it’s time to remove all cured resin from the resin tank. 

To remove the cleaning sheet from the tank:

  1. Ensure that the print has completed.
  2. Open the printer cover. Do remove the resin tank.
  3. Grip the cleaning sheet removal tool handle and carefully pull it upwards to peel the cleaning sheet away from the resin tank. Do not pull or tug on the tool suddenly. If necessary, pull at different angles to separate the cleaning sheet from the resin tank film.
  4. Lift the cleaning sheet out of the resin tank and a) rest it on paper towels or b) hang it in the build platform using the cleaning sheet removal tool to drain the excess resin back to the resin tank before putting it on paper towels.
  5. Separate the cleaning sheet removal tool from the cleaning sheet.
  6. The cleaning sheet is cured resin and can be deposited in any trash receptacle. If there is uncured resin on your cleaning sheet, roll it up with gloved hands and squeeze out the resin before disposing of it. Alternatively, place the cleaning sheet on a sunny windowsill for 24–48 hours until all resin has completely cured.

Tip:

To conserve resin, you can drain the uncured resin coating the cleaning sheet through a filter back into the tank.

Removing cured resin manually

Use the plastic scraper that comes with the accessories box or a similar tool to remove individual pieces of cured resin from the resin tank. Apply minimal force to remove the cured resin. Avoid using the corners of the tool to dig under the print.

Notice:

Do not use a metal tool to inspect the Form Studio 1 resin tank or remove cured resin from the tank. Metal tools may damage the tank film, leading to failed prints or a resin spill.

  1. Put on a new, clean pair of nitrile gloves.
  2. Remove the build platform and resin cartridge from the printer.
  3. Remove the resin tank from the printer. Place the resin tank on a clean, flat surface.
  4. Prepare several paper towels nearby to collect cured and uncured resin.
  5. Rest the edge of the plastic mixer on the interior of the resin tank. Skim the surface. Search for obstructions that indicate cured resin stuck to the resin tank.
  6. To remove cured resin:
    1. Slide the edge of the plastic mixer under the edge of the cured resin.
    2. Pry with moderate pressure. Slide or pry from different angles or increase pressure to detach the cleaning sheet from the resin tank. Do not press directly into the resin tank with the edge of the tank scraper.
    3. Lift the cured resin out of the resin tank. 
    4. Rest the cured resin on paper towels.
  7. Dispose of the cured resin.
  8. Clean the plastic mixer and work surface.

Cleaning the resin tank

Keep the resin tank—especially the top and underside surfaces of the film—clean and free of cured resin and other debris to ensure print quality and extend the lifetime of the printer.

Cleaning the tank film

The bottom of the Form Studio 1 resin tank is made of a transparent film. Light shines upward through this film to cure the liquid resin in the tank. Any scratches or debris on the tank film will cause defects on printed parts. Resin can cure inside large flaws in the film, creating deposits that can cause errors and print failures. When interacting with the Form Studio 1 resin tank, take care to avoid scratching, denting, or puncturing the film.

Notice:

Do not use paper towels or any other abrasive cleaners to clean the resin tank film. Doing so can scratch the tank film and cause print failures.

To clean the tank film or film underside:

  1. Empty the liquid resin from the resin tank into an opaque container.
  2. To clean the tank film: Place the empty resin tank on a clean, flat surface.
  3. To clean the film underside: Place the empty resin tank upside-down on a clean, flat surface.
  4. Apply a small amount of clean IPA to a lint-free cloth.
  5. Wipe the surface of the film to remove contamination or resin. If visible residue or streaks remain on the tank film following cleaning, use a fresh cloth and additional IPA to wipe down the bottom of the tank until no streaks remain.

Cleaning the resin tank exterior

To clean the resin tank exterior:

  1. Use a lint-free cloth and clean IPA to remove contaminants from the resin tank exterior.
  2. Keep the sides of the tank clean and free of resin.
  3. Ensure no debris or resin is present on the bottom of the resin tank, as this will come into contact with the LPU when the tank is returned to a printer.