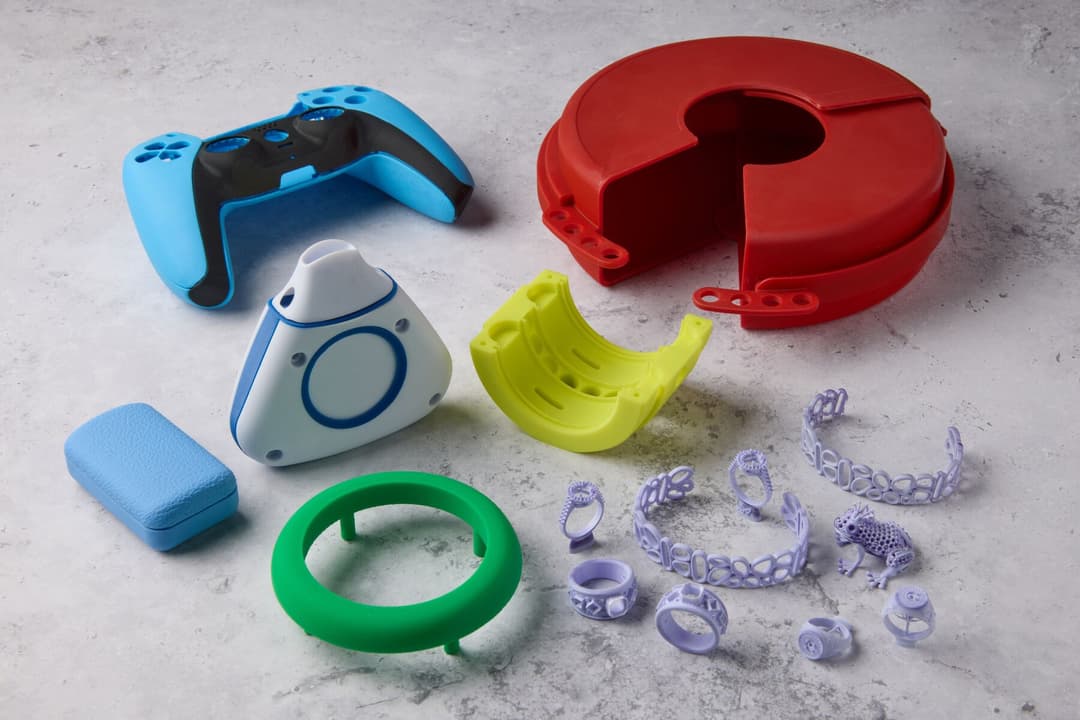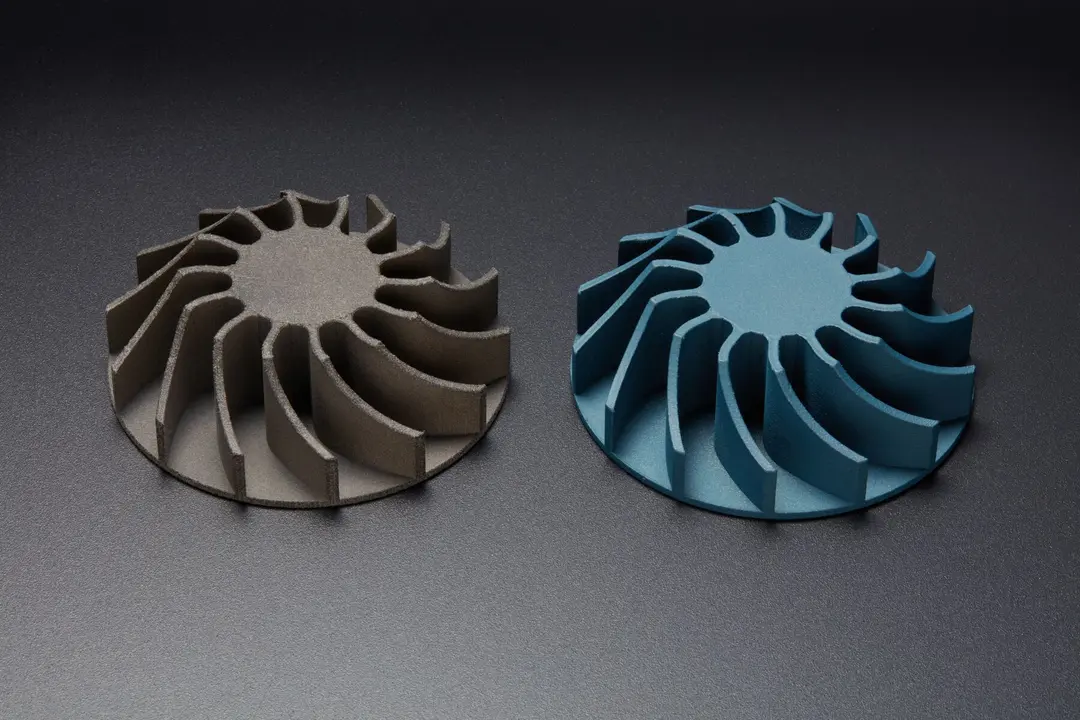
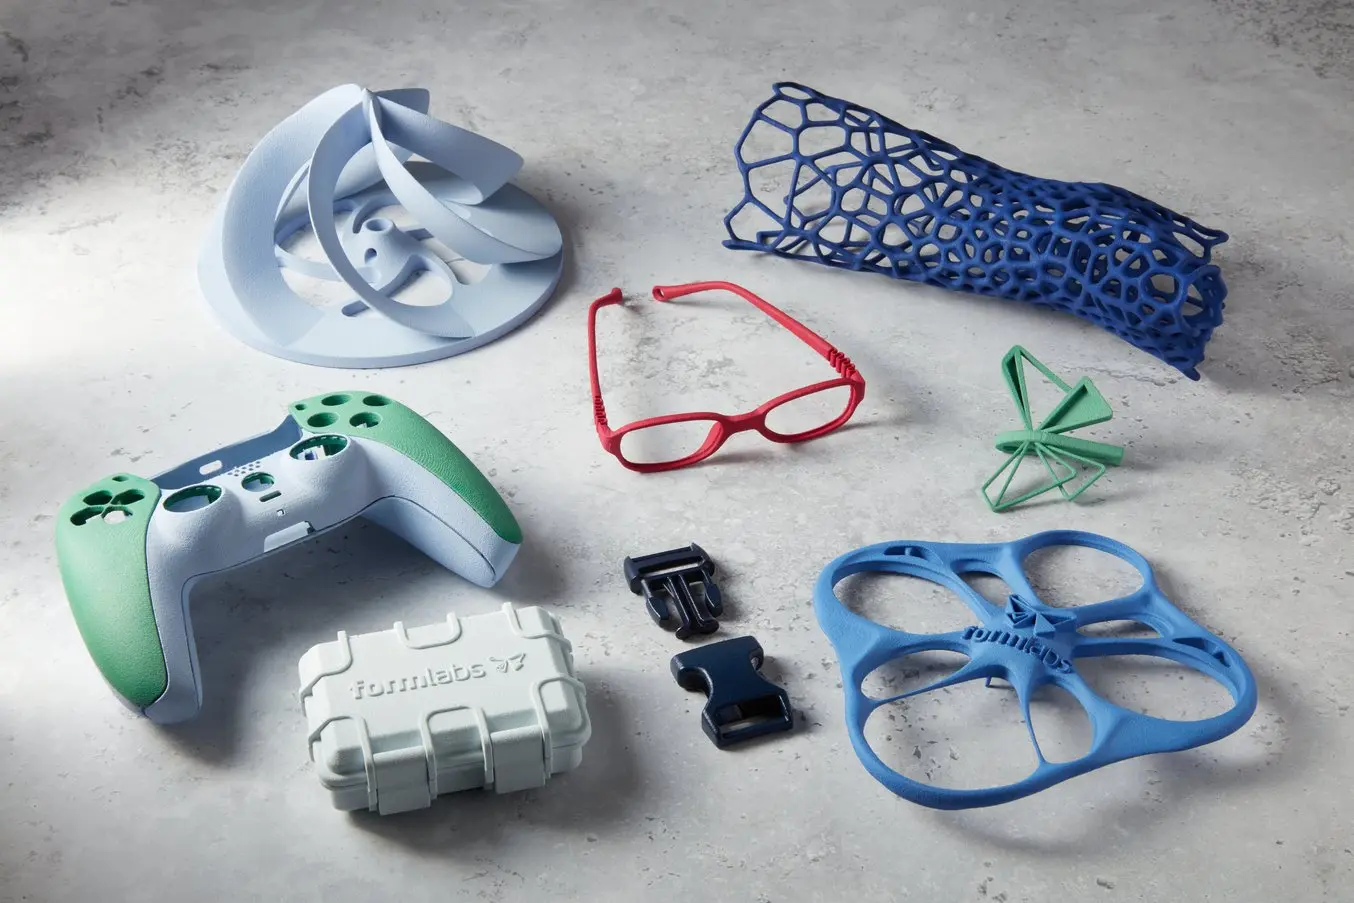
Mittels selektivem Lasersintern (SLS) hergestellte 3D-Druckteile kommen in immer mehr Industriezweigen zum Einsatz, von der Luft- und Raumfahrt bis hin zum Brillendesign. Grund dafür sind ihre überragenden mechanischen Eigenschaften und das kosteneffiziente Fertigungsverfahren. Um die ästhetischen und mechanischen Eigenschaften SLS-3D-gedruckter Teile noch zu steigern, nutzen Anwender*innen häufig zusätzliche Nachbearbeitungstechniken wie Färben, Beschichten, Galvanisieren oder Lackieren.
Das Einfärben von 3D-Druckteilen aus Nylon 12 White Powder auf SLS-3D-Druckern der Fuse-Serie eröffnet Kunden eine Vielzahl von Möglichkeiten, überzeugende Prototypen zu erstellen und produktionsreife Teile in einer Reihe von Farben zu fertigen.
In diesem Leitfaden stellen wir das Verfahren zum Färben von SLS-3D-Drucken vor und beleuchten die zahlreichen Vorteile, die dieser Prozess bietet. Laden Sie unser Whitepaper herunter, um den vollständigen Arbeitsablauf zum Färben kennenzulernen.
Warum sollten Sie SLS-3D-gedruckte Teile färben?
In jeder Phase des Prozesses vom Design bis zur Fertigung kommen SLS-3D-Druckteile immer häufiger zum Einsatz. Aufgrund der leicht körnigen Oberfläche von SLS-3D-Drucken werden auch Nachbearbeitungslösungen wie Glättung, Beschichtung und Färben immer beliebter.
Das Färben ist eine kostengünstige Methode zur farblichen Gestaltung von SLS-Druckteilen, mit der sich deren Ästhetik steigern lässt, ohne die mechanischen Eigenschaften zu beeinflussen. Ob es sich um kleine Chargen von farbigen Teilen oder Großserienproduktion im Pantone-Farbsystem handelt – es gibt für jeden Arbeitsprozess das richtige Färbeverfahren.
Unser Team hat vier beliebte Färbemethoden getestet und seine Ergebnisse vorgestellt. In diesem Leitfaden erhalten Sie einen groben Überblick. Um die vollständigen Ergebnisse einzusehen, laden Sie unser Whitepaper herunter.
Das Färben eignet sich sowohl für funktionale Prototyp als auch für die Fertigung von Teilen für die Endverwendung, um mit individueller Farbgebung einer Markenästhetik entsprechen.
Kostenlosen SLS-Probedruck anfordern
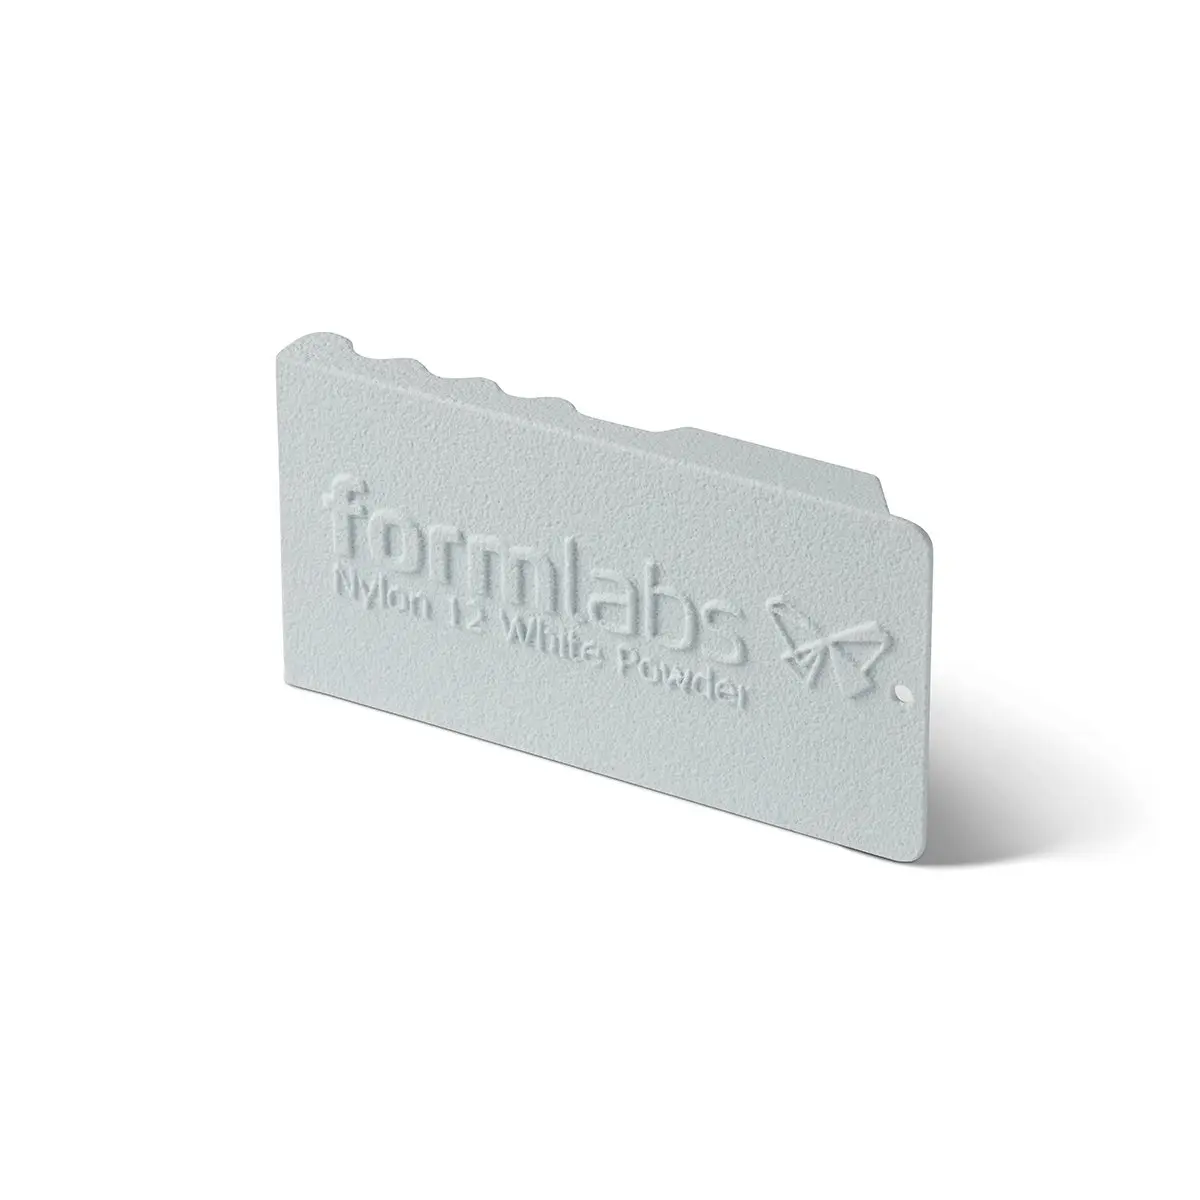
Sehen und fühlen Sie die Qualität von Formlabs aus erster Hand. Wir senden Ihnen einen kostenlosen Probedruck aus Nylon 12 White Powder, gedruckt auf dem Fuse 1+ 30W, an Ihren Arbeitsplatz.
Dyeing Equipment
We tested dyeing equipment to assemble the optimal setup for dyeing Nylon 12 White Powder. Below, we outline the hardware, dye mixture, and dye bath parameters that achieved the best results in our testing.
Dyeing Station
When choosing a dyeing system, one should consider the part size, quantities, price, and levels of color consistency required. Dyeing systems range from a few hundred dollars to tens of thousands of dollars, and the price is often commensurate with the level of quality and consistency achievable. The four most common methods for dyeing 3D printed parts each have distinct advantages, and it’s important to set expectations regarding color quality and budget before choosing a method.
| Methode | Größe | Stückzahl | Farbe | UV-Stabilität | Kosten |
|---|---|---|---|---|---|
| Farbbad | ★★ | ★★ | ★★ | Nein | Unter 50 € |
| Ultraschallfärben | ★★★ | ★★★ | ★★★ | Nein | 100–1000 € |
| Hochdruckfärben | ★★ | ★★ | ★★★★ | Nein | 100–500 € |
| DyeMansion DM60 | ★★★★★ | ★★★★★ | ★★★★★ | Ja | > 50 000 € |
The hardware that we recommend for dyeing is the ESVC-28 - Spectrum Thermal Circulator from Winco. This machine is affordable, available from multiple sources, and is easy to set up and use.
US Source: $699.99
EMEA Source: €659.99
APAC Source: $299
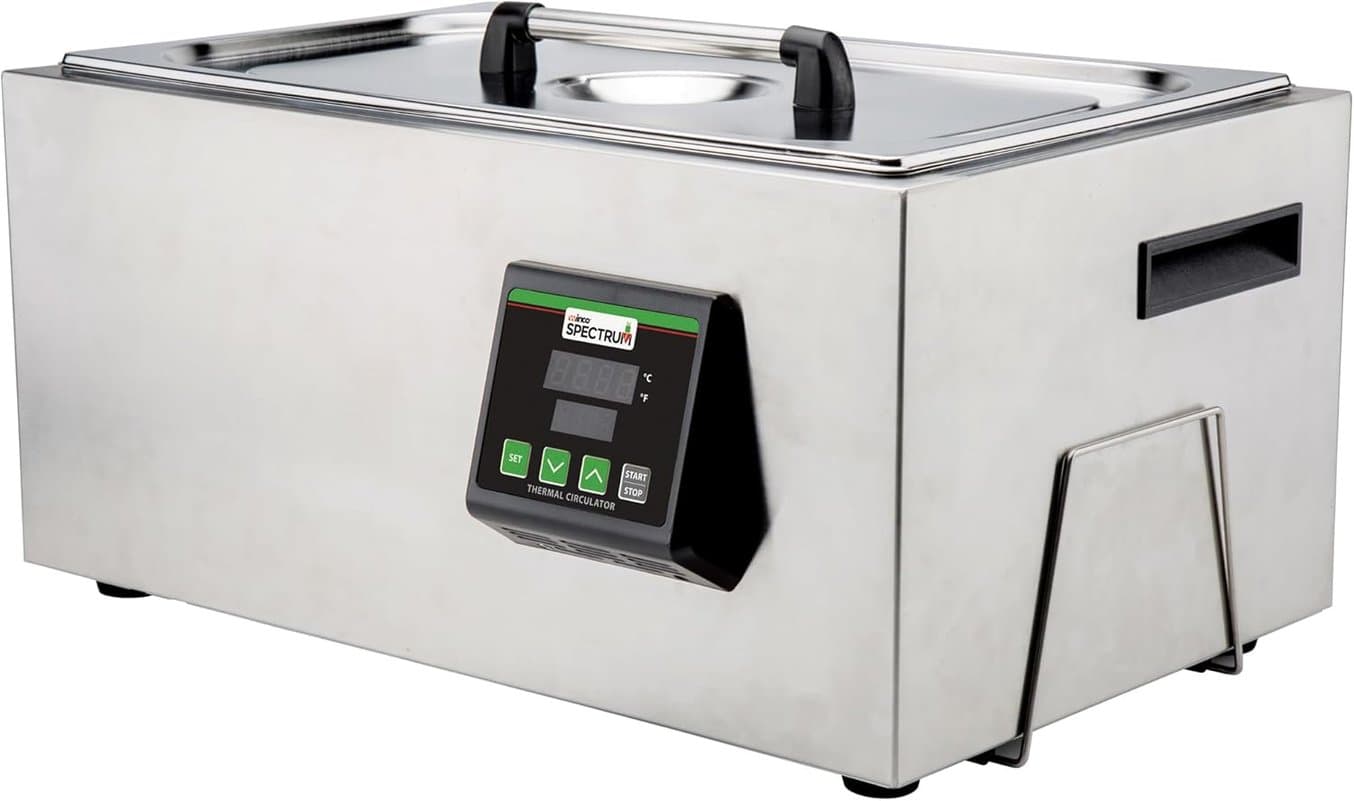
The Winco ESVC-28 Spectrum Thermal Circulator is an ideal solution for ultrasonic dyeing.
Any system that is able to reach the necessary temperatures of 80 °C to 90 °C as well as circulate the solution should be adequate for dyeing. We also recommend having stainless steel tongs nearby to assist in removing parts from the dye bath.
There are also industrial solutions available on the market for dyeing SLS parts, like the Dyemansion DM60, that are cost-effective for high volumes of parts and when extremely consistent results are necessary. This product is capable of holding up to 60 L of components per dyeing batch and will automatically inject the dye as well as rinse the parts post-dye.
The DM60 confers a much higher degree of consistency when compared to pot dyeing as well as improved UV stability of the dyes. An additional service offered by Dyemansion is tailored color development. For users with a strict color requirement or who are looking to dye a very high volume of parts (end-use parts, production runs of 1000+ units), using an industrial machine such as the DM60 may be a good choice.
These larger format solutions take much of the manual labor out of the dyeing process and include programmed settings for different types of parts and colors. However, higher upfront costs mean the return on investment will be faster for those printing very high volumes of parts.
Dyeing Station
When choosing a dyeing system, one should consider the part size, quantities, price, and levels of color consistency required. Dyeing systems range from a few hundred dollars to tens of thousands of dollars, and the price is often commensurate with the level of quality and consistency achievable. The four most common methods for dyeing 3D printed parts each have distinct advantages, and it’s important to set expectations regarding color quality and budget before choosing a method.
Wie Sie Teile aus dem SLS-3D-Drucker färben
Formlabs has conducted extensive testing to determine what colors can be achieved with SLS printed parts using accessible, low-cost dyeing techniques. The dye used was RIT ProLine dye, a low-cost, easily accessible powder that contains a mixture of direct, acid, and disperse dyes, and is effective on nylon fibers. Further variables tested include temperature, acidity, saturation of dye, duration of dye time, and detergent additive in the dye solution. Both Nylon 12 Powder and Nylon 12 White Powder parts were tested and the effect of each variable is covered below.
1. Part Preparation
It is essential to ensure that parts are properly cleaned prior to dyeing. Loose powder remaining on the surface of the part may absorb dye differently from sintered powder, leading to a less controlled, nonuniform dye finish, and making the part less wash-safe. We recommend cleaning parts with the Fuse Blast automated cleaning and polishing solution. This will ensure that all loose powder is removed from the part without adding additional labor time to the workflow. Alternatively, a manual media blaster can be used to ensure the parts are clean.
When cleaning parts printed with Nylon 12 White Powder, a blasting cabinet that was previously used for gray powders is not recommended as the residual powder can give the white parts a grey sheen.
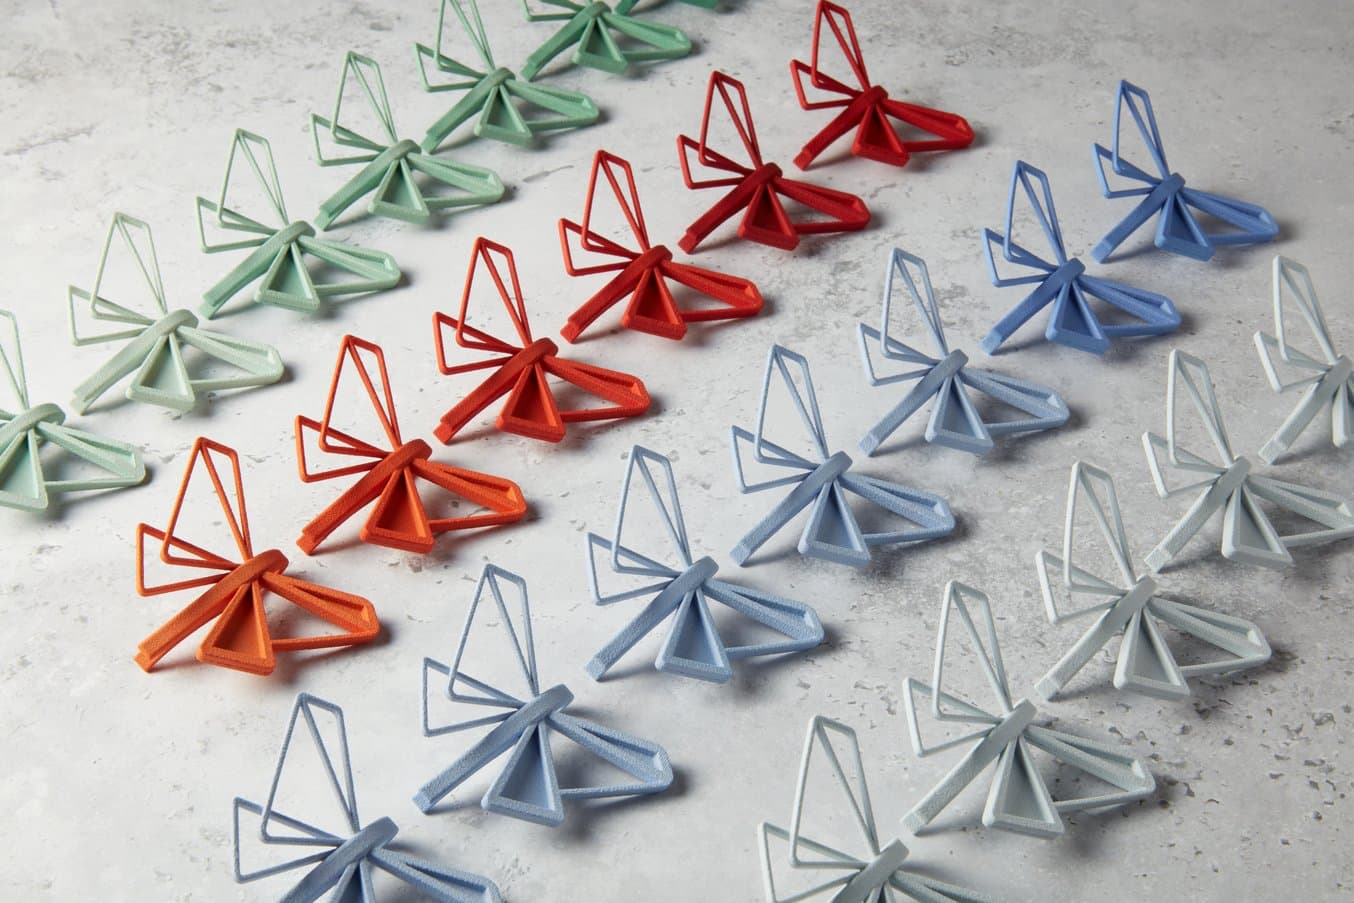
Temperature and time have a huge impact on the final part color. Based on our tests, higher temperatures lead to a more saturated color in a shorter amount of time.

The parts in this image were dyed in the same dye bath, at 90 °C, with parts removed at 3-minute intervals from right to left.
If a lighter shade is desired, consider reducing the dye solution temperature to 70 °C or lower. At higher temperatures, saturation can occur extremely quickly, leaving very little margin for deviation and potentially resulting in variance of finished parts. There is an increase in part uptake of dye over time but this trend plateaus at 20-25 minutes as the part reaches a saturation point where no more dye can penetrate the surface.
Changing Dye Bath Colors
When changing the colors of a dye bath, first drain the entirety of the current solution and dispose of it according to local regulations and the dye’s safety data sheet (SDS). Alternatively, the dye bath can also be stored in liquid form to be used at a later date, according to local safety regulations.
As a dye solution is heated and cycled, some settling can occur. Due to this, the walls and base of the tank should be wiped down after draining to ensure no cross-contamination of colors occurs. Once these two steps are completed, a rinse with clean water is recommended to make sure any remaining dye in the circulation system is removed.
Only after the machine is cleaned should a new dye solution be prepared. If multiple colors are going to be used frequently, getting multiple circulators to prevent frequent swapping is an option.
Ken Pillonel designed an easy workaround for this step, using large flasks filled with dye solution within the tank, and a rotating magnet on the bottom of them to agitate the liquid. This way, he can use different flasks for each dye color, without waiting for cooling and cleaning. To learn more about his method and this workaround, watch his video, shared at the end of the article.
1. Part Preparation
It is essential to ensure that parts are properly cleaned prior to dyeing. Loose powder remaining on the surface of the part may absorb dye differently from sintered powder, leading to a less controlled, nonuniform dye finish, and making the part less wash-safe. We recommend cleaning parts with the Fuse Blast automated cleaning and polishing solution. This will ensure that all loose powder is removed from the part without adding additional labor time to the workflow. Alternatively, a manual media blaster can be used to ensure the parts are clean.
When cleaning parts printed with Nylon 12 White Powder, a blasting cabinet that was previously used for gray powders is not recommended as the residual powder can give the white parts a grey sheen.
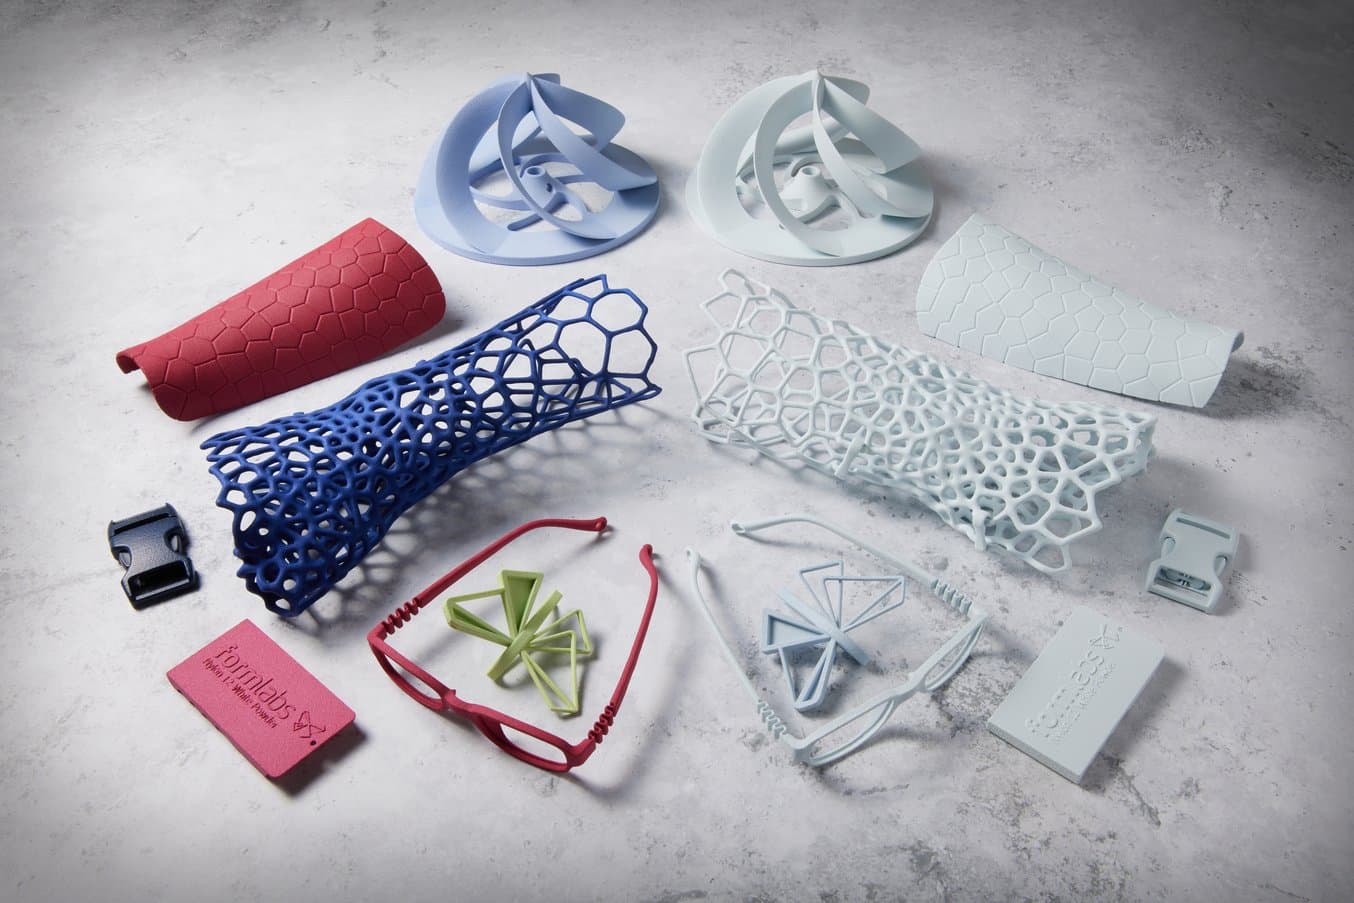
Farb- und Materialkombinationen
Das Färben weißer Teile
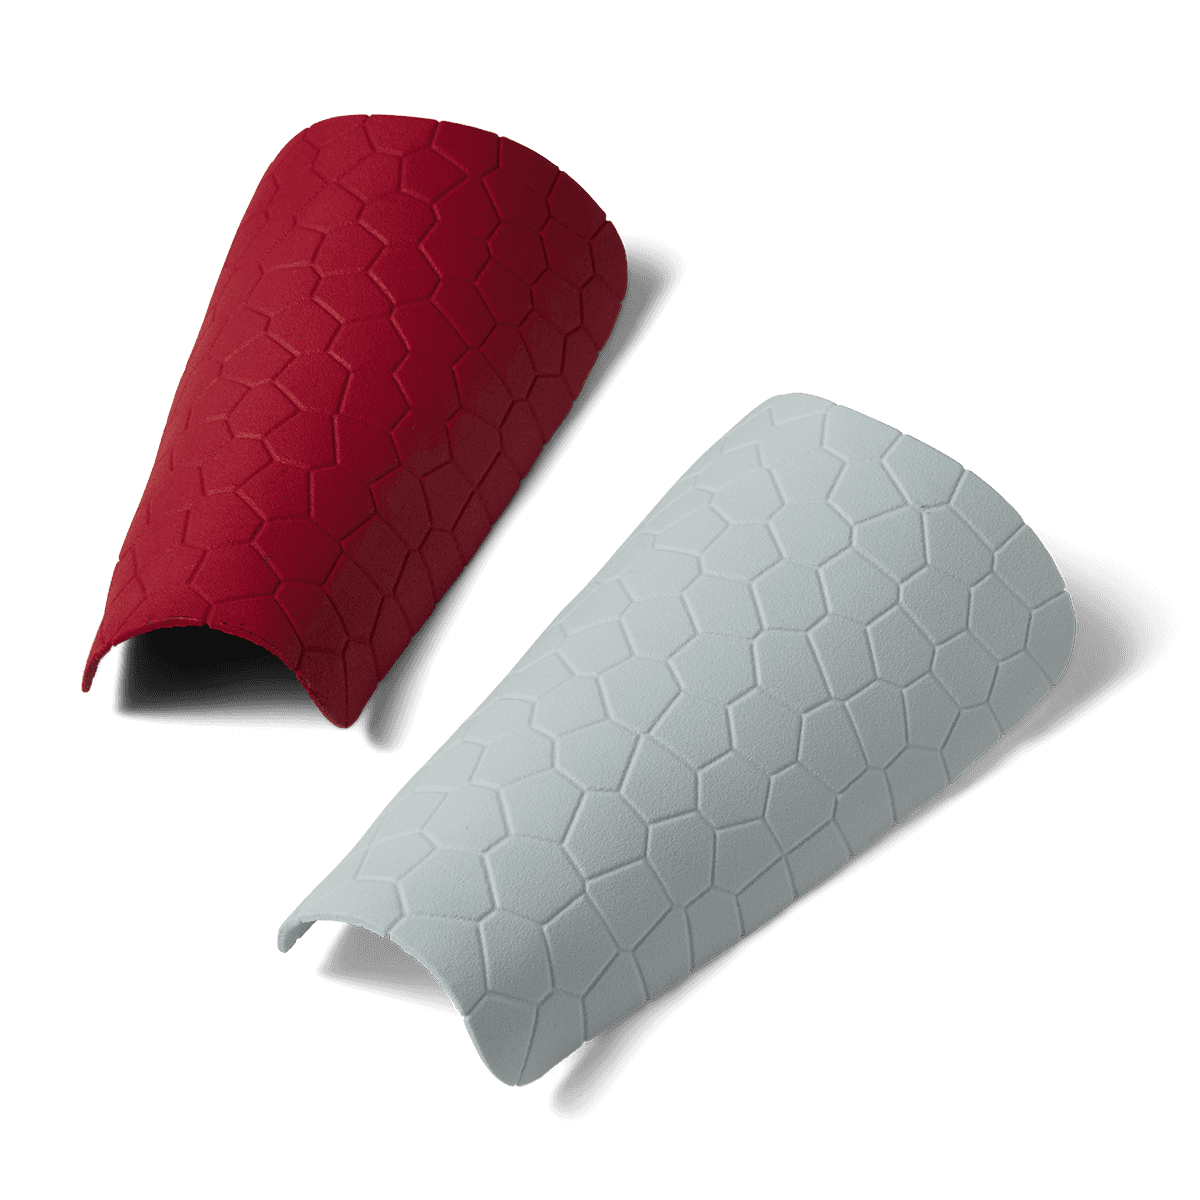
Das Färben von Nylon 12 White Powder ist die beste Option, um eine möglichst breite Palette an Farben zu erhalten. Nylon 12 White Powder sollte zum Färben aller hellen Farben, einschließlich Pastellfarben und leuchtender Farben verwendet werden.
Mit Nylon 12 White Powder 3D-gedruckte Teile, die in einer Ultraschall-Färbestation eingefärbt wurden.
Das Färben grauer Teile
Mit dem in unserem Whitepaper beschriebenen Verfahren konnten Teile aus Nylon 12 Powder erfolgreich eingefärbt werden. Da Druckteile aus Nylon 12 Powder jedoch eine dunkelgraue Farbe haben, sind nur dunklere Farbtöne möglich, und diese sind oft gedämpfter in ihrer Optik.
Dunkelgraue Teile aus Nylon 12 Powder, in dunkleren Farbtönen eingefärbt.
Teile schwarz färben
Wenn Schwarz die gewünschte Endfarbe ist, empfehlen wir die Verwendung des standardmäßigen Nylon 12 Powder von Formlabs mit Rit ProLine Black. Das Material hat ein dunkleres Substrat, wodurch der Übergang zu Schwarz durchgehender ist.
Das Schwarzfärben von Teilen aus Nylon 12 White Powder ist zwar möglich, wird aber nicht empfohlen. Aufgrund des helleren Substrats ist das Färben dunklerer Farben schwieriger als beim ursprünglich dunklen Nylon 12 Powder.
Advantages of Dyeing
Dyeing is typically implemented as an alternative to coatings. The advantages of dyeing over conventional paints and coatings are lower cost and labor needs, and the possibility to color complex geometries.
Kosten
The equipment required to bring dyeing in-house is highly accessible. Once the equipment has been sourced, the cost of running dye trials is incredibly low. Due to this, dyeing is more cost-effective than paints and coatings in the majority of situations.
Arbeitskosten
The equipment required to bring dyeing in-house is highly accessible. Once the equipment has been sourced, the cost of running dye trials is incredibly low. Due to this, dyeing is more cost-effective than paints and coatings in the majority of situations.
Teilgeometrie
The equipment required to bring dyeing in-house is highly accessible. Once the equipment has been sourced, the cost of running dye trials is incredibly low. Due to this, dyeing is more cost-effective than paints and coatings in the majority of situations.
Teilgeometrie
The equipment required to bring dyeing in-house is highly accessible. Once the equipment has been sourced, the cost of running dye trials is incredibly low. Due to this, dyeing is more cost-effective than paints and coatings in the majority of situations.
Dyeing is ideal for both functional prototyping and end-use production of parts with custom colors to match brand aesthetics.
Färben von SLS-Nylonteilen: Das Experiment von Ken Pillonel
Ken Pillonel, Ingenieur und Gründer des beliebten YouTube-Kanals Exploring the Simulation, hat mit dem SLS-Ecosystem der Fuse-Serie eine „Ein-Mann-Kunststofffabrik“ aufgebaut. Nachdem er seine Kapazitäten erweiterte und einen zweiten Fuse 1+ 30W, Fuse Sift und Fuse Blast anschaffte, kann Pillonel seine Airpod-Ladegehäuse für die Endverwendung heute aus gefärbtem Nylon 12 White Powder produzieren. Im folgenden Video erläutert Pillonel im Detail den SLS-3D-Druck von Endprodukten und die Einrichtung eines Stickstoff-Workflows und erklärt, wie Sie einen präzisen, wiederholbaren und qualitativ hochwertigen Färbeprozess erreichen.
Erste Schritte zum Färben von SLS-3D-gedruckten Teilen

Dank erschwinglicher Prozesse wie dem Ultraschallfärben ist das Färben von SLS-Teilen eine einfache und kostengünstige Methode, um Ihre Kreationen ästhetisch aufzuwerten.
Das Färben von Teilen aus Nylon 12 White Powder und Nylon 12 Powder unter Verwendung leicht zugänglicher Geräte und Farbstoffe ist eine kostengünstige und effiziente Methode, um fertigen Teilen jeden beliebigen Farbton zu verleihen. Dieses Verfahren bietet eine taugliche Alternative zu herkömmlichen Beschichtungen, da es nur minimale Arbeit erfordert und komplexe Geometrien effektiv einfärbt.
Wenn Sie eine Anwendung anstreben, die farbige SLS-Druckteile aus Nylon erfordert, wenden Sie sich an unser Team, um mehr über das Fuse-Ecosystem und das Färben von Nylonteilen zu erfahren.
Um mehr über den SLS-3D-Druck oder das Färben von SLS-Druckteilen zu erfahren, kontaktieren Sie unser Team. Wenn Sie die vollständigen Ergebnisse unserer Tests und den Schritt-für-Schritt-Leitfaden einsehen möchten, laden Sie gern unser Whitepaper herunter.