

LIBRO BLANCO
Formlabs Logo

Setting up your Form 4 generation printer

Setting up your Form 4 generation printer

Encendido de la impresora

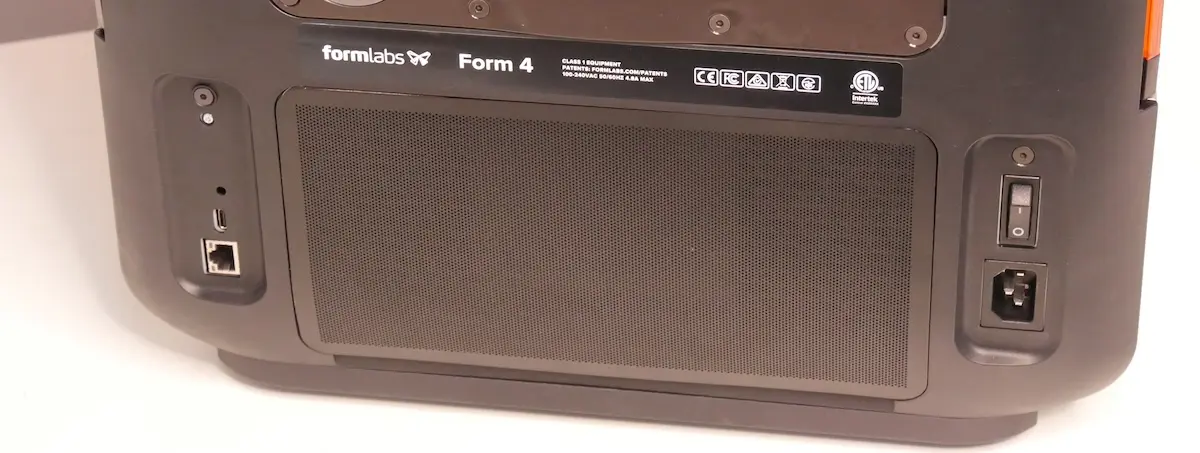
Conecta el cable de alimentación a la impresora y a una fuente de alimentación. Enciende la impresora con el interruptor situado en su parte posterior izquierda.

Rear ports on a Form 4 generation printer

La primera vez que la impresora se conecte a la corriente, mostrará una introducción en la pantalla táctil con una serie de pasos iniciales. Los pasos iniciales incluyen instrucciones para insertar consumibles (el tanque de resina, el mezclador, el cartucho de resina y la base de impresión) en la impresora. Sigue estos pasos para preparar la impresora para su uso.

Nota:

Si la impresora no se inicia y no muestra las indicaciones de introducción, asegúrate de que la cubierta está cerrada. Si está cerrada, abre la cubierta y comprueba si hay dos imanes redondos de bloqueo situados a lo largo de su borde inferior. Si uno de los imanes se ha desprendido de la cubierta, es posible que se haya adherido a la carcasa de la impresora o que se haya quedado atrapado debajo de uno de los pasadores del tanque de resina. Vuelve a pegar el imán a la cubierta con un adhesivo, y cierra la cubierta cuando se haya secado para continuar.
Inserción del tanque de resina y el mezclador

Advertencia:

Las resinas pueden causar irritación en la piel o una reacción alérgica cutánea. Usa guantes cuando manipules resina líquida o superficies cubiertas de resina. Lávate la piel con abundante jabón y agua.

The resin tank is the primary container for holding resin after it is dispensed from the cartridge. Resin is cured onto the build platform when light passes through the tank's bottom film during printing.

The resin mixer improves print consistency by evenly mixing the resin and checking for debris.

  1. Lift the printer’s cover.
  2. Remove all packaging from the resin tank before inserting it into the printer.
  3. Remove the resin tank lid and set it aside.
  4. With the tank spout facing away from you, place the resin tank flat between the blue latches in the middle of the printer.
  5. Press down on the sides of the resin tank with your thumbs. Latch the tank into place by closing the two latch handles on the sides.
  1. Remove all packaging from the resin mixer before inserting it into the printer.
  2. Open the latch on the mixer before inserting it into the printer.
  3. Insert the mixer into the mixer mount with the flat body in the tank. If the two parts of the mixer have come apart, reassemble the mixer first.
  4. Lock the mixer into place by closing the latch.

Inserción de la base de impresión

The build platform is the surface that each part prints onto. To insert the build platform:

  1. Lift the build platform latch.
  2. Align the build platform with the build platform mount and push into place.
  3. Lower the build platform latch to secure the build platform.

Inserción del cartucho de resina

The resin cartridge stores resin to be dispensed into the resin tank. To prepare the resin cartridge:

  1. Shake the resin cartridge to ensure the resin is mixed well.

Aviso:

No retires la válvula de goma en la parte inferior del cartucho ni la pinches con un instrumento afilado. Esta válvula de mordida controla la liberación de la resina. La retirada de la misma haría que la resina fluyera de forma continua y causara daños graves a la máquina. La garantía no cubre estos daños.

  1. Align the cartridge with the opening at the back of the printer.
  2. Lower the resin cartridge until the top of the cartridge is level with the top of the printer. The cartridge sits loosely inside the cartridge slot. This ensures the load cell can accurately measure cartridge resin levels.
  3. If the printer is on, it will display a message on the touchscreen and play a notification sound once it detects the cartridge.
  4. Press open the vent cap before starting a print so that the resin tank fills correctly.

Printing with the Form 4

Ahora que la impresora está preparada:

Setting up the Form 4B

The Form 4B is a dental and medical-specific 3D printer that is validated to print 14+ materials for biocompatible applications from the Formlabs materials library.

Form 4B printers need to be temporarily connected to the internet when the printer is being set up for the first time. While connected to the internet, the printer quickly and securely registers a Formlabs biocompatible materials lifetime license. This is a one time configuration that is saved for the lifetime of your printer, even if you perform a factory reset on the machine.

Notice:

Form 4B printers are not able to print with Formlabs materials for biocompatible applications until they have been temporarily connected to the internet.

The first time the printer is connected to power, it displays a series of onboarding steps on the touchscreen. The onboarding steps include instructions for inserting consumables (resin tank, mixer, resin cartridge, and build platform) into the printer. Follow these steps, as detailed above, to prepare the printer for use.

  1. Turn on your Form 4B.
  2. Follow the onboarding instructions. If you don’t see onboarding steps, tap Settings > General > Show onboarding on the printer touchscreen.
  3. When you are prompted to temporarily connect to the internet, connect to an available Wi-Fi network. If no network is available, you can also connect via Ethernet or a temporary mobile hotspot.
    • Wi-Fi: Tap the desired wireless network. If prompted, enter your network password and tap the checkmark to confirm.
    • Ethernet: Plug an Ethernet cable into the back of your printer, then plug the other end into the LAN port of your modem or router.
    • Mobile hotspot: Set up your hotspot and check that it is connected to the internet. Connect the printer to the hotspot via Wi-Fi or an Ethernet cable, depending on your device.
  4. When the onboarding steps are completed successfully, you should see Form 4B displayed at the top left of your touchscreen.
  5. You are now ready to print with any Formlabs material for biocompatible applications.

Checking if your Form 4B is set up correctly

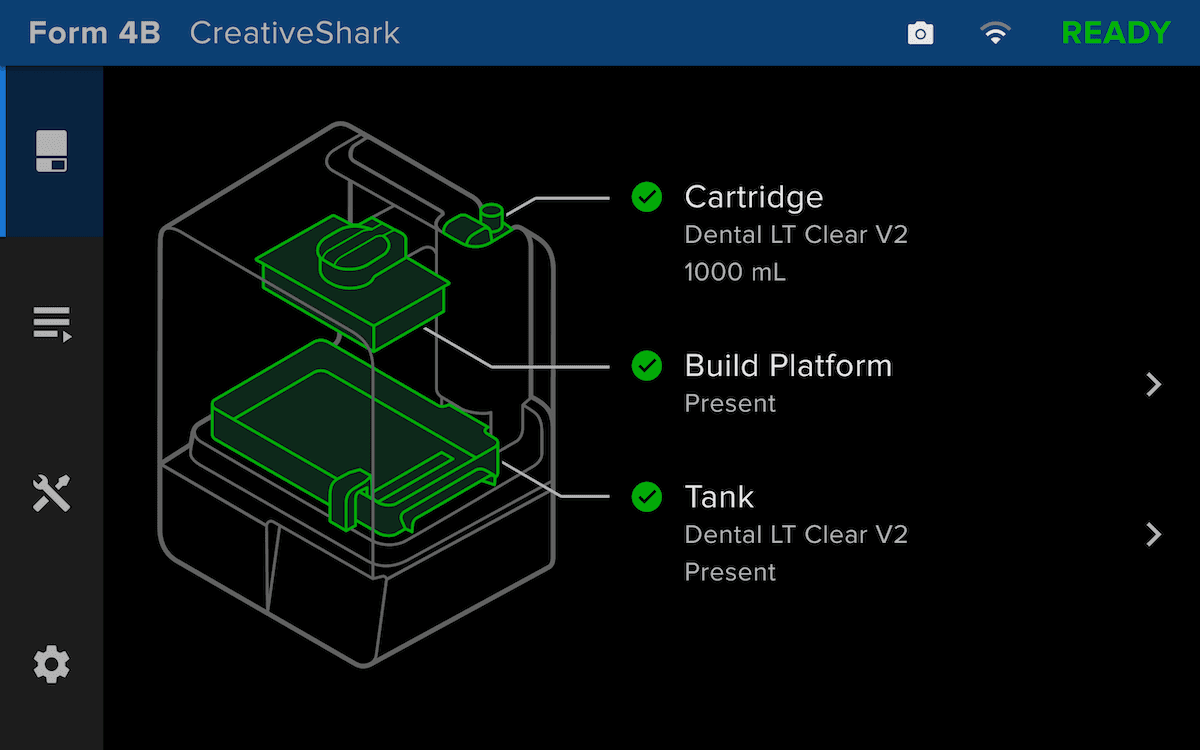
When a Form 4B printer is set up correctly, the status bar on top of the printer touch screen will be blue and say Form 4B.

Form 4B status screen

Troubleshooting Form 4B setup

If you purchased a Form 4B printer but cannot print with a Formlabs material for biocompatible applications, please try the following troubleshooting steps.

  1. Follow the steps above to temporarily connect to the internet.
  2. Restart your printer using the power switch on the back left of the printer.
  3. Check if your printer says Form 4B in the top left of the touchscreen.
  4. If not, retry the printer onboarding wizard. Tap Settings > General > Show onboarding on the touchscreen and follow the steps.
  5. If your printer still doesn’t say Form 4B on the top left of the touchscreen, contact Formlabs Support.