
Spare parts and replacement parts are critical for both manufacturing facilities and consumers to eliminate equipment downtime and reduced productivity when defective equipment requires repair or refurbishment. To be able to access and provide critical spare parts, companies have to maintain an expensive inventory and navigate through dynamic supply chains.
But what happens if a supplier goes out of business or the lead times take too long?
3D printing for spare and replacement parts is increasingly becoming a powerful solution to address supply chain disruptions and spare parts availability. 3D printers can now be used to create anything from DIY spare parts by customers to stopgap replacement parts, and even long-lasting replacement parts that can substitute parts made with traditional tools, empowering manufacturers to replace large inventories with on-demand spare part production.
In this guide, we outline the steps to digitally fabricate spare parts through additive manufacturing, help you choose the right technologies, and show real-life examples.
How to 3D Print In-House Jigs, Fixtures, and Other Manufacturing Aids
Download our white paper to learn the principles behind creating effective jigs, fixtures, replacement parts, and other manufacturing aids in-house with 3D printing.
Step-by-Step: 3D Printing Spare and Replacement Parts
1. Check for Feasibility
Spare parts function within a system and to ensure that 3D printed spare parts work properly, first consider the technical requirements of the part such as geometry, intended use, and mechanical stressors. Let’s look at some of these criteria:
-
Geometry: 3D printers offer almost unlimited design freedom, so there’s a good chance that anything manufactured using traditional tools can also be 3D printed. Some design adjustments might be advised to optimize for lower costs, faster speed, or increased strength.
-
Size: The part needs to fit into the build volume of a 3D printer, which is generally around 15-30 cm in any dimension for desktop and benchtop machines. Alternatively, create the replacement component as an assembly of multiple smaller parts.
-
Material: 3D printers can replace most plastic parts and even some metal parts. Find a material that’s closest to the properties of the material used for the original parts.
-
Stresses: Consider the stresses and impacts the replacement part will have to endure. Choose more advanced 3D printing technologies and engineering materials for long-lasting parts.
Even if 3D printed spare parts don’t fully check all the criteria, they can often serve as stopgap replacements to eliminate machine downtime. In this scenario, a spare 3D printed component that ensures proper functionality but is limited by its long-term durability is used until a durable replacement is available.
2. Get the 3D Model
Once you confirm that the part can be 3D printed, you need to acquire 3D models of the spare part. If the replacement part is for your own product and it was designed using CAD software, then the digital file should be readily available. For third party tools, some manufacturers offer original CAD models of the spare parts.
If there’s no design available, create the design in CAD software yourself or contract it from a design service. For parts with a simple design, this can be done based on manual measurements, but for more complex designs, reverse engineering with 3D scanning is a powerful workflow to design and produce replicated parts.
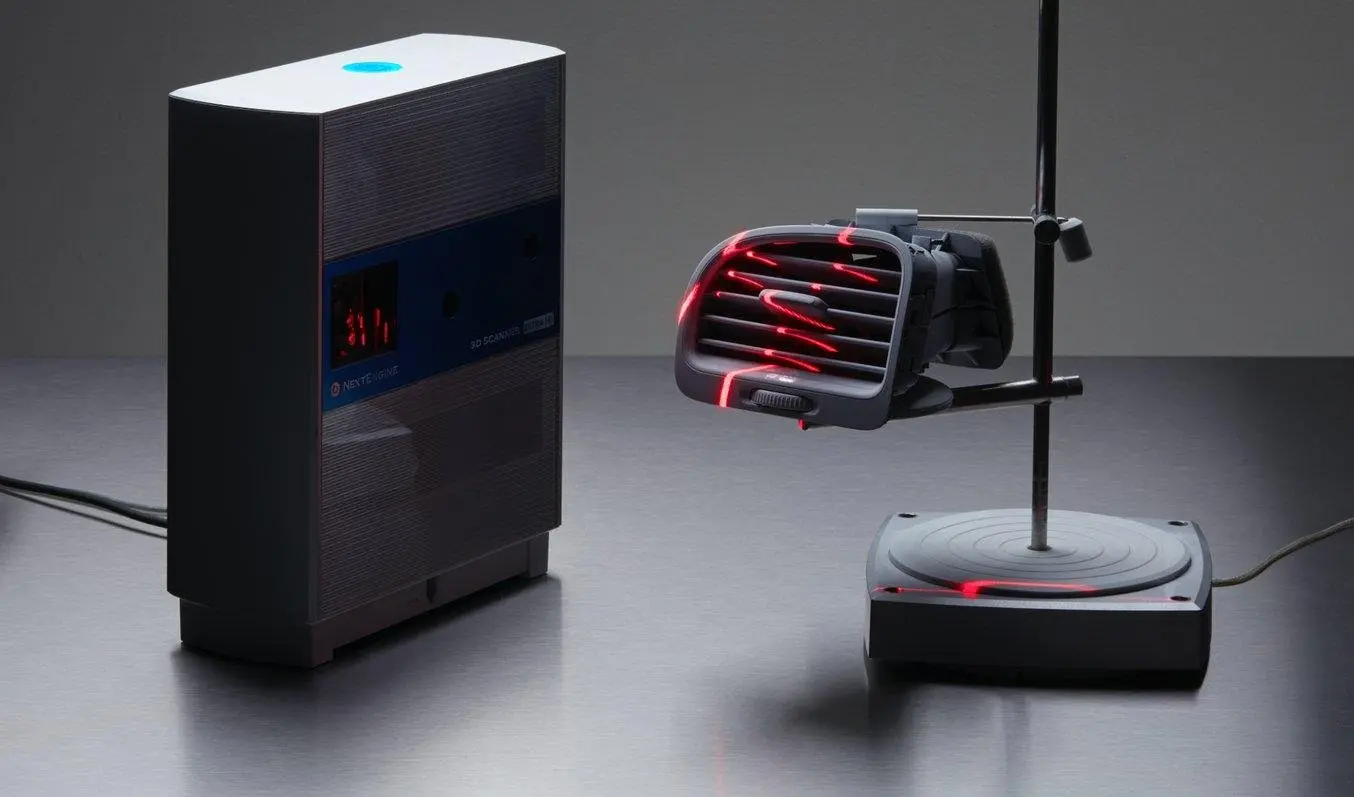
Reverse engineering involves using a 3D scanner to capture the mesh required to make the 3D models.
3. 3D Print the Spare Parts
Prepare the CAD model for 3D printing using print preparation software and send it to your 3D printer. Choosing the right technology and material is crucial — see the next section for specific recommendations.
3D printed parts generally require some sort of post-processing, such as washing, depowdering, removing support structures, post-curing, or sanding. The parts can then be used directly or post-processed further for specific applications by smoothing, painting, coating, and more.
4. Testing and Iteration
Once the replacement part is ready, conduct tests to ensure the 3D printed spare part functions as intended. If the tests highlight deficiencies, 3D printing makes it easy to iterate the design to improve the performance of the spare parts.
The depth of this testing should depend on the use case. For stopgap replacement parts, it’s enough if they just work as intended for a limited time, but manufacturers who intend to use 3D printed replacement parts as a substitute for traditional parts should have the new parts undergo the same testing cycles as their predecessors, while also considering the specific characteristics of the 3D printing process, like the difference in strength based on orientation.
Choosing the Right Technology and Material for 3D Printing Replacement Parts
3D printing has been ubiquitous in prototyping and product development for decades. Now, this maturing technology is entering widespread use in manufacturing. In the product development process, manufacturers are already leveraging the flexibility of 3D printing for producing internal tools, such as jigs, fixtures, and other manufacturing aids, or even rapid tooling such as molds for injection molding or thermoforming.
Recent advances in machinery, materials, and software open opportunities for producing high-precision, functional 3D prints that can stand in for end-use parts, including long-lasting spare parts and replacement parts.
Stress Testing 3D Printed Parts for End-Use Applications
This white paper presents Formlabs 3D printing hardware and material solutions for end-use part production. It documents various users' case studies and includes stress testing results to verify the suitability of 3D printing materials for end-use applications.
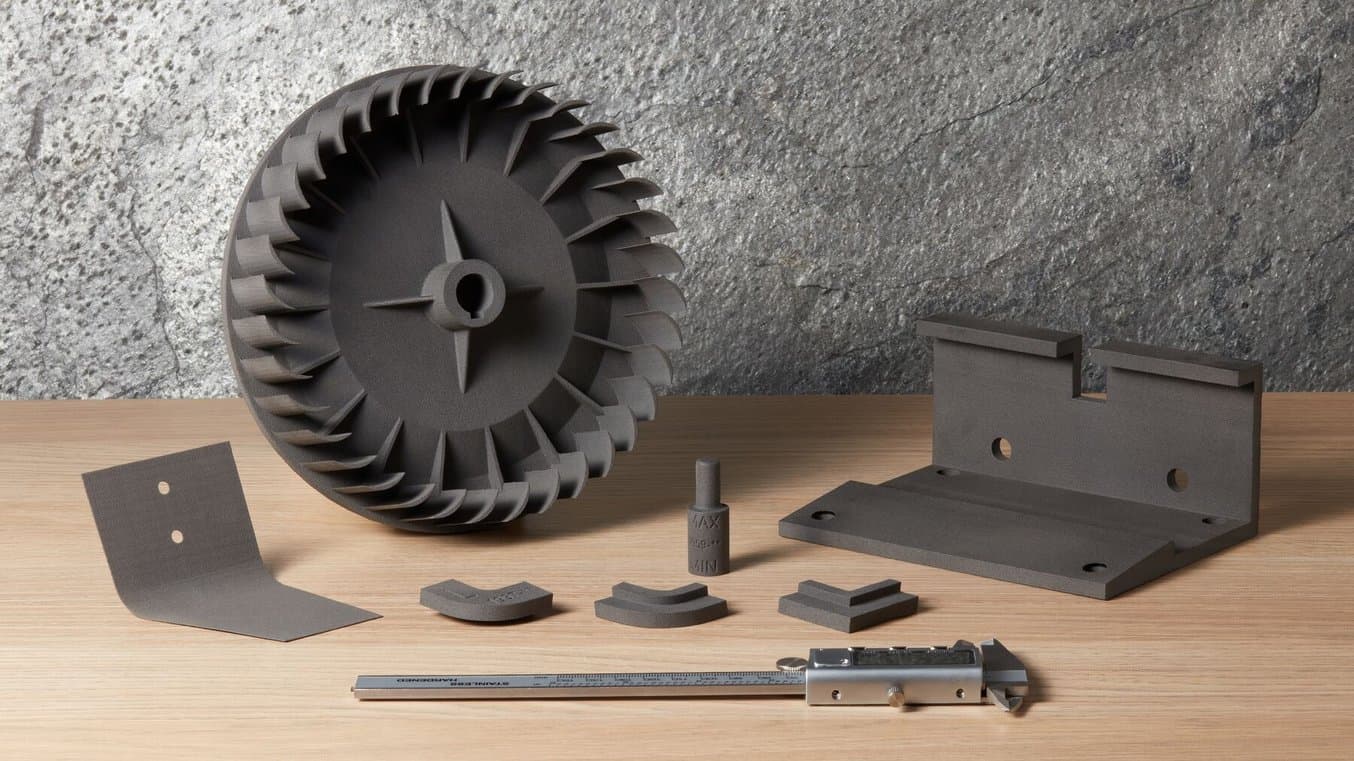
3D printers are most commonly used to produce plastic parts — metal 3D printers are also available, but at a substantially higher cost. There are many different types of 3D printers, the most common processes for producing plastic parts being: fused deposition modeling (FDM), stereolithography (SLA), and selective laser sintering (SLS).
Here’s a brief comparison of these processes, the available materials, and ideal applications with respect to spare parts:
| Fused Deposition Modeling (FDM) | Stereolithography (SLA) | Selective Laser Sintering (SLS) | |
|---|---|---|---|
| Accuracy | ★★★★☆ | ★★★★★ | ★★★★★ |
| Surface Finish | ★★☆☆☆ | ★★★★★ | ★★★★☆ |
| Throughput | ★★★☆☆ | ★★★★☆ | ★★★★★ |
| Complex Designs | ★★★☆☆ | ★★★★☆ | ★★★★★ |
| Ease of Use | ★★★★★ | ★★★★★ | ★★★★☆ |
| Materials | Standard thermoplastics, such as ABS, PLA, and their various blends. | Wide variety of resins, including engineering materials with advanced properties (ABS-like, PP-like, flexible, heat-resistant, rigid) | Engineering thermoplastics. Nylon 11, nylon 12, and their composites, as well as TPU for flexible parts. |
| Ideal for | Simple replacement parts Stopgap solutions | Simple and complex replacement parts Stopgap solutions Parts requiring fine details and a smooth surface finish | Simple and complex replacement parts Stopgap solutions Sturdy, stable, and long-lasting end-use replacement parts |
While most traditional manufacturing processes require expensive industrial machinery, dedicated facilities, and skilled operators, 3D printing enables in-house production with low overhead and minimal infrastructure. Compact desktop or benchtop 3D printing systems for creating plastic parts are affordable and require very little space and no special skills.
Outsourcing can be an option for replacement parts that aren’t time-sensitive, but this often comes with the same challenges as stocking a physical spare parts inventory. Delivery timelines can be multiple weeks, compared to less than 24 hours for most 3D printed parts, which increases the possibility of extended machine downtime and lost productivity.
Digital Fabrication of Spare Parts
For manufacturers, the digitalization of the spare parts inventory management and replacement parts production provides an opportunity to eliminate some of the traditional challenges like supply chain issues, minimum order quantities, and waste due to obsolete parts.
Setting up a digital warehouse is a cost-effective way to reduce inventory management costs. Pairing this system with an in-house digital fabrication tool like 3D printing supports on-demand strategies, and enables manufacturers to reduce costs and lead times, improve resiliency, and mitigate downtime.
The digital warehouse or spare parts inventory is used to store spare parts designs, systematically classify components, optimize bills of materials, and manage inventory. 3D printers and other digital fabrication tools can then be used to produce the spare parts to stock a physical inventory or replace parts at need.
Case Studies: How Companies Use 3D Printing for Replacement Parts
Replacement parts are one of the most common applications of 3D printing. Let’s look at a few real-life examples from Formlabs customers, from 3D printing spare parts for automotive applications to custom robot grippers.
Award-winning custom car shop Ringbrothers initially brought SLA 3D printing in-house as a prototyping tool to iterate faster and more cost-effectively. Since adopting the technology, they’ve found ways to use 3D printing to push the quality and creativity of their work with end-use parts, including spare parts for classic cars.
For a mirror project, the team used 3D printed parts as part of the final assembly; the part acted as a permanent assembly fixture bonded inside a carbon shell that additional parts are bolted onto. In another case, the team used a castable 3D printing material to create a metal emblem for a custom car project.
“That next-level detail wouldn't have been possible had we not been able to 3D print the wax and have [our local jeweler] cast it in-house, ” said product development specialist, Matt Moseman.
Ashley Furniture, the world’s largest furniture manufacturer, integrates new technologies into its factories, from 3D printing to robotics. There are 700 3D printed parts at work on Ashley Furniture’s factory floor in Arcadia, Wisconsin, right alongside industrial robots and CNC milling workhorses, from assembly to fabrication.
Besides manufacturing aids, some of their most practical applications are replacement parts for the manufacturing floor. When a vacuum retainer ring for a point-to-point drilling machine couldn’t be purchased on its own, the only option was to purchase the whole assembly, which was costly.
“The company wouldn’t sell just the ring, we would have to buy the whole pod for $700,” said production engineer Brian Konkel. “Instead, we were able to 3D scan the part to capture the geometry, and print a replacement part for $1 to keep our drilling equipment running, without having to buy the complete assembly.”
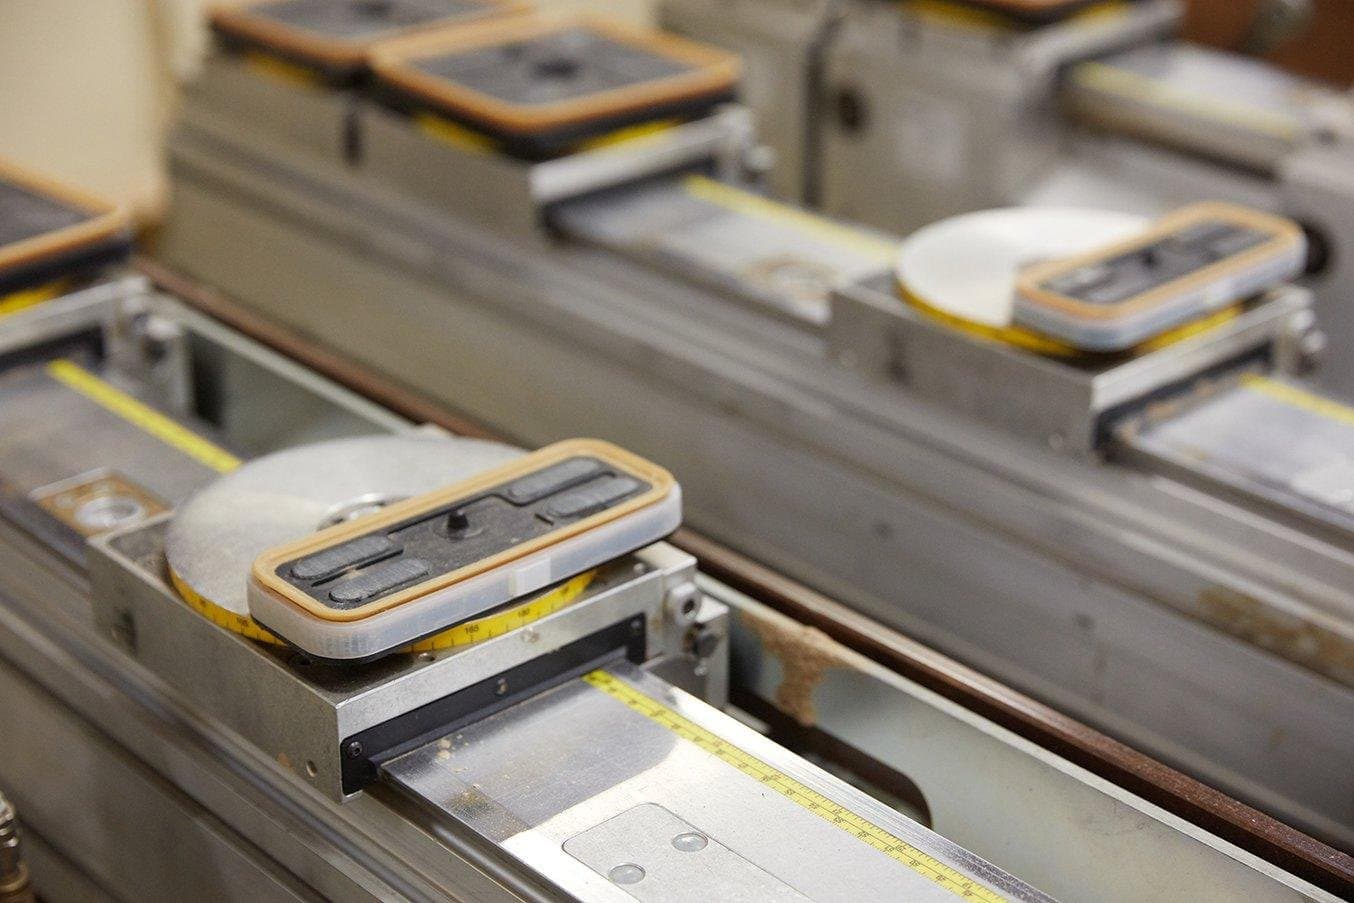
Instead of purchasing a complete new assembly pod for $700, the company 3D printed the part that needed replacement for just $1.
Productive Plastics is a leading contract manufacturing company specializing in custom plastic thermoforming component production and design service. They operate six manufacturing cells, so that multiple projects can progress simultaneously. Each cell is equipped with an industrial thermoformer, a CNC milling machine, an assembly area, and a computer system to organize and monitor operations.
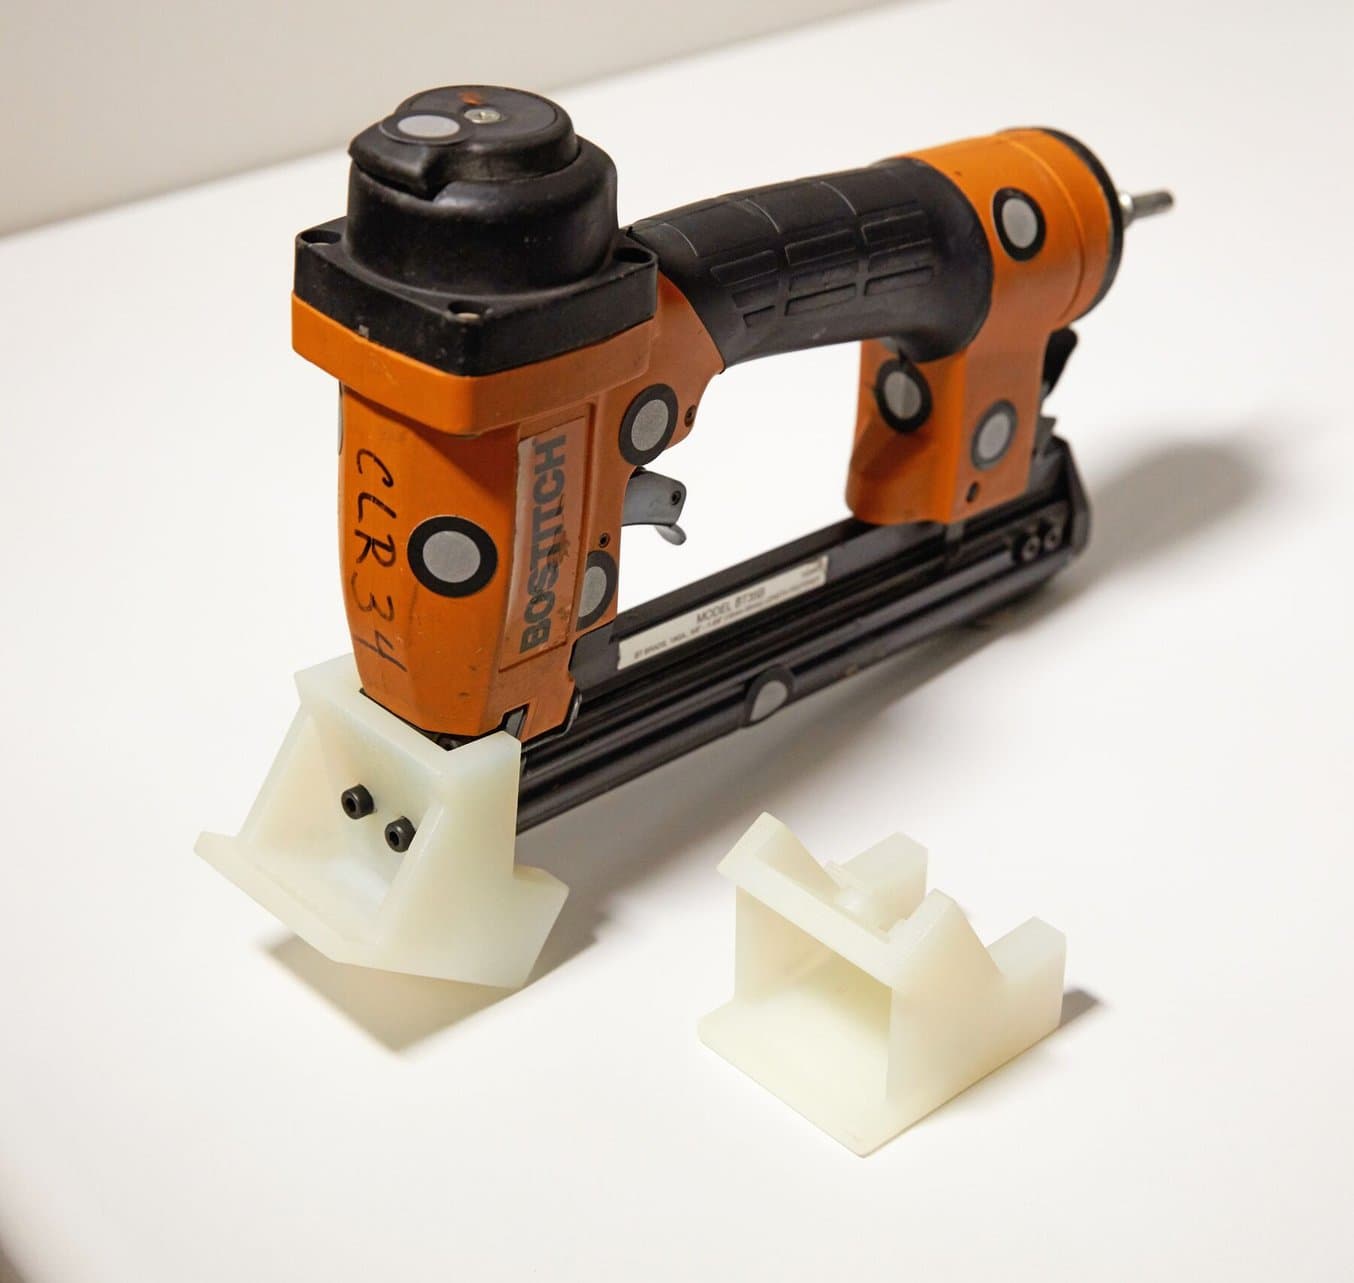
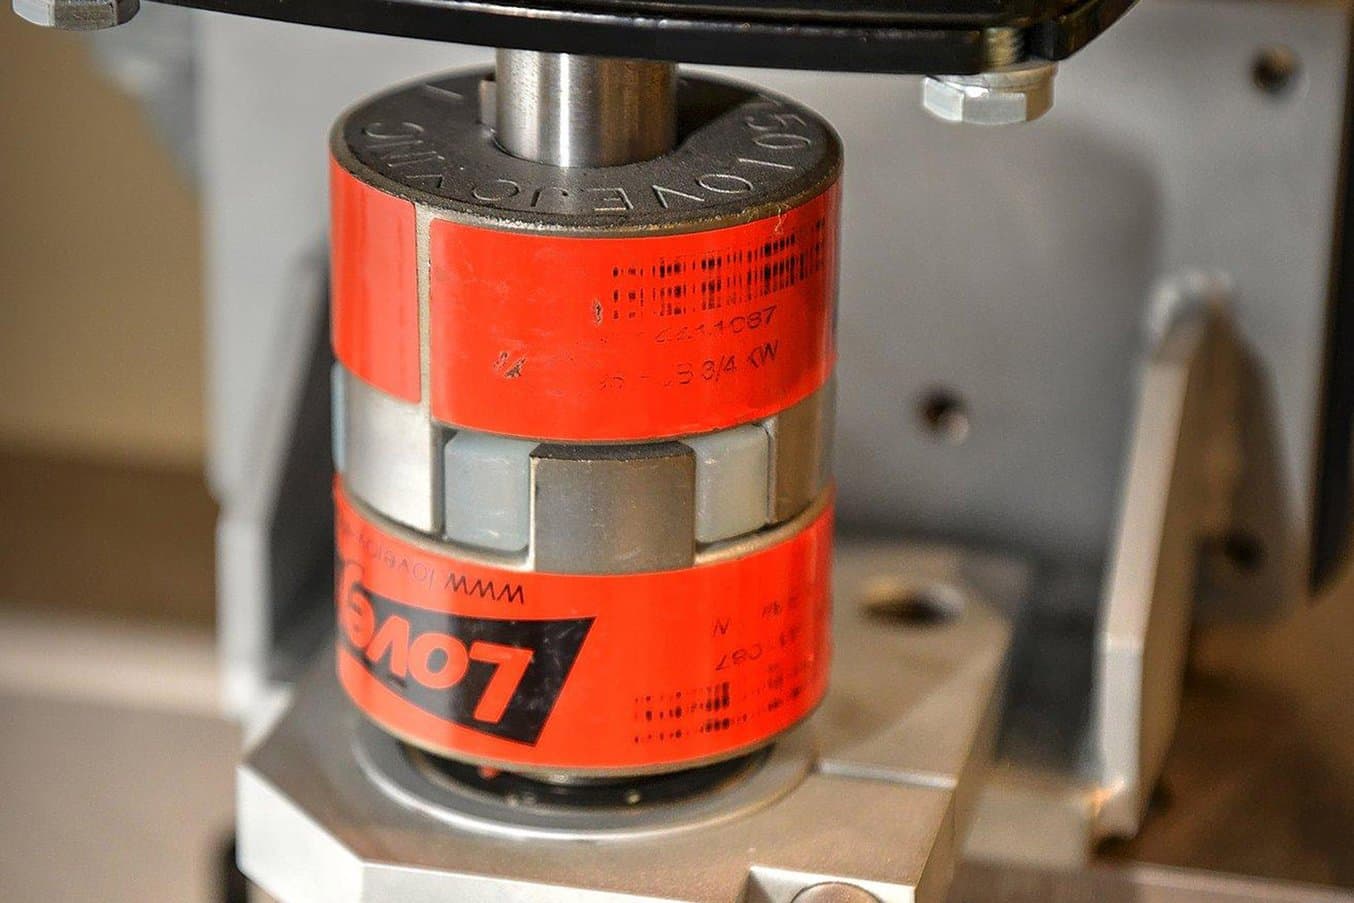
When one machine’s cooling fan broke, the thermoformer was simply unusable, shutting down an entire work cell. The team was looking at a six to eight-week lead time for receiving a replacement part from their supplier. To keep the floor running while waiting for repair, they 3D printed a stop-gap replacement part for the impeller.
They designed two replacement impeller iterations in Solidworks, then printed them on a Fuse 1 SLS 3D printer overnight, using Nylon 12 Powder. The self-supporting nature of SLS 3D printing enabled a dual-sided design with a center bore — without supports to remove or post-process, the impeller was immediately ready to fit into the existing machine.
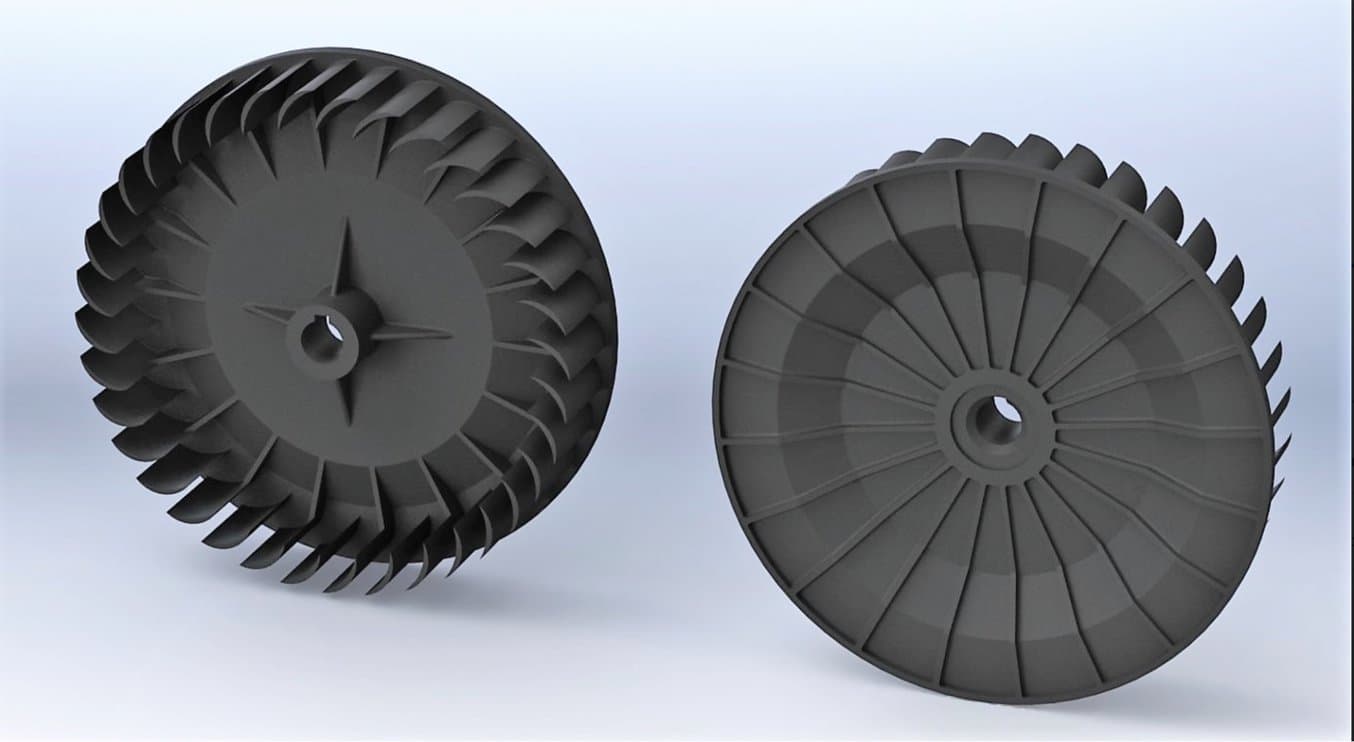
The 3D file of the impeller stopgap replacement part in Solidworks.
“With many other printing methods it would have been difficult to do the backside of the impeller, specifically the ribs and center bore, which are injection molding type of features. [...] One of the reasons why we chose the Fuse 1 is that we don't have to use supports. This part really highlights the strength of the Fuse 1 to print complex geometries,” said Kyle Davidson, Sales and Marketing Director at Productive Plastics.
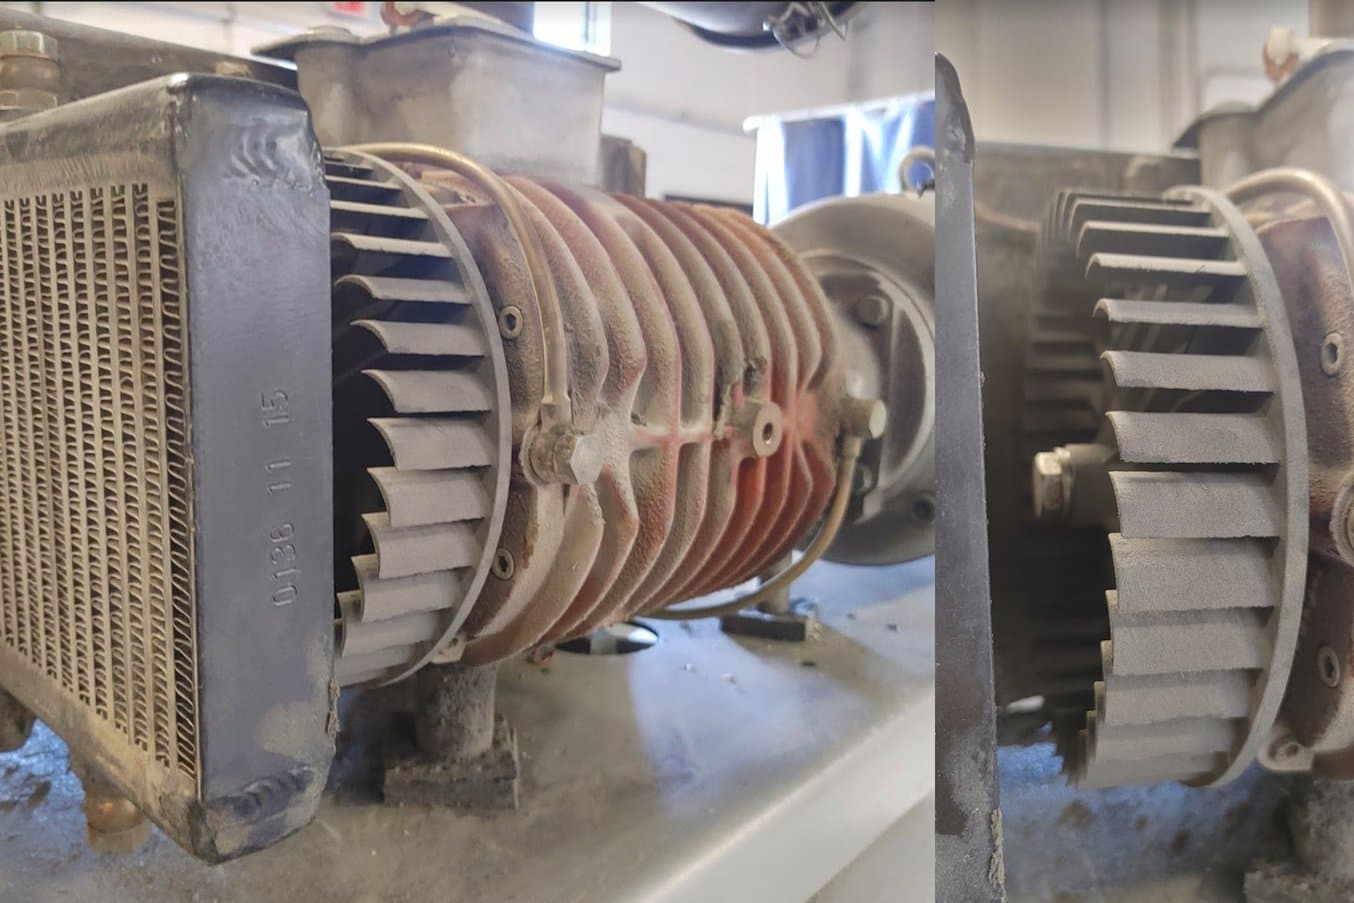
A close-up (right) and expanded view (left) of the 3D printed impeller, fitting seamlessly into the industrial thermoforming vacuum pump.
The impeller worked immediately, getting the cell back up and running the next day after failure and it was working as intended until the team replaced it with the supplier’s part about 6 weeks later.
At Productive Plastics, one manufacturing cell cycle time ranges between 5 and 15 minutes, leading to a minimum volume of production of 40 parts per day for one work cell. 6 weeks of machine downtime would generate a loss of more than 1,200 parts and $30,000 — when averaging the cost per part to $25.
| In-house 3D printed part | Outsourced repair part | |
|---|---|---|
| Lead time | 1 day | 6-8 weeks |
| Loss due to downtime | $1,000 | $30,000 |
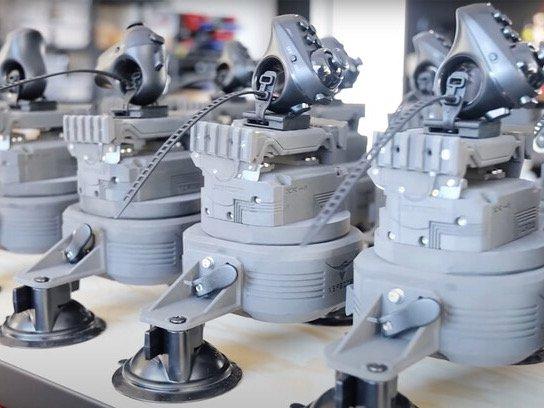
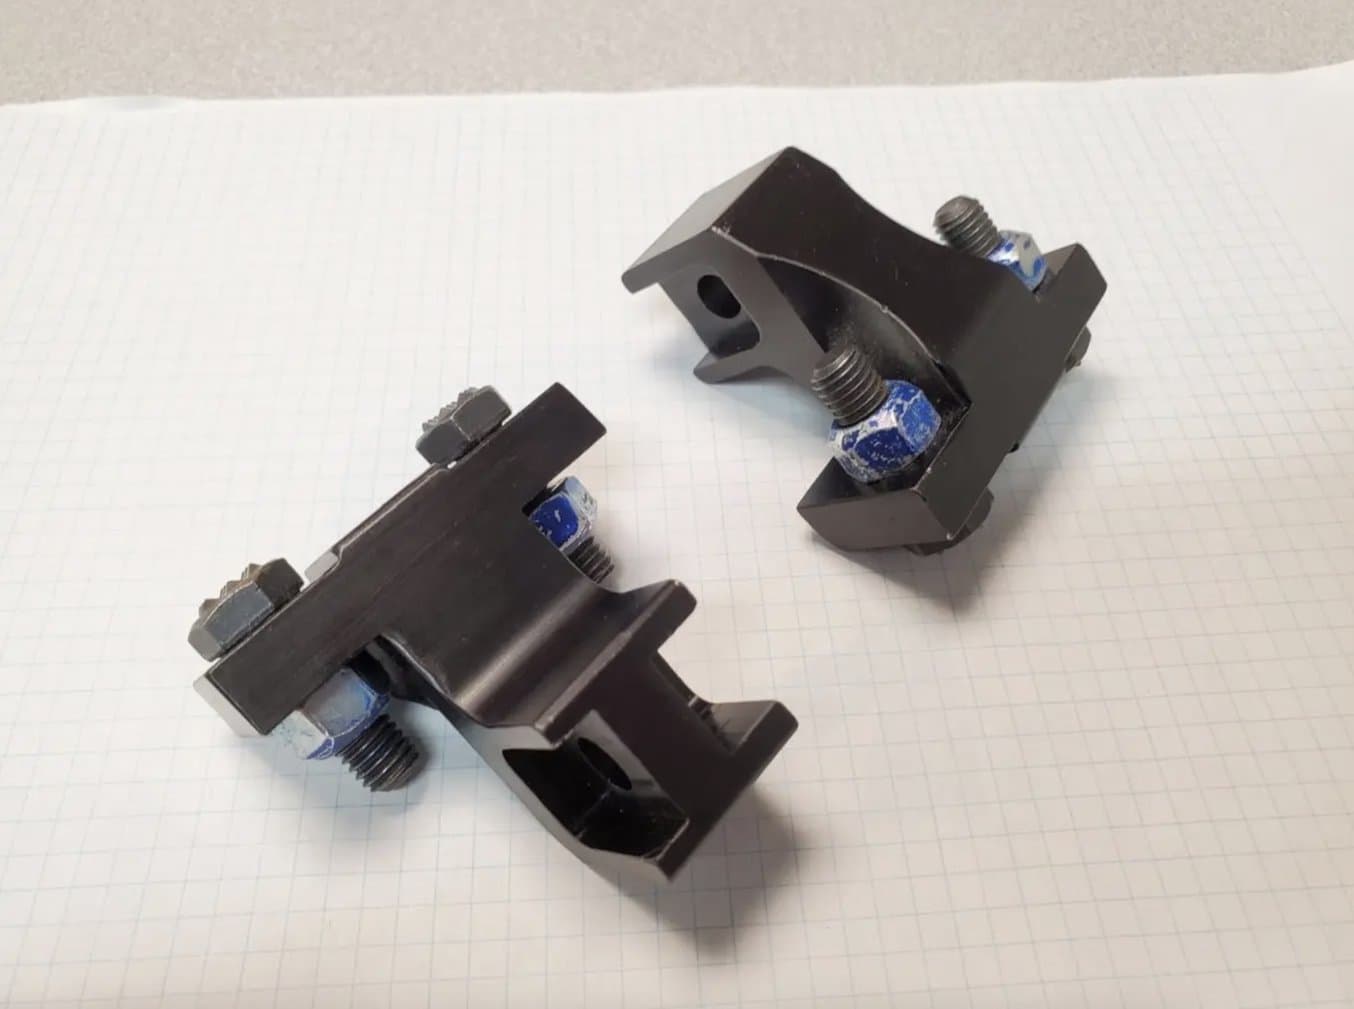
Researchers at the AMRC composites center were exploring how to automate moving carbon fiber plies with high accuracy and speed using a pick and place robot. After prolonged use, however, the L-brackets that held the robot’s compressed air grippers started to bend around the joints which lead to failures. Using 3D printing, the researchers could quickly develop a new solution, a custom springy component with a complex design that would not be possible to manufacture with traditional tools.
“I've done five iterations of the set of six grippers, which could have taken like 10-15 weeks to machine, and that's without even doing any trials,” said Matthew Williams, the composite technician working on the project.
Engineering service provider STS Technical Group also leveraged the SLA 3D printing to replace generic robot grippers with 3D printed grippers, superior in performance. The team developed custom grippers for moving and positioning fuel injectors in a manufacturing environment.
By switching from steel machined grippers to 3D printed polymeric grippers, they reduced the risk of marring on softer parts’ surface. Moreover, moving from a generic V-shape to a geometry form-fitting the fuel injector improved the grip contact for better accuracy and reliability, and reduced the pressure required in the process.
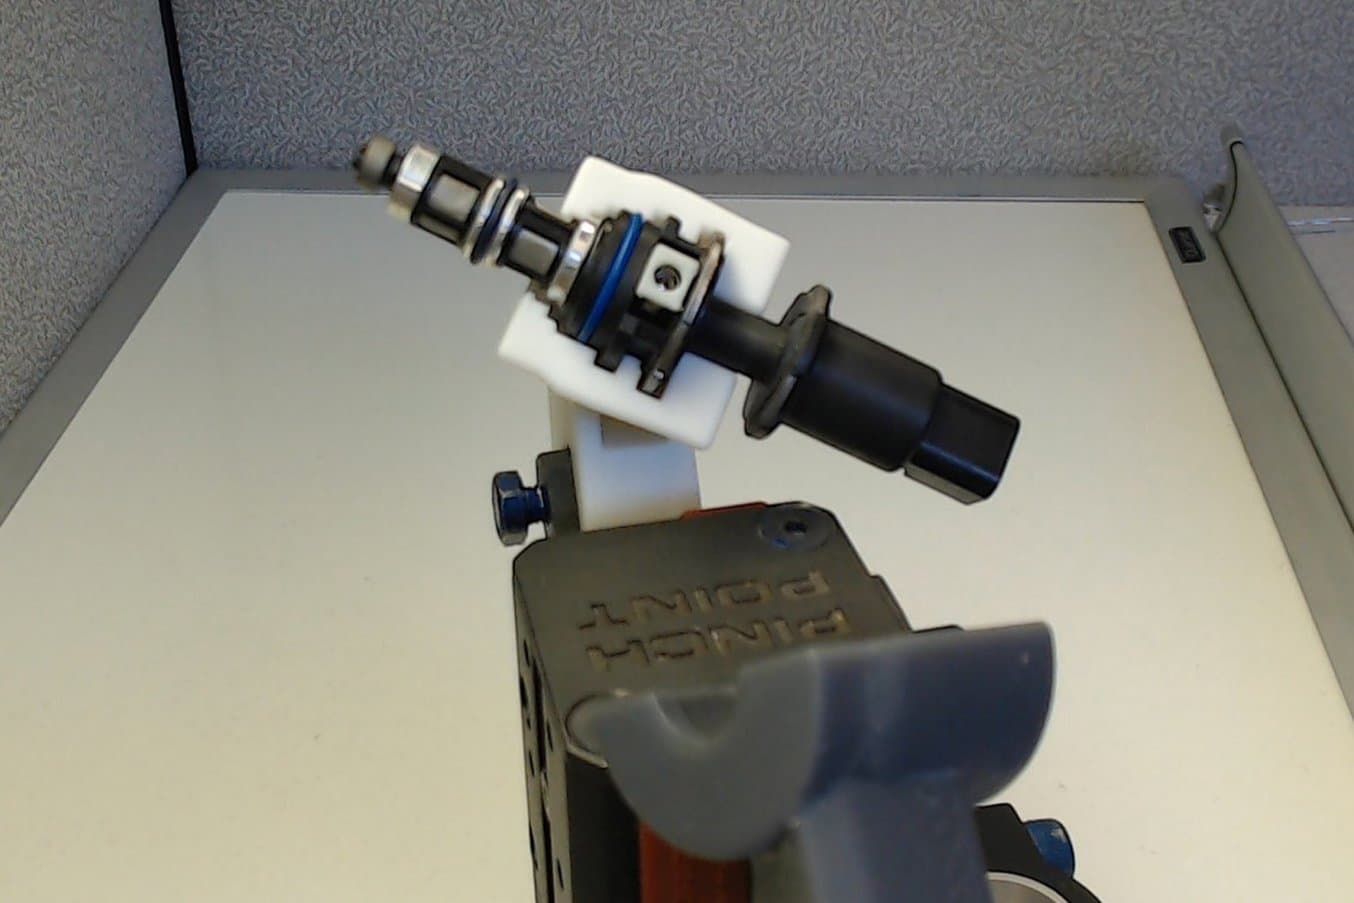
The generic grippers that were originally installed on the pneumatic cylinder (top). The pneumatic cylinder assembly; complete with Rigid 4000 Resin 3D printed grippers holding the fuel injector (bottom).
Machine shop A&M Tool and Design has scaled their use of 3D printing to produce functional parts like fixtures and several end-use parts. For example, when a spider coupling for one of their large lens polishing machines arrived in the wrong size two days before a big trade show, mechanical engineer Ryan Little quickly designed and 3D printed a correctly-sized replacement on an SLA 3D printer. The printed coupling was used to drive a two-horsepower motor on a grinding machine.
When an outsourced spider coupling for a lens polishing machine arrived in the wrong size, A&M Tool and Design 3D printed a replacement in Durable Resin for a quick fix ahead of a big trade show.
Is 3D Printing Replacement Parts Legal?
Generally yes, but it depends on the exact case.
Reverse engineering is generally legal and manufacturers may choose to 3D print spare parts using their in-house designs without breaching trade secret law.
If a manufacturer intends to 3D print spare parts for commercial purposes, it may be held liable under applicable law and may have obligations to supply designs or goods which satisfy certain safety and quality requirements under their contracts.
An extensive UK government study on the legal requirements and liabilities associated with the 3D printing of spare parts provides excellent insight into the legality of the process. The study considered the manufacturing of both spare and replacement parts alongside the legal requirement across every stage of the production cycle in the US, UK, EU, Canada, Japan, and China.
Get Started with 3D Printing Replacement Parts and Spare Parts
3D printing replacement parts and spare parts in-house is an affordable, quick, and efficient way to eliminate downtime and lost productivity.
Formlabs offers cutting-edge SLA and SLS 3D printers and industrial-grade materials for manufacturing spare and replacement parts. Explore our 3D printers or get in touch with a specialist to discuss how you can piece together an ideal workflow.