
3D printing is a powerful tool and Formlabs resin 3D printers make it easy to start printing. By adding advanced techniques to your 3D print process, you can expand what it’s possible to create. From finishing to assemblies to fabrication, advanced 3D printing techniques open up possibilities for 3D printed molds, electroplating, surface textures, fittings, prints larger than your printer, and much more.
CAD and 3D Modeling
Snap-Fit Joints
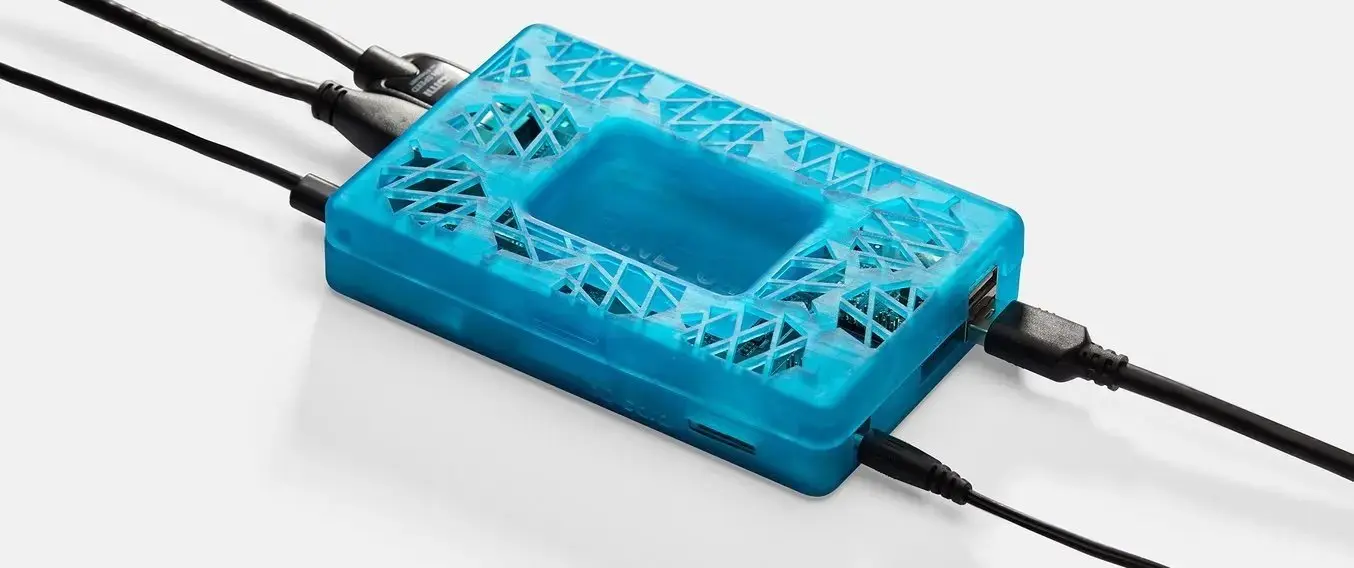
This plastic electronics enclosure was printed on a Formlabs resin 3D printer.
There are many designs for snap-fit components, which attach plastic parts together without the use of screws or adhesives. Snap-fits are often used when designing custom enclosures, interlocking printed parts together.
For more information, check out our step-by-step guide on designing and 3D printing snap-fit enclosures.
Large Models
When determining what’s possible with a compact desktop 3D printer, think beyond the build volume. Print large parts by splitting them into small sections and adding pins and slots to guide assembly, or use chemical fastening for parts that are not meant for functional use.
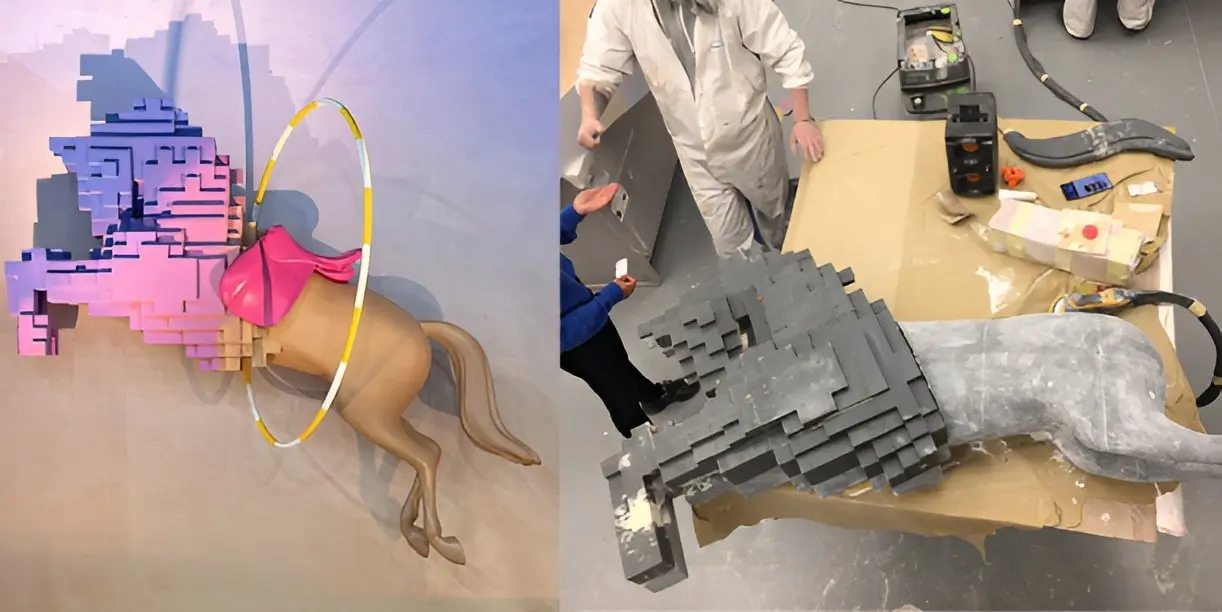
Precise and accurate printing on Form Series 3D printers makes it easy for Harlequin to assemble smaller parts into life-size models.
To learn more, read our guide on assembling large models or check out a case study with Harlequin Design, a visual merchandising firm that assembles large, 3D printed models for world-renowned brands.
Lattices
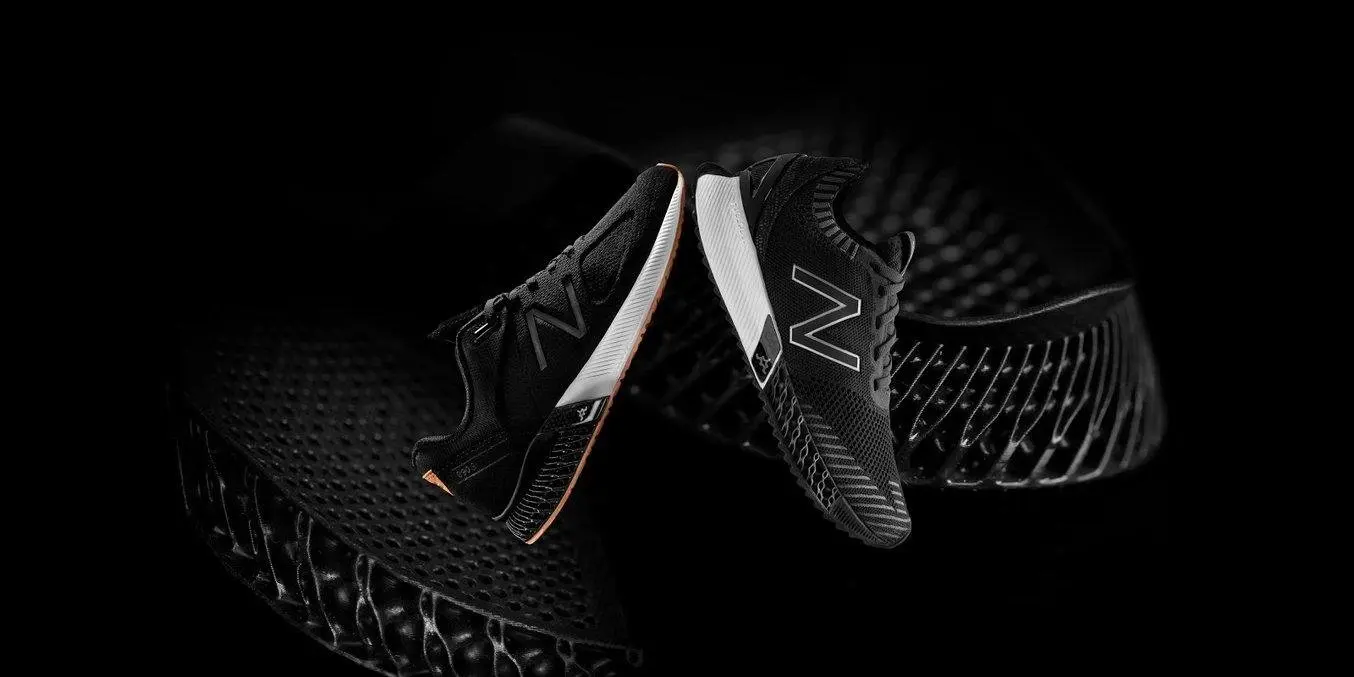
Two New Balance products use a 3D printed lattice structure to absorb shock and return energy with less material and weight than traditionally manufactured parts.
Lattice-like structures are commonly seen in 3D printed parts as it’s a simple and cost-effective method for producing a large quantity of negative features — like holes, slots, and pass-throughs — largely regardless of size or angle. These negative features reduce the material required to build the part, cut total build time, and maintain or even enhance structural integrity and part performance.
In flexible or semi-rigid materials, lattice structures can improve the ability of a part to absorb stress and strain from a variety of angles and pressures, creating extra compliance where needed, and providing the strength to resist compression or deflection in other areas.
To learn more, read our case study with New Balance.
Flexures
Also known as compliant mechanisms, flexures include living hinges and other flexible mechanisms that achieve force and motion through deformation of an elastic body. Use compliant features to create high precision and low hysteresis mechanisms.
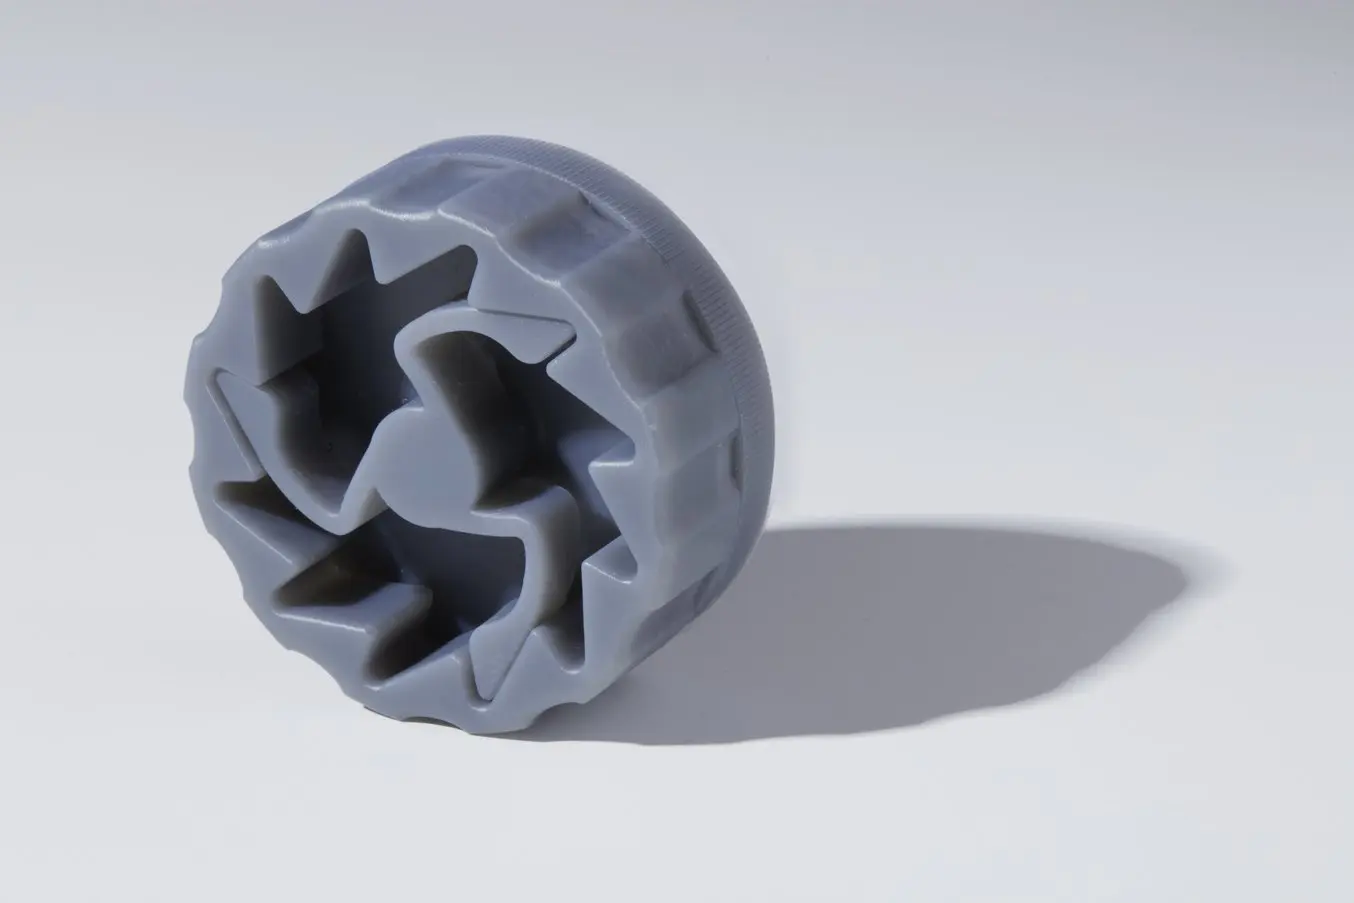
This compliant mechanism is printed in Tough 1500 Resin.
To evaluate a 3D printed compliant mechanism for yourself, request a free sample part printed from PU Rigid 650 Resin.
Gaskets
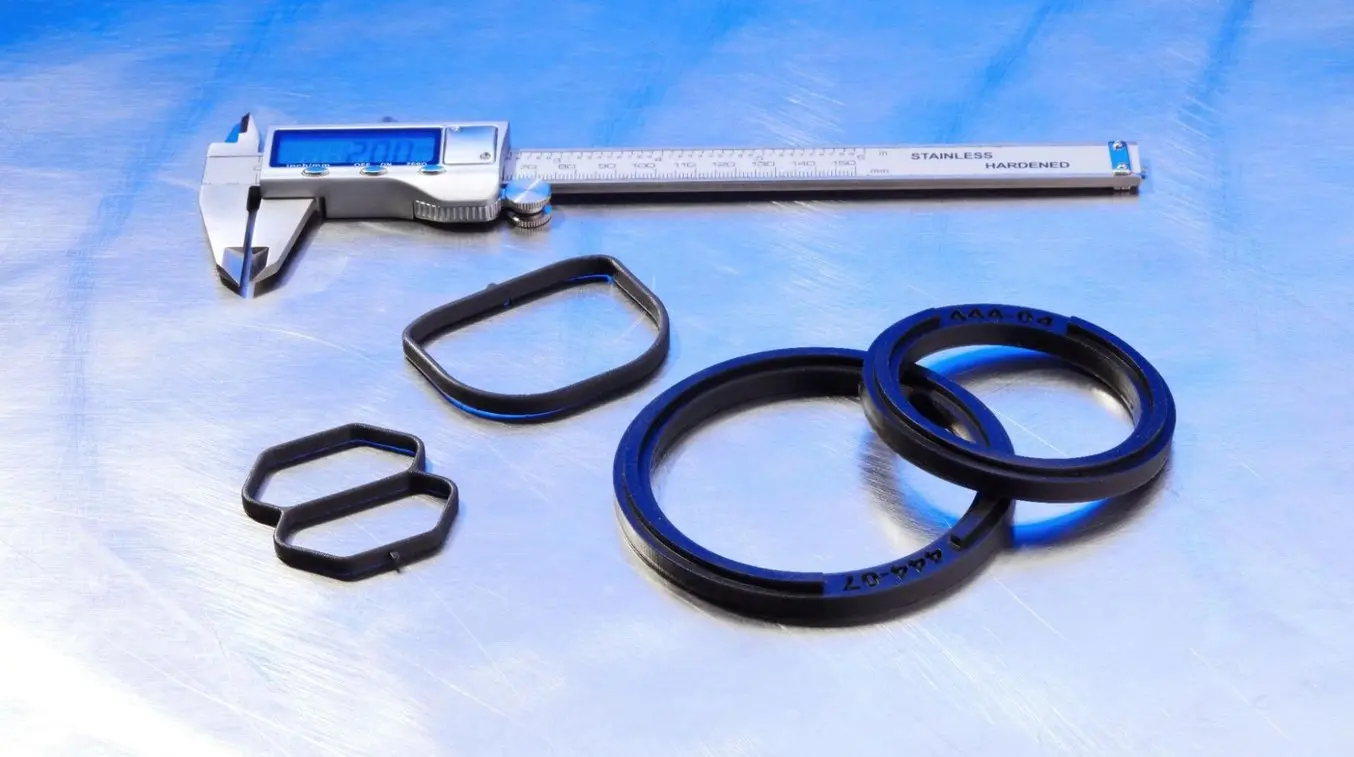
Custom gaskets from Dorman Products 3D printed in Silicone 40A Resin.
There is a widespread need for custom or low-volume watertight and gas-tight parts across several industries, such as marine research, underwater robotics, sustainable technologies engineering, oil and gas industries, and defense. Create watertight enclosures by 3D printing a groove and outfitting it with an O-ring.
Learn more about watertight 3D printing in our white paper, including how to select an O-ring, and pressure-testing results from 3D printing watertight enclosures.
Assembly
Threads and Inserts
Knowing the best ways to create strong, functional assemblies with 3D printed parts saves engineers time and money. Screws, bolts, and threaded features are common methods for assembling and aligning mechanical components or transmitting motion. Attach screws to 3D printed parts by using inserts, tapping, and 3D printing screw threads.
Read our article to learn more about 3D printing threads and adding threaded inserts to 3D printed parts.
Resin Adhesive
Formlabs resins can behave like glue when exposed to UV light. Use a syringe or similar device to apply resin to areas that need to be glued. Irradiate the resin with a 405 nm laser pen or pointer and, in seconds, you can patch holes or glue parts together. Note that, due to the formulation of Formlabs resins, you will need a 405 nm laser pen or pointer in order for this technique to work.
Learn more about using resin as an adhesive in our forum.
Fabrication Techniques
Jigs and Fixtures
Create manufacturing aids by 3D printing jigs, fixtures, alignment pins, and caps.
Jigs and fixtures are used to make manufacturing and assembly processes simpler and more reliable, reducing cycle times and improving worker safety. Typically, manufacturers machine tooling in metal, either in-house or through outsourced vendors. However, metal is not always necessary for these parts, and Formlabs Resins can be used to replace metal fixtures in automated machining operations, electronics assembly lines, foundries, and other production facilities.
Read our guide to learn more about replacing machined jigs and fixtures with 3D printed parts.
Sheet Metal Forming
Form complex parts from a metal sheet by using 3D printed plastic dies. Metal components are used in applications from appliances to construction parts and car body panels due to their strength, stiffness, and long-term durability. Sheet metal forming requires dies that are traditionally produced out of metal by machining, in many cases outsourced to service providers. With Formlabs resin 3D printers, it’s possible to print plastic dies for sheet-metal forming, saving time and costs.
Mold Making and Casting
Work with a wide range of materials, including silicone and thermoplastics, by injecting or casting them into 3D printed molds, including two-part injection molds, overmolds, compression molds, and eggshell molds. These methods can be employed for prototyping products, small-batch production of customer beta units, or production of custom end-use goods.
Unilver and Serioplast 3D print molds for rapid stretch blow molding, using them to develop and test new bottle designs in record time, and at low costs. They share the key benefits and applications in this case study and webinar.
To learn more about producing silicone parts with 3D printed molds, read the guide, or download our white paper on using molds to create silicone medical devices.
Insert Molding
Insert molding is another form of injection molding in which existing parts are encased by placing them in a mold and injecting them with plastic. Insert molding is often used to add a plastic layer on top of a metal one, for example, to add a plastic handle to a metal screwdriver. You can also use insert molding to manufacture insulated pipes, wiring, and other similar products, or embed electronics into plastics.
3D printed molds can be used for insert molding.
Learn more about insert molding and when it should be used in our guide, or download our white paper to read about three case studies.
Thermoforming
Use 3D printed parts as molds to shape thermoplastic sheets under heat and pressure. 3D printed thermoforming molds can be used with both benchtop and industrial machines to efficiently and affordably produce dozens of functional prototypes, parts for pilot production, or custom and low volumes of end-use parts. From orthodontics to packaging, thermoforming is a versatile production method.
Explore our extensive guides, resources, and case studies to learn more about thermoforming or download the white paper to learn more.
Stamping
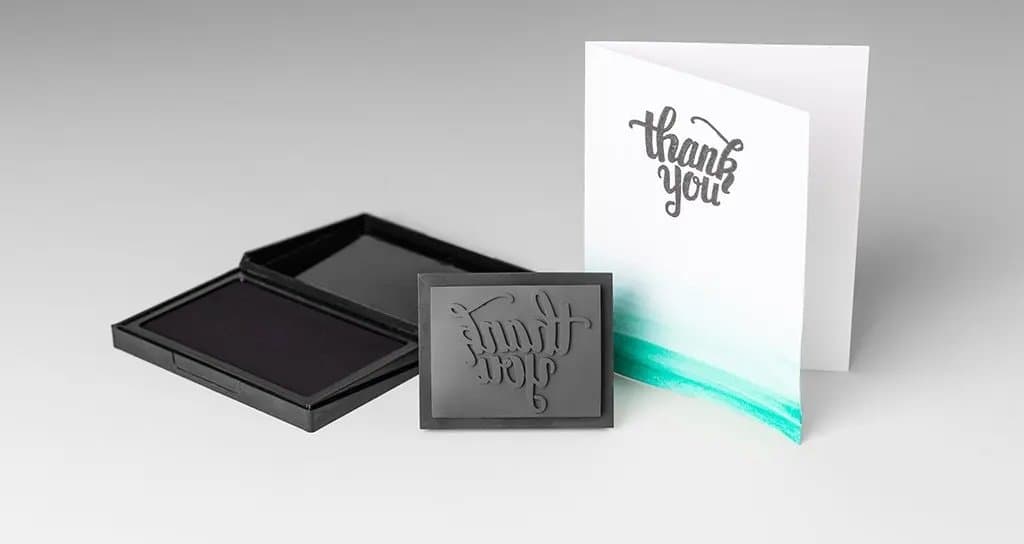
3D print with Flexible Resin to make custom stamps.
Use Formlabs Flexible 80A Resin to create compressible stamps for ink printing. Read the guide to create a custom stamp in seven easy steps.
Lithophanes
A lithophane is a three-dimensional image that changes according to the intensity and quality of the light striking it. The light areas are very thin, allowing more light to pass through, while the thicker parts appear darker. By adjusting part thickness to control light transmission, it’s possible to create images with stereolithography 3D printing.

Hold the lithophane up to the light or create an LED backlight lamp to see the image.
Read our step-by-step guide for free lithophane generators or a tutorial on advanced tools and techniques.
Finishing
Dyes
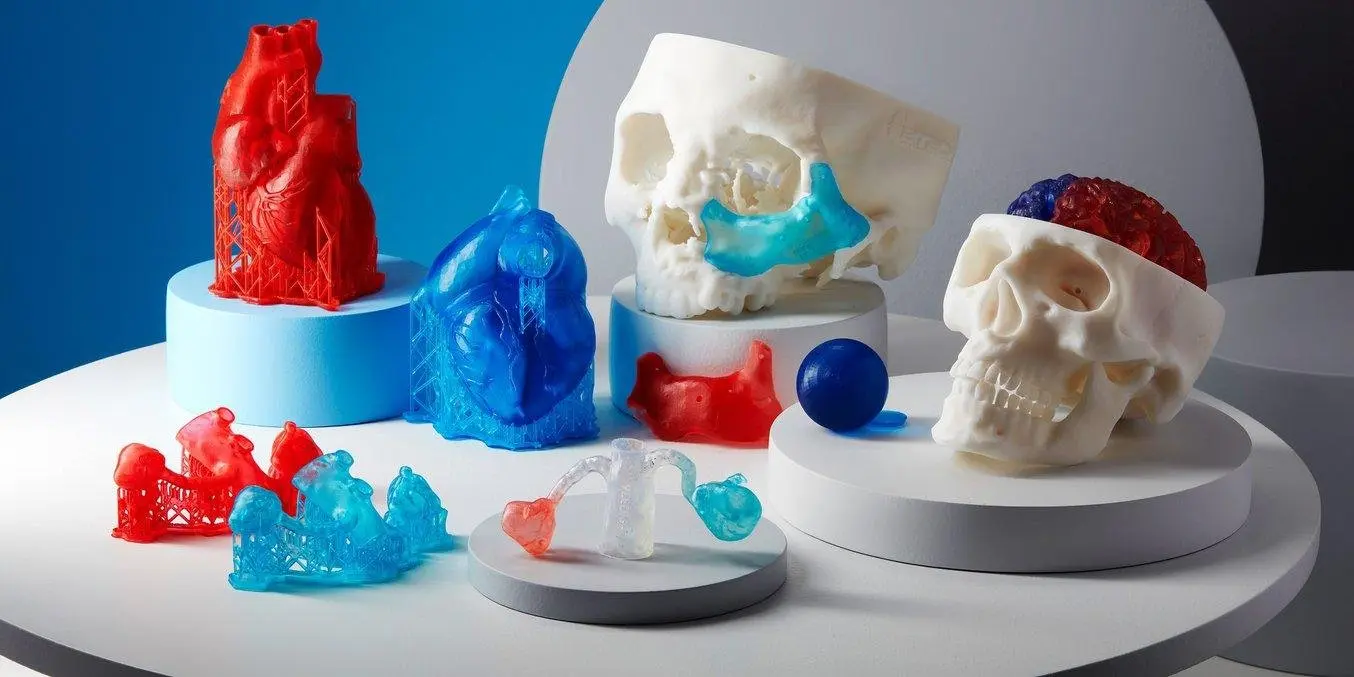
Dyes are one way to color 3D printed parts, including anatomical models used for diagnosis and education.
Color parts by printing with dyed resin or dying parts after printing. While SLA 3D printing is renowned for its high levels of accuracy, it offers more limited options for printing in color than other 3D printing methods, like fused deposition modeling (FDM). When printing with Formlabs resin printers, printing in a single color is simple with our Color Kit. Other options for adding color include printing with dyed resin, dyeing SLA parts after printing, painting with acrylic, and coloring hollow parts. Learn more about the best applications for each method and follow step-by-step instructions in our guide.
Fragrances

What began as an April Fools’ Day joke is now a reality — this 3D printed strawberry smells like strawberries.
It’s possible to create scented parts by adding fragrance oil to resin before printing. Read our guide for the complete recipe and instructions to try it out for yourself.
Electroplating
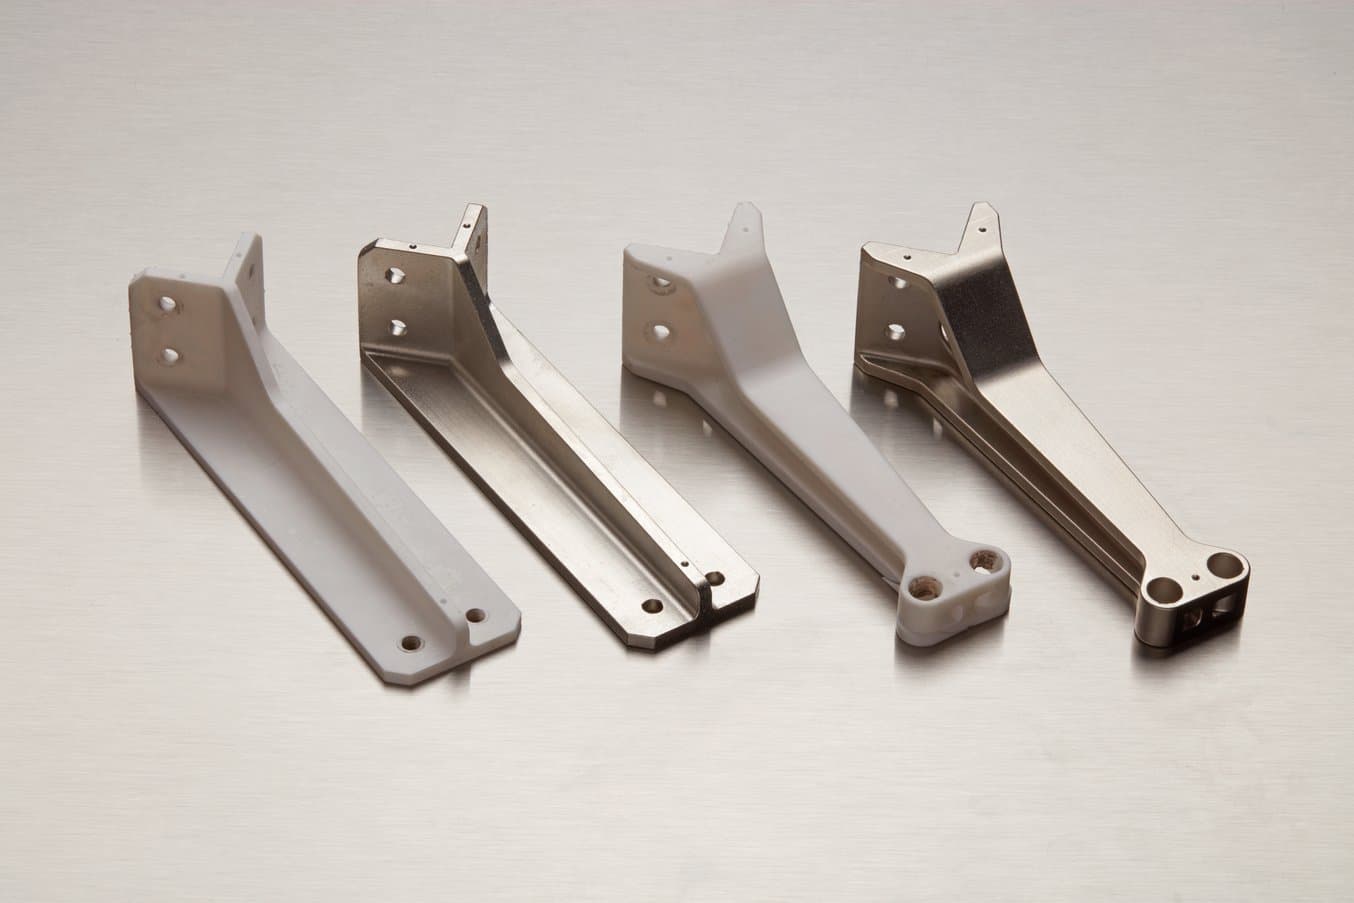
The smooth, finely textured surfaces of SLA 3D printed parts are ideal for electroplating.
Electroplating lets you combine the strength, electrical conductivity, abrasion and corrosion resistance, and appearance of certain metals with different materials that boast their own benefits, such as 3D printed plastic parts.
Stereolithography (SLA) 3D printing is ideal for electroplating because it creates 3D printed parts with very smooth or finely textured surfaces that make the transition between the two materials — plastics and metals — seamless. It also creates watertight parts that won’t get damaged when submerged in the chemical bath required during the electroplating process.
To learn more about electroplating, read the article, or download the white paper for strategies and use cases for electroplating SLA parts.
Polishing
Create perfectly smooth surfaces by sanding them with progressively finer abrasives. A pen sander creates uniform surface finish on flat and gently curved parts, A rotary tool with grinding, polishing, and buffing bits is ideal for creating a buff, polished sheen on SLA parts. For flat and gently curved parts, a pen sander can also be used.
With the help of experienced engineers and valued users, we’ve curated a set of 3D printing finishing tools designed to enhance surface finish, smooth planes and edges, and elevate overall appearance while driving down labor time and cost per part, making it easy to create smooth, polished SLA parts.
Priming, Painting, and Coating
Protect and change the appearance of a 3D printed part by priming, spray painting, and coating it.
Sanding parts to ensure a smooth surface is the first step to painting a 3D printed part. Once a part is smooth, priming ensures a pristine surface onto which paint can be added. After painting and polishing, clear coat can be added to protect the part.
For a thorough materials list and step-by-step direction, read our guide.
Texture
Create complex surface texture with displacement maps using the Formlabs Texture Engine. This free, lightweight, web-based app is designed to quickly apply textures to 3D models, ready to be 3D printed. Many plastic parts incorporate surface textures and patterns to enhance the look and feel or to optimize the part for an intended application. Typically, this is done as a secondary process, but 3D printing makes it possible to apply textures and patterns directly to files for printing.
Water Transfer Printing
Also known as hydrographics, water transfer printing is used to apply complex graphic designs to a 3D printed part using a PVA hydrographic film. Immersion printing is typically used to customize objects with graphic patterns. The object is dipped into a water bath with a floating, partially dissolved colored film, which wraps around the object and transfers the graphic to the surface. Objects with compound curves are challenging to color with graphics any other way.
3D models are often designed with image textures, which are wrapped around the model using a “UV map.” By printing a modified UV map onto hydrographic transfer film, we can apply a diffuse texture to the surface of the 3D print. Unlike normal repeating-pattern hydrographics, a UV texture needs to be accurately positioned on the model. This requires a way to simulate and predict the behavior of the hydrographic film as it wraps around the model.
Read our guide to learn how to apply full color patterns onto your parts with computational hydrographics.
Advancing 3D Printing
Formlabs resin printers can be used for diverse applications and industries from engineering and manufacturing, to dental and medical, to aerospace and entertainment. Form 4 Series masked stereolithography (MSLA) 3D printers represent the next evolution in SLA 3D printing, delivering unprecedented speed without compromising on dimensional accuracy or surface finish. WIth intuitive workflows and best-in-class reliability, Form 4 and Form 4L allow you to print with ease, so you can spend time pushing your ideas, and not troubleshooting your prints.
Explore Formlabs resin 3D printers or talk to a 3D printing expert to learn how 3D printing can help you reach your goals.