
Clear Resin is a powerful 3D printing material that appears in nearly every industry. Surgeons use it to build medical models that help save lives and engineers have made functional magnifying lenses to build prototypes and examine small parts. With its refractive properties, Formlabs Clear Resin can also make amazing prisms.
A prism is transparent optical element with flat, polished surfaces that refract light. When white light shines through it at a certain angle, a rainbow of refracted light comes out the other side. A variety of geometric prisms are found in many tools that bend light, like cameras, binoculars, and even submarine periscopes. As an educational tool about the properties of light spectrums and refraction, a prism manipulates sunlight by splitting its light into the visible spectral composition that we are all familiar with — a rainbow.

How to Make a 3D Printed Prism

What You’ll Need:
Form 2 3D printer
Formlabs Clear Resin
Prism .form file
Sandpaper (fine and heavy grits)
Cork
Glossy clear coat

Print out a triangular prism.
We chose an equilateral triangle with each angle at 60 degrees. Download it here.Sand the print.
Start with the heaviest grit (such as 150) and end with the lightest (2000) that you have in your toolbox. Between 1500 and 2000, wet-sand the surface by dampening the sandpaper with warm water. Finally, polish it with damp cork.

Remove layer lines and prevent new scratches by sanding on a smooth, flat surface in circular motions.

Before sanding layer lines (left). After the first pass with 150-grit sandpaper (right).

Finish to optical transparency.
Finally, spray the polished prism with a glossy clear coat.
If you wet the sanded print, the water will coat the surface enough for it to refract light. But once dry, the surface becomes cloudy. You can cure Clear Resin onto the print’s flat surface, but this method is not ideal. It takes a lot of patience, and the prism turns yellow and loses its shape after too much curing.
Clear nail polish also works, but many varieties dry too fast to create a uniform surface. In the end, nothing beats an acrylic polymer spray. A glossy version made for cars will dry quickly into a flawless surface.

From left to right: Not sanded, no rainbow. Sanded + Clear Resin, hints of spectral splitting. Sanded + clear nail polish, a fractured rainbow. Sanded + glossy acrylic spray, a strong rainbow. Have fun with your prism

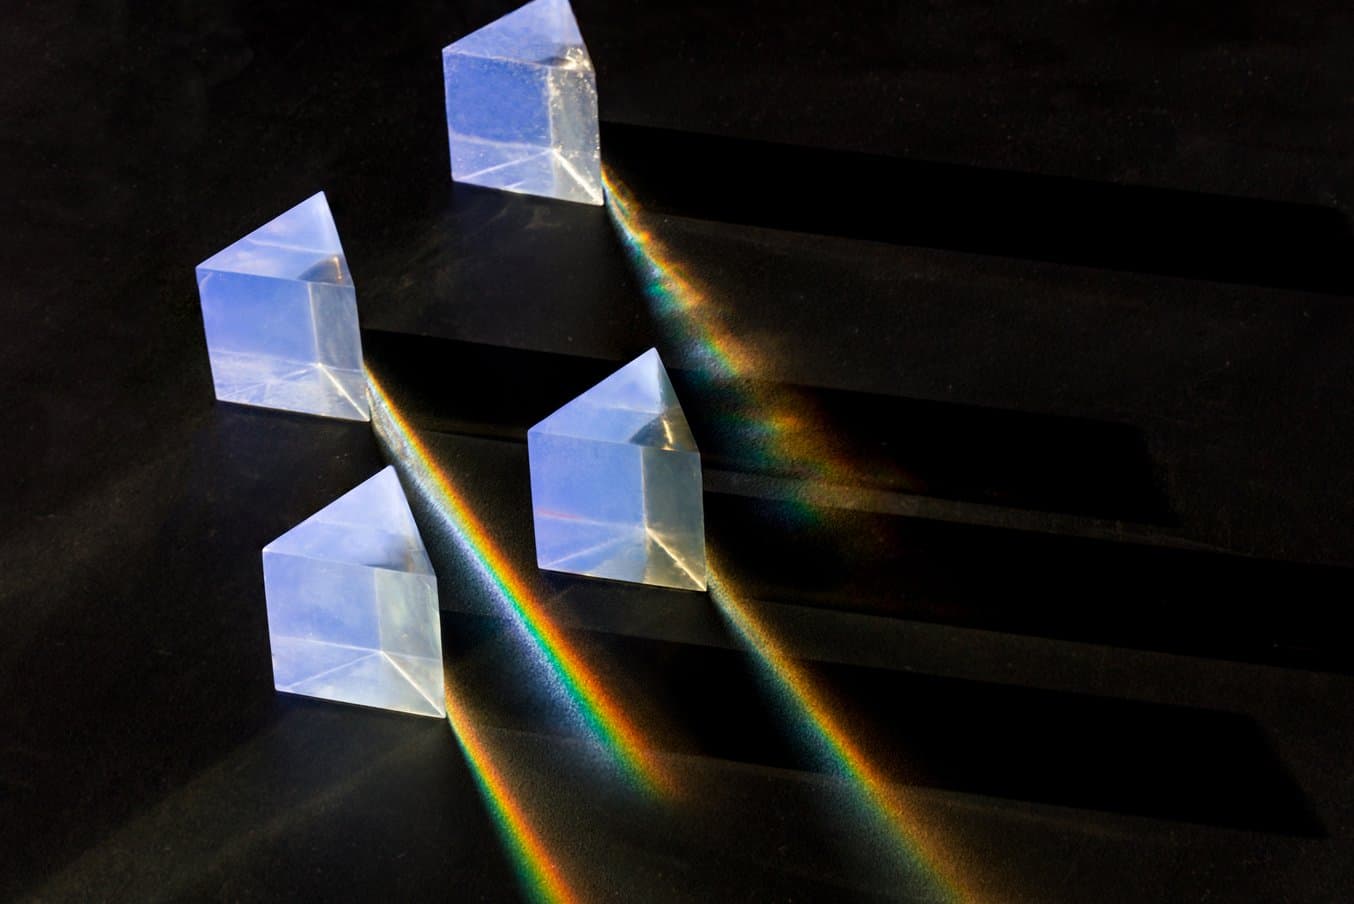
Use prisms together to bend rainbows.
In our winter office, we had best results between 2:00 and 3:30 on a sunny day. Your results depend on your location, season, and sunlight direction. If you don’t want to wait for the sun, a flashlight or laser pointer will also shine through the prism. Experiment with different angles and light colors, and enjoy the beautiful product of your hard work.

Formlabs White Paper: Post-Curing Prints
We set out to study the post-cure process in detail in order to optimize final mechanical properties of printed parts. Download the white paper to learn more.