
Discover How 3D Printing is Revolutionizing the Creation of Cell Cultures: Examples, Workflows, and Considerations
Since Ross Granville Harrison successfully grew neuroblasts in-vitro in 1907, cell culture research has greatly contributed to medical advancements. In spite of this, fundamental technologies and techniques have remained largely unchanged for much of the last century.
However, in recent years, advances in the field of cell culture research have resulted in a "cultural" renaissance, so to speak. One of the technologies enabling this is stereolithography (SLA) 3D printing. Also known as additive manufacturing, 3D printing can help cell culture research move into a new era of more accurate and realistic cell culture experiments while reducing development costs and time, and opening the door to more new and complex geometries.
This post will first describe what cell cultures are, how research is traditionally performed, and how 3D printing technology is changing the industry. You will learn:
- The main types of cell culture devices being created today.
- The multiple benefits 3D printing brings to cell culture device creation.
- The simple step by step process to 3D print cell cultures.
Ross Granville Harrison
Ross Granville Harrison was an American zoologist who developed the first successful animal tissue cultures and pioneered organ transplantation. During his first year as professor of comparative anatomy and biology at Yale (1907–38), where he also served as chairman of the zoology department, Harrison cultivated tadpole tissue and discovered that nerve fibres grew from it. He observed that the nerve-cell outgrowths display protoplasmic movement, settling a controversy concerning the formation and nature of nerve fibres. His observations laid the foundation for modern nerve physiology and neurology, and his culture technique was instrumental in the development of cancer vaccines and polio vaccines.
What is a Cell Culture? Removing the Confusion
At the most basic level, cell culture refers to a technique by which cells are removed from an animal or plant and grown within a carefully controlled in-vitro or artificial environment. Cells may be removed from the tissue directly or separated by enzymes or mechanical processes, or they may be taken from an already established cell line or cell strain. The basic requirements for cell culture are a primary cell, a place to propagate, a growth media that provides relevant nutrients, and a suitable environment.
The main goals of cell culture are to develop new pharmaceuticals or to perform research on biological systems. The cell culturing industry is projected to become a $45 billion market by 2027.
Cell culture applications are expansive and varied. They are instrumental to the development of new pharmaceuticals or treatments and have had a significant positive effect on modern healthcare. Cell culture applications can be broadly divided into clinical and experimental categories as described in the table below.
Some notable leaders in the cell culturing techniques, tools, and patents markets include Merck, Thermo Fisher Scientific, and Irvine Scientific.
| Clinical Applications | Experimental Applications |
|---|---|
| Stem cell differentiation | Study tissue growth and maturation |
| Study tissue growth and maturation | Study of virus biology |
| Basic cell biology | Development of vaccines |
| Study of virus biology | Study genes and their role in disease and health |
| Replicate disease mechanisms | Large-scale cell lines to generate pharmaceuticals |
Let’s Review Equipment Commonly Found in Cell Culture Laboratories
Listed below are the general equipment used by scientists to develop cell cultures:
- Fume Hood: Used to maintain a clean, aseptic environment free of contamination. Fume hoods also extract any harmful airborne agents.
- Incubator: Cells are grown in an incubator that controls the CO2, O2, and temperature for optimal cell propagation. The temperature is typically maintained at 37°C.
- Water Bath: The warm water bath is used to warm reagents so that when they are added to the culture they do not cause a thermal shock to the cells. An alternative to a water bath is a metal-bead bath.
- Centrifuge: The centrifuge is used to pelletize the cells and separate them from any reagents.
- Refrigerator: The refrigerator is used to store reagents when not in use. It can also be used to store frozen cells for later use.
- Hemocytometer: This is used to facilitate the counting of living and dead cells. A hemocytometer is a manual process whereas a cell counting machine can automate the counting process.
- Microscope: The microscope is used to inspect the culture to ensure it is propagating as expected.
- Cell Culture Flasks: Used to house the cell culture during propagation. Petri dishes are also used.
- Growth Medium: The growth medium provides the relevant nutrients to the cells to allow them to propagate. Different cell types require different growth mediums.
- Reagents: There are many different reagents used in cell cultures. Reagents are used to dissociate adherent cells and also to sterilize a flask or Petri dish.
- Pipettes: Pipettes are used to apply the relevant reagents, cells, and growth medium into the cell culture flasks.
- Waste Containers: All disposable equipment used during cell culture experiments must be safely discarded into a marked waste bin.
3D Printing: A New Dimension in Cell Culture Research
3D printing, specifically SLA printing, has many different benefits which are impacting the creation of cell cultures. This section will cover some of the more established applications as well as highlight the specific benefits afforded by 3D printing.
Request a Free Sample Part
See and feel Formlabs quality firsthand. We’ll ship a free sample part to your office.
3D Printing Benefits Cell Culture Science Through:
- Rapid Prototyping: 3D printing allows for the creation of multiple iterations of design, size, shape, or assembly based on results of real-life testing and analysis, helping bring better products to fruition faster. This means multiple designs can be produced and tested in parallel to more quickly arrive that best possible solution. 3D printing empowers researchers with same-day prototyping and the flexibility to evaluate multiple design variations in parallel.
- Design Freedom: One of the greatest benefits of 3D printing, and especially SLA printing, is the ability to produce complex geometries and designs that were previously inaccessible with conventional manufacturing. Researchers now have the freedom to design experiments with more complex and organic geometries and configurations for their application. If you can imagine it, there’s a pretty good chance you can print it.
- Human Analogue: Although technically in the same category as design freedom, the freedom to create human analogues cannot be overstated. From microfluidics and “organs-on-a-chip” to scaffold-free 3D cell cultures, 3D printing allows the fabrication of complex cell culture devices that more accurately represent human physiology.
- In-House Manufacturing: Cell culture labs can design and manufacture components in-house without having to rely on external vendors. In-house manufacturing of end-use devices is becoming commonplace in the healthcare industry, whether for patient-specific devices or augmenting supply chains, the ability to produce components in-house allows for greater flexibility and autonomy.
- Low Cost: 3D printing cell culture devices is significantly cheaper than traditional manufacturing techniques like injection molding, CNC machining, and photolithography for low to moderate volumes of parts.
| Additive Manufacturing | Subtractive Manufacturing | |
|---|---|---|
| Equipment Costs | Professional desktop printers start at $3,500 for plastics. Large-scale industrial machines for metals start from ~$400,000. | Small CNC machines for workshops start around $2,000. More advanced workshop tools go well beyond that depending on the number of axes, features, part size, and tooling needed for specific materials. |
| Training | Desktop printers are practically plug and play, requiring minor training on build setup, maintenance, machine operation, and finishing. Industrial additive manufacturing systems require dedicated staff and extensive training. | Small CNC machines require moderate training for software, job setup, maintenance, machine operation, and finishing. Larger, industrial subtractive systems require dedicated staff and extensive training. |
| Facility Requirements | Desktop machines are suitable for the office and benchtop systems for a workshop environment with moderate space. Industrial 3D printers often require a dedicated space or room with HVAC control. | Small CNC machines are suitable for workshops. Industrial systems require a larger, dedicated space. |
| Ancillary Equipment | Tools and (some automated) systems for cleaning, washing, post-curing, and finishing, depending on the process. | Various tooling. More advanced systems automate some processes like tool changing, chip clearing and handling, and coolant management. |
-
Material Diversity: The number of 3D printing materials is expanding rapidly, and offer greater options for researchers to choose from, including biocompatible and sterilizable options. 3D printing also enables the development of custom materials to meet individual needs. Formlabs Medical has heavily invested in creating its own line of biocompatible resins designed for healthcare professionals who are seeking medical-grade materials for a wide range of applications where both mechanical performance and biocompatibility are critical. Materials in our BioMed Resin family are developed and manufactured in an ISO 13485 certified facility and are compatible with common disinfection and sterilization methods. We will revisit this topic in a later section of this post.
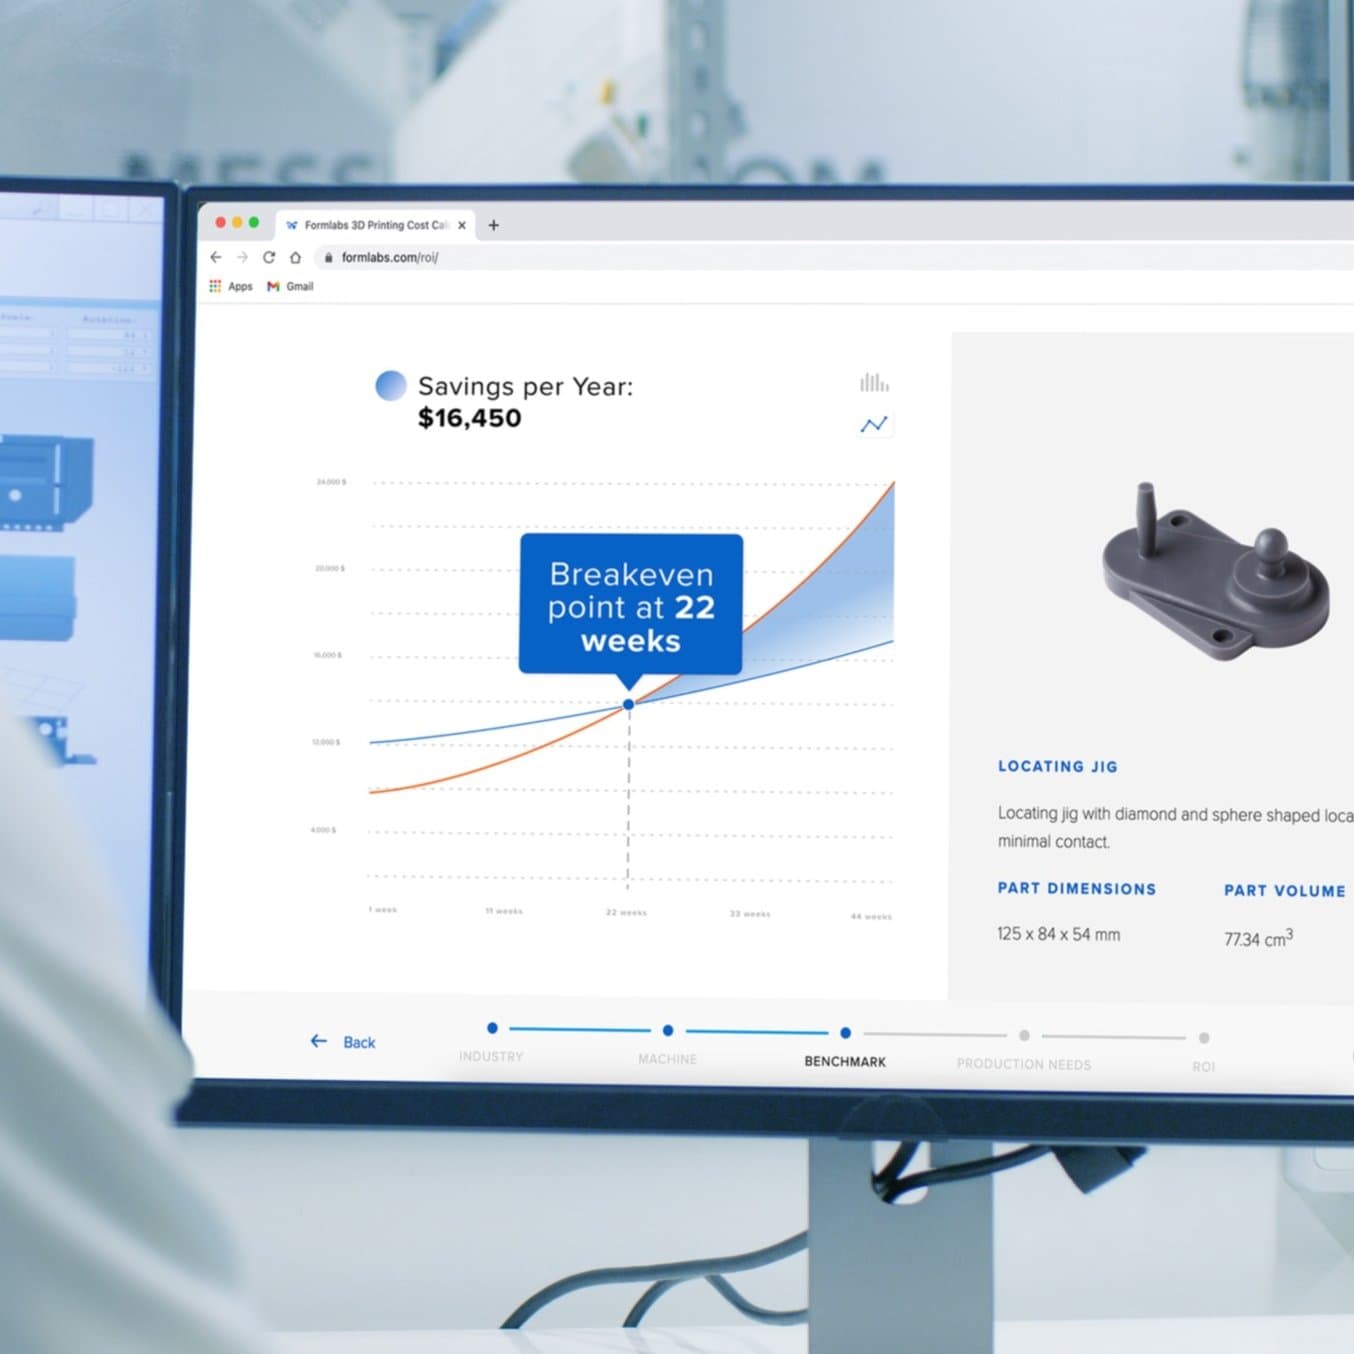
Calculate Your Time and Cost Savings
Try our interactive ROI tool to see how much time and cost you can save when 3D printing on Formlabs 3D printers.
3D Printing Applications: New Research Opportunities
There are five core applications that have emerged within the field of cell cultures that most often deploy 3D printing. They are: cell scaffolds, microfluidics, bioreactors, specimen collection devices, and labware. In this section we will look at the benefits each of these applications gain with the addition of 3D printing.
1. Scaffolds for 3D Cell Cultures
To reproduce the complex three-dimensional structures found in organic in-vitro environments, cells need support structures, called scaffolds. In the laboratory setting, these scaffolds are made from a porous, biocompatible polymer. SLA 3D printing can be used to create molds for the scaffold polymer.
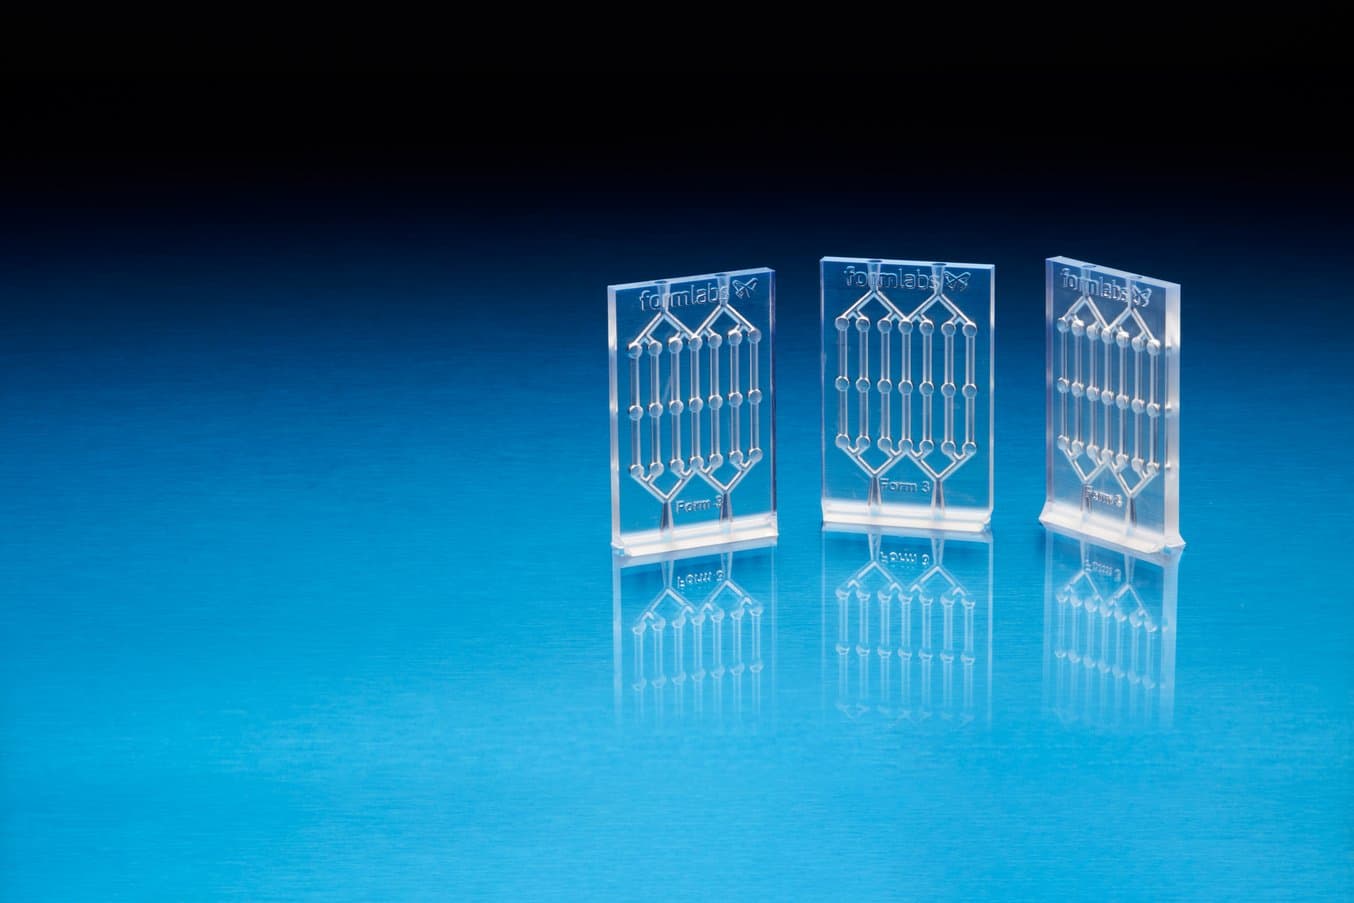
To create a scaffold mold for a 3D cell culture, first the researcher will determine the intended shape, and 3D print a corresponding negative model. This negative is then used to cast a silicone mold which can be used to form the scaffold polymer. A similar process of 3D printed master, silicone mold, and end-use polymer product is shown below in this fabricated model of a multi-channel blood vessel.
2. Microfluidics & Millifluidics
Microfluidics is a technique used to create accurate, predictive models on a sub-millimeter scale that simulate complex biological systems in their in-vivo environments without disrupting their inherent biological interactions. These microfluidic testing devices are also called ‘organs on a chip’ as they can mimic the basic function of various organs. For example, a ‘lung on a chip’ can replicate blood flow, airflow, and the motion experienced by lung cells. This allows researchers to perform experiments on organ tissue in realistic environments without having to use animal models.
Traditional manufacturing techniques like photolithography, CNC machining, and injection molding can be used to produce microfluidics chips. However, these techniques are often expensive and time-consuming. They are also limited to simple and generally inorganic geometries.
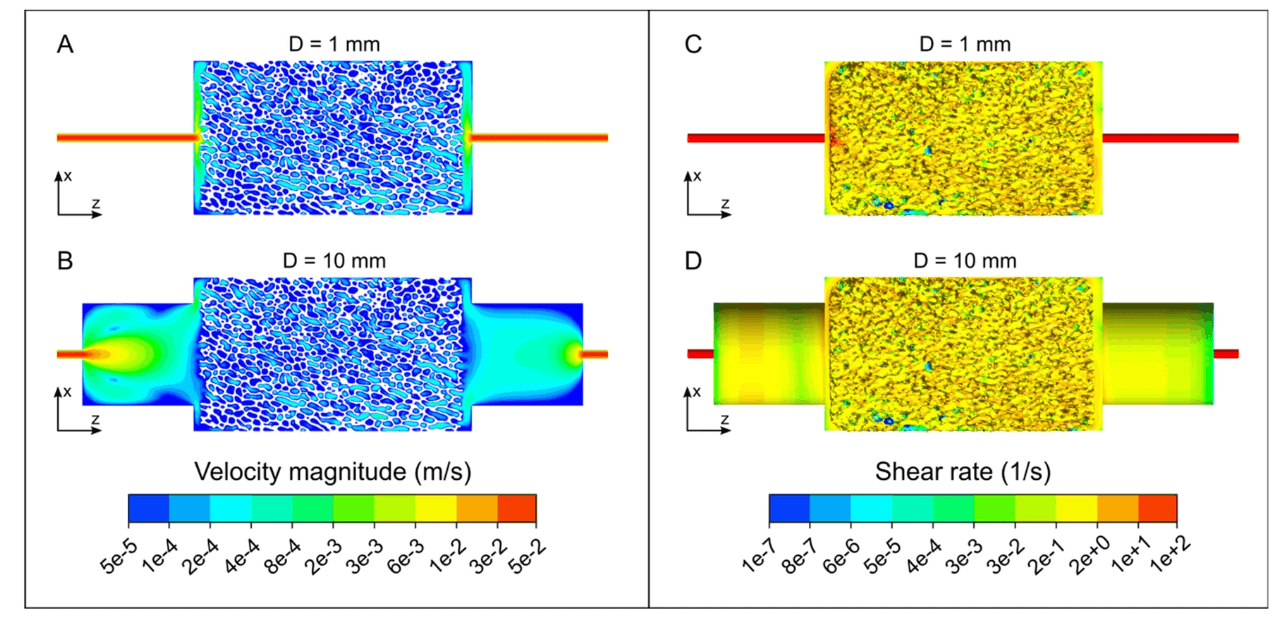
3D printing can produce microfluidic chips in a fraction of the time and cost, while also allowing for complex geometries if required. In a 3D printed microfluidic device, the channel roughness and location of fluid mixing can be controlled and varied with micron-level accuracy. This degree of control enables researchers to test a greater number of fluid path configurations, then test them the same day.
Much like microfluidics, millifluidics is simply the manufacture of the same devices but with millimeter-scale fluid channels. Millifluidics are less challenging to manufacture and can be used for a wide range of applications. Here are a few ways in which millifluidics and microfluidics are produced using 3D printing:
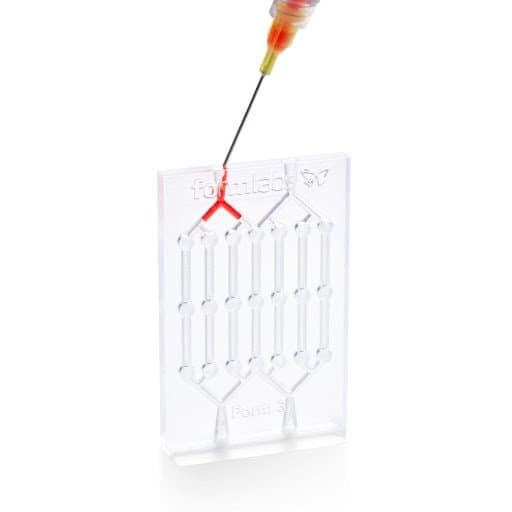
- Closed channels: In this instance, internal channels are printed directly into the fluidic device. While this can be,accomplished successfully, it does require some design considerations. For instance, internal channels are generally more successful when oriented vertically and channels that terminate within the fluidic device can be difficult to property wash during post-processing.
- Open channels: Simpler than printing closed channels, this method involves printing channels on the surface of the fluidic chip that will later be sandwiched between other materials such as PDMS. The primary consideration for this method is ensuring the print remains flat and avoids warping during printing and/or post-processing.
- Channel molds: Rather than printing open or closed channels directly into the print, this method involves printing positive features onto the surface of the print that will later be used as a mold for the fluidic device.
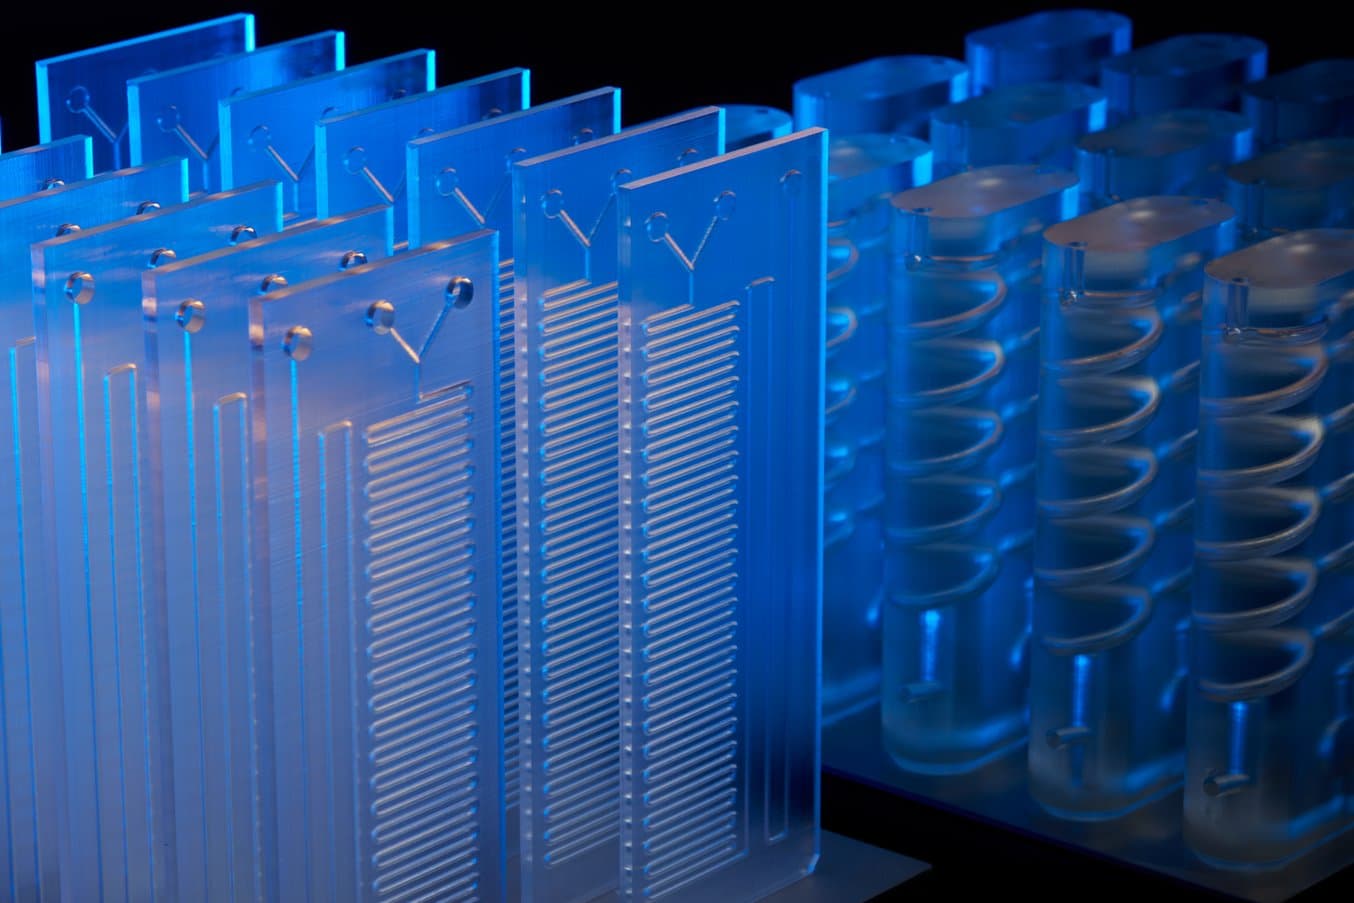
More information related to 3D printing microfluidics, millifluidics, and labs-on-a-chip can be found on the Formlabs blog.
Microfluidics chips printed in Clear Resin
3. Bioreactors
Bioreactors are devices that maintain all the environmental conditions that cells need to propagate effectively. These conditions include pH, gas supply, temperature, and growth medium. A bioreactor will maintain all these parameters with limited human input. 3D printing allows for customized bioreactors that have been optimized specifically for an individual experiment. An example of this is the design of a perfusion system that can seed adipogenic stem cells into a bone-substitute scaffold. Multiple different reactor configurations were designed and printed to investigate different bioreactor configurations.
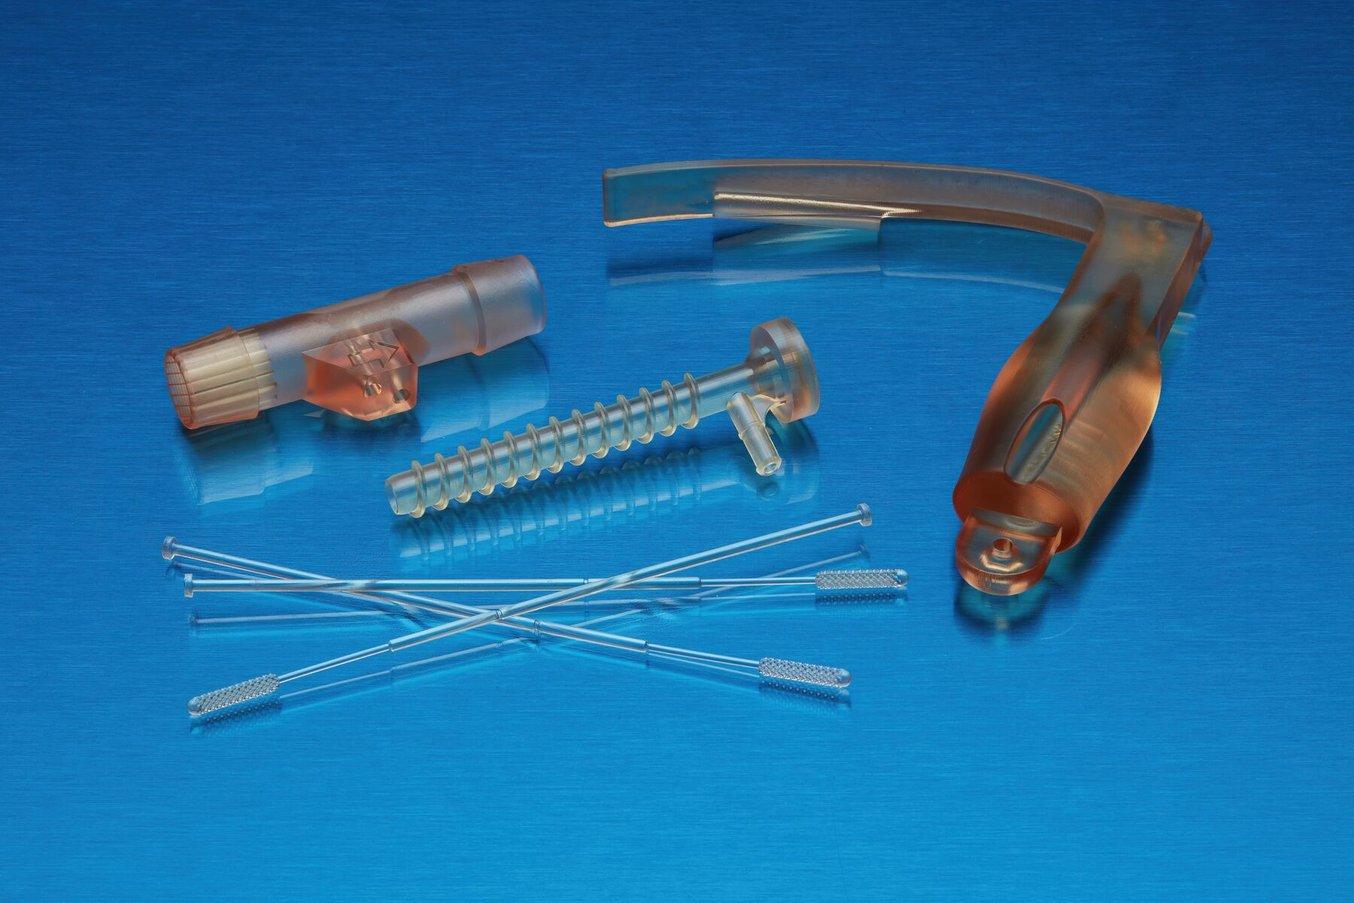
4. Specimen Collection Devices
Puritan Medical Products in Maine, and Copan Diagnostics in Italy, two major suppliers of nasopharyngeal swabs, could not keep up with demand as COVID-19 swept across the world in 2020. nnovators at the Morsani School of Medicine at the University of South Florida turned to 3D printing to help fill the resulting supply chain gap.
They, in conjunction with Northwell Health and Formlabs, designed the first mass-produced 3D printed specimen collection swab. The swabs were printed on the Form 3B using a semi-rigid biocompatible resin. To date, over 40 million COVID-19 test swabs have been 3D printed across sixty different countries.
To drive home the impact 3D printing has had, in early 2023, USF Health, Northwell Health, and Formlabs were recognized by the US Patent and Trademarks Office with a Patent for Humanity award. With the advent of 3D printed biocompatible materials, there has been an increase of medical professionals directly 3D printing specimen collections devices. These could be holding containtors, or swabs. The 3D printing of COVID-19 swabs was so successful that The United States Patent and Trademark Office, in 2023, awarded the Patents for Humanity to the University of South Florida Health, Northwell Health, Tampa General Hospital, and Formlabs.
5. Labware
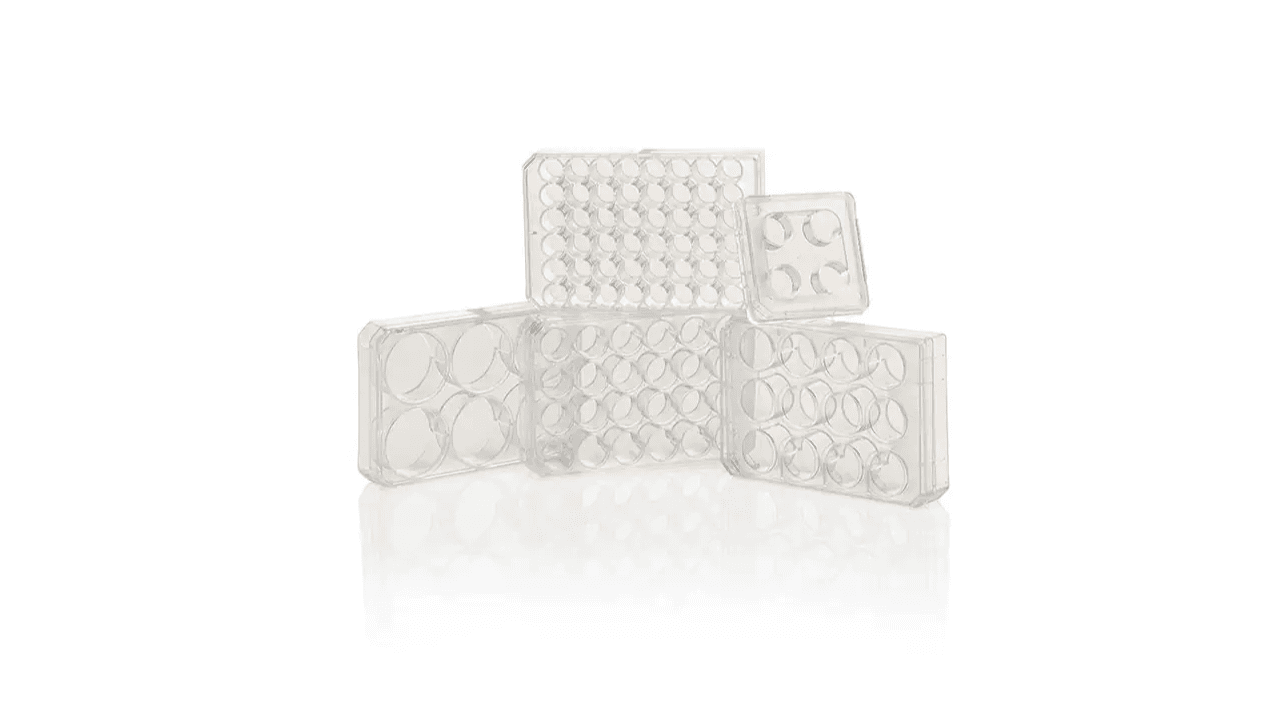
A standard well plate. Soruce.
In addition to complex microfluidics and bioreactors, 3D printing can also be employed to solve more mundane but important challenges in the cell culture lab. An example of this is the modification of a traditional well plate design to include different baffle geometries. Custom baffle plates are traditionally very expensive and time-consuming process to manufacture. However, with the accesible and affordable 3D printing technology, producing custom labware projects becomes far easier to achieve. The images below show a standard well plate compared to a custom well plate.
Designing Cell Culture Devices for 3D Printing
When developing 3D printable cell culture devices, there are a few best practices that, if followed, will yield optimal results. Let’s take a deeper look at what best practices for 3D printing and cell cultures look like.
Step 1: Design
When designing cell culture devices, it is important to understand DFM (Design For Manufacturing) tenants that aim to reduce the cost and complexity of a part. For parts manufactured using SLA printers, the following general rules can produce high-quality parts:
| Minimum Supported Wall Thickness | 0.2 mm | Thinner walls may warp |
|---|---|---|
| Minimum Unsupported Wall Thickness | 0.2 mm | Thinner walls may warp |
| Maximum Unsupported Overhang Length | 5 mm | Unsupported overhangs are not encouraged as they will begin to deform over 1 mm |
| Minimum Unsupported Overhang Angle | 10 mm | This is the angle from the horizontal |
| Maximum Horizontal Span | 29 mm | Like overhangs, unsupported bridges are not encouraged |
| Minimum Vertical Wire Diameter | 0.2 mm to 1.5 mm | 0.2 mm wires can be a maximum of 7 mm tall whereas 1.5 mm wires can be up to 30 mm tall |
| Minimum Embossed Detail | 0.1 mm | For embossed text, 0.1 mm is the minimum size that will still be visible |
| Minimum Engraved Detail | 0.15 mm | For engraved text, 0.15 mm is the minimum size that will still be visible |
| Minimum Clearance | 0.5 mm | Anything less may cause parts to fuse |
| Minimum Hole Diameter | 0.5 mm | Smaller holes may be fused closed during printing |
| Minimum Drain Hole Diameter | 2.5 mm | Drain holes are critical to resin entrapment in the part |
Parts can be designed in any CAD software. This CAD model can then be saved as an OBJ or STL file format to be imported into Formlabs 3D print preparation software PreForm. PreForm is free to download and can automatically generate supports and optimal print orientation for your part.
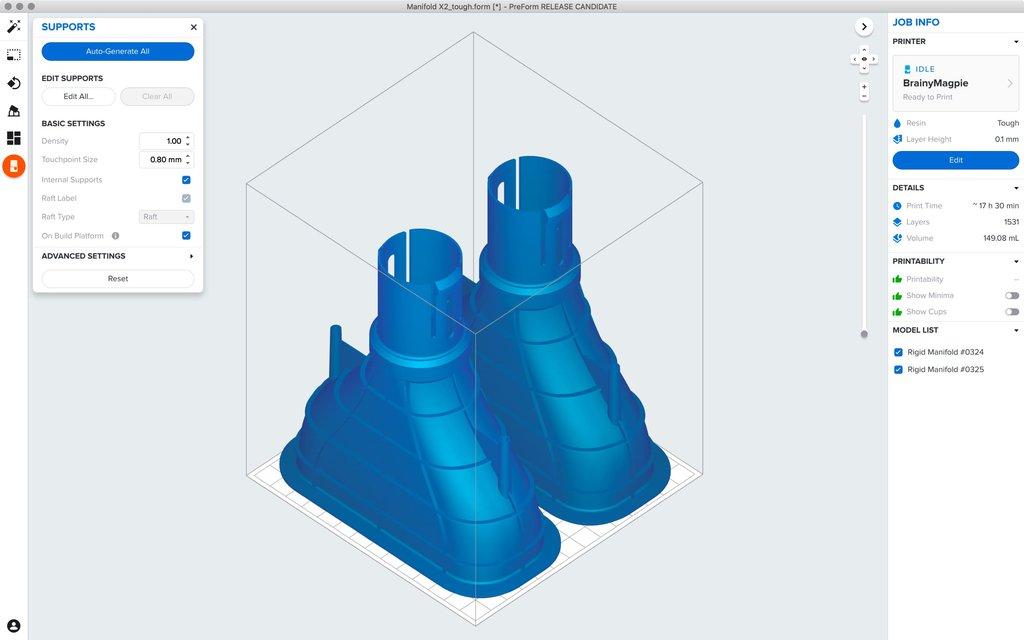
Print preparation software, or slicing software, will slice the model into many different layers. Each layer is essentially a cross-sectional image of the part that is projected onto the build plate. The orientation of the part must be selected to ensure that resin can flow from the part while also optimizing the placement of supports and reduction of overall print time. Thankfully, programs such as PreForm come with automatic algorithms that set up your print’s layout, orientation, and supports, so anyone on your team can print successfully without specialized training.
Material Selection for 3D Printed Cell Cultures
It must be noted that many resins are cytotoxic, meaning that they destroy cells. This is due to various plasticizers, photoinitiators, and other leachable chemicals that may be present in the printing materials. Some materials are certified as biocompatible, and as such, it is important to make use of these to ensure the parts themselves do not negatively affect cell cultures. Materials also need to be temperature resistant up to 120°C to survive steam sterilization. Formlabs resins have been evaluated to the following biocompatibility standards:
-
ISO 10993-1:2018: Biological evaluation of medical devices – Part 1: Evaluation and testing within a risk management process
-
ISO 7405:2009/(R)2015: Dentistry – Evaluation of biocompatibility of medical devices used in dentistry
-
ISO 18562-1:2017: Biocompatibility evaluation of breathing gas pathways in healthcare applications – Part 1: Evaluation and testing within a risk management process
When biocompatible materials are not available or desired, specialized coatings like parylene have been shown to provide an effective barrier between the cells and the part. If used for microfluidics, optical clarity is essential to perform optical microscopy. Optically clear, biocompatible, and temperature-resistant resins are available.
Formlabs offers a growing library of biocompatible materials across both SLS and SLA printing. For our SLA line of printers, that would include:
-
BioMed White Resin: an opaque white material for biocompatible applications requiring long-term skin or short-term mucosal membrane contact.
-
BioMed Black Resin: a matte black material suitable for applications that require high-contrast for visualization, excellent definition, and a smooth surface quality.
-
BioMed Amber Resin: a rigid material for biocompatible applications requiring long-term topical skin or short-term mucosal membrane contact.
-
BioMed Clear Resin: a rigid, transparent material which is also validated in accordance with ISO 18562, allowing for gas pathway applications in healthcare.
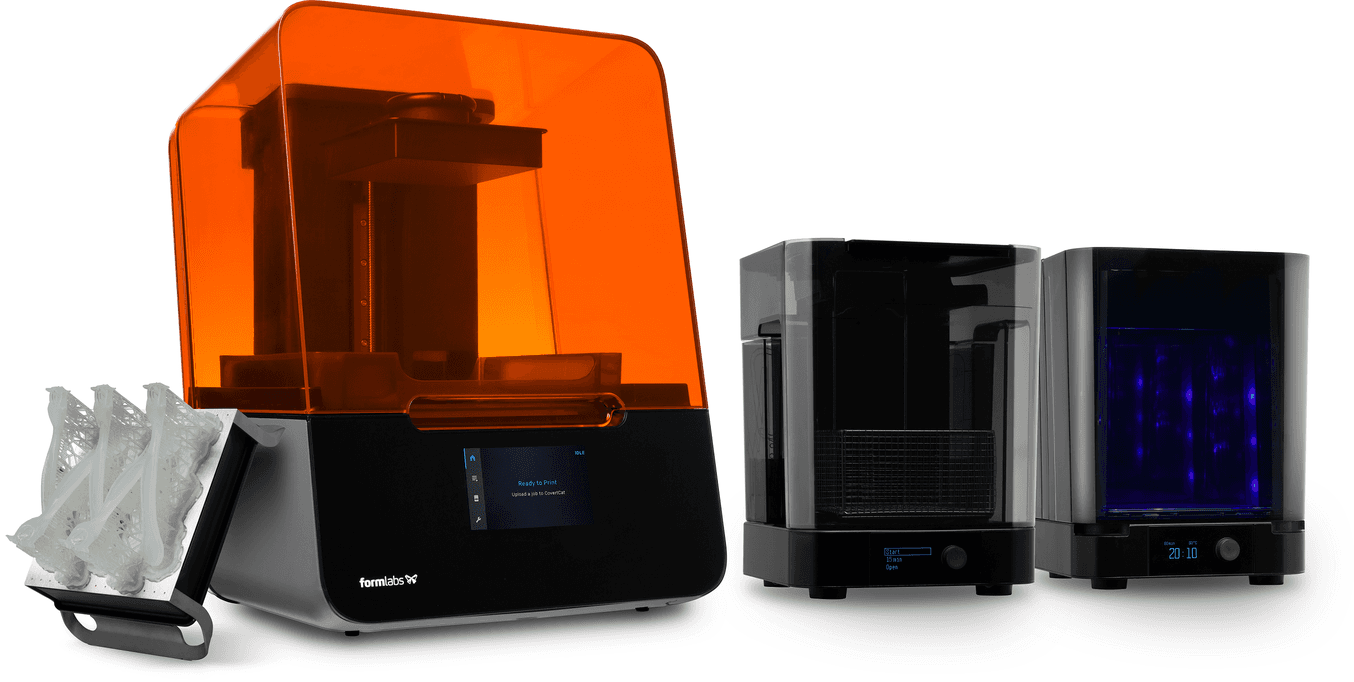
3D Printing Your Cell Culture Device
Once the cell culture component has been designed and the optimal material selected, the printing can begin. The type of machine used will affect the quality of the final part and therefore the quality of the experiment. Printers with possible layer heights of 50 microns are ideal for printing advanced cell culture devices. As an example, the Form 3B+ from Formlabs can print in layer heights of either 100 or 50 microns, allowing the printer to switch between high-detailed cell culture devices and any other types of medical prints which do not require the highest level of detail.
The 3D printing process is largely automated, requiring check-ins only if the printer has flagged some type of printer error. SLA 3D printing is known for its low failure rate. Once the part is done it can be carefully removed from the build plate.
Post-Processing And Final Steps
Once the part is complete it must undergo several post-processing steps as listed below:
- Support Removal: The first step is to remove the supports with a sharp side cutter. The closer the cut to the part, the better. This reduces any subsequent sanding work.
- Washing & Post Cure: Once the supports have been removed, the part must be rinsed with isopropyl alcohol to remove any uncured resin. Once the parts are dry, they can be UV post-cured. Care must be taken during the washing process to ensure that sensitive features are not broken as the part is still relatively weak before curing. It may be appropriate to use a syringe filled with isopropyl alcohol to inject cleaning fluid into the internal channels of your print.
- Sanding: Sanding is a crucial step not only for improved part appearance but also to enhance optical clarity. Starting at 3,000 grit sandpaper, carefully sand the part and increase by 200 until the desired finish is achieved or a sandpaper grit of 12,000 is reached. Clear spray coatings can also be used to increase optical clarity without the need for extensive sanding. However, care must be taken when using spray coatings as they may be cytotoxic.
- Sterilization: When working with cell cultures, it is important to sterilize the part to eliminate any potential for a cytotoxic environment. This is typically done using steam sterilization at 120°C for 20 minutes while maintaining a pressure of two bars.
Formlabs offers world-class 3D printers and materials that can be a force multiplier in any cell culture lab. Formlabs printers and materials have been successfully used in many different cell culture applications. To learn more about how Formlabs can help your research and development within the cell culture field, contact a representative.