
Design for manufacturing (DFM), or design for manufacture and assembly (DFM/A), is a set of technology-specific design practices that aim to reduce the cost and complexity of a part or product to make it easier and more economical to manufacture, and eliminate excessive changes down the line. The further along a design is in the product development process, the more expensive changes become, making it critical to address design issues as early in the process as possible.
An engineer’s toolkit has developed tremendously over the last decades, and today, advanced tools like 3D printers help to bridge the gap from design to manufacturing to improve workflows and accelerate and simplify DFM processes.
Read on to learn about DFM rules and principles for common manufacturing methods and the various ways 3D printing is used in manufacturing.
Watch our webinar to learn about five ways to use 3D printing in your manufacturing workflow.
Why Design for Manufacturing?
Design for manufacturing reduces costs and time to market, and produces significant improvements in quality and reliability. It is imperative to always consider DFM principles when developing a new component or product. Analyzing existing components to verify that they are efficiently designed and manufactured may also yield considerable results.
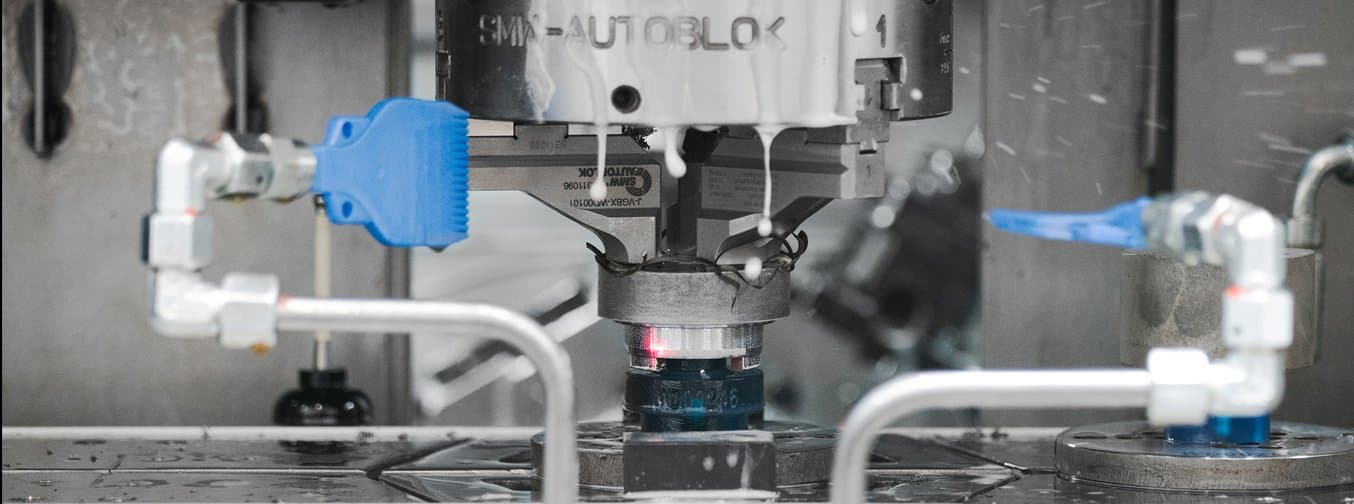
When designing for a specific manufacturing process or technology, DFM is about turning the geometries, mechanisms, and feature requirements generated during the product development process into something that can be readily manufactured and assembled through the use of industrial machinery.
At a deeper level, DFM/A is used to not just make sure a part can be made, but make sure that the part can be made reliably to the engineer’s original specification, with minimized tooling costs, low part costs, quick cycle speeds, and insignificant scrap rates.
In practice, this implies that the DFM process is often a negotiation of sorts between design intent and the practicalities of making products at scale in a cost-effective manner.
General DFM Rules and Principles
The following five factors should be taken into consideration in the design process:
- Process: Choose the correct manufacturing processes, as they will control the design direction.
- Design: Adhere to the design guidelines of the chosen core manufacturing processes.
- Material: Design products with respect to the chosen material as different materials have different manufacturing requirements.
- Testing: Design the part to enable easy inspection and testing.
While DFM is highly dependent on the manufacturing process, the following general rules and best practices will always be relevant regardless of the type of part or technology:
- Minimize part count: Using fewer parts decreases cost and improves efficiency from manufacturing to logistics. Reducing the overall component count will reduce assembly difficulty, make inspection and testing easier, and minimize up front tooling cost. Consolidate assembled parts into a single component wherever possible.
- Use standard components: Reduce the number of custom-made parts and replace them with standard, off-the-shelf components to save on the bill of materials (BOM), lower lead times, and simplify sourcing.
- Design multi-functional parts: A single part can serve multiple purposes, such as being a structural part and a heat dissipating element at the same time, or facilitating secondary functions like aligning, fixturing, or assembly.
- Design parts for use across product lines: Some parts can have the same or different functions when used in different products if a company has multiple related products or product lines. Make use of these existing components to reduce the need for custom-made parts.
- Determine acceptable fit and finish range: Final operations like painting, polishing, machining, or holding tighter tolerances and finish levels increase manufacturing costs and may not be required depending on end-use of parts. Determine which dimensions of the part are truly critical, and give more leeway on non-critical dimensions to keep manufacturing and quality control costs low.
- Facilitate handling: Parts should be assembled only from one direction. If possible, this direction should be from above, in a vertical direction, to make use of gravity. Design each part to be symmetrical to facilitate orientation, as symmetrical parts cannot be installed incorrectly, or do not require special sensors or mechanisms to orient them in automated assembly. If part symmetry is not possible, make parts clearly asymmetrical and implement external guiding features to avoid failures.
- Design for fixturing: Consider the manufacturing process to design parts for fixturing. Parts designed for automated assembly require registration features, as machine tools, assembly stations, and automatic transfer equipment needs to be able to grip or fixture the part in a known position for subsequent operations.
- Design for the ease of alignment: Variations in part dimensions and accuracy might lead to errors in assembly and damage the part or equipment. Design features that facilitate alignment such as tapers, chamfers, and moderate radius sizes.
DFM Considerations Reliant on the Manufacturing Technology
Determining exactly the right design choices and trade-offs is largely dependent on scale, budget, and how important it is to preserve specific design intent.
Here are a few examples of such considerations:
- While CNC machining is a great process for producing prototypes or low-volume (< 1000), high margin parts, it is not ideal for consumer devices manufactured at high volumes due to its high costs, unless you’re Apple. Finding an alternative process to manufacture metal parts, such as metal casting or forming, can lead to lower costs, but will require redesigning the part.
- Designers should generally replace fasteners for injection molded parts with tabs or snap fits whenever possible as fasteners require handling and feeding operations that increase manufacture time and cost. But if a product is expected to be produced at a lower scale, using mechanical fasteners may result in lower overall cost because the tooling cost increase to add cams and slides for creating snaps would be higher.
- Injection molded parts have noticeable marks on some sections of a part where the ejector pins exert pressure on the part to push it off of the core. While most of these are possible to hide, the product team has to decide if this is worth the increased cost or if these are acceptable on the inner or hidden parts of a plastic enclosure.
In summary, every manufacturing process has its own set of constraints, but also best practices, and clever tricks for getting the most out of every part for the least cost. Make sure to explore process-specific DFM rules and guidelines and consult contract manufacturers.

Additionally, an interesting way to get a peek into design choices (and mistakes) made by other companies is reading or watching product teardowns. A great place to start is the Bolt blog.
Watch our webinar to learn how engineers at Formlabs used desktop 3D printers in production, from prototyping for manufacturability to printing functioning end-use parts used on the line.
Accelerate and Simplify DFM With 3D Printing
3D printing is continuously making inroads into mainstream manufacturing. Custom 3D printed jigs, fixtures, and other tooling) are widely used on the manufacturing floor, and low- to mid-volume manufacturing is becoming possible with automated printer cells as professional machines become affordable and more companies gain access to the benefits of the technology.
In many cases, 3D printing is also used to supplement traditional manufacturing processes for creating castable parts, low-volume molds or custom tooling for production.
Product Development
It can be difficult evaluate design decisions with a CAD model alone. Designers are sometimes hesitant to experiment with prototypes, as producing a single part or assembly with traditional materials and techniques is both expensive and time-consuming.
3D printing technology simplifies the creation of prototypes, so designers can have high-fidelity, functional parts within hours at a fraction of the cost of a traditional prototype.

Stereolithography (SLA) and selective laser sintering (SLS) are ideal technologies for 3D printing prototypes. SLA 3D printers offer a selection of engineering materials, and produce smooth, isotropic parts that are both strong and highly detailed. SLS printers are geared more towards producing functional prototypes and production parts out of flexible or rigid thermoplastic materials such as nylon.
See what you can create with a Form 2
Explore the materials to discover the one that fits your needs.
Request a Free Sample

Surrogate Parts
Surrogate parts are placeholder parts used to assess specific functional aspects of a design and tune in the final manufacturing process before mass production. This helps eliminate the risk of discovering too late that a part and process will not fit or function as intended.
3D printed surrogate parts can be used to replace expensive parts or parts that are not readily available, savings weeks or months in production.
The following factors can be evaluated with surrogate parts:
- Production: The quality of the parts the manufacturing process yields with complex processes like injection molding or overmolding.
- Assembly: How a part interfaces with existing components.
- Serviceability: How easy it is to perform maintenance activities on the part or assembly.
- Installation: How easy the part will be to install.
Low-Volume Injection Molds
Some SLA materials with high temperature resistance can be used to produce low-volume injection molds. These molds can be used to:
- Test designs with respect to DFM.
- Test mold tooling configurations.
- Experiment with materials.
- Perform low-volume production runs.
Designers can print multiple mold iterations at a fraction of the cost and time to produce machined tooling.

Custom Manufacturing
When it comes to limited quantity manufacturing of custom components, traditional processes like injection molding are often not economical due to associated high tooling costs.
The design freedom and the rapidly improving material and performance characteristics, 3D printing is increasingly used to create custom production parts without as many manufacturing constraints as with traditional manufacturing techniques.

Elevate Manufacturing Workflows With 3D Printing
Design for manufacturing is just one of the areas where 3D printing can benefit the manufacturing process. Watch our webinar to see how leading manufacturers leverage 3D printing to save money and shorten lead times from design to production and learn about five ways to use 3D printing in your manufacturing workflow.