

Calibrating the doser (Fuse Sift)
Calibrating the doser (Fuse Sift)
After replacing the doser assembly on the Fuse Sift, its home position needs to be calibrated.
Replacing the doser assembly
To replace the Fuse Sift doser, follow the instructions in Fuse Sift - Replacing the Doser Assembly [EN]. It is not recommended to perform this repair unless instructed to do so by Formlabs Support or your certified service provider.
Calibrating the doser
The doser calibration routine is only available in Fuse Sift firmware 1.7.0 and later. If necessary, update your machine’s firmware to access this feature.
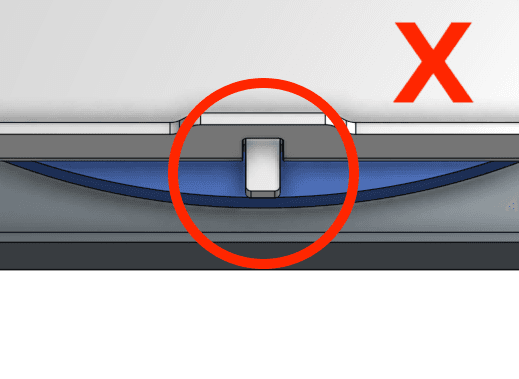
- Ensure that the doser plate is oriented such that the metal tabs are aligned. The doser plate is located behind the lower front enclosure panel. If you already replaced these panels after completing the repair, remove them following the instructions in Fuse Sift - Replacing the Doser Assembly [EN]. If the tabs are not aligned, use your hand to rotate the motor gear at the rear of the doser assembly and align the tabs. Take care not to pinch your fingers in the doser gear.

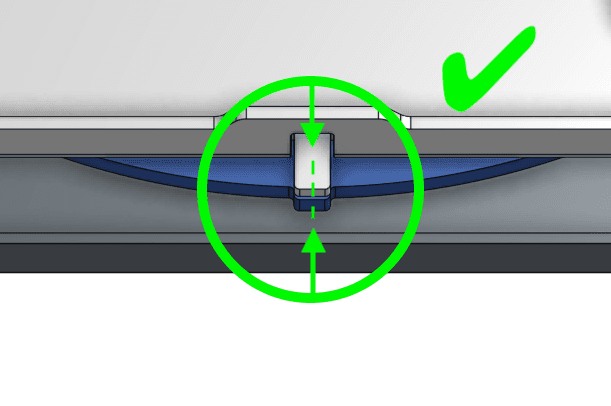
Correct orientation of Fuse Sift doser before calibration
Incorrect orientation of Fuse Sift doser before calibration
- On the touchscreen, tap Maintenance > Calibrate Doser.

- Follow the instructions on the UI to complete the calibration procedure.


Checking the new doser home position
Try filling a powder cartridge to verify that the doser is functioning properly. If needed, add powder to the Fuse Sift first. If the fill cycle completes successfully and no powder flows from the doser after the cycle is complete, then the calibration was successful. If the doser encounters an obstruction error or if powder continues to flow from the doser after the fill cycle is complete, perform the calibration procedure again.
If you encounter issues with the doser calibration routine, contact Formlabs Support or your certified service provider.