WHITE PAPER
Powder on top of optical cassette (Fuse 1 generation)
Powder on top of optical cassette (Fuse 1 generation)
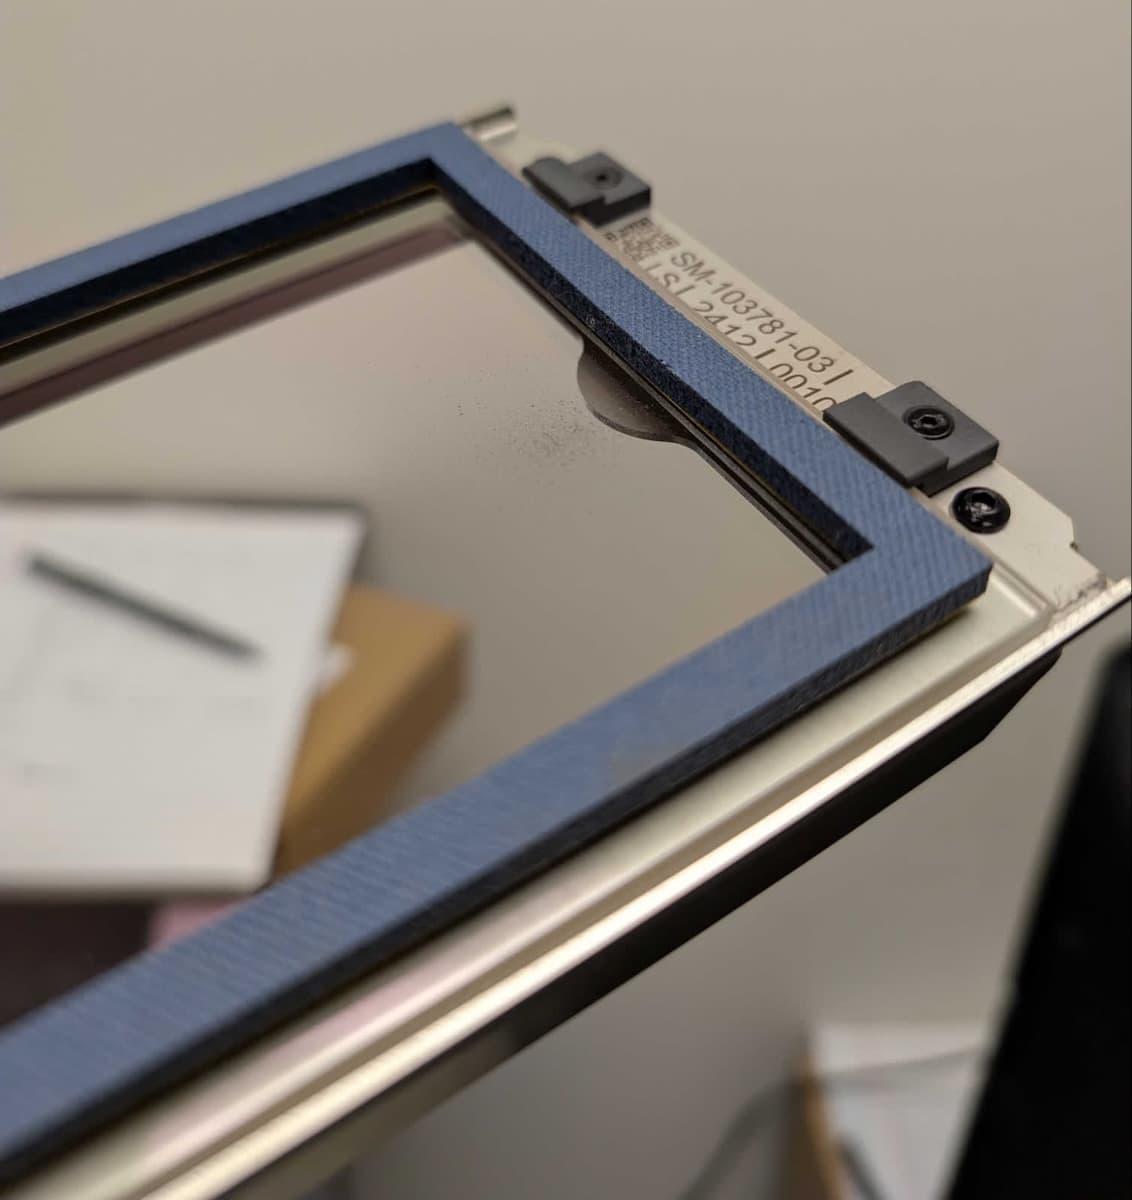
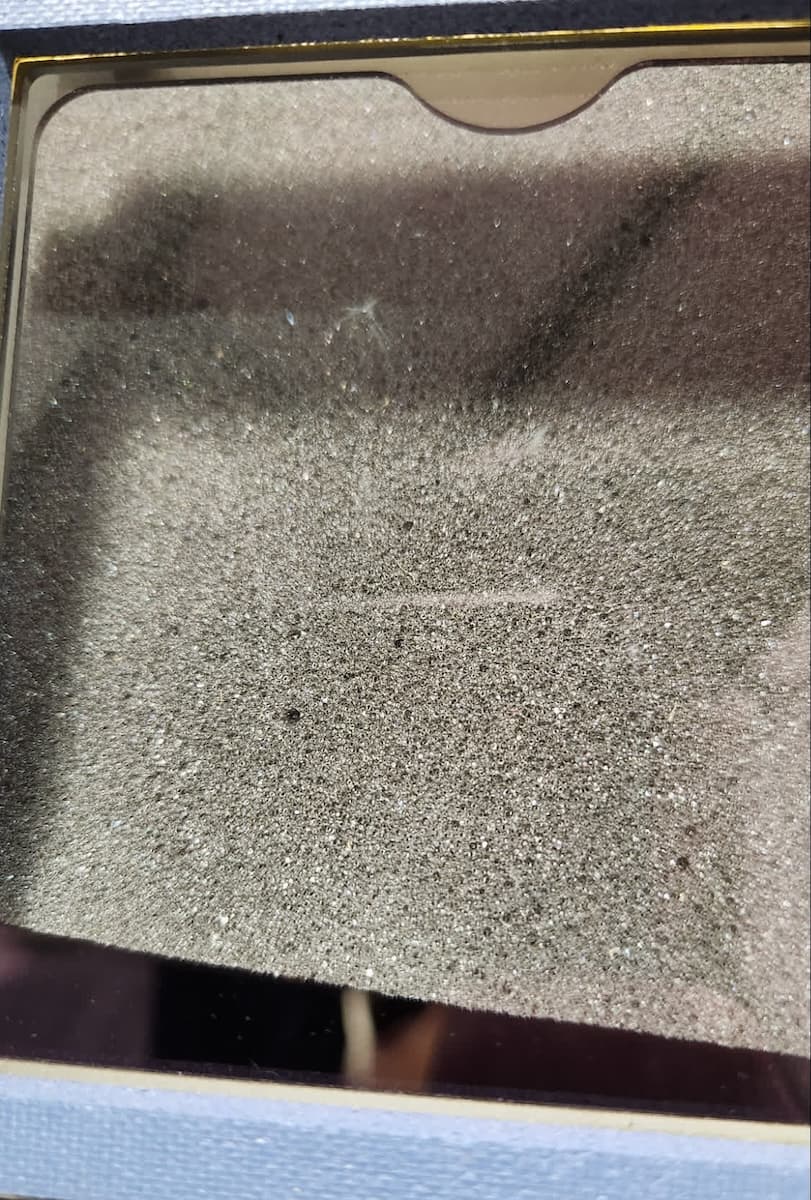
During normal operation, powder can accumulate on the bottom surface (i.e., the side facing the print enclosure) of the Fuse 1 generation optical cassette. As such, the standard cleaning procedure only involves cleaning that side of the cassette windows. Under some circumstances, powder can reach and settle on the top surface of the optical cassette. If there is powder there during a print, it can partially block the laser, leading to print failures and making the optical cassette harder to clean.
Causes
- Contamination during optical cassette cleaning or replacement
- Print enclosure door closed while vacuuming the exhaust line
- Powder leaking past the upper laser window
Symptoms
- Sintered powder on the top (gasket side) of the optical cassette
- Optics-related print issues, such as pitting
Troubleshooting steps
- Confirm that you are following the recommended steps for cleaning the optical cassette and that your workspace is clear of any loose powder during cleaning.
- Follow powder storage best practices. If the air in your workspace has a significant amount of loose powder, the printer’s top fan can draw powder into the printer itself.
- When purging the printer’s exhaust line, make sure you leave the print enclosure door open while vacuuming the exhaust port in the filter cabinet. If you close the print enclosure door while vacuuming the exhaust line, the forced airflow can carry powder into the top of the printer, where it can subsequently settle on top of the optical cassette.
- Avoid using compressed air to clean your printer, particularly the top of the printer, except when specified. As with the exhaust line, the forced airflow can carry powder to other parts of your printer.
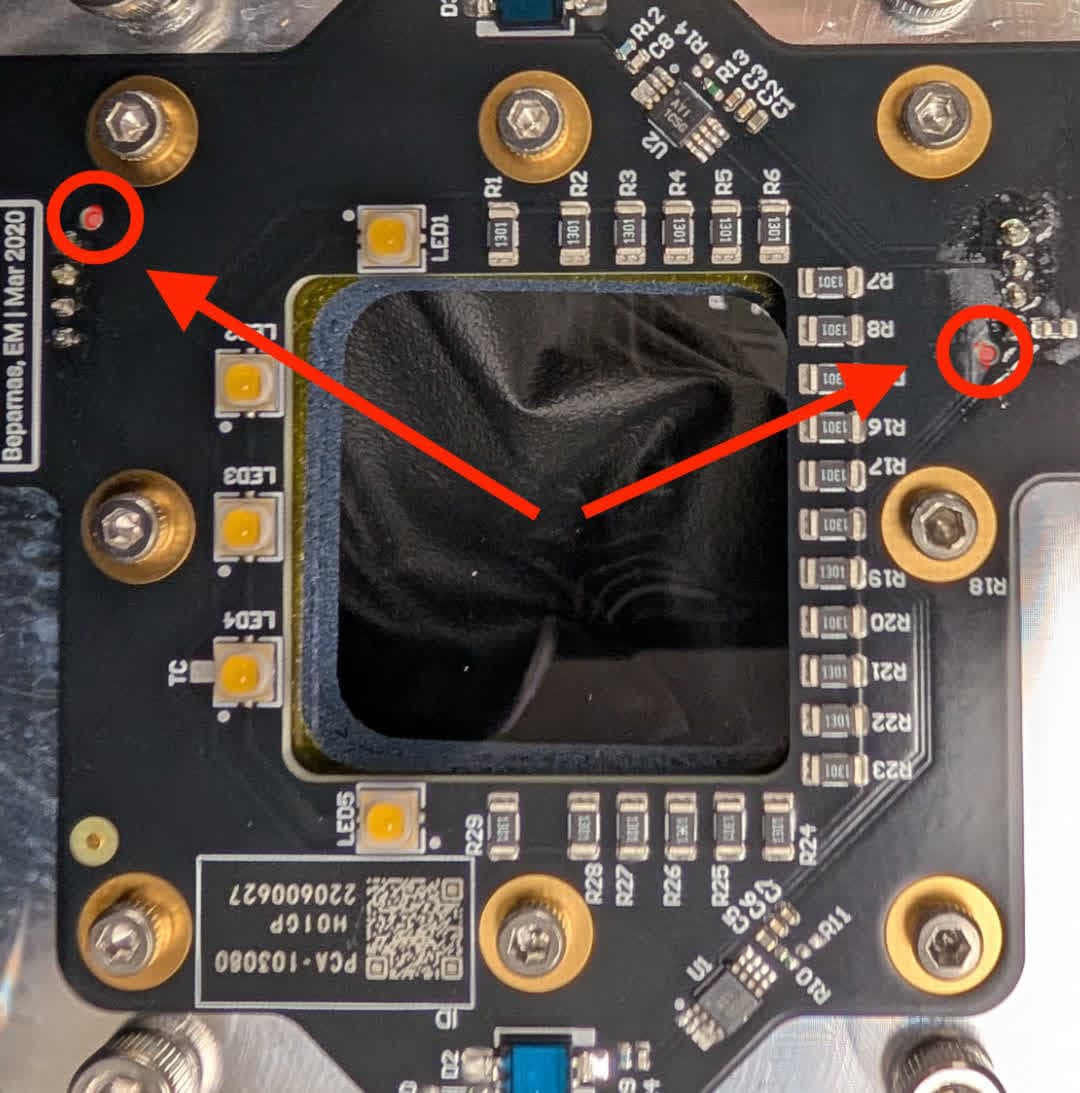
- The upper laser window has a variety of electronic components around the window itself. On some upper laser window assemblies, the holes for through-hole electronic components can be large enough to allow powder in the top of the printer to fall through onto the optical cassette below. These holes can safely be plugged to prevent further powder ingress.
Inspecting and modifying the upper laser window
To inspect and modify your printer’s upper laser window to prevent powder from contaminating the top of the optical cassette:
- Remove the printer’s top panel, following the steps in the guide for replacing the upper laser window. Vacuum any loose powder out of the top of the printer as you work.
- Open the print enclosure door, remove the optical cassette (if present), and locate the through-holes in the upper laser window, shown here. You can fill these holes with the upper laser window still in place or, for easier access, remove the upper laser window first.
- To remove the upper laser window, continue following the steps in the guide for replacing the upper laser window.
- Fill both holes with high temperature RTV silicone. Take care not to contaminate any other parts of the upper laser window.
- Allow the silicone to cure per the manufacturer’s instructions.
- If you removed the upper laser window, reinstall it.
- Reinstall the printer’s top panel.
- Clean and reinsert the optical cassette.
- Power on the printer and run a test print.