
Required Supplies:
Formlabs:
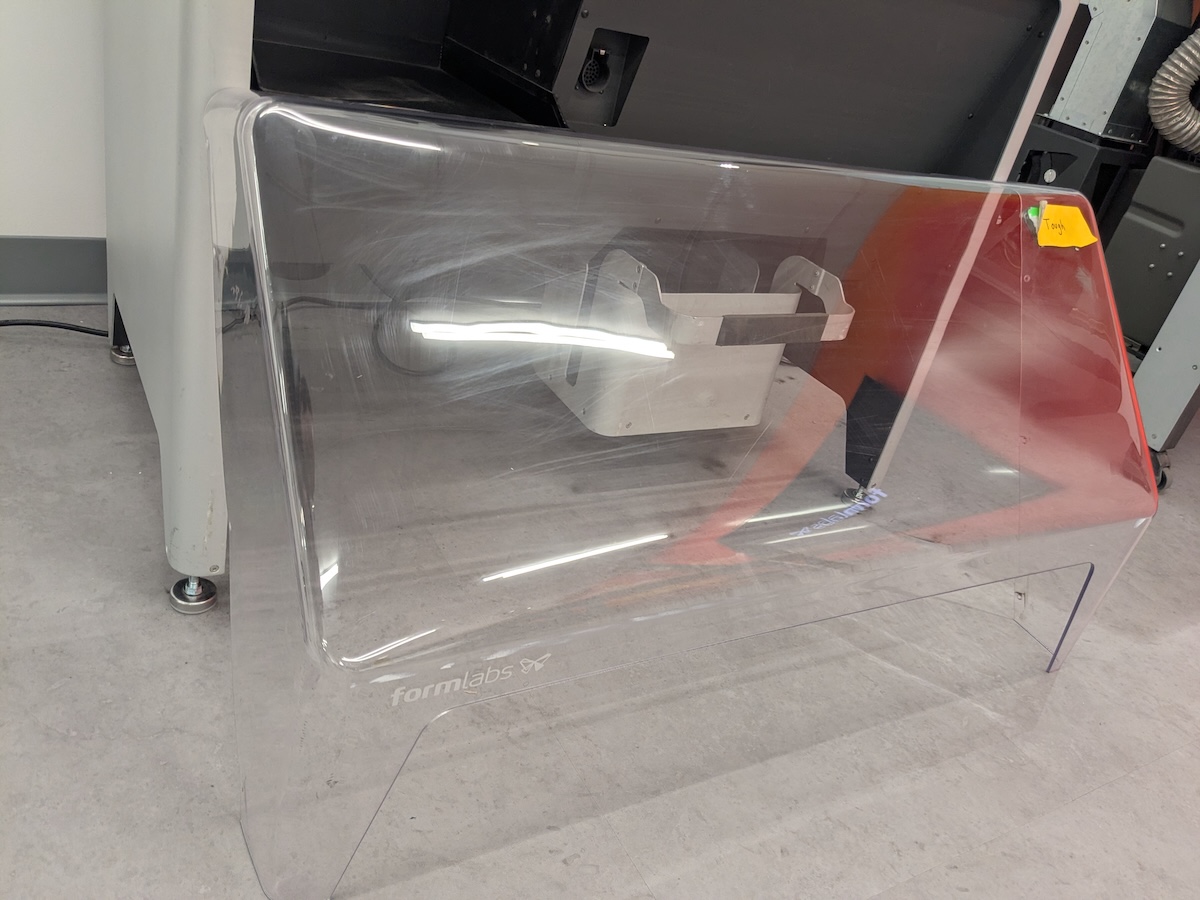
- Replacement Fuse Sift hood (RP-FS1-SHC-01)
Third-party:
- 2.5 mm hex driver
- Nitrile gloves

The Fuse Sift hood helps contain loose powder within the workspace. It also provides a mounting point for the Fuse Sift Glovebox. If the hood is damaged, powder may escape the Fuse Sift or the Glovebox may not stay in place.
Use this guide to replace the Fuse Sift hood.
Required Supplies:
Formlabs:
Third-party:
Estimated time: 15–20 minutes
Preparing the workspace
Overview: Prepare the Fuse Sift and workspace for replacing the hood.
Step 1: Prepare the workspace
Clear a workspace around your Fuse Sift. You will need to access both sides of the machine and the top edge of the hood.
Step 2: Remove the glovebox panel
If you have installed a Fuse Sift Glovebox on your machine, remove it before continuing. Open the hood, loosen the two clamps on the Glovebox, remove the Glovebox, and close the hood.
Removing the hood
Overview: Unscrew the hood mounting screws and remove the hood from the Fuse Sift.
Step 1: Remove the hood retention screws
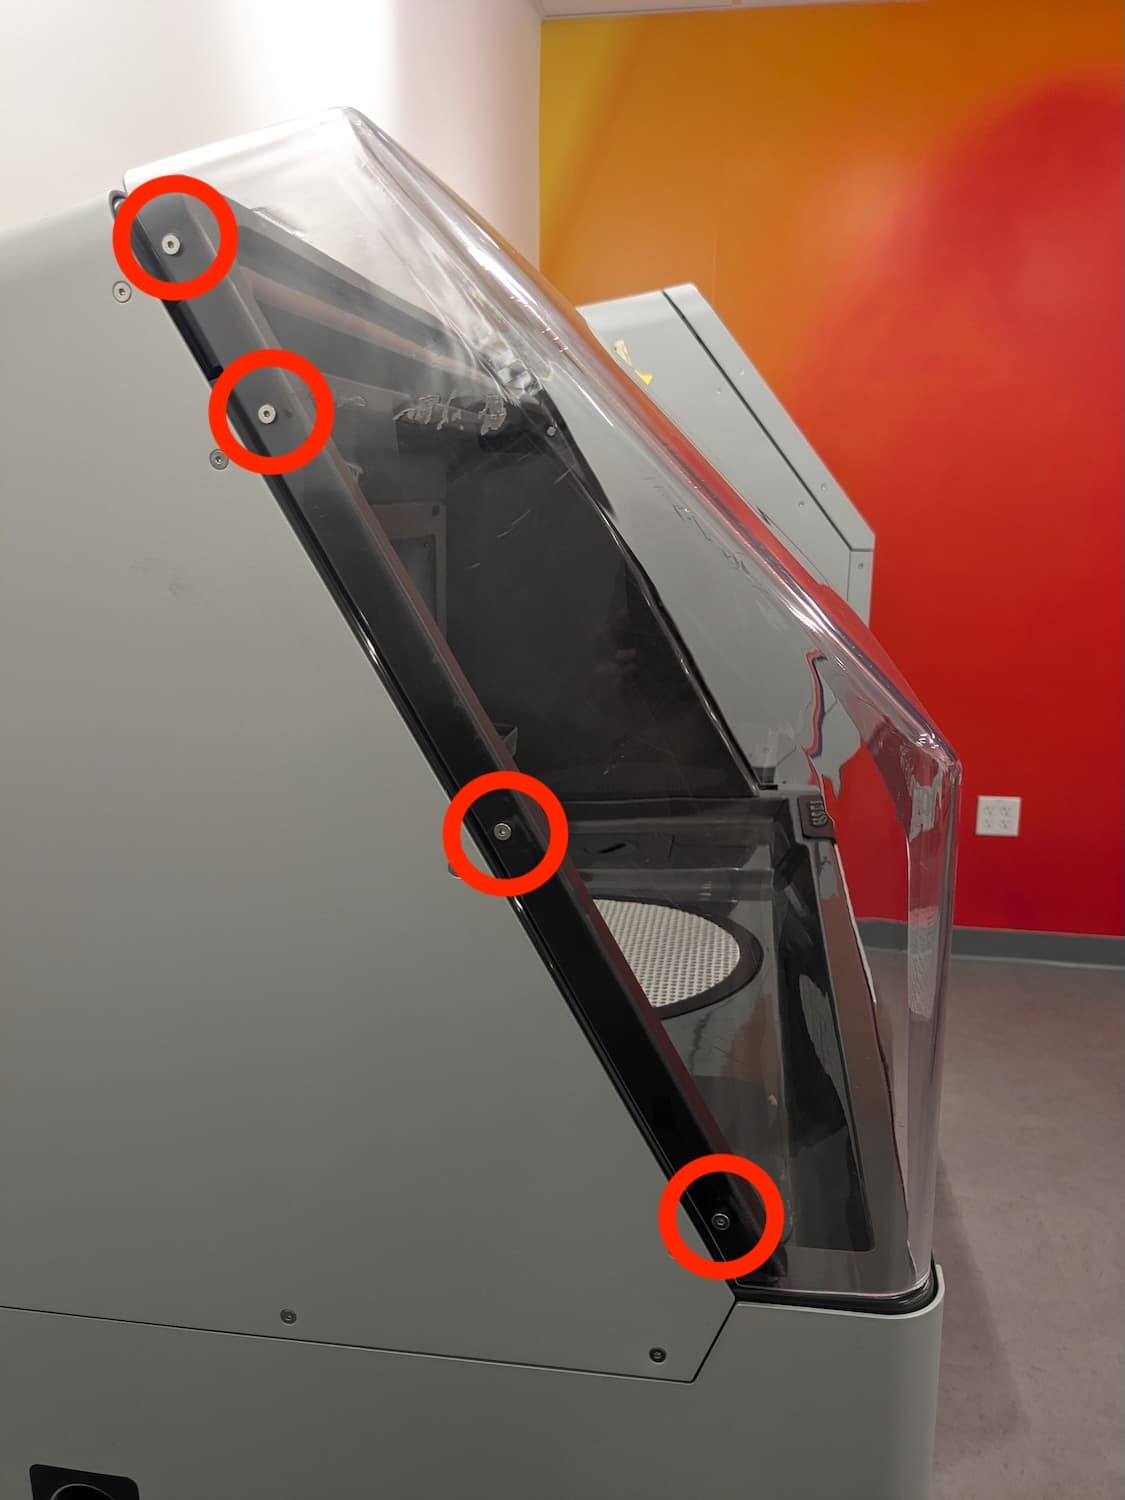
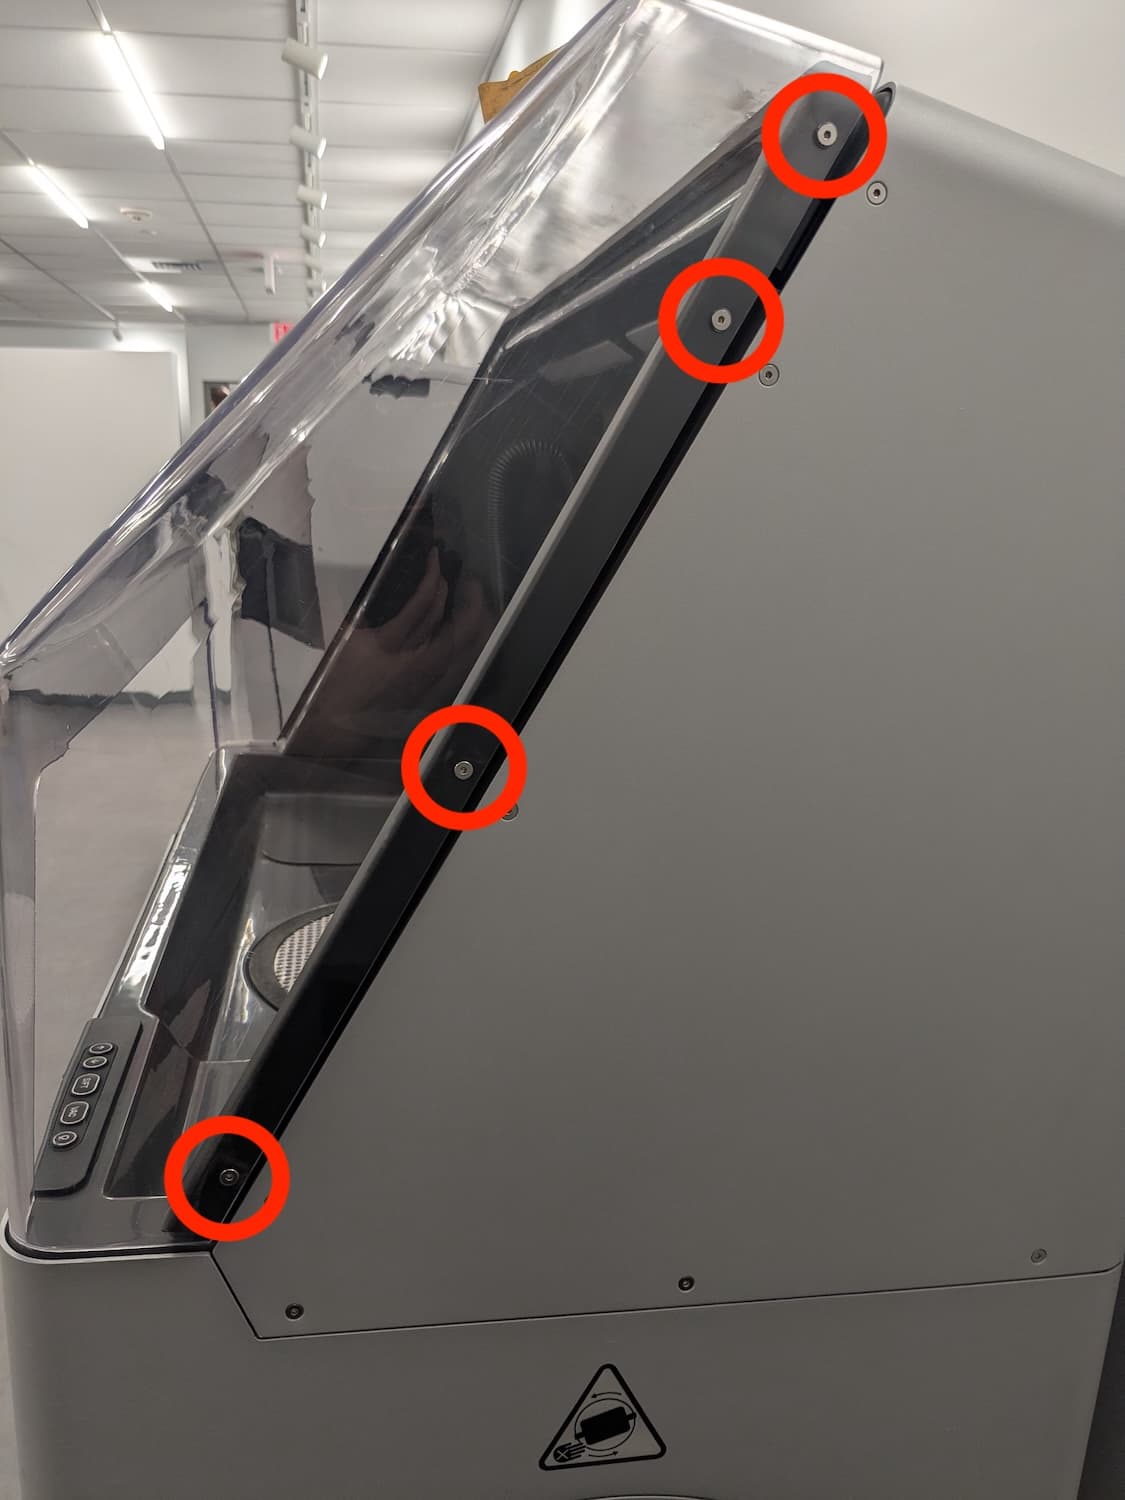
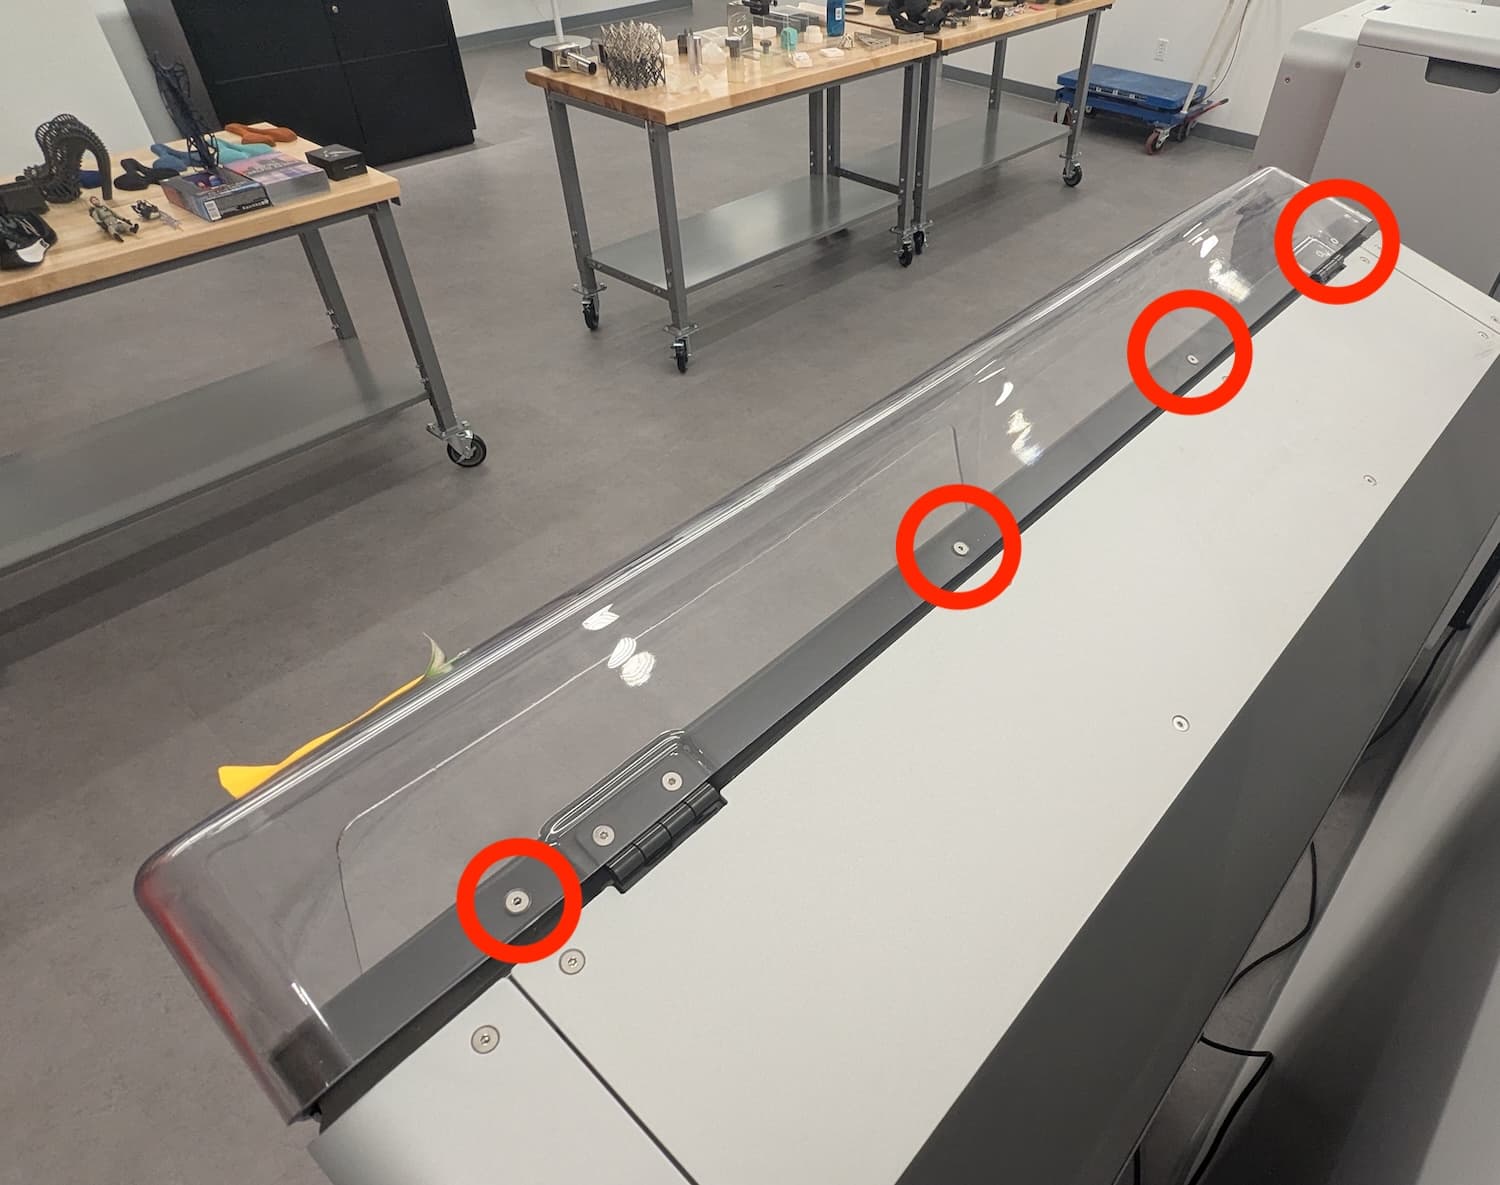
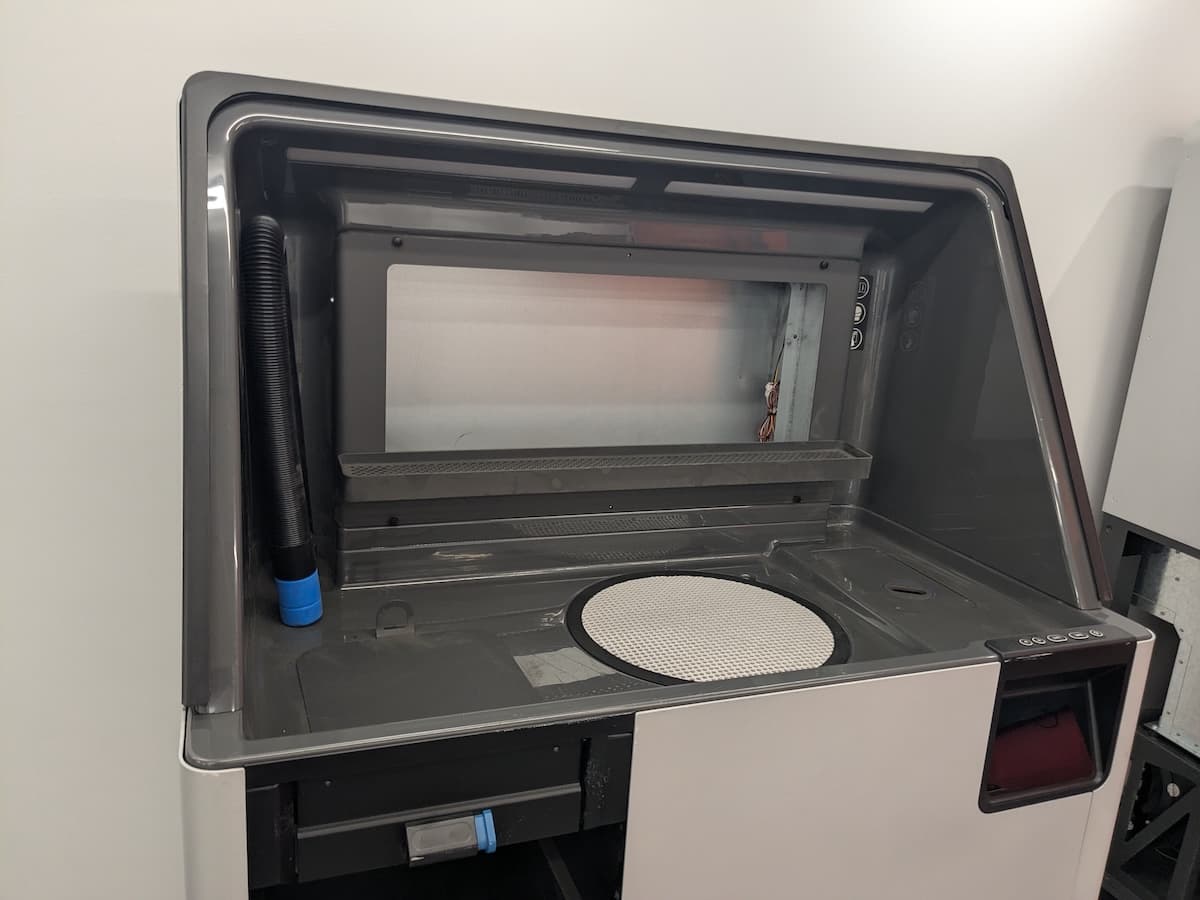
The Fuse Sift hood is secured to the machine with 12 screws. Using a 2.5 mm hex driver, loosen and remove the 12 screws. Set the screws aside. The hood should stay in place once all the screws are removed, but take care to ensure it does not fall off of the machine.
Lift the hood off of the Fuse Sift and set it aside for disposal.
Installing the replacement hood
Overview: Mount and secure the new Fuse Sift hood.
Lift the new hood onto the front edge of the Fuse Sift work surface. Roughly align the screw holes in the hood with the corresponding holes around the edge of the Fuse Sift.
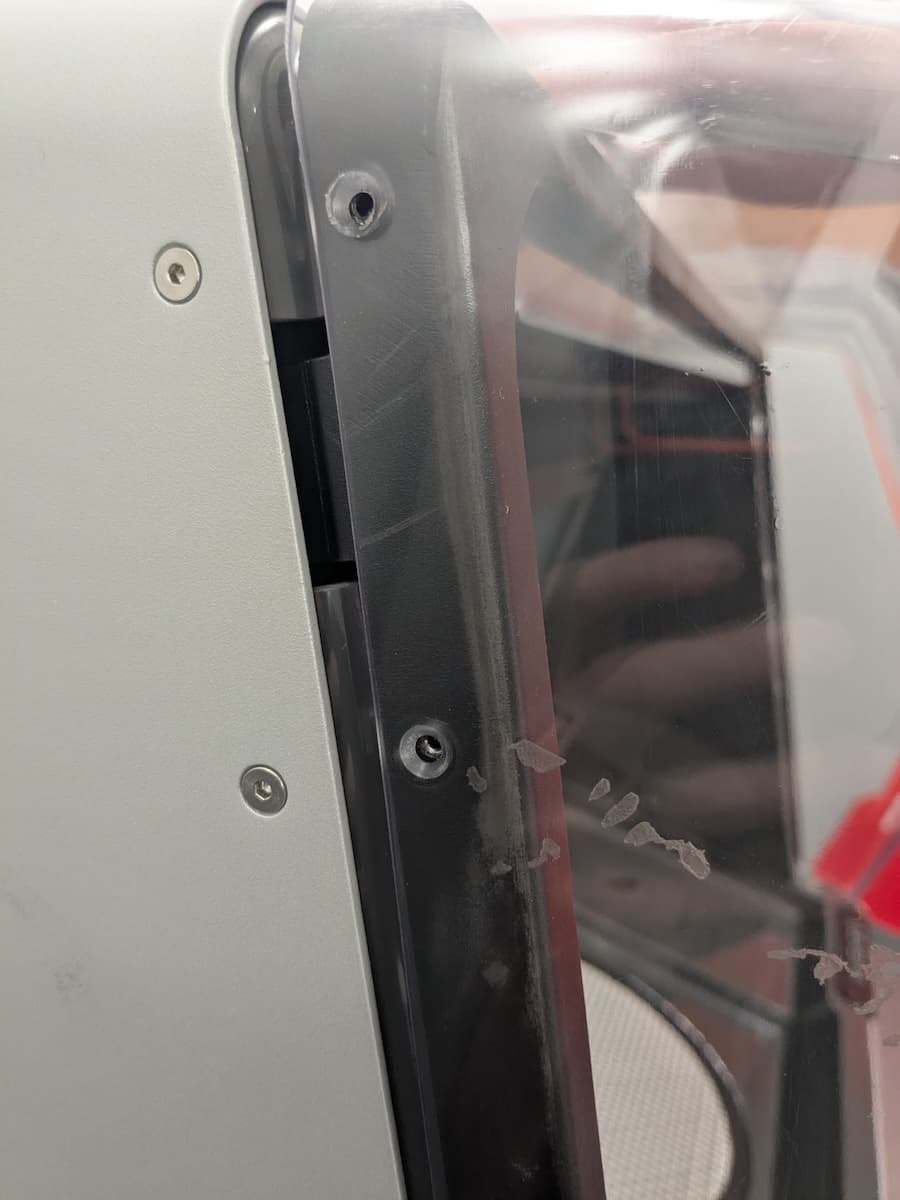
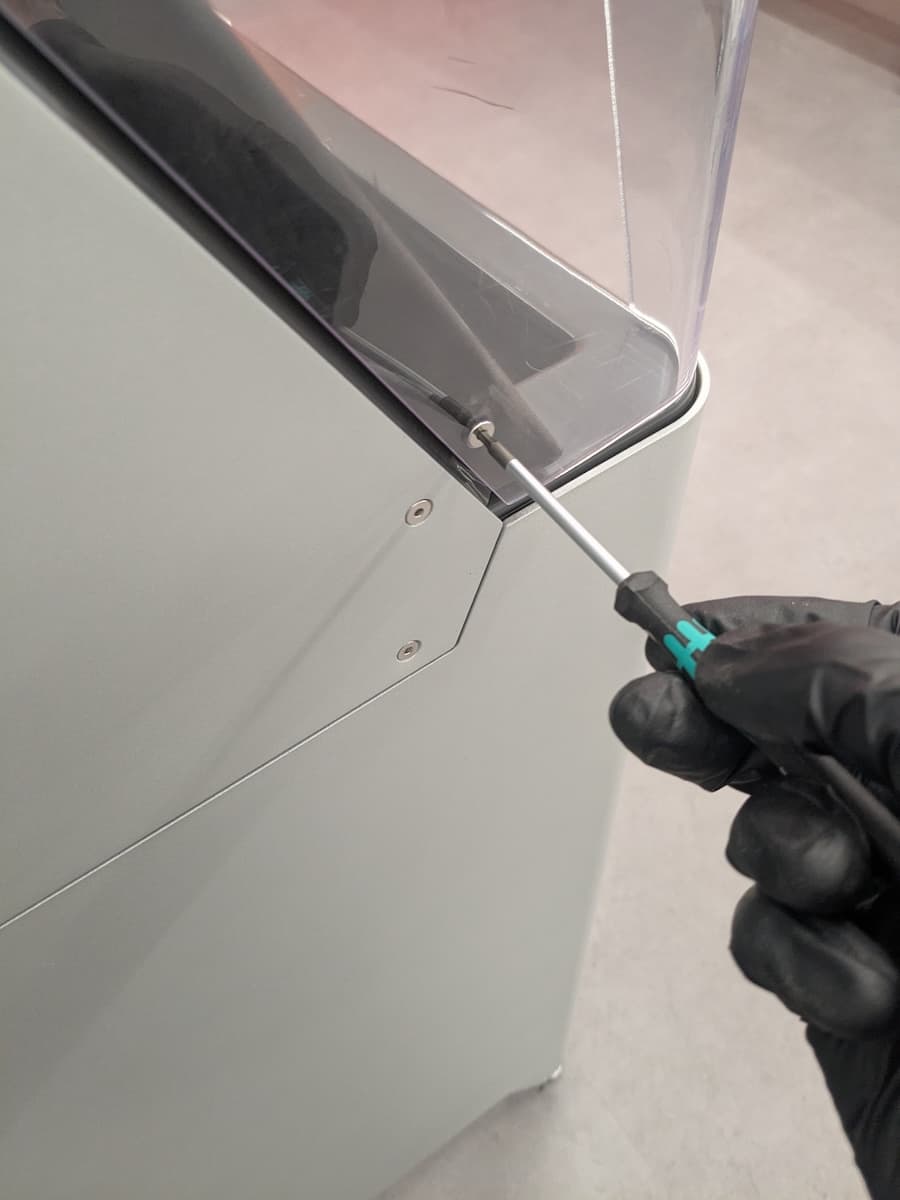
Thread one mounting screw into each of the 12 screw holes around the edge of the hood. If needed, flex the hood slightly to align the holes. Using a 2.5 mm hex driver, tighten until snug.
Finalizing the repair
Overview: After installing the new Fuse Sift hood, test the repair.
Step 1: Reinstall the glovebox
If you previously had a Fuse Sift Glovebox installed, reinstall it on the new hood.
Step 2: Test the hood
Open and close the Fust Sift hood. Make sure it moves easily and feels secure.