
Note:
Depending on the package you purchase, the accessories may ship together on a pallet. If you are in a building with palletized deliveries, ensure you have access to the loading dock.

Prior to unboxing and installing the powder recovery station, prepare a suitable workspace for the Fuse 1 and Fuse Sift, ensure you have sufficient space to store consumables, and purchase additional supplies so you are ready to process powder when your Fuse Sift arrives.
Follow Formlabs instructions to unbox, connect the vacuum and cables, and turn on your Fuse Sift. Connect the powder recovery station to a network to manage your machine remotely and receive notifications.
Receiving
The standard Fuse Sift package ships on one pallet and contains the Fuse Sift powder recovery station, surface grate, and parts basket. Powder cartridges and accessory boxes ship separately from the Fuse Sift’s packaging.
Note:
Depending on the package you purchase, the accessories may ship together on a pallet. If you are in a building with palletized deliveries, ensure you have access to the loading dock.
| Powder recovery station | Vacuum | Pallet including product and boxes (if applicable) | |
|---|---|---|---|
| Shipping dimensions | 99 × 57 × 156 cm 39 × 22.4 × 61.4 in | 50 × 50 × 80 cm 19.7 × 19.7 × 31.5 in | 111 × 71 × 178 cm 44 × 28 × 70.1 in |
| Shipping weight | 138 kg 304.2 lb | 44 kg 97 lb | 154 kg 340 lb |
| Product weight | 93 kg 205 lb | 25 kg 55 lb | n/a |
Unboxing
The custom packaging the machine arrives in is specially designed to protect the machine during shipping. During unboxing, inspect the product for any damage or missing items. In the case of damage or missing items, contact Formlabs Support or a certified service provider.
Step 1: Position the packaging
Position the packaging near the designated location, leaving enough room for two people to comfortably maneuver throughout the area. Stand the packaging upright to ensure it is level.
Step 2: Open the box
Open the Fuse Sift's box from the top by removing the lid, then consecutively remove the two C-shaped shells.
Step 3: Disengage the steel brackets
Locate the four (4) steel brackets holding the unit’s feet to the pallet. Use a 8-mm socket driver to remove the 12 bolts, then disengage the brackets from the machine. Retain all fastening hardware for future use.
Step 4: Lift the machine out of the box
Loop both orange lifting straps under the machine from left-to-right, ensuring that the straps are not crossed. With one person on each side, insert your forearms into each loop so they do not go past your elbows.
Caution:
Removing the machine from its packaging requires at least two people that are comfortable lifting large and heavy objects.
Step 5: Position the machine
With your back straight and knees slightly bent, brace against the machine with your palms as you and a second person lift the unit up. Carefully move the machine into its workspace and set the unit down gently.
Caution:
Due to its size and weight, do not move or reposition the Fuse Sift alone. If the unit needs to be moved, at least two or more individuals should use the lifting straps provided with the machine.
Step 6: Remove additional packaging material
Remove any additional wrapping and packaging from the outside of the unit.
Note:
The original packaging is designed to be kept and reused for transporting or shipping the machine for service. Save the complete packaging including any inserts for your convenience.
Step 7: Remove the top foam ring
Open the hood and remove the top foam ring from the sifter cavity.
Step 8: Remove the bottom foam ring
Turn the turnbuckles to release the sieve mesh and remove the bottom foam ring.
Step 9: Reinstall the sieve mesh
If you plan to print with Nylon 11 CF Powder, replace the included 150 μm sieve with a 300 μm sieve. If you plan to print with TPU 90A Powder, you can switch to the 300 μm sieve if using Speed Optimized print settings. Otherwise, continue with the included sieve.
Place the sieve inside the cavity and turn the turnbuckles back towards the center of the sieve to install.
Step 10: Install surface grate
Remove the surface grate from the accessory box and install it over the sieve before connecting the machine to power.
Installing
After selecting a location for the Fuse Sift, install any additional accessories, connect the vacuum hose, then connect the Fuse Sift to a power source to turn on the machine.
Step 1: Install the tool shelf
Hook the tool shelf over the pegs on the vent at the back of the work area. When installed correctly, the tool shelf sits level and is flush against the vent.
Step 2: Install the powder catch tray
Place the powder catch tray in the build chamber enclosure. When installed correctly, the powder catch tray sits flat and is flush against the back wall of the enclosure.
Step 3: Set up the build chamber port cover
The build chamber port cover is a removable cover that sits at the top of the build chamber enclosure. Place the build chamber port cover over the build chamber port whenever a build chamber is not installed to prevent tools, printed parts, or loose powder from escaping the work area.
Step 4: Connect the vacuum
Assemble the vacuum, then connect its hose and power cable to the port in the back-left corner of the workspace. Depending on the date of manufacture of your vacuum, it may have a separate grounding wire. If it does, connect the grounding wire to a grounded piece of metal. Some vacuum models have an integrated earth chain instead of a grounding wire and require no further setup to be used safely.
Loop the hose around the hook located above the port. Flip the breaker switch on the vacuum to the ON position.
Plug the included power cable into the power port on the back of the unit and connect the power cable to a dedicated circuit.
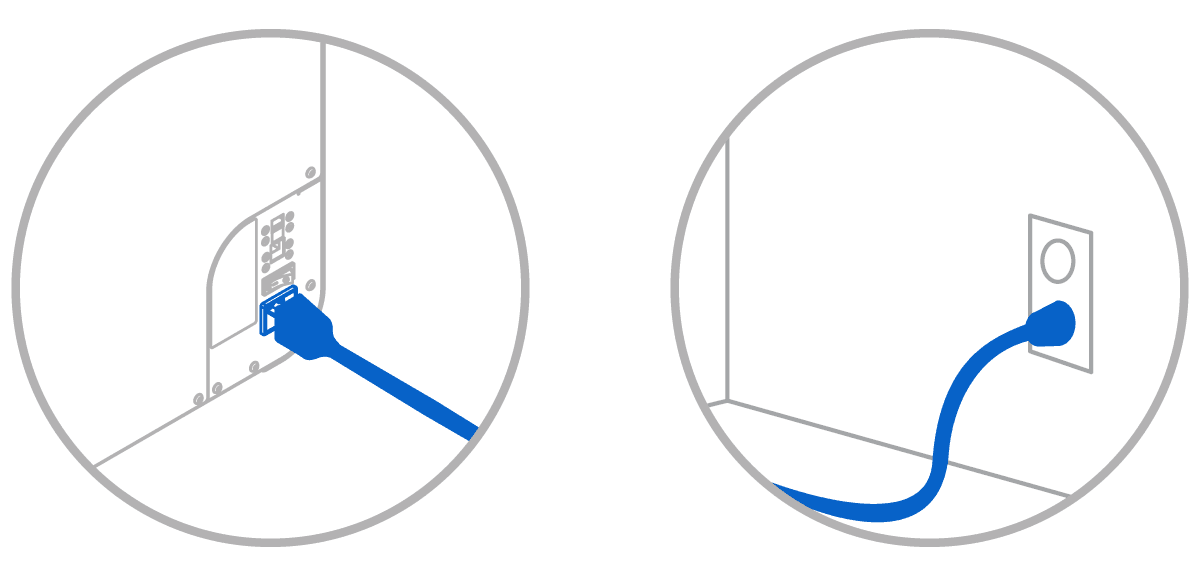
To turn on the machine:

Connecting
Connect the powder recovery station to a secured network via Wi-Fi or Ethernet to establish an internet connection. The machine also connects directly to a computer via USB.